
How to Use an Aed Defibrillator
This standard operating procedure explains how to use an AED defibrillator correctly during a cardiac emergency. An Automated External Defibrillator (AED) is a key component of delivering both basic and advanced life support, and it is essential for providing high-quality basic life support. Follow these steps to apply an AED safely and effectively.
Video: How to use an AED | Automated External Defibrillator - OSCE Guide | UKMLA | CPSA | PLAB 2 by Geeky Medics (2023). All credit for the demonstration goes to the creator; watch the original on YouTube. The written guide below was generated from this video by Docsie. Creator? Request a change or removal.
Purpose
This standard operating procedure explains how to use an AED defibrillator correctly during a cardiac emergency. An Automated External Defibrillator (AED) is a key component of delivering both basic and advanced life support, and it is essential for providing high-quality basic life support. Follow these steps to apply an AED safely and effectively.
Scope
This procedure applies to any responder who needs to operate an AED on a patient experiencing a suspected cardiac arrest. It covers preparing the device, applying the pads, following the AED's prompts, and continuing care through repeated cycles of analysis, shock delivery, and CPR.
Required equipment
- An Automated External Defibrillator (AED) unit
- AED pads in a sealed foil packet, with a connector lead and chest-placement illustrations
- Access to the patient's bare chest
Step-by-step procedure
Step 1: Familiarize yourself with the AED kit components
When you open the AED kit, you will find the AED device itself and a set of pads in a foil packet. The pads have a connector and illustrations showing correct placement on the chest.
Step 2: Prepare the AED and pads
Open the foil packet containing the pads and identify the lead connecting the two pads. Review the diagrams printed on the pads to understand where each one should be placed on the patient's chest before you proceed.
Step 3: Turn on the AED
Press the power button on the AED to turn it on. Once powered on, the AED provides voice or visual prompts to guide you through every subsequent step of the process.
Step 4: Apply the pads to the patient
Expose the patient's bare chest, then place the pads as follows:
- One pad on the right infraclavicular area, just below the right collarbone
- One pad on the left mid-axillary line, on the side of the chest below the armpit
Ensure both pads are firmly attached to the skin before continuing.
Step 5: Connect the pads to the AED
If the pads are not already connected, attach the connector from the pads to the AED device.
Step 6: Follow the AED's rhythm analysis instructions
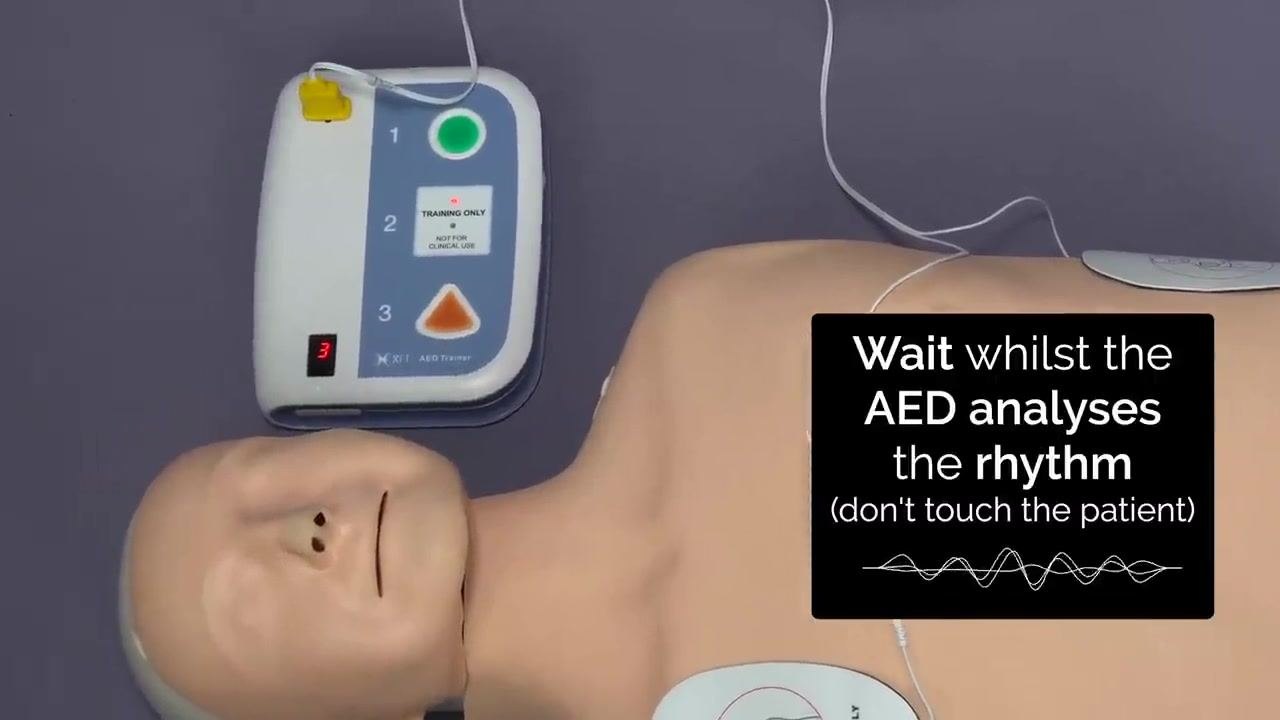
Wait while the AED analyzes the patient's heart rhythm. Do not touch the patient during analysis. The AED will indicate whether a shock is advised.
Step 7: Deliver the shock if advised
If the AED advises a shock, wait until it has finished charging. Ensure everyone is clear of the patient, then press the flashing shock button when prompted. The AED will confirm once the shock has been delivered.
Step 8: Resume CPR
Immediately begin or resume CPR after the shock has been delivered, following the AED's instructions.
Step 9: Follow AED timing for reassessment
The AED times two minutes of CPR. After this period, it prompts you to stop chest compressions so it can reassess the patient's heart rhythm.
Step 10: Pause chest compressions when prompted
When the AED instructs you to stop chest compressions after the two-minute CPR cycle, listen carefully for its prompt and pause immediately so it can reassess the patient's heart rhythm. Do not touch the patient during this analysis period.

Step 11: Continue to follow AED prompts
Remain attentive to the AED's instructions for further action. Be prepared to resume CPR or deliver another shock if advised. The AED continues to guide you through cycles of CPR and rhythm analysis until emergency medical services arrive or the patient shows signs of recovery.
Verification and summary
By following these steps, you can effectively use an AED to provide life-saving support during a cardiac emergency. Always follow the specific prompts and instructions provided by the AED device you are using, remain calm, and continue care exactly as instructed until professional help arrives.
Generation details: cost, quality tiers
Docsie billed 1,500 credits ($1.05) to analyze this 3-minute video at standard quality. The rewrite, template fill and Word/PDF exports were included. The same video at each quality tier:
| Quality | Frames sampled | Credits | Approx. cost |
|---|---|---|---|
| Draft | every 16-30 s | 750 | $0.52 |
| Standard (this guide) | every 8-15 s | 1,500 | $1.05 |
| Detailed | every 4-7 s | 3,000 | $2.10 |
| Ultra | every 1-3 s | 6,000 | $4.20 |
Credits priced at $0.70 per 1,000; plans include a monthly allowance. Enterprise customers on on-premise or bring-your-own-model deployments run this on their own inference and pay no per-video credits.
Generated by Docsie Video-to-Docs on 2026-09-10 from a 2-minute video. Screenshots are frames from the source video and belong to their creator, Geeky Medics, whose original is embedded above. If you own this video and want the guide removed or credited differently, contact us and we will act within one business day.