
How to Enable Visual Builder Studio in Oracle Fusion
Visual Builder Studio (VB Studio) lets you extend your Oracle Cloud Applications with custom pages, components, and logic. This guide walks you through how to enable Visual Builder Studio in Oracle Fusion, create a VB Studio project, and complete the initial configuration so your development team can begin extending your Oracle Cloud Application.
Video: Setting Up Visual Builder Studio for Oracle Cloud Application Extensions by Oracle Learning (2022). All credit for the demonstration goes to the creator; watch the original on YouTube. The written guide below was generated from this video by Docsie. Creator? Request a change or removal.
Visual Builder Studio (VB Studio) lets you extend your Oracle Cloud Applications with custom pages, components, and logic. This guide walks you through how to enable Visual Builder Studio in Oracle Fusion, create a VB Studio project, and complete the initial configuration so your development team can begin extending your Oracle Cloud Application.
Prerequisites
Before you enable Visual Builder Studio in Oracle Fusion, confirm the following:
- Your Oracle Cloud Application and Visual Builder Studio installations are already set up and running.
- You have administrative privileges for Visual Builder Studio (VB Studio).
- Your developers have a suitable Oracle Cloud Applications role or privilege.
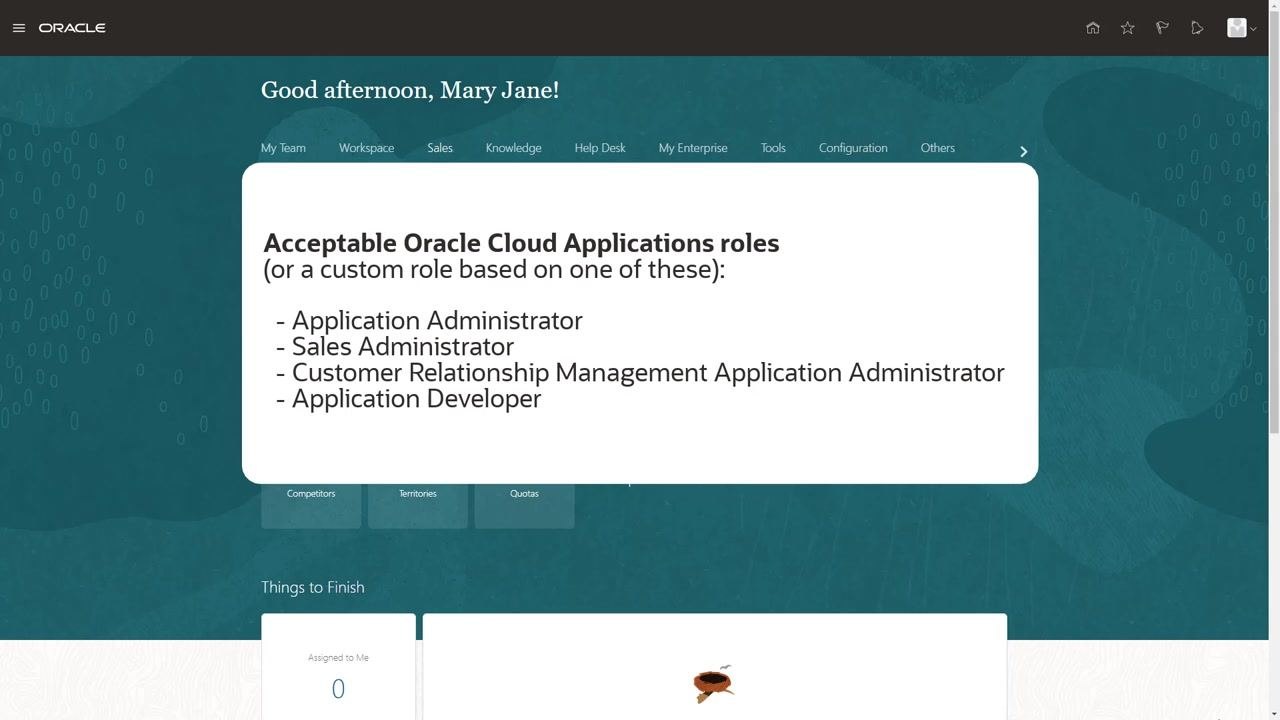
Acceptable Oracle Cloud Applications roles
Assign one of the following roles (or a custom role based on one of these) to your developers:
- Application Administrator
- Sales Administrator
- Customer Relationship Management Application Administrator
- Application Developer
Navigate to Visual Builder Studio
Open your Oracle Cloud Applications dashboard. Use the navigation menu at the top to locate the Configuration section, then click Visual Builder under the Configuration menu.
Create a new VB Studio project
In VB Studio, select the option to create a new project. Enter a project name, such as the name of your Oracle Cloud app (for example, "Digital Sales").
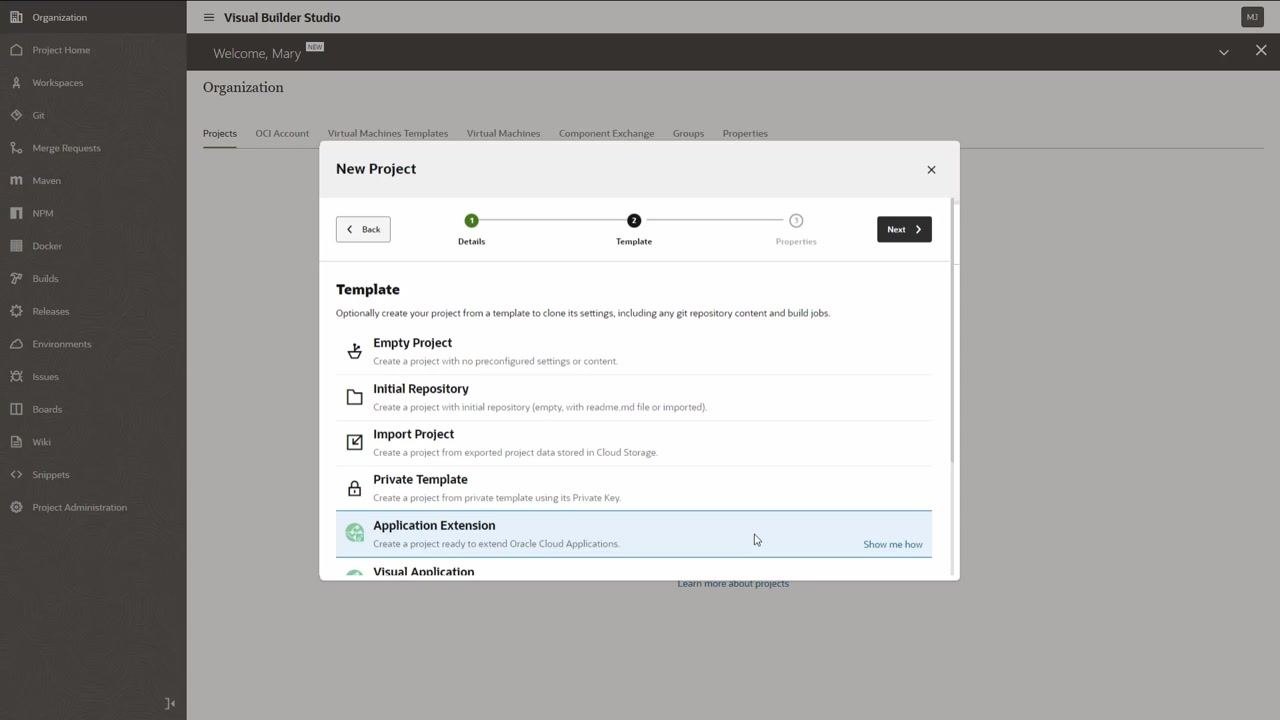
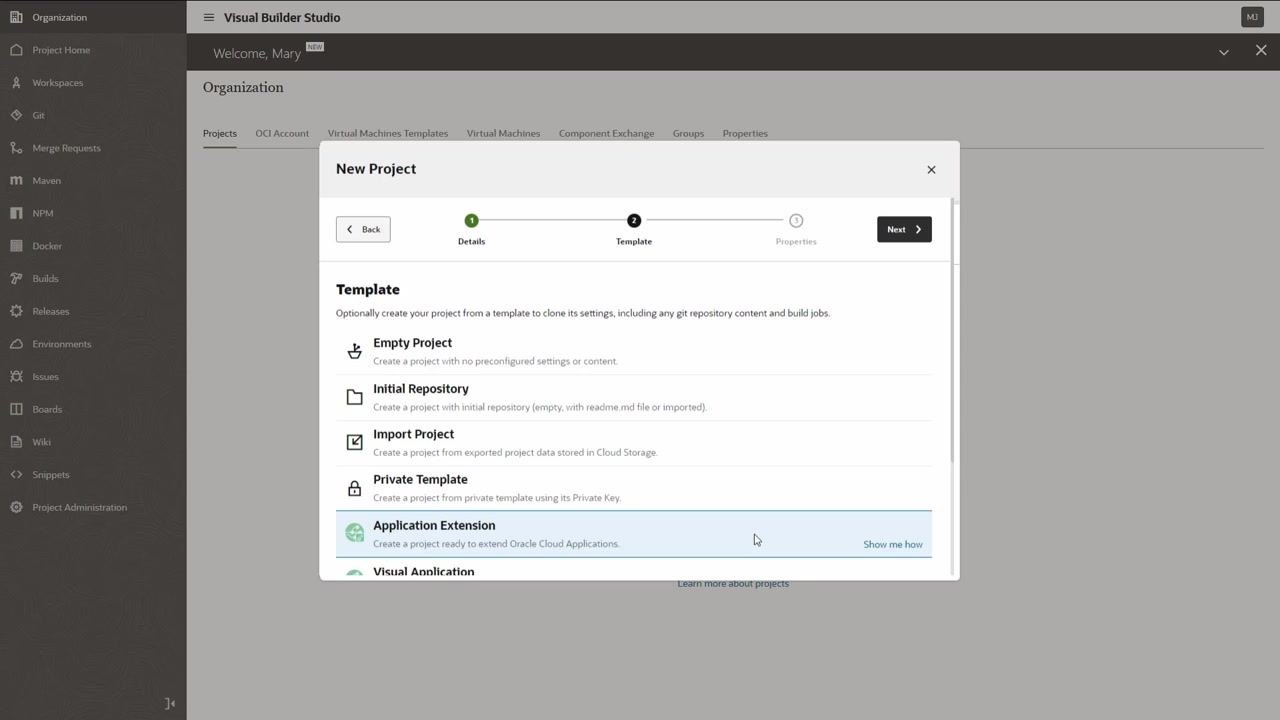
In the New Project dialog, choose the Application Extension template. This template is essential because it sets up the necessary development environment and resources for Oracle Cloud App extensions.
Review and configure project properties
Based on your project name and selections, VB Studio automatically populates the following fields:
- Extension Name — for example, digital-sales Extension
- Extension Id — for example, site_digitalsalesExtension
- Workspace Name — for example, Workspace 1 (your private Git repository for development work)
- Oracle Cloud Applications Development Instance — for example, Oracle Cloud Applications (Fusion)
- Git Repository Name — for example, digital-sales.git
- Working Branch Name — for example, branch1
From the Base Application dropdown, select the Oracle Cloud Application your developers will extend (for example, Digital Sales, Contact Center, and so on).
If desired, you can modify the Git repository name or the working branch name before continuing.
Finish creating the project
Review all details and click Finish to create your VB Studio project for Oracle Cloud Application extensions.
Once you complete these steps, you have a properly configured VB Studio project, ready for your development team to begin extending your Oracle Cloud Application.
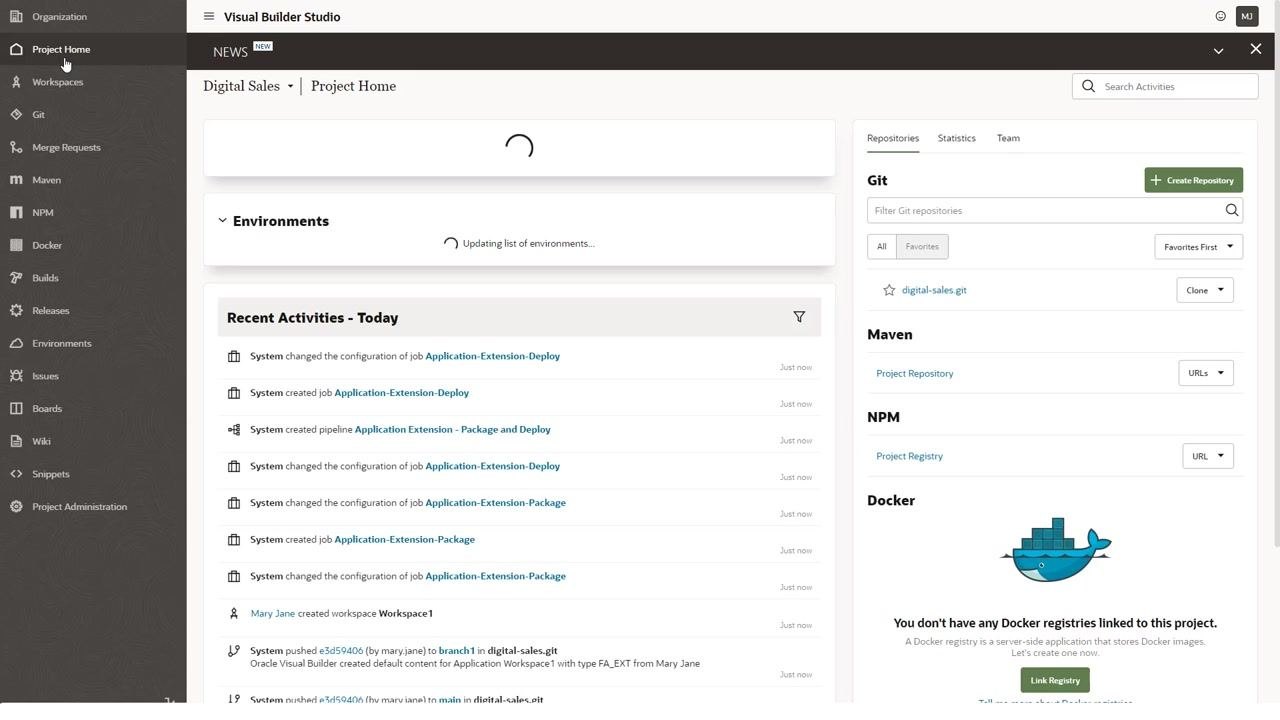
Review the project homepage and auto-created artifacts
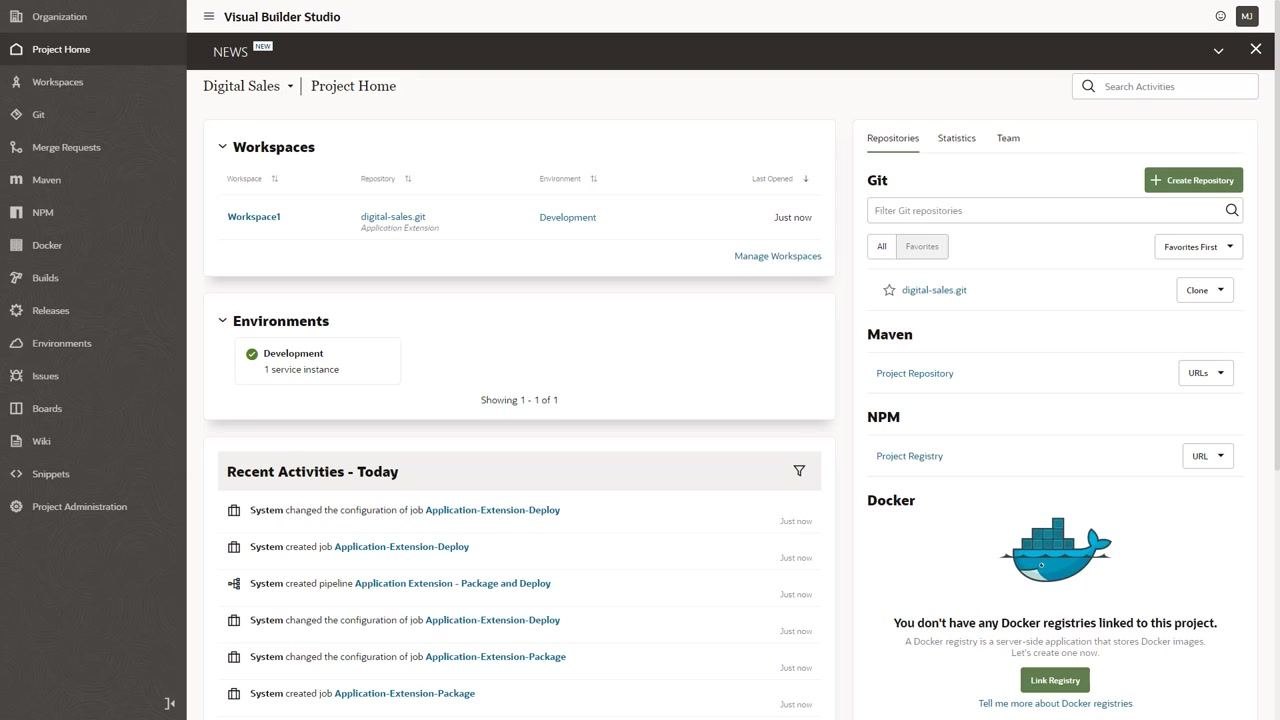
After the project is created, navigate to the Project Home page in Visual Builder Studio. Confirm that the following artifacts have been automatically created:
- Git repository — for example,
digital-sales.git - Workspace — for example,
Workspace1 - Environment — for example,
Development - Two build jobs (for packaging and deployment)
- Pipeline (for orchestrating build and deployment)
Review the Recent Activities section to see system-generated actions, such as job and pipeline creation.
Explore the workspace and environment
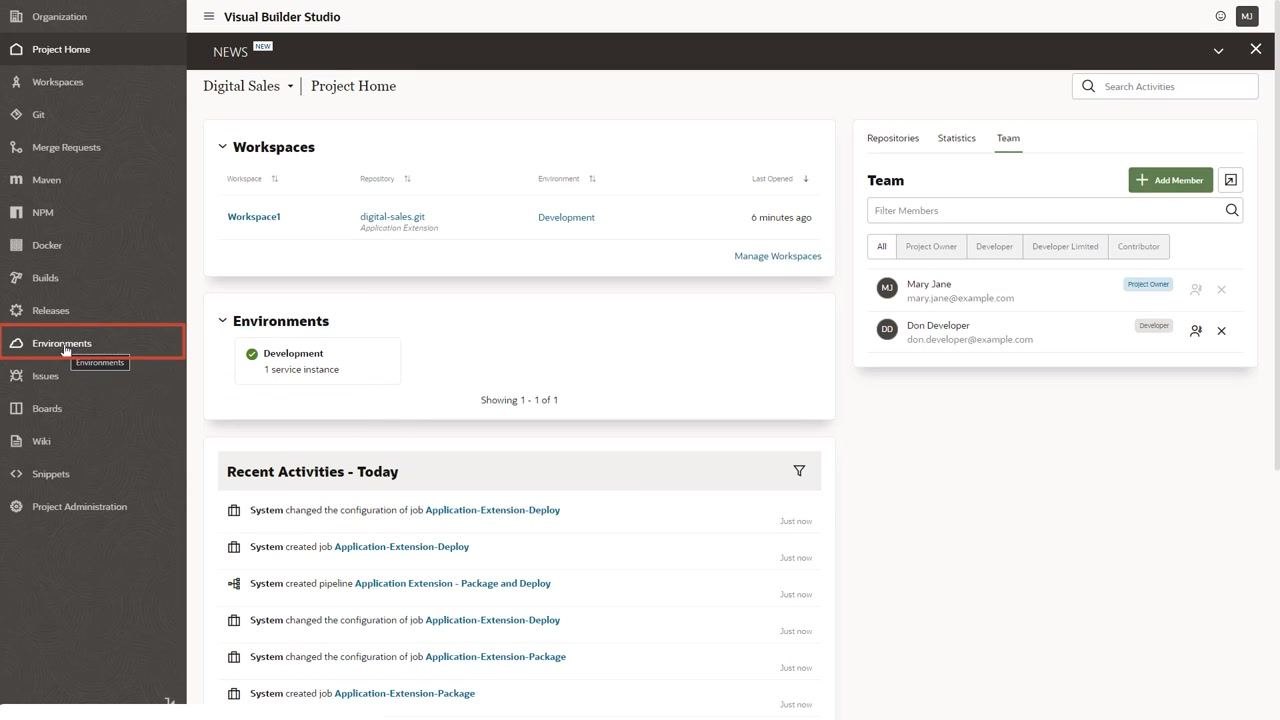
In the Workspaces section, verify that your workspace (for example, Workspace1) is linked to the correct repository and environment. In the Environments section, confirm the presence of the Development environment with at least one service instance.
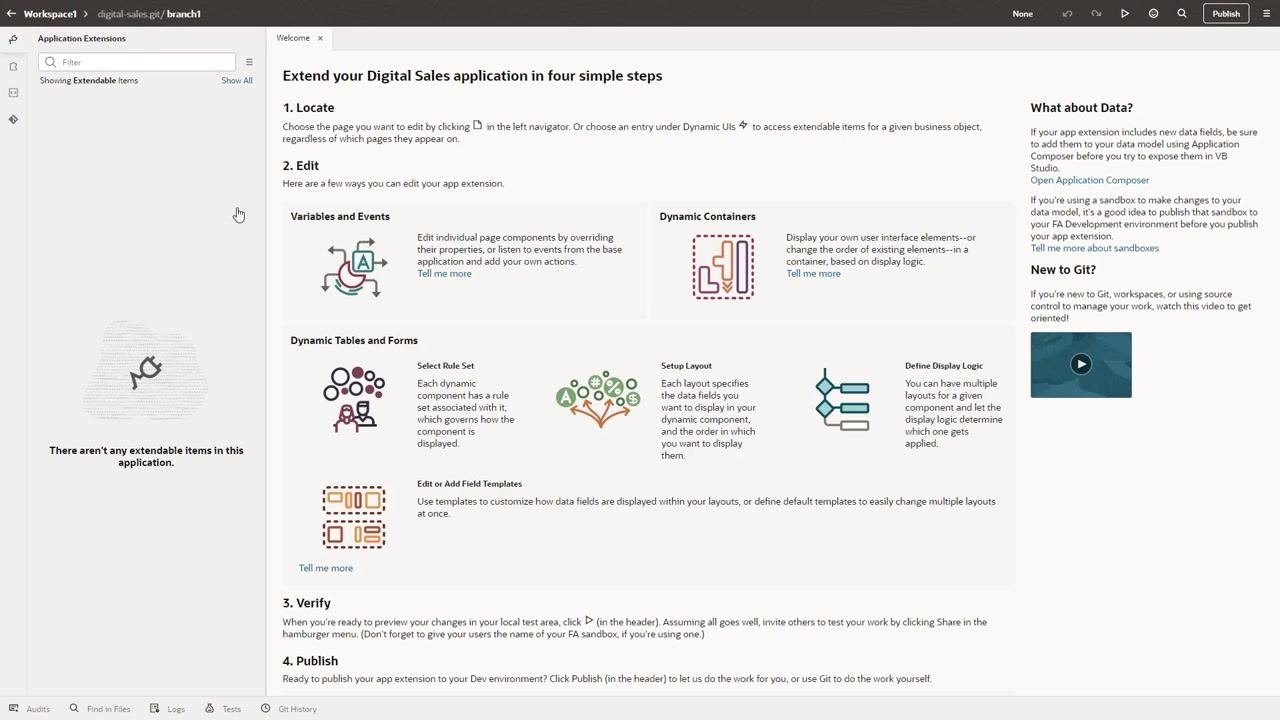
Edit the app extension in VB Studio Designer
Open your workspace to access the VB Studio Designer. Use the four-step guide to extend your application:
- Locate — choose the page or component to edit
- Edit — modify variables, events, containers, tables, forms, and display logic
- Verify — preview and test your changes
- Publish — deploy your extension to the development environment
If there are no extendable items, the left panel will indicate this.
Configure build jobs for deployment
Go to the Builds section and select the Application-Extension-Deploy job. Click Configure to specify the credentials required to connect to your target development instance.
This step is mandatory and only needs to be done once per project, even if multiple developers will use it.
Set up production jobs and pipelines (optional)
While in the Builds section, consider creating additional jobs and pipelines for production deployment. Set up a pipeline for packaging and deploying from your Oracle Cloud App development instance to your production instance.
- Make jobs private to restrict access to authorized users only.
- Ensure that the pipeline is set to be manually triggered for added control.
Add project members and assign privileges
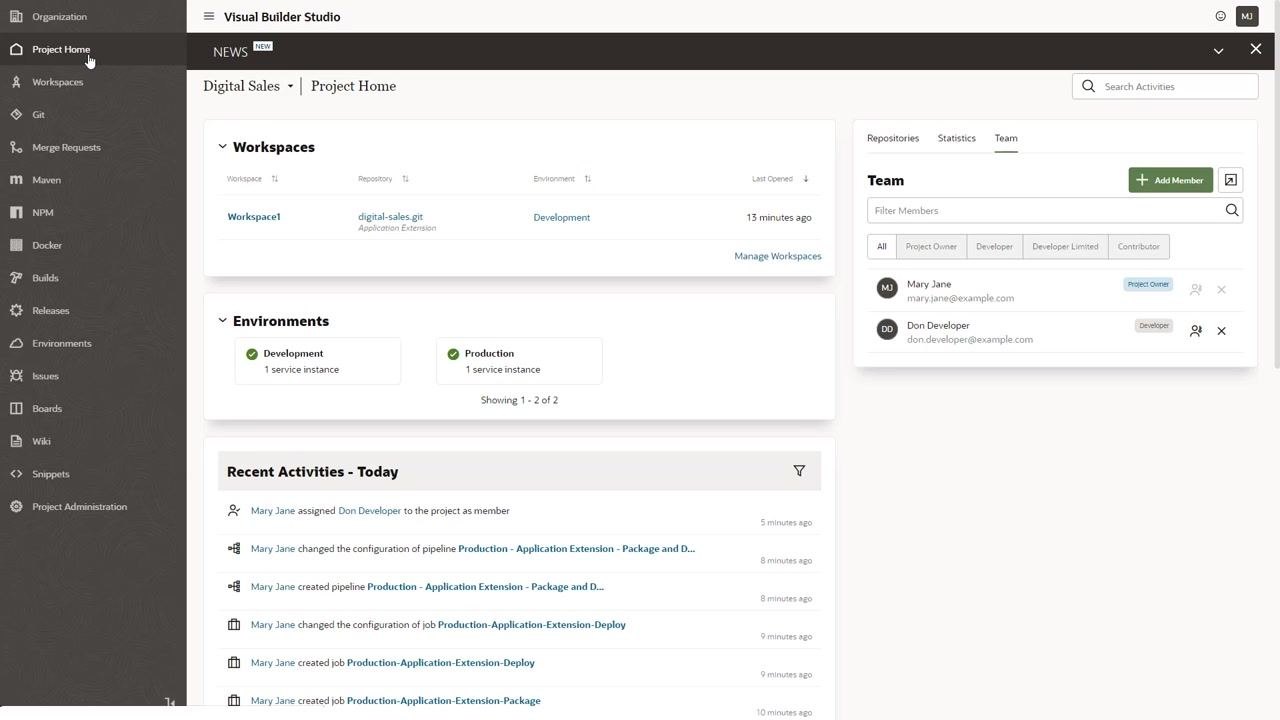
Return to Project Home and open the Team tab. Click Add Member and enter the username (for example, Don Developer). Assign the appropriate membership level:
- Project Owner
- Developer Full Access
- Developer Limited Access
- Contributor
As the project owner, you have full access by default.
Review and expand your Oracle Cloud App environments
Confirm that your Development Oracle Cloud App instance is set up as specified during project creation. To view the details of your environment, click the Development environment tile in the Environments section. This displays information about the associated service instance and its configuration.
As your project grows, consider setting up additional environments for Test and Production Oracle Cloud Applications instances:
- Add new environments by clicking the Environments section and following the prompts to specify the target Oracle Cloud instance.
- Each environment should have at least one service instance associated with it.
After adding a production environment, verify that both Development and Production environments are listed, each with their own service instance.
Summary
You have now enabled Visual Builder Studio in Oracle Fusion, created an Application Extension project, verified its auto-generated artifacts, configured build jobs and pipelines, added team members, and reviewed your environments. Your VB Studio project is ready for your development team to begin building and deploying extensions to your Oracle Cloud Application.
Generation details: cost, quality tiers
Docsie billed 2,000 credits ($1.40) to analyze this 4-minute video at standard quality. The rewrite, template fill and Word/PDF exports were included. The same video at each quality tier:
| Quality | Frames sampled | Credits | Approx. cost |
|---|---|---|---|
| Draft | every 16-30 s | 1,000 | $0.70 |
| Standard (this guide) | every 8-15 s | 2,000 | $1.40 |
| Detailed | every 4-7 s | 4,000 | $2.80 |
| Ultra | every 1-3 s | 8,000 | $5.60 |
Credits priced at $0.70 per 1,000; plans include a monthly allowance. Enterprise customers on on-premise or bring-your-own-model deployments run this on their own inference and pay no per-video credits.
Generated by Docsie Video-to-Docs on 2026-10-14 from a 3-minute video. Screenshots are frames from the source video and belong to their creator, Oracle Learning, whose original is embedded above. If you own this video and want the guide removed or credited differently, contact us and we will act within one business day.