
How to Create an XML Report in Oracle EBS
This guide walks you through the complete process of how to create an XML report in Oracle EBS using XML Publisher and a data template. You will review a data template XML file, register a data definition, define a concurrent program, attach it to a request group, submit a request, review the XML output, build an RTF template in Microsoft Word, and confirm the final report output in PDF format.
Video: How to create XML publisher Report with parameter in Oracle apps R12 using data template Approach by Subratkumar123 (2021). All credit for the demonstration goes to the creator; watch the original on YouTube. The written guide below was generated from this video by Docsie. Creator? Request a change or removal.
This guide walks you through the complete process of how to create an XML report in Oracle EBS using XML Publisher and a data template. You will review a data template XML file, register a data definition, define a concurrent program, attach it to a request group, submit a request, review the XML output, build an RTF template in Microsoft Word, and confirm the final report output in PDF format.
Prerequisites
- Access to an Oracle Applications (E-Business Suite) environment with the XML Publisher Administrator responsibility.
- A prepared XML data template file (for example,
XXFIRST_REPORT_DATA_TEMPLATE.XML). - Microsoft Word with the XML Publisher Template Builder add-in installed, for building the RTF template.
- Administrator access or coordination with your Oracle Applications administrator for permissions related to responsibilities and concurrent programs.
Review the data template XML file
Before registering anything in Oracle Applications, open the XML data template file (XXFIRST_REPORT_DATA_TEMPLATE.XML) in a text editor and review its structure.
- The file begins with the XML declaration:
<?xml version="1.0" encoding="UTF-8"?>. - The
<dataTemplate>element includes the attributesname="Emp_Data_Template",description="EMP_Data_Template_Report", andversion="1.0". - A
<parameters>section and other XML nodes are defined according to your report requirements.
Confirm the file is correctly formatted and ready for use before continuing.
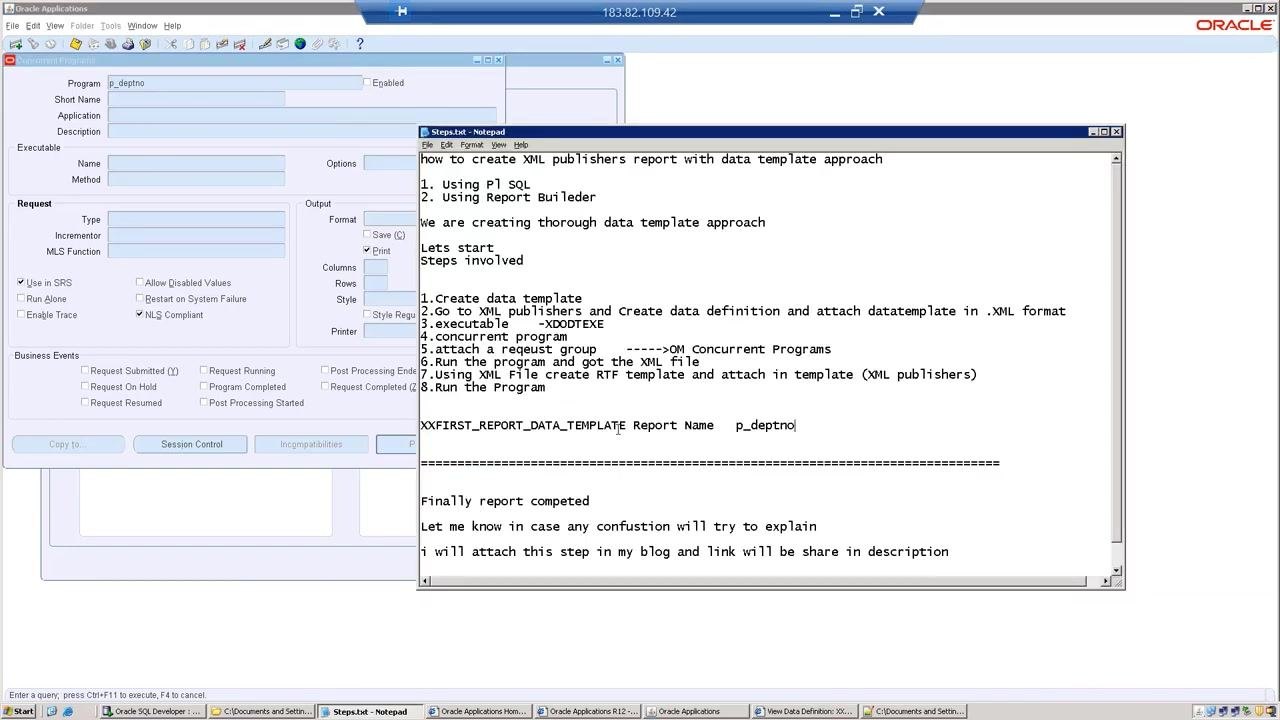
Open the Oracle Applications environment
Log in to your Oracle Applications environment and open the XML Publisher Administrator or the relevant responsibility.
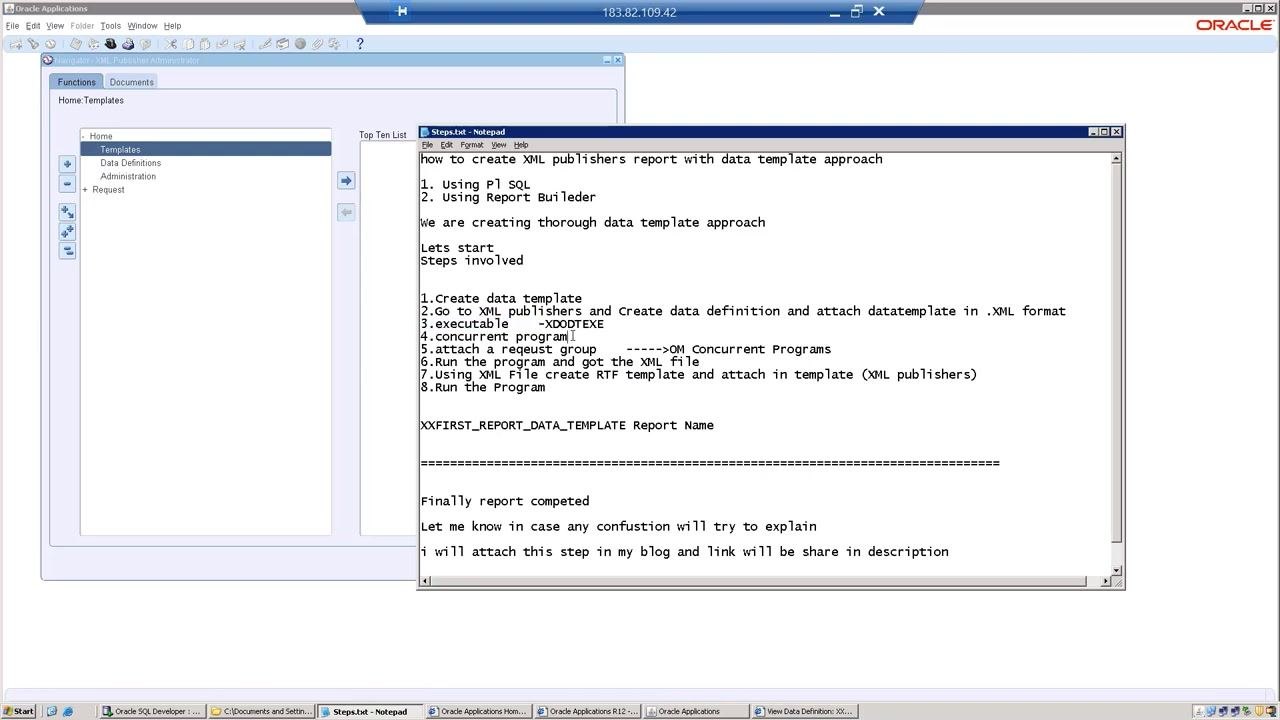
From the main menu, select the option that leads to the XML Publisher functions, then open the Templates or Data Definitions section.
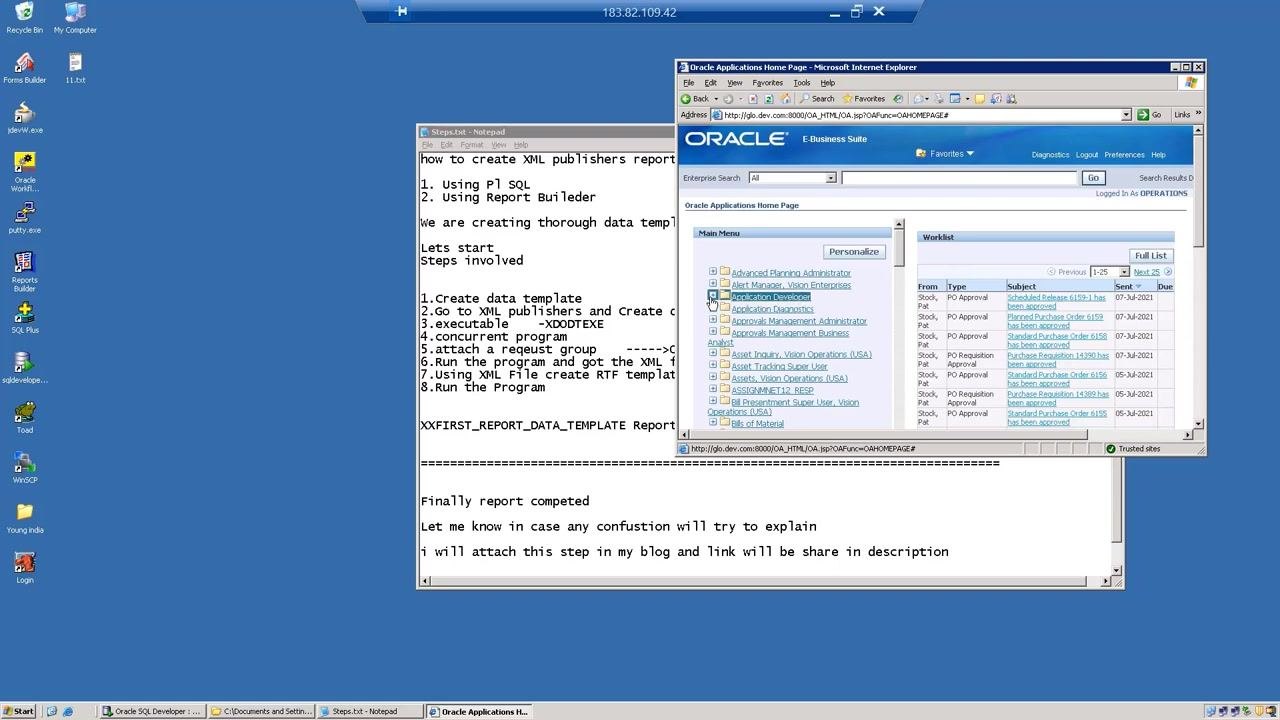
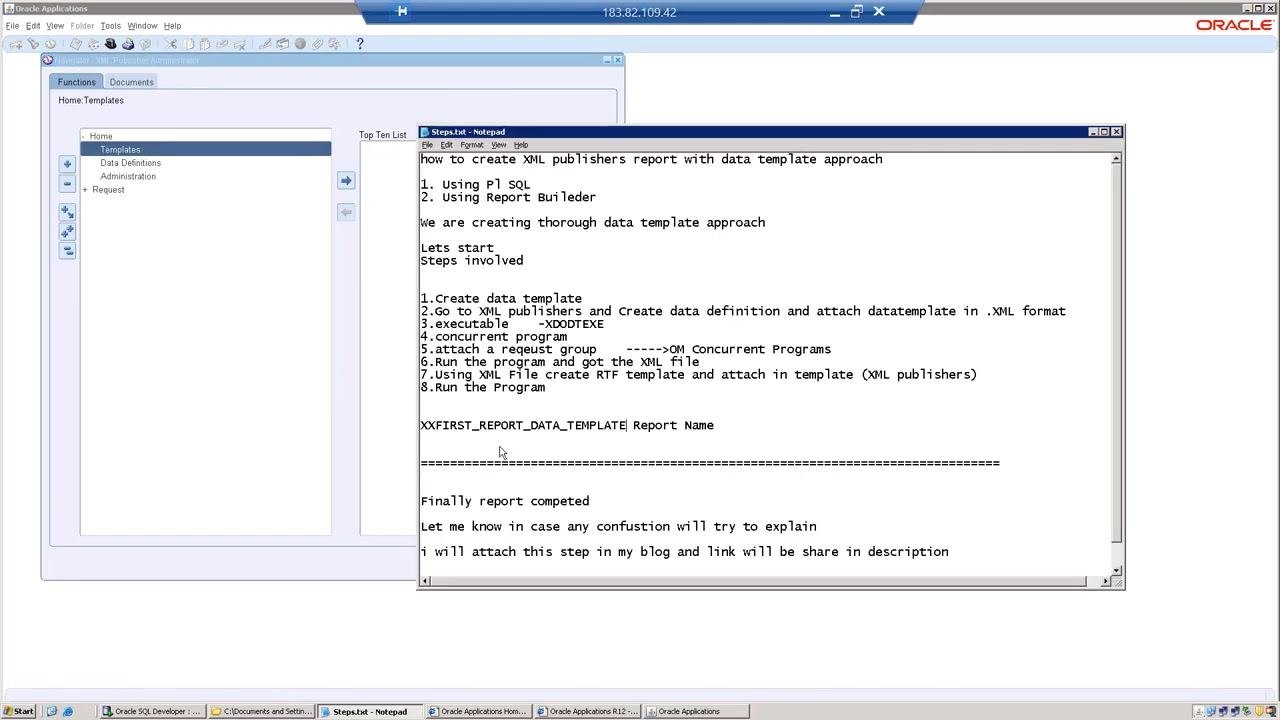
Add a new data definition layer
In the XML Publisher interface, click the Data Definitions tab, then click the button or link to create a new data definition (for example, Create Data Definition).
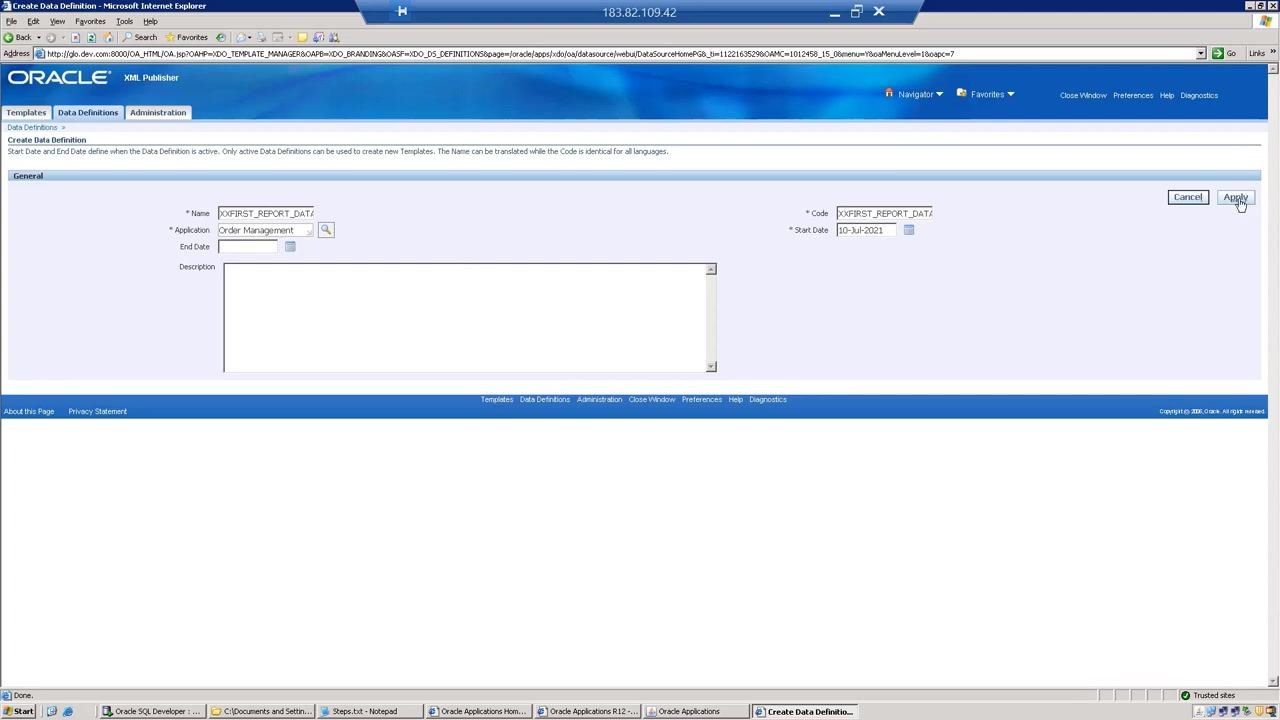
Enter the data definition details
Fill in the required fields for the new data definition:
- Name:
XXFIRST_REPORT_DATA_TEMPLATE - Application:
Order Management - Code:
XXFIRST_REPORT_DATA_TEMPLATE - Start Date: a valid date (for example,
10-Jul-2021) - End Date: leave blank unless you want to set an expiration
- Description: optional, for your own reference
Double-check that the Name and Code fields match exactly, then click Apply to save the new data definition layer.
Note: Enter all field values exactly as specified to avoid inconsistencies. If anything is unclear, refer to the on-screen instructions or consult your administrator.
Confirm data definition creation and attach the data template file
After saving, verify the confirmation message: "Data Definition XXFIRST_REPORT_DATA_TEMPLATE has been successfully created."
Review the details under the General section:
- Name:
XXFIRST_REPORT_DATA_TEMPLATE - Application:
Order Management - Code:
XXFIRST_REPORT_DATA_TEMPLATE - Start Date:
10-Jul-2021
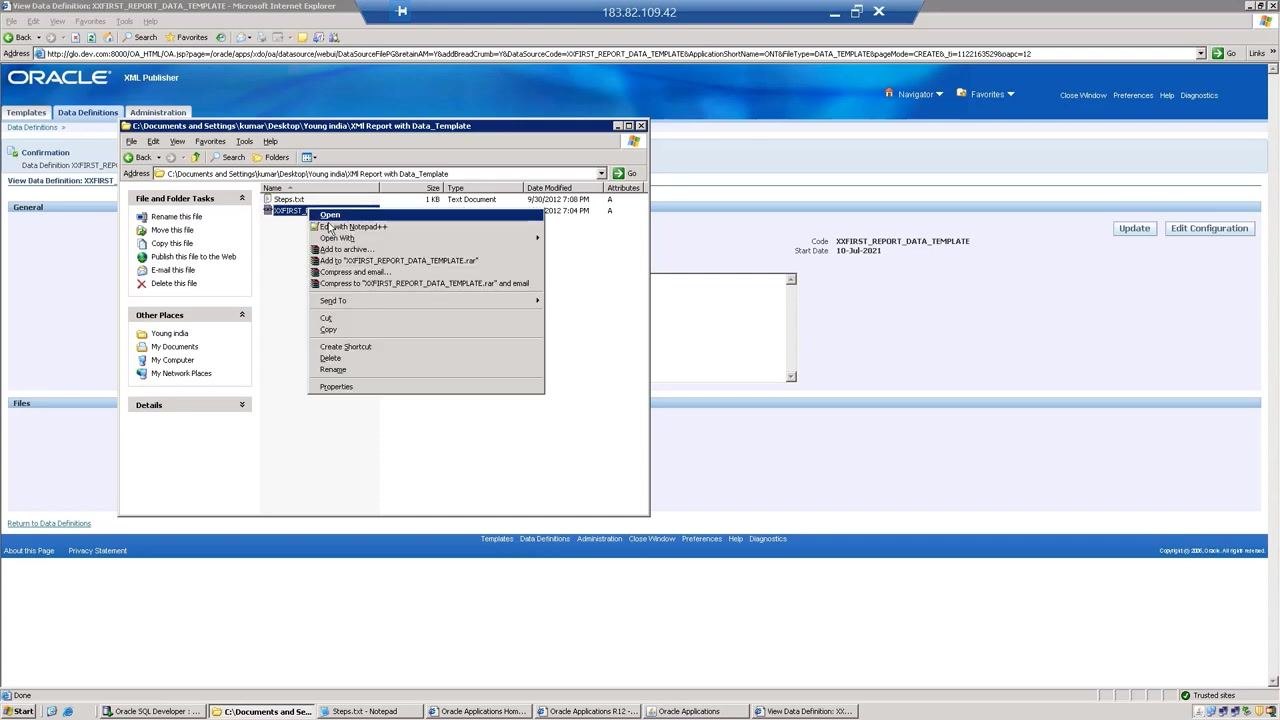
In the Files section, click Add File next to Data Template to upload your .xml data template file. Once uploaded, confirm it appears as XXFIRST_REPORT_DATA_TEMPLATE.XML with an Update file option.
Select the responsibility for the concurrent program
Open the Responsibilities window, search for and select the appropriate responsibility (for example, ASSIGNMENT12_RESP), then click OK to proceed.
Define the concurrent program
Open the Concurrent Programs form and enter the following details:
- Program:
XXFIRST_REPORT_DATA_TEMPLATE - Short Name:
XXFIRST_REPORT_DATA_TEMPLATE - Application:
Order Management - Executable:
xdo
Ensure the Enabled checkbox is selected, set the Output Format to Text initially, and check Use in SRS and Run Alone as needed.
Next, complete the executable configuration:
- In the Executable field, enter
XDODTEXE. - In the Method field, enter
Java Concurrent Program. - In the Output section, select
XMLfrom the format dropdown.
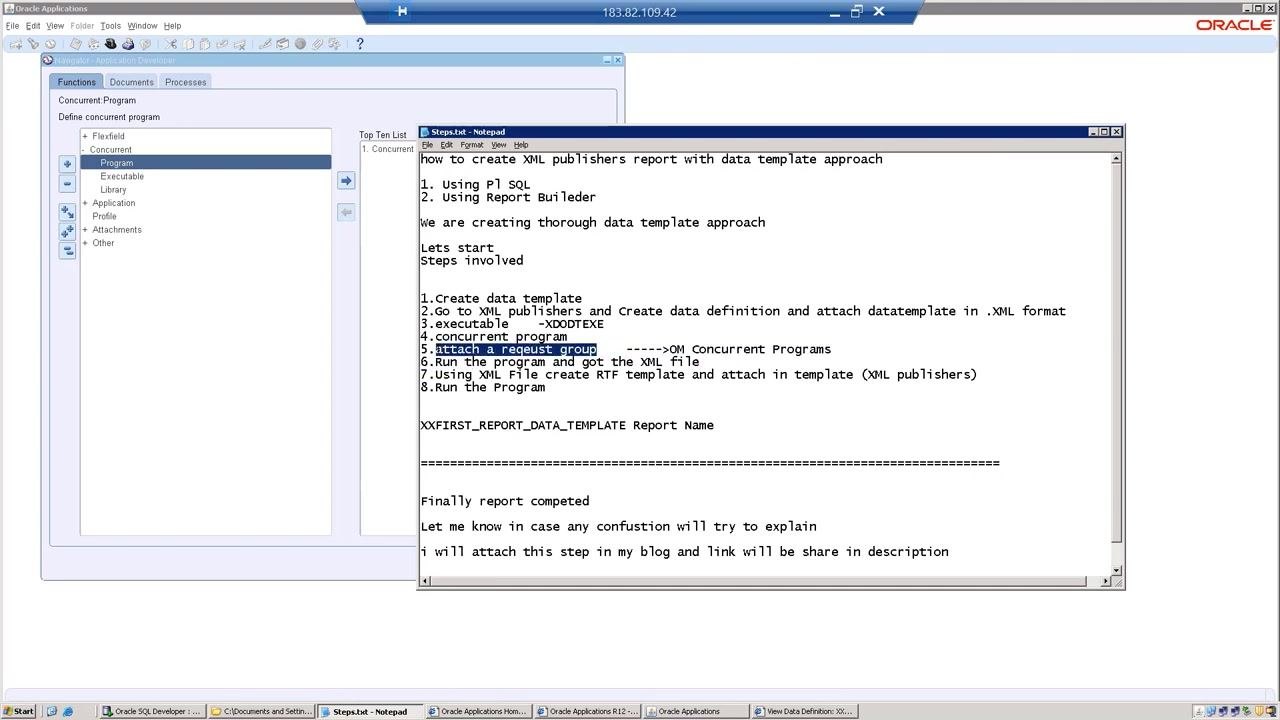
Attach the request group
Navigate to the Request Group assignment within the concurrent program definition and open the Request Groups form. Enter or select the appropriate group, application, and code, then add the concurrent program so it can be run by users with the assigned responsibility.
Note: Always verify that names, codes, and file attachments match exactly as specified. Coordinate with your Oracle Applications administrator if you encounter permission issues.
Open the Request Groups window and locate the program
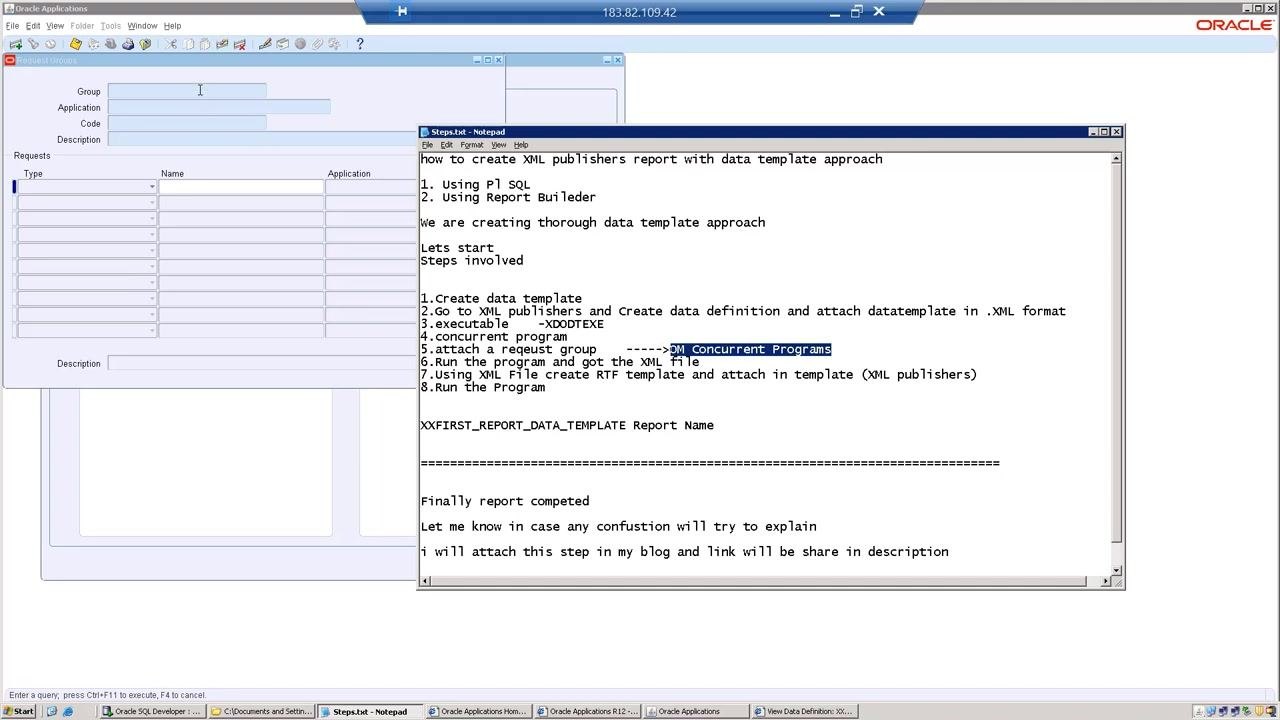
Launch Oracle Applications and navigate to the Request Groups window. Enter the following:
- Group:
OM Concurrent Programs - Application:
Order Management - Code:
OM_CONC_PROGRAMS - Description:
Order Management Concurrent Programs
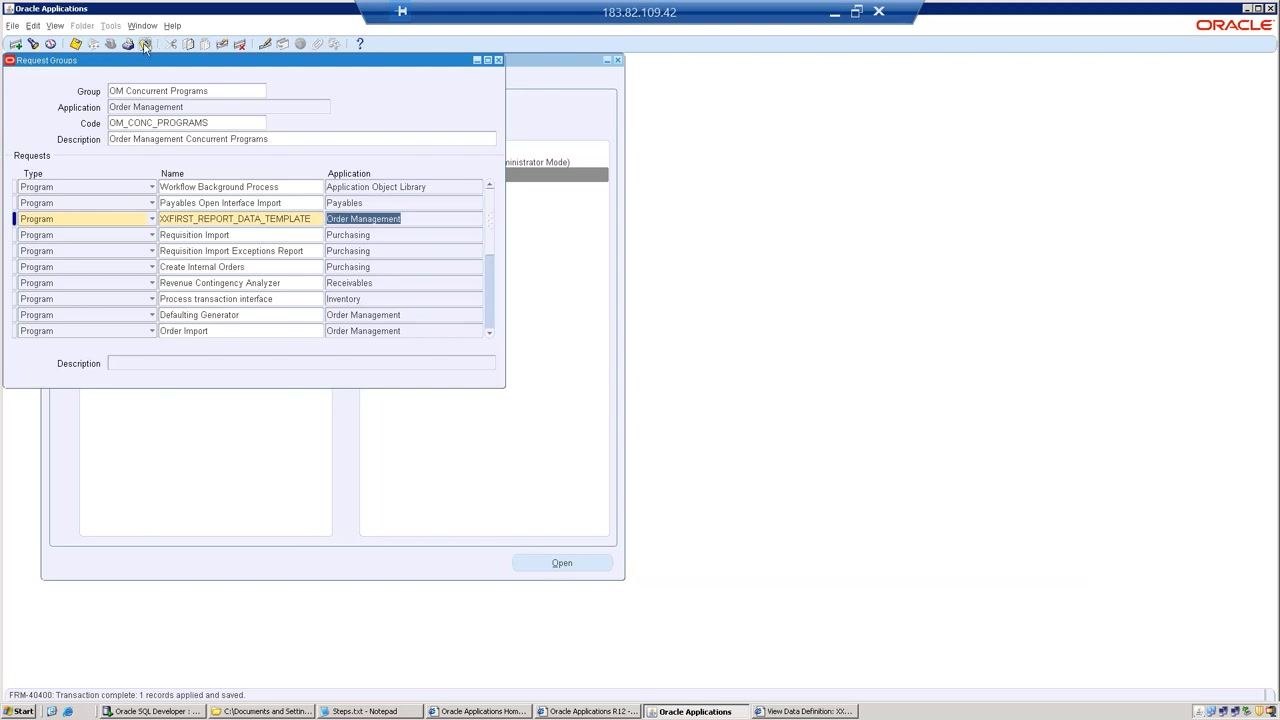
In the Requests section, locate and highlight the row with Type: Program, Name: XXFIRST_REPORT_DATA_TEMPLATE, Application: Order Management.
Configure the concurrent program parameters
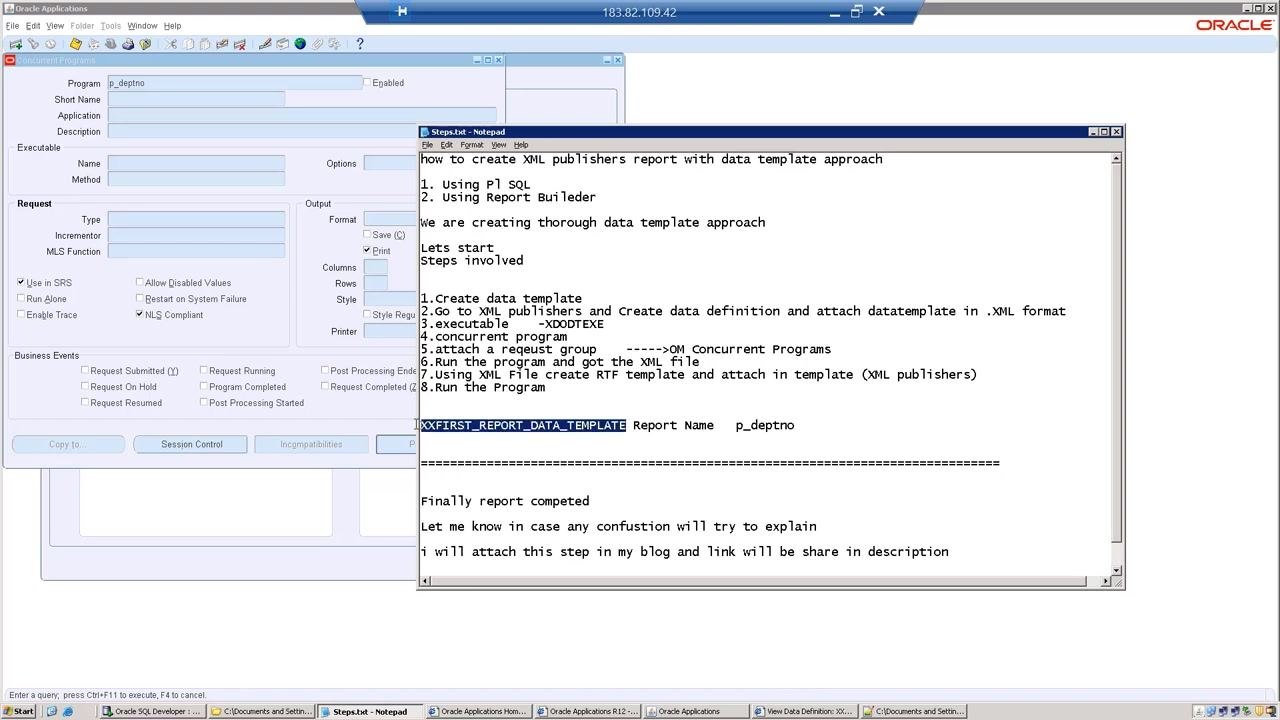
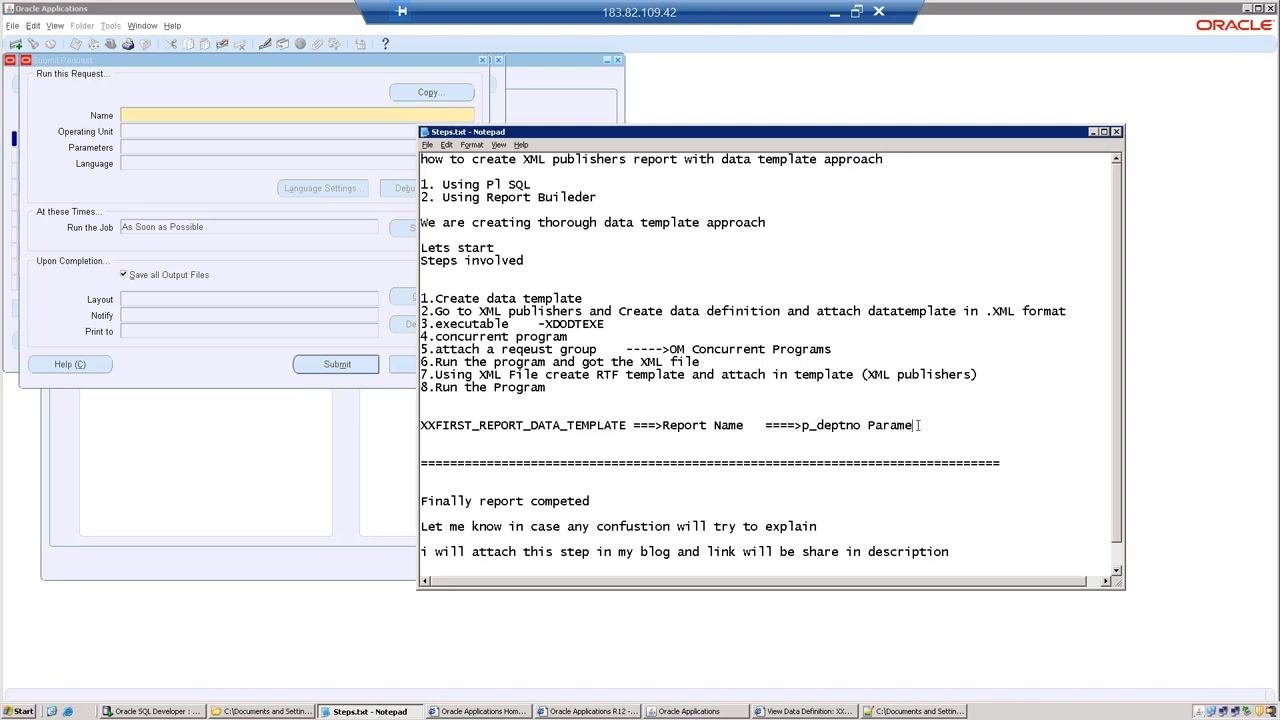
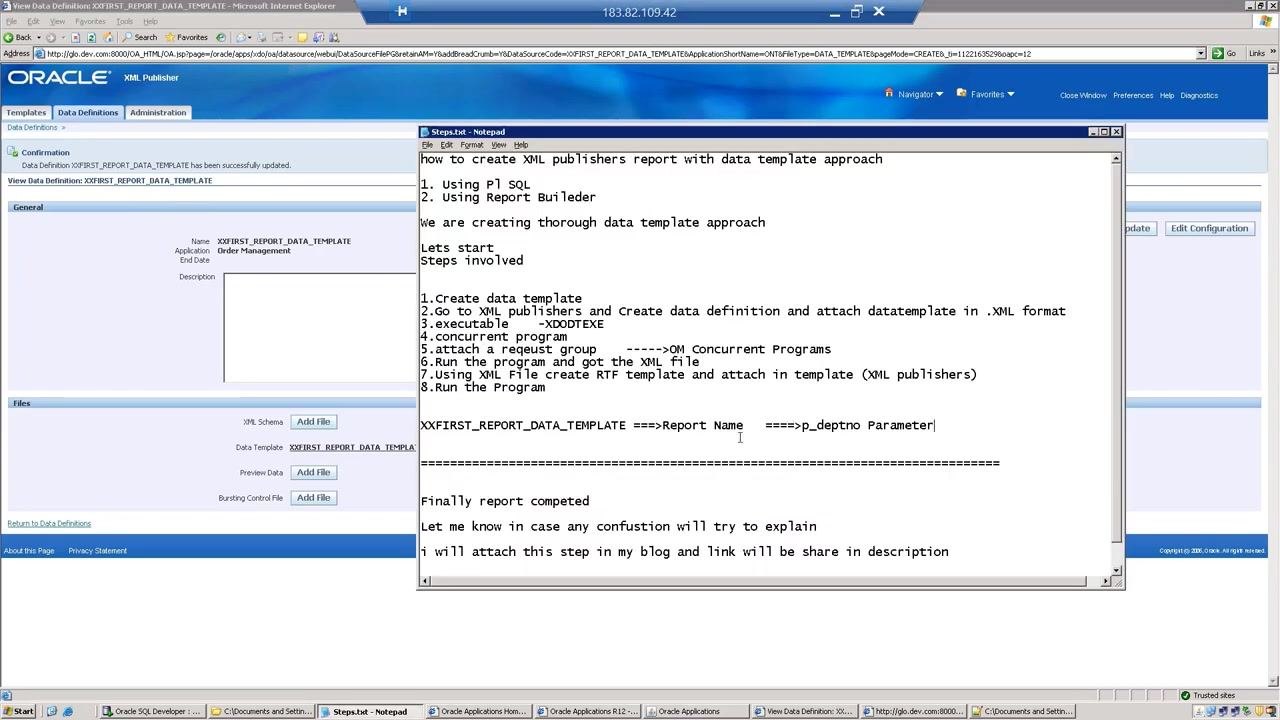
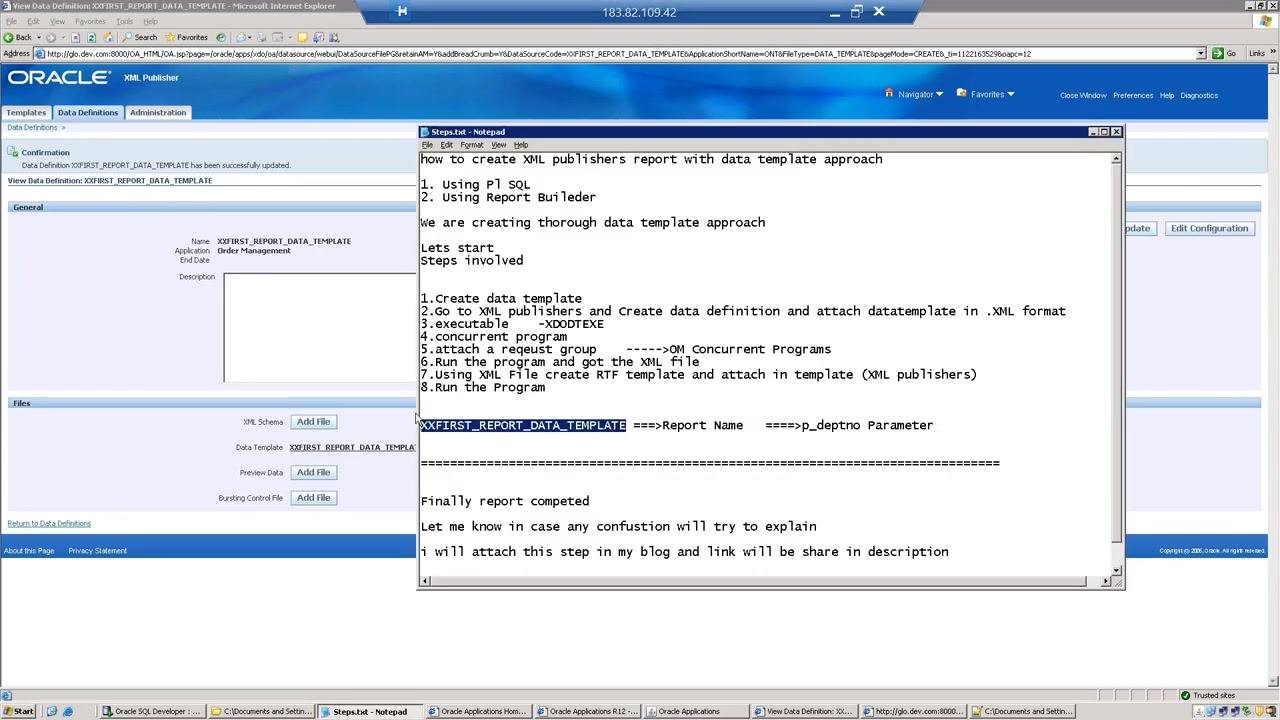
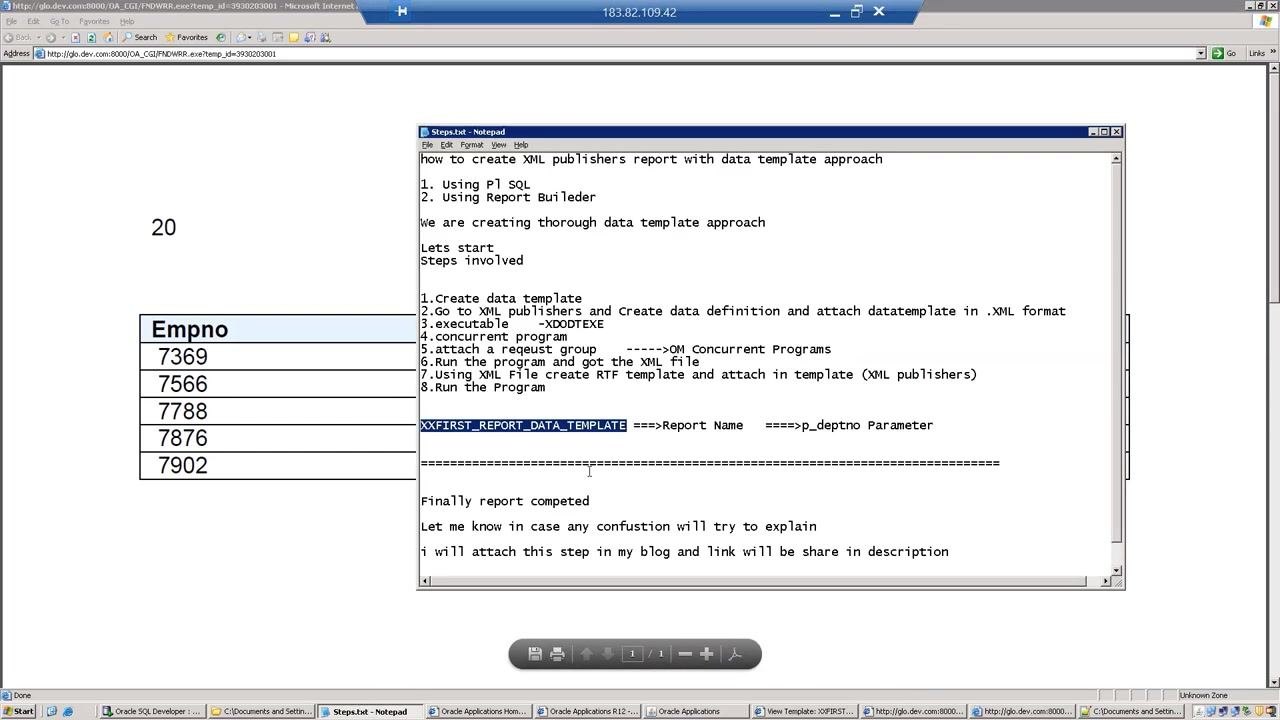
Open the reference Notepad file and observe the highlighted parameter p_deptno, which is used in the report definition and must be configured in Oracle Applications.
In the Concurrent Program Parameters window, enter:
- Program:
XXFIRST_REPORT_DATA_TEMPLATE - Application:
Order Management - Seq:
10 - Parameter:
p_deptno
In the Validation section, click the Value Set field to open the Value Sets dialog, search for and select the appropriate value set (for example, 10 Characters), then click OK to confirm.
Review the parameter configuration
Verify the final parameter configuration in the Concurrent Program Parameters window:
- Program:
XXFIRST_REPORT_DATA_TEMPLATE - Application:
Order Management - Parameter:
p_deptno(Seq: 10) - Value Set:
10 Characters - Prompt:
p_deptno - Token:
deptno - Display Size:
10 - Description Size:
50
Ensure all fields are filled in as shown and the parameter is enabled if required.
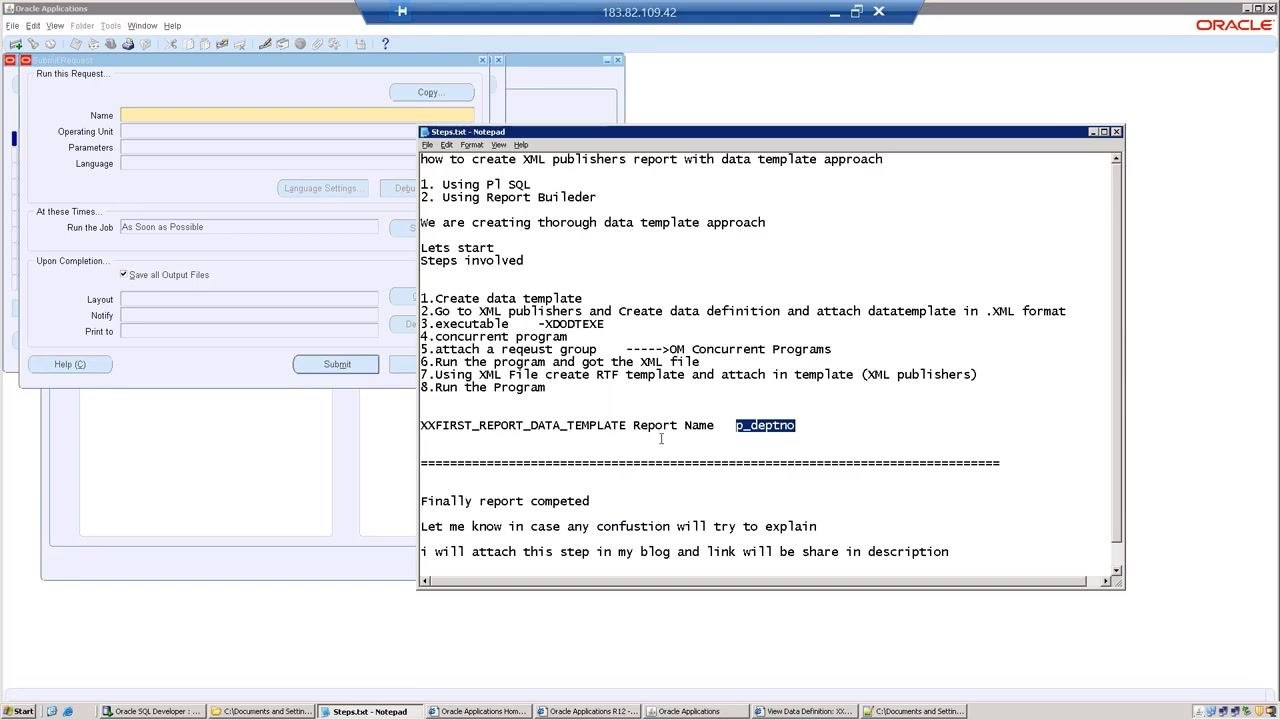
Submit a new request
Open the Find Requests dialog and select Submit a New Request. In the "What type of request do you want to run?" dialog, choose Single Request, then click OK to proceed.
If you decide not to proceed, click Cancel in the same dialog to exit the submission process.
View completed requests and the XML output
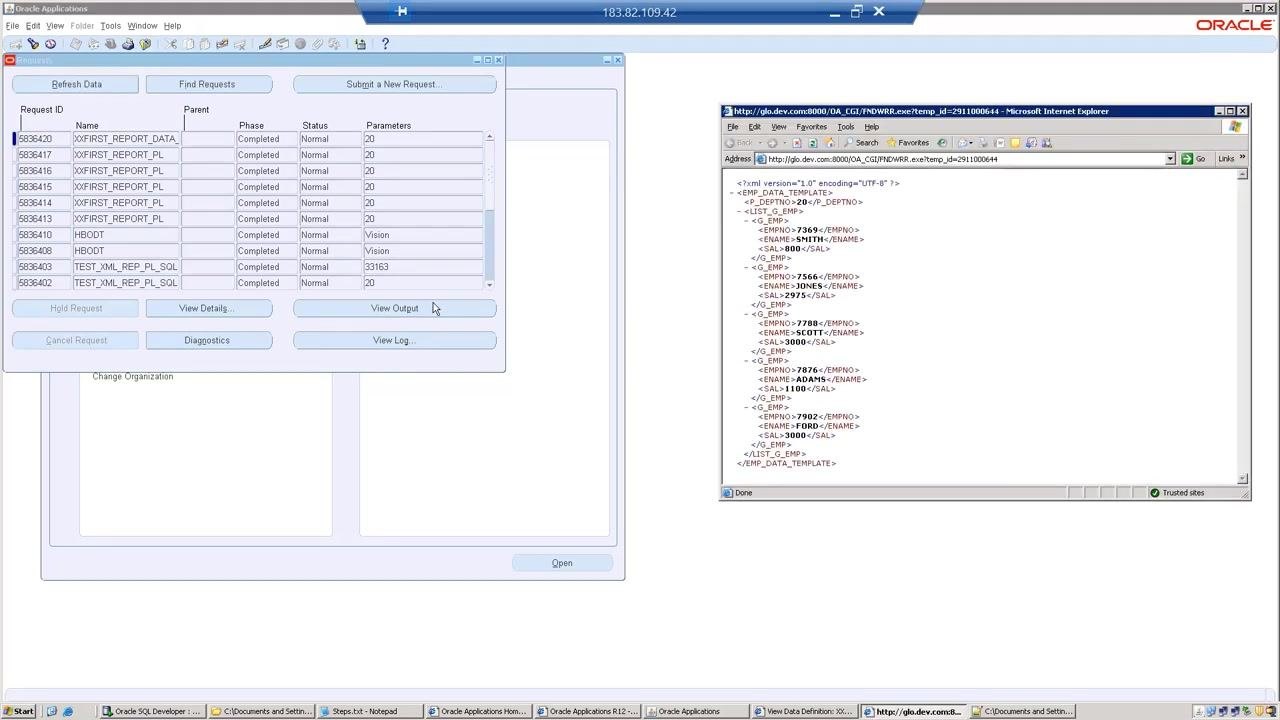
Open the Find Requests window and review the list of completed requests, including request IDs, names (such as XXFIRST_REPORT_DATA_TEMPLATE and XXFIRST_REPORT_PL), status, and parameters. All relevant requests should show a status of "Completed" and "Normal".
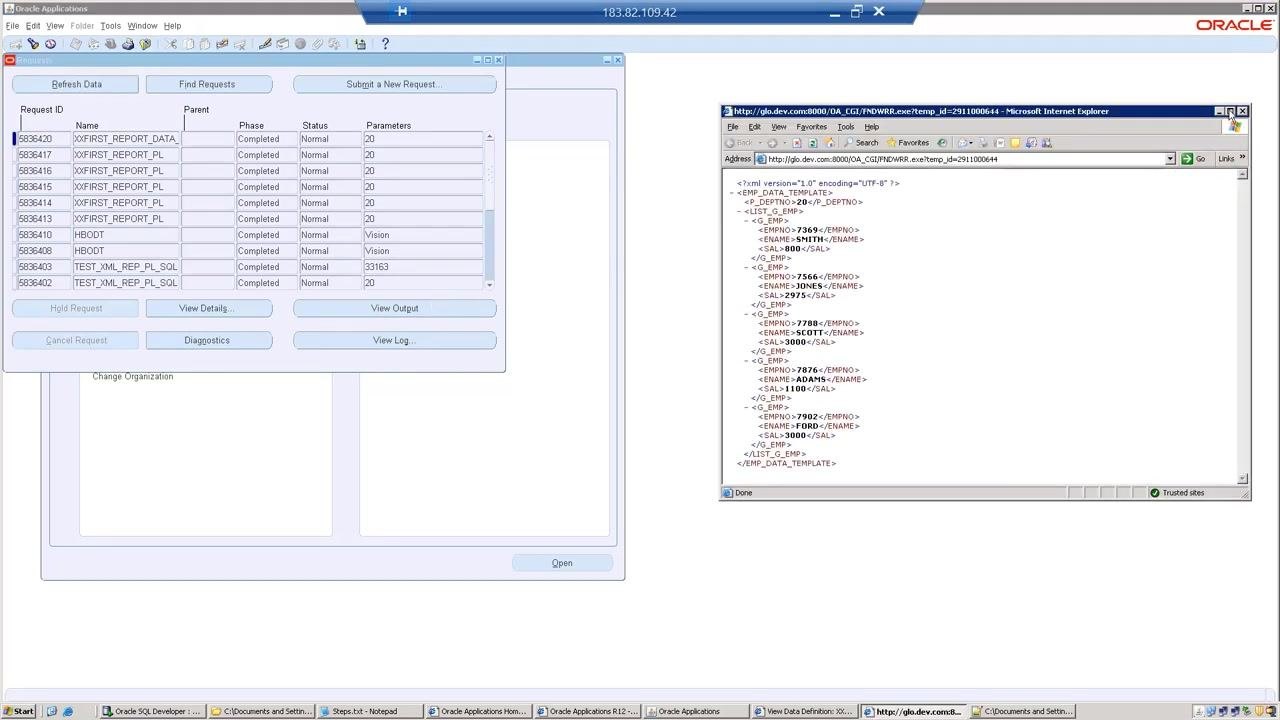
Select the relevant request and click View Output to display the generated XML. Confirm the structure:
- Root element:
<EMP_DATA_TEMPLATE> - Parameter:
<P_DEPTNO>20</P_DEPTNO> - A list of employees with
<EMPNO>,<ENAME>, and<SAL>tags
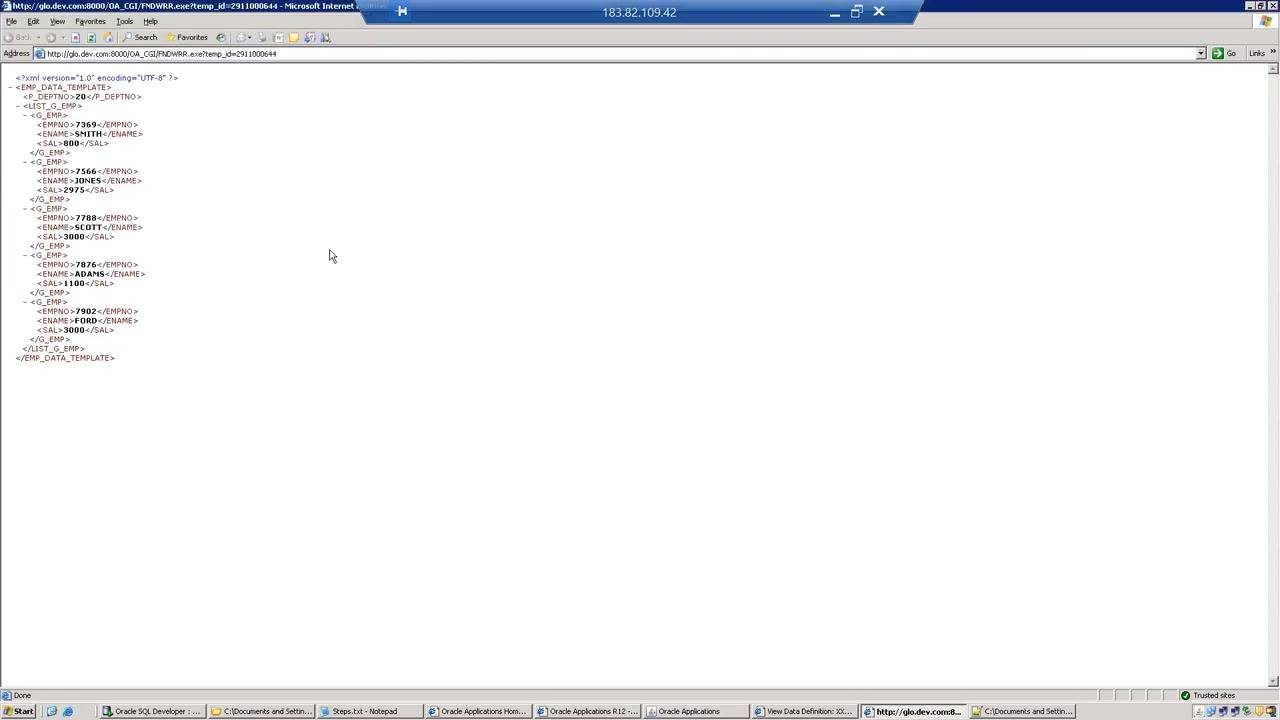
Examine the output in detail to confirm the correct parameter value, verify that employee data is structured under <LIST_G_EMP>, and ensure all tags are properly closed and the XML is well-formed.
Select the XML output file for the RTF template
In Microsoft Word, with the XML Publisher Template Builder add-in active, open the "Please select XML data" dialog. Navigate to the XML Report with Data_Template directory, select the output file XXFIRST_REPORT_DATA_TEMPLATE_OUTPUT.XML, and click Open.
Preview the RTF template and save it
Preview the RTF template with the loaded XML data in Microsoft Word, and observe the table structure with columns Empno, Ename, and Sal.
A prompt appears stating that the function requires the document to be in Rich Text Format (.rtf), and that you will be prompted to save the document as RTF before XML Publisher continues. Click OK to proceed.
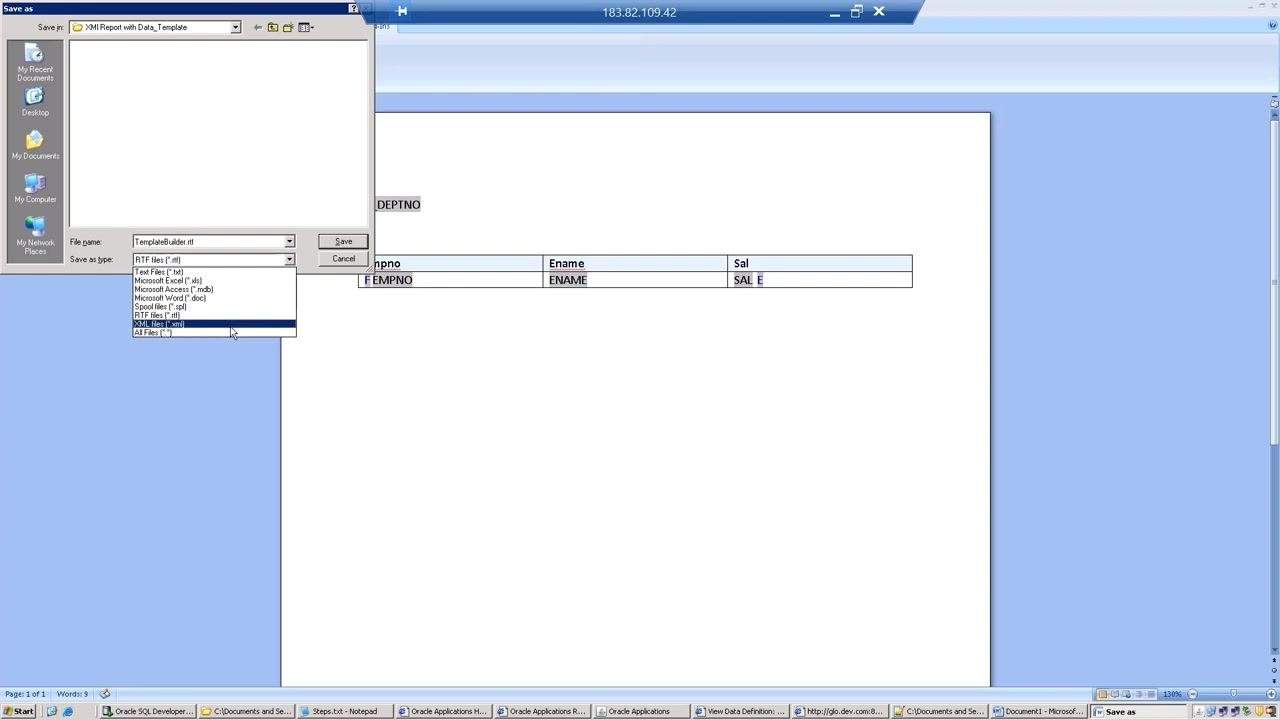
When the Save As dialog appears, navigate to the XML Report with Data_Template folder, enter the file name TemplateBuilder.rtf, select RTF files (*.rtf) from the Save as type dropdown, and click Save.
Associate the template with an application
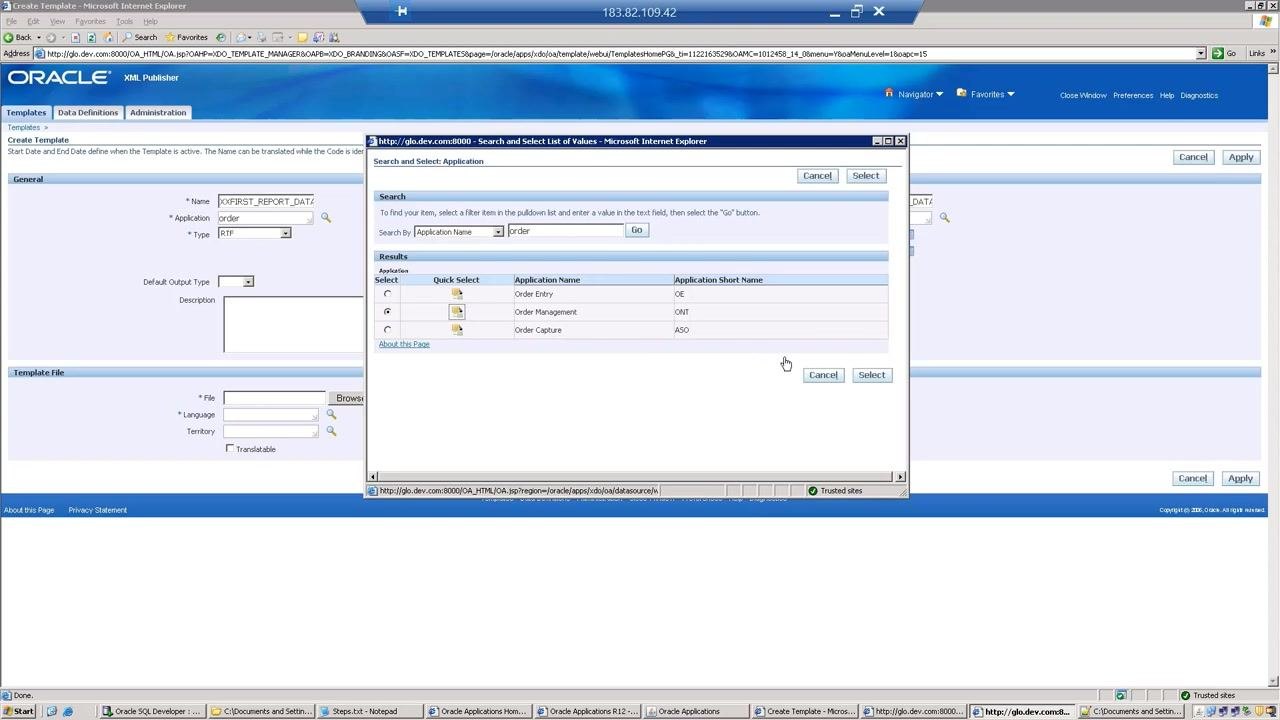
In Oracle Applications, on the Create Template screen, click the search icon next to the Application field. In the "Search and Select: Application" dialog, search by name (for example, "Order"), and select the appropriate application from the results, such as Order Entry (OE), Order Management (ONT), or Order Capture (ASO). Click Select to confirm.
Set the default output type
On the Create Template screen, set the Default Output Type dropdown to the desired format. Available options include EXCEL, EDI, HTML, PDF, and RTF. Select PDF as the default output type for this template.
Attach the output XML file to the template
On the Create Template screen, click Browse next to the File field under Template File. In the "Choose file" dialog, navigate to the XML Report with Data_Template directory, select XXFIRST_REPORT_DATA_TEMPLATE_OUTPUT.XML, and click Open to attach it.
Confirm the template creation
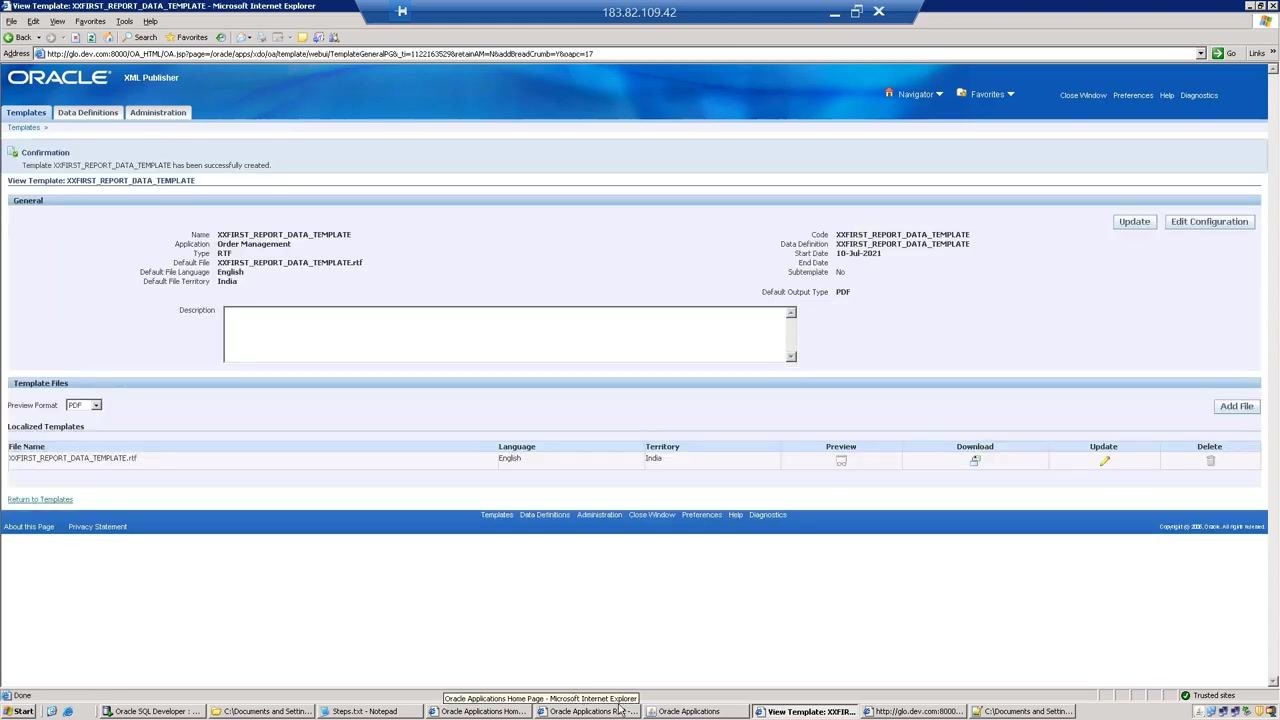
After saving and attaching the template, the View Template screen displays a confirmation message: "Template XXFIRST_REPORT_DATA_TEMPLATE has been successfully created."
Review the template details:
- Name:
XXFIRST_REPORT_DATA_TEMPLATE - Application:
Order Management - Type:
RTF - Default File:
XXFIRST_REPORT_DATA_TEMPLATE.rtf - Default Output Type:
PDF - Default File Language:
English - Default File Territory:
India
Confirm that the localized template is listed with the correct file name, language, and territory, and that the preview format is set to PDF.
Review the final report output
Open the generated report output in your web browser or PDF viewer and confirm it displays the expected data:
- Department number:
20 - Table columns:
Empno,Ename,Sal - Employee data:
- 7369, SMITH, 800
- 7566, JONES, 2975
- 7788, SCOTT, 3000
- 7876, ADAMS, 1100
- 7902, FORD, 3000
Ensure the table formatting and data accuracy match your requirements.
Summary
You have now completed the full process of how to create an XML report in Oracle EBS: reviewing the data template XML file, registering the data definition, defining and enabling the concurrent program, attaching it to a request group, submitting and reviewing the request, building and saving the RTF template, associating it with an application, and confirming the final PDF output. With the data definition, concurrent program, and RTF template all configured, users with the assigned responsibility can now run this report through Oracle Applications whenever needed.
Generation details: cost, quality tiers
Docsie billed 5,500 credits ($3.85) to analyze this 11-minute video at standard quality. The rewrite, template fill and Word/PDF exports were included. The same video at each quality tier:
| Quality | Frames sampled | Credits | Approx. cost |
|---|---|---|---|
| Draft | every 16-30 s | 2,750 | $1.92 |
| Standard (this guide) | every 8-15 s | 5,500 | $3.85 |
| Detailed | every 4-7 s | 11,000 | $7.70 |
| Ultra | every 1-3 s | 22,000 | $15.40 |
Credits priced at $0.70 per 1,000; plans include a monthly allowance. Enterprise customers on on-premise or bring-your-own-model deployments run this on their own inference and pay no per-video credits.
Generated by Docsie Video-to-Docs on 2026-10-14 from a 10-minute video. Screenshots are frames from the source video and belong to their creator, Subratkumar123, whose original is embedded above. If you own this video and want the guide removed or credited differently, contact us and we will act within one business day.