
How to Create an Invoice in NetSuite
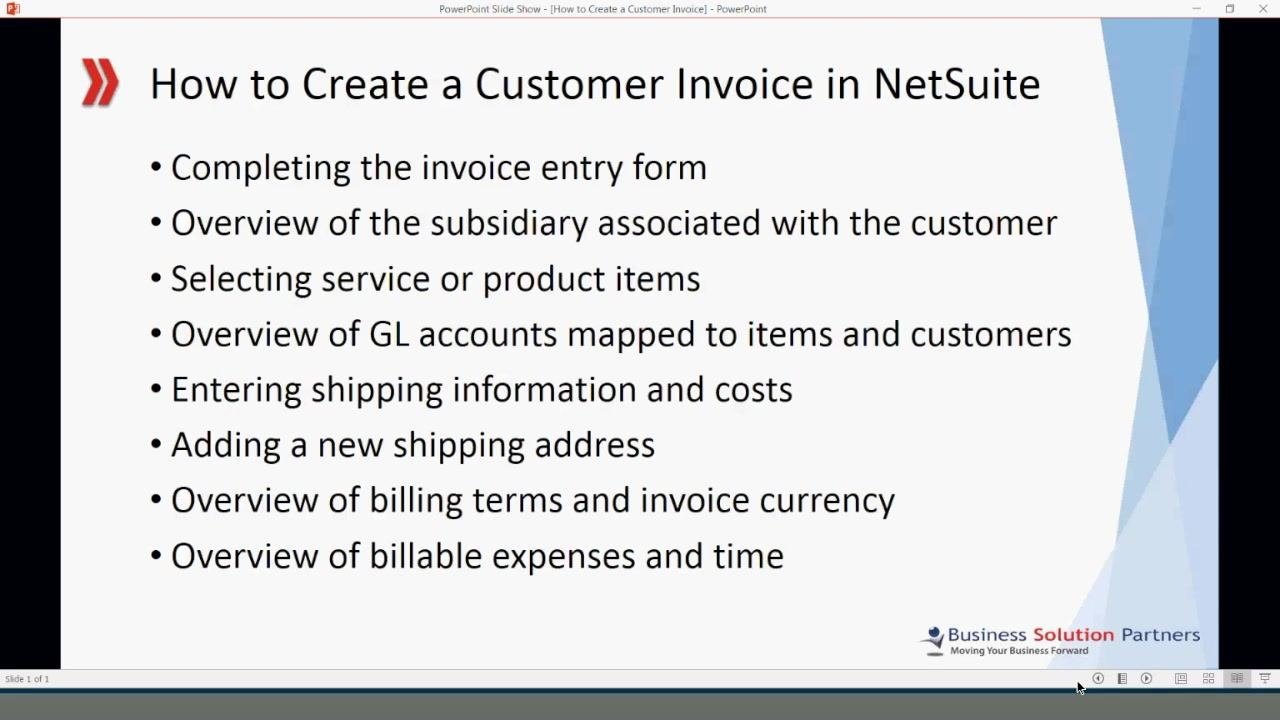
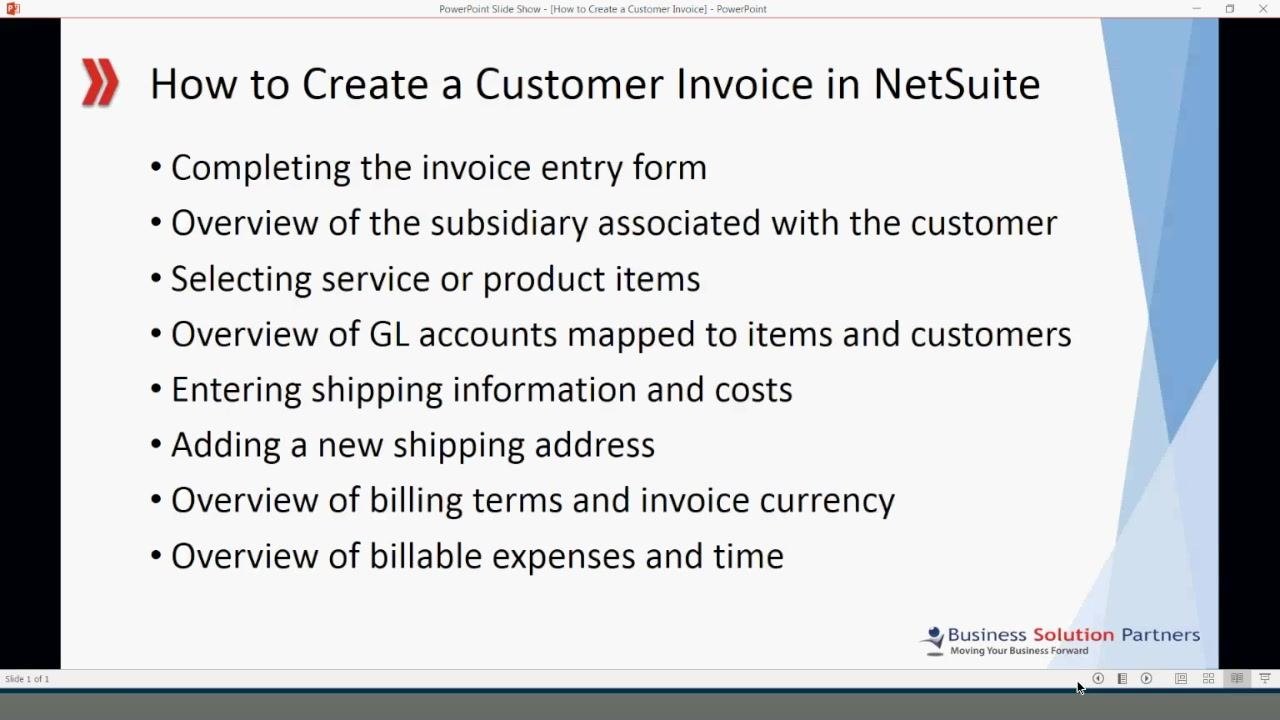
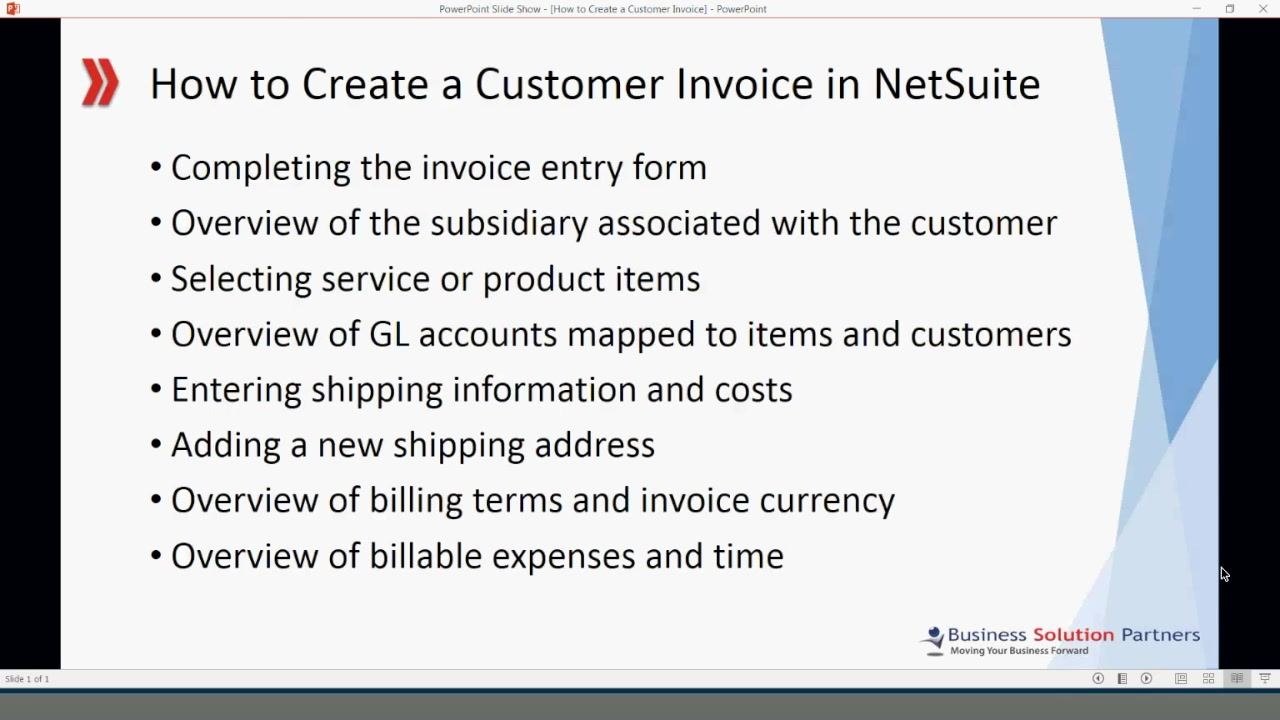
This guide walks you through how to create an invoice in NetSuite, from opening the invoice entry form to saving the completed transaction. You'll learn how to complete the invoice header, select the correct subsidiary, choose service or product items, understand how items map to GL accounts, enter shipping and billing information, add a shipping address, review billing terms and currency, and account for billable expenses and time.
Video: NetSuite Tutorial: How to Create a Customer Invoice by BSP - Award Winning Oracle NetSuite Partner (2017). All credit for the demonstration goes to the creator; watch the original on YouTube. The written guide below was generated from this video by Docsie. Creator? Request a change or removal.
This guide walks you through how to create an invoice in NetSuite, from opening the invoice entry form to saving the completed transaction. You'll learn how to complete the invoice header, select the correct subsidiary, choose service or product items, understand how items map to GL accounts, enter shipping and billing information, add a shipping address, review billing terms and currency, and account for billable expenses and time.
Before you begin
Before creating an invoice, confirm the following:
- You have access to either the Customers or Billing menu in NetSuite.
- The customer record already exists and is linked to the correct subsidiary, since every invoice for a customer posts to that customer's assigned subsidiary.
- The items you plan to bill have already been set up with a list price and a tax code, since these settings determine how each item is priced and taxed on the invoice.
- If your company uses the Advanced Billing module, you know the billing start and end dates for the transaction.
- You are aware that you can only post to open accounting periods.
Open the invoice entry form
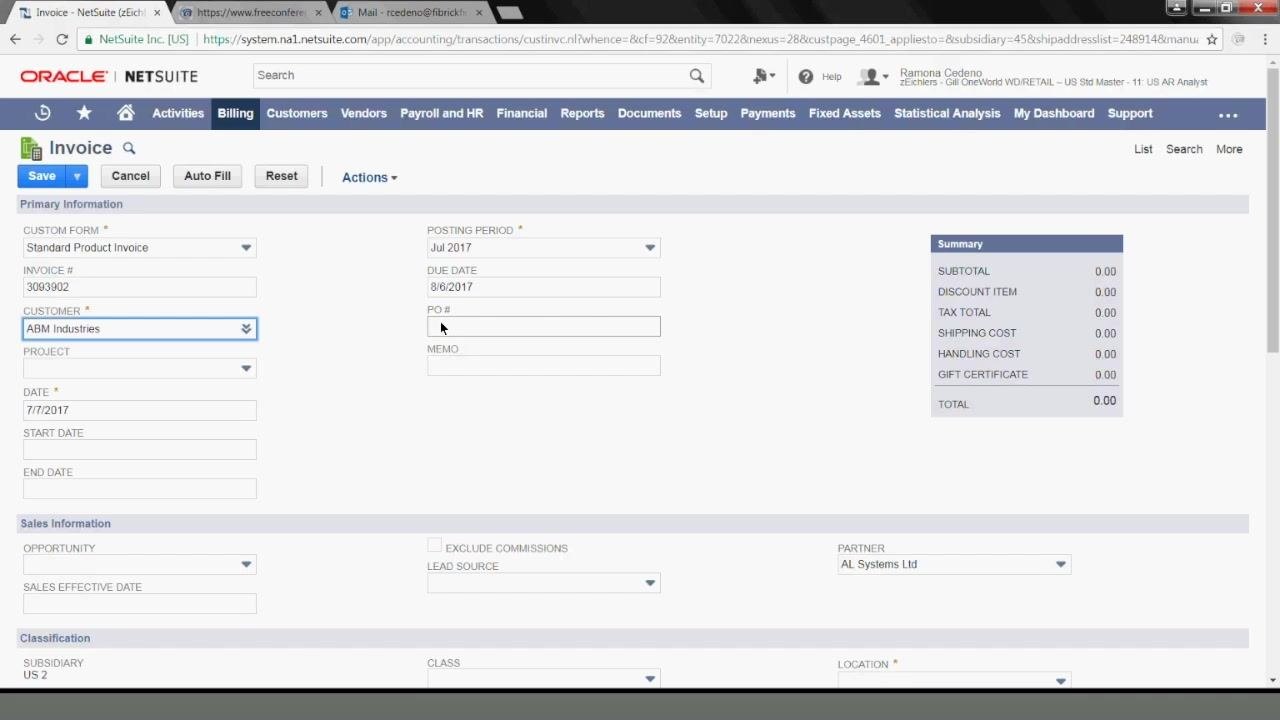
Navigate to the invoice entry form using one of the following paths:
- Customers > Sales > Create Invoices
- Billing > Sales > Create Invoices
Select the invoice form type
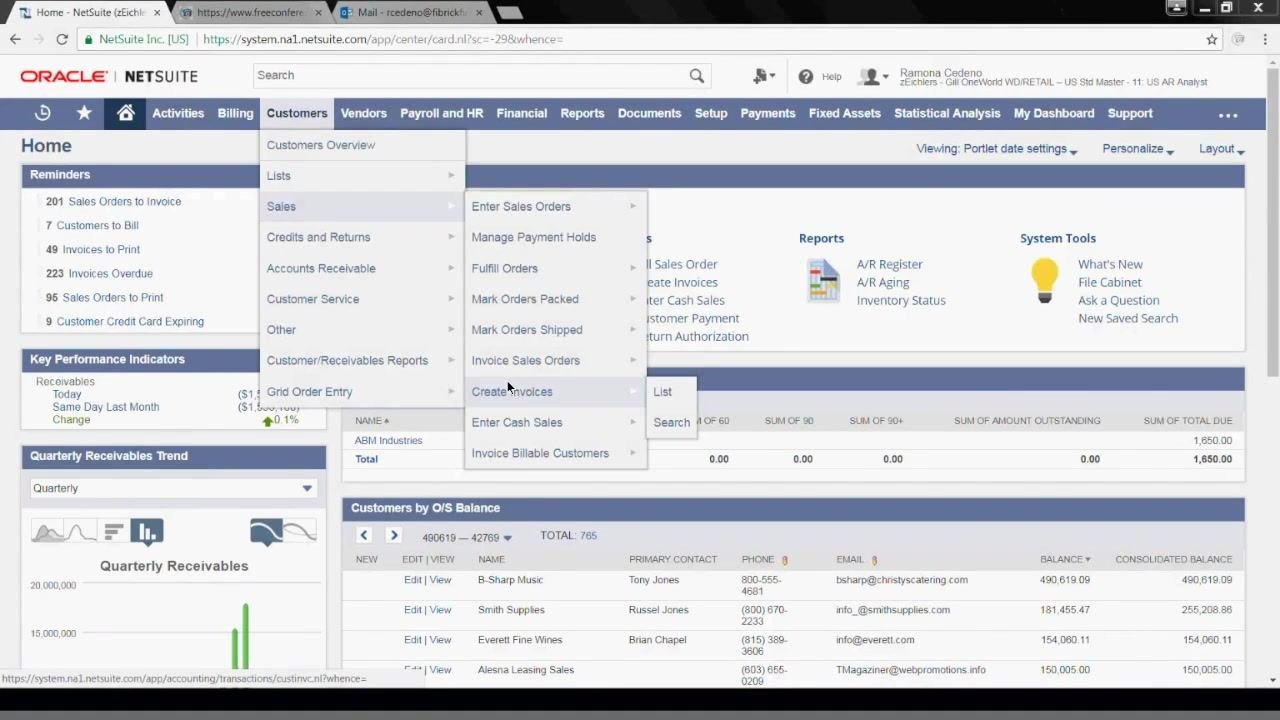
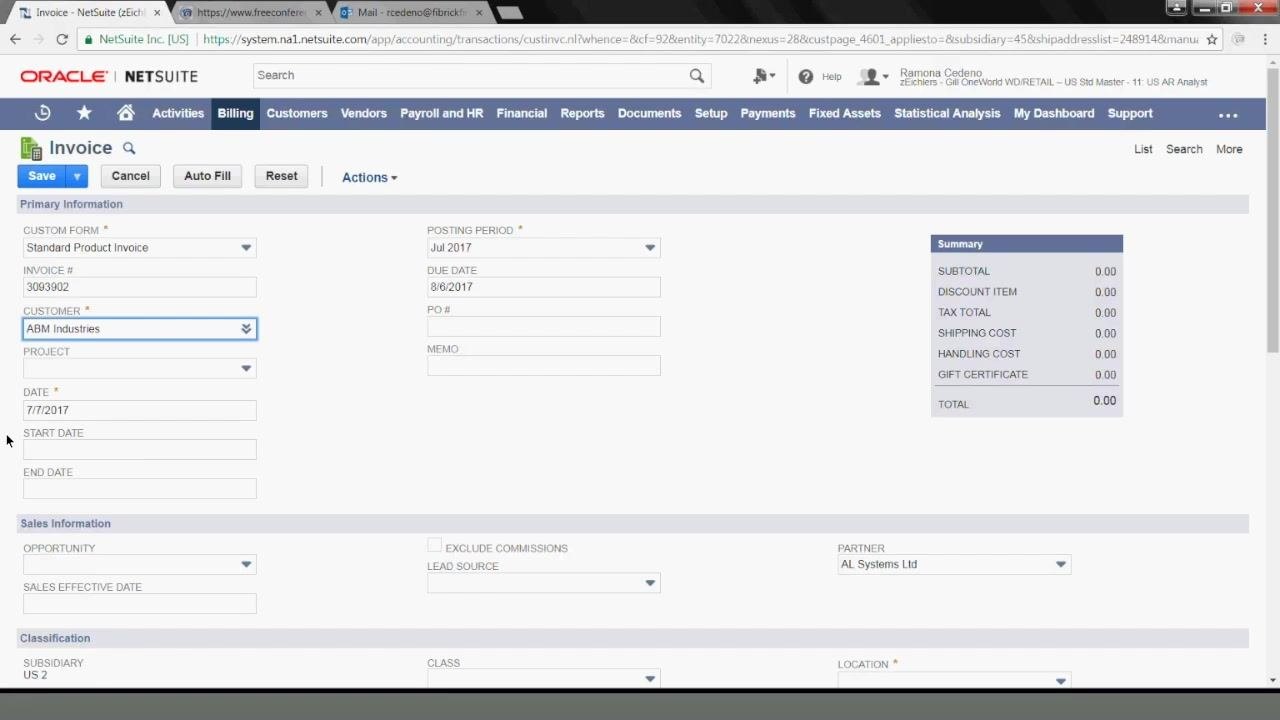
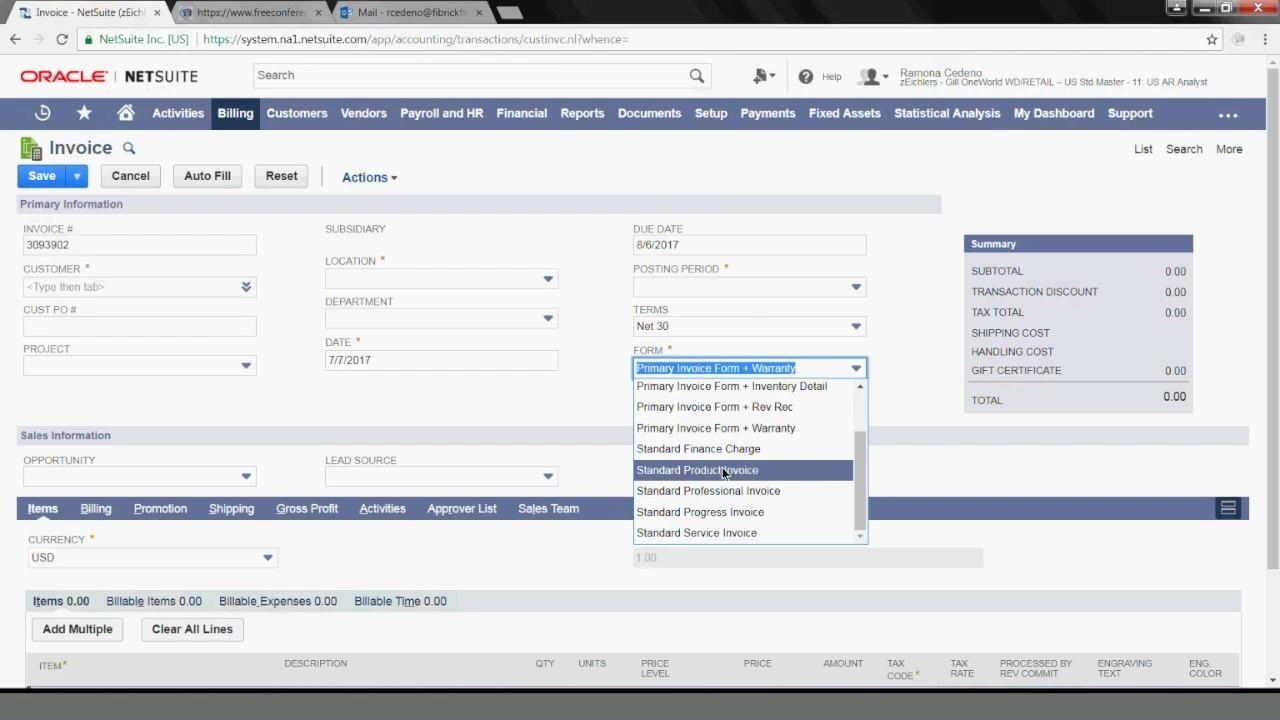
On the invoice entry form, click the Form dropdown and select Standard Product Invoice. Your firm may have custom forms configured, so choose the one that matches your requirements.
Enter the customer
The Invoice Number field is pre-filled automatically (for example, 3093902). In the Customer field, type and select the customer name, such as "ABM Industries."
Set the invoice date and posting period
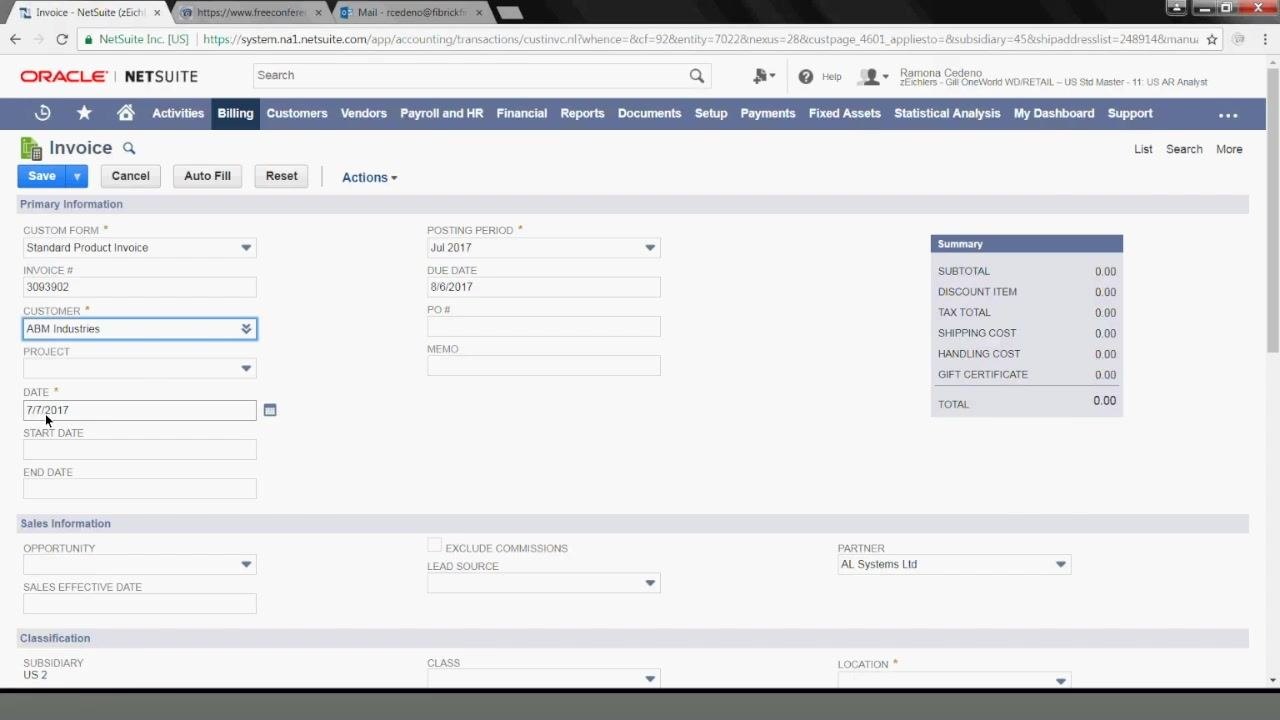
The Date field defaults to today's date (for example, 7/7/2017), and the Posting Period defaults to the current month (for example, Jul 2017). Change either field if needed.
Adjust the date and posting period if necessary
Update the Date field if the invoice should carry a different date than today, and update the Posting Period if you need to post to a different open period. You can only select open periods.
Enter project and billing dates (optional)
If your company tracks invoices by project, select the appropriate value in the Project field. If your company uses the Advanced Billing module, enter the Start Date and End Date for the billing period; the Start Date should reflect when the first billing takes place.
Add a PO number and memo (optional)
Enter a purchase order number in the PO # field if you want to track the invoice by PO, and add any relevant notes in the Memo field.
Review sales opportunity information (optional)
In the Sales Information section, complete the following fields if applicable:
- Opportunity: select the related sales opportunity.
- Sales Effective Date: enter the effective date for the sale.
- Lead Source: select the lead source from the dropdown.
- Partner: confirm or select the partner involved (for example, "AL Systems Ltd").
- Exclude Commissions: check this box if commissions should not be calculated for this invoice.
Review subsidiary and classification details
The Subsidiary field is automatically linked to the customer (for example, "US 2"), since each customer is associated with only one subsidiary. Every invoice for this customer posts to that assigned subsidiary.
Add department, class, and location
Select the appropriate Department if required, choose a Class if your company uses class tracking, and select the Location (for example, "Boston," which may be required for your company).
Complete custom fields
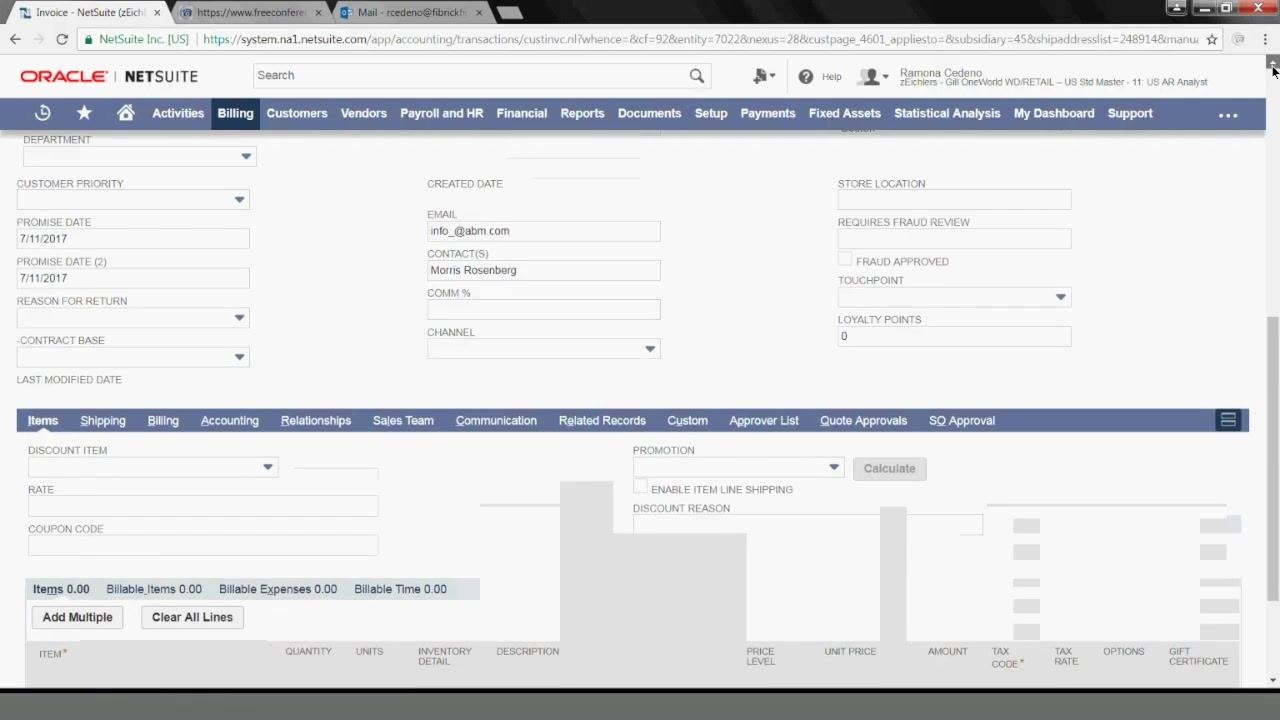
Scroll through the form to check for custom fields specific to your firm, such as Store Location, Requires Fraud Review, Touchpoint, or Loyalty Points, and fill them in as required by your company's processes.
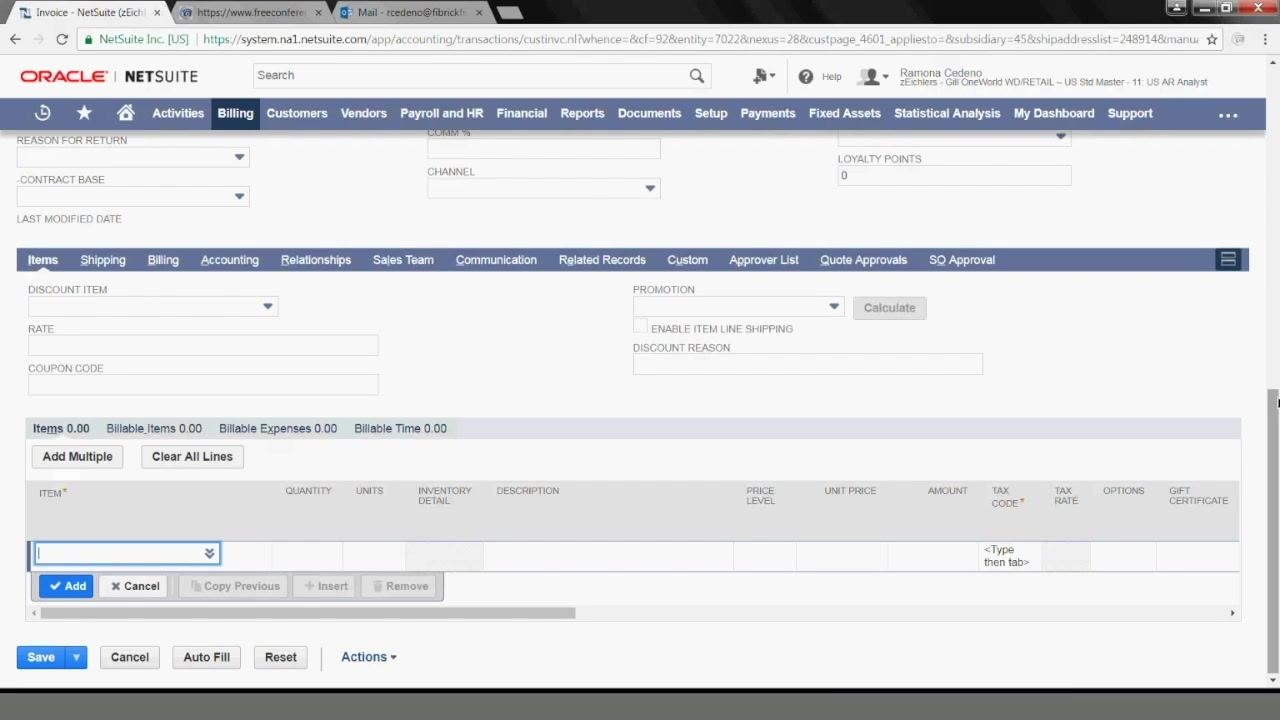
Open the Items tab
Locate the Items tab among the invoice's financial tabs (Items, Shipping, Billing, Accounting, and others). This tab contains fields for discounts as well as the item entry grid.
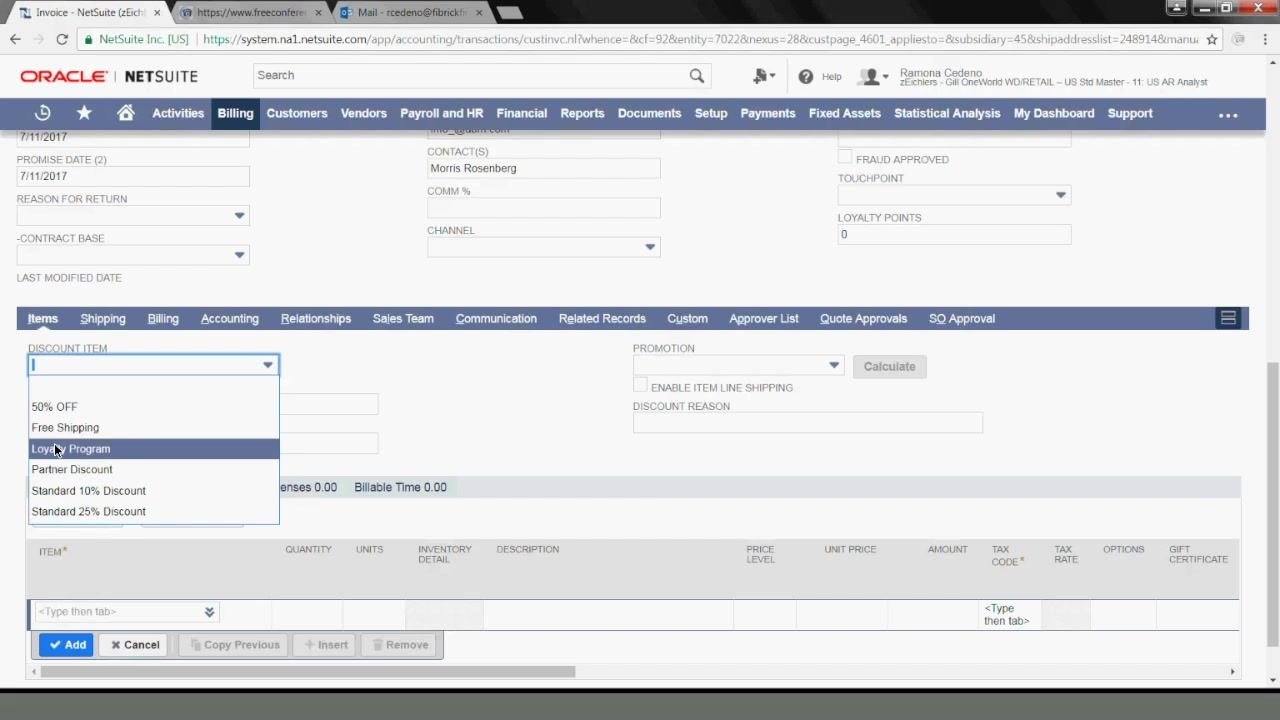
Apply a discount if applicable
In the Discount Item dropdown, select a preset discount if your firm tracks or offers them, such as "50% OFF," "Free Shipping," "Loyalty Program," "Partner Discount," "Standard 10% Discount," or "Standard 25% Discount." Enter a Rate or Coupon Code if required.
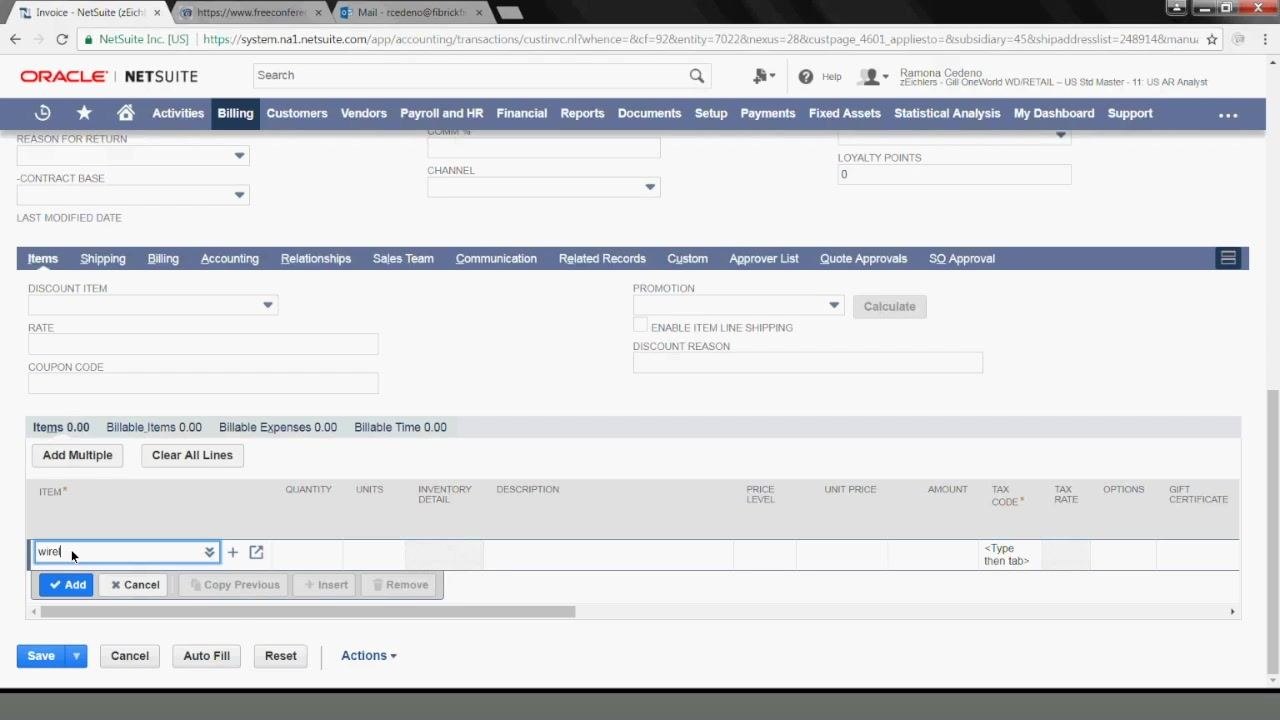
Enter the product or service
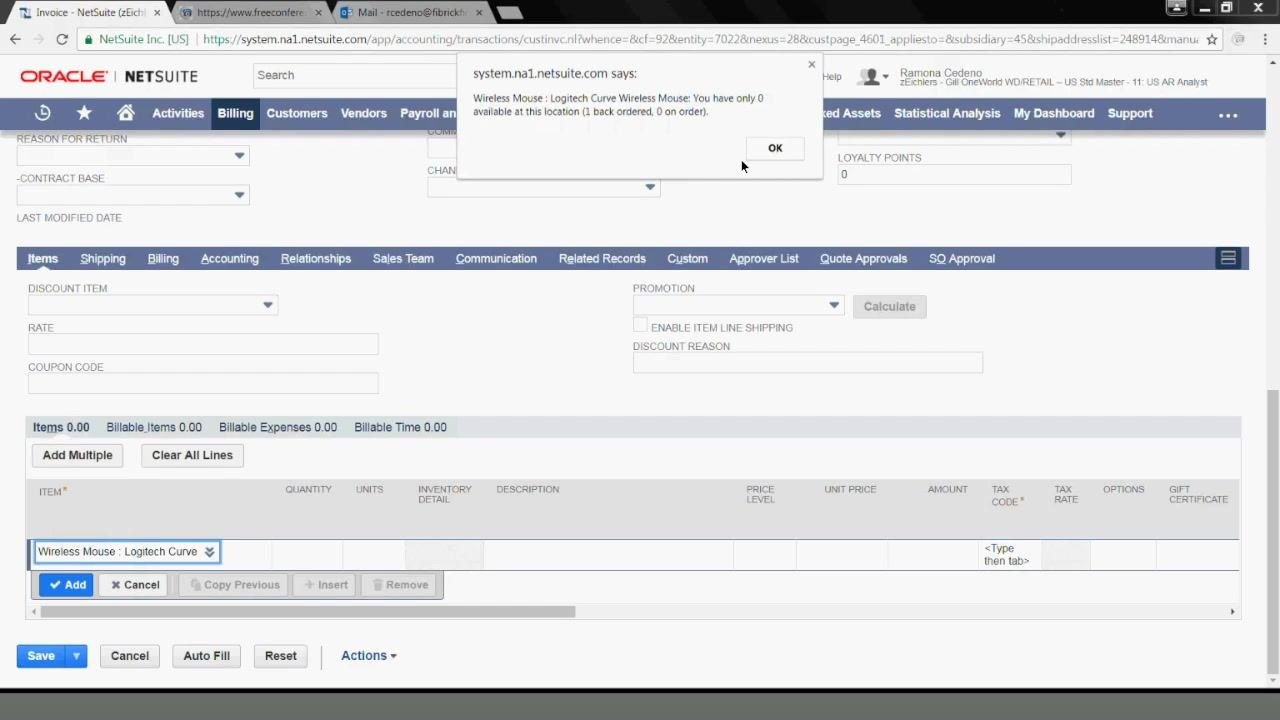
In the ITEM field, type the name or part of the name of the product or service you're selling. For example, type "wireless mouse" to search for the Logitech Curve Wireless Mouse, then select the correct item from the search results.
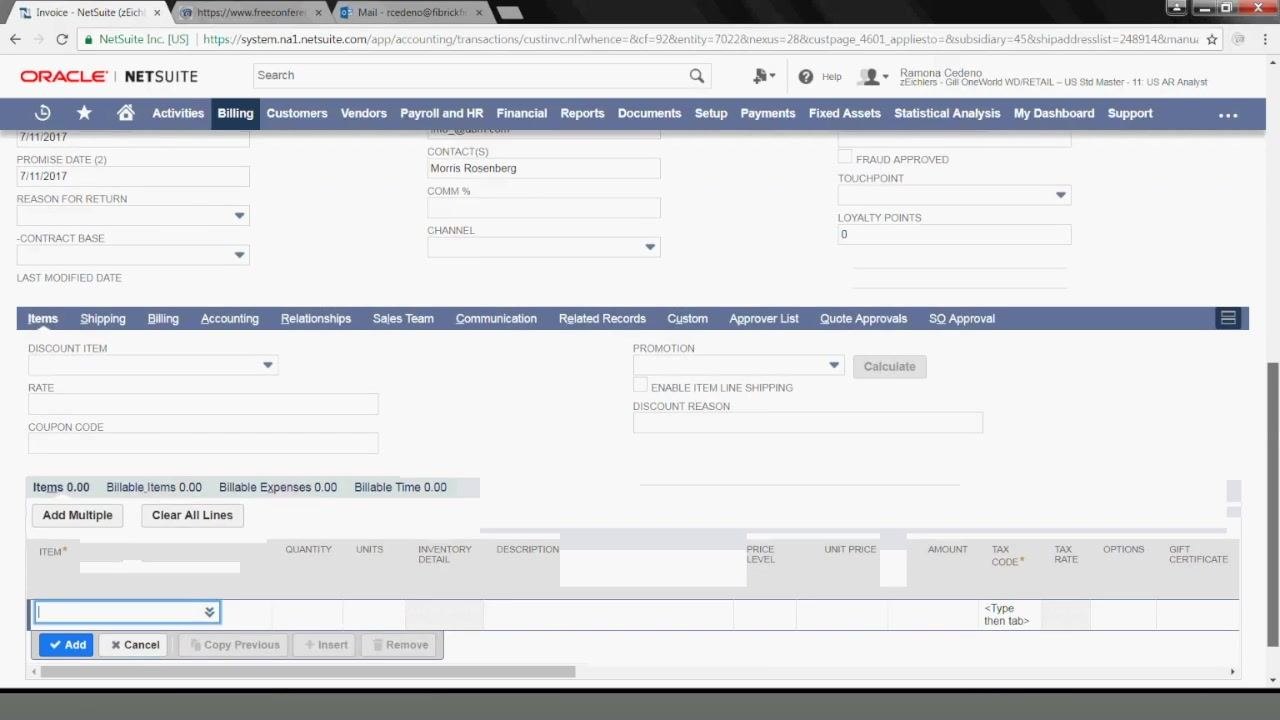
Handle inventory warnings
If the selected item is out of stock, a warning popup appears, such as: "Wireless Mouse: Logitech Curve Wireless Mouse: You have only 0 available at this location (1 back ordered, 0 on order)." Click OK to acknowledge the warning and continue adding the item to the invoice.
Review pre-filled item details
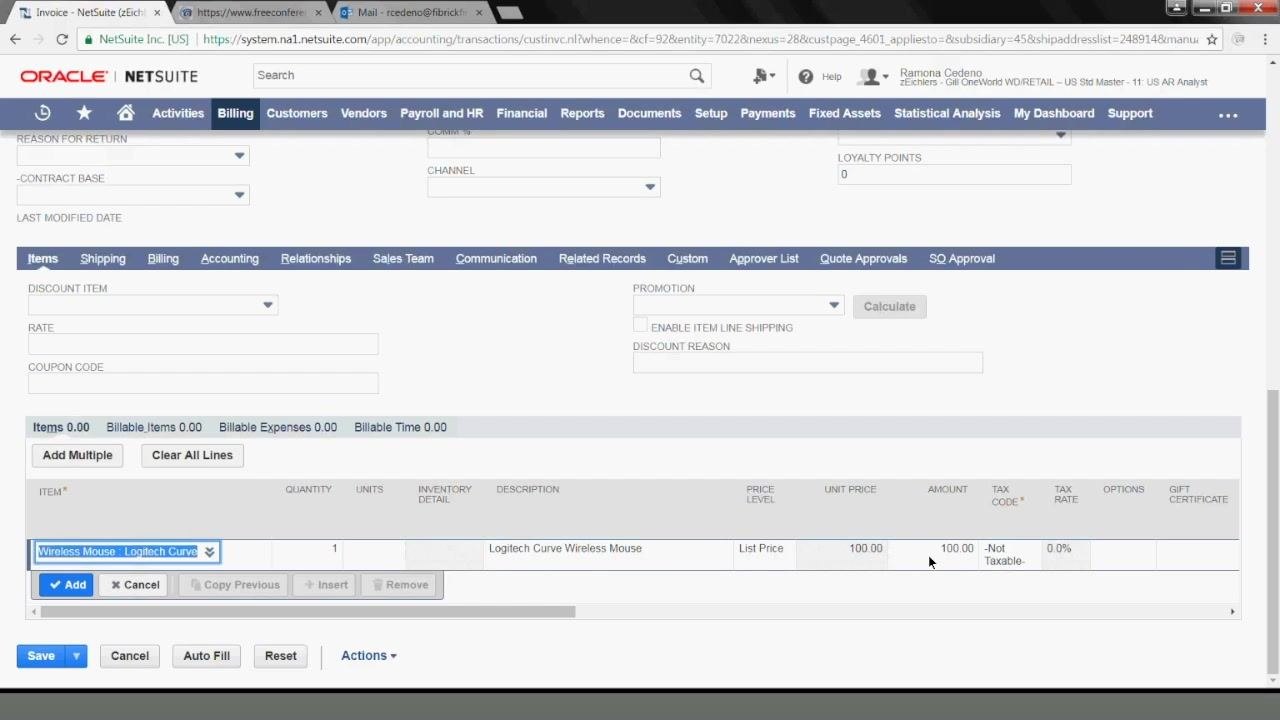
After selecting the item, confirm that fields such as Description, List Price, Unit Price, Amount, Tax Code, and Tax Rate are populated correctly based on the item setup, along with Quantity and Units. Make adjustments if anything is incorrect before continuing.
Add the item to the invoice
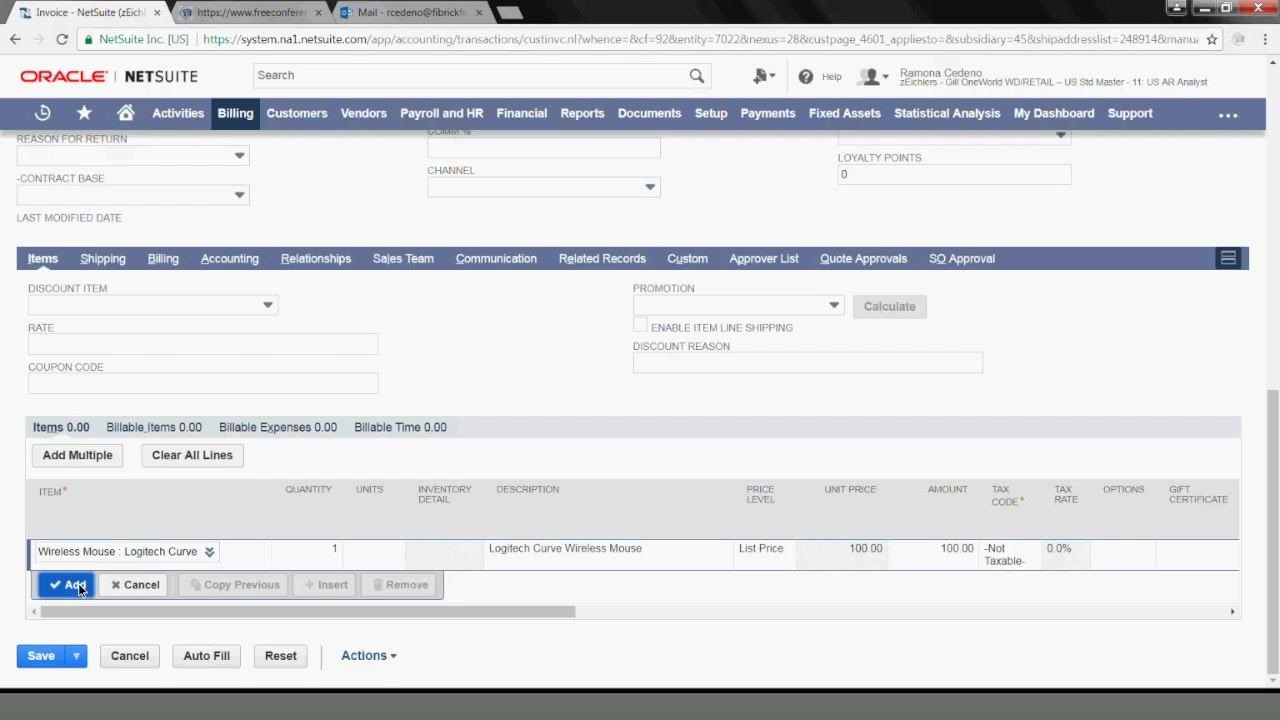
With the item details confirmed—Quantity 1, Description "Logitech Curve Wireless Mouse," Price Level "List Price," Unit Price 100.00, Amount 100.00, Tax Code "-Not Taxable-," and Tax Rate 0.0%—click the blue Add button to add the item to the invoice.
Verify the item was added
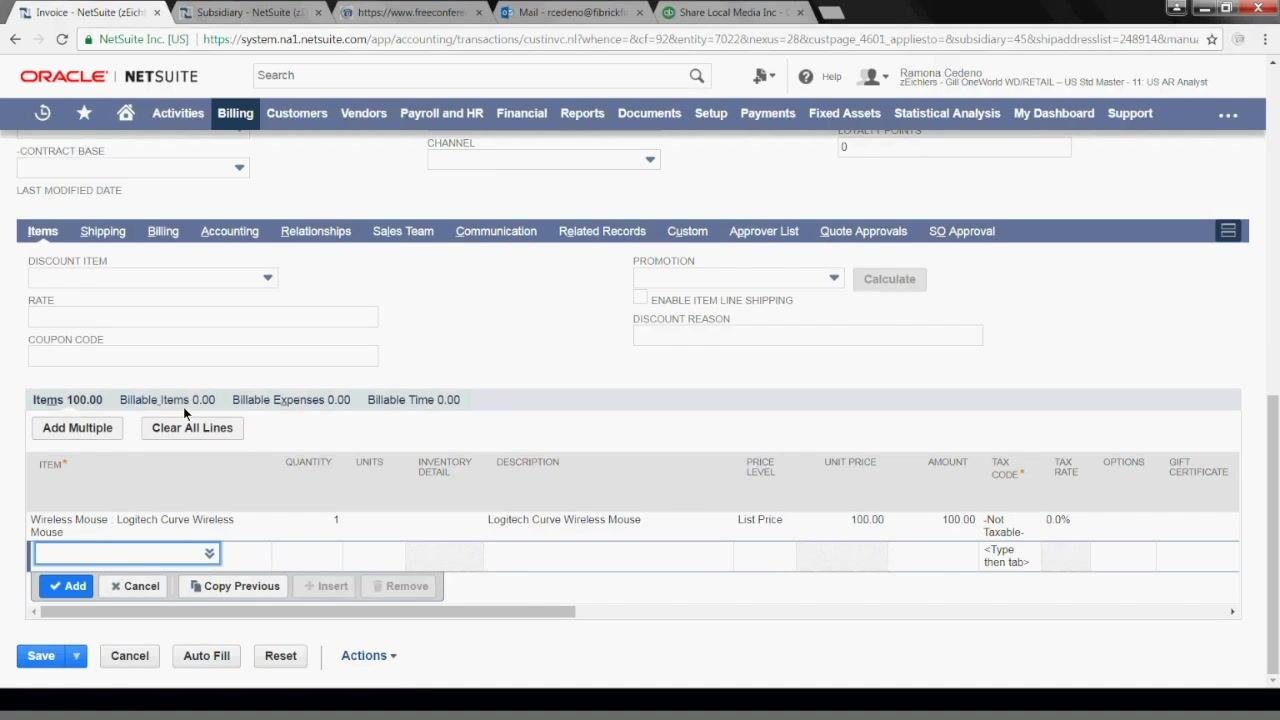
Confirm the item now appears in the summary section below the grid, with the total updated under Items (for example, Items 100.00). Repeat the item entry steps for each additional item you need to bill.
Review billable items, expenses, and time
Above the item list, review the Billable Items, Billable Expenses, and Billable Time summary fields. These sections display transactions previously marked as billable for the customer, such as travel and expense entries. If there are none for this client, the fields will read 0.00 and you can proceed.
Open the Shipping tab and enter shipping details
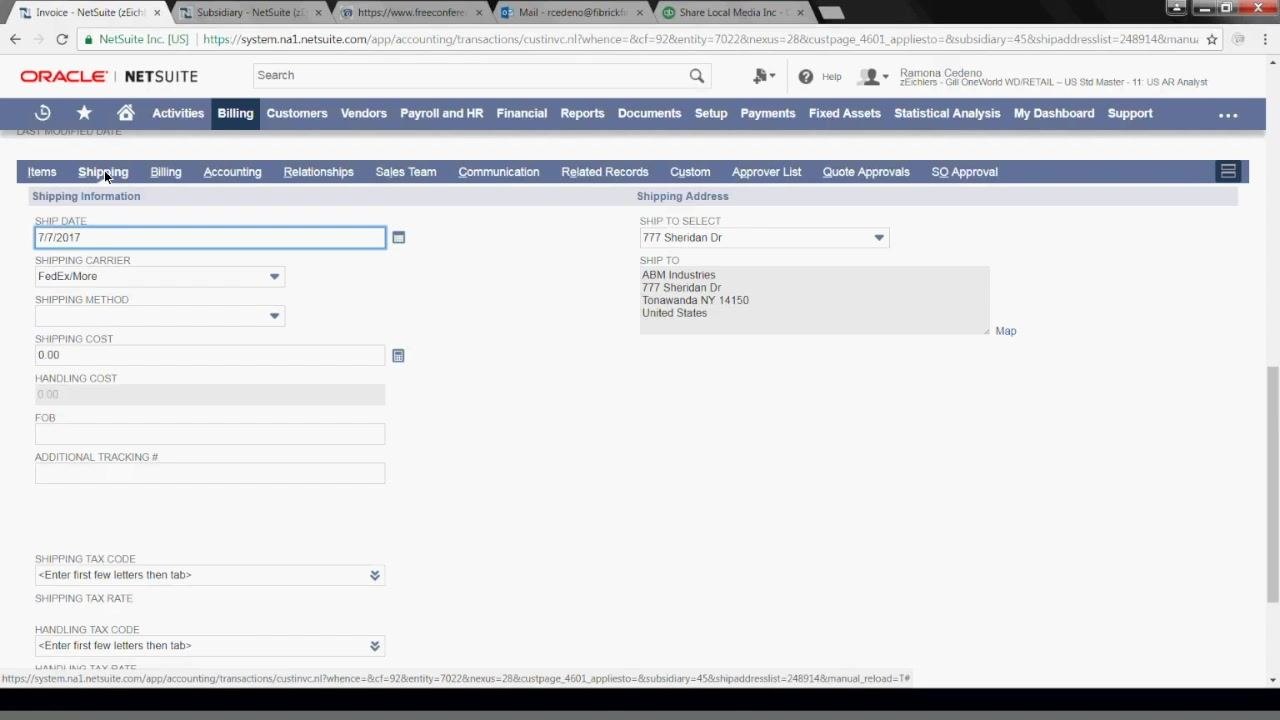
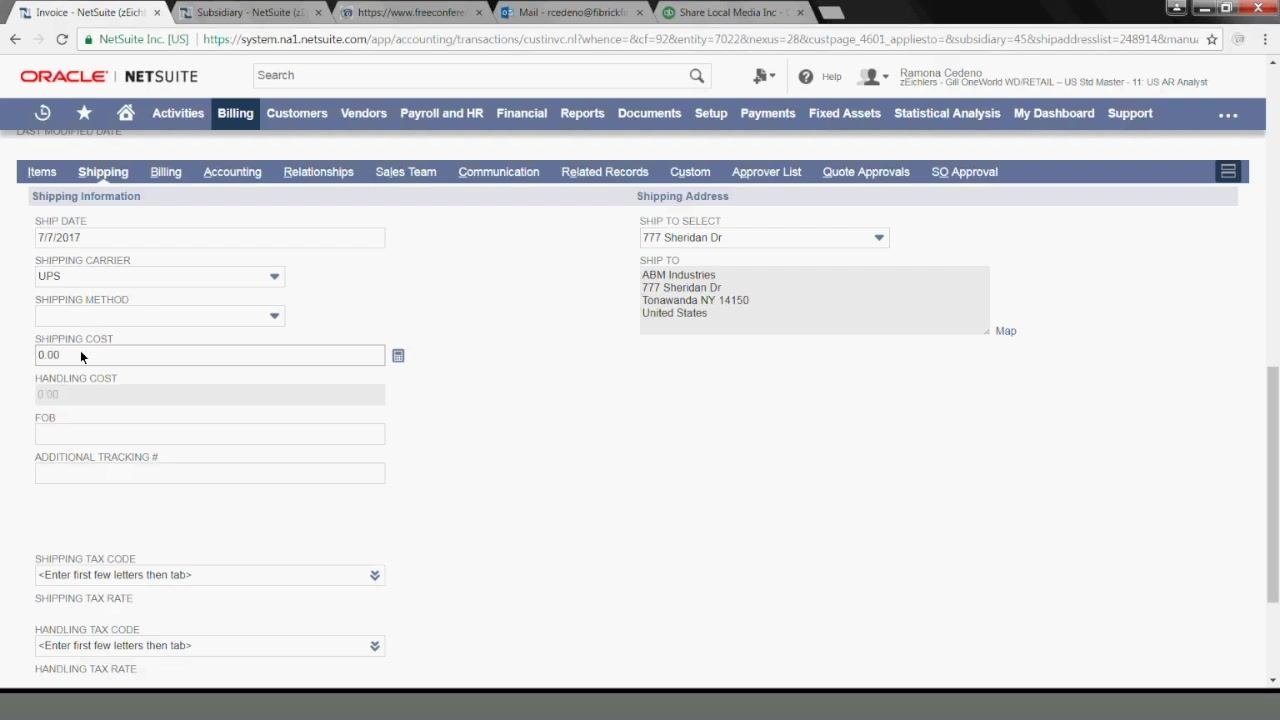
Click the Shipping tab, then review and update the following fields:
- Ship Date: defaults to today's date (for example,
7/7/2017); change if necessary. - Shipping Carrier: select from available options.
- Shipping Method: leave blank or select as required.
- Shipping Cost: enter the shipping cost (defaults to
0.00). - Handling Cost: enter if applicable (defaults to
0.00). - FOB: enter if required.
- Additional Tracking #: enter if available.
The shipping address appears on the right (for example, ABM Industries, 777 Sheridan Dr, Tonawanda NY 14150, United States).
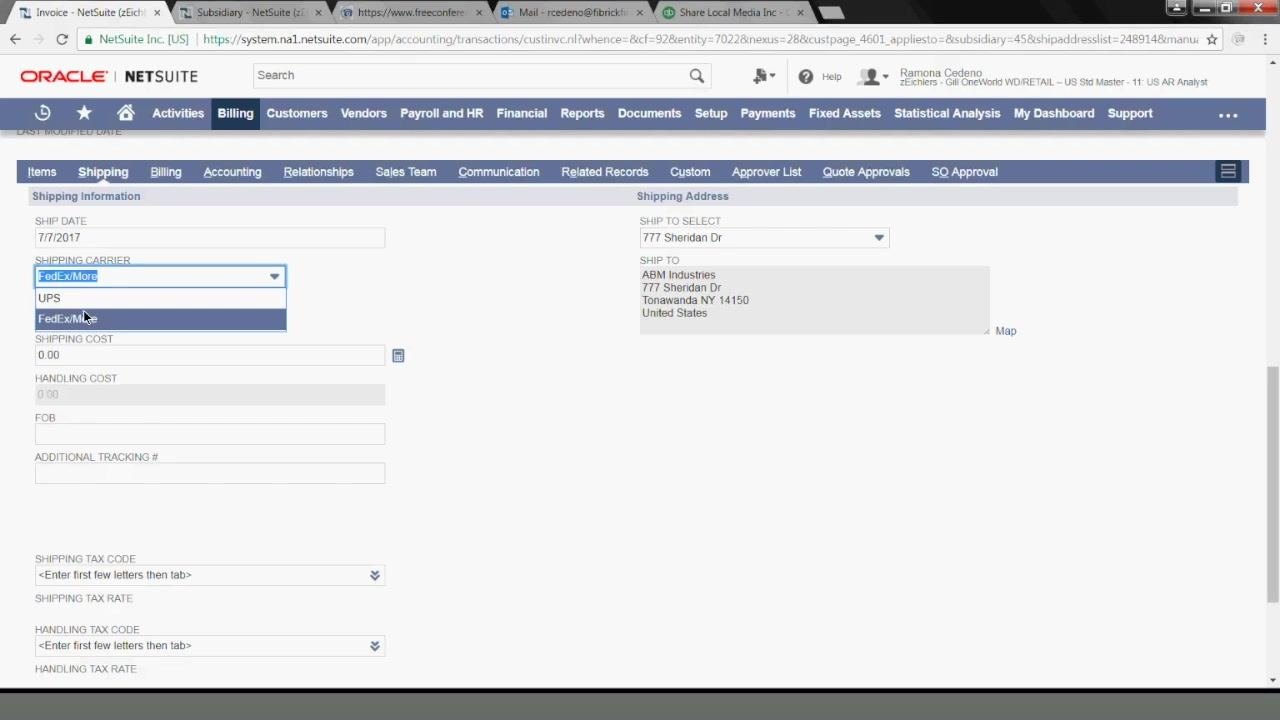
Select the shipping carrier
Use the dropdown menu to choose the shipping carrier, such as FedExMore or UPS, selecting whichever carrier your internal team has assigned.
Add a shipping cost to the invoice
If you enter a value in the Shipping Cost field, it will be added to the invoice total. Make sure all shipping-related fields are completed as required.
Review the shipping address
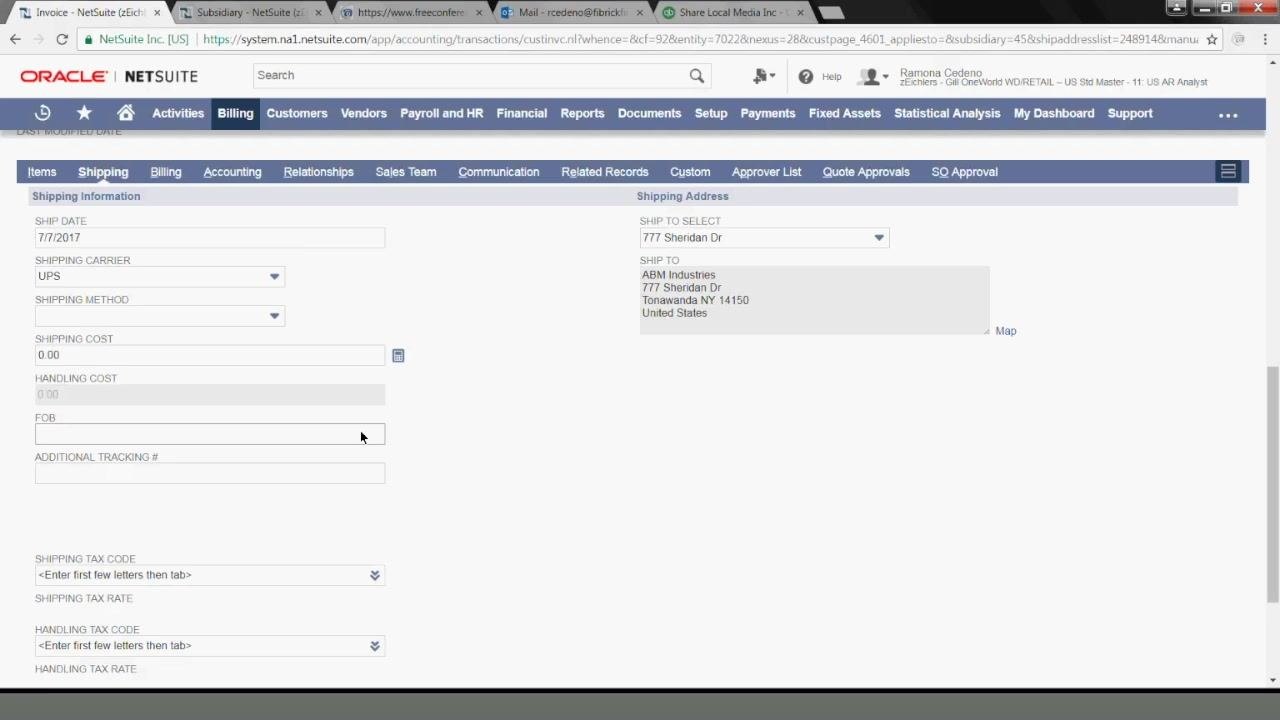
Confirm the Shipping Information fields and, under Shipping Address, verify the current address (for example, Ship to Select 777 Sheridan Dr, with the full address for ABM Industries shown below it). Note that the ability to select or add shipping addresses depends on a setting enabled in your account.
Add or select a shipping address
To change the shipping address, click the dropdown under Ship to Select. Options include existing addresses (such as 777 Sheridan Dr), - New - to add a new address, or - Custom - to enter a custom address for this shipment.
Review and edit billing information
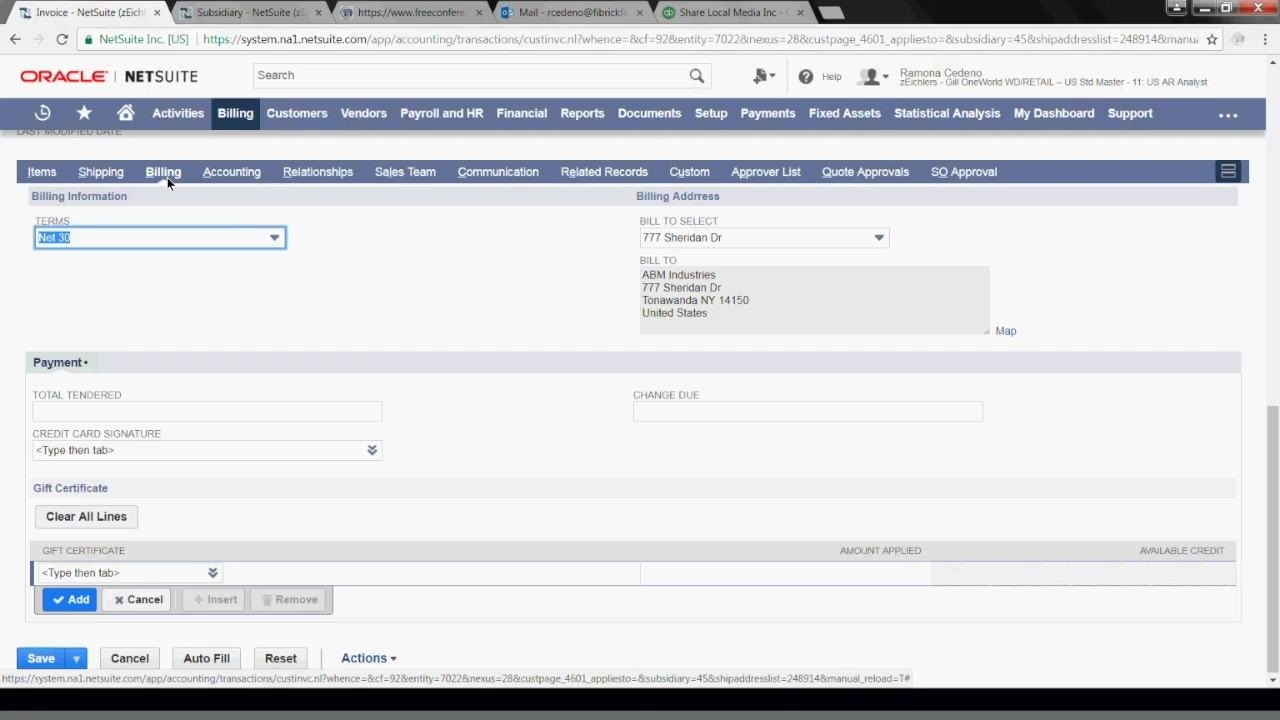
Click the Billing tab to access billing details. In the Billing Information section, set the Terms (for example, Net 30, with other options including 1% 10 Net 30, 2% 10 Net 30, Due on receipt, Net 15, and Net 60), and enter values for Credit Card Signature, Gift Certificate, Total Tendered, or Change Due as applicable. The Billing Address section on the right lets you select or change the billing address, similar to the shipping address.
Configure accounting information
Click the Accounting tab to review account-related fields. In the Account Information section, confirm the Account (for example, 1100 Accounts Receivable), the Currency (defaults to the subsidiary's currency, for example USD), and the Exchange Rate (defaults to the current rate for the selected currency). Additional fields may include Sales / SQ FT, Items Sold, and Ave $ Per TRX. In the Revenue and Gross Profit sections, review or enter values such as Estimated Gross Profit, Estimated Gross Profit Percent, Estimated Extended Cost, Margin, Wages Cost, Wages, TRXCOUNT, and Ave Items Per TRX. Some of these fields may be custom to your company.
Review customer relationship information
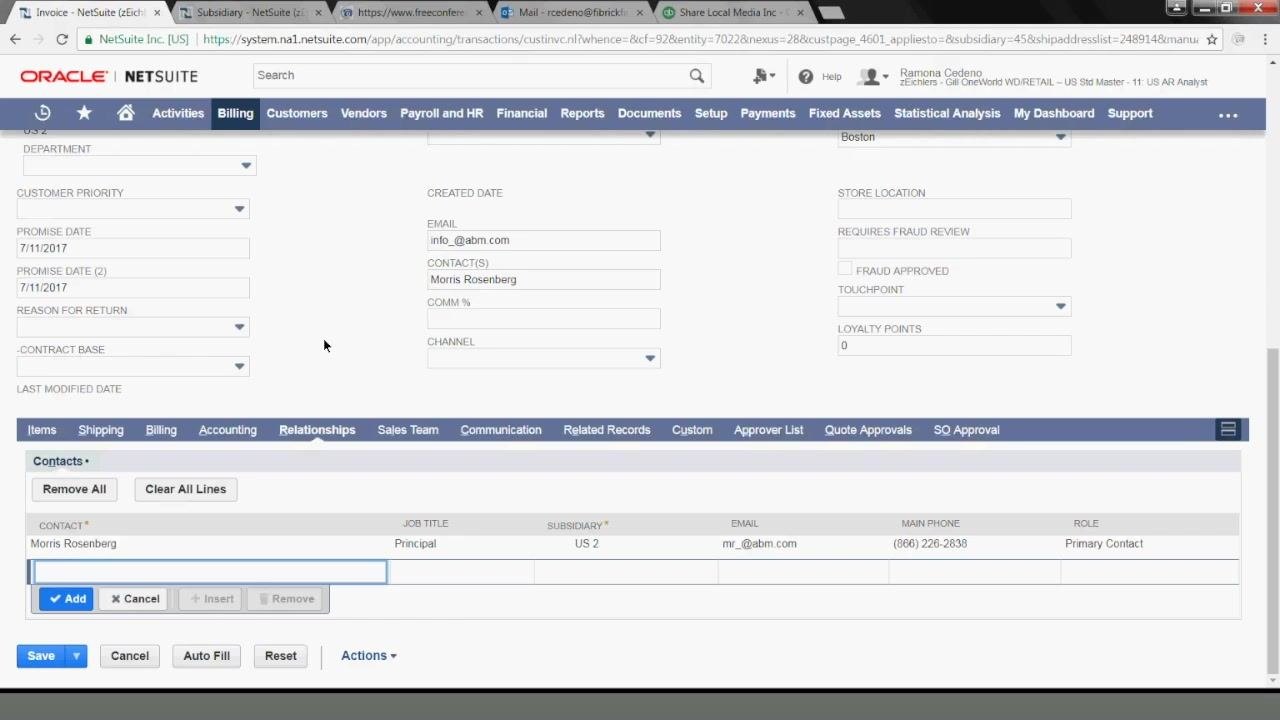
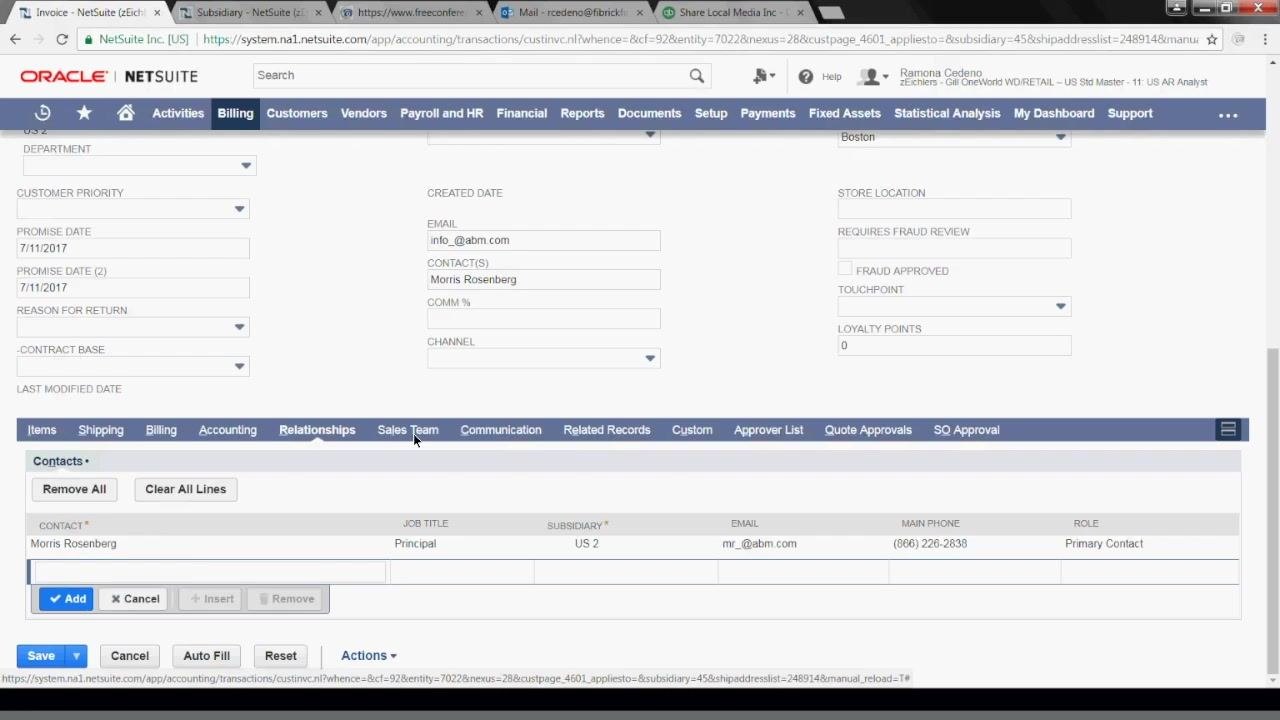
Click the Relationships tab to view customer contacts. In the Contacts section, review associated contacts, such as Morris Rosenberg (Job Title: Principal, Subsidiary: US 2, Email: mr_@abm.com, Main Phone: (866) 226-2838, Role: Primary Contact). Use the Add, Cancel, Insert, or Remove buttons to manage contacts as needed.
Assign sales team members
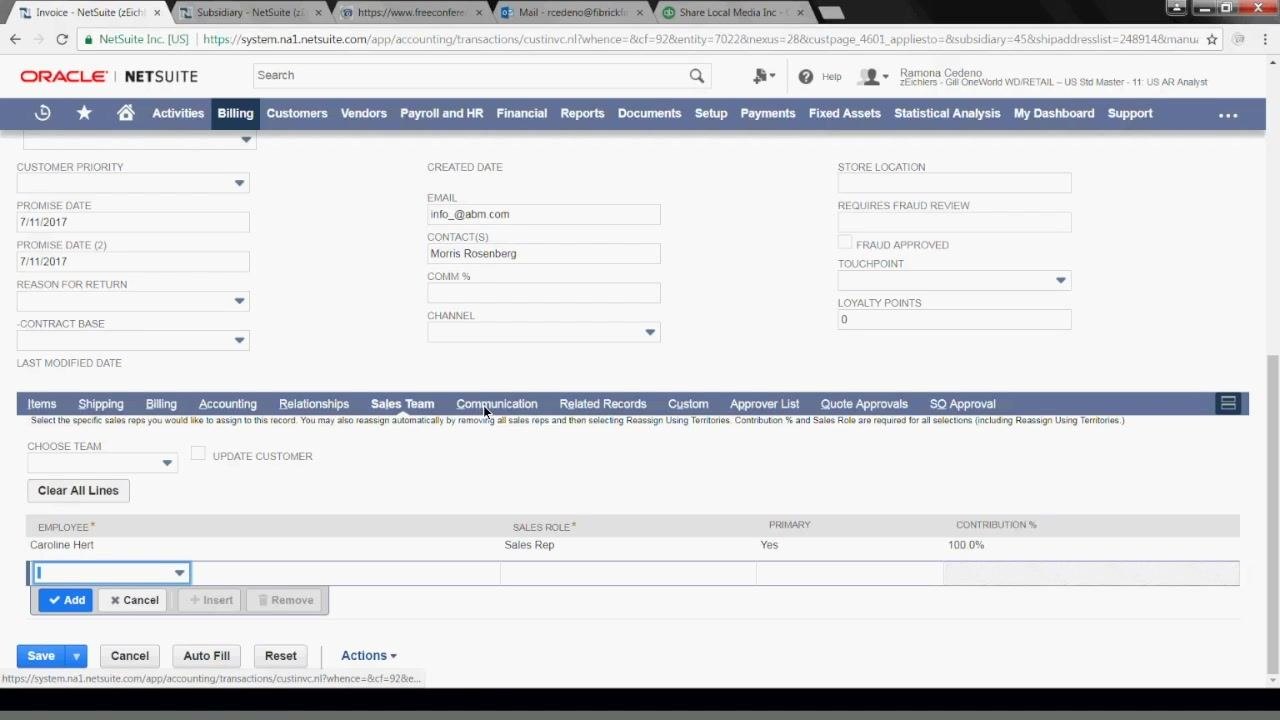
Click the Sales Team tab. In the Employee section, review or assign the sales rep for your firm (for example, Caroline Hert, Sales Role: Sales Rep, Primary: Yes, Contribution %: 100.0%). Use the Choose Team dropdown to select a team if needed, click Add to assign additional sales reps, or Remove to delete existing ones.
Configure communication options
Click the Communication tab. Under Messages, choose how to send the invoice by checking To be Printed, To be Faxed (confirming the fax number), or To be E-mailed (confirming the recipient email). Enter a custom note in the Customer Message box, or select a predefined message from the Select Message dropdown.
Review related records
Click the Related Records tab to link related transactions, such as a returns credit memo, to this invoice after it is saved and other transactions are posted. Use the Returns Credit Memo dropdown to select a related record if applicable.
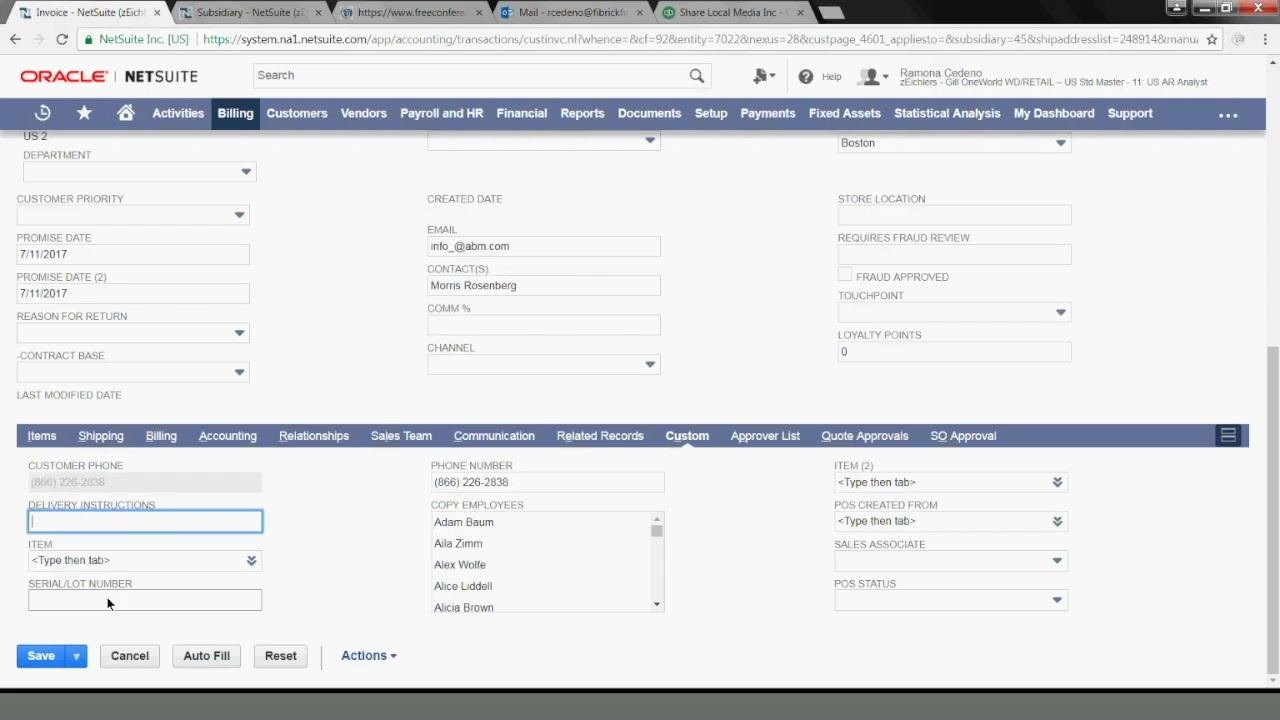
Enter custom information
Click the Custom tab and enter any additional information required by your organization, such as Delivery Instructions, an Item (type the item and press Tab), Serial/Lot Number, and Copy Employees to notify (for example, Adam Baum, Alia Zimm, Alex Wolfe, Alice Liddell, Alicia Brown). Additional custom fields may include Item (2), POS Created From, Sales Associate, and POS Status.
Save the invoice
Review all entered information for accuracy, then click the Save button at the bottom left of the screen.
Confirm the invoice was created
After saving, a confirmation message appears at the top of the screen: "Confirmation: Transaction successfully Saved." The invoice summary displays the Invoice #, Customer, Status (OPEN), Date, Due Date, Subtotal, Total, and Amount Due (for example, Invoice #3093902 for ABM Industries, dated 7/7/2017, due 8/6/2017, with a Subtotal, Total, and Amount Due of 100.00). From here, you can click Edit to make changes, click Accept Payment to record a payment, or use the Actions menu for additional options.
What's next
Now that you know how to create an invoice in NetSuite, you can apply the same process to bill customers for products or services, add multiple line items, apply discounts, and account for billable expenses and time. If you need to create a new service or product item, or associate an item with a GL account, refer to your item setup documentation before returning to the invoice entry form. For further assistance, support and training resources are available through your NetSuite partner.
Generation details: cost, quality tiers
Docsie billed 5,500 credits ($3.85) to analyze this 11-minute video at standard quality. The rewrite, template fill and Word/PDF exports were included. The same video at each quality tier:
| Quality | Frames sampled | Credits | Approx. cost |
|---|---|---|---|
| Draft | every 16-30 s | 2,750 | $1.92 |
| Standard (this guide) | every 8-15 s | 5,500 | $3.85 |
| Detailed | every 4-7 s | 11,000 | $7.70 |
| Ultra | every 1-3 s | 22,000 | $15.40 |
Credits priced at $0.70 per 1,000; plans include a monthly allowance. Enterprise customers on on-premise or bring-your-own-model deployments run this on their own inference and pay no per-video credits.
Generated by Docsie Video-to-Docs on 2026-09-08 from a 10-minute video. Screenshots are frames from the source video and belong to their creator, BSP - Award Winning Oracle NetSuite Partner, whose original is embedded above. If you own this video and want the guide removed or credited differently, contact us and we will act within one business day.