
How to Create a Saved Search in NetSuite
Saved searches in NetSuite let you gather, filter, and sort data from records. Once created, a saved search can be reused as many times as needed, shared with other users, or placed on dashboards for convenient access. This guide walks you through setting permissions, creating a saved search, defining its criteria and results, and configuring advanced options such as highlighting, audience, notifications, and audit tracking.
Video: How to Create Saved Searches in NetSuite by SuiteRep (2022). All credit for the demonstration goes to the creator; watch the original on YouTube. The written guide below was generated from this video by Docsie. Creator? Request a change or removal.
Saved searches in NetSuite let you gather, filter, and sort data from records. Once created, a saved search can be reused as many times as needed, shared with other users, or placed on dashboards for convenient access. This guide walks you through setting permissions, creating a saved search, defining its criteria and results, and configuring advanced options such as highlighting, audience, notifications, and audit tracking.
Saved searches enable efficient data management and reporting, and can be configured for sharing and dashboard integration.
Prerequisites
Before creating or managing saved searches, make sure the following permissions and settings are in place:
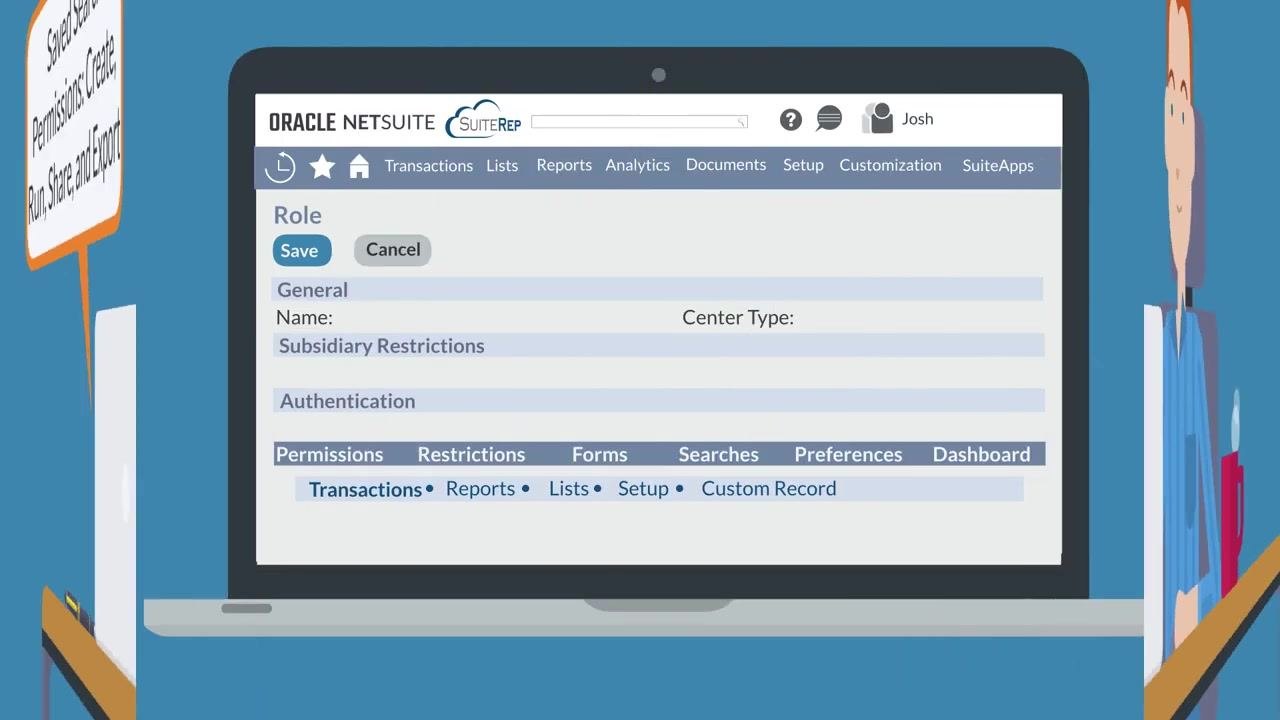
- Create, Run, Share, and Export permissions for saved searches, assigned by an administrator on the role record.
- Access to the specific records and transactions the saved search will query, since users can only run saved searches on data they are permitted to access.
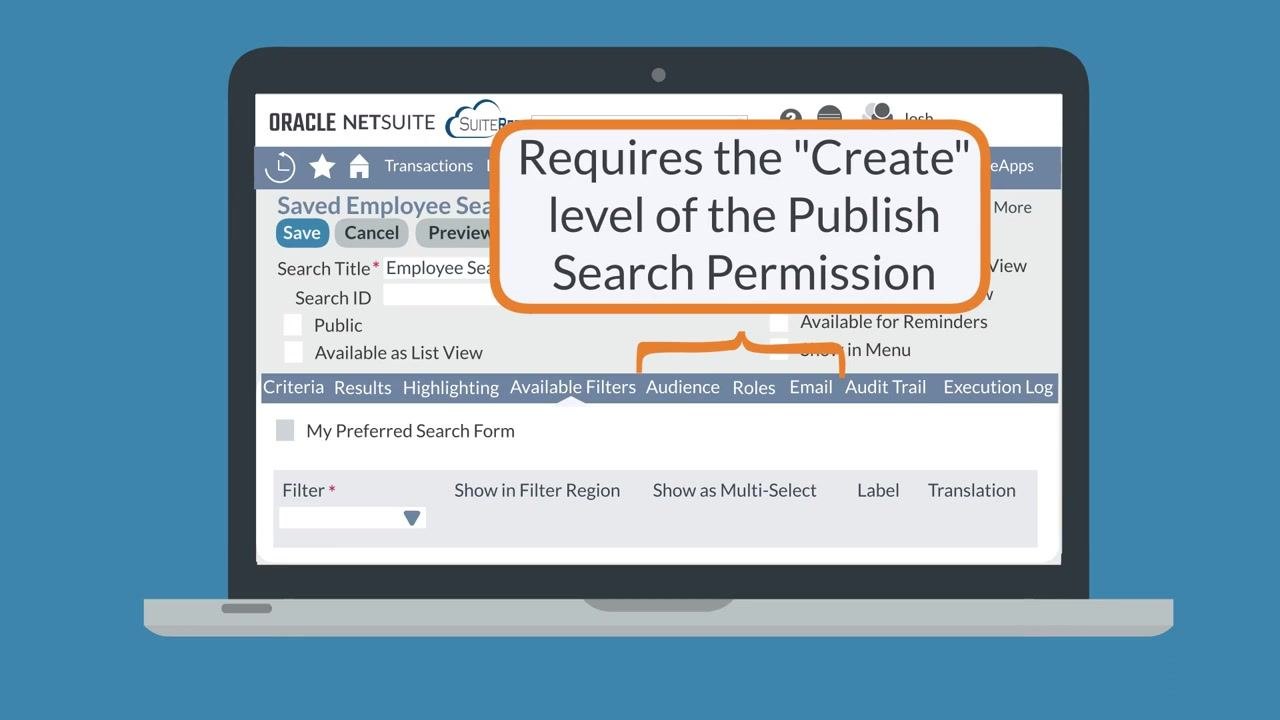
- The Create level of the Publish Search permission if you need to use the Audience, Roles, or Email subtabs (administrators have this by default).
Set saved search permissions
Saved search permissions determine who can create, run, share, and export saved searches. Administrators configure these permissions on the role record.
To set permissions:
- Navigate to the role record in NetSuite.
- Go to the Permissions tab.
- Select the Lists subtab to configure saved search permissions.
- Assign permissions such as Transactions, Reports, Lists, Setup, and Custom Record as needed.
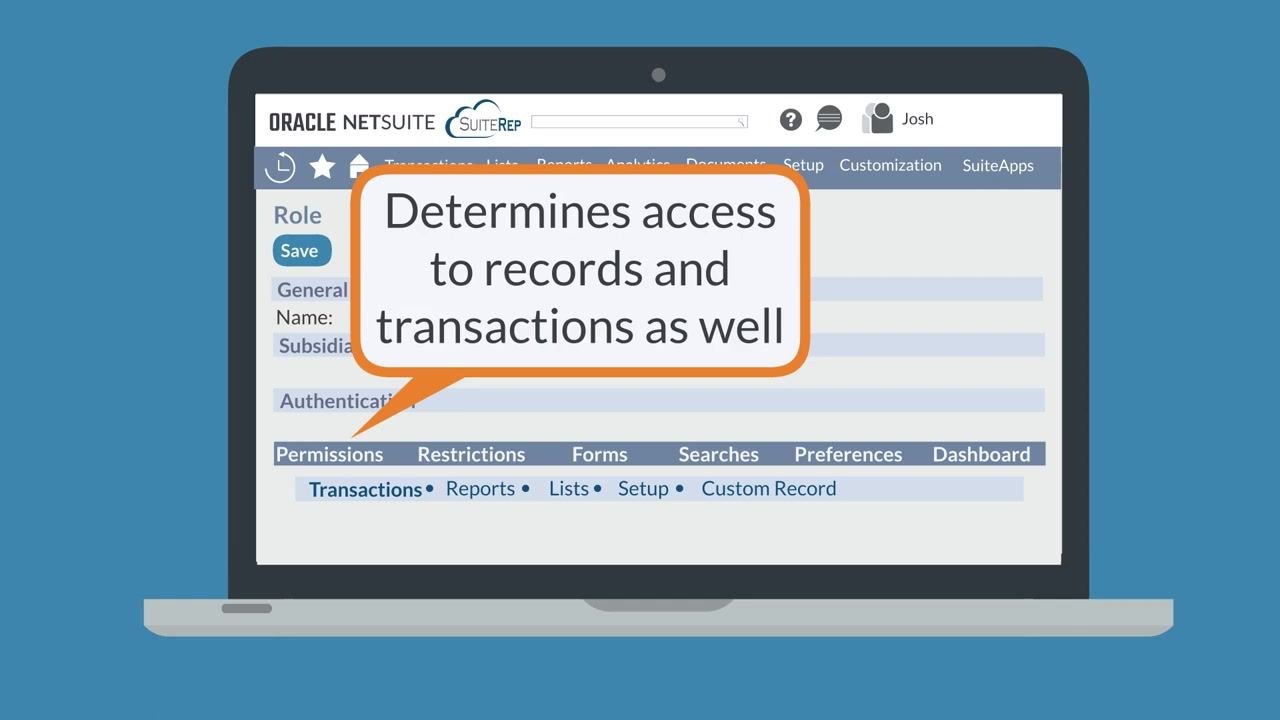
The Permissions tab also determines access to records and transactions, so users can only run saved searches on data they are authorized to view.
Set personal search display preferences
You can control how saved search results display by adjusting your personal preferences.
- Go to Home > Set Preferences > Analytics.
- Under the Analytics tab, locate the Search section.
- Review the available search preferences, including Show List When Only One Result.
If Show List When Only One Result is checked, a saved search that returns a single result will display it in list view. If unchecked, NetSuite opens the record directly instead of showing the list.
Create a new saved search
You can start a new saved search in several ways, depending on where you are working in NetSuite.
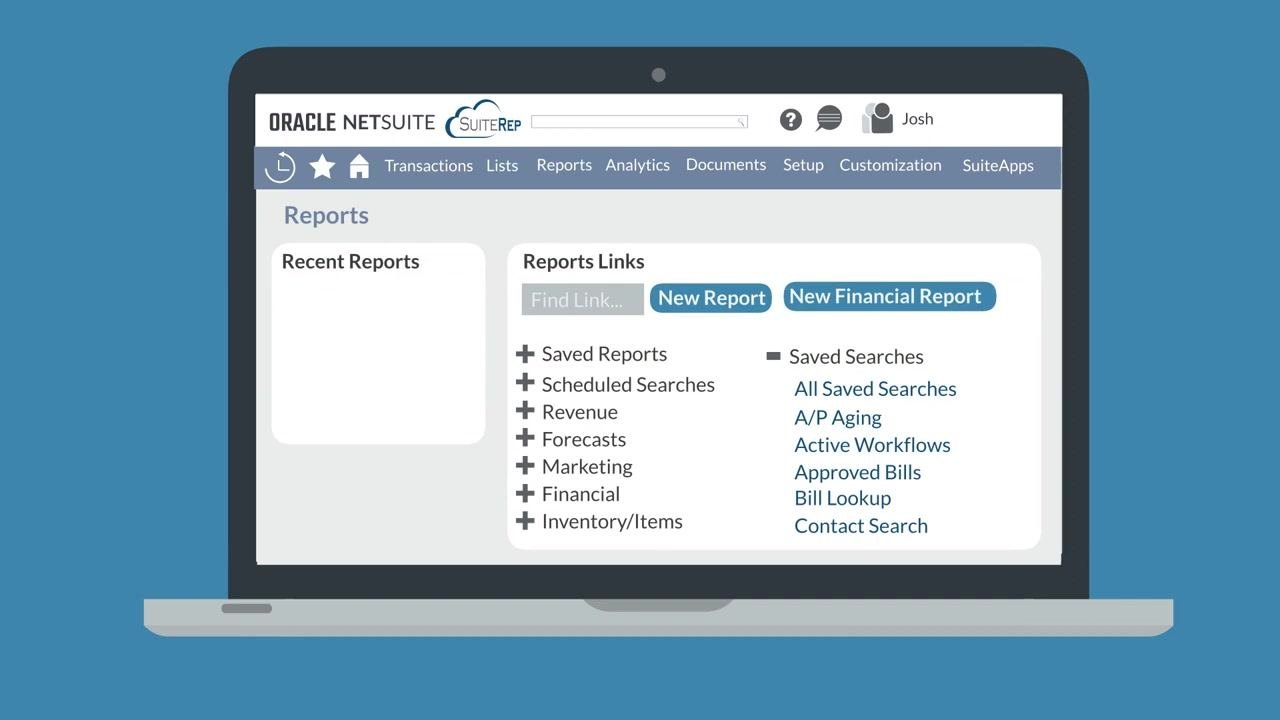
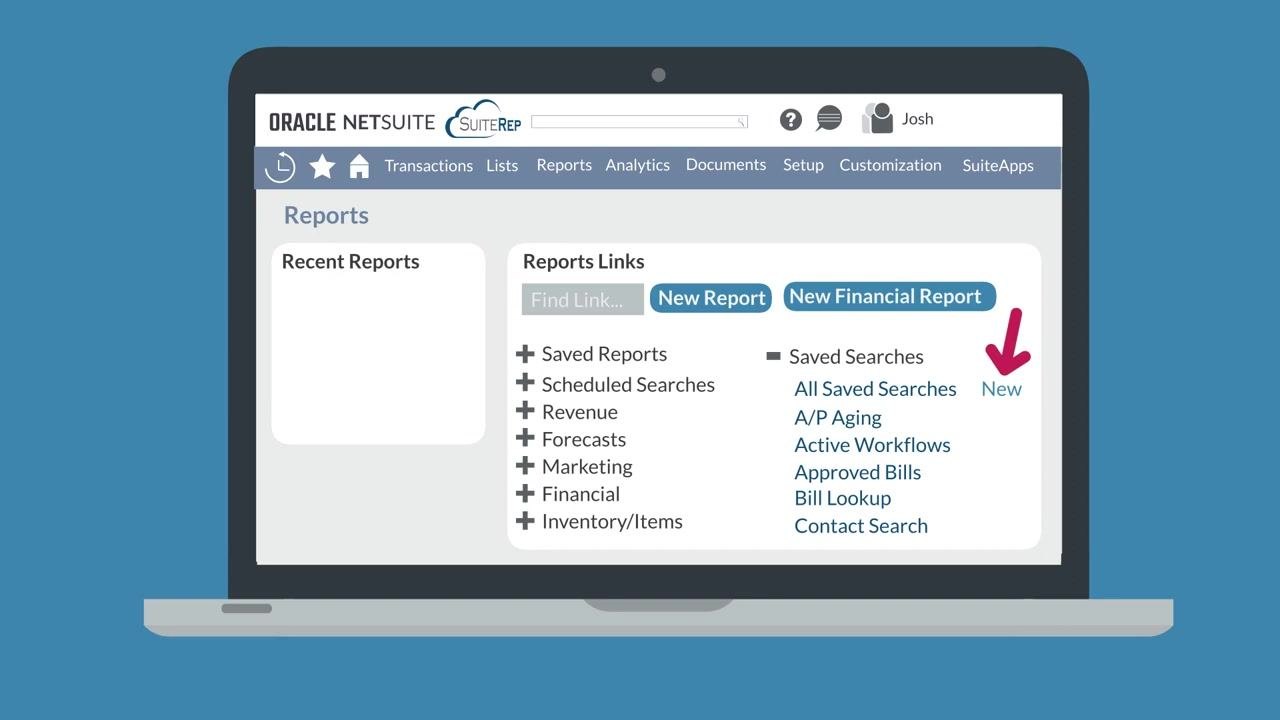
- From the Reports menu: go to Reports > Saved Searches > All Saved Searches > New.
- From the Lists menu: go to Lists > Search > Saved Searches > New.
You can also start from the Reports dashboard by hovering over the All Saved Searches link and selecting New when it appears to the right. Both Simple Searches and Advanced Searches include a Create Saved Search button, which converts your current search into a saved search.
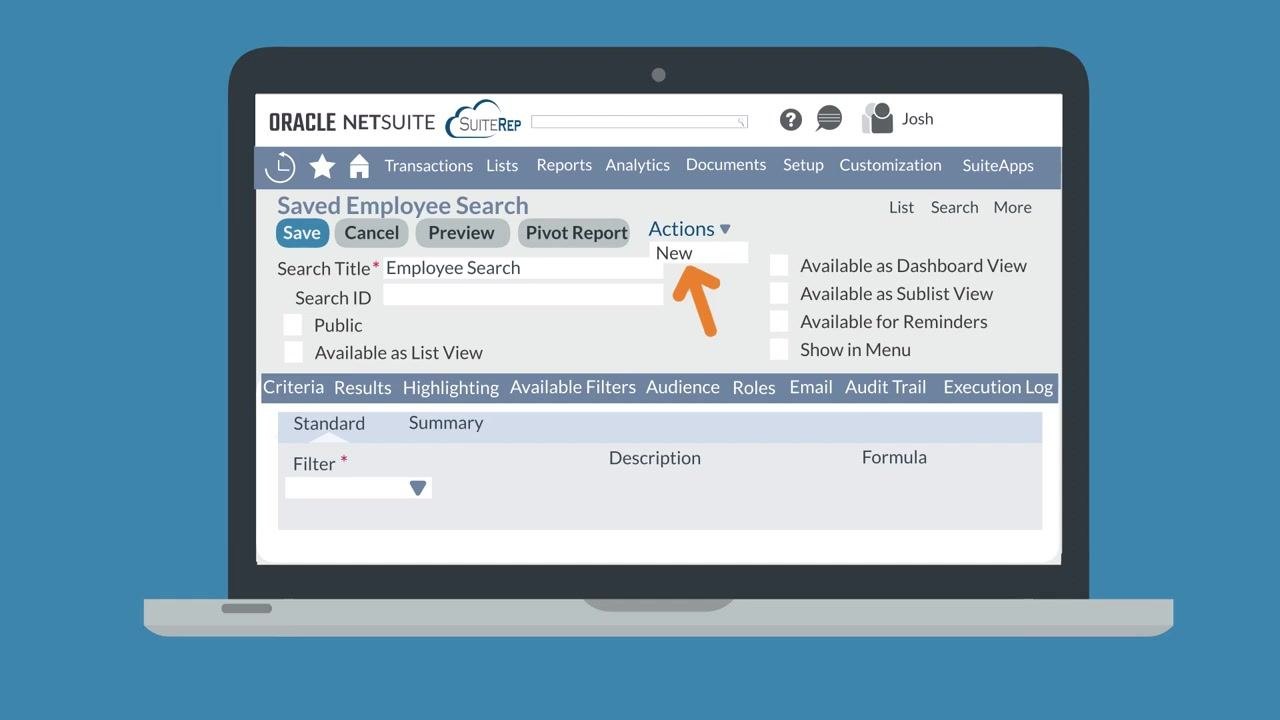
Alternatively, you can create a saved search from an existing search record: hover over the Actions dropdown at the top of the saved search record page and select New to pull up a blank saved search for the same record type.
You can also create one from the list of saved searches by navigating to the Saved Searches list view and clicking the New Saved Search button at the top of the page.
Choose the root record and set criteria
If you create the saved search from scratch (not from a simple or advanced search), you will be prompted to select the root record type the search will run on.
If you create the saved search from an existing simple or advanced search, any criteria already set will automatically copy over to the new saved search. If you start from scratch, you will need to define all criteria manually.
Define the search and explore its subtabs
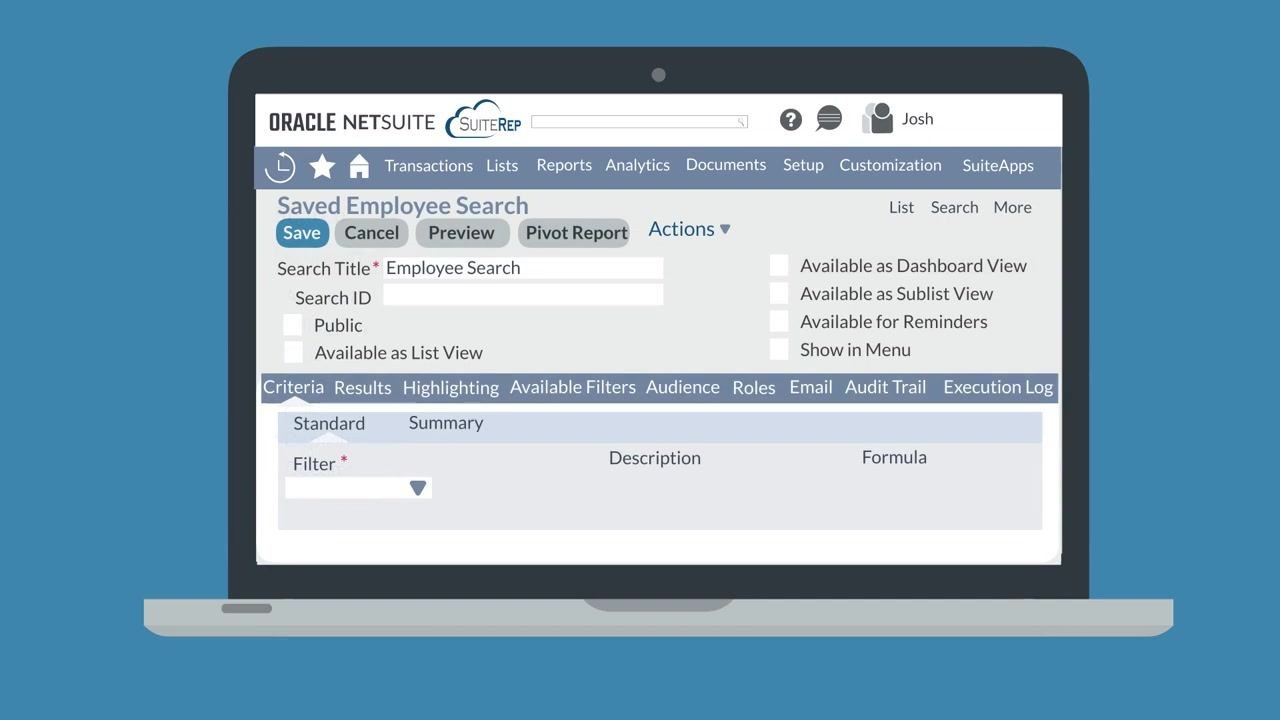
Begin defining your saved search by entering a Search Title (for example, "Employee Search") and, optionally, a Search ID. Set visibility options such as Public or Available as List View.
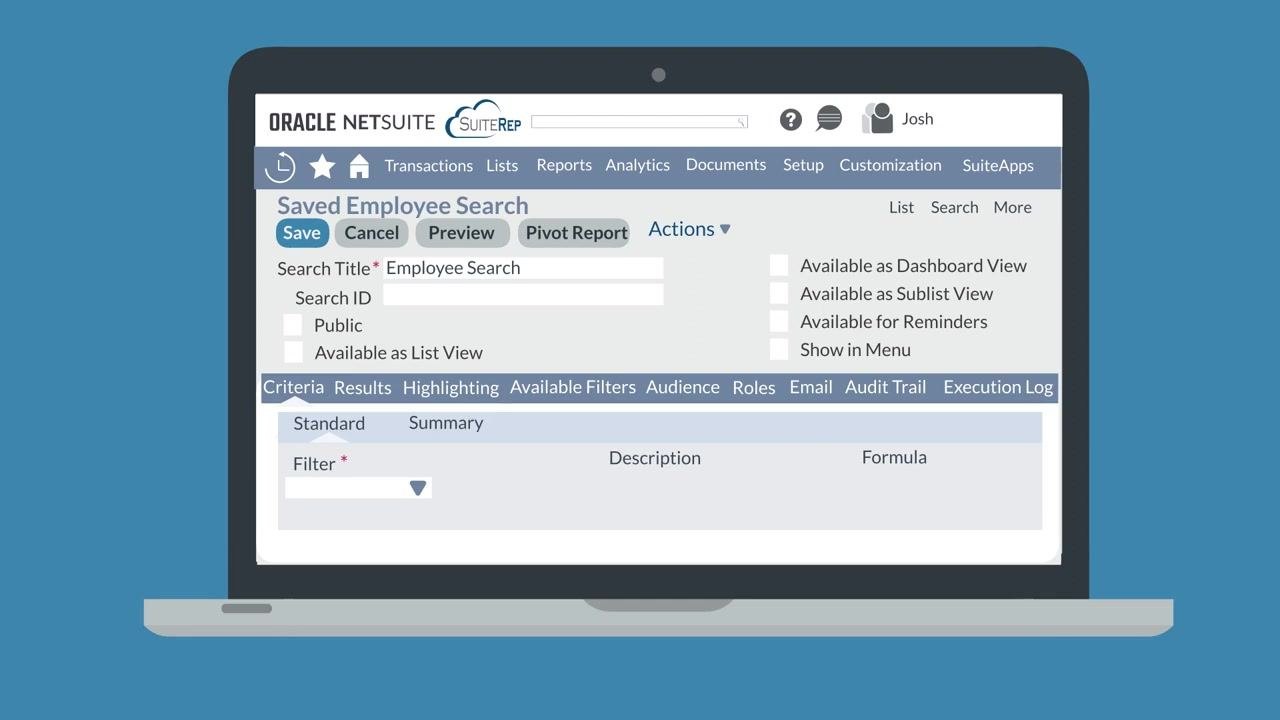
The saved search definition page includes several key subtabs:
- Criteria: sets filters to narrow down the results your search returns, based on root record fields or fields in related, joinable record types.
- Results: determines the appearance of your search results, including sorting, arranging, and grouping.
Configure the Results subtab
On the Results subtab, specify how to sort your results using the Sort By and Then By options, and choose the output type and which columns to display.
Highlight important results
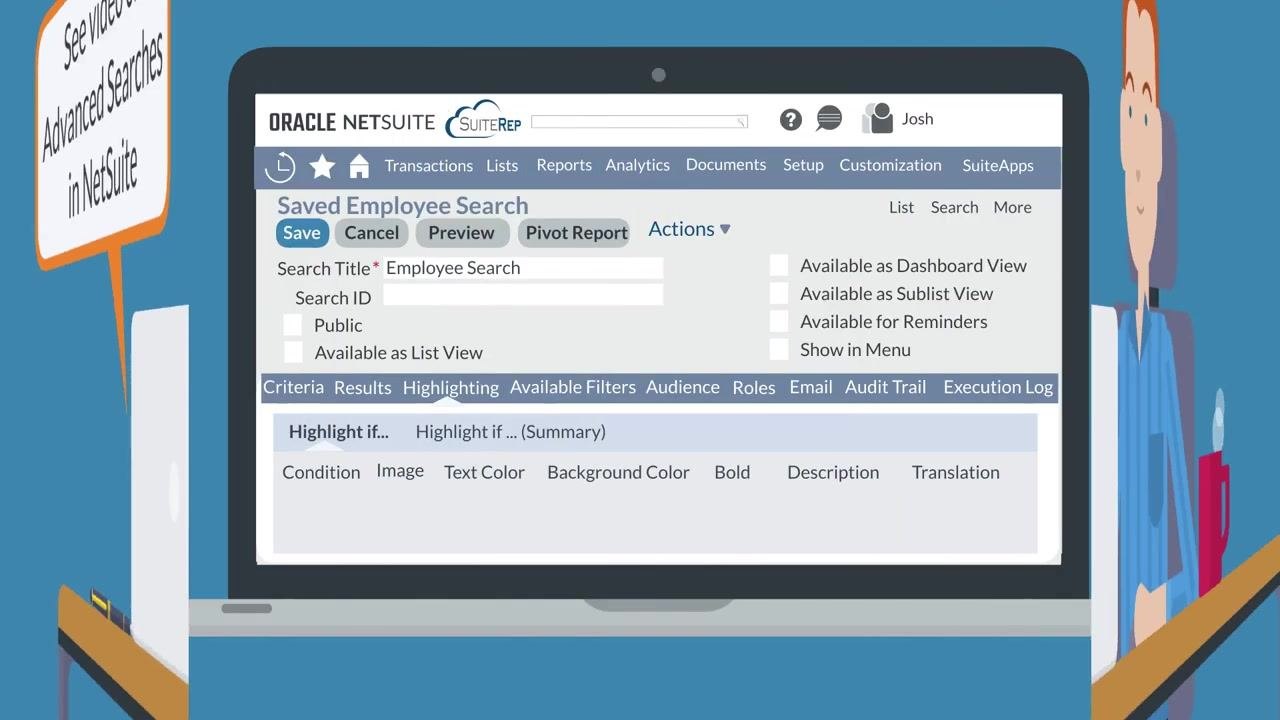
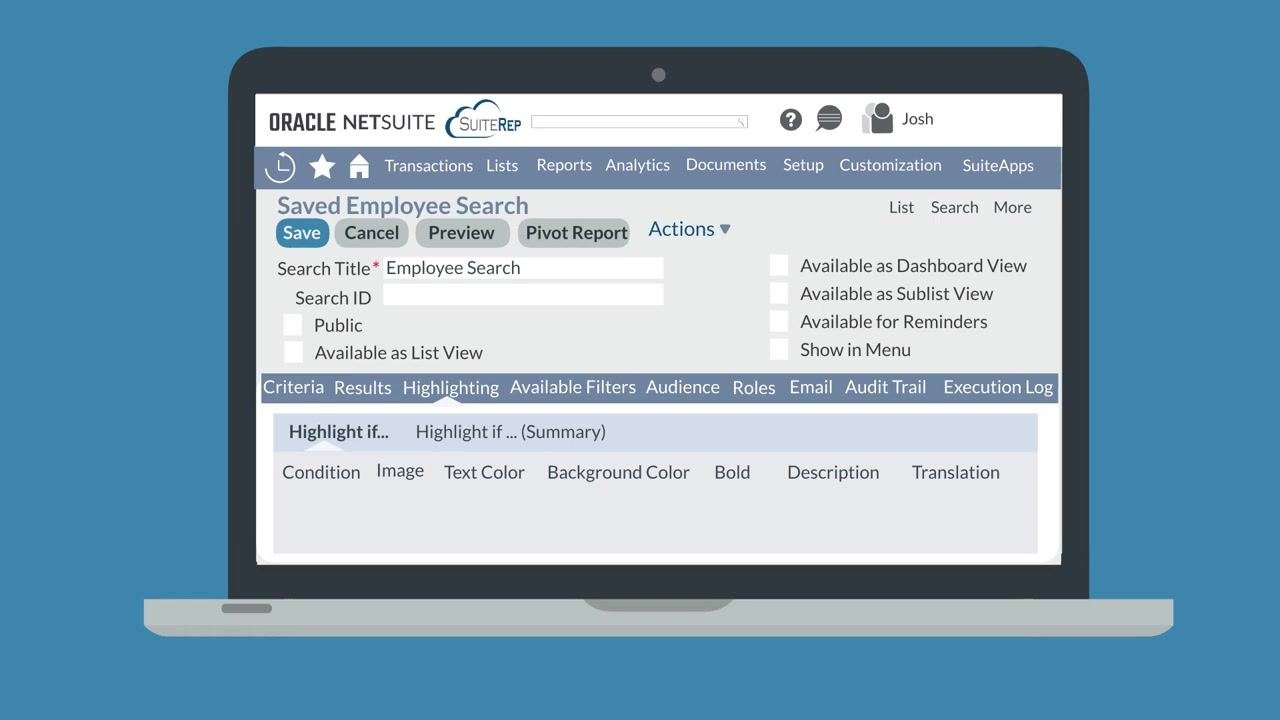
Use the Highlighting subtab to emphasize specific results based on defined conditions.
For each condition, you can choose from several highlighting options:
- Insert an image to visually flag results.
- Change the text color for emphasis.
- Apply a background color to rows that meet your criteria.
- Make the text bold for standout results.
These options also include description and translation settings, and help you quickly locate key results when running the saved search.
Set available filters
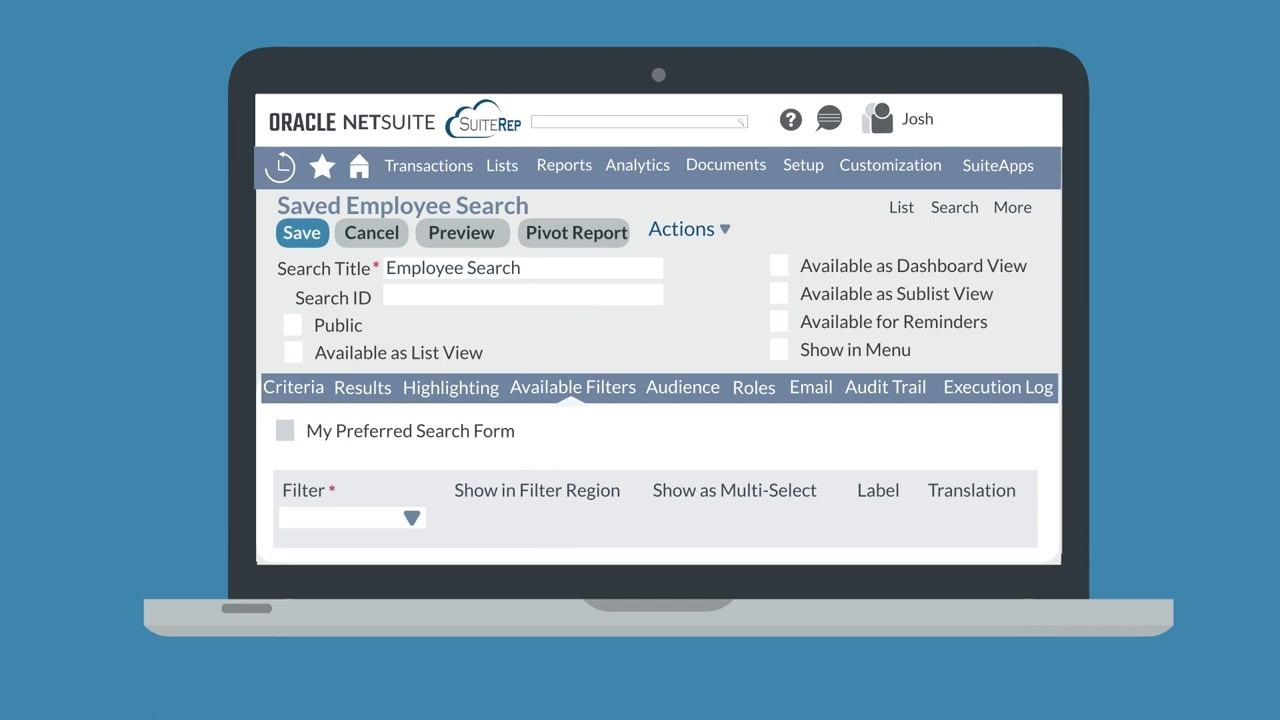
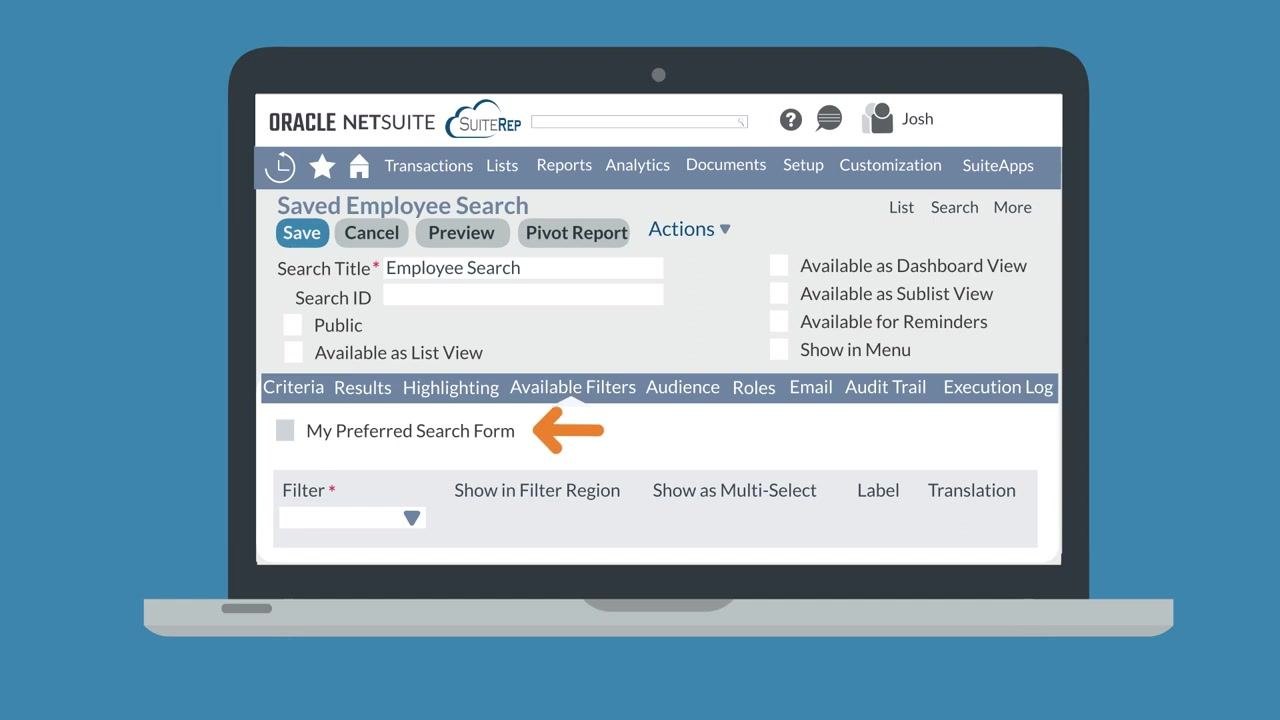
Click the Available Filters subtab to configure which fields and formulas will appear as filters at the top of the Saved Search Results page. When you run the saved search, these filters appear in the list view so users can further refine results.
To limit the simple search form for this record type to only the fields selected in Available Filters, check the My Preferred Search Form checkbox. This restricts both simple and advanced searches for the record type to just these fields.
Note permissions for advanced subtabs
Only administrators and users with the Create level of the Publish Search permission can access and use the Audience, Roles, and Email subtabs while creating a saved search.
Define the audience
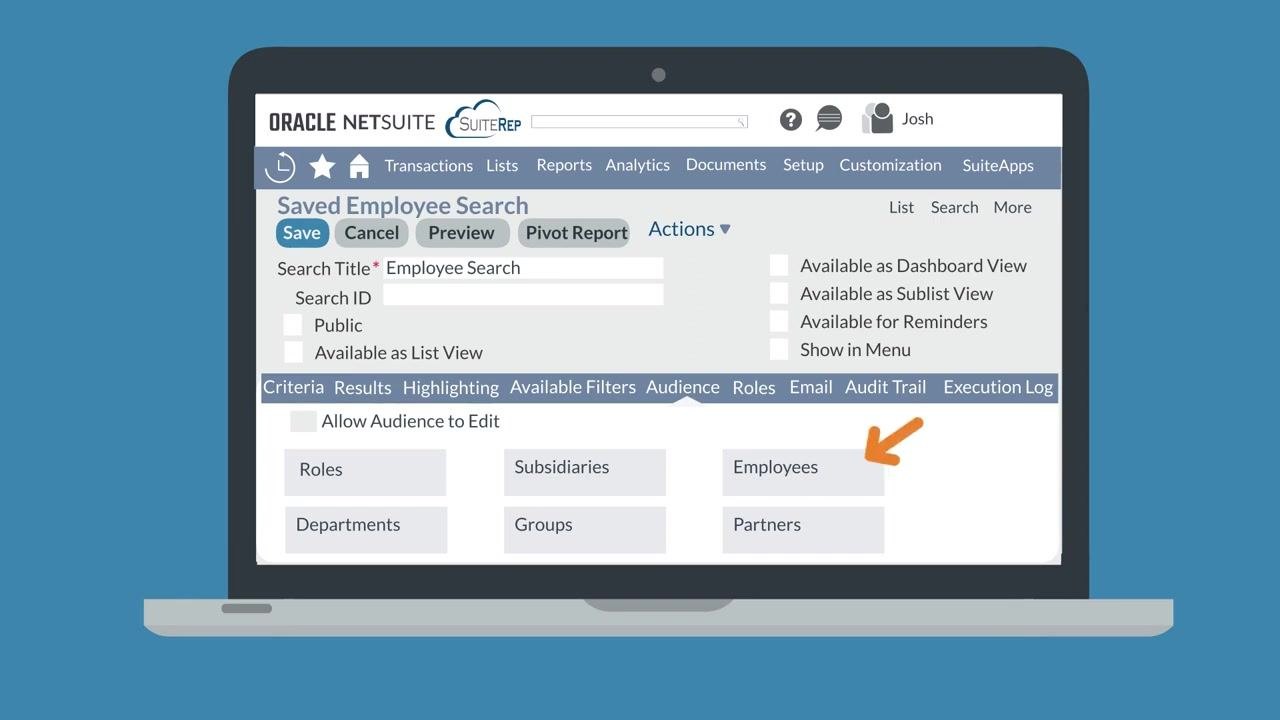
Click the Audience subtab to specify who in the company will see the saved search in their list. You can make the search available to:
- Specific employees
- All employees within a particular department, role, subsidiary, or group
- Partners or groups as needed
To let your selected audience edit the original saved search rather than just a copy, check Allow Audience to Edit.
Make the saved search public
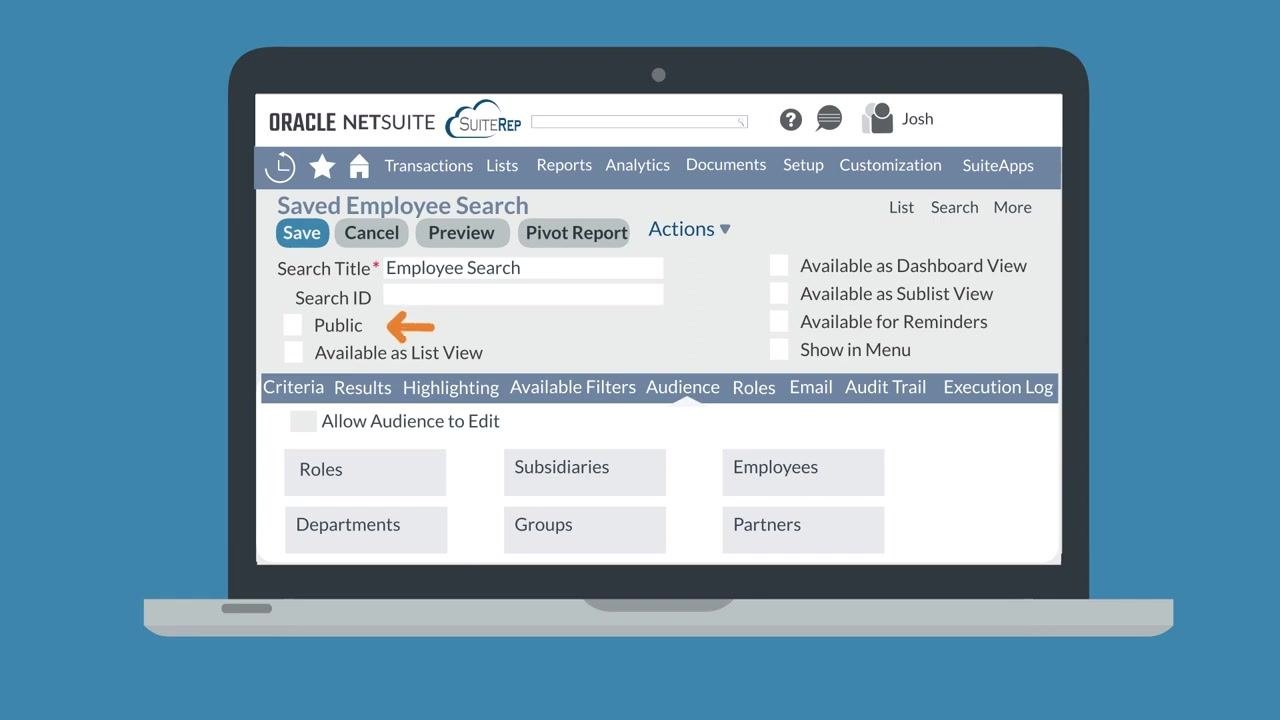
To make the search available to everyone in the company who has access to the underlying record type, check the Public checkbox in the top field group of the saved search.
Set role-based display preferences
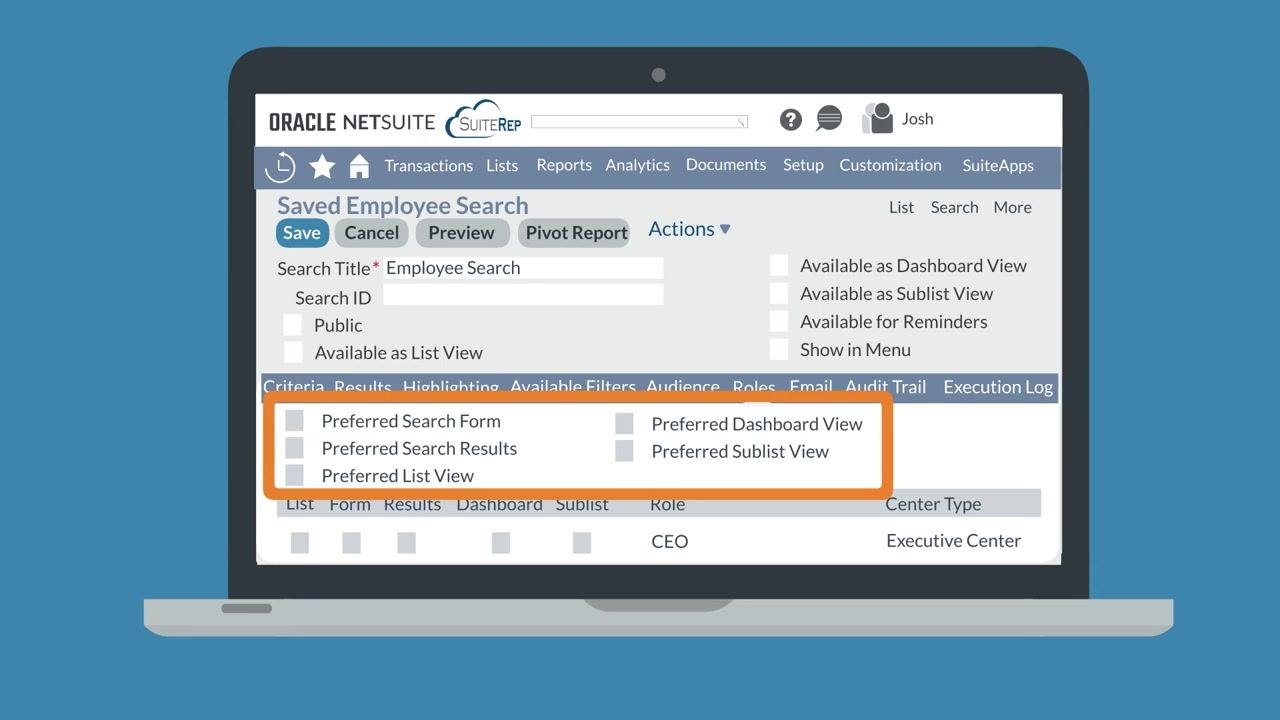
Click the Roles subtab to control how the saved search appears for users, either globally or for specific roles. This section includes checkboxes for:
- Preferred Search Form
- Preferred Search Results
- Preferred List View
- Preferred Dashboard View
- Preferred Sublist View
For example, checking Preferred List View makes this saved search the default list view when users access the root record. You can assign these preferences globally for all roles or specify them for individual roles, such as CEO or Executive Center.
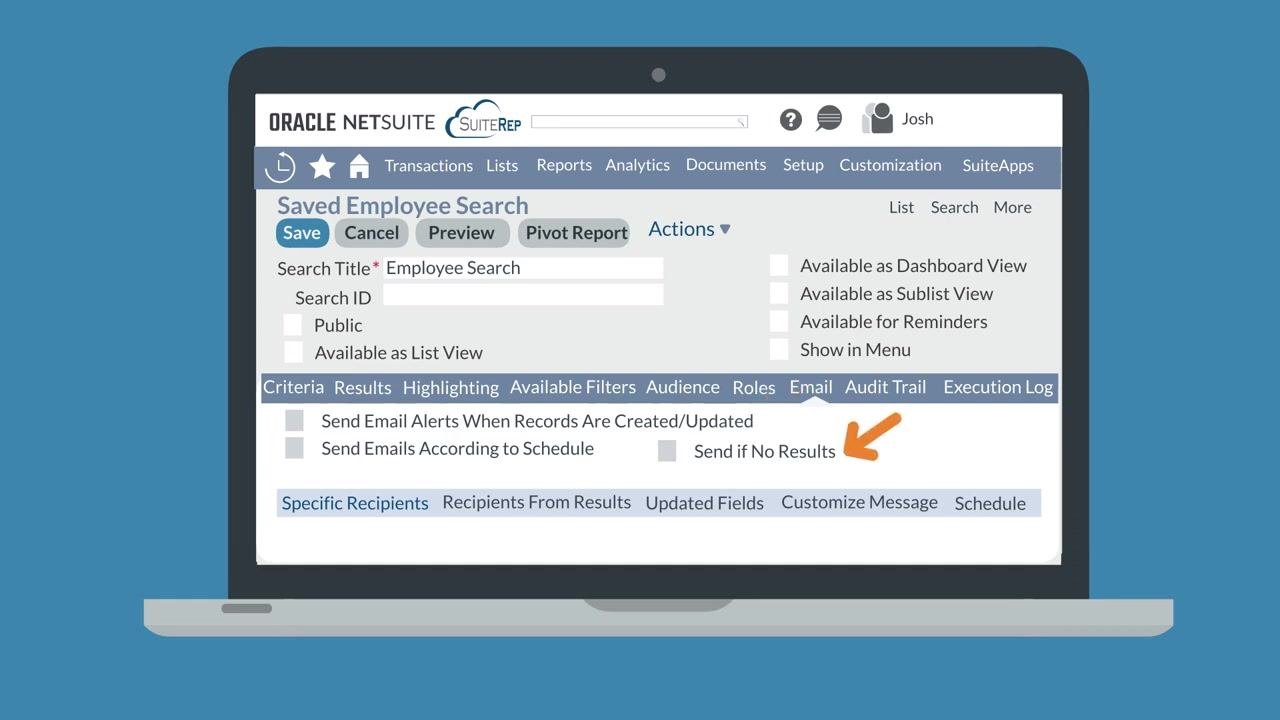
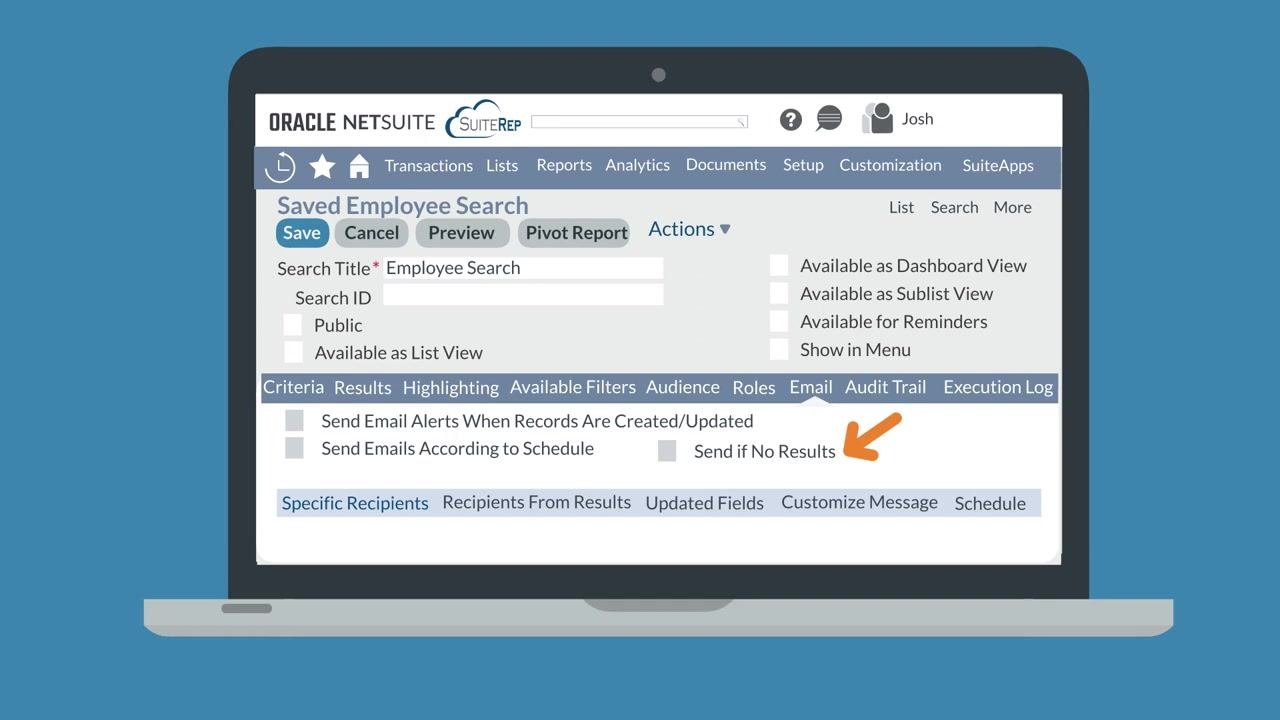
Configure email notifications
Click the Email subtab to set up email alerts for your saved search:
- Send Email Alerts When Records Are Created/Updated: sends alerts when relevant records change.
- Send Emails According to Schedule: sends results on a defined schedule.
- Send if No Results: sends an email even if the search returns no results.
In the lower section, you can specify Specific Recipients, choose Recipients From Results, update fields, customize the message, or set the schedule.
Track changes with the audit trail
Click the Audit Trail subtab to review a log of changes to the saved search, including:
- Date of change
- Set By (the user who made the change)
- Component Action (the type of action performed)
- Component Type (what was changed)
- Component Name (the name of the changed component)
Use this log to monitor who made changes to the saved search and when.
Review the execution log
Click the Execution Log subtab to view a record of the search's activity, including:
- Run On (the date and time the search was run)
- Run By (the user who executed the search)
- Was Export (whether the results were exported)
Use this log to track when and by whom the saved search was executed.
Summary
By following these steps, you can manage permissions, create and define saved searches, apply highlighting and filters, configure audiences and role-based preferences, set up email notifications, and track changes and executions in NetSuite. Each subtab on the saved search definition page offers powerful customization to tailor your searches to your business needs.

What's next
For additional help or expert NetSuite services, you can reach out to SuiteRep. The SuiteRep website offers information on their NetSuite services, including consulting and support for saved searches and other NetSuite features.
Generation details: cost, quality tiers
Docsie billed 4,000 credits ($2.80) to analyze this 7-minute video at standard quality. The rewrite, template fill and Word/PDF exports were included. The same video at each quality tier:
| Quality | Frames sampled | Credits | Approx. cost |
|---|---|---|---|
| Draft | every 16-30 s | 1,750 | $1.22 |
| Standard (this guide) | every 8-15 s | 3,500 | $2.45 |
| Detailed | every 4-7 s | 7,000 | $4.90 |
| Ultra | every 1-3 s | 14,000 | $9.80 |
Credits priced at $0.70 per 1,000; plans include a monthly allowance. Enterprise customers on on-premise or bring-your-own-model deployments run this on their own inference and pay no per-video credits.
Generated by Docsie Video-to-Docs on 2026-09-08 from a 7-minute video. Screenshots are frames from the source video and belong to their creator, SuiteRep, whose original is embedded above. If you own this video and want the guide removed or credited differently, contact us and we will act within one business day.