
How to Recall Mail in Outlook in Microsoft 365
If you've ever sent an email by mistake, you'll want to know how to recall mail in Outlook before the recipient reads it. This guide walks you through recalling a sent message, understanding when recall will and won't work, and setting up delayed delivery and undo send features so you have extra time to catch mistakes before an email actually leaves your outbox.
Video: How to Recall Mail in Outlook | Undo Send Any Email by Kevin Stratvert (2022). All credit for the demonstration goes to the creator; watch the original on YouTube. The written guide below was generated from this video by Docsie. Creator? Request a change or removal.
If you've ever sent an email by mistake, you'll want to know how to recall mail in Outlook before the recipient reads it. This guide walks you through recalling a sent message, understanding when recall will and won't work, and setting up delayed delivery and undo send features so you have extra time to catch mistakes before an email actually leaves your outbox.
Prerequisites
Before you try to recall a message, confirm the following:
- You and the recipient must both use Microsoft 365 or Microsoft Exchange accounts within the same organization or tenant. Recall does not work for external addresses, such as Gmail, or for recipients in a different company.
- The recipient must not have read the email yet.
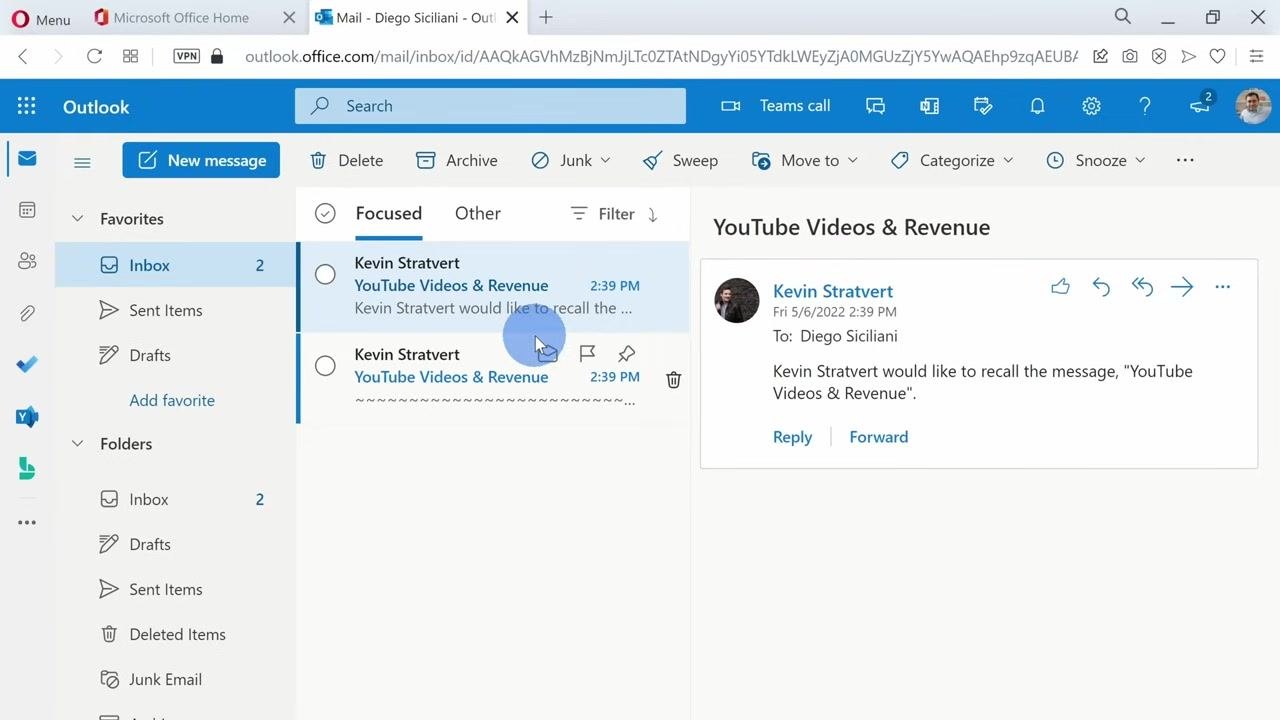
- The recipient must be using the Outlook desktop application. If they use Outlook on the web or mobile, they will see both the original message and a notification that you tried to recall it, which can draw more attention to the message.
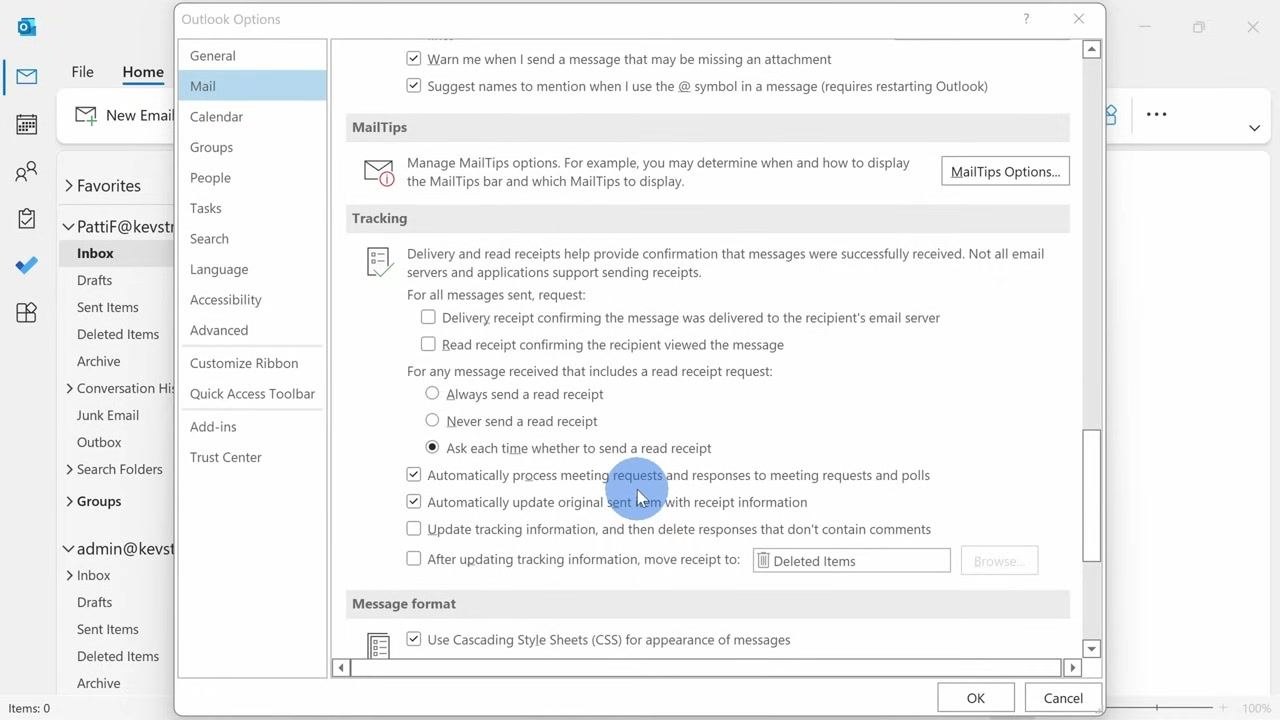
- The recipient's Outlook must have the default tracking setting enabled to automatically process this type of request. You can verify this under File > Options > Mail > Tracking, where "Automatically process meeting requests and responses to meeting requests and polls" should be checked.
How to recall a sent email in Outlook desktop
Follow these steps to recall, undo, or delete a message you've already sent.
Open Outlook and locate the sent email
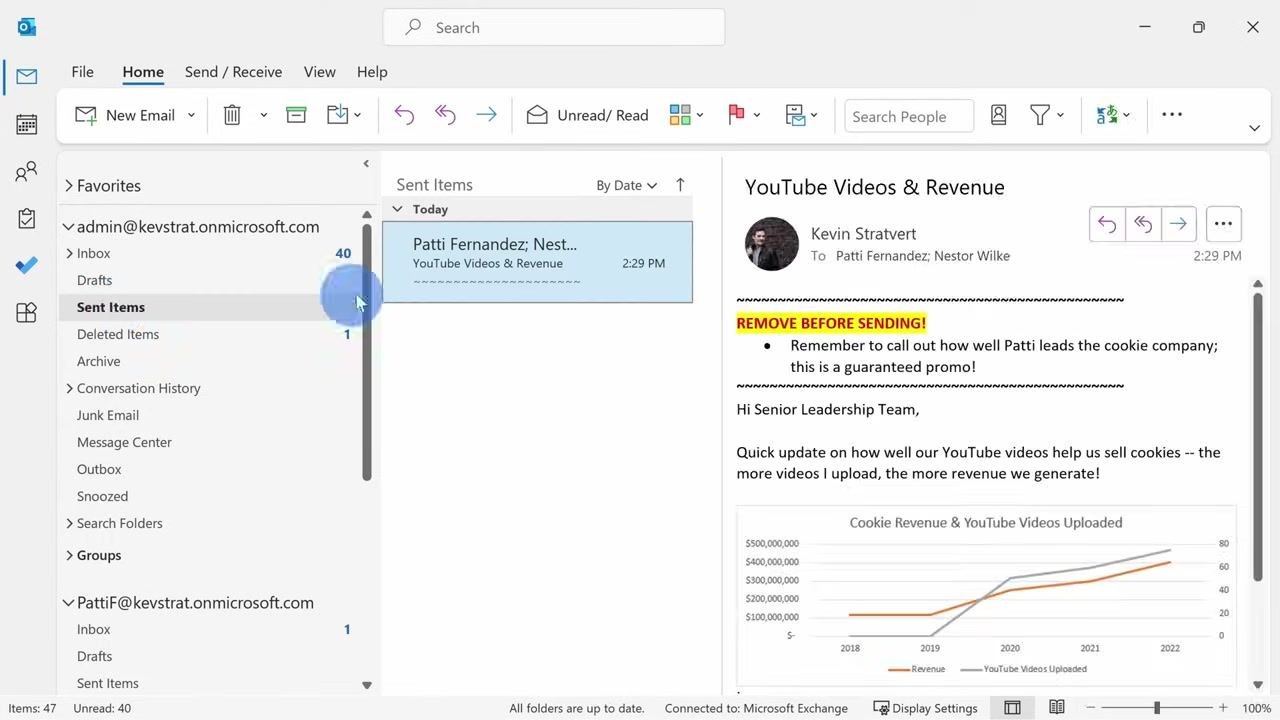
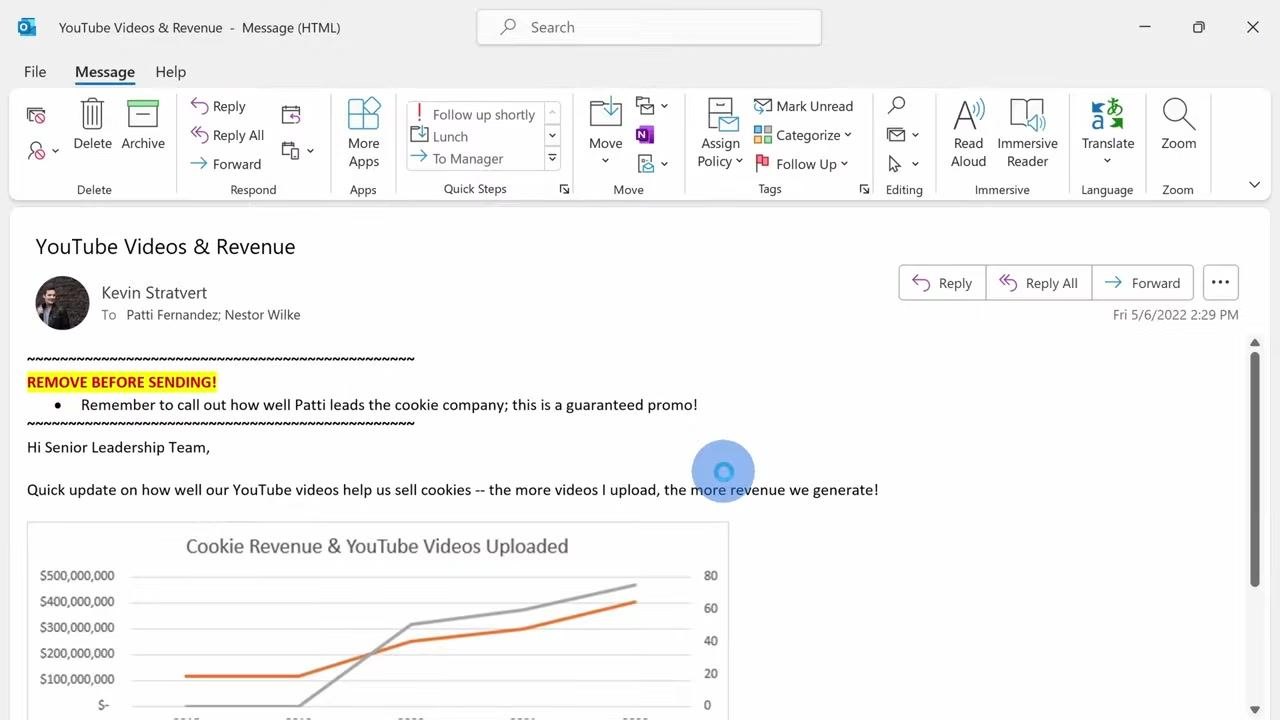
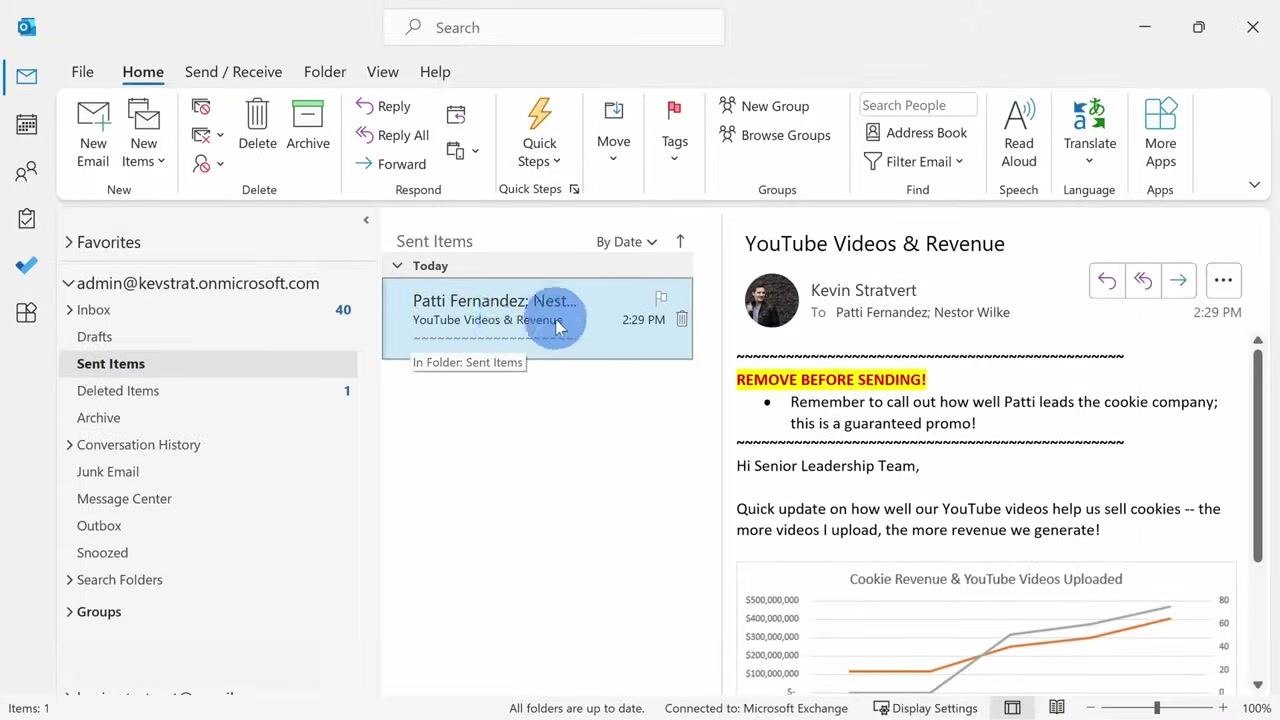
Go to your Outlook application and click the Sent Items folder in the left navigation pane. Find the email you want to recall, then double-click it to open it in a new window.
Access the recall feature
In the opened email window, look at the top ribbon and locate the Actions menu (this may appear under "More Move Actions" depending on your Outlook version). Click Actions, then select Recall This Message... from the dropdown.
Choose your recall option
A prompt appears with two choices:
- Delete unread copies of this message
- Delete unread copies and replace with a new message
Select Delete unread copies of this message if you simply want to remove the email, then click OK.
View the recall confirmation
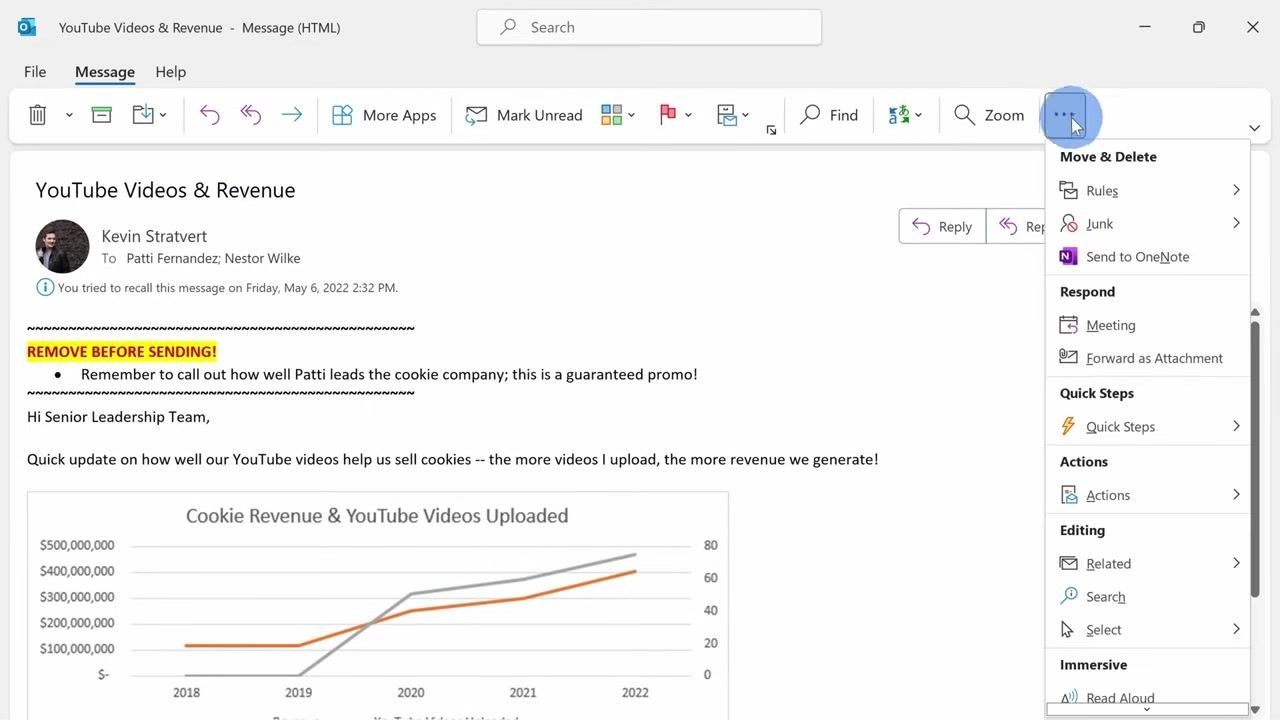
After you attempt the recall, a confirmation banner appears at the top of the email indicating that Outlook tried to recall the message, for example: "You tried to recall this message on Friday, May 6, 2022 2:32 PM."

Use the alternative method with a simplified ribbon
If you're using the simplified ribbon and don't see the Actions menu, click the ellipsis (three dots) on the far right of the ribbon to open the overflow menu. Look for the Actions category in the dropdown and select Recall This Message... from there.
Why recall might not work
Recall only succeeds when specific conditions are met. Review these limitations before relying on it:
- Both you and the recipient must be on Microsoft 365 or Microsoft Exchange within the same organization or tenant.
- The email must still be unread by the recipient.
- The recipient must be using the Outlook desktop app; web or mobile users will see a recall notification alongside the original message instead of a clean removal.
Even when every requirement is satisfied, recall is not guaranteed to succeed for other technical reasons. Because of this, it's worth setting up additional safeguards, such as delayed delivery.
Prevent mistakes with delayed email delivery
Setting a delay on outgoing messages gives you a window to catch and fix mistakes before an email is actually sent.
Compose your message
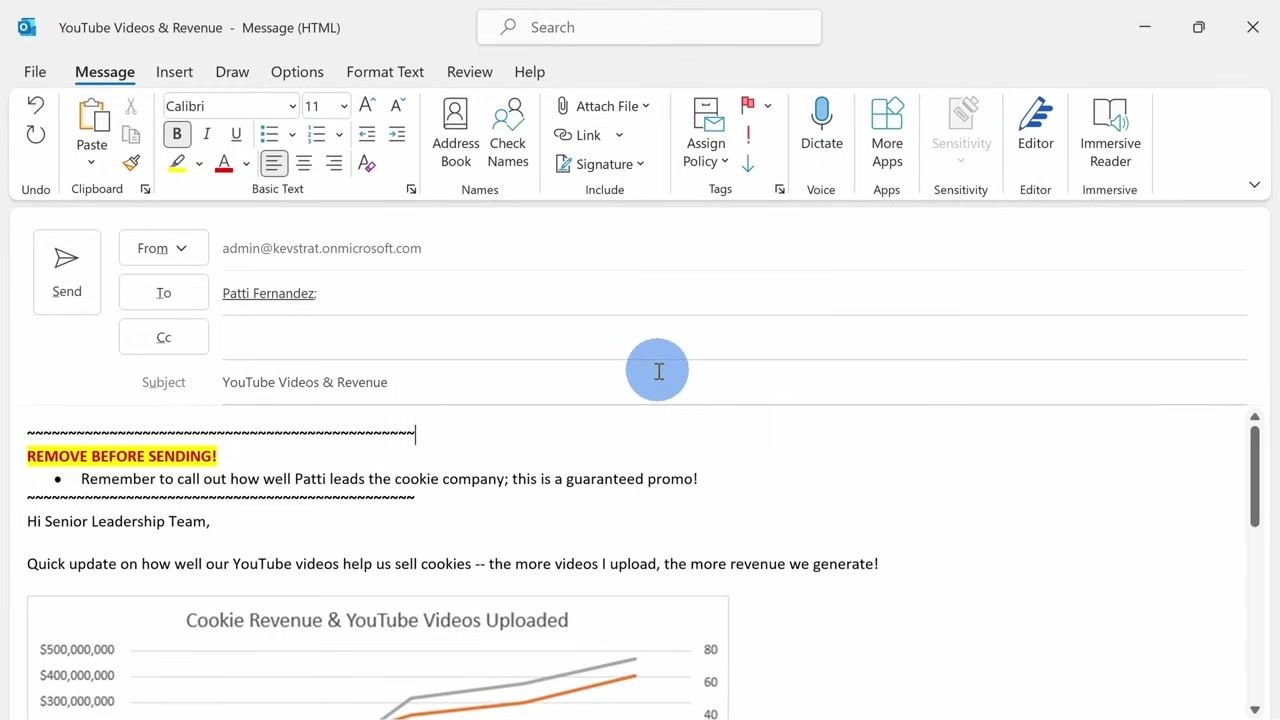
In Outlook, click New Email and draft your message as usual.
Set a delivery delay
Go to the Options tab in the message ribbon and click Delay Delivery. In the Properties dialog, under Delivery options, check Do not deliver before and set the date and time you want the email to be sent. Click Close to save the settings.
Send the email
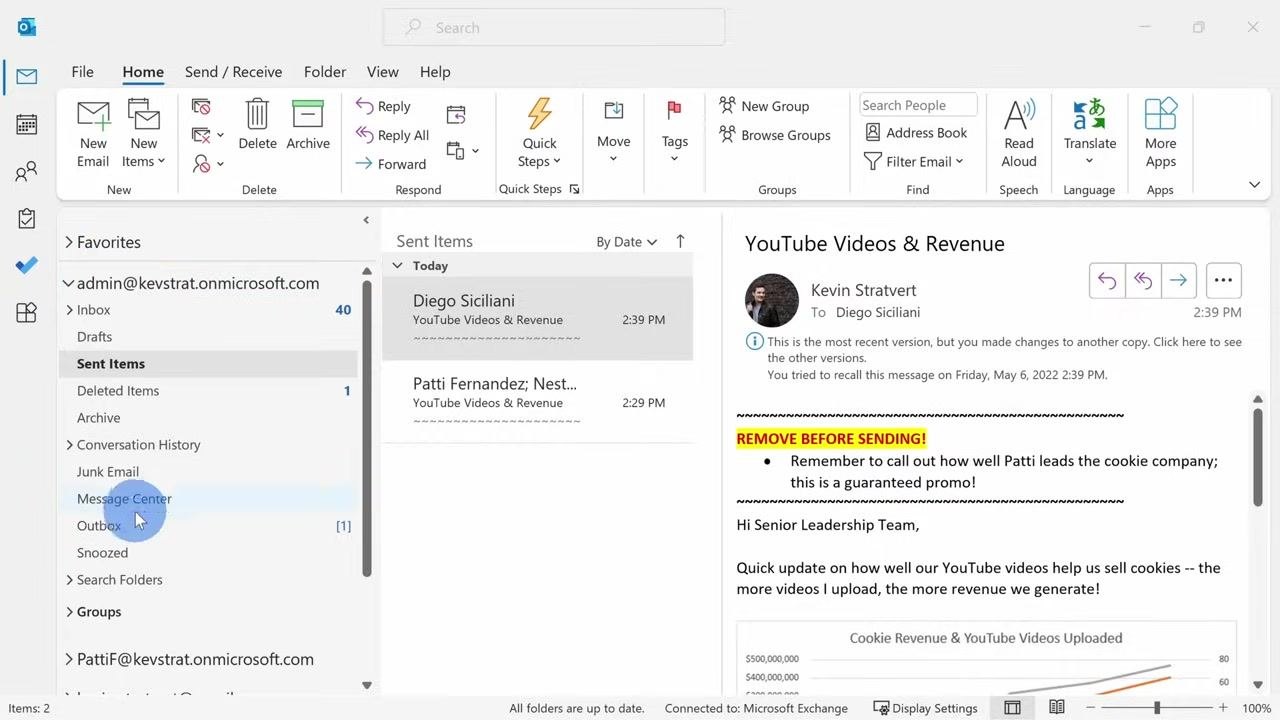
Click Send as usual. The email stays in your Outbox until the specified delivery time, giving you a chance to make changes or delete it before it actually goes out.

Edit a delayed email before it sends
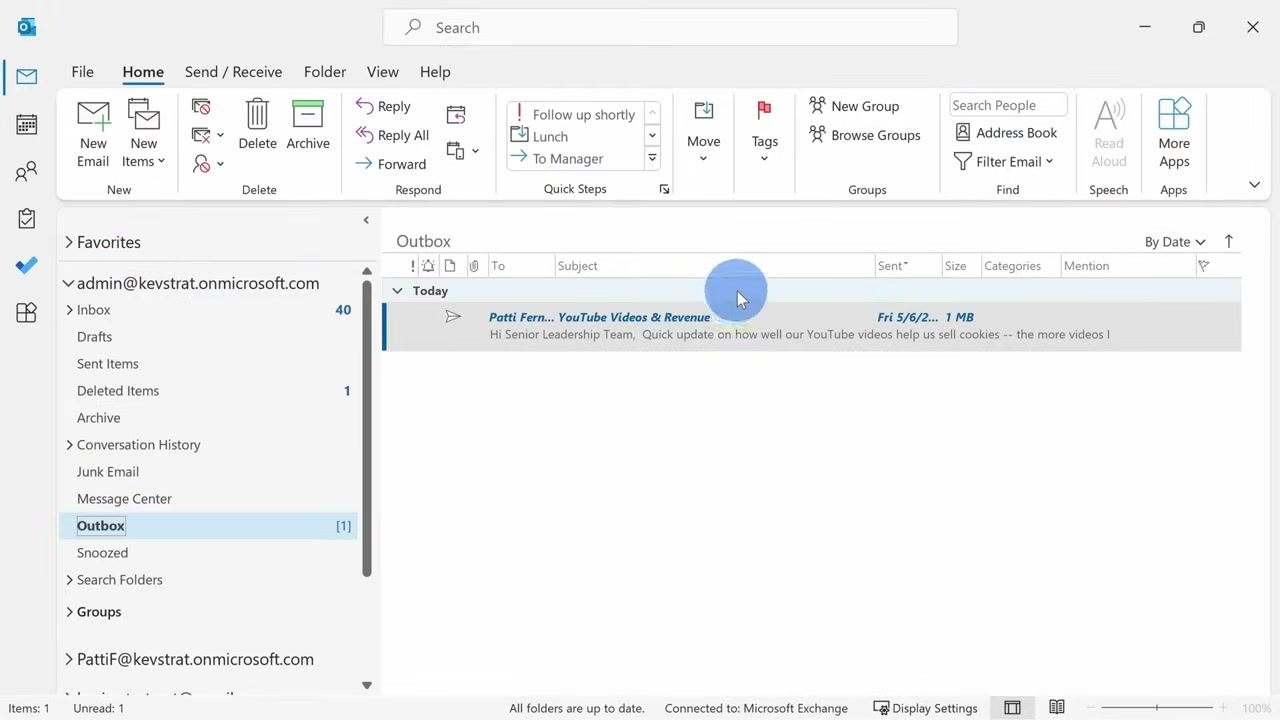
If you need to make changes after clicking Send but before the delivery time arrives, click the Outbox folder in the left navigation pane and locate your delayed message. Double-click it to open, make your edits, and click Send again to re-queue it. The message won't go out until the scheduled delivery time is reached.
Automatically delay all outgoing emails
You can set up a rule so every email you send is automatically delayed, giving you a consistent buffer to catch mistakes.
Open the Rules Wizard
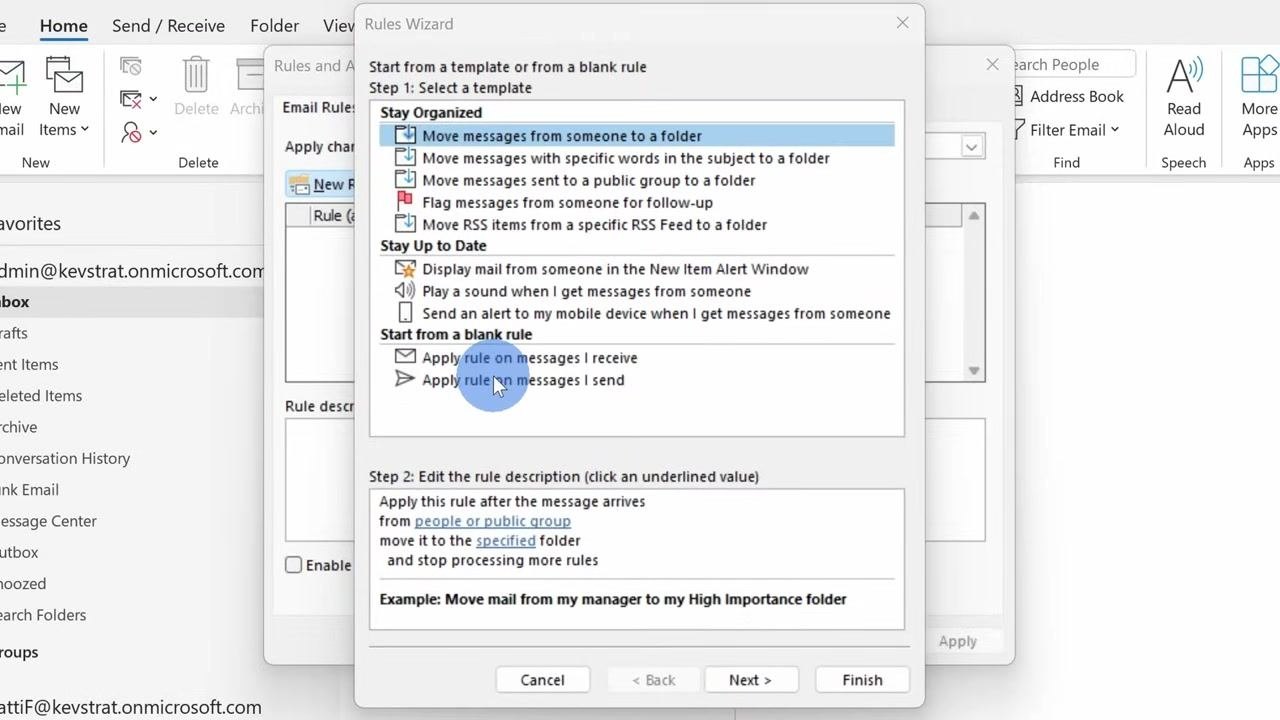
Click the Home tab in the ribbon, then click Rules in the middle of the ribbon and select Manage Rules & Alerts. In the Rules and Alerts dialog, click New Rule.
Apply the rule to messages you send
Under "Start from a blank rule," select Apply rule on messages I send, then click Next.
Skip conditions to apply the rule to all messages
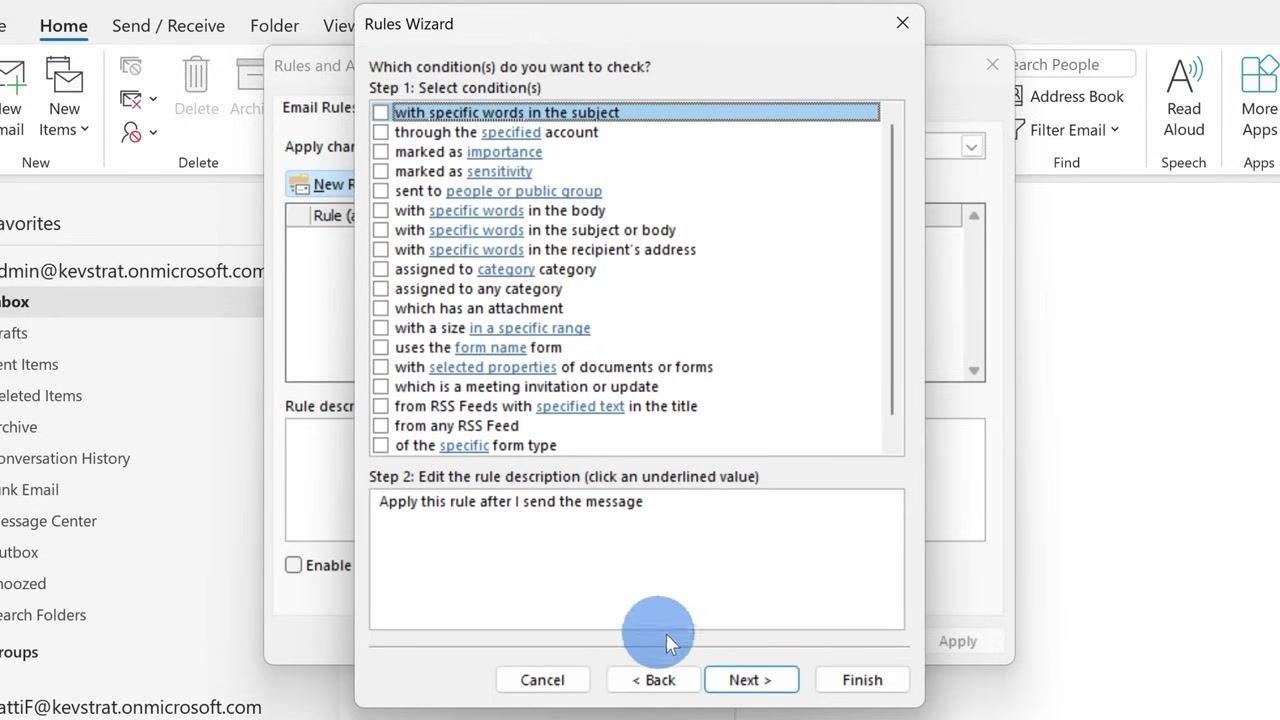
On the conditions screen, leave all boxes unchecked so the rule applies to every outgoing message. Click Next, and if prompted to confirm the rule will apply to all messages, click Yes.
Choose the defer delivery action
On the actions screen, check the box for defer delivery by a number of minutes.
Set the delay duration
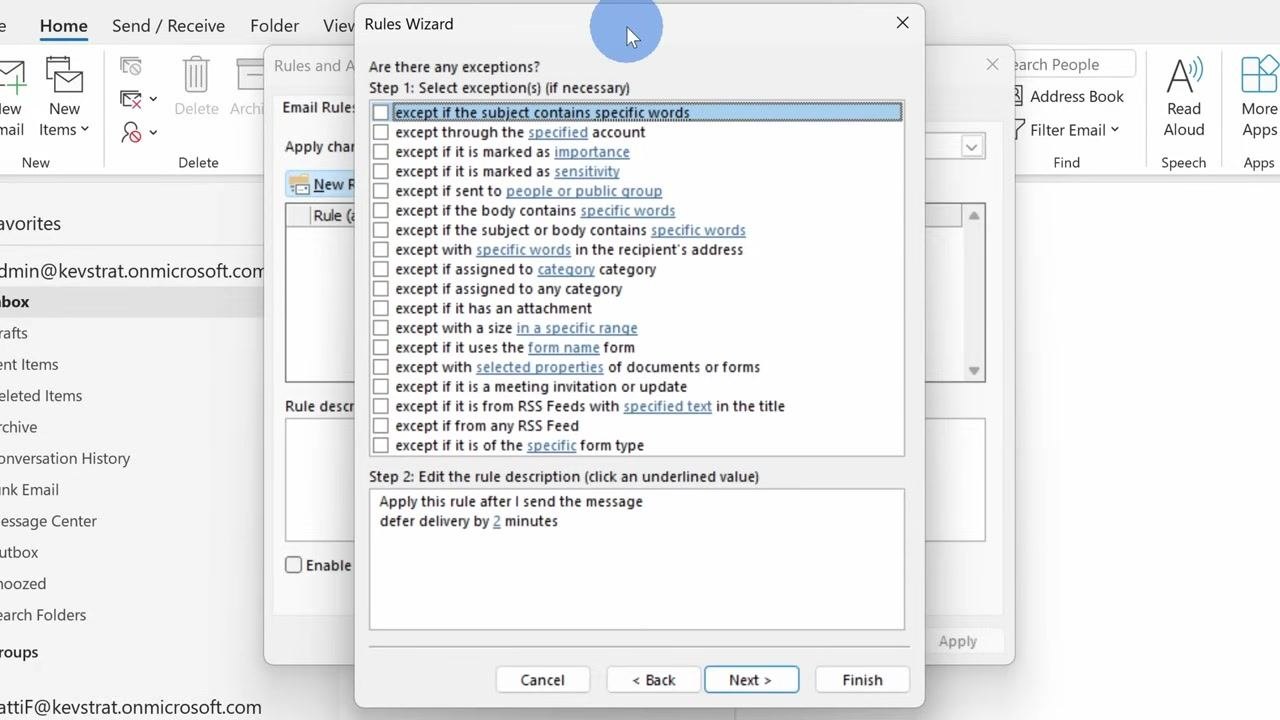
Click the underlined "a number of minutes" link in the rule description. In the Deferred Delivery dialog, enter your desired delay, for example 2 minutes, and click OK.
Skip exceptions
When the wizard asks, "Are there any exceptions?" leave all options unchecked if none are needed, then click Next.
Name and finish the rule
On the "Finish rule setup" screen, enter a name such as Delay Sending emails. Make sure Turn on this rule is checked, then click Finish.
This rule only applies to emails sent from the Outlook desktop app; it will not affect emails sent from other devices or from webmail.
Test the rule
Send a test email. After clicking Send, the message appears in the Outbox folder. While it's there, you can open it to make changes or corrections before it actually sends.
If you make changes, click Send again; the message will go out after the delay period you configured (in this example, 2 minutes).
Configure Undo Send in Outlook on the web
Outlook on the web offers a shorter, simpler alternative to the desktop delay rule.
Open compose settings
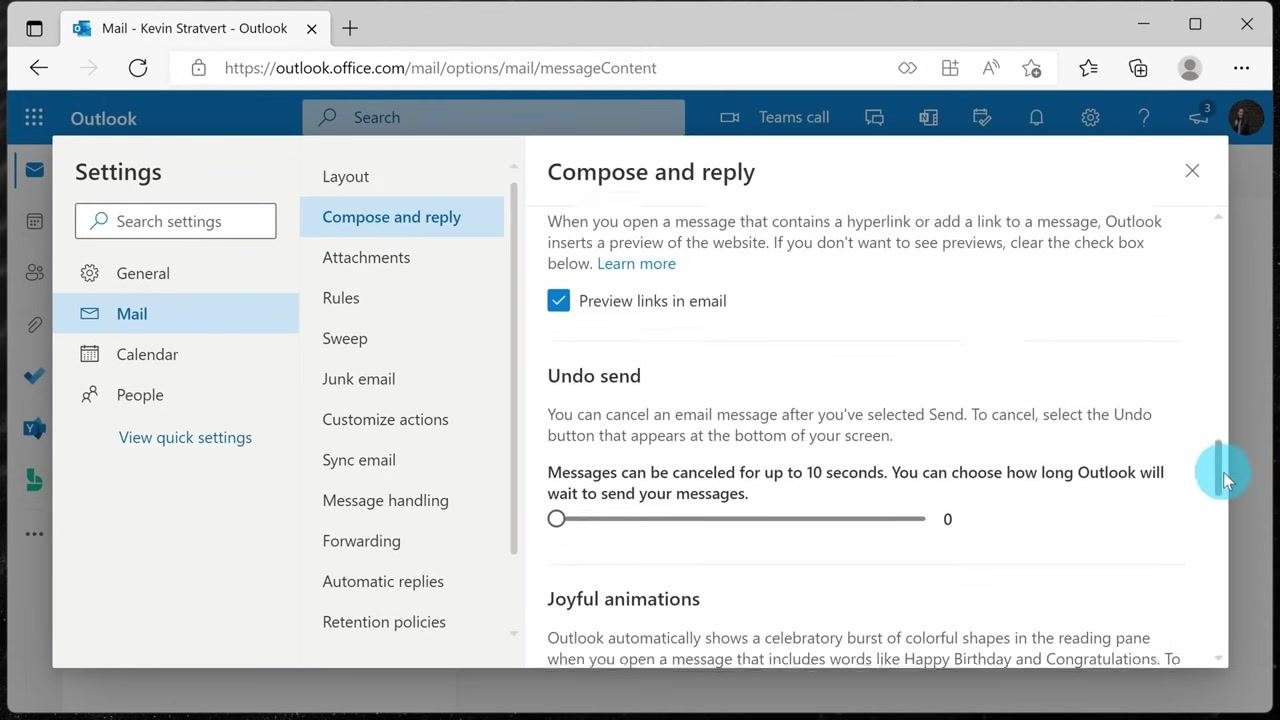
Click the Settings icon and select View all Outlook settings. In the left pane, select Mail > Compose and reply.
Set your undo send buffer
Find the "Undo send" section and adjust the slider to set a buffer time of up to 10 seconds for canceling a sent message. This is a shorter window than the desktop delay rule.
Cancel a message after sending
When you send an email in Outlook on the web, a prompt appears in the bottom-left corner. Click Undo within your configured buffer time to cancel sending the message.
Why this matters
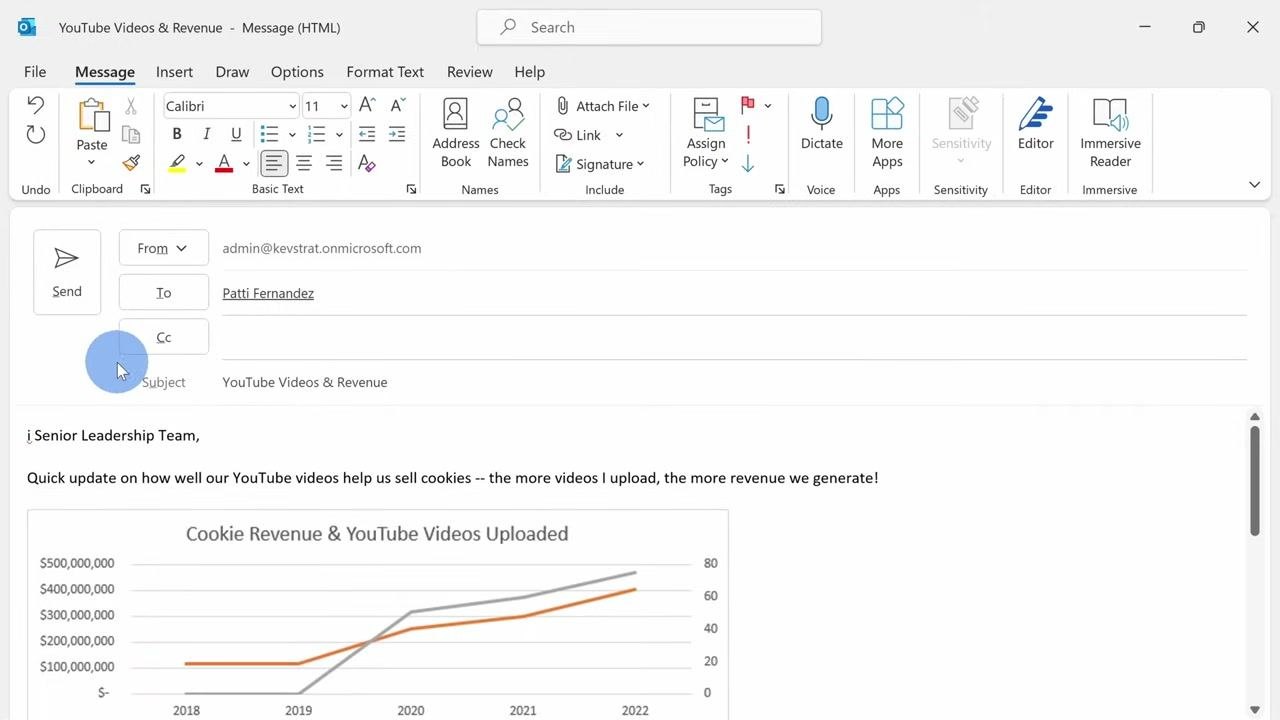
Research from Kevin Cookie Company shows that most people check for errors in their emails after sending, rather than before. This is why recall, delayed delivery, and undo send are valuable safeguards: they give you a chance to catch mistakes during the window between sending a message and its actual delivery.
What's next
Now that you know how to recall mail in Outlook, consider combining these approaches for the strongest protection against email mistakes:
- Use Recall This Message for one-off situations when a message has already been sent and the recipient meets the requirements.
- Set up an automatic delay rule in Outlook desktop so every message gives you a built-in buffer before it leaves your outbox.
- Enable Undo Send in Outlook on the web for a quick, short-window safety net when composing from a browser.
Generation details: cost, quality tiers
Docsie billed 4,000 credits ($2.80) to analyze this 8-minute video at standard quality. The rewrite, template fill and Word/PDF exports were included. The same video at each quality tier:
| Quality | Frames sampled | Credits | Approx. cost |
|---|---|---|---|
| Draft | every 16-30 s | 2,000 | $1.40 |
| Standard (this guide) | every 8-15 s | 4,000 | $2.80 |
| Detailed | every 4-7 s | 8,000 | $5.60 |
| Ultra | every 1-3 s | 16,000 | $11.20 |
Credits priced at $0.70 per 1,000; plans include a monthly allowance. Enterprise customers on on-premise or bring-your-own-model deployments run this on their own inference and pay no per-video credits.
Generated by Docsie Video-to-Docs on 2026-09-09 from a 7-minute video. Screenshots are frames from the source video and belong to their creator, Kevin Stratvert, whose original is embedded above. If you own this video and want the guide removed or credited differently, contact us and we will act within one business day.