
How to Create a Team and Add Members in Microsoft Teams
This guide walks you through creating a team in Microsoft Teams, adding members (including guests), setting up channels, and customizing your team's settings for effective collaboration.
Video: How to create a team and add members in Microsoft Teams by Microsoft 365 (2020). All credit for the demonstration goes to the creator; watch the original on YouTube. The written guide below was generated from this video by Docsie. Creator? Request a change or removal.
This guide walks you through creating a team in Microsoft Teams, adding members (including guests), setting up channels, and customizing your team's settings for effective collaboration.
Prerequisites
- Access to Microsoft Teams.
- Permission to create a team within your organization.
- Email addresses for any guests you want to invite from outside your organization.
- Note: You must be a team owner to invite guests. If you create the team, you are automatically assigned as the owner.
Creating your team
Step 1: Open Microsoft Teams and navigate to Teams
Launch Microsoft Teams and select the Teams icon from the left sidebar to view your existing teams and channels. You will see a list of existing teams and channels, along with options to add people or create more channels.
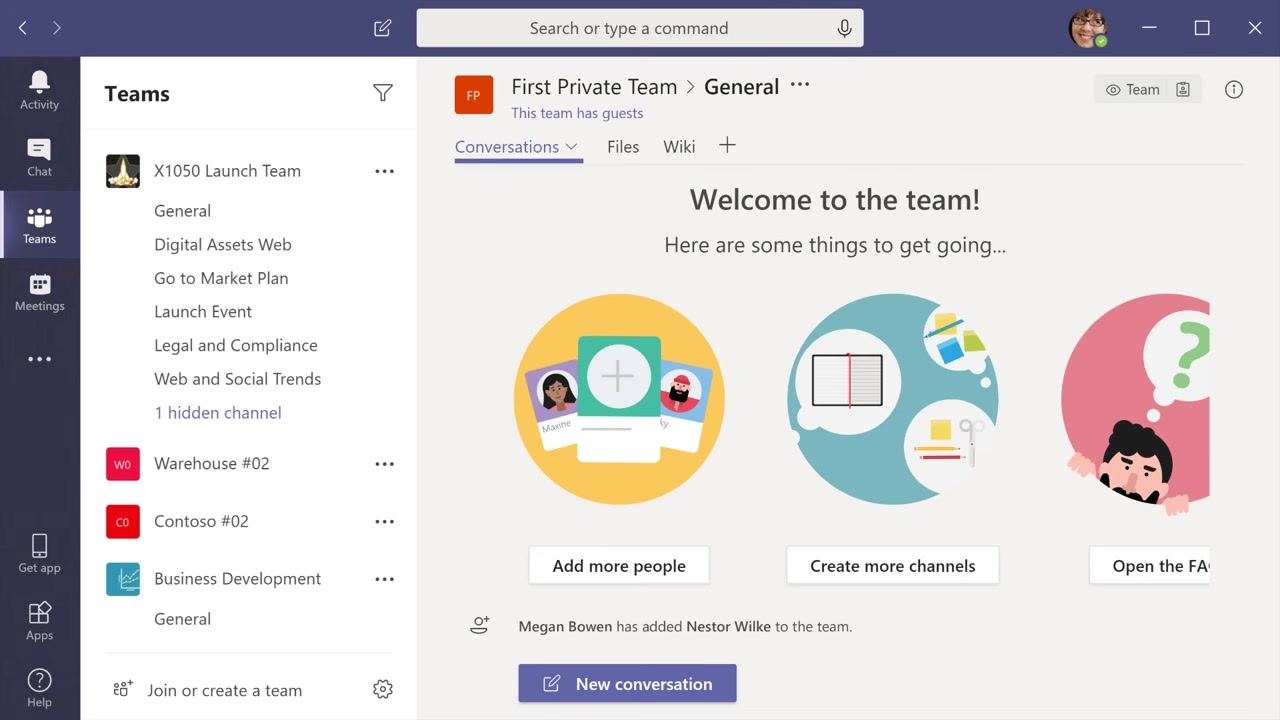
Step 2: Join or create a team
At the bottom of the Teams list, select Join or create a team.
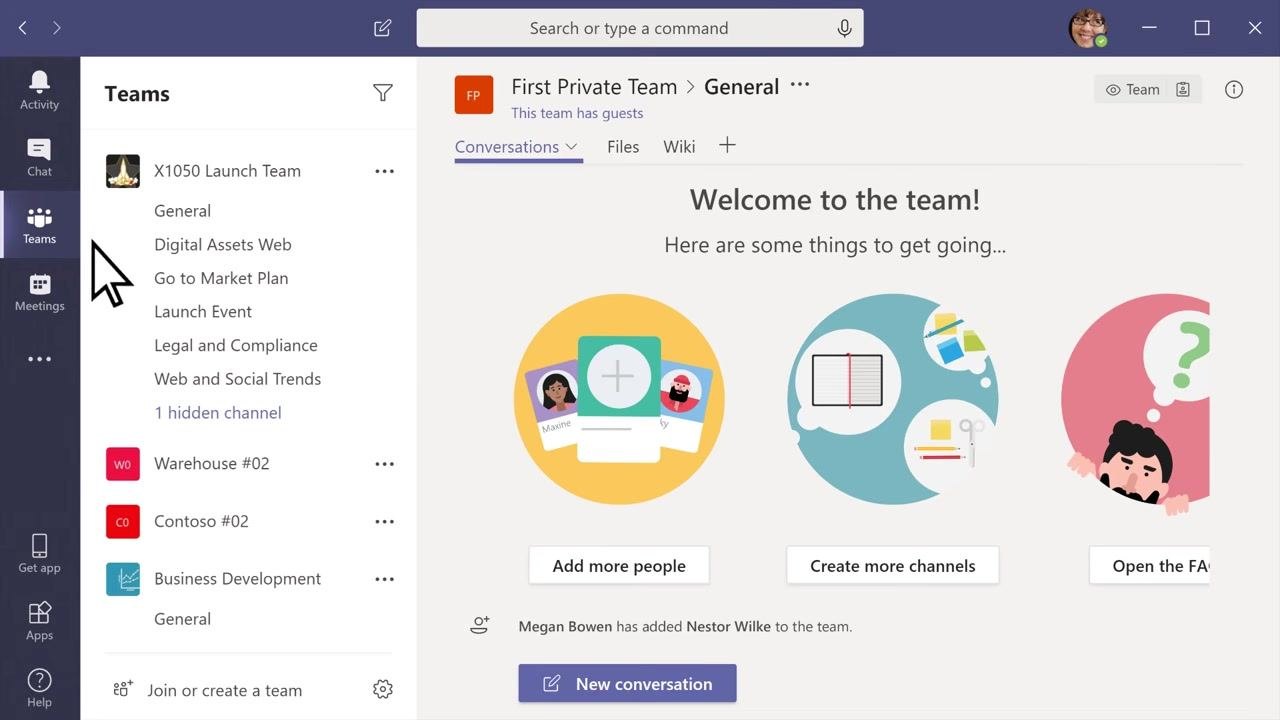
Step 3: Create a new team
Select Create a new team, then choose whether to build the team from scratch or from an existing group.
Step 4: Set team privacy
Decide on the privacy level for your team:
- Private: People need permission to join.
- Public: Anyone in your organization can join.
- Org-wide: Everyone in your organization automatically joins.
Select the option that best fits your needs.
Step 5: Name and describe your team
Enter a team name and an optional description, then select Create to finalize the team setup.
Adding members and guests
Step 6: Add members to your team
In the "Add members" dialog, start typing names, distribution lists, or security groups to add people from your organization. To invite people from outside your organization, type their email addresses to add them as guests.
Step 7: Add guests and set display names
For each guest, you can edit their display name for clarity. Click the pencil icon next to the guest's name, enter a friendly display name, and confirm the change.
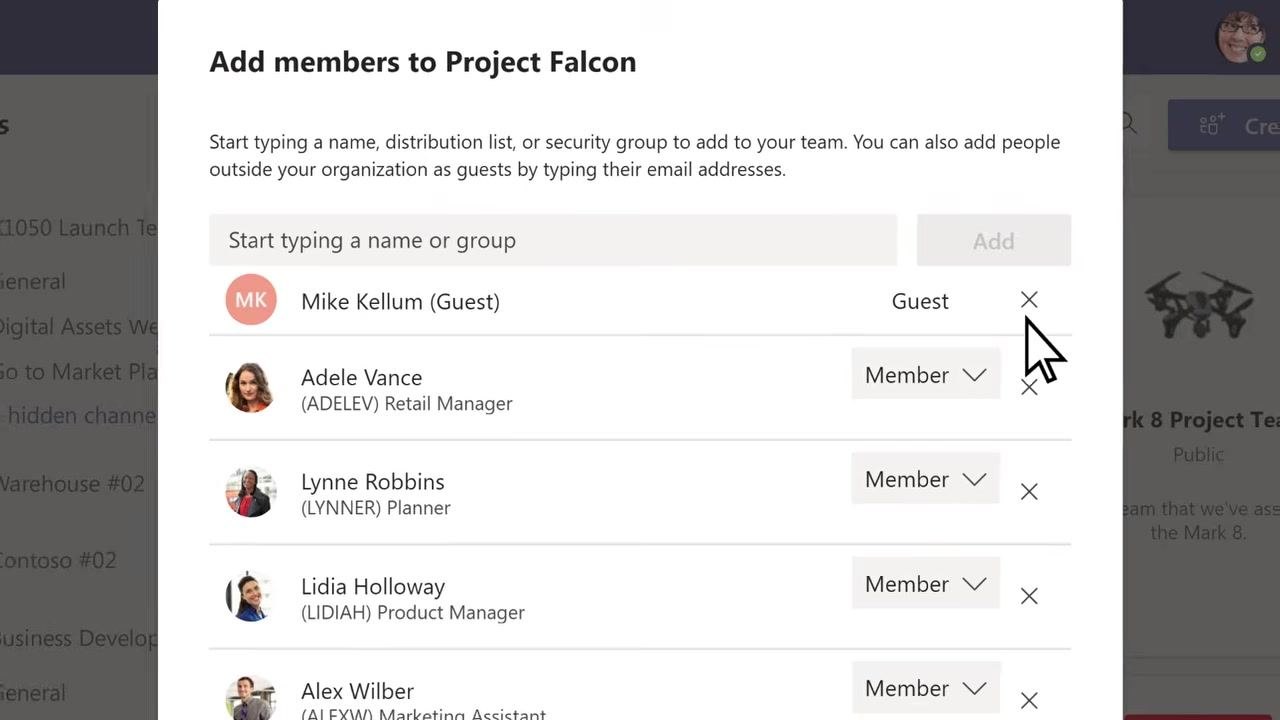
Step 8: Review team members and roles
Review the list of added members and their assigned roles (Member or Guest), and adjust roles if necessary.
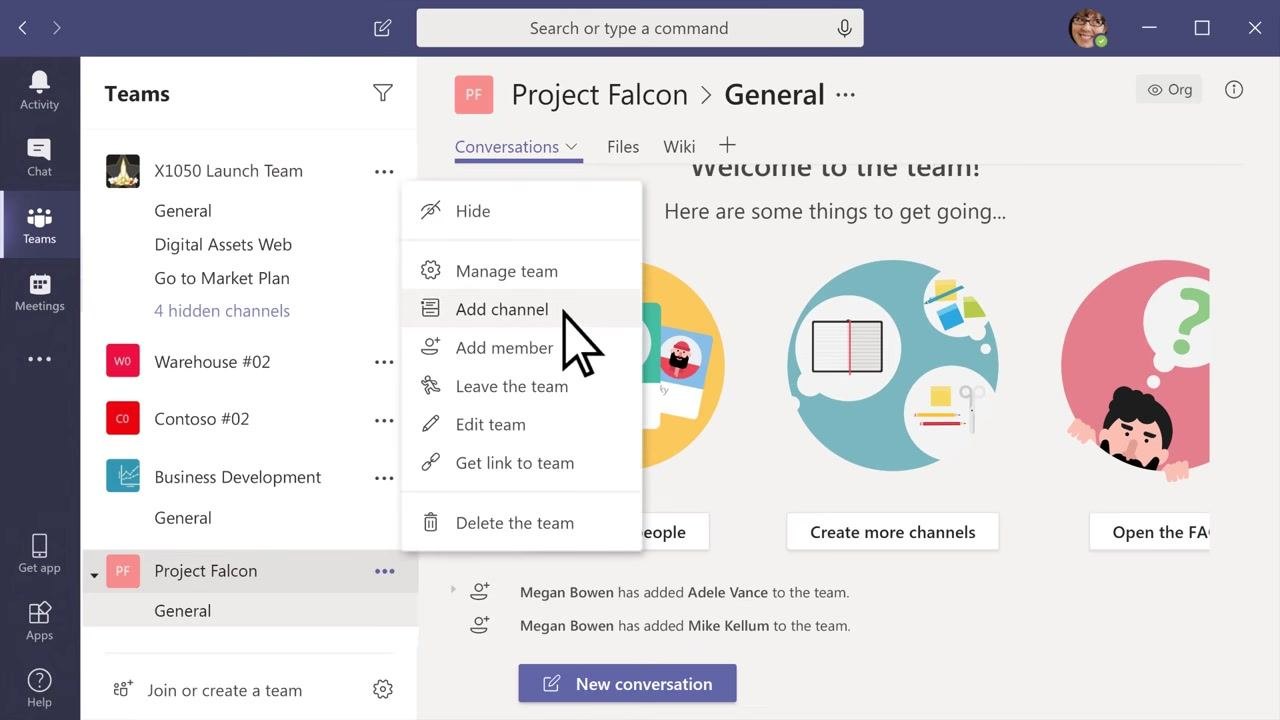
Setting up channels
Step 9: Understand default channels
Every new team automatically includes a General channel. Use this channel for information and announcements relevant to the whole team.
Step 10: Add additional channels
To create a new channel, select the three dots (More Options) next to your team name, then choose Add channel from the dropdown menu.
Step 11: Configure channel details
Enter a channel name (letters, numbers, and spaces are allowed) and, optionally, a description to help others understand the channel's purpose. Set the privacy level for the channel (Standard makes it accessible to everyone on the team), and decide whether it should automatically appear in everyone's channel list by checking the corresponding box.
Step 12: Finalize channel creation
For example, enter "Product Specs" as the channel name and "Specifications for Project Falcon" as the description. Ensure "Standard – Accessible to everyone on the team" is selected for privacy, and check "Automatically show this channel in everyone's channel list" if you want it visible by default. Click Add to create the channel.
By completing these steps, you will have created a team, added members (including guests), and set up channels tailored to your team's needs.
Managing and customizing your team
After setting up your team and channels, you can further personalize and manage it using the following options.
Step 13: Access more options for your team
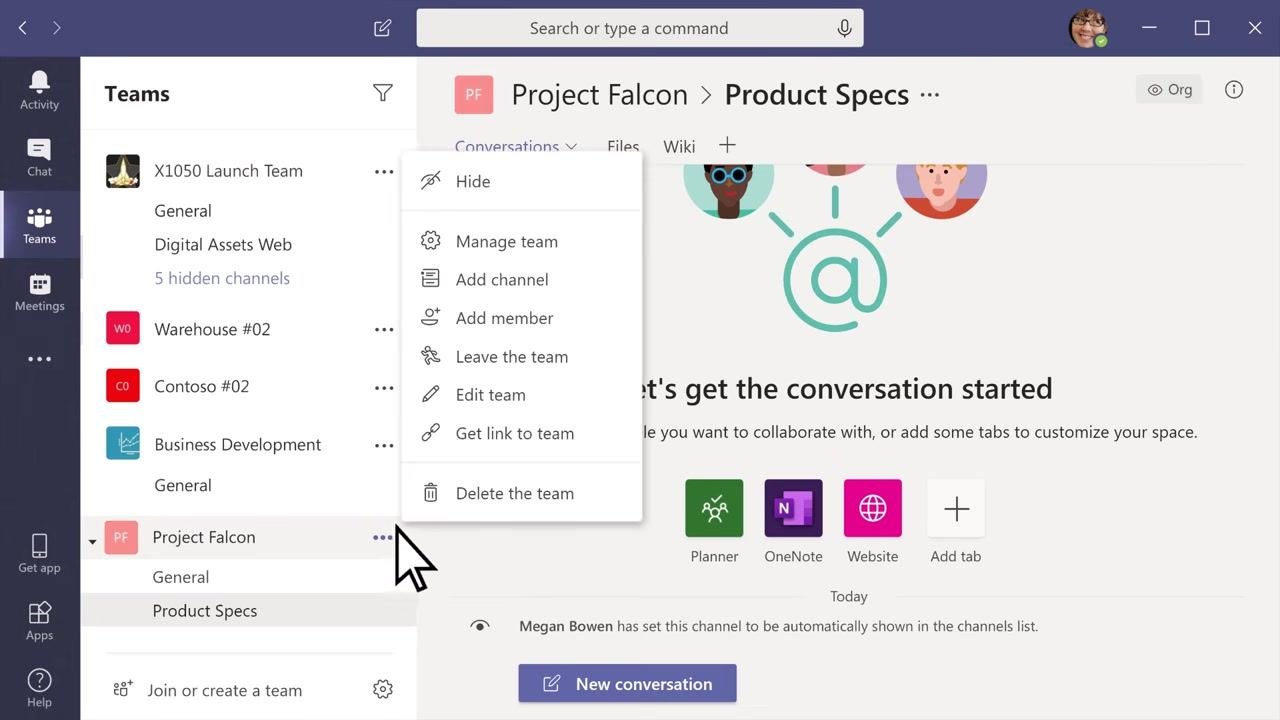
Locate your team in the Teams list (for example, "Project Falcon") and click the three dots (More Options) next to your team name. A dropdown menu appears with several management options, including:
- Manage team
- Add channel
- Add member
- Leave the team
- Edit team
- Get link to team
- Delete the team
Select Manage team to access all management and customization features in one place.
Step 14: Customize team settings
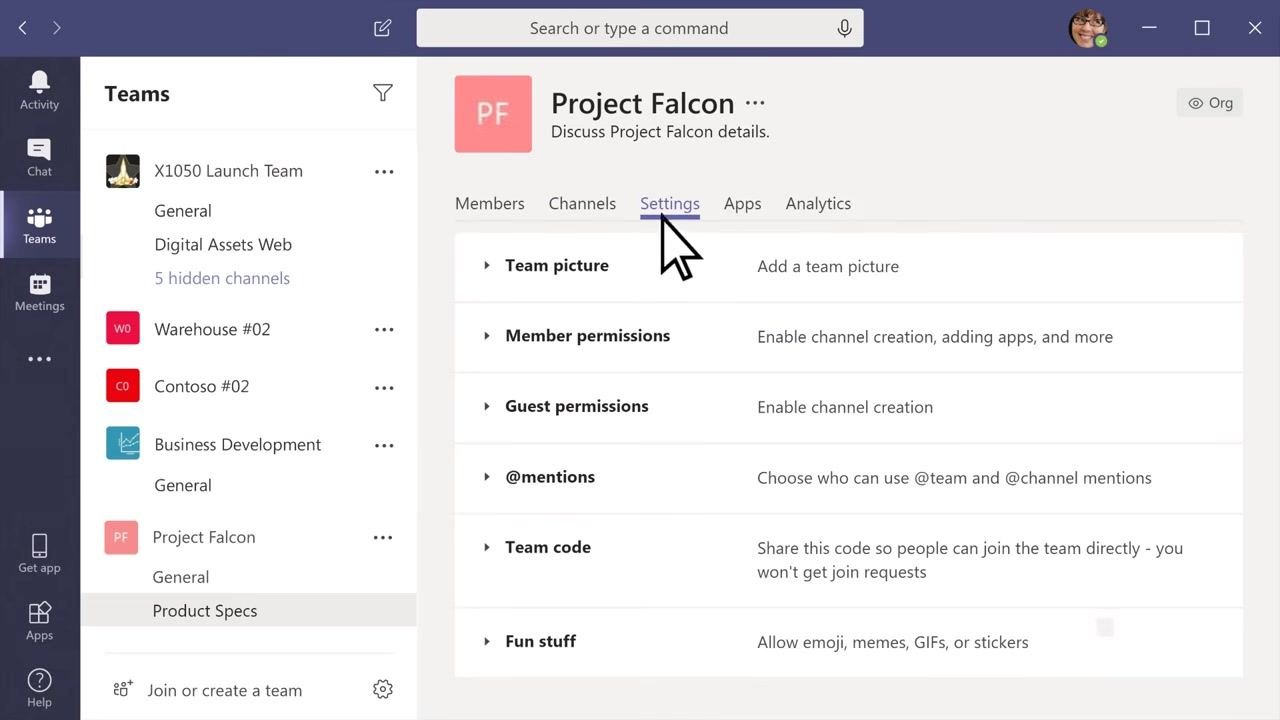
In the Manage Team view, select the Settings tab. Here, you can configure several options:
- Team picture: Add or change a team picture to give your team some personality.
- Member permissions: Enable or restrict channel creation, app additions, and more for team members.
- Guest permissions: Control whether guests can create channels.
- @mentions: Choose who can use @team and @channel mentions.
- Team code: Generate a code for others to join the team directly.
- Fun stuff: Allow or restrict emojis, memes, GIFs, or stickers.
Step 15: Add or change a team picture
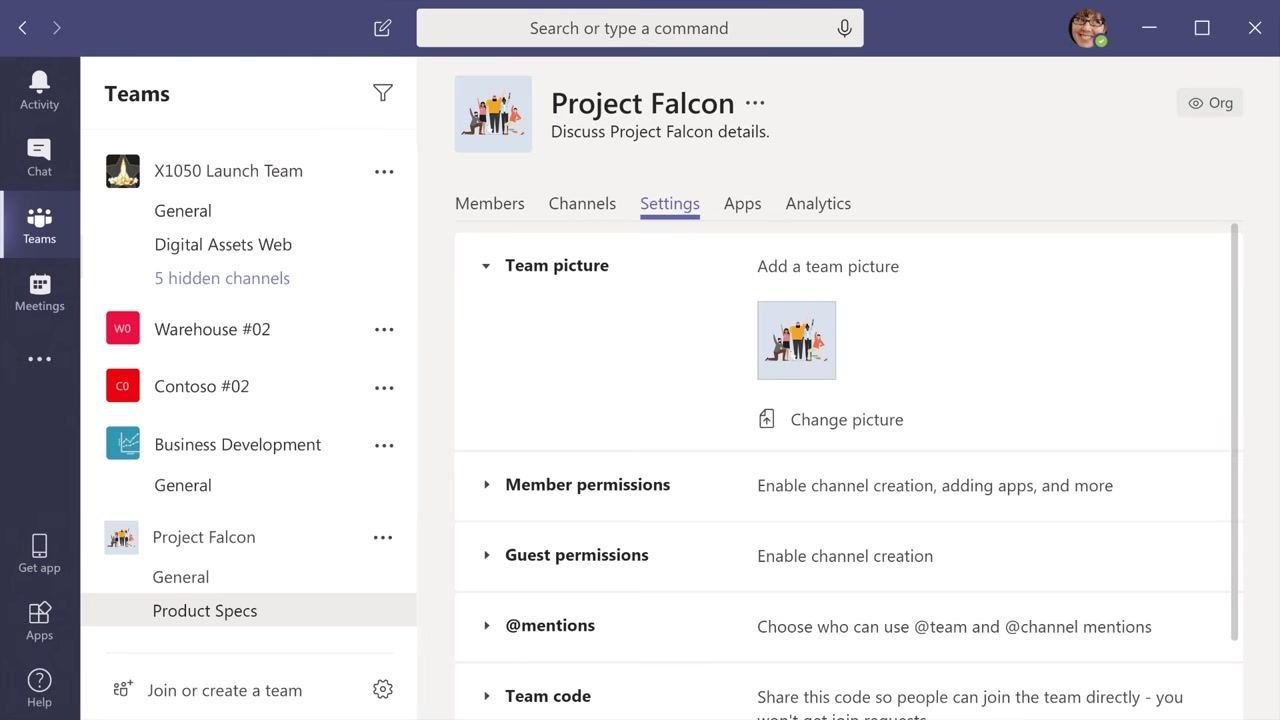
Under the Team picture section, click Change picture and upload or select an image to represent your team. The new team picture will appear next to your team name in the Teams list and in the team header.
Summary
With a team name, added members and channels, and a personalized team picture, your team setup is complete and ready for collaboration. Following these steps ensures your Microsoft Teams environment is both functional and tailored to your team's needs.
Generation details: cost, quality tiers
Docsie billed 1,500 credits ($1.05) to analyze this 3-minute video at standard quality. The rewrite, template fill and Word/PDF exports were included. The same video at each quality tier:
| Quality | Frames sampled | Credits | Approx. cost |
|---|---|---|---|
| Draft | every 16-30 s | 750 | $0.52 |
| Standard (this guide) | every 8-15 s | 1,500 | $1.05 |
| Detailed | every 4-7 s | 3,000 | $2.10 |
| Ultra | every 1-3 s | 6,000 | $4.20 |
Credits priced at $0.70 per 1,000; plans include a monthly allowance. Enterprise customers on on-premise or bring-your-own-model deployments run this on their own inference and pay no per-video credits.
Generated by Docsie Video-to-Docs on 2026-09-08 from a 2-minute video. Screenshots are frames from the source video and belong to their creator, Microsoft 365, whose original is embedded above. If you own this video and want the guide removed or credited differently, contact us and we will act within one business day.