
How to Create a Form in Microsoft Forms
This guide walks you through creating a training feedback form using Microsoft Forms. You will learn how to build the form with multiple question types, reorder and configure questions, preview and test the form, customize its appearance, share it with respondents, and review the responses you collect.
Video: How to Create a Form with Microsoft Forms by Collaboration Coach (2018). All credit for the demonstration goes to the creator; watch the original on YouTube. The written guide below was generated from this video by Docsie. Creator? Request a change or removal.
This guide walks you through creating a training feedback form using Microsoft Forms. You will learn how to build the form with multiple question types, reorder and configure questions, preview and test the form, customize its appearance, share it with respondents, and review the responses you collect.
Prerequisites
- Access to an Office 365 portal account with Microsoft Forms enabled.
- A web browser to access the Office 365 portal and Microsoft Forms.
Creating the form
Access Microsoft Forms from the app launcher
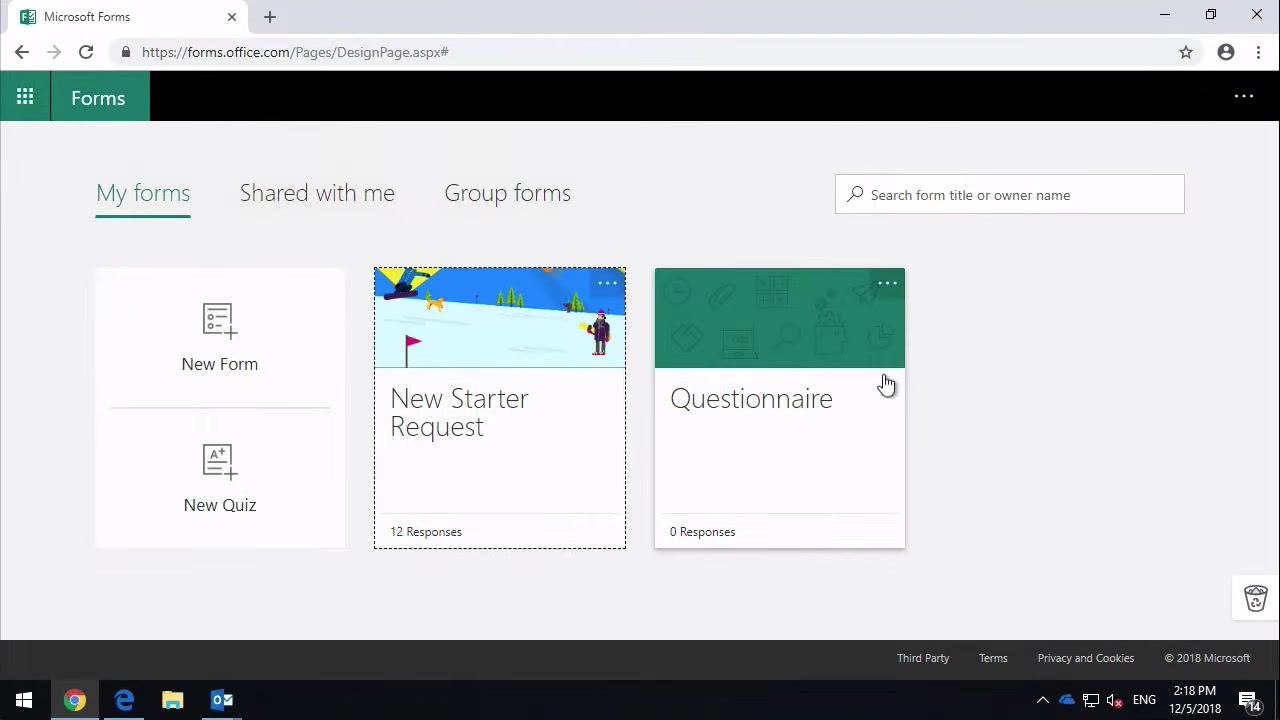
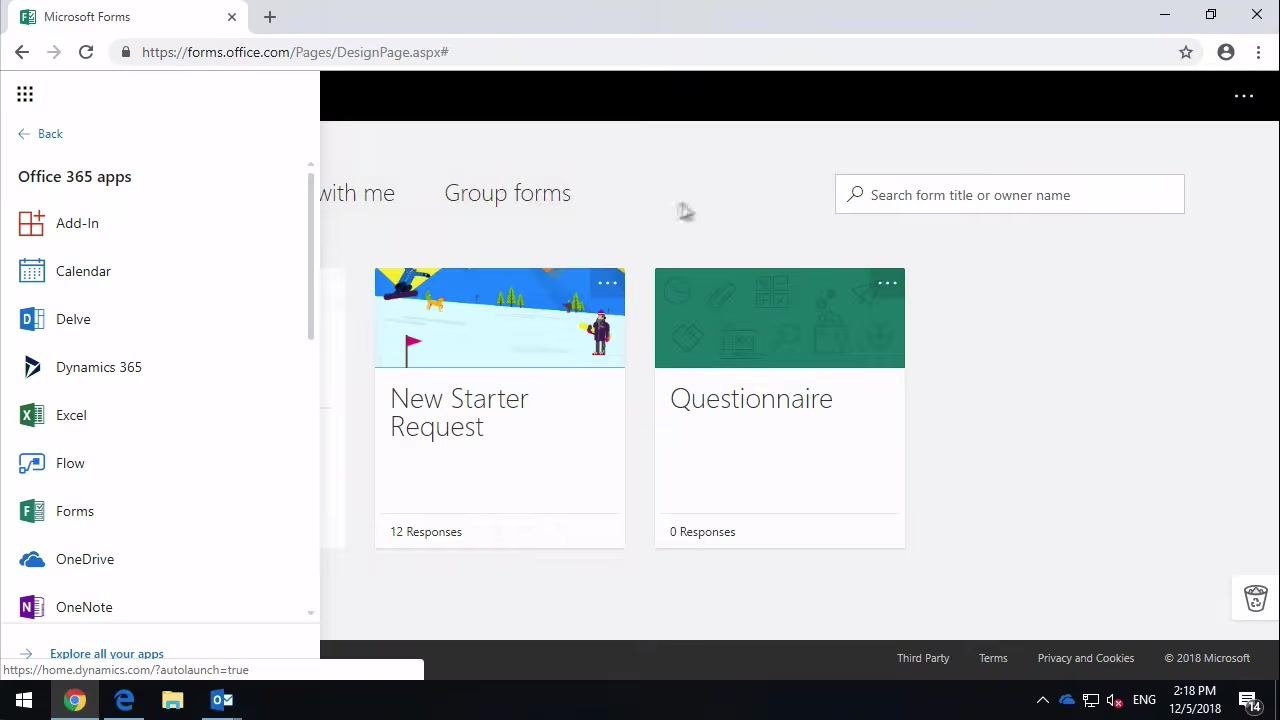
Open your browser and navigate to your Office 365 portal. Click the app launcher (grid icon) in the top left corner. If Forms is not immediately visible, click All apps and select Forms from the list. You will be taken to the Microsoft Forms landing page.
Start a new form
On the landing page, locate the New Form tile under My forms. Click the New Form tile to begin creating a new form.
Enter the form title
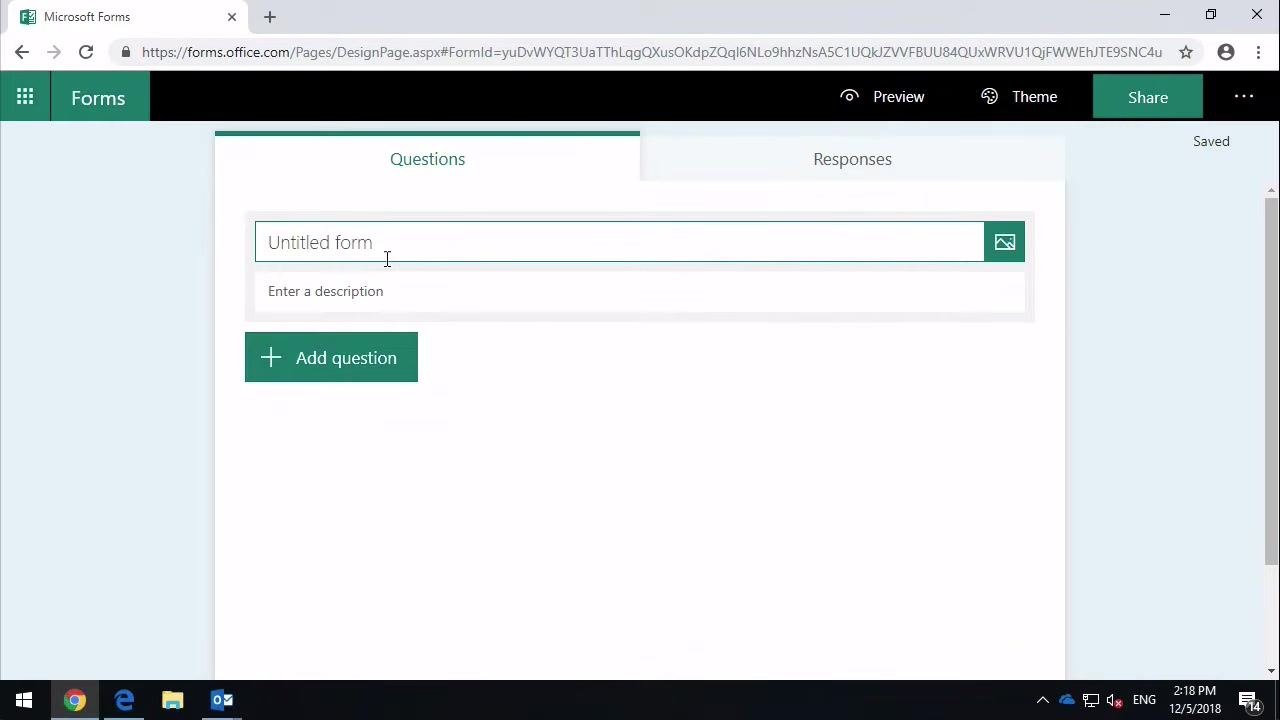
In the new form window, click on the Untitled form field and enter the title: Training Feedback. You can optionally add a description in the Enter a description field, or leave it blank.
Confirm the form title
Ensure the form title now reads Training Feedback.
Add the first question (Date)
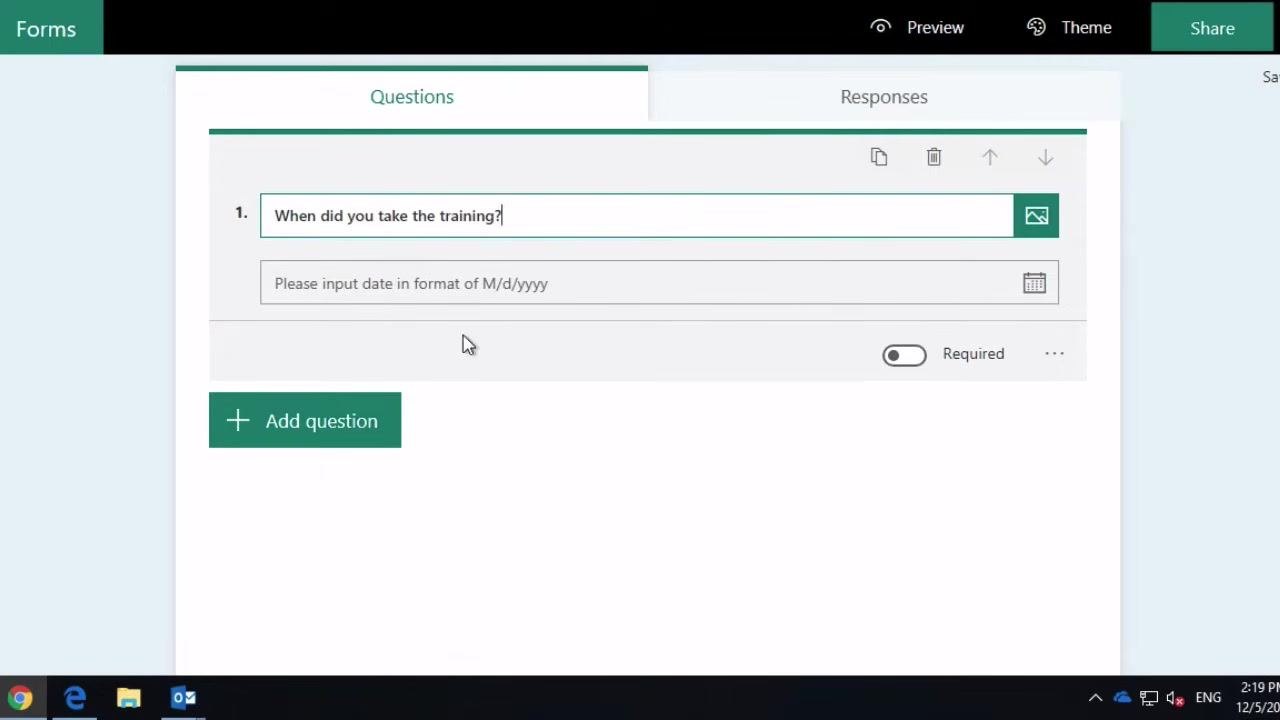
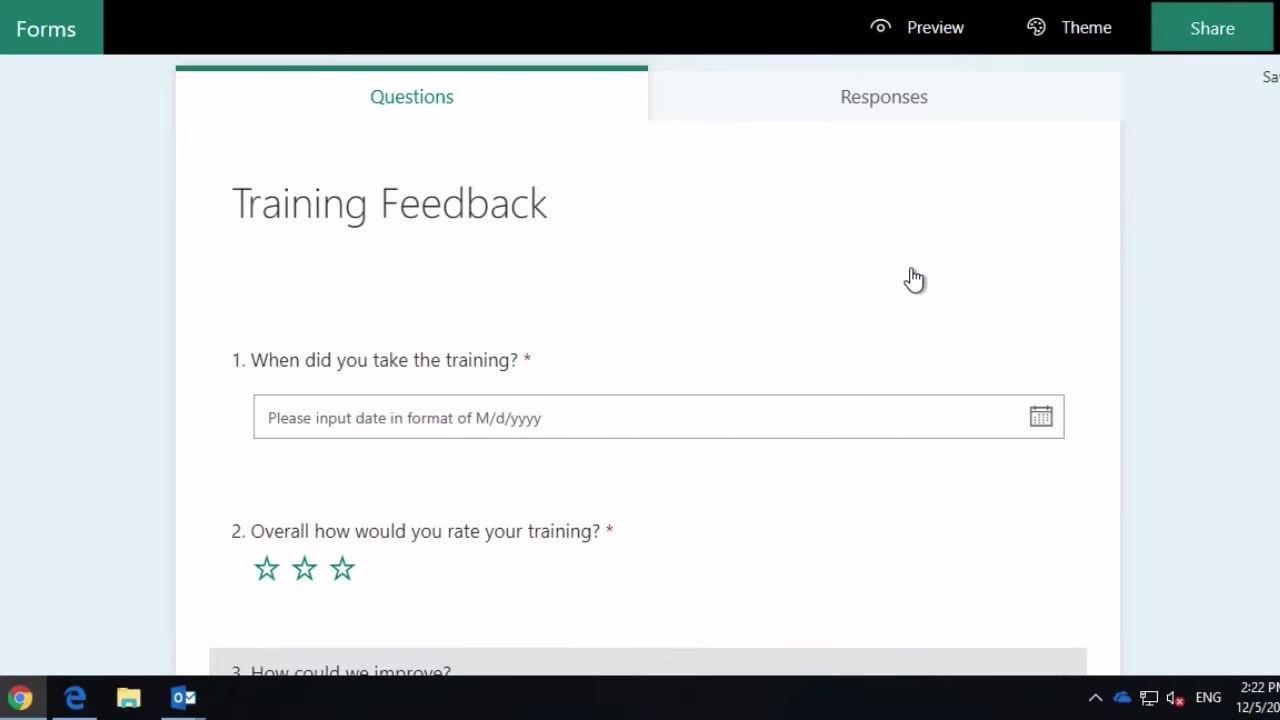
Click the + Add question button and select the Date question type. In the question field, enter: When did you take the training? The prompt below should read: "Please input date in format of M/d/yyyy". Toggle the Required switch to ON to make this question mandatory.
Verify the required setting
Confirm that the Required toggle is enabled for the date question.
Add the second question (Rating)
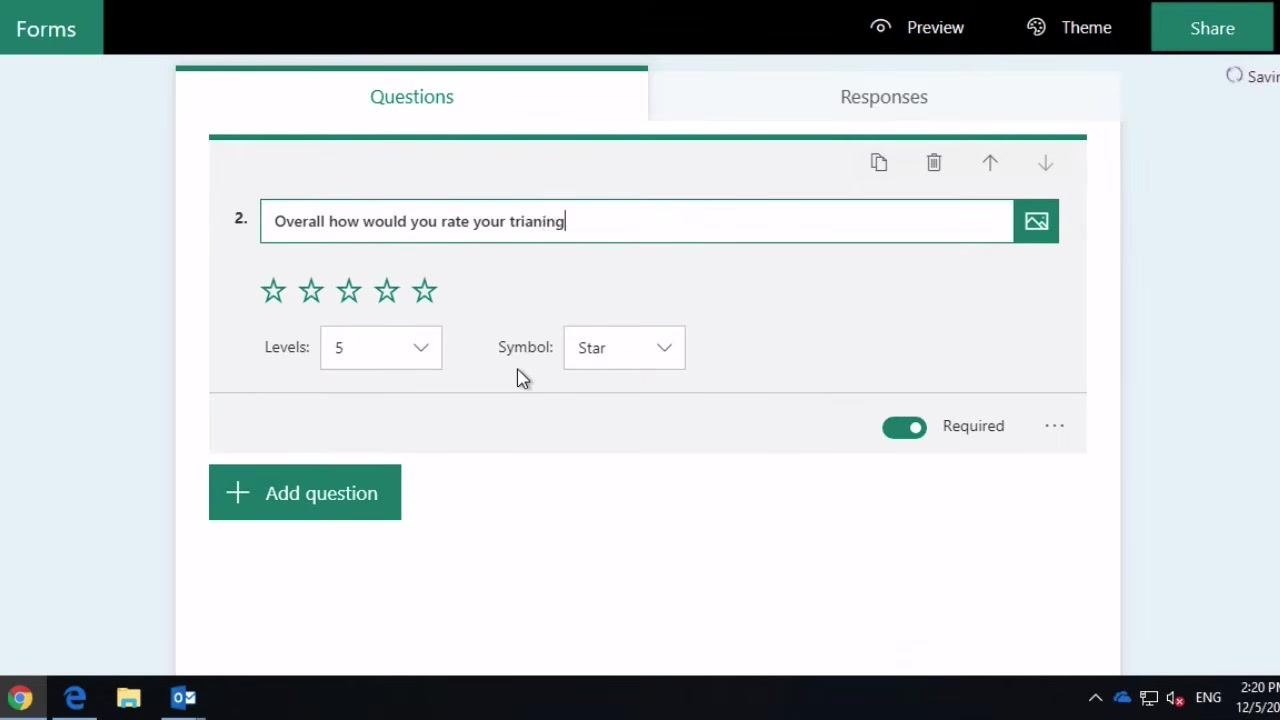
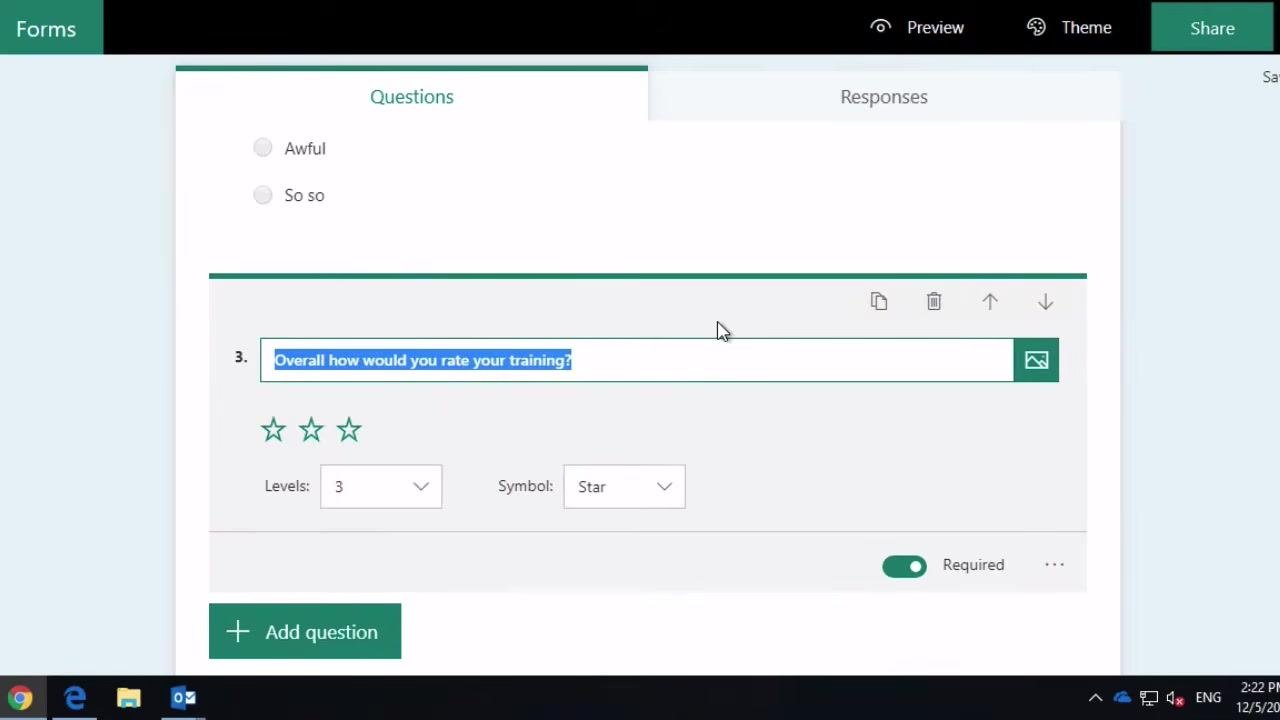
Click + Add question again and select the Rating question type. Enter the question: Overall how would you rate your training? Set Levels to 3 and Symbol to Star. Toggle the Required switch to ON.
Add the third question (Text)
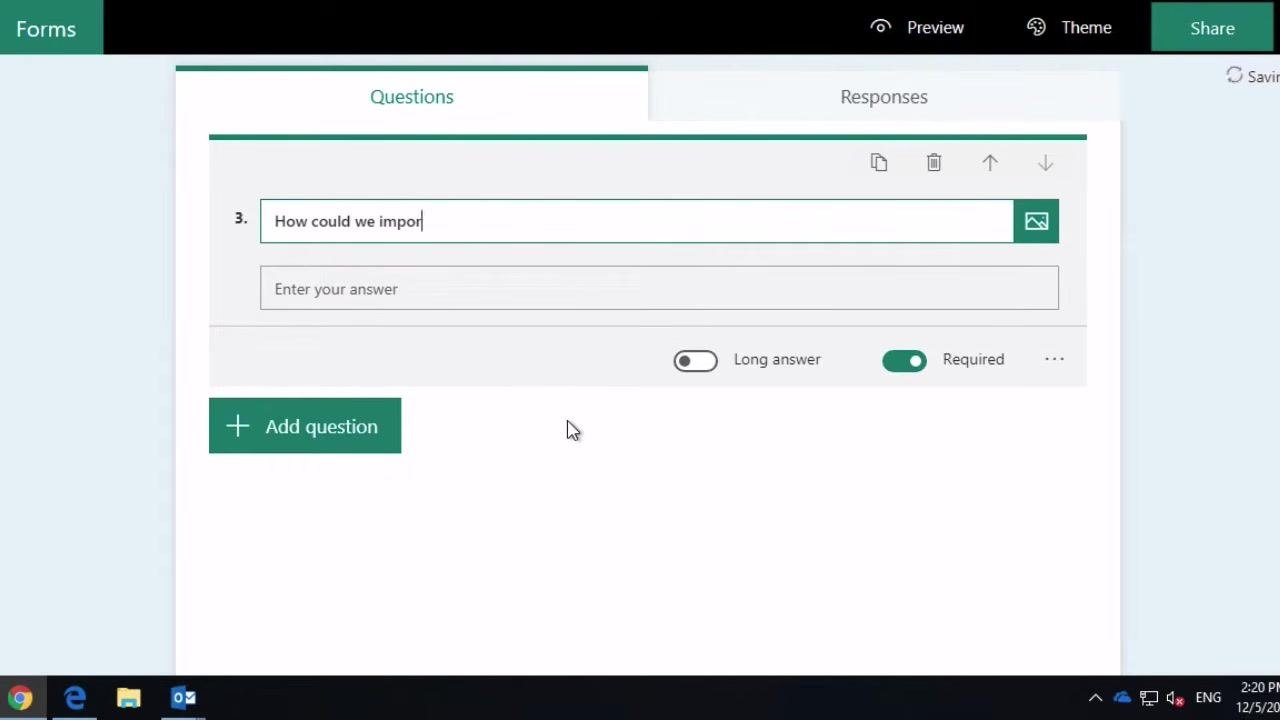
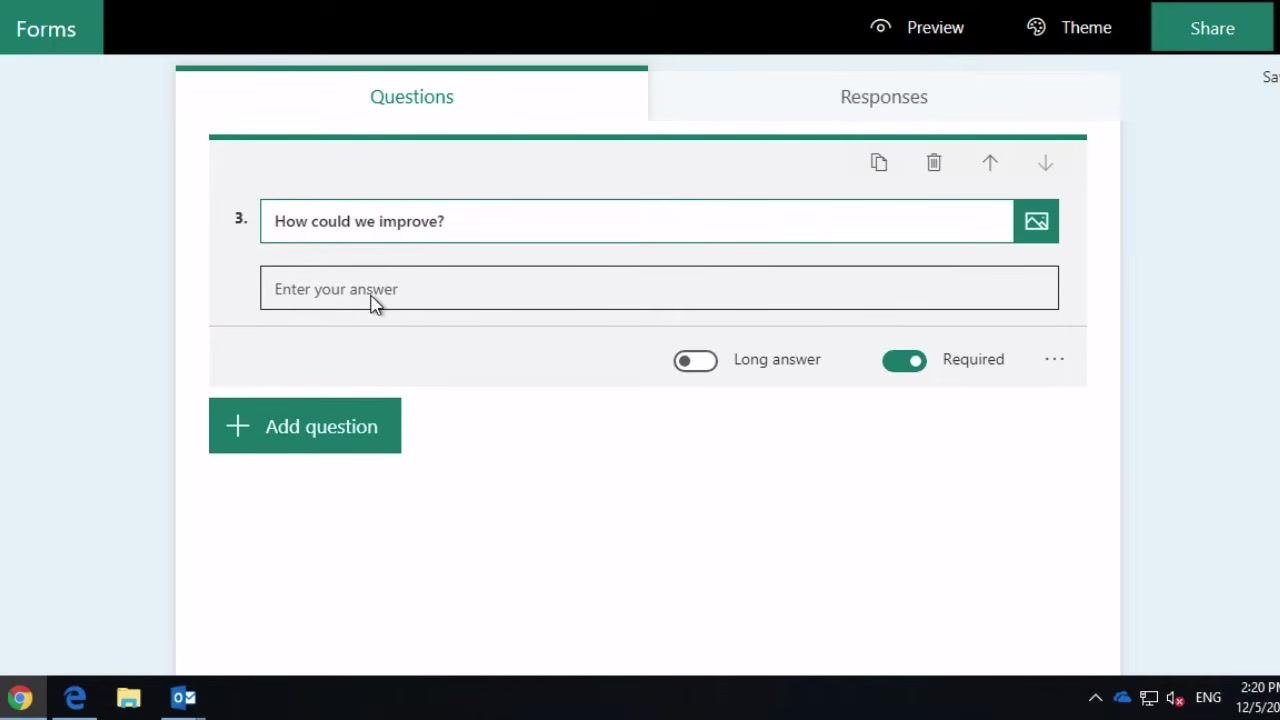
Click + Add question and select the Text question type. Enter the question: How could we improve? Leave the Long answer toggle OFF unless you want to allow longer responses. Toggle the Required switch to ON if you want to make this question mandatory.
By following these steps, you will have created a basic training feedback form including a date question, a rating question with three stars, and a text feedback question, each set as required to ensure complete responses.
Customizing and organizing questions
Enable long answer for the text question
Locate the "How could we improve?" question and toggle the Long answer switch ON to allow respondents more space to type their feedback.
Make the text question optional
Toggle the Required switch OFF for the "How could we improve?" question so that respondents are not forced to answer.
Add a fourth question (Choice)
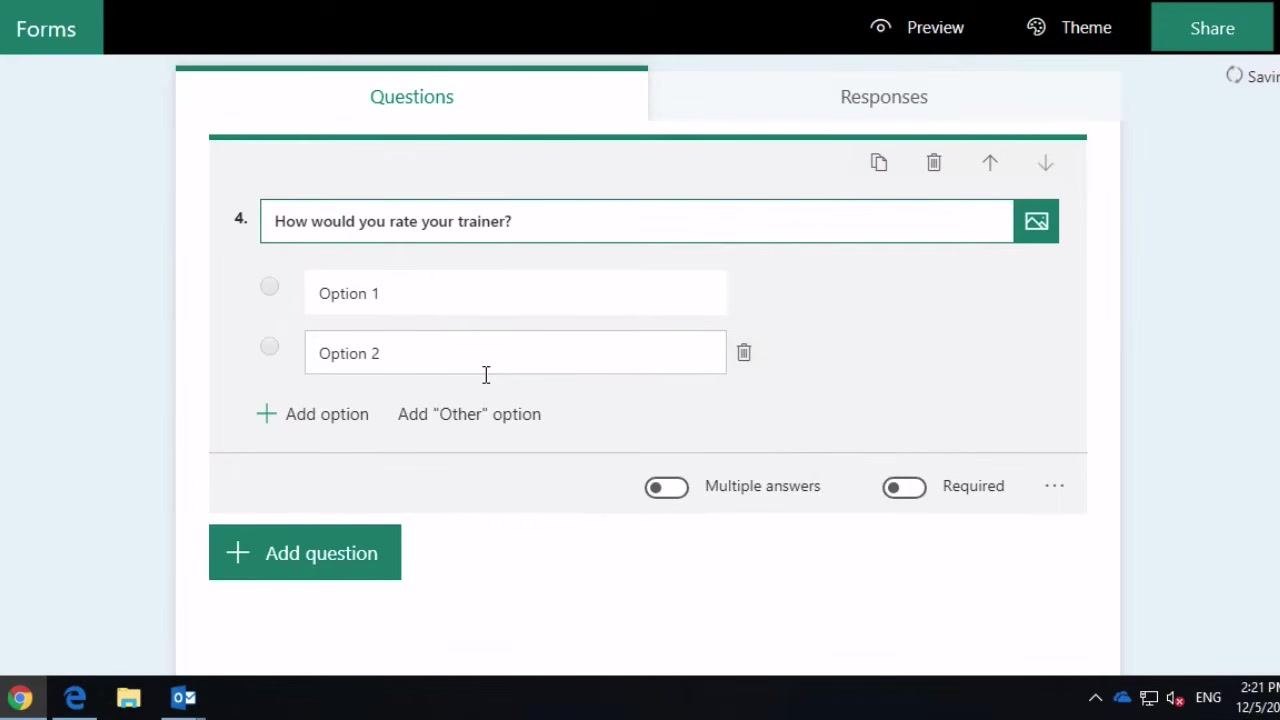
Click + Add question and select the Choice question type. In the question field, enter: How would you rate your trainer? For the answer options, enter:
- Option 1:
Awesome - Option 2:
Awful
Add a third option to the choice question
Click + Add option and enter the third option: So so.
Review multiple answers and required settings
Ensure the Multiple answers toggle is OFF so respondents can only select one option. Ensure the Required toggle is OFF if you do not want to force a response for this question.
Review the form layout
Scroll up to review all questions and their order:
-
- When did you take the training? (Date, Required)
-
- Overall how would you rate your training? (Rating, Required)
-
- How could we improve? (Text, Optional, Long answer enabled)
-
- How would you rate your trainer? (Choice, Optional, Options: Awesome, Awful, So so)
Reorder questions
To move "How would you rate your trainer?" up to the second position, click the up arrow button next to the question until it appears as question 2. To move "Overall how would you rate your training?" down to the last position, click the down arrow button next to the question until it appears as the last question.
By following these steps, you have added a choice question, adjusted answer settings, and reordered your questions for optimal flow.
Previewing and testing the form
Preview the form as a responder
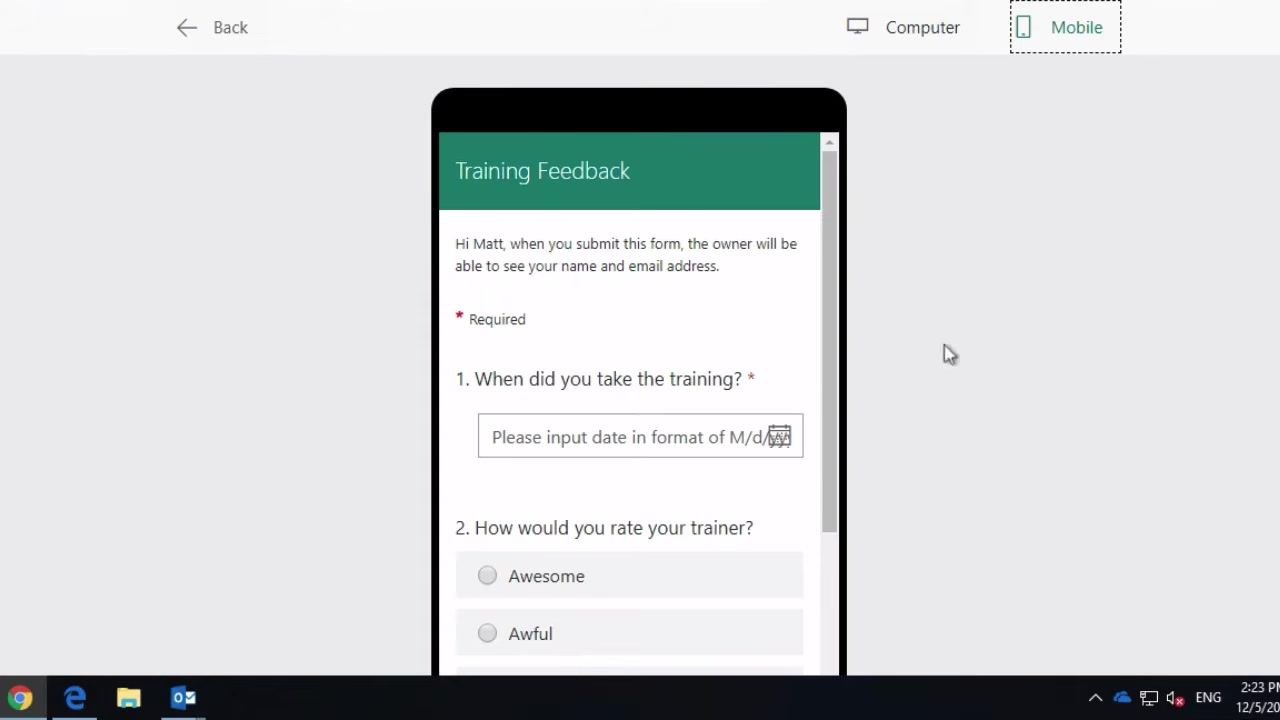
Click the Preview button at the top of the form editor. The form opens in a new page displaying exactly how it will appear to respondents. By default, the preview shows the Computer (desktop) view.
Switch between desktop and mobile views
At the top right of the preview page, click Mobile to see how the form will look on a phone. Review the layout and ensure all questions are visible and accessible. Click Computer to return to the desktop preview.
Test filling out the form
In preview mode, fill out the form as a test responder:
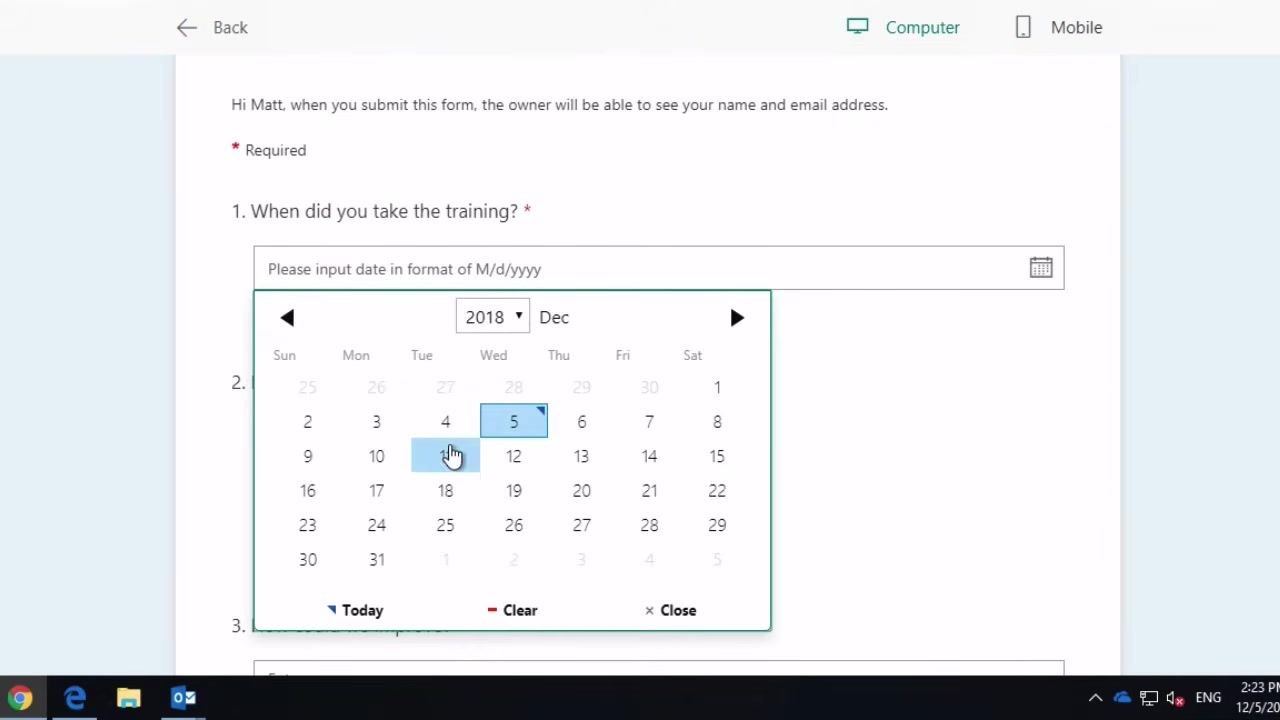
- For "When did you take the training?", click the date field and select a date from the calendar (e.g., December 5, 2018).
- For "How would you rate your trainer?", select Awesome.
- For "How could we improve?", enter feedback such as
more snacks. - For "Overall how would you rate your training?", select 3 stars.
Submit the test response
After completing all questions, click Submit. A confirmation page appears with the message "Thanks! Your response was submitted." Optionally, click Submit another response to test again.
Return to edit mode
Click Back to exit the preview and return to the form editor.
View collected responses
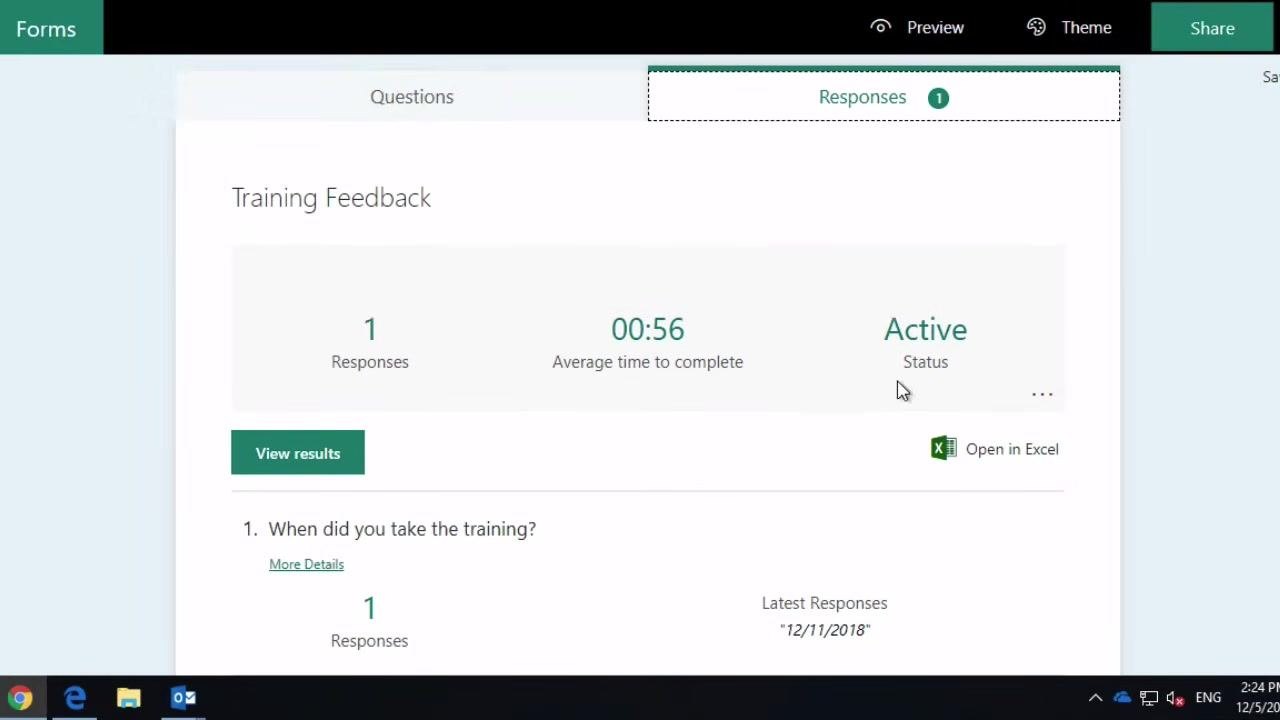
In the form editor, click the Responses tab at the top. You will see a summary including the number of responses (e.g., 1), average time to complete (e.g., 00:56), and status (e.g., Active). Click View results to see individual responses, including the date selected, trainer rating, improvement suggestions, and overall rating.
(Optional) Manage responses
If the response was a test, you may delete it by selecting the response and clicking the delete icon. Otherwise, leave it to keep the data for analysis.
By following these steps, you can ensure your form is user-friendly on all devices, functions as intended, and that you can effectively review and manage the responses you receive.
Viewing and customizing form responses
Open the Responses tab
Navigate to the Responses tab to view how questions were answered. Observe the summary at the top: 1 Response, 00:56 average time to complete, and Active status. Click View results to see individual responses, or click Open in Excel to export responses for further analysis.
Review detailed responses for each question
For "When did you take the training?", see the latest response date: 12/11/2018. For "How would you rate your trainer?", view the breakdown: Awesome: 1, Awful: 0, So so: 0. A pie chart visually represents the rating distribution.
Customizing the form appearance
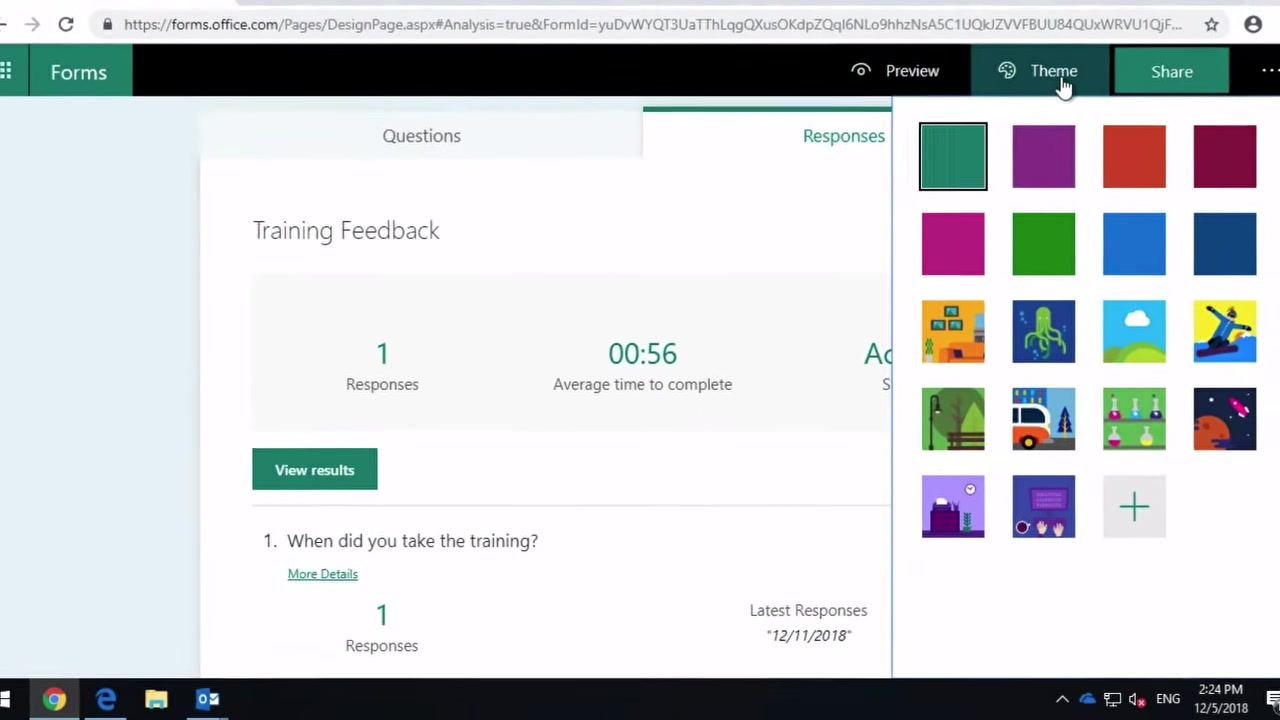
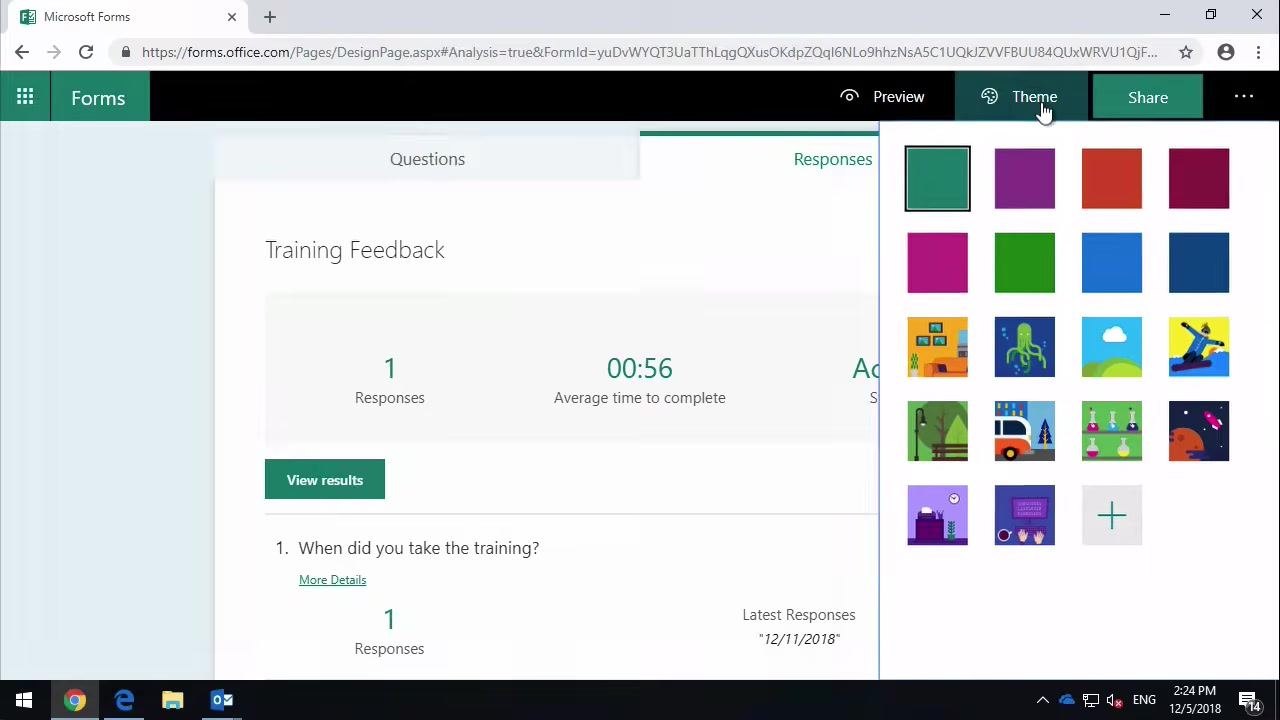
Open the theme selection panel
Click the Theme button at the top right to open the theme selection panel. Browse the available solid color themes and image/graphic themes, and select a theme by clicking on it to instantly apply it to your form.
Add a custom image from the web
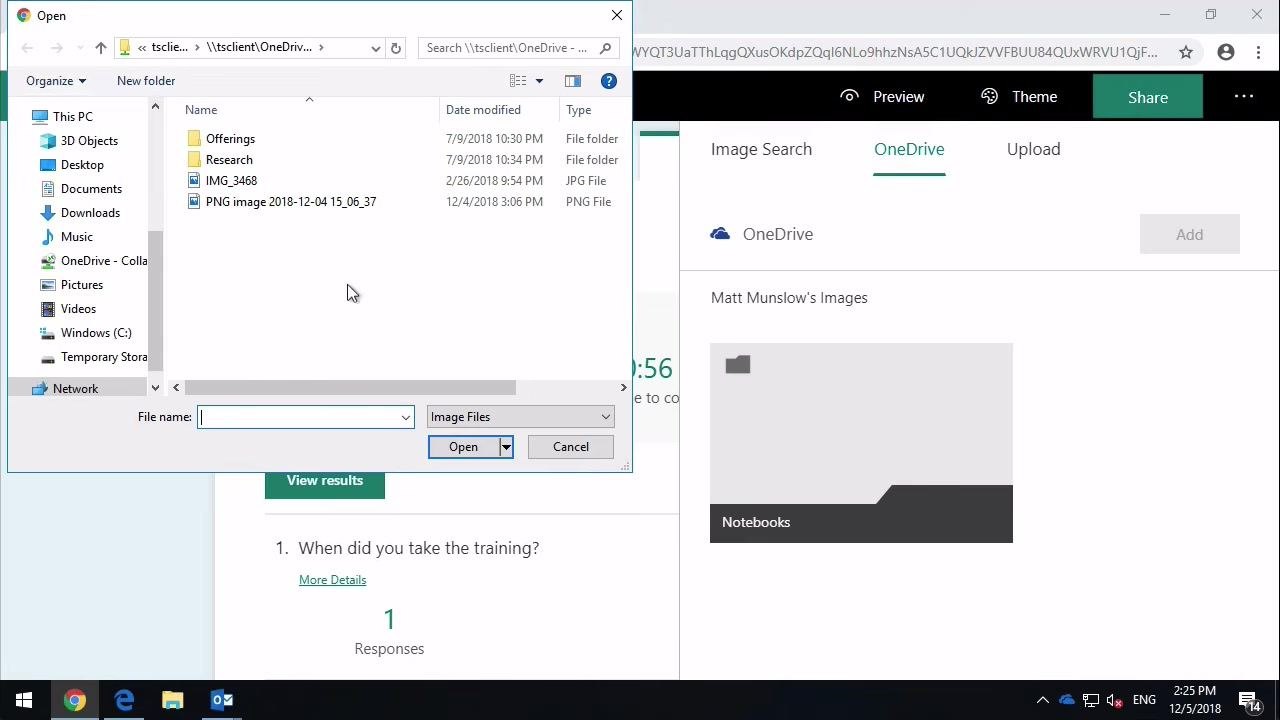
To use a custom image, select the "+" (add image) option in the theme panel. Choose from three tabs: Image Search (Bing), OneDrive, or Upload. For web images, use the Bing search bar to find and add an image.
Add an image from OneDrive
Click the OneDrive tab, browse your folders, and select the desired image file. Click Open to add the image as your form theme.
Verify the applied theme
After selecting a theme or image, verify that your form's appearance updates accordingly. The background and accent colors change to match your chosen theme.
Sharing the form
Open the share panel
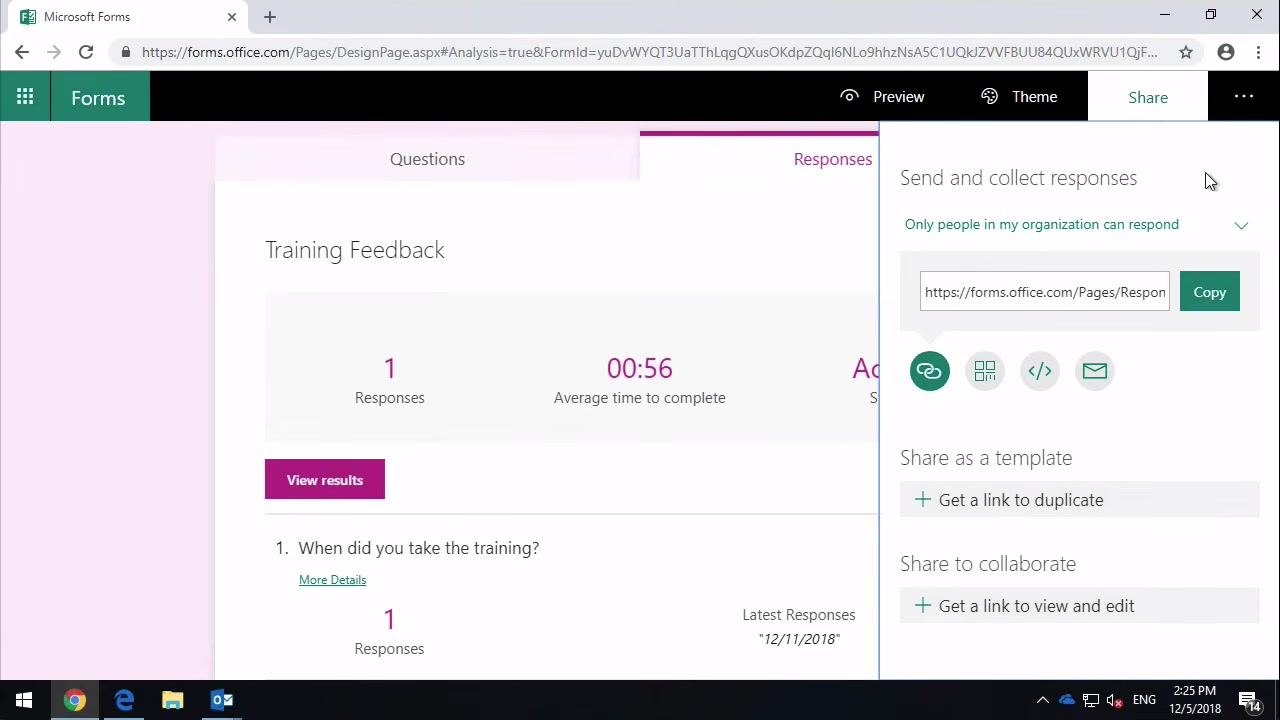
Click the Share button at the top right to prepare your form for distribution. The "Send and collect responses" panel appears. By default, only people in your organization can respond. Copy the provided link to share with respondents.
Change who can respond
Click the dropdown under "Only people in my organization can respond" and select either Anyone with the link can respond (for public access) or Only people in my organization can respond (for restricted access). Confirm your selection to update the sharing permissions.
By following these steps, you can view responses, customize the appearance of your form, and configure sharing settings to control who can access and respond to it.
Testing and viewing form responses as a responder
Allow anyone with the link to respond
In the Send and collect responses panel, click the dropdown labeled Only people in my organization can respond and select Anyone with the link can respond. Notice the tooltip: "Anyone with the link can respond to this form (sign-in is not required)."
Copy the form link
After selecting the desired permission, click the Copy button next to the generated link. The message "This link is ready for you to paste" confirms the link is copied.
Test the form in a different browser
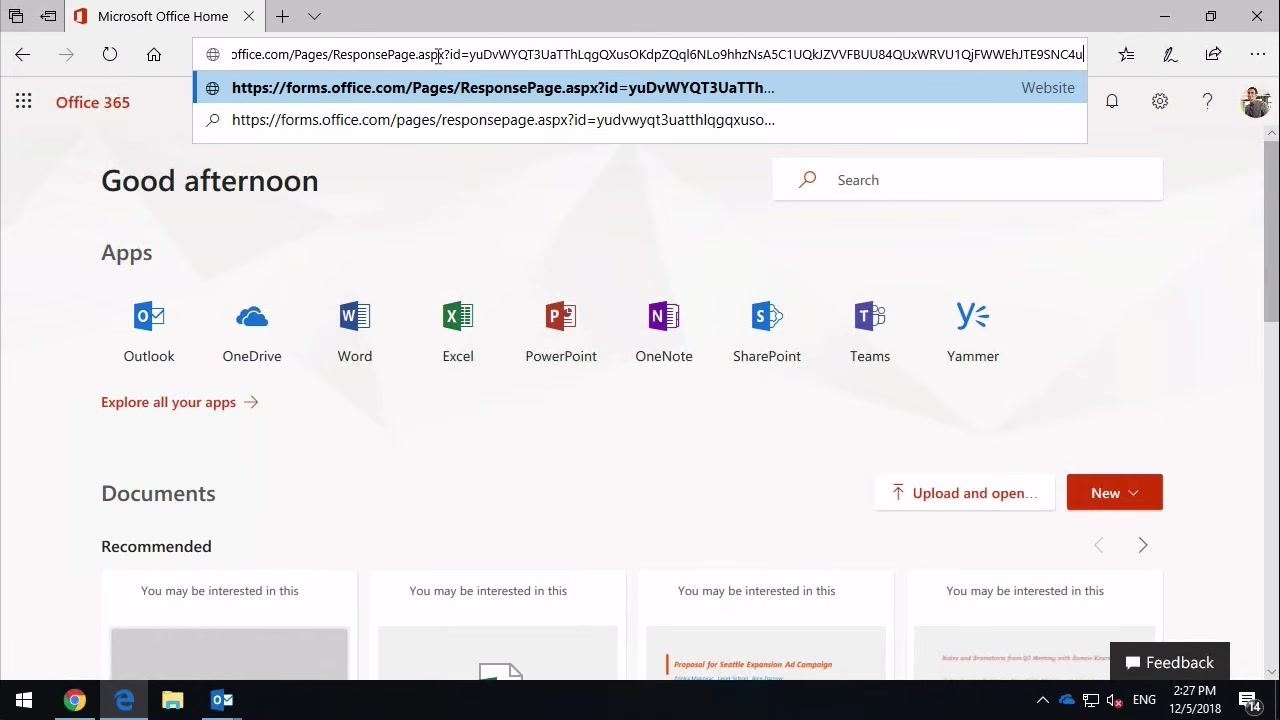
Open a new browser (e.g., Microsoft Edge). Paste the copied form link into the address bar and press Enter. The browser loads the Microsoft Office Home page, indicating the user is preparing to access the form.
Fill out and submit the form as a test responder
The form displays a greeting and instructions, e.g., "Hi Alex, when you submit this form, the owner will be able to see your name and email address." For "When did you take the training?", click the calendar icon and select a date (e.g., December 11, 2018). For "How would you rate your trainer?", select a rating (e.g., "Awesome" or "Awful"). Optionally, leave other fields blank or fill as desired, then click Submit.
Verify that the new response is recorded
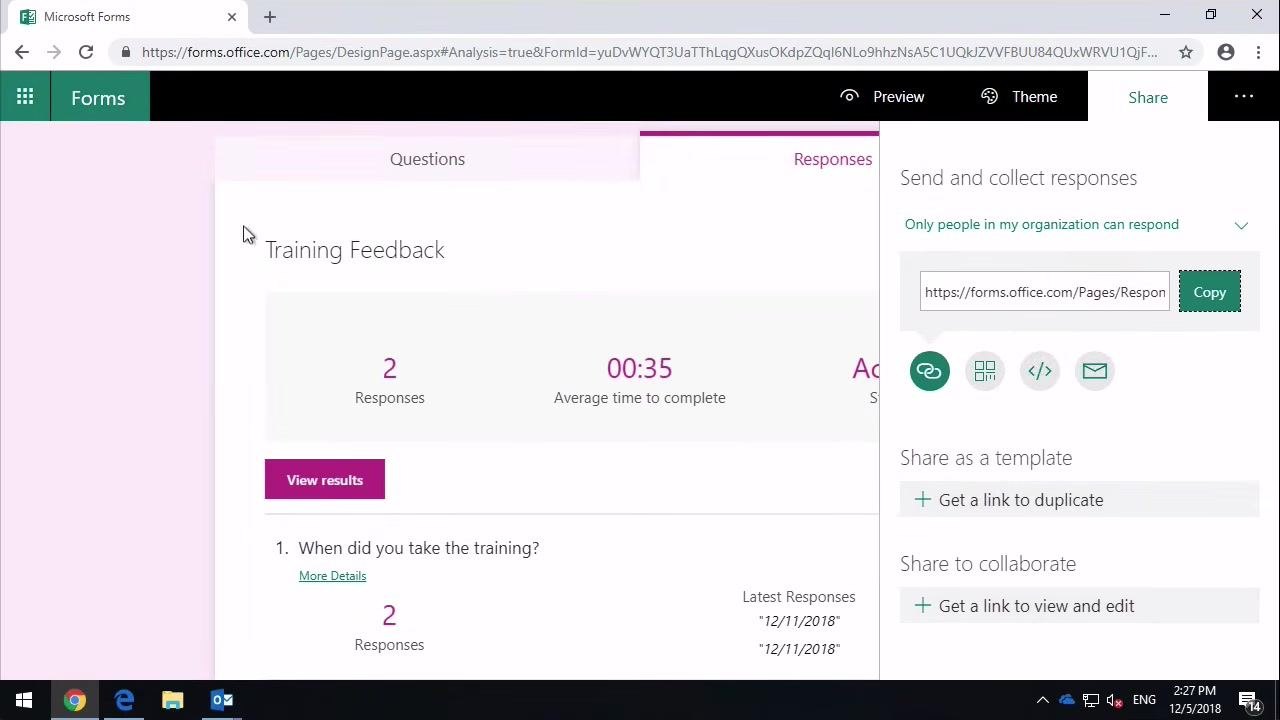
Return to the original browser where the form was created. In the Responses tab, observe that the number of responses has increased (e.g., from 1 to 2), the average time to complete is updated (e.g., 00:35), and the latest response dates are listed under each question.
View individual responses
Click View results to see detailed answers from each responder. Use the responder dropdown to switch between individual responses (e.g., "Alex Wilber"). Review the answers for each question, including the selected date and rating, along with the time taken to complete the form (e.g., 00:15).
Summary
By following this guide, you have created a training feedback form in Microsoft Forms with a date question, a rating question, a text question, and a choice question. You have reordered questions, previewed and tested the form on desktop and mobile, customized its theme and appearance, configured sharing permissions, and verified that responses are collected and viewable correctly. This ensures your form is accessible and functioning as intended for all users.
Generation details: cost, quality tiers
Docsie billed 4,500 credits ($3.15) to analyze this 9-minute video at standard quality. The rewrite, template fill and Word/PDF exports were included. The same video at each quality tier:
| Quality | Frames sampled | Credits | Approx. cost |
|---|---|---|---|
| Draft | every 16-30 s | 2,250 | $1.57 |
| Standard (this guide) | every 8-15 s | 4,500 | $3.15 |
| Detailed | every 4-7 s | 9,000 | $6.30 |
| Ultra | every 1-3 s | 18,000 | $12.60 |
Credits priced at $0.70 per 1,000; plans include a monthly allowance. Enterprise customers on on-premise or bring-your-own-model deployments run this on their own inference and pay no per-video credits.
Generated by Docsie Video-to-Docs on 2026-09-08 from a 8-minute video. Screenshots are frames from the source video and belong to their creator, Collaboration Coach, whose original is embedded above. If you own this video and want the guide removed or credited differently, contact us and we will act within one business day.