
How to Read Vernier Calipers
This procedure explains how to read vernier calipers accurately, covering both the main scale and the vernier scale. It walks through zeroing the caliper, identifying correct measurement surfaces, and interpreting readings down to the nearest 0.1 mm and 0.02 mm. Follow these steps in order to build the skill of reading vernier calipers with confidence, using the worked practice examples to check your understanding.
Video: How to Read a Metric Vernier Caliper by WeldNotes (2017). All credit for the demonstration goes to the creator; watch the original on YouTube. The written guide below was generated from this video by Docsie. Creator? Request a change or removal.
This procedure explains how to read vernier calipers accurately, covering both the main scale and the vernier scale. It walks through zeroing the caliper, identifying correct measurement surfaces, and interpreting readings down to the nearest 0.1 mm and 0.02 mm. Follow these steps in order to build the skill of reading vernier calipers with confidence, using the worked practice examples to check your understanding.
Purpose
This SOP provides a consistent method for reading metric vernier calipers, from basic whole-millimeter readings on the main scale to precise tenths and hundredths of a millimeter on the vernier scale.
Scope
This procedure applies to metric vernier calipers, including calipers designed to measure to the nearest 0.1 mm and calipers designed to measure to the nearest 0.02 mm (1/50th of a millimeter). All vernier scale types operate on the same basic principle, though this guide focuses on the metric version.
Required equipment
- A metric vernier caliper (0.02 mm precision) for detailed practice
- A metric vernier caliper (0.1 mm precision) for simpler practice readings
- A workpiece or object to measure (optional, for hands-on practice)
Understanding the vernier caliper
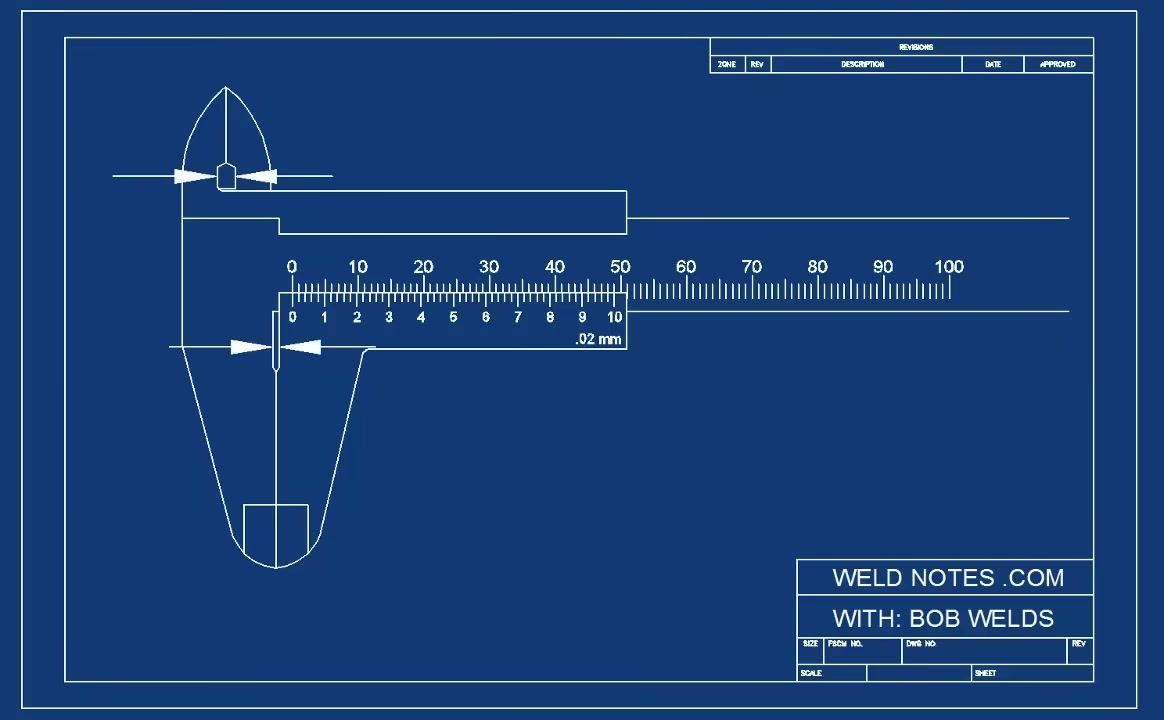
Step 1: Identify the caliper type and precision. Vernier calipers come in different types, but all follow the same basic reading principle. The metric vernier caliper covered in this guide measures to the nearest 1/50th of a millimeter (0.02 mm), since 1 divided by 50 equals 0.02.
Zeroing the caliper and identifying measurement surfaces
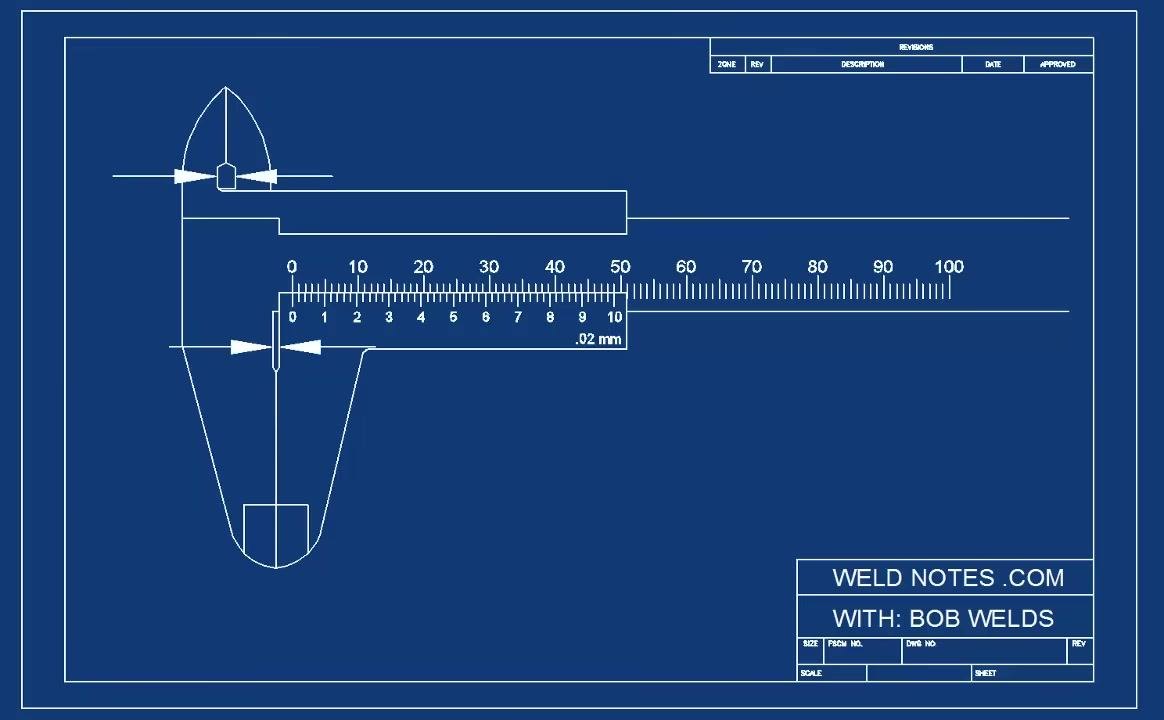
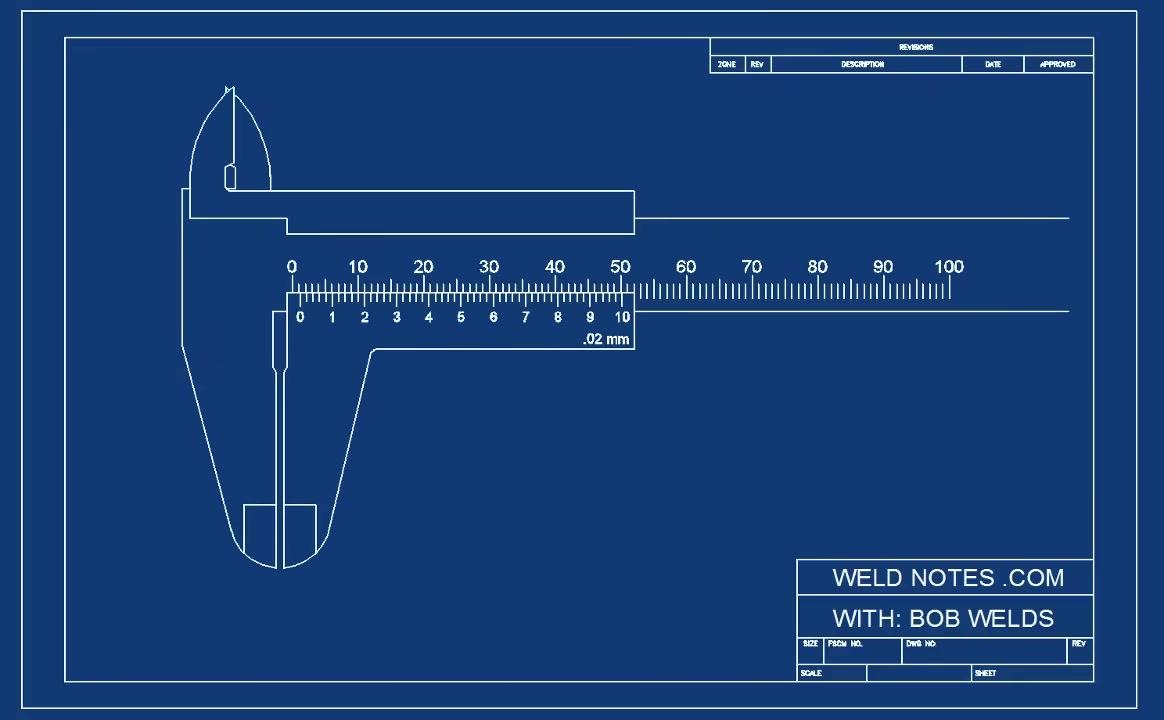
Step 2: Close the jaws fully to measure "zero." Fully closing the jaws is an important calibration step. Measuring zero helps you identify the correct surfaces for taking measurements and shows which areas should not be used.
Step 3: Observe the measurement surfaces and gaps. When the jaws are fully closed, note where the two parts of the caliper line up flush — these are the correct places to take measurements. Do not place objects in the gaps on the caliper, as these are not valid measurement points.
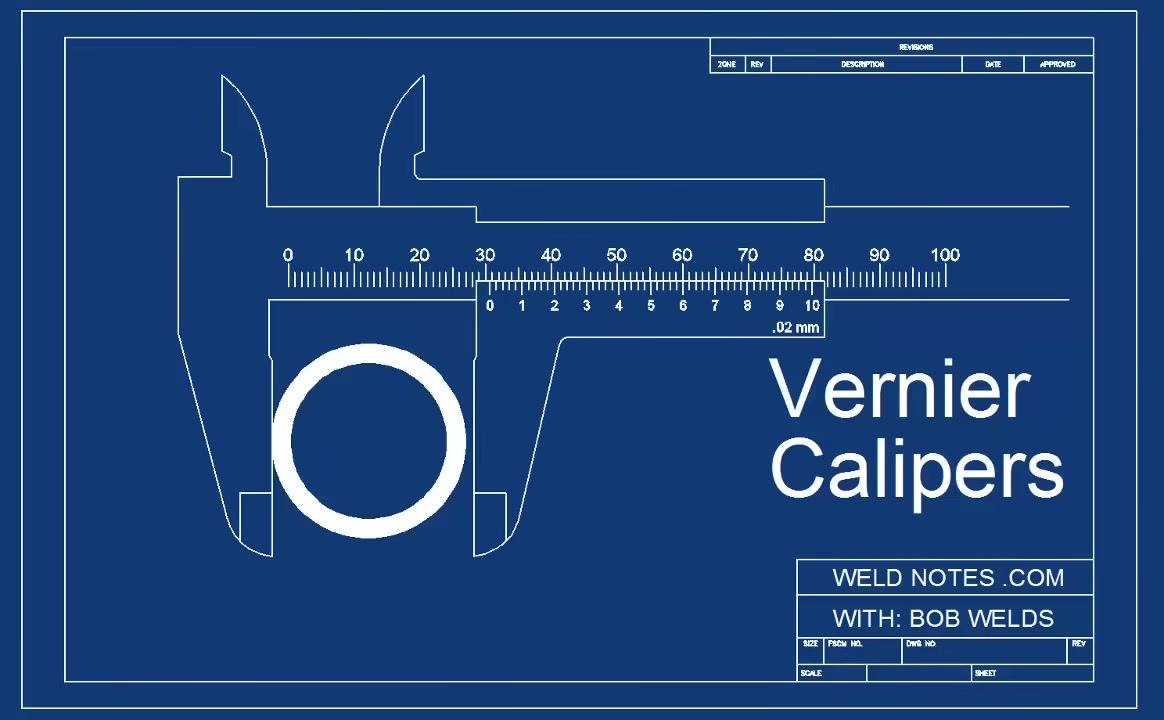
Step 4: Locate the main scale and the vernier scale. Every vernier caliper has two scales: the fixed main scale and the sliding vernier scale. The zero mark on the vernier scale tells you where to read the main scale.
Step 5: Confirm the zero alignment. With the jaws fully closed, the zero mark on the vernier scale should align with a value on the main scale. In this example, the zero mark points to zero on the main scale, confirming correct calibration.
Reading the main scale
Step 6: Take a basic measurement. Close the calipers on the workpiece and read the main scale. Each mark on the main scale represents one whole millimeter. For example, if the zero mark aligns with the fifth mark, the reading is 5 millimeters.
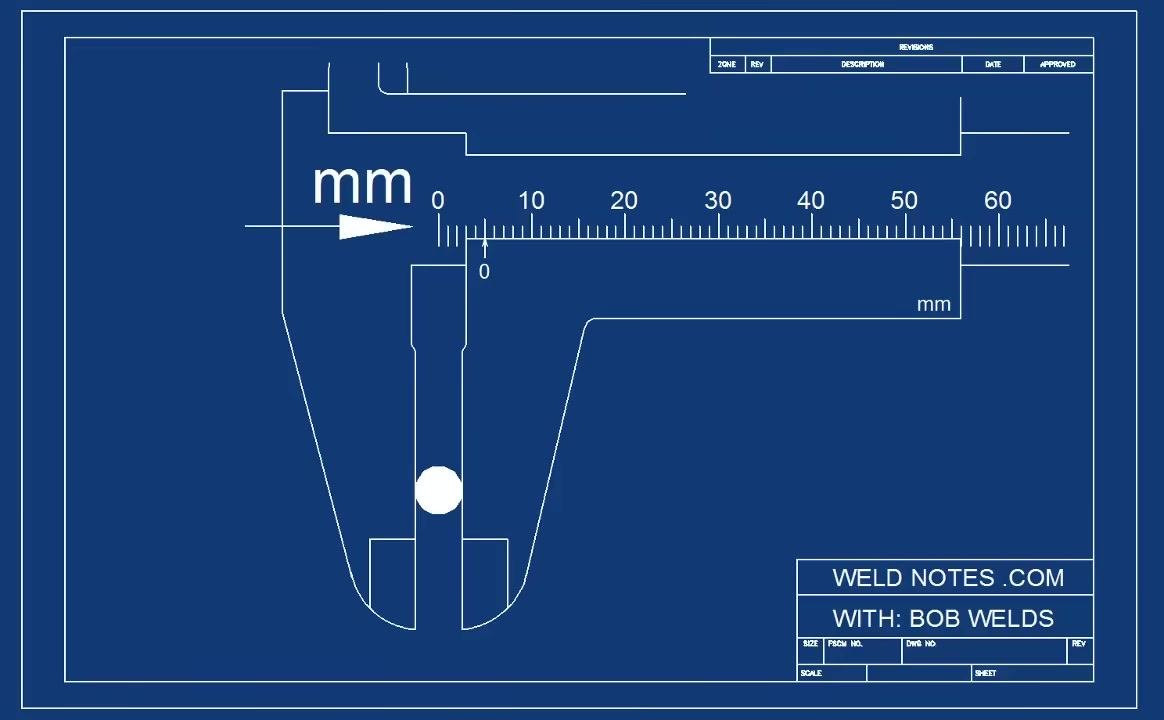
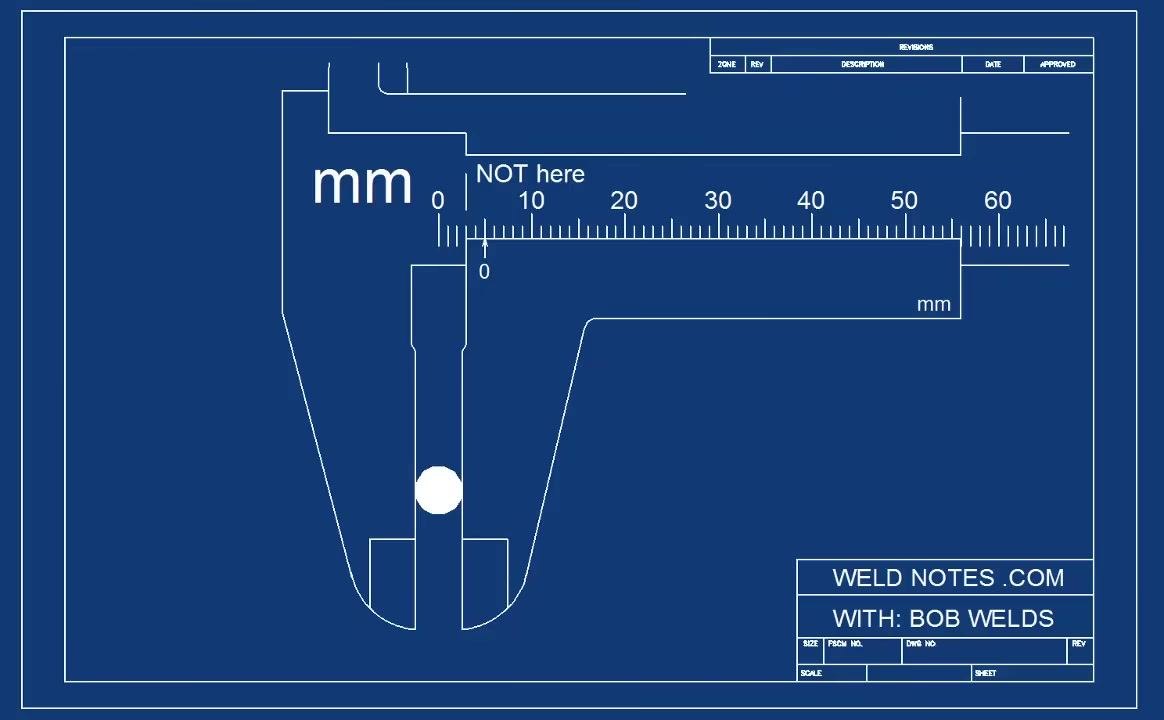
Step 7: Always read from the zero mark. Take your main scale reading from the zero mark on the vernier scale only — never from any other part of the caliper.
Step 8: Avoid common reading mistakes. Do not read from the wrong part of the scale, as this produces an incorrect measurement. Always use the zero mark on the vernier scale as your reference for the main scale reading. For example, if the zero mark aligns with the 5 mm mark, the reading is exactly 5 millimeters.
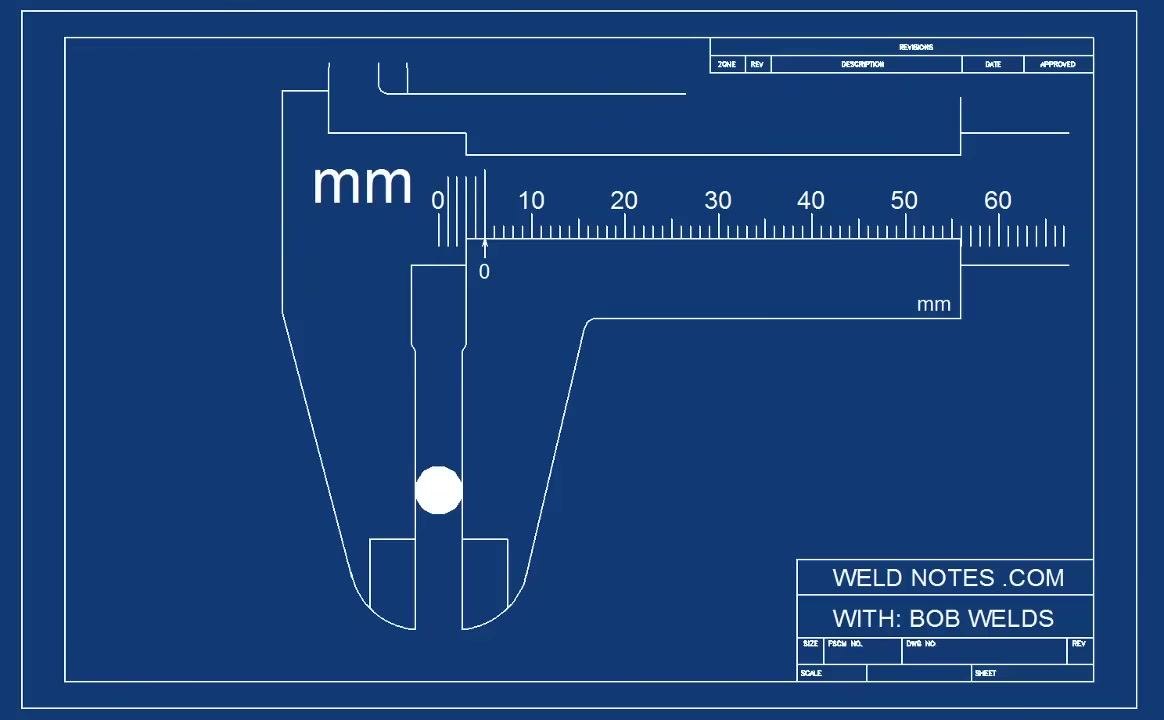
Reading the vernier scale for precision
When the zero mark on the vernier scale falls between two main scale marks (for example, between 5 and 6 mm), you need the vernier scale to determine the precise value beyond the whole millimeter.
Step 9: Learn the structure of the vernier scale. The vernier scale is numbered from 0 to 10, and each mark represents 0.1 mm (one-tenth of a millimeter). This scale lets you read tenths of a millimeter for greater accuracy.
Step 10: Find the best-aligned vernier mark. Look closely at both scales. One vernier mark will line up more closely with a main scale mark than any other. The number on that aligned vernier mark is the additional tenths of a millimeter to add to your main scale reading. For example, if the mark labeled 7 lines up best, add 0.7 mm to the main scale reading.
- If the pointer sits a little more than halfway between two main scale marks, expect the aligned vernier mark to be a little past halfway as well
- Scan the full vernier scale carefully before settling on the best-aligned mark
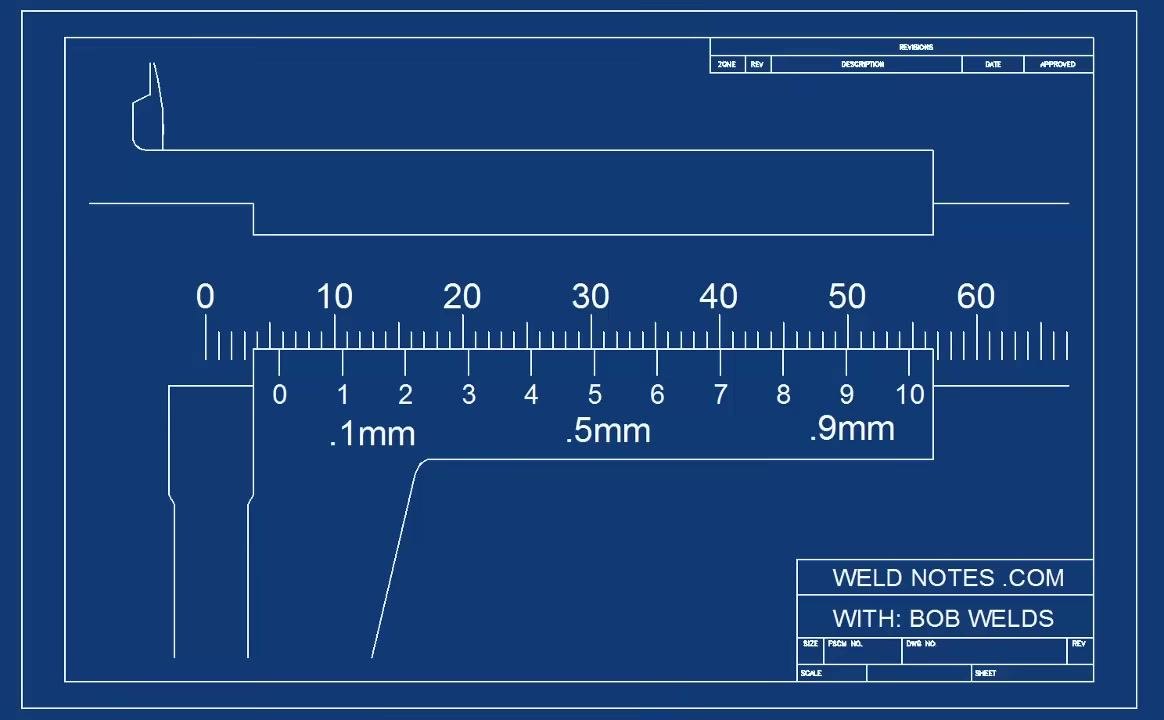
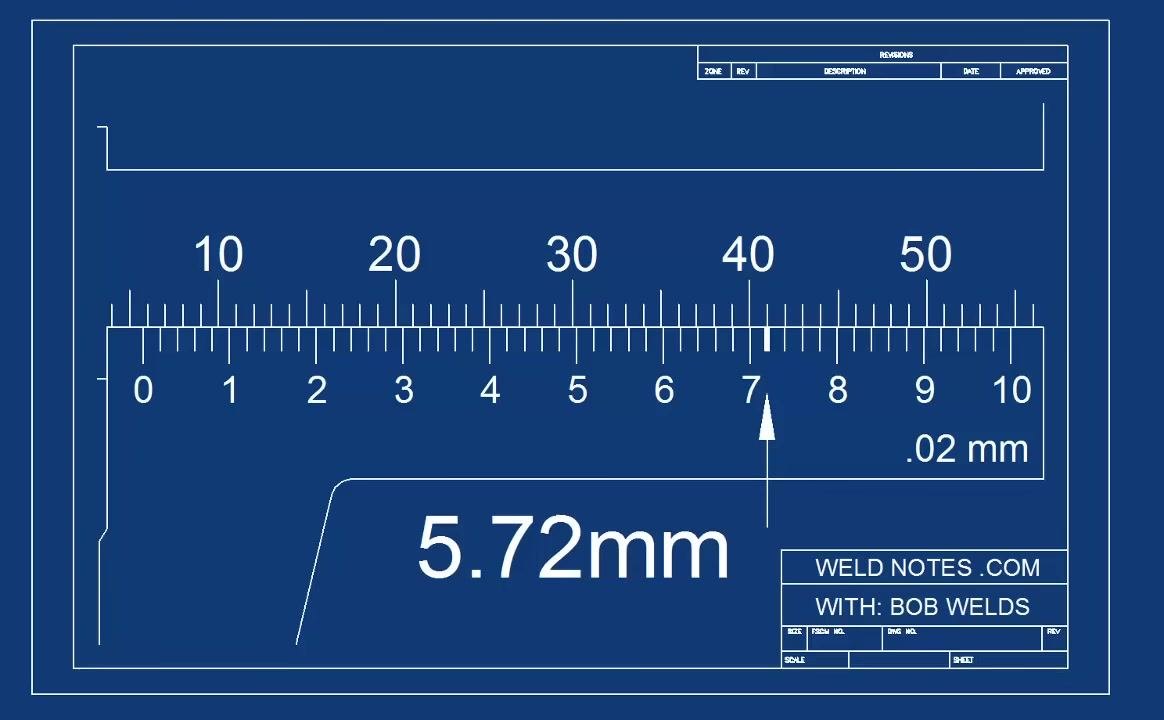
Step 11: Achieve even greater accuracy (0.02 mm calipers). Some calipers, like the one shown, can measure to the nearest 0.02 mm. After identifying the best-aligned vernier mark, check whether the next mark aligns even better. For example, if the mark next to 7 aligns best and is labeled .02 mm, add 0.02 mm to your main scale reading for maximum precision.
Practice: high-precision caliper (0.02 mm)
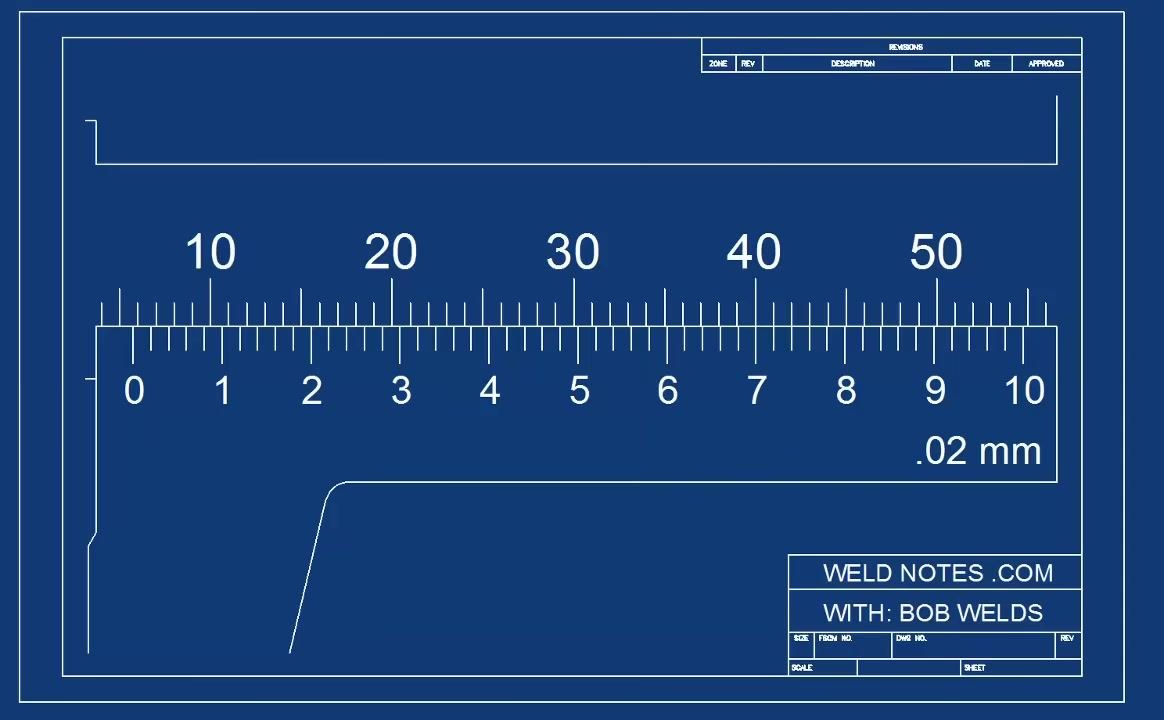
Step 12: Count the increments and calculate the reading. Confirm the value of each mark using the scale label (for example, ".02 mm" means each vernier mark represents 0.02 millimeters). Starting from the "6" on the main scale, count each vernier mark: 0, 0.62, 0.64, 0.66, 0.68, 0.70, 0.72. This gives a reading of 5.72 millimeters.
Practice: simpler caliper (0.1 mm)
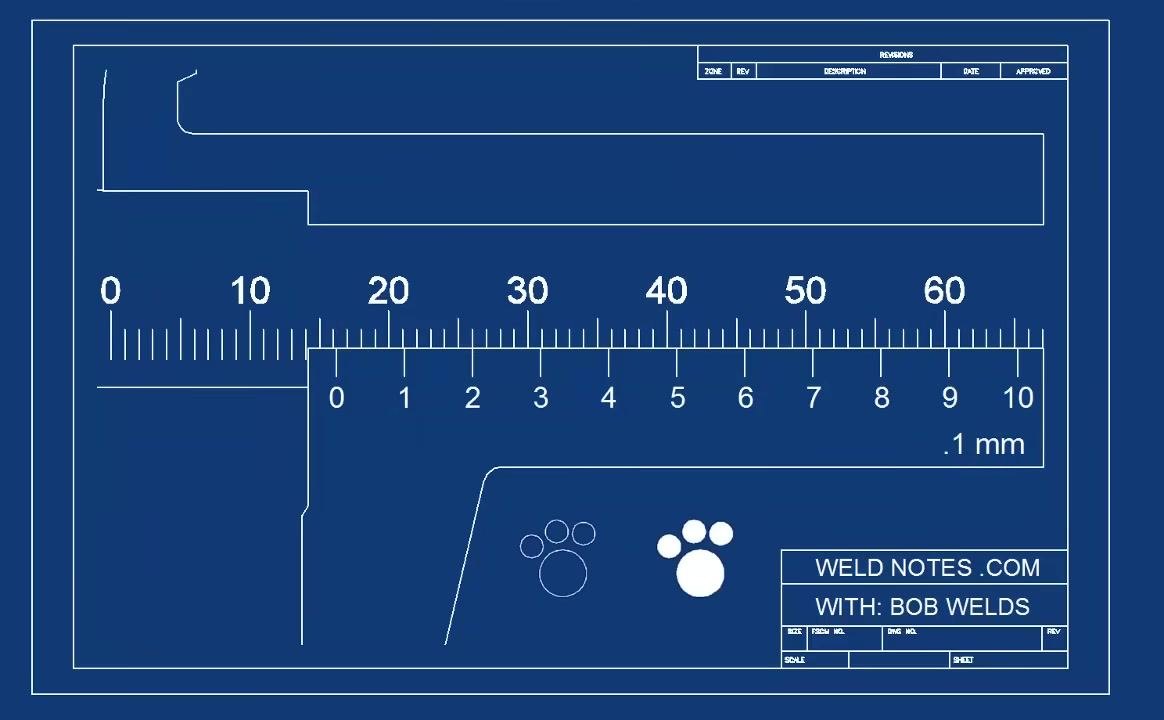
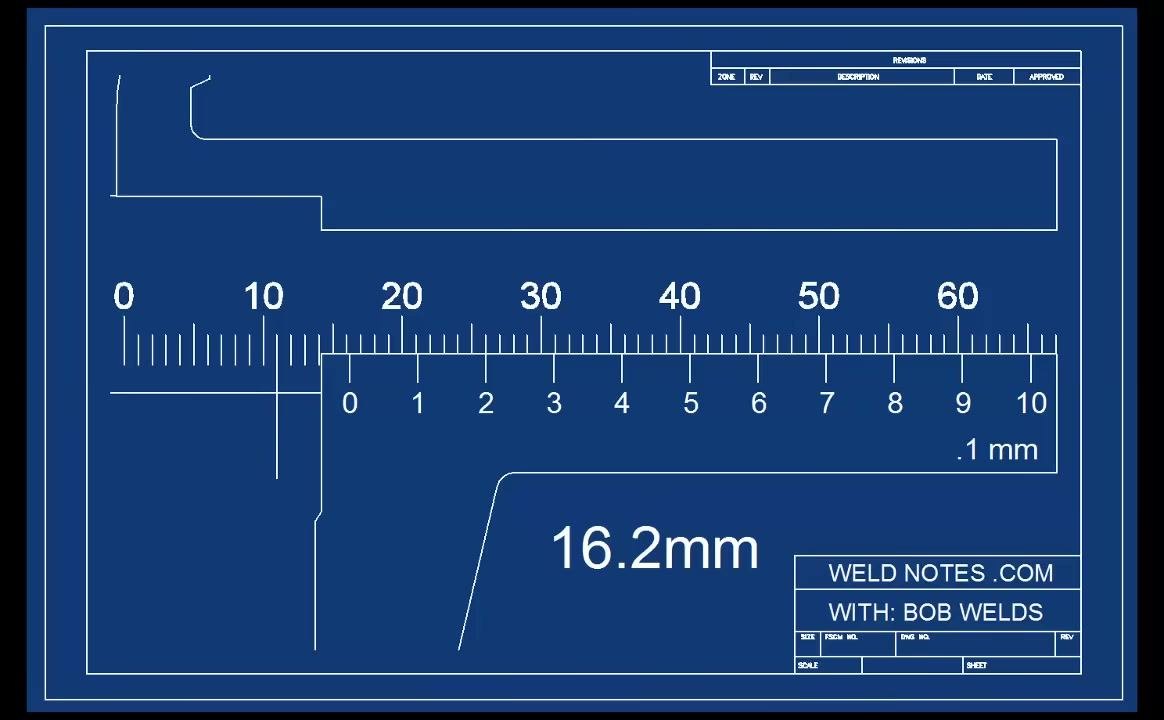
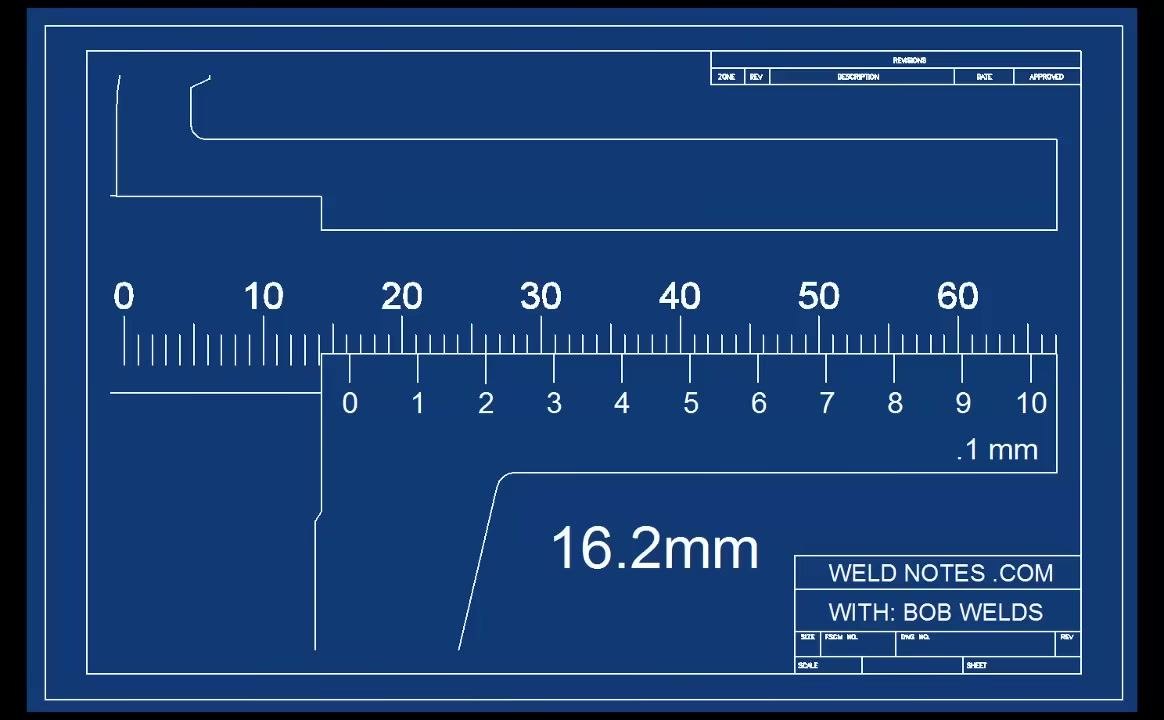
Step 13: Review the overall caliper view. This example uses a caliper that reads to the nearest 0.1 mm for easier practice. Pause and try to read the measurement yourself before checking the answer; the example shown reads 16.2 millimeters.
Step 14: Read the whole millimeters, then the vernier scale. Identify the whole millimeters on the main scale: 10, 11, 12, 13, 14, 15, 16. Notice the reading falls just past the 16 mm mark. Look at the vernier scale to find where the marks line up; the aligned mark is at 0.2, giving a reading of 16.2 millimeters.
Step 15: Confirm the reading. Double-check that the vernier mark at 0.2 lines up best with a main scale mark before finalizing the reading of 16.2 millimeters.
Reviewing the full caliper layout
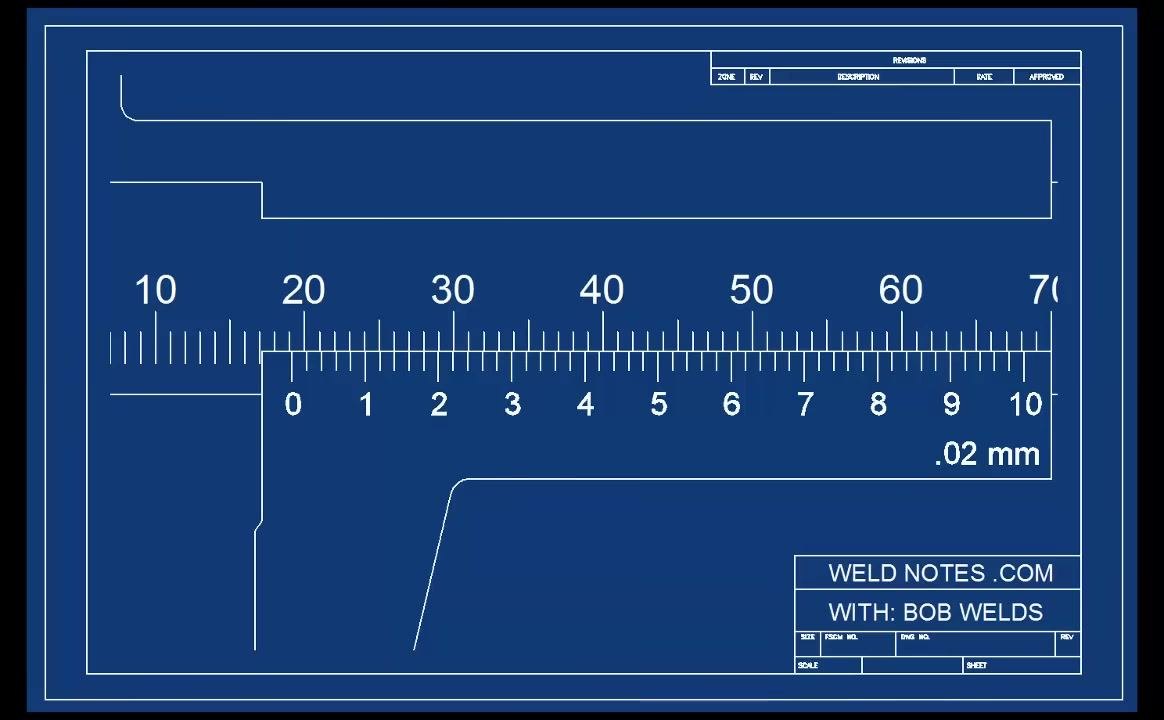
Step 16: Study the complete scale before zooming in. Review the entire caliper: the main scale is marked in millimeters and numbered at intervals of 10 (10, 20, 30, 40, 50, 60, 70), and the vernier scale sits below it, labeled from 0 to 10. The ".02 mm" label indicates that each vernier increment represents 0.02 millimeters. Understanding this full layout helps before moving to a detailed, zoomed-in reading.
Practice example: worked problem 1
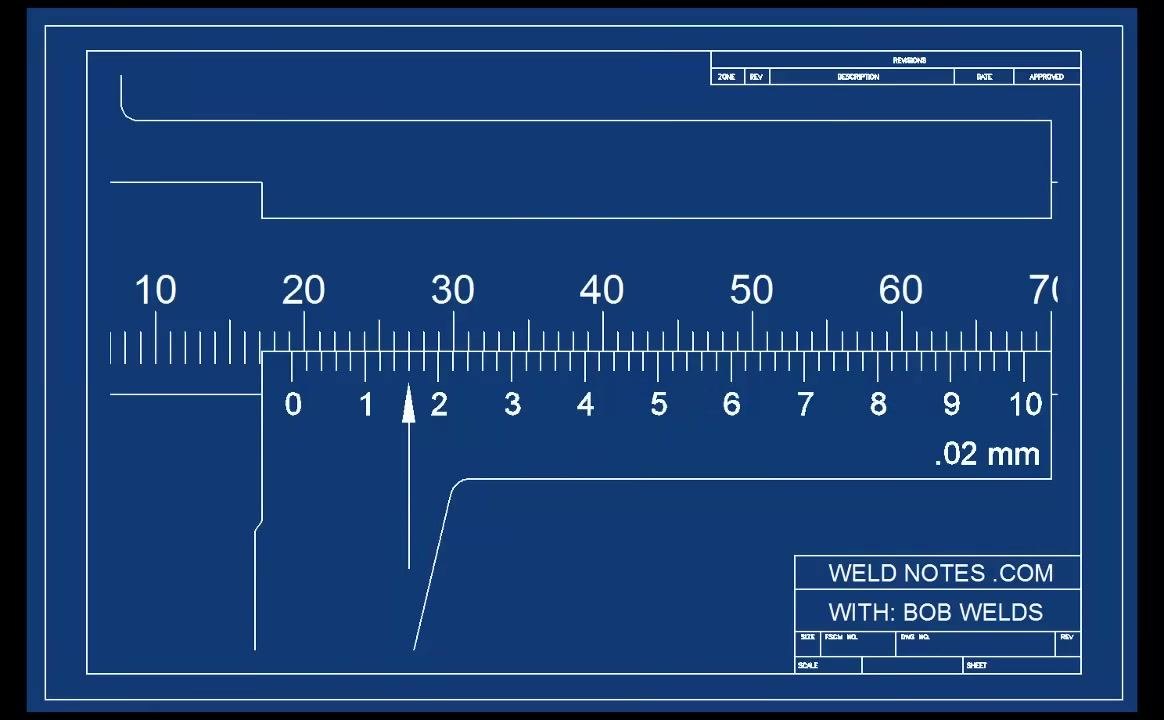
Step 17: Review the scale before the answer is revealed. Examine the vernier caliper scale with both the main and vernier scales visible. Pause here and check your own reading before continuing.
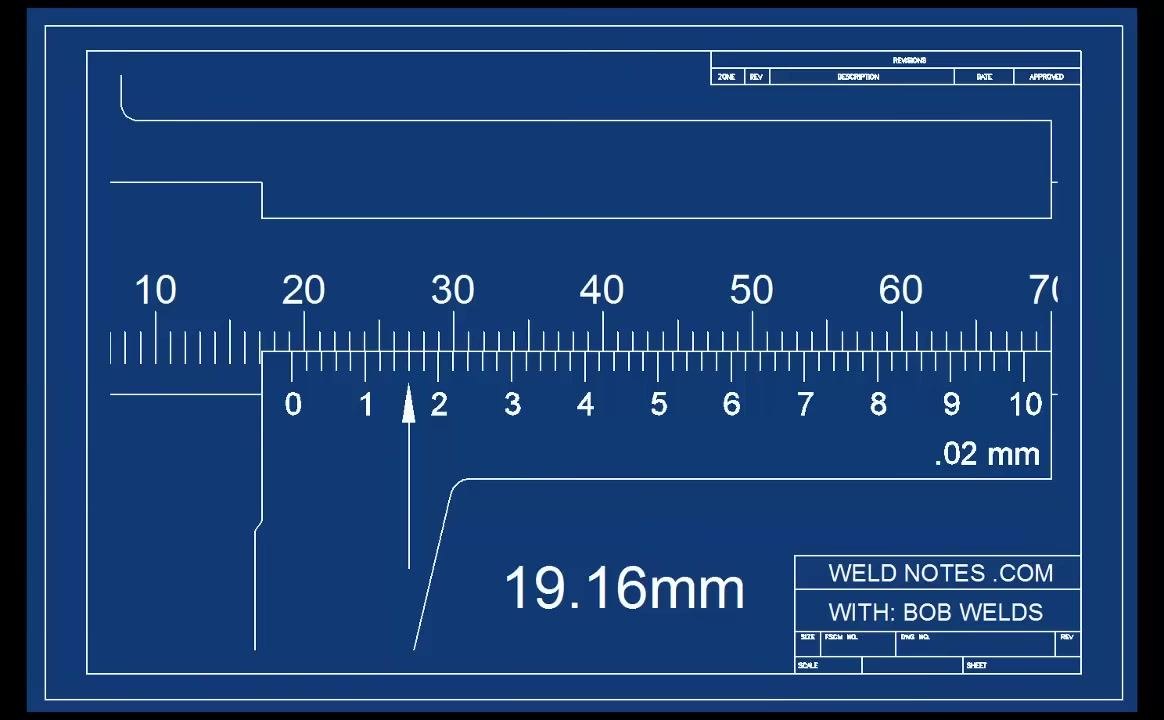
Step 18: Identify the alignment point. An arrow marks the point on the vernier scale that lines up with the main scale — in this case, the 2 mark.
Step 19: Confirm the final reading. With the arrow at the 2 mark, the confirmed reading is 19.16 millimeters.
Practice example: worked problem 2
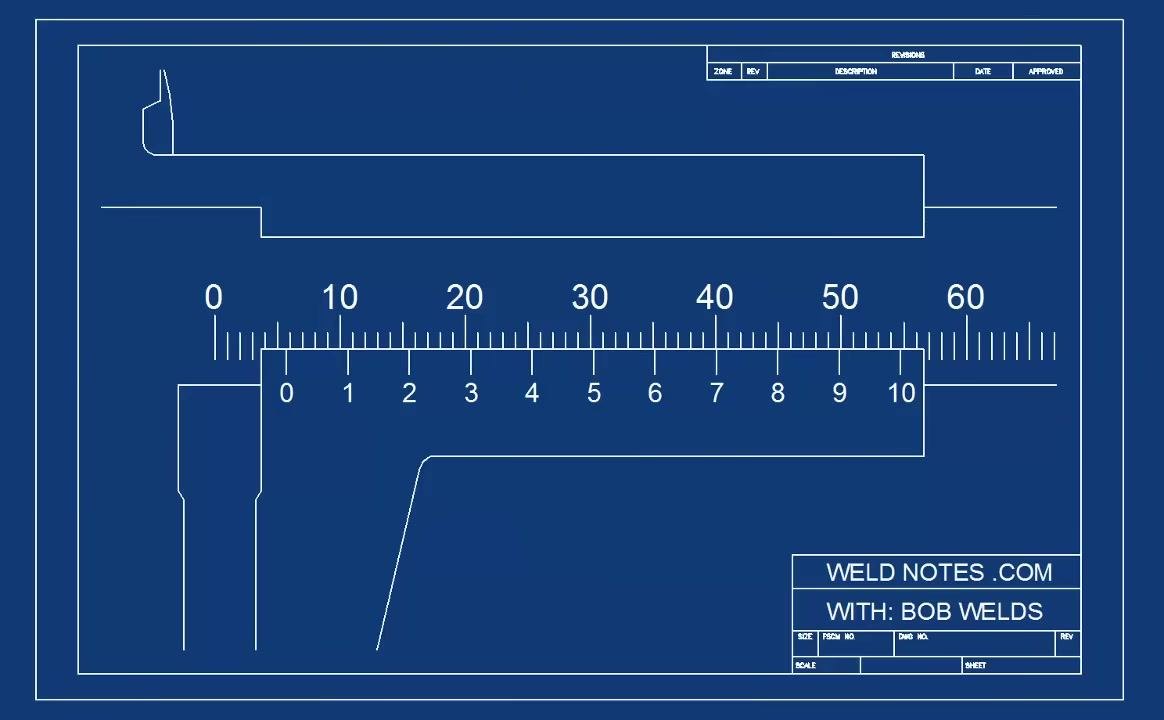
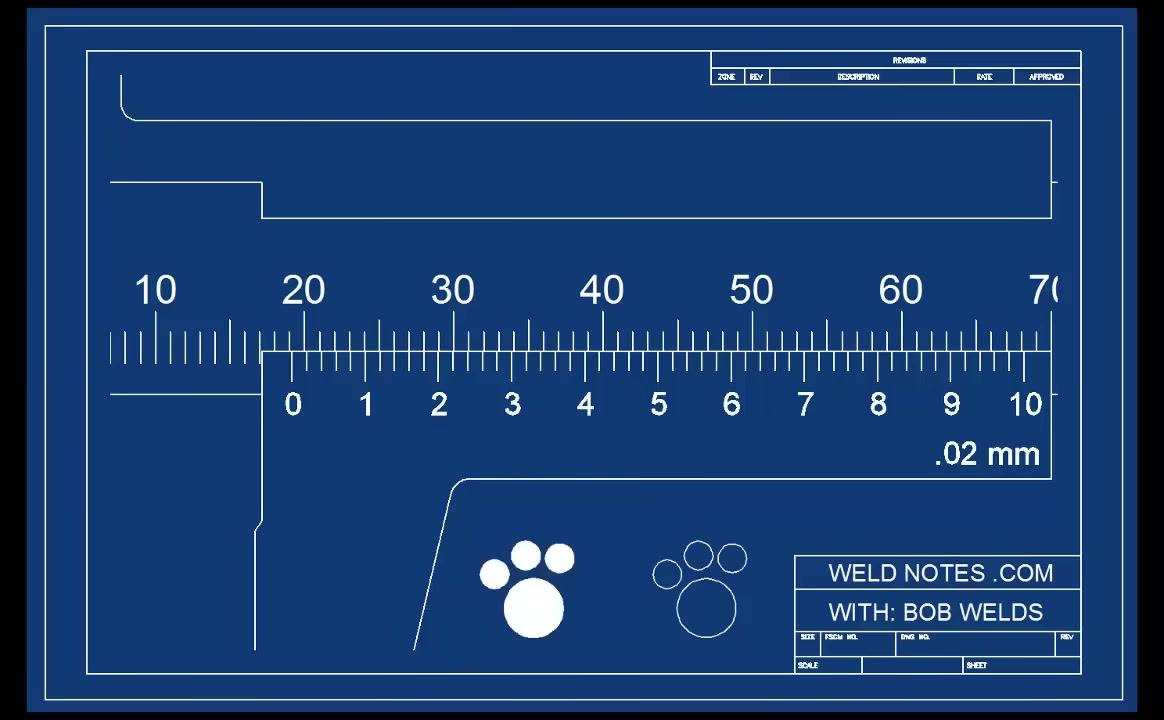
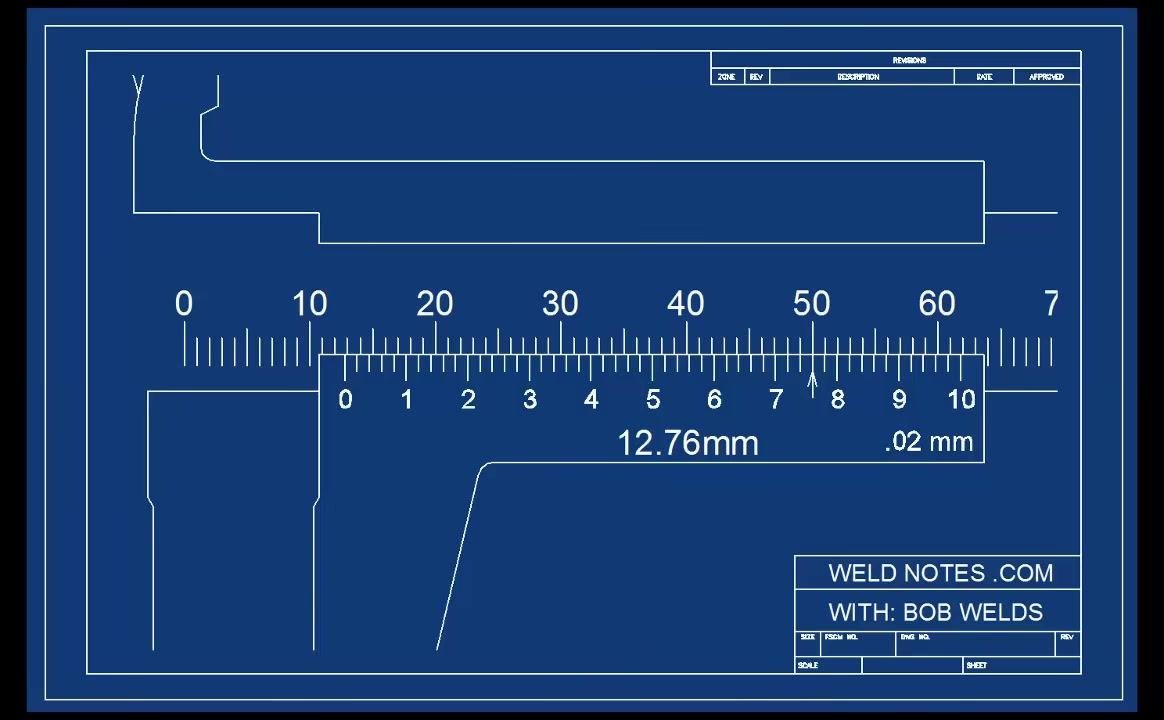
Step 20: Zoom in on the new caliper setup. The main scale is labeled 0, 10, 20, with the vernier scale starting at 0. Pause here and read the whole millimeters before proceeding.
Step 21: Take a closer look at the whole-millimeter value. A further zoomed-in view shows the main scale from 0 to 20 with the vernier scale at 0, along with a partial figure ("12.") that hints at the whole-millimeter portion of the reading.
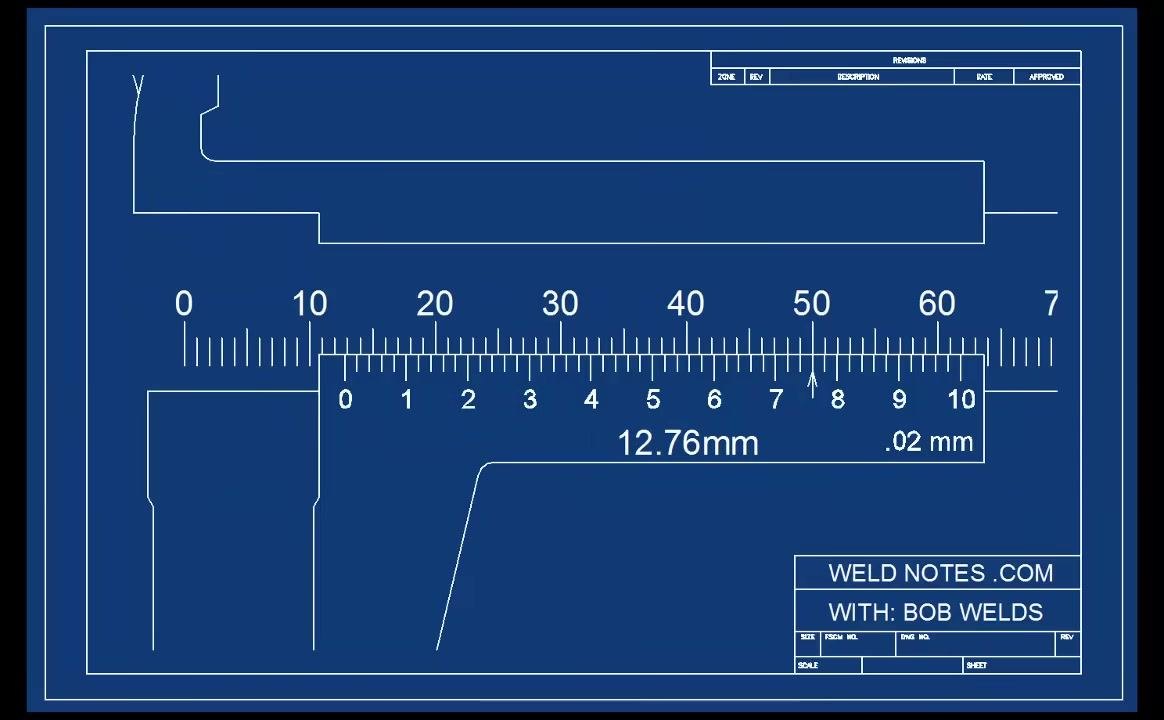
Step 22: Identify the best-aligned vernier mark. Focus on the 40–50 range of the vernier scale, where the large numbers 4 through 8 are shown. Identify which mark lines up best with the main scale to determine the fractional part of the reading.
Step 23: View the final answer. The full caliper scale confirms the answer: 12.76 millimeters, with the vernier scale's arrow pointing to the 8 mark.
Verification and summary
To confirm you can read vernier calipers correctly, verify the following for each measurement:
- The jaws close fully and the zero mark aligns correctly during calibration
- The reading is taken from the zero mark on the vernier scale, not from any other point
- The whole-millimeter value is read from the main scale first
- The best-aligned vernier mark is identified to add the correct tenths (0.1 mm) value
- For high-precision calipers, the next-best-aligned mark is checked to add the correct hundredths (0.02 mm) value
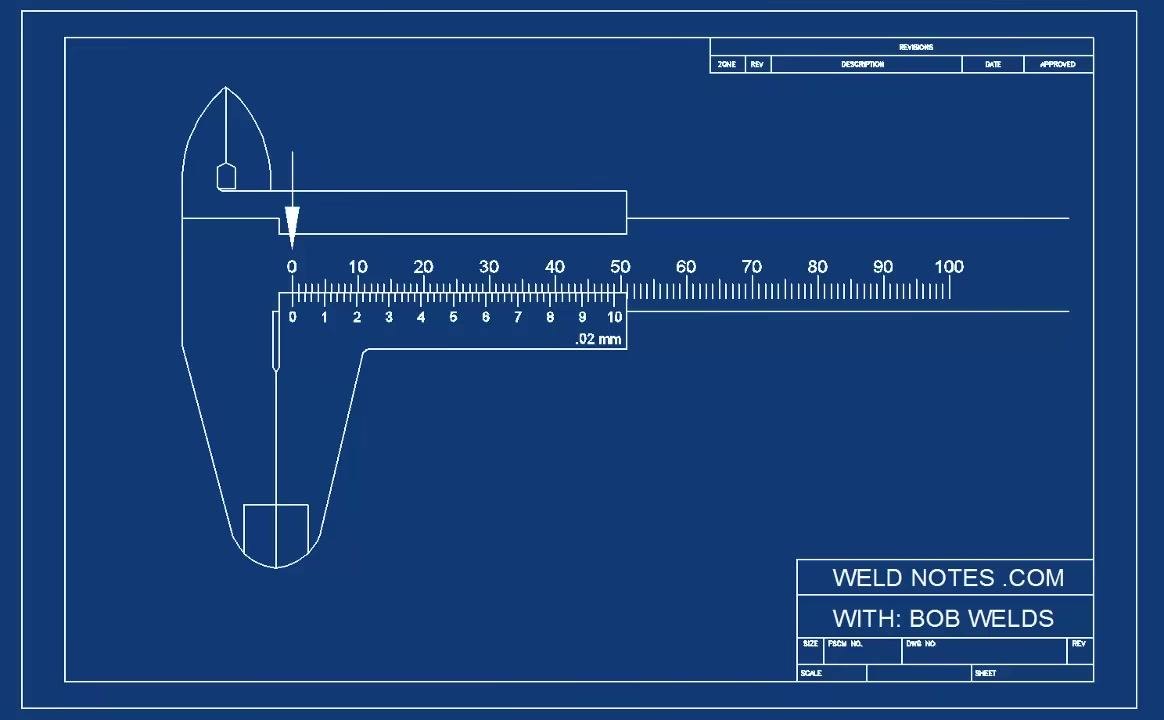
Practicing with both the 0.02 mm caliper and the simpler 0.1 mm caliper reinforces the same core skill: locating the zero mark, reading the main scale, and finding the best vernier alignment.
What's next
Continue practicing with real workpieces to reinforce how to read vernier calipers under different measurement conditions. Repeat the zeroing check periodically to confirm your caliper remains accurately calibrated before taking new measurements.
Generation details: cost, quality tiers
Docsie billed 4,000 credits ($2.80) to analyze this 8-minute video at standard quality. The rewrite, template fill and Word/PDF exports were included. The same video at each quality tier:
| Quality | Frames sampled | Credits | Approx. cost |
|---|---|---|---|
| Draft | every 16-30 s | 2,000 | $1.40 |
| Standard (this guide) | every 8-15 s | 4,000 | $2.80 |
| Detailed | every 4-7 s | 8,000 | $5.60 |
| Ultra | every 1-3 s | 16,000 | $11.20 |
Credits priced at $0.70 per 1,000; plans include a monthly allowance. Enterprise customers on on-premise or bring-your-own-model deployments run this on their own inference and pay no per-video credits.
Generated by Docsie Video-to-Docs on 2026-09-08 from a 7-minute video. Screenshots are frames from the source video and belong to their creator, WeldNotes, whose original is embedded above. If you own this video and want the guide removed or credited differently, contact us and we will act within one business day.