
How to Delete a Ticket in Jira
This guide walks you through logging in to Jira and safely deleting a ticket (issue) from your project backlog. It also covers an alternative deletion method and what to do if you run into problems.
Video: How to Delete a Ticket in Jira (Full 2024 Guide) by DeepLaughs (2024). All credit for the demonstration goes to the creator; watch the original on YouTube. The written guide below was generated from this video by Docsie. Creator? Request a change or removal.
This guide walks you through logging in to Jira and safely deleting a ticket (issue) from your project backlog. It also covers an alternative deletion method and what to do if you run into problems.
Prerequisites
- A web browser with access to the Jira homepage.
- A Jira account (existing or newly created).
- Access to a project with a backlog containing issues.
Access the Jira website
Open your web browser and navigate to the Jira homepage. You will see the main landing page with the message "All great projects start with Jira," along with options such as Try Jira Free, Explore for Project Management, and navigation links including Features, Product guide, Templates, Pricing, and Enterprise.

Log in or sign up
If you already have Jira credentials, click Sign in at the top right and enter your login details.
If this is your first time using Jira, click Get Jira free (yellow button) or a similar sign-up option, then follow the on-screen instructions to create your account.
Navigate to your project backlog
Once logged in, select your project from the dashboard. Go to the Backlog section in the left sidebar under PLANNING. You will see a list of issues in your backlog, each showing its title, status, and other details.
Understand the implications of deleting a ticket
Before proceeding, keep the following in mind:
- Deleting a ticket in Jira is permanent and cannot be undone.
- All comments, attachments, and history associated with the issue will be lost.
- Only proceed if you are certain, and keep a backup if necessary.
Create or select the ticket to delete
If you need to create a new issue for demonstration or testing, click + Create issue, enter the required details (for example, "What needs to be done?"), and press Enter to add it to your backlog.
Select the issue you wish to delete by clicking the checkbox next to its title.
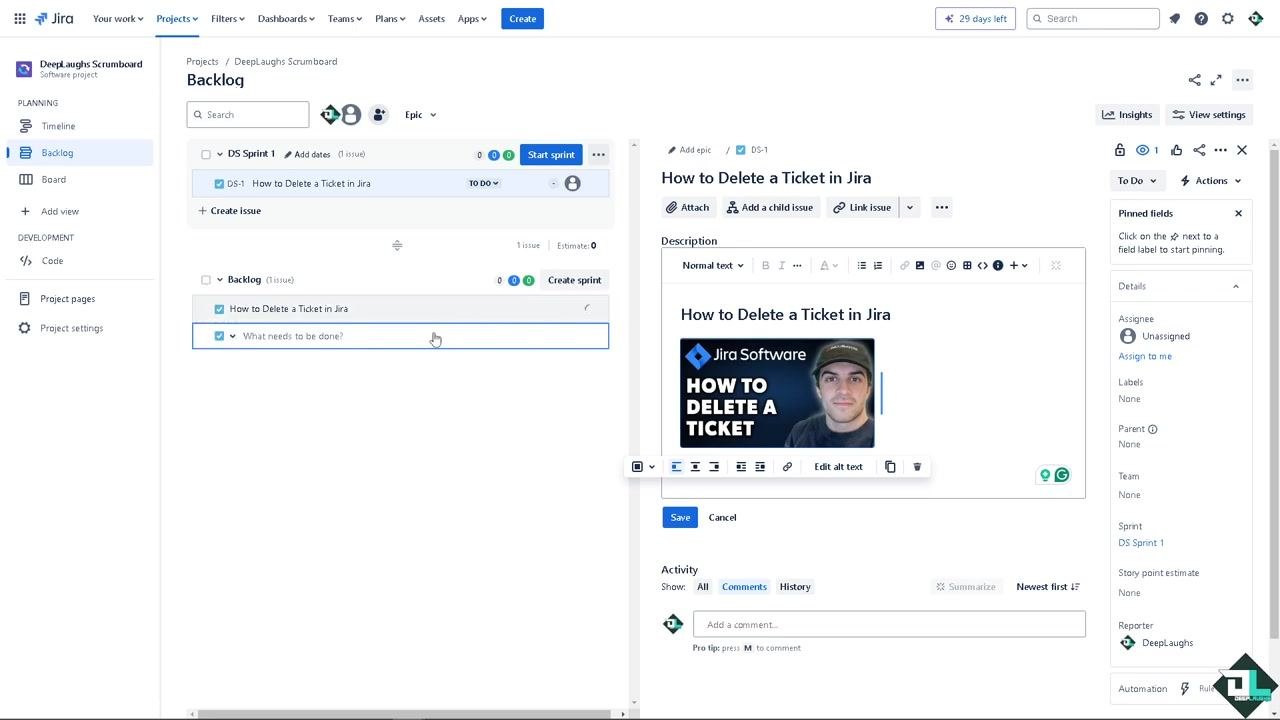
Open the issue actions menu
With the issue selected, locate the ellipsis button (three dots) on the right side of the issue row and click it to open the actions menu.
Delete the issue
In the actions menu, click Delete. A confirmation dialog appears, warning that this action is permanent and will remove all data associated with the issue.
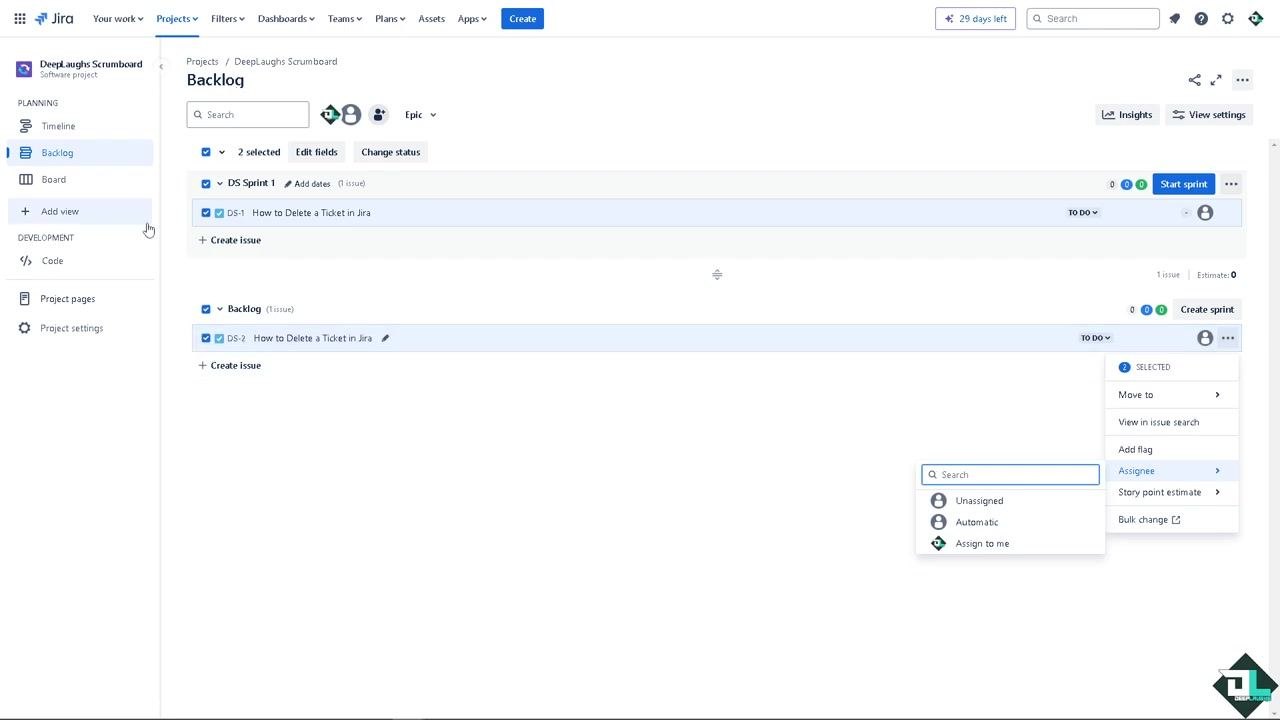
Confirm deletion
Review the warning message carefully. If you are sure, click Delete in the confirmation dialog. The issue will be permanently removed from your backlog.
Important notes
- Always ensure you have a backup or have exported any necessary information before deleting an issue.
- Only delete issues when absolutely necessary to maintain the integrity and quality of your project backlog.
Alternative method: Deleting another ticket
You can also delete a ticket through the issue details panel:
- Click + Create issue, enter the details (for example, "What needs to be done?"), and press Enter to add it to your backlog.
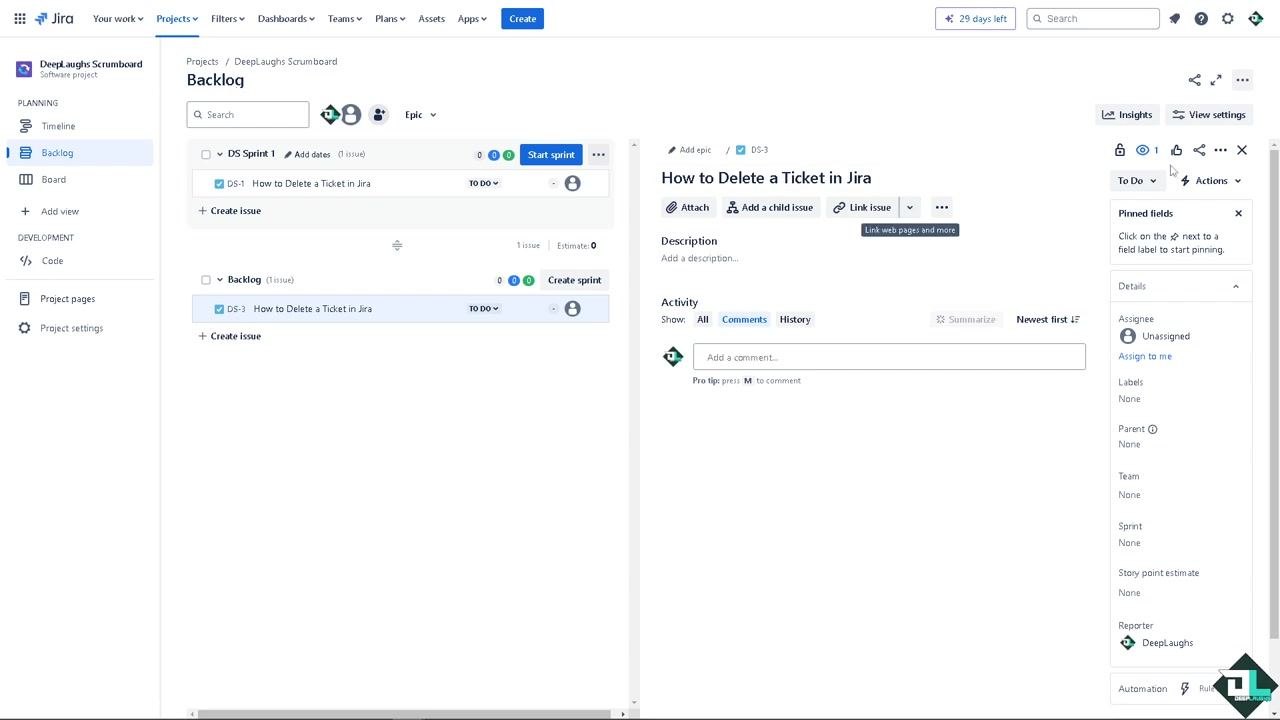
-
Click on the issue you want to delete to open its details panel.
-
In the issue details panel, click the Actions button (three dots) in the upper right corner and select Delete from the dropdown menu.
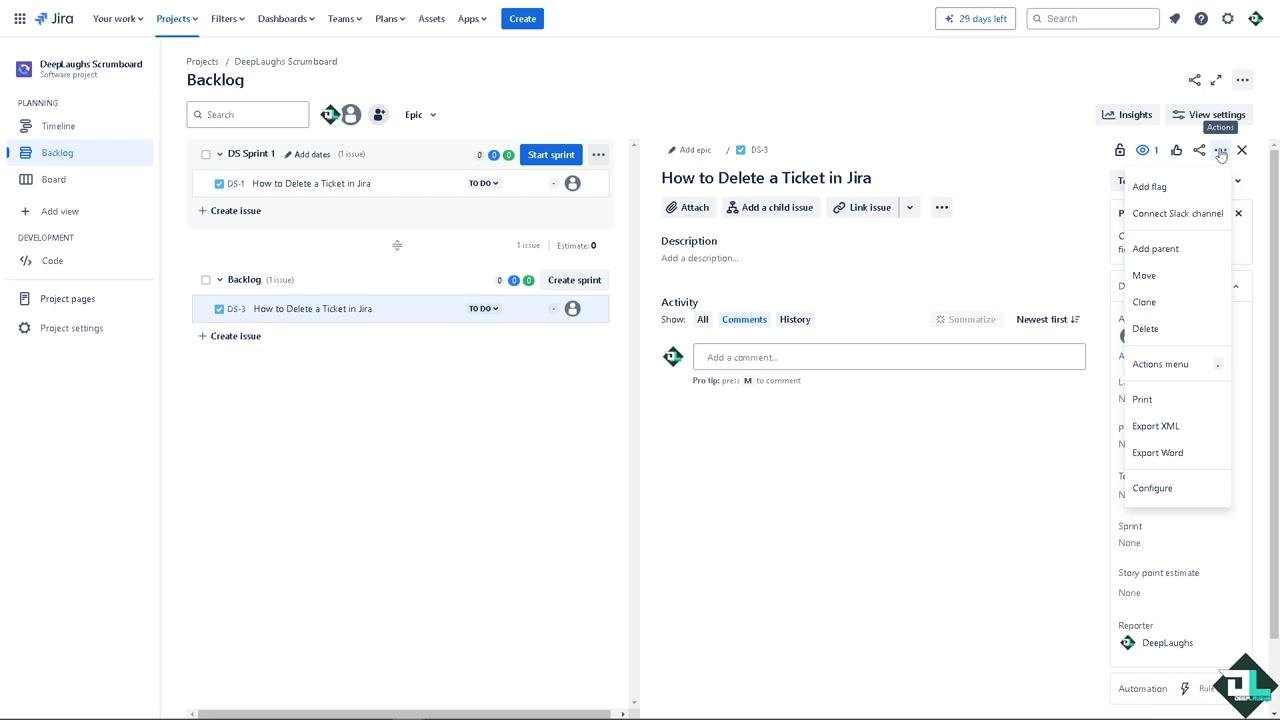
- Confirm the deletion in the dialog that appears. Remember, this action is permanent and will remove all comments, attachments, and data associated with the issue.
Troubleshooting deletion problems
If you encounter a bug or glitch while trying to delete a ticket, go to the Help section in Jira and type your question to search the help documentation.
If self-help does not resolve the issue, visit the Atlassian support page to contact the Jira customer support team. You can raise a support ticket for technical issues or bugs.
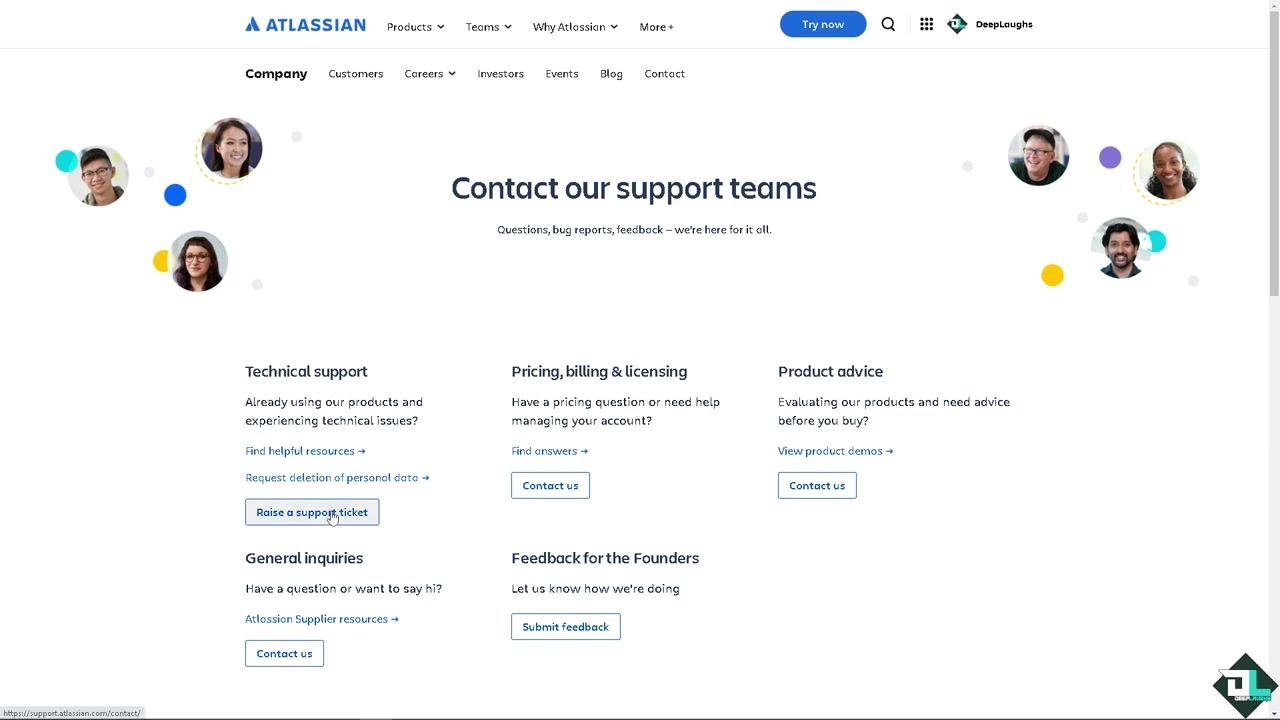
When raising a support ticket, provide specific details about your problem, including:
- The user, project, or issue impacted.
- Steps to reproduce the problem.
- When you first noticed the issue.
- Any relevant screenshots or videos.
The support staff will provide troubleshooting steps and insights to help resolve your issue.
What's next
- If you want to learn how to recover deleted issues or tickets in Jira, refer to the separate video or resource mentioned on the channel.
- If you are unsure about deleting an issue, consider resolving or closing it instead.
By following these steps, you can delete tickets in Jira, troubleshoot any issues you encounter, and contact support for further assistance.
Generation details: cost, quality tiers
Docsie billed 2,000 credits ($1.40) to analyze this 4-minute video at standard quality. The rewrite, template fill and Word/PDF exports were included. The same video at each quality tier:
| Quality | Frames sampled | Credits | Approx. cost |
|---|---|---|---|
| Draft | every 16-30 s | 1,000 | $0.70 |
| Standard (this guide) | every 8-15 s | 2,000 | $1.40 |
| Detailed | every 4-7 s | 4,000 | $2.80 |
| Ultra | every 1-3 s | 8,000 | $5.60 |
Credits priced at $0.70 per 1,000; plans include a monthly allowance. Enterprise customers on on-premise or bring-your-own-model deployments run this on their own inference and pay no per-video credits.
Generated by Docsie Video-to-Docs on 2026-09-08 from a 3-minute video. Screenshots are frames from the source video and belong to their creator, DeepLaughs, whose original is embedded above. If you own this video and want the guide removed or credited differently, contact us and we will act within one business day.