
How to Create a Filter in Jira
Jira filters let you save specific search criteria so you can quickly access the issues most relevant to your work. This guide walks you through creating a new filter, saving it, adjusting its permissions, and editing it later.
Video: How to Create Filter in Jira Step by Step Tutorial – Jira How-to's Series by Jexo by Monday Coffee by Appfire (2022). All credit for the demonstration goes to the creator; watch the original on YouTube. The written guide below was generated from this video by Docsie. Creator? Request a change or removal.
Jira filters let you save specific search criteria so you can quickly access the issues most relevant to your work. This guide walks you through creating a new filter, saving it, adjusting its permissions, and editing it later.
Prerequisites
- Access to a Jira instance with permission to create and save filters.
Navigate to filters in Jira
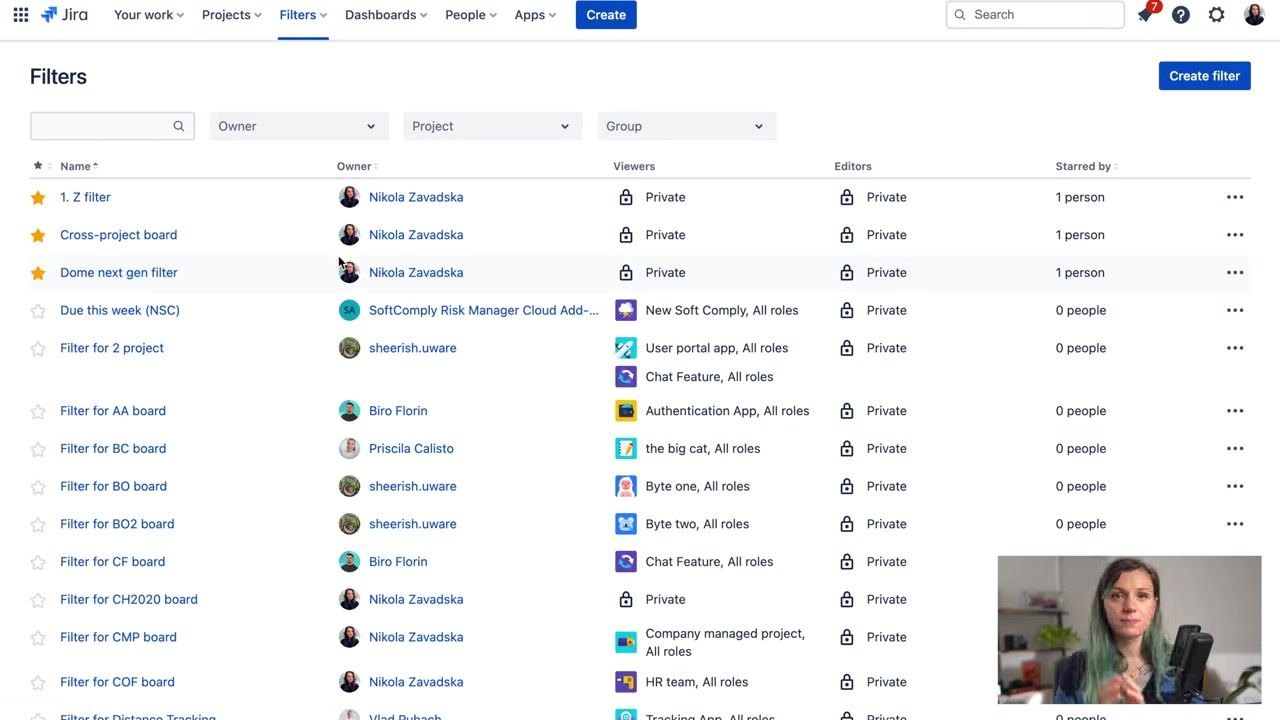
Go to the top navigation bar in Jira and click on the Filters menu. Select View all filters from the dropdown to display a list of all filters available in your Jira instance, including default filters and those shared by other users.
Review existing filters
Browse the list to see filters by name, owner, project, group, viewers, editors, and who has starred them. Note that some filters are private, while others are shared with specific groups or roles.
Create a new filter
Click the Create filter button in the top right corner of the Filters page. You will be redirected to the Jira Search interface.
Define your filter using basic search
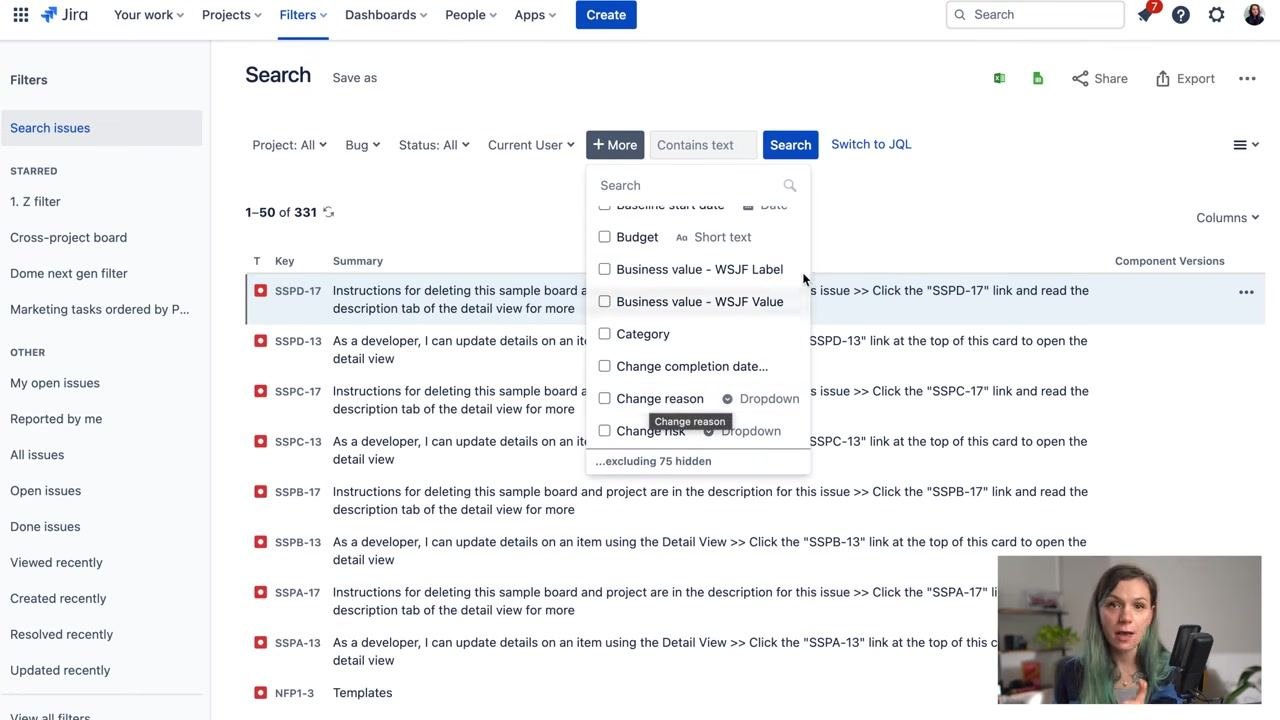
In the Search interface, use the dropdown menus to select your filter criteria:
- Project: Choose the relevant project(s).
- Issue Type: For example, select "Bug".
- Status: Choose the status of issues you want to filter.
- Assignee: Select "Current User" to filter issues assigned to yourself.
- Click + More to add additional fields to your filter.
For example, to view all bugs assigned to yourself, set Issue Type to "Bug" and Assignee to "Current User".
Add advanced criteria using JQL (optional)
If you need more advanced filtering, click Switch to JQL and enter your query in the provided field. For example:
assignee in (currentUser()) AND issuetype = Bug order by created DESC
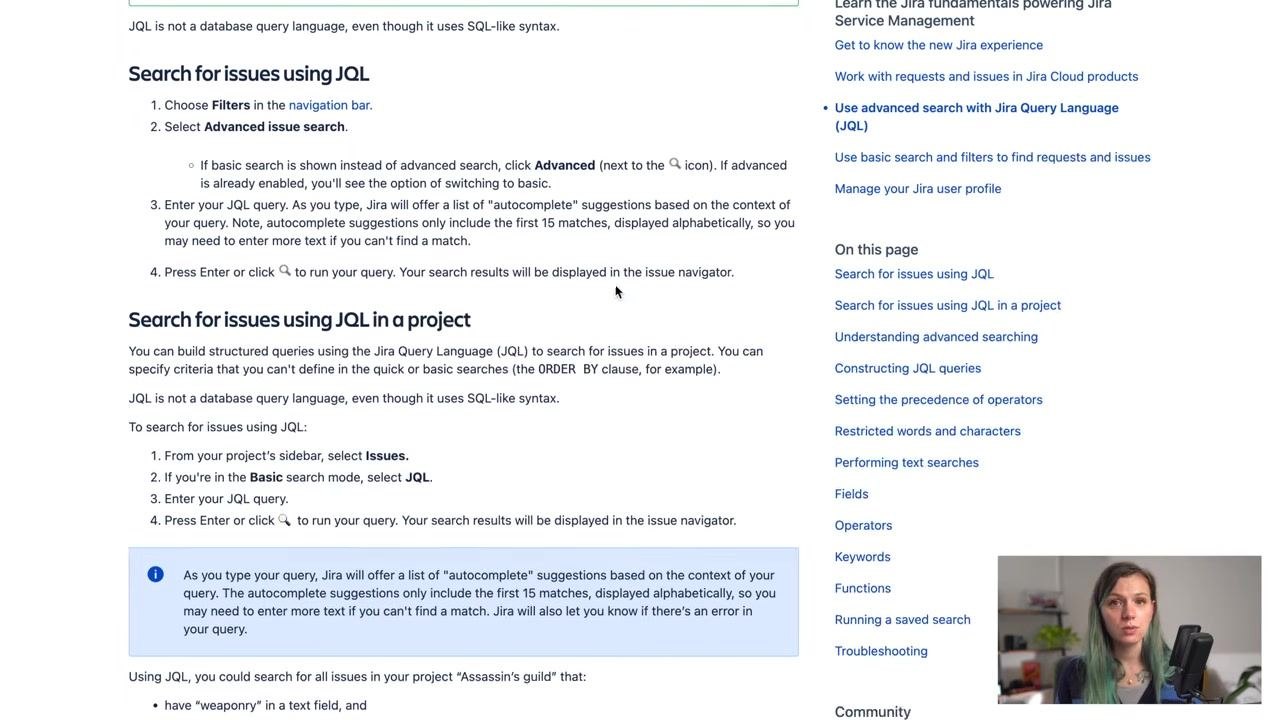
Use the help icon next to the search bar to access the Jira Query Language documentation for guidance on constructing queries.
Access JQL documentation (optional)
Click the help icon to open the Jira Query Language documentation. Review the instructions and examples provided to help you build more complex queries.
Save your filter
Once your filter criteria are set, either through basic search or JQL, click the Save as button at the top of the search results. Enter a name for your filter in the dialog that appears and confirm to save it for future use.
Name and save your filter
In the Save Filter dialog, enter a descriptive name for your filter—for example, "All bugs assigned to Nikki" in the Filter Name field. Click Submit to save the filter.
Review filter details and permissions
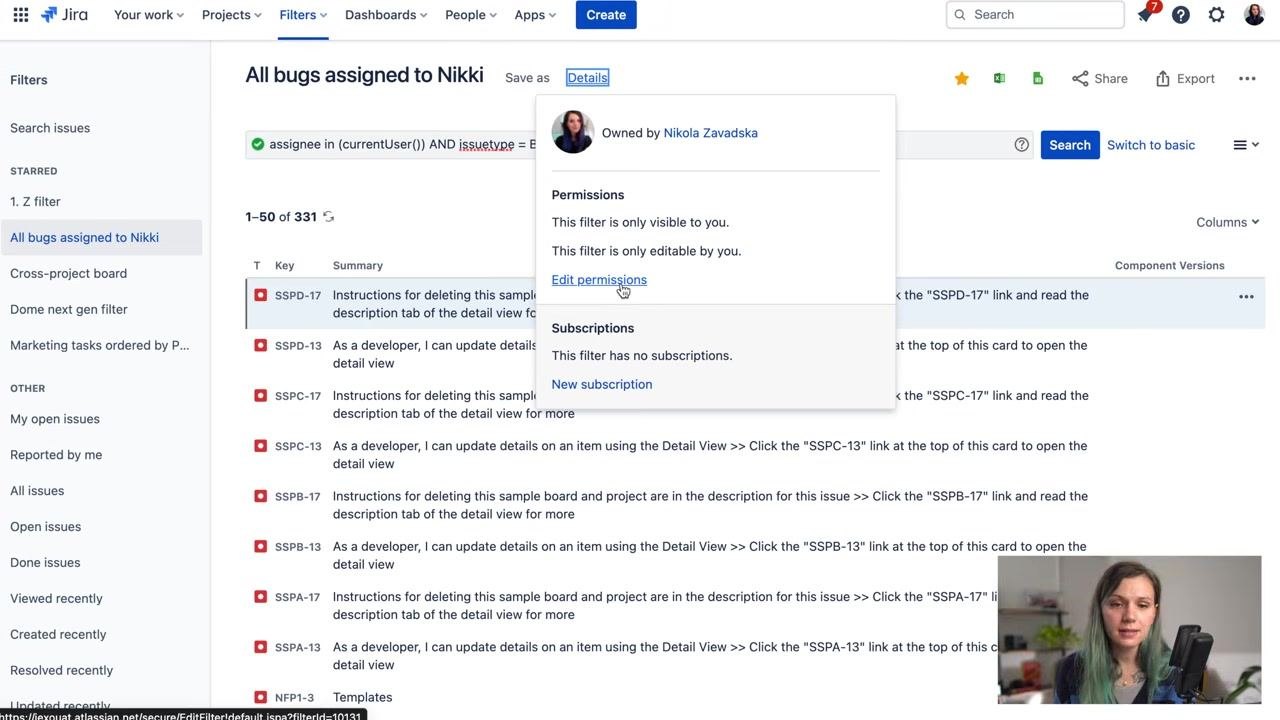
Once saved, your filter appears in the left sidebar under "Starred" or "Other" filters. Click the filter name (for example, "All bugs assigned to Nikki") to view its details, then click the Details link near the filter name to open the filter information panel.
Review the owner, permissions, and subscriptions. By default, the filter is only visible and editable by you. To change who can view or edit the filter, click Edit permissions.
Edit filter permissions
In the permissions dialog, choose who can view or edit the filter:
- Grant access to everyone in the organization.
- Grant access to specific groups.
- Restrict access to certain projects.
Adjust permissions as needed to share the filter with colleagues or teams, then save your changes.
Locate and star your filter
Find your saved filter in the "All filters" list or under "Starred" in the sidebar. Click the star icon next to the filter name to mark it as a favorite—this ensures it appears at the top of your filter list for quick access.
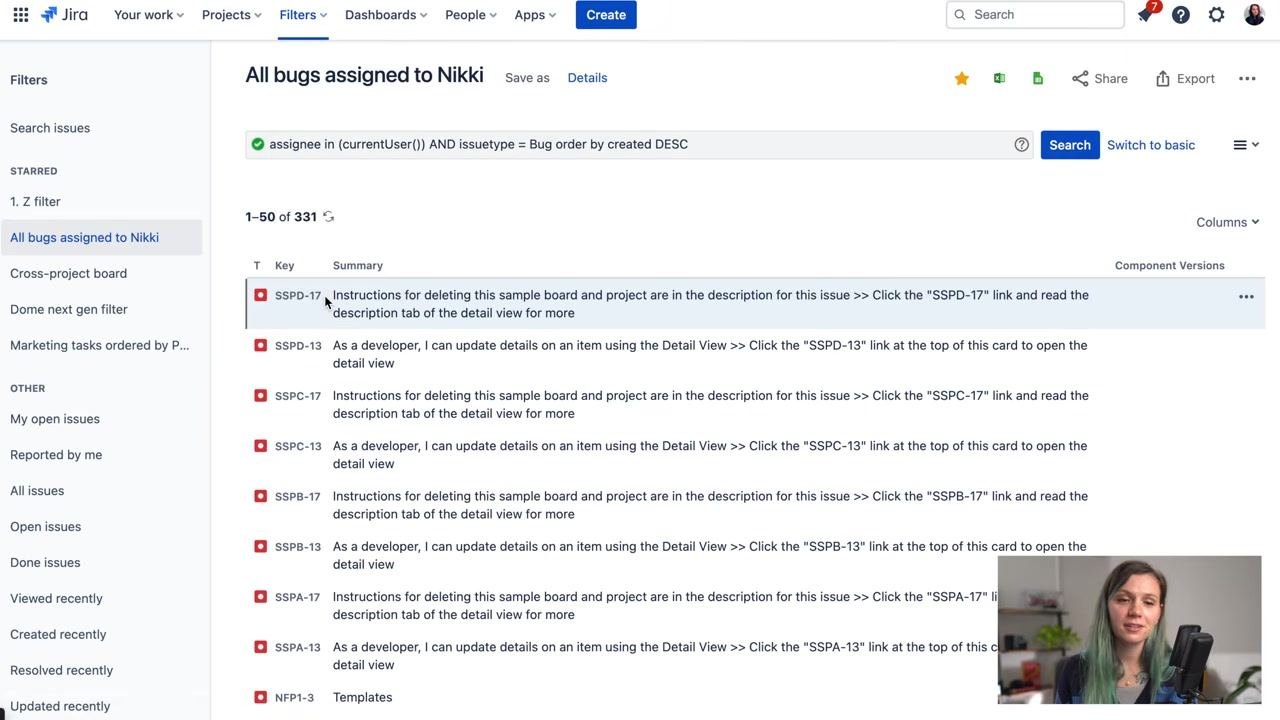
Edit an existing filter
To modify a saved filter, click its name in the sidebar. Jira opens the search interface with the filter's current criteria. Make any necessary changes to the filter criteria, such as updating the JQL or changing fields, then click the Save button at the top to update the filter with your changes.
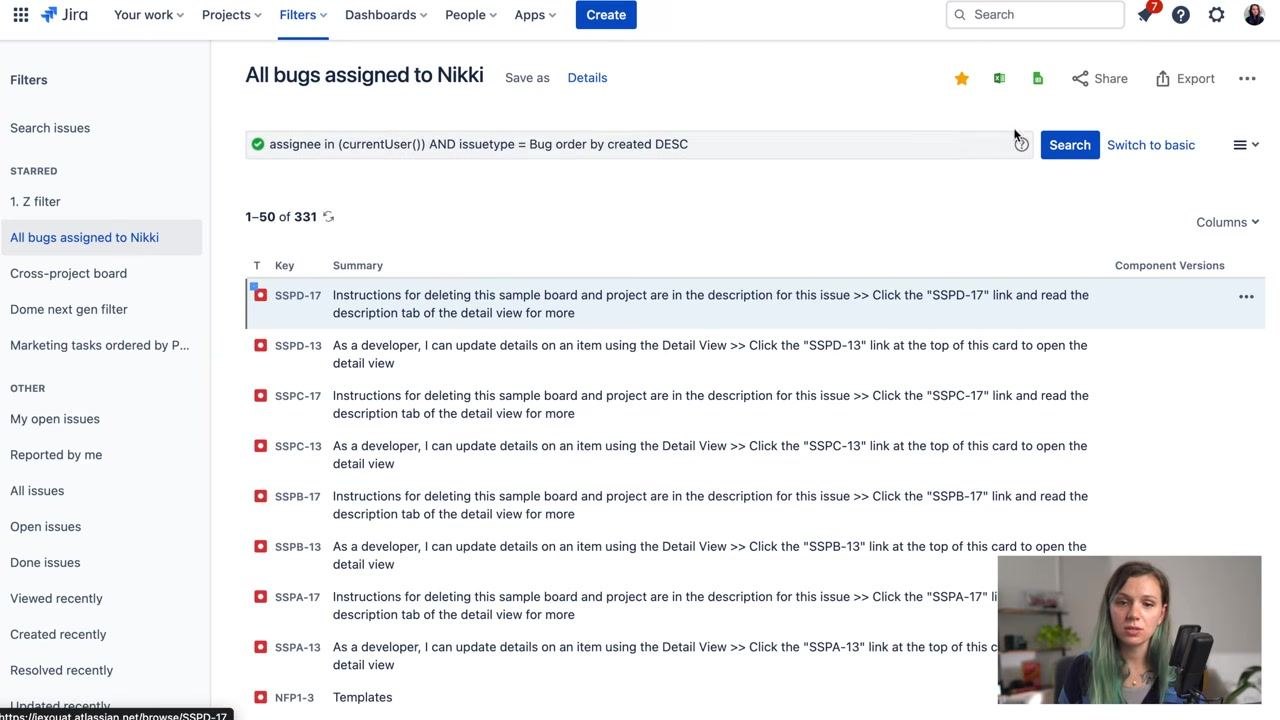
Verify the filter save confirmation
After saving, look for a confirmation message at the top right indicating your filter has been successfully saved. If your search returns no results, Jira displays a "No issues were found to match your search" message.
Summary
By following these steps, you can create, customize, save, share, and edit filters in Jira, ensuring you and your team have quick access to the issues most relevant to your work and reporting needs.
What's next
For additional Jira tutorials and tips, subscribe to the channel as prompted at the end of the video.
Generation details: cost, quality tiers
Docsie billed 2,000 credits ($1.40) to analyze this 4-minute video at standard quality. The rewrite, template fill and Word/PDF exports were included. The same video at each quality tier:
| Quality | Frames sampled | Credits | Approx. cost |
|---|---|---|---|
| Draft | every 16-30 s | 1,000 | $0.70 |
| Standard (this guide) | every 8-15 s | 2,000 | $1.40 |
| Detailed | every 4-7 s | 4,000 | $2.80 |
| Ultra | every 1-3 s | 8,000 | $5.60 |
Credits priced at $0.70 per 1,000; plans include a monthly allowance. Enterprise customers on on-premise or bring-your-own-model deployments run this on their own inference and pay no per-video credits.
Generated by Docsie Video-to-Docs on 2026-09-08 from a 3-minute video. Screenshots are frames from the source video and belong to their creator, Monday Coffee by Appfire , whose original is embedded above. If you own this video and want the guide removed or credited differently, contact us and we will act within one business day.