
How to Create a Subtask in Jira
Subtasks help you break down a Jira issue into smaller, trackable pieces of work. This guide walks you through how to create a subtask in Jira, from locating the parent issue to confirming that the subtask has been added successfully.
Video: How to Add or Create a Subtask in Jira [2026 Full Guide] by BM Tech Tutorials (2025). All credit for the demonstration goes to the creator; watch the original on YouTube. The written guide below was generated from this video by Docsie. Creator? Request a change or removal.
Subtasks help you break down a Jira issue into smaller, trackable pieces of work. This guide walks you through how to create a subtask in Jira, from locating the parent issue to confirming that the subtask has been added successfully.
Prerequisites
- Access to a Jira instance with an active login.
- A project containing at least one existing issue to which you want to add a subtask.
Open your Jira dashboard
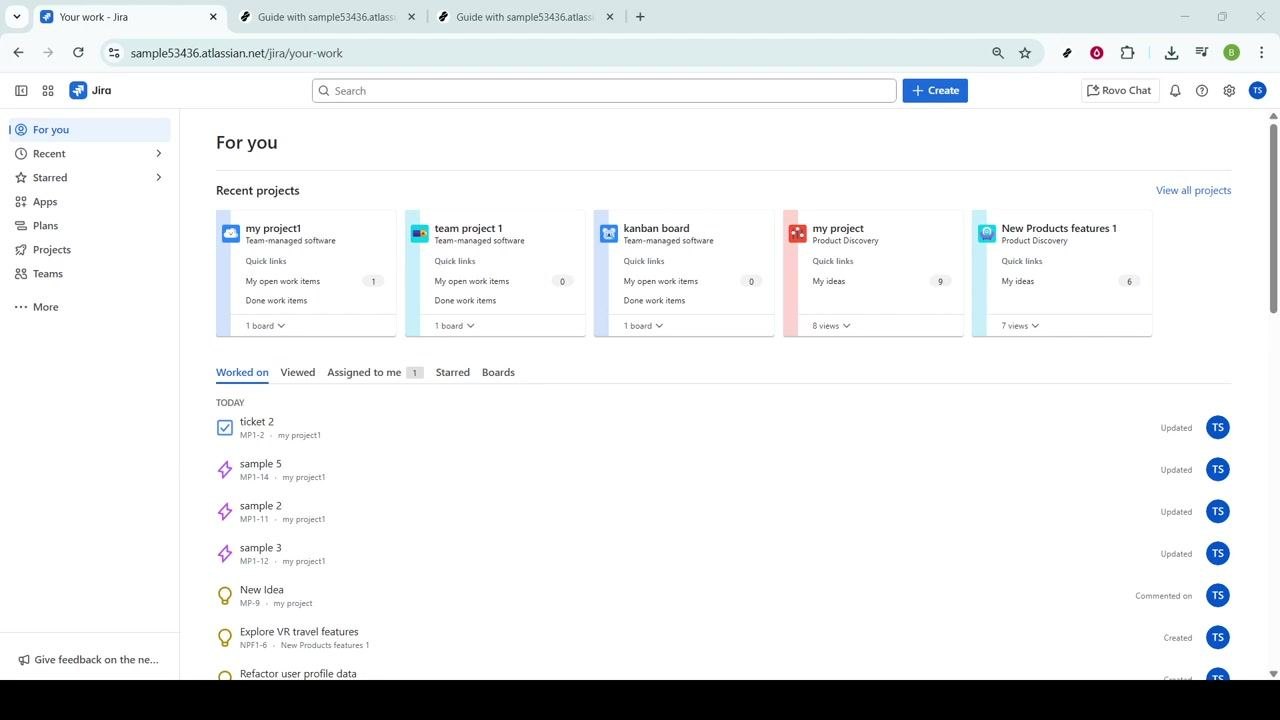
Open your Jira instance in your web browser and make sure you are logged in and on the main dashboard. The dashboard displays a For you section with your recent projects and a list of recent work items.
Select the project
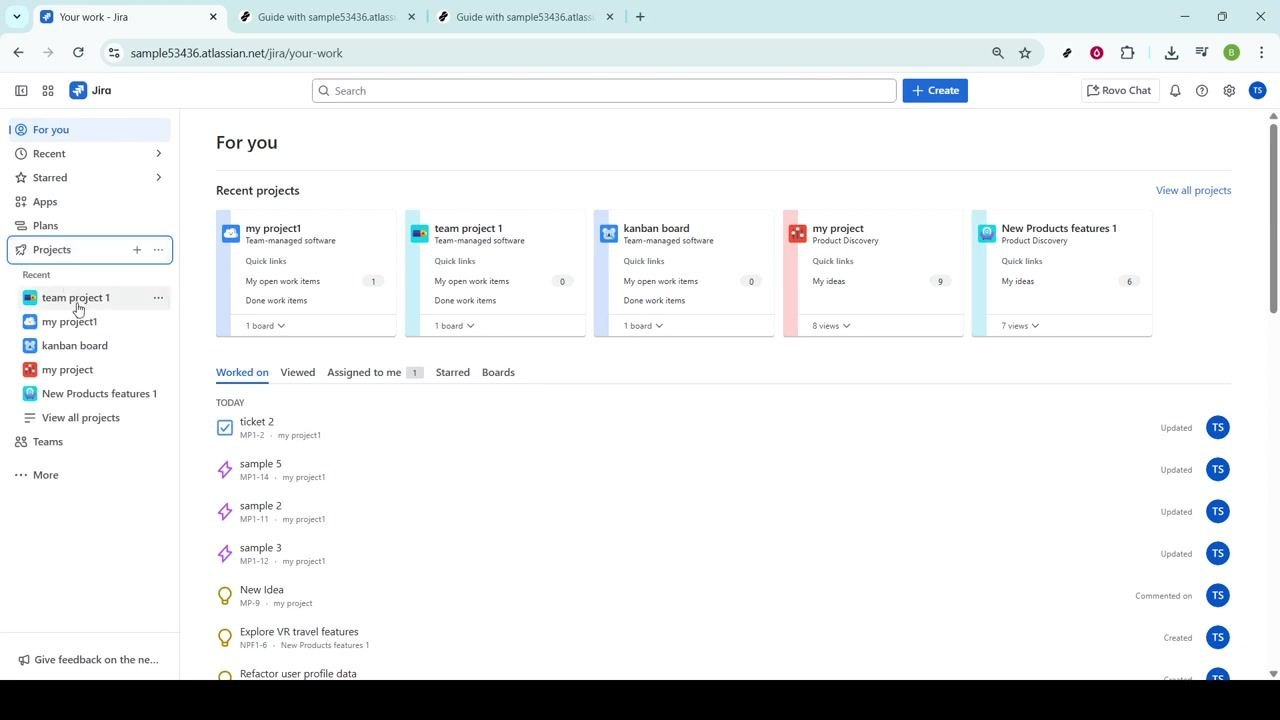
In the left sidebar, locate the Projects section. Under Recent, click on the project you want to manage (for example, "my project1" or "team project 1"). Selecting the correct project ensures that any subtasks you create are associated with the right objectives.
Open the project board
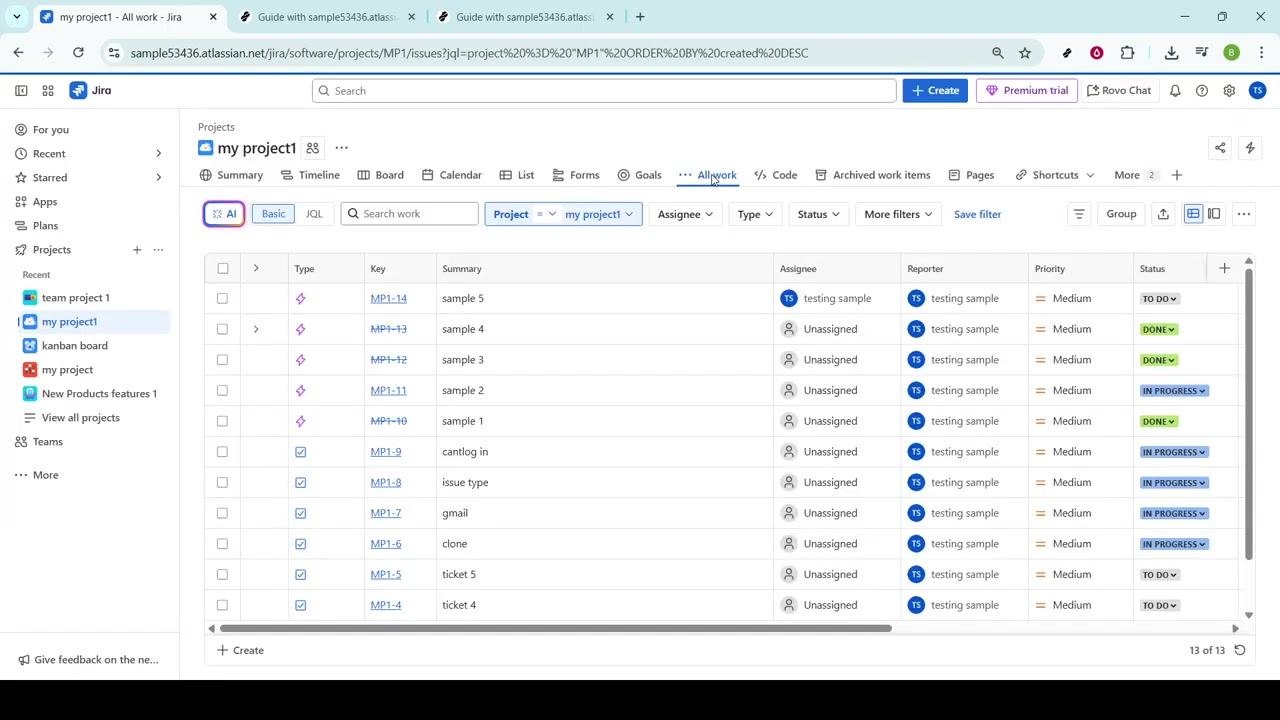
Once inside your chosen project, use the navigation menu at the top of the screen and click on the All work tab. This view lists all issues, tasks, subtasks, bugs, and other issue types within the project, giving you a full overview of the project's current status.
Find and open the parent issue
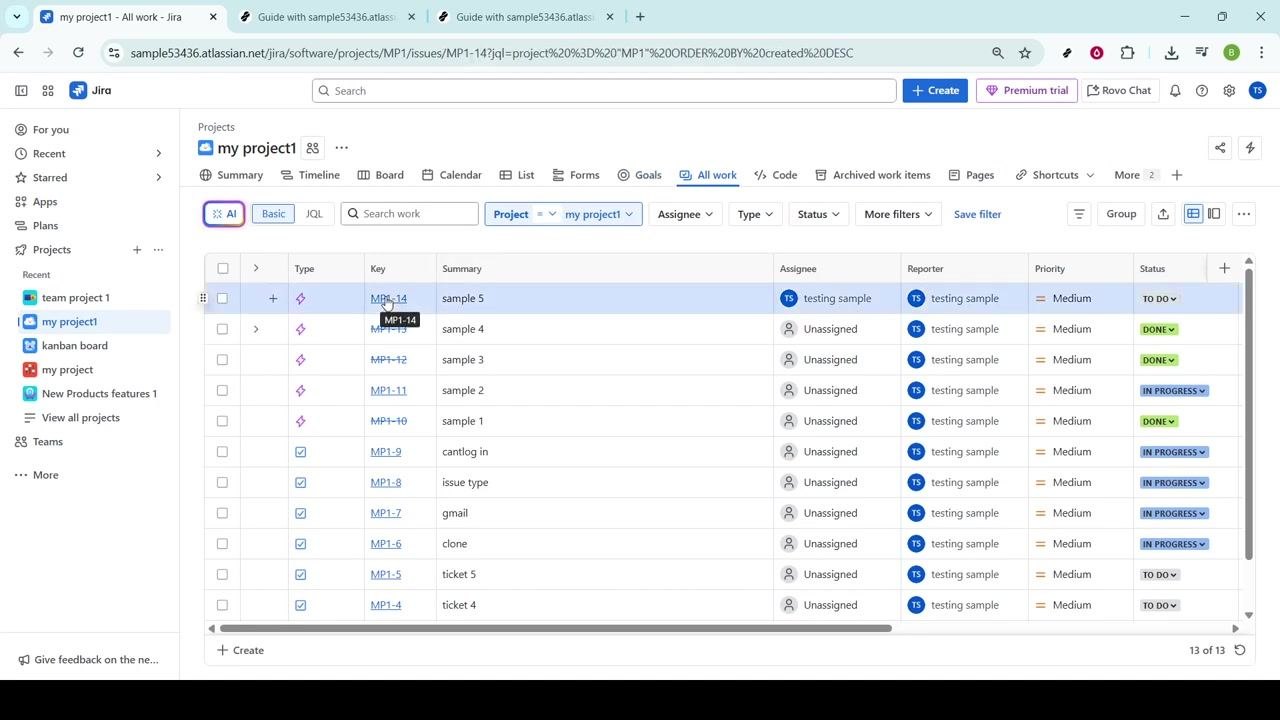
In the All work view, locate the specific issue to which you want to add a subtask. Issues are listed with columns such as Type, Key, Summary, Assignee, Reporter, Priority, and Status. Click on the issue key (for example, "MP1-14" for "sample 5") to open its detailed page.
Review the issue details page
The issue details page displays the issue name, description, and various action buttons. Before adding a subtask, confirm you are viewing the correct issue by checking the summary and key shown at the top.
Click the Add button
Under the issue name, find the + Add button. This button lets you add various elements to the issue, including subtasks. Click + Add to open a dropdown menu with the available options.
Select Child work item
After clicking + Add, a dropdown menu appears. Locate and select Child work item (this may also be labeled "Child Issue" or "Subtask" depending on your Jira configuration). This links the new item directly to the parent issue as a subtask, keeping your project organized.
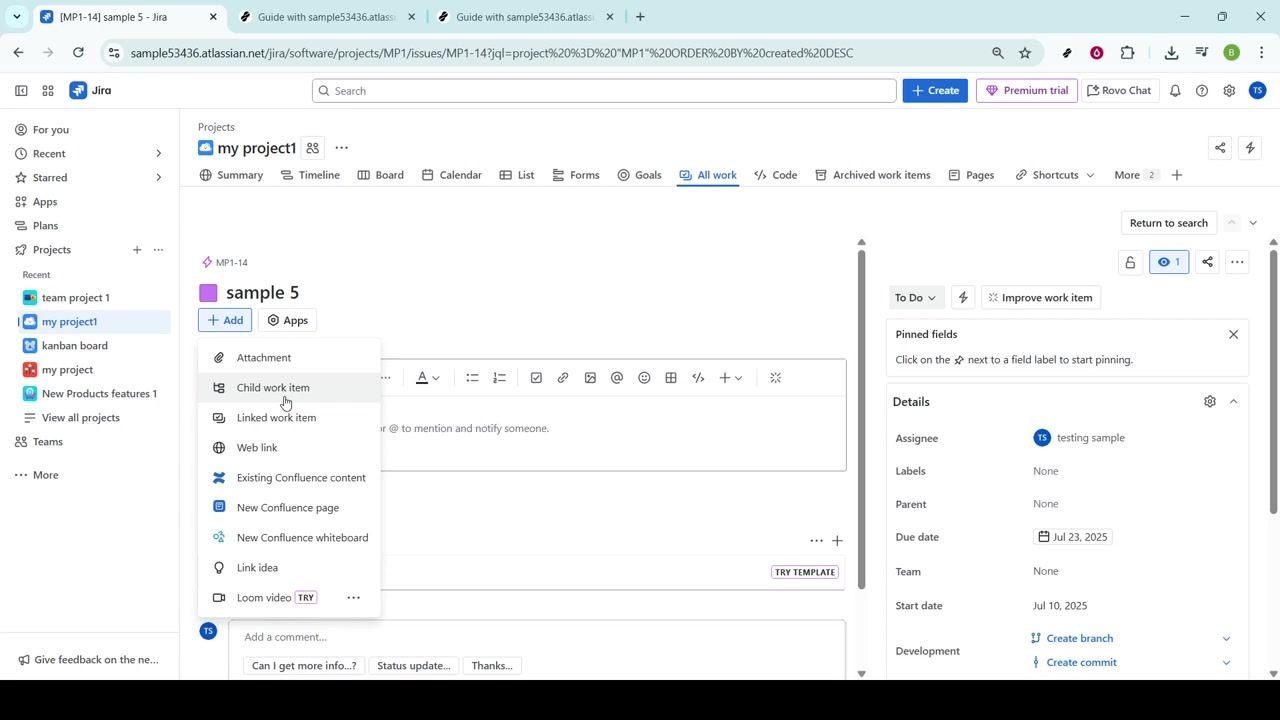
Enter the subtask details
The Child work items section opens below the issue description. In the What needs to be done? field, enter a clear and specific description for the subtask (for example, "please delete once done"). You can also click on additional fields to:
- Assign the subtask to a specific team member.
- Set a priority (for example, Medium).
- Add labels or a due date for better categorization and tracking.
The more detailed your description and metadata, the easier it will be for your team to understand and complete the subtask.
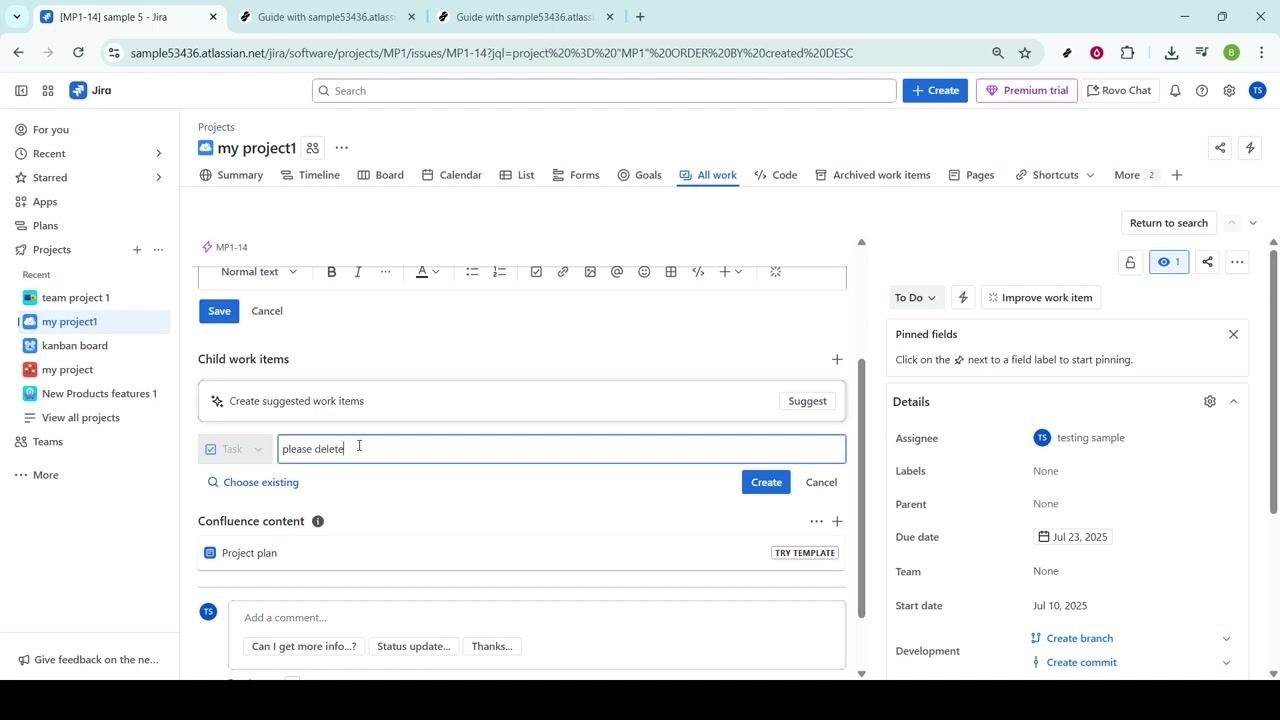
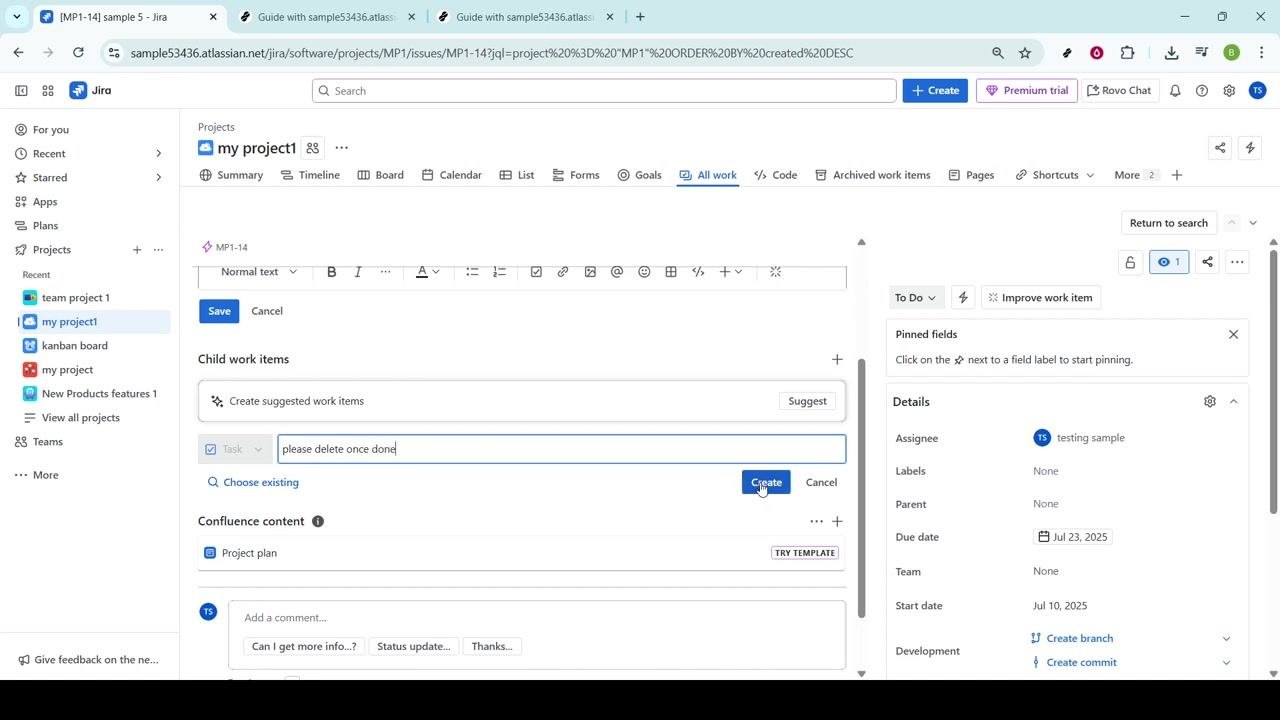
Create the subtask
Once all necessary information is filled out, locate the blue Create button to the right of the description field. Click Create to save the subtask. This adds the subtask under the parent issue and integrates it into your project's workflow.
Verify that the subtask was created
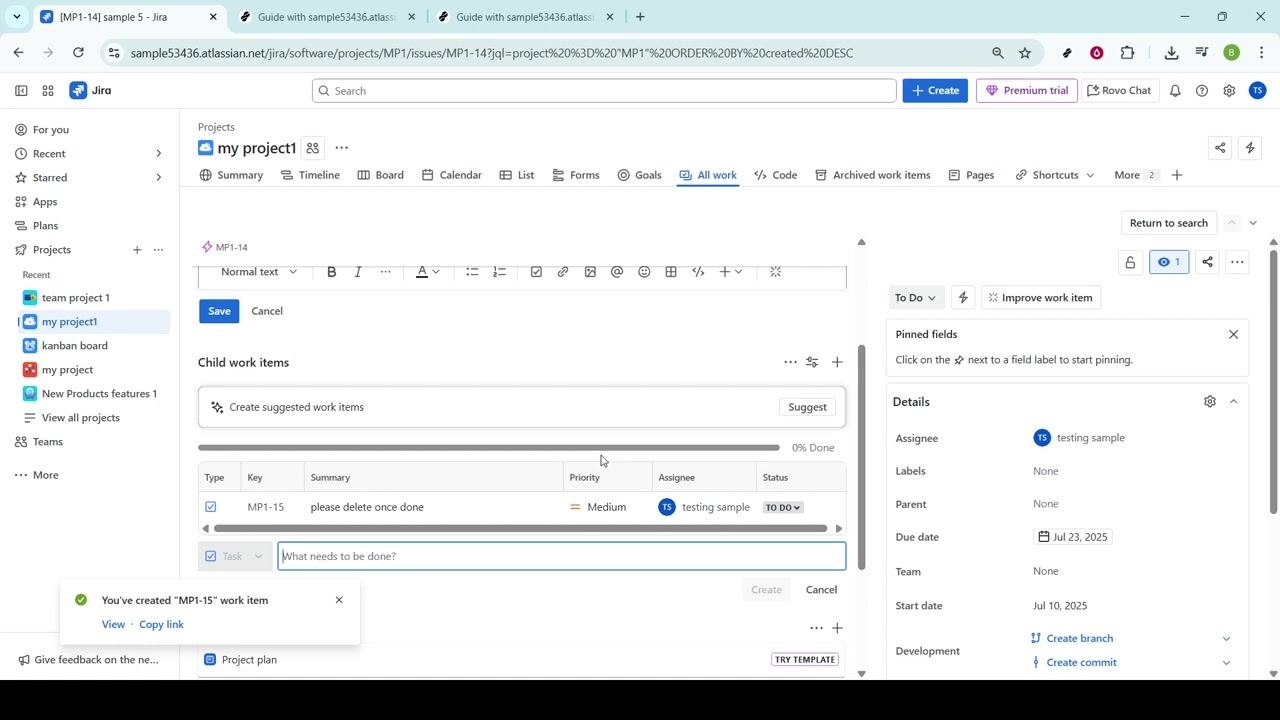
After creation, the new subtask appears in the Child work items list under the parent issue, showing its key (for example, "MP1-15"), summary, priority, assignee, and status. A confirmation message such as "You've created 'MP1-15' work item" may appear, with options to view or copy the link to the subtask. Confirm that the subtask is listed and all details are correct.
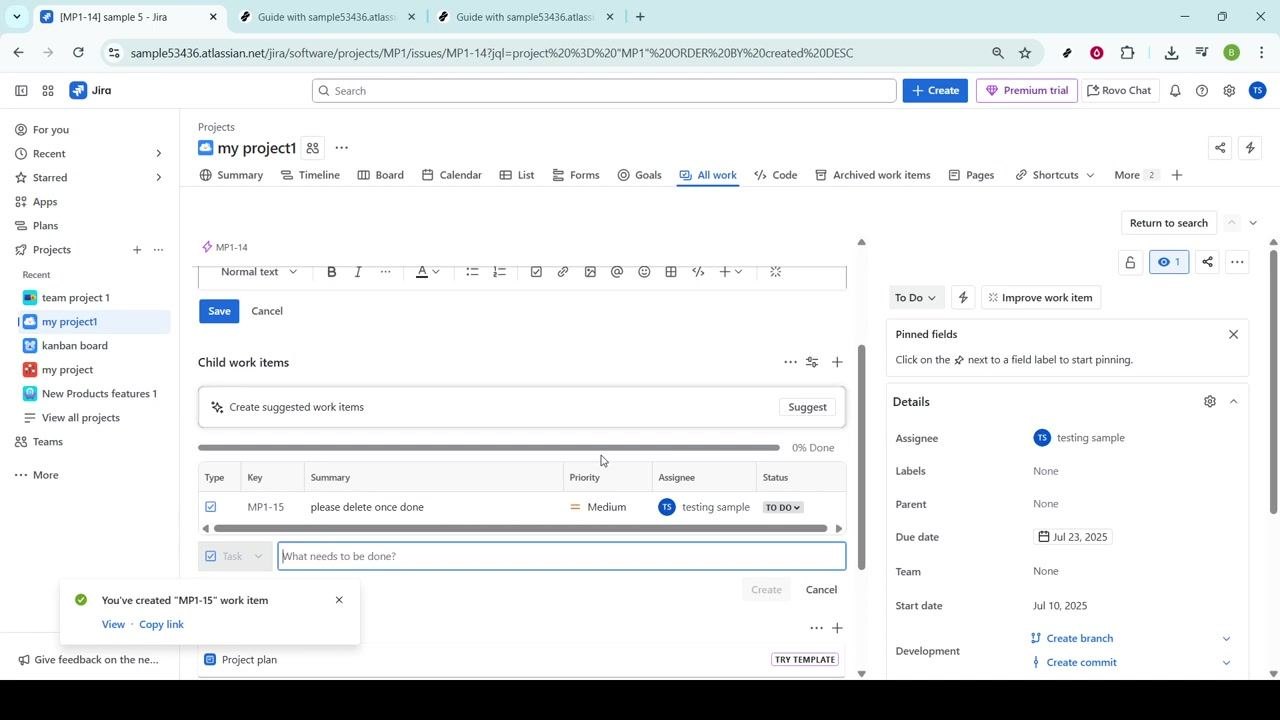
Reviewing the confirmation and details
Once your subtask is created, take a moment to review the confirmation and surrounding details:
- Confirmation message: A message at the bottom left of the interface reads "You've created 'MP1-15' work item," with options to View or Copy link. This confirms the subtask was successfully added to the parent issue.
- Child work items list: Confirm the new subtask's details are accurate:
- Type: Task
- Key: MP1-15
- Summary: please delete once done
- Priority: Medium
- Assignee: testing sample
- Status: TO DO
- Parent issue panel: On the right panel, verify the parent issue's fields, including:
- Assignee: testing sample
- Labels: None
- Parent: None
- Due date: Jul 23, 2025
- Team: None
- Start date: Jul 10, 2025
- Development: Options to Create branch and Create commit are available.
What's next
You can continue managing your project by adding more child work items — simply enter a new description in the What needs to be done? field and click Create. Use the Save button at the top of the issue page to save any changes to the parent issue, or Cancel to discard them.
By completing these steps, you now know how to create a subtask in Jira and verify it was added correctly. Using subtasks this way keeps your project organized and helps your team stay clear on responsibilities, improving clarity, accountability, and progress tracking.
Generation details: cost, quality tiers
Docsie billed 2,000 credits ($1.40) to analyze this 4-minute video at standard quality. The rewrite, template fill and Word/PDF exports were included. The same video at each quality tier:
| Quality | Frames sampled | Credits | Approx. cost |
|---|---|---|---|
| Draft | every 16-30 s | 1,000 | $0.70 |
| Standard (this guide) | every 8-15 s | 2,000 | $1.40 |
| Detailed | every 4-7 s | 4,000 | $2.80 |
| Ultra | every 1-3 s | 8,000 | $5.60 |
Credits priced at $0.70 per 1,000; plans include a monthly allowance. Enterprise customers on on-premise or bring-your-own-model deployments run this on their own inference and pay no per-video credits.
Generated by Docsie Video-to-Docs on 2026-09-08 from a 3-minute video. Screenshots are frames from the source video and belong to their creator, BM Tech Tutorials, whose original is embedded above. If you own this video and want the guide removed or credited differently, contact us and we will act within one business day.