
How to Create a Project in Jira
This guide walks you through how to create a project in Jira Cloud, from opening the Projects menu to picking a template, naming your project, and setting access permissions. By the end, you'll have a fully configured project ready for your team to use.
Video: Creating a project in Jira | Atlassian by Atlassian (2024). All credit for the demonstration goes to the creator; watch the original on YouTube. The written guide below was generated from this video by Docsie. Creator? Request a change or removal.
This guide walks you through how to create a project in Jira Cloud, from opening the Projects menu to picking a template, naming your project, and setting access permissions. By the end, you'll have a fully configured project ready for your team to use.
Before you begin
A project in Jira is a collection of tasks that need to be completed to achieve a specific outcome. Projects act as containers that help you organize and track work across your team. Jira projects are highly configurable, so you can adapt them to fit any organizational structure, workflow, or team maturity level.
Open the Projects menu
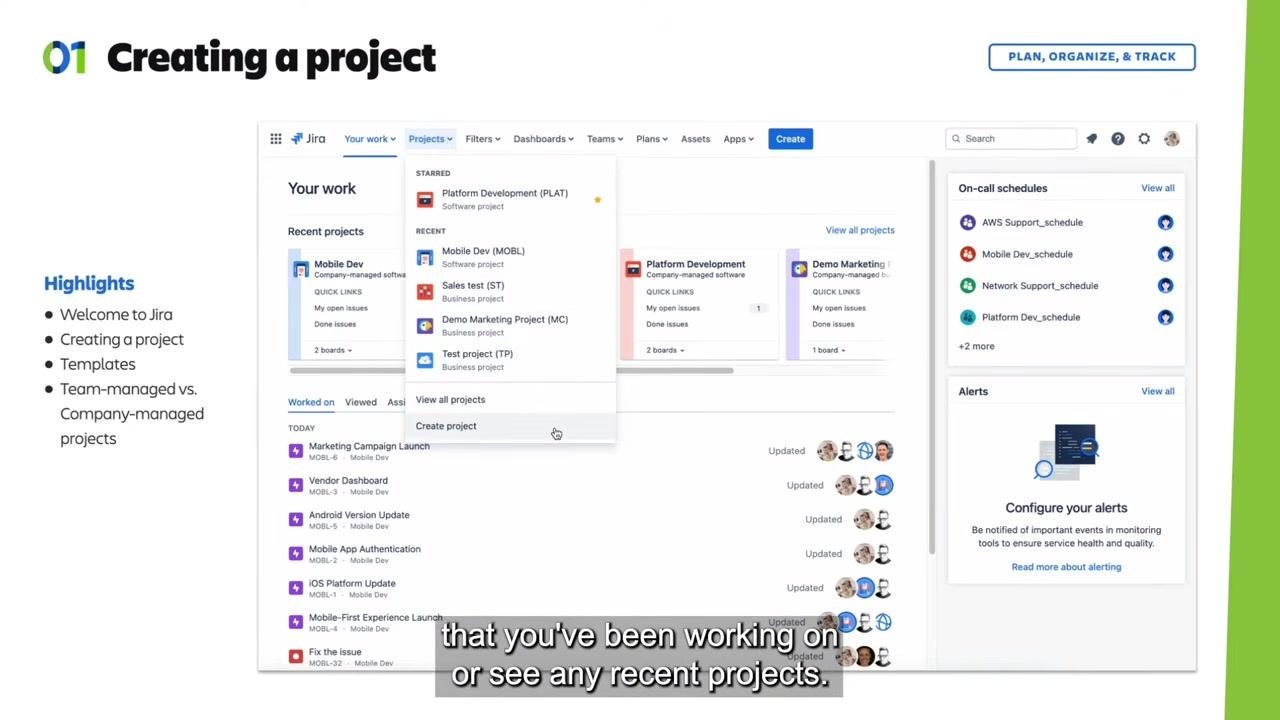
In the top navigation bar, select the Projects dropdown menu. This menu shows projects you've been working on and any recent projects you've accessed. To start a new one, select Create project from the dropdown.
Choose a project template
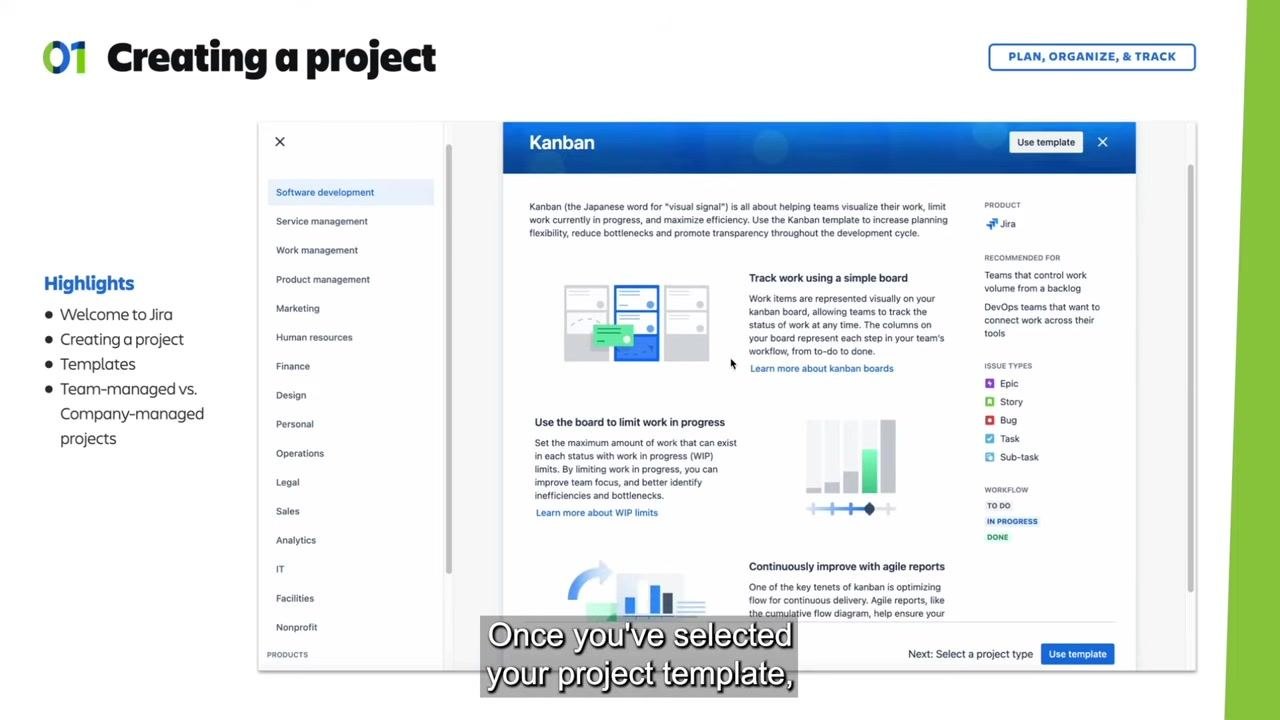
After selecting Create project, Jira presents a list of templates organized by team type, including Software development, Service management, Work management, Product management, Marketing, Human resources, Finance, Design, Personal, Operations, Legal, Sales, Analytics, IT, Facilities, and Nonprofit.
Select the category that best fits your team's needs. For example, under Software development, you can choose between Kanban, Scrum, or Top-level planning templates. Click on any template to read its description and see how it's typically used.
Review the template details
Once you select a template, such as Kanban, a detailed description appears. Review the following before proceeding:
- What the template is for, such as visualizing work, limiting work in progress, or maximizing efficiency
- Recommended use cases, such as teams that control work volume from a backlog
- Issue types included, such as Epic, Story, Bug, Task, and Sub-task
- Workflow stages, such as To Do, In Progress, and Done
Once you've reviewed the details, click Use template to proceed.
Select a project type
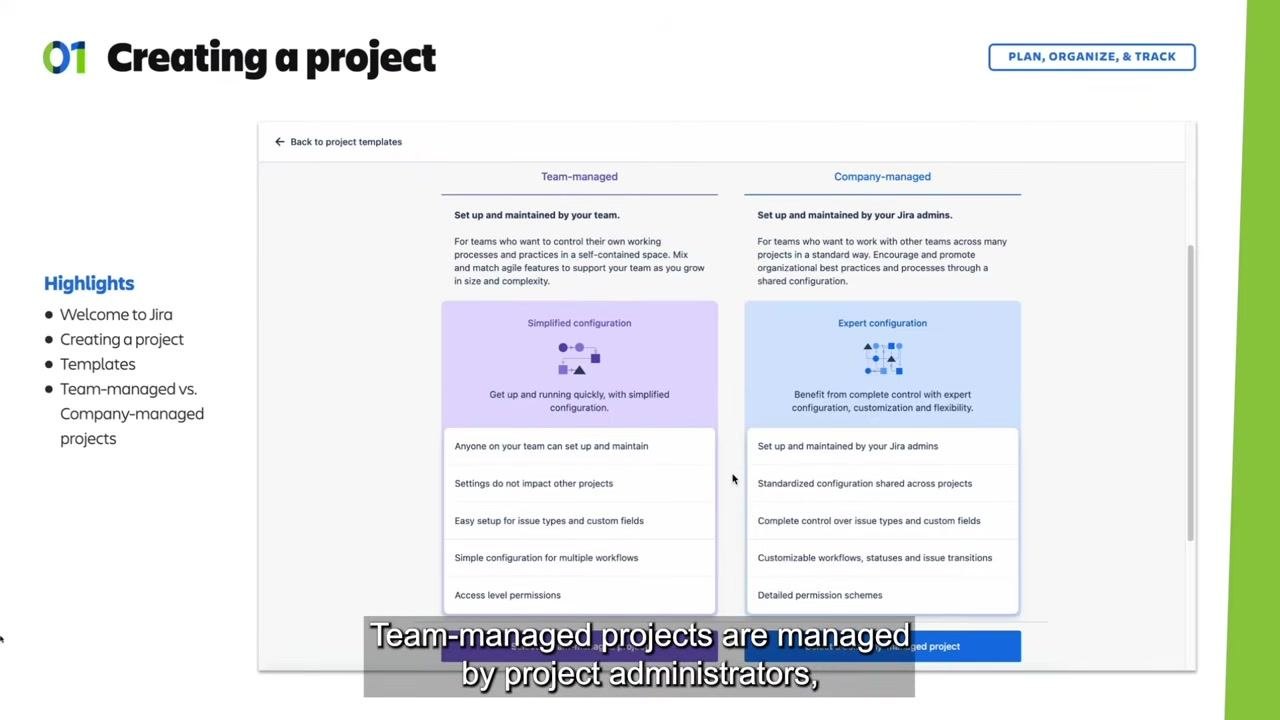
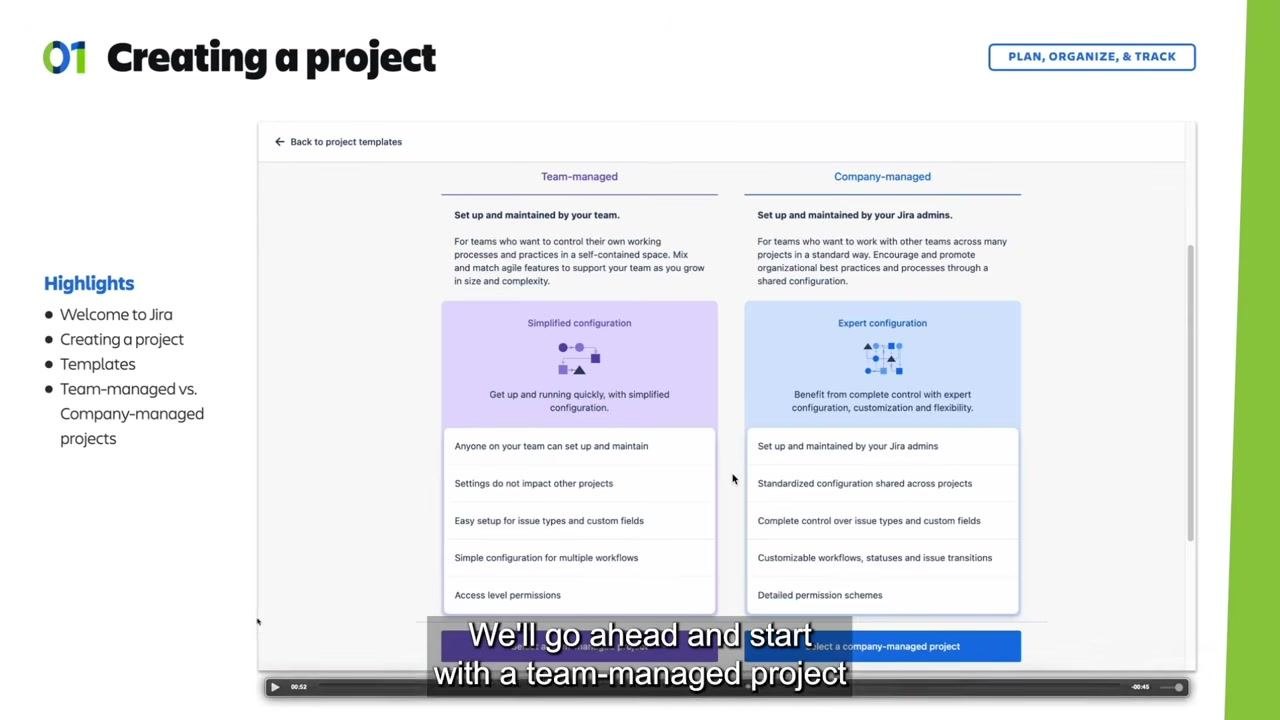
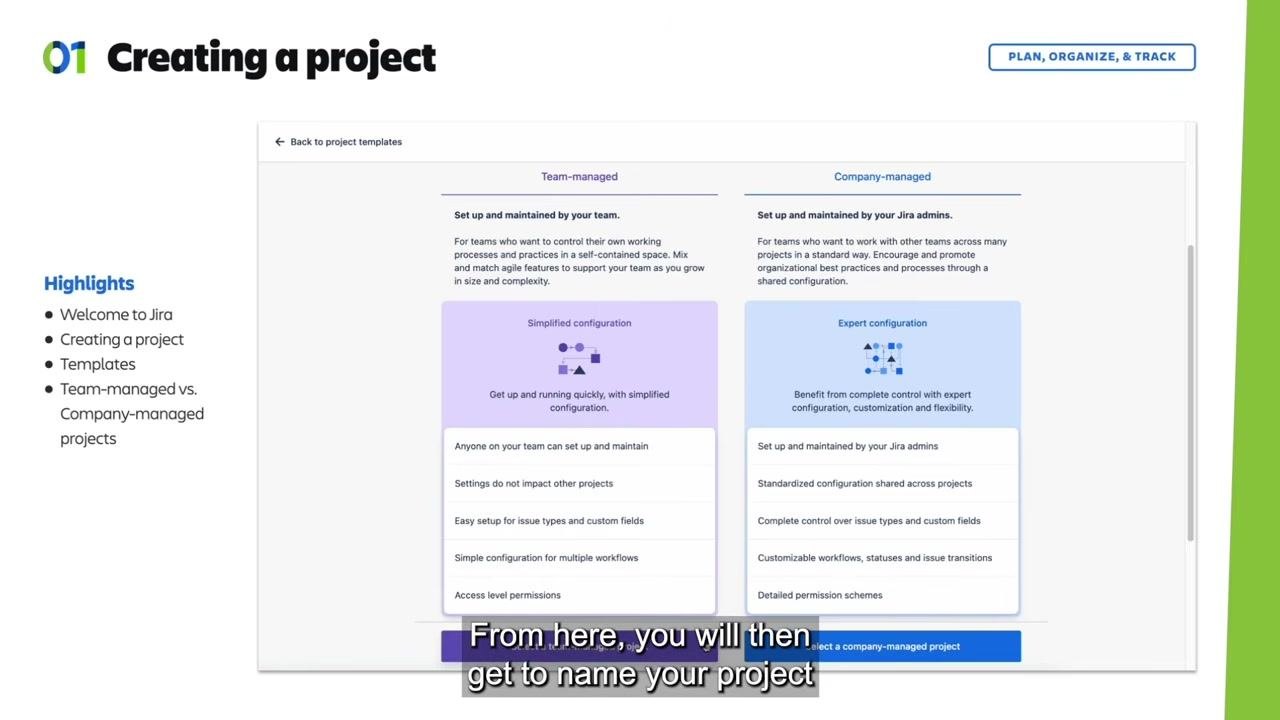
After choosing your template, Jira asks you to pick between two project types:
- Team-managed projects: Managed by project administrators, without needing a Jira admin. This option offers simplified configuration, easy setup for issue types and custom fields, and doesn't affect other projects. It's ideal for small teams that want to get started quickly.
- Company-managed projects: Managed by Jira admins, promoting organizational best practices through shared configuration. This option offers expert configuration, standardized workflows, and detailed permission schemes. It's suited to larger teams that need standardization across multiple projects.
For this walkthrough, select Team-managed project to proceed with a simplified setup.
Name your project and set the access level
Enter your project name in the Name field (for example, "Space Project"). Then choose an access level from the dropdown:
- Private: Only admins and people added to the project can search for, view, create, or edit its issues.
- Limited: Anyone with access to the Jira site can search for, view, and comment on the project's issues, but only people added to the project can create or edit them.
- Open: Anyone with access to the Jira site can view, create, and edit issues in the project.
For this walkthrough, select Private, then click Next to continue.
Connect Jira to other Atlassian products (optional)
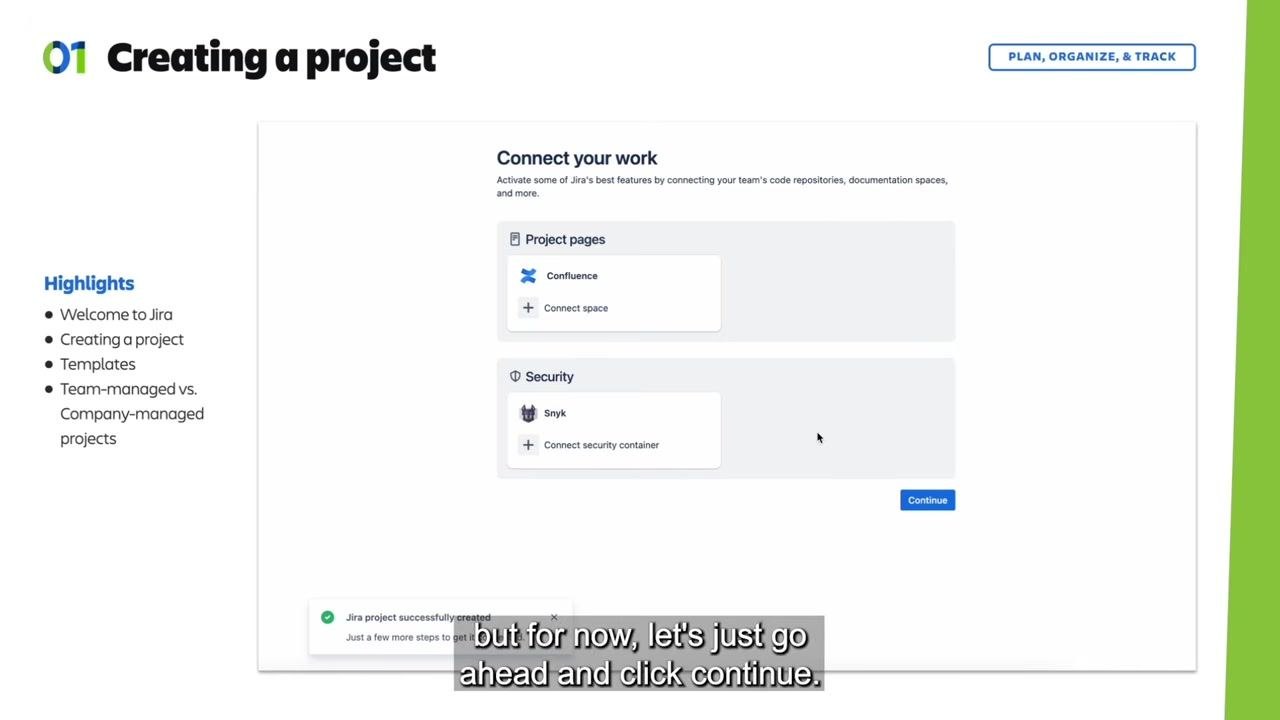
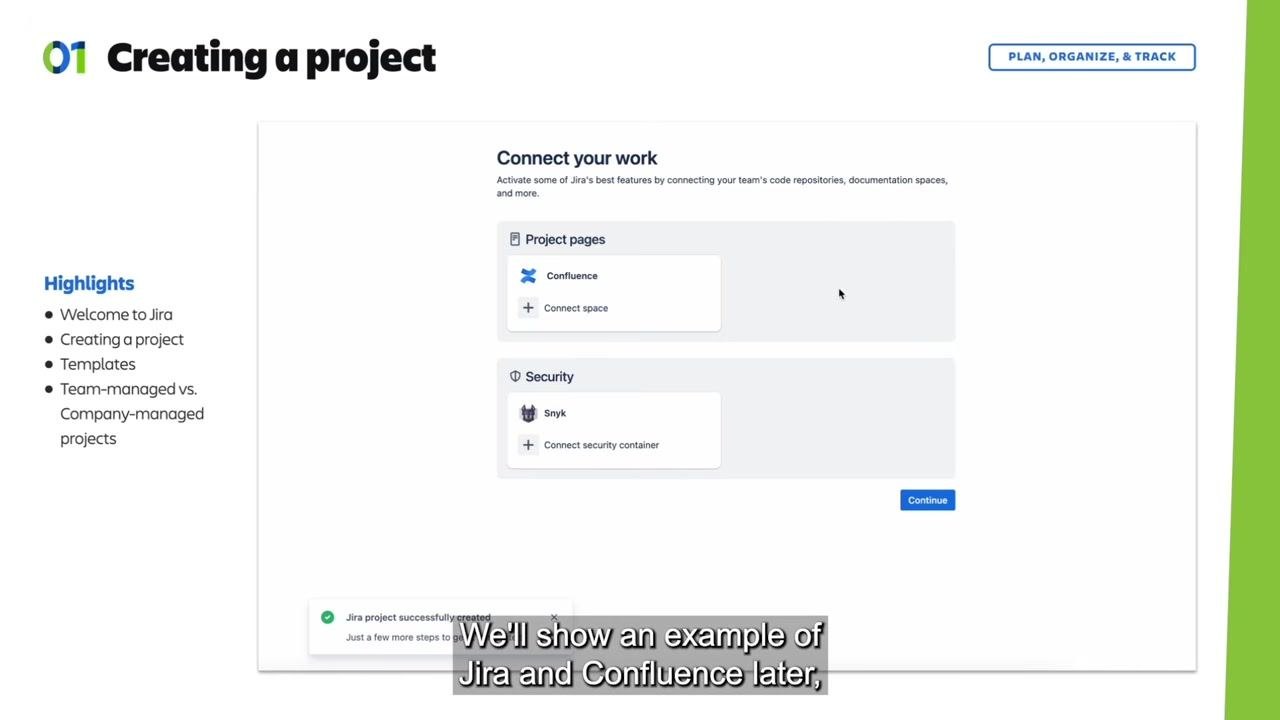
On the Connect your work screen, you can link your project to other Atlassian products:
- Project pages: Connect to Confluence spaces for documentation.
- Security: Connect to Snyk for security container integration.
You can skip these integrations if you don't need them yet. Click Continue to proceed.
What's next
Once you complete these steps, your Jira project is created and ready for your team to start managing work. You can revisit the access level and integrations at any time as your team's needs evolve, and you can create additional projects using a different template or project type whenever a new initiative requires it.
Generation details: cost, quality tiers
Docsie billed 2,000 credits ($1.40) to analyze this 4-minute video at standard quality. The rewrite, template fill and Word/PDF exports were included. The same video at each quality tier:
| Quality | Frames sampled | Credits | Approx. cost |
|---|---|---|---|
| Draft | every 16-30 s | 1,000 | $0.70 |
| Standard (this guide) | every 8-15 s | 2,000 | $1.40 |
| Detailed | every 4-7 s | 4,000 | $2.80 |
| Ultra | every 1-3 s | 8,000 | $5.60 |
Credits priced at $0.70 per 1,000; plans include a monthly allowance. Enterprise customers on on-premise or bring-your-own-model deployments run this on their own inference and pay no per-video credits.
Generated by Docsie Video-to-Docs on 2026-09-08 from a 3-minute video. Screenshots are frames from the source video and belong to their creator, Atlassian, whose original is embedded above. If you own this video and want the guide removed or credited differently, contact us and we will act within one business day.