
How to Create a Sequence in HubSpot
This guide walks you through how to create a sequence in HubSpot, from choosing a starting template to enrolling contacts and monitoring performance. Sequences let you send a series of targeted, timely emails to nurture contacts over time, and they automatically unenroll a contact once that person replies to an email or books a meeting.
Video: How to create sequences in HubSpot by HubSpot Tutorials (2022). All credit for the demonstration goes to the creator; watch the original on YouTube. The written guide below was generated from this video by Docsie. Creator? Request a change or removal.
This guide walks you through how to create a sequence in HubSpot, from choosing a starting template to enrolling contacts and monitoring performance. Sequences let you send a series of targeted, timely emails to nurture contacts over time, and they automatically unenroll a contact once that person replies to an email or books a meeting.
Prerequisites
- Access to a HubSpot account.
- Permission to use the Automation menu and the Sequences tool.
Understand the purpose of sequences
Sequences allow you to send a series of targeted, timely emails to nurture contacts over time. When a contact replies to an email or books a meeting, HubSpot automatically unenrolls that contact from the sequence, so you don't need to track responses manually.
Access the sequences tool
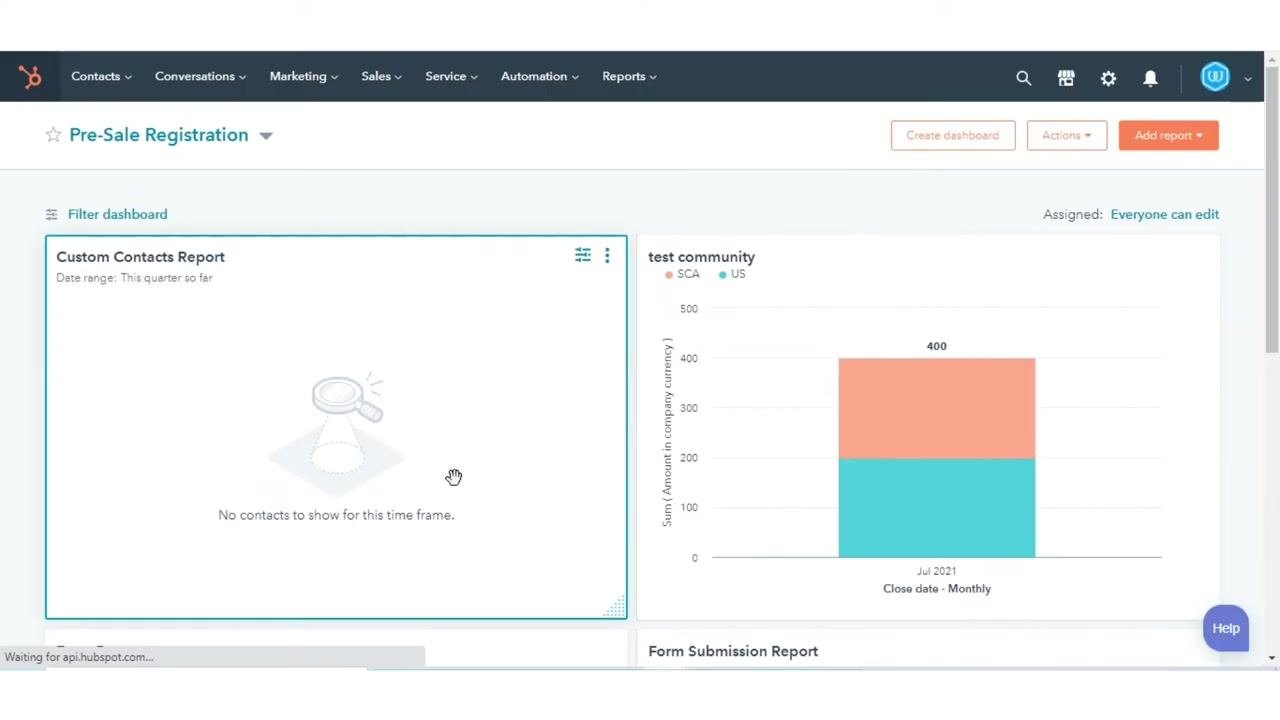
In your HubSpot account, navigate to the top menu and click Automation. From the dropdown menu, select Sequences to open the sequences dashboard.
Start creating a sequence
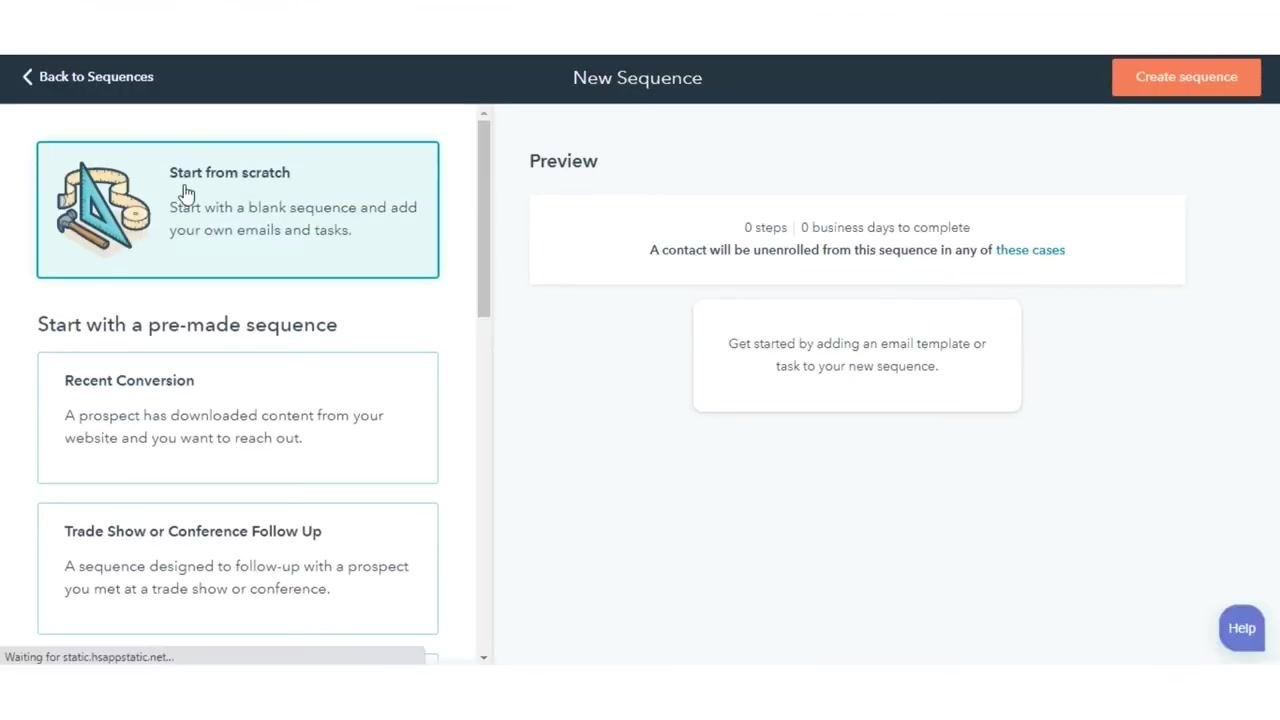
Click the Create Sequence button to begin. In the left panel, choose one of the following options:
- Start from Scratch: Begin with a blank sequence and add your own emails and tasks.
- Select a Pre-made Sequence Template: Choose from templates such as "Recent Conversion" or "Trade Show or Conference Follow Up."
Name your sequence
In the Sequence Editor, click the Edit Pencil icon next to the sequence name and enter a descriptive name for your sequence.
Add steps to your sequence
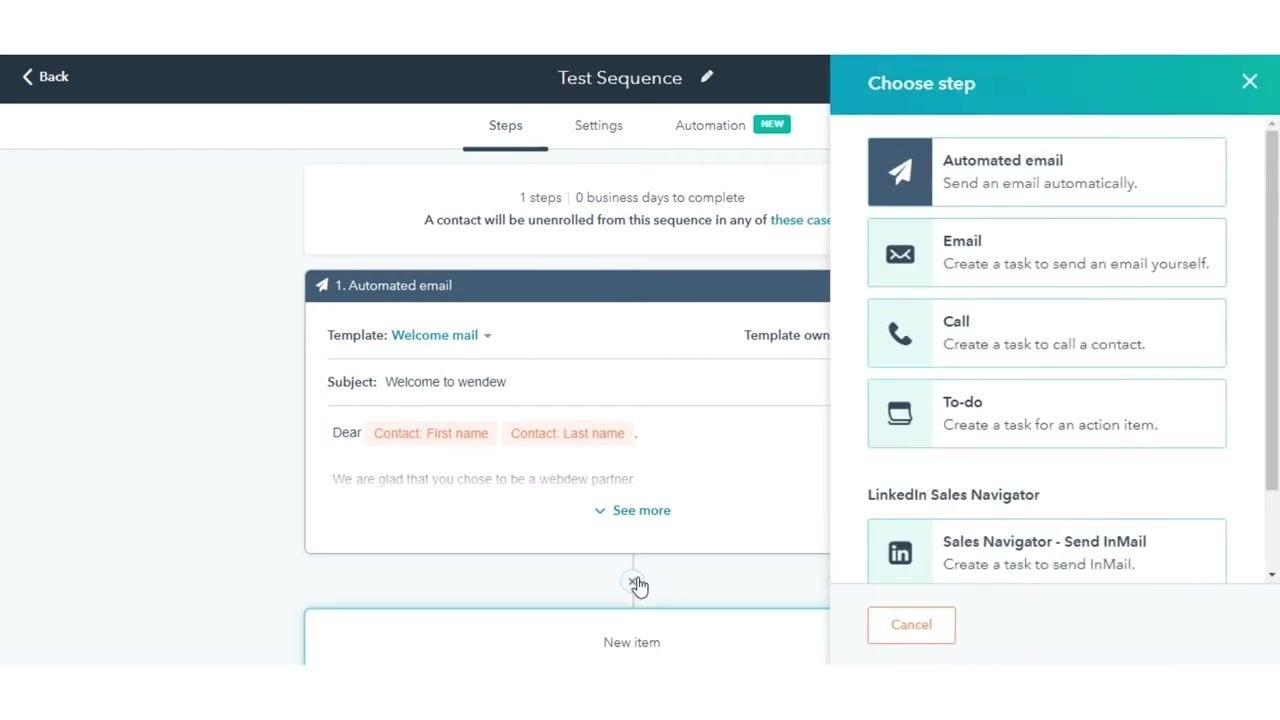
Click the plus (+) icon to add a new step. In the right panel, select one of the following actions:
- Automated Email: Send an email automatically.
- Email: Create a task to send an email manually.
- Call: Create a task to call a contact.
- To-do: Create a task for an action item.
- Sales Navigator - Send InMail: Create a task to send InMail via LinkedIn Sales Navigator.
Add an automated email step
To send an automated email, click Automated Email. You can then either create a new template or reuse an existing one:
- Click Create New Email Template to build a new template from scratch.
- Click the Email Templates dropdown menu, or use the search bar, to find an existing template such as "Welcome mail," "Implementation documents," or "Follow Up Template."
Configure the email template
After selecting a template, review its subject line and content before adding it to the sequence. For example, the "Welcome mail" template uses the subject "Welcome to wendew" and includes personalization tokens for the contact's first and last name.
Add task reminders
To create a task reminder, click Email, Call, or To-do in the Choose Step panel. In the Add Task panel, fill in the following fields:
- Title: Enter a descriptive title (e.g., "Task for contact").
- Type: Select the task type (e.g., Email).
- Priority: Choose a priority level (e.g., High).
- Queue: Assign the task to a queue (e.g., "test queue").
- Notes: Enter task details in the Notes field.
Use the toolbar at the bottom of the Notes field to format the text with bold, italic, underline, lists, links, and more.
Insert a link or snippet in task notes
In the Add Task panel, click the Insert snippet button in the Notes field to add a reusable text snippet. You can also use the formatting toolbar to insert a link or otherwise format your notes as needed. This helps standardize communication and saves time when creating similar tasks.
Add a delay between actions
When you add a second action to your sequence, select the delay in days before the next task or email is triggered. This lets you space out your outreach and follow-up steps for optimal engagement. For example, after sending an automated email, you might set a delay of 2 days before the next task—such as a follow-up call—is created.
Review sequence completion
Once all steps are added, review your sequence for accuracy and completeness. Confirm that each action, delay, and task is configured as intended before moving forward.
Save and activate the sequence
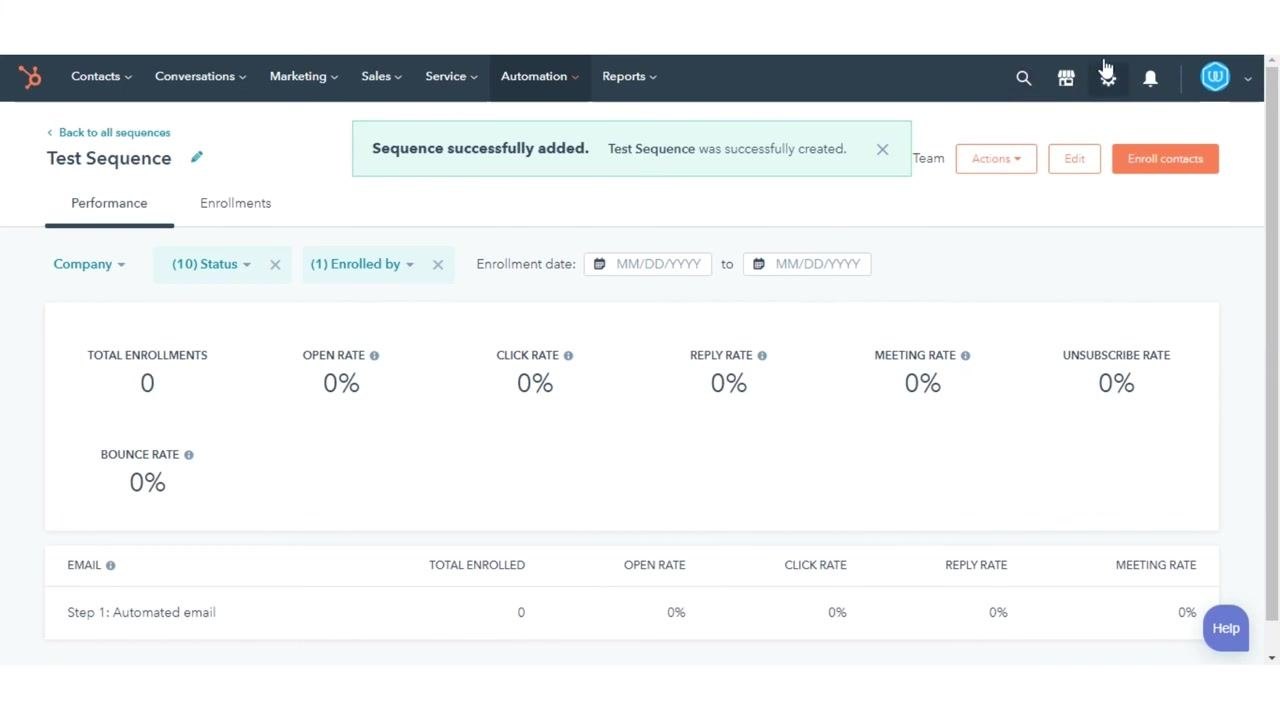
Click Save to store your sequence. A confirmation message appears: "Sequence successfully added. [Sequence Name] was successfully created."
You're then redirected to the sequence performance dashboard, where you can monitor metrics such as total enrollments, open rate, click rate, reply rate, meeting rate, unsubscribe rate, and bounce rate.
Enroll contacts in the sequence
Click Enroll contacts to start adding contacts to your sequence. Use filters such as company, status, and enrollment date to select the right contacts.
Monitor sequence performance
Check the performance dashboard regularly to track engagement and optimize your sequence over time.
What's next
With your sequence saved and contacts enrolled, keep an eye on the performance dashboard to see how your emails and tasks are performing. Use the enrollment, open, click, reply, meeting, unsubscribe, and bounce rates to refine your messaging, adjust delays between steps, and improve engagement over time.
Generation details: cost, quality tiers
Docsie billed 1,500 credits ($1.05) to analyze this 3-minute video at standard quality. The rewrite, template fill and Word/PDF exports were included. The same video at each quality tier:
| Quality | Frames sampled | Credits | Approx. cost |
|---|---|---|---|
| Draft | every 16-30 s | 750 | $0.52 |
| Standard (this guide) | every 8-15 s | 1,500 | $1.05 |
| Detailed | every 4-7 s | 3,000 | $2.10 |
| Ultra | every 1-3 s | 6,000 | $4.20 |
Credits priced at $0.70 per 1,000; plans include a monthly allowance. Enterprise customers on on-premise or bring-your-own-model deployments run this on their own inference and pay no per-video credits.
Generated by Docsie Video-to-Docs on 2026-09-08 from a 2-minute video. Screenshots are frames from the source video and belong to their creator, HubSpot Tutorials, whose original is embedded above. If you own this video and want the guide removed or credited differently, contact us and we will act within one business day.