
How to Use a Hoyer Lift
This standard operating procedure explains how to use a Hoyer lift to safely transfer a patient from a wheelchair to an exam table or bed. Following these steps in order helps protect the patient from injury and ensures the sling and lift are used correctly at every stage of the transfer.
Video: Clinical Education: How to use a Hoyer Lift by Springfield Clinic (2017). All credit for the demonstration goes to the creator; watch the original on YouTube. The written guide below was generated from this video by Docsie. Creator? Request a change or removal.
This standard operating procedure explains how to use a Hoyer lift to safely transfer a patient from a wheelchair to an exam table or bed. Following these steps in order helps protect the patient from injury and ensures the sling and lift are used correctly at every stage of the transfer.
Purpose
This procedure provides step-by-step guidance for caregivers and healthcare workers on positioning a sling, operating a Hoyer lift, and completing a full patient transfer safely and comfortably.

Scope
This procedure applies to any situation where a patient needs to be moved between a wheelchair and a table or bed using a mechanical Hoyer lift, including transfers performed by clinical staff or by caregivers at home.
Required equipment
- Hoyer lift with adjustable boom and sling bar
- Patient sling with color-coded straps
- Wheelchair with lockable brakes and removable/swing-away leg rests
- Table or bed to receive the patient
Procedure
Ensure the patient has a sling in place
Confirm that the patient already has a sling positioned under their body before beginning the transfer. If the patient does not have a sling in place, prepare to position one as described in the following steps.
Communicate with the patient and caregiver
Explain to the patient what you are about to do, including that you will be placing a sling under their body to assist with lifting them using a mechanical lift. If a caregiver is present, involve them in the process and ask for any specific instructions based on how transfers are normally performed at home.
Prepare the wheelchair
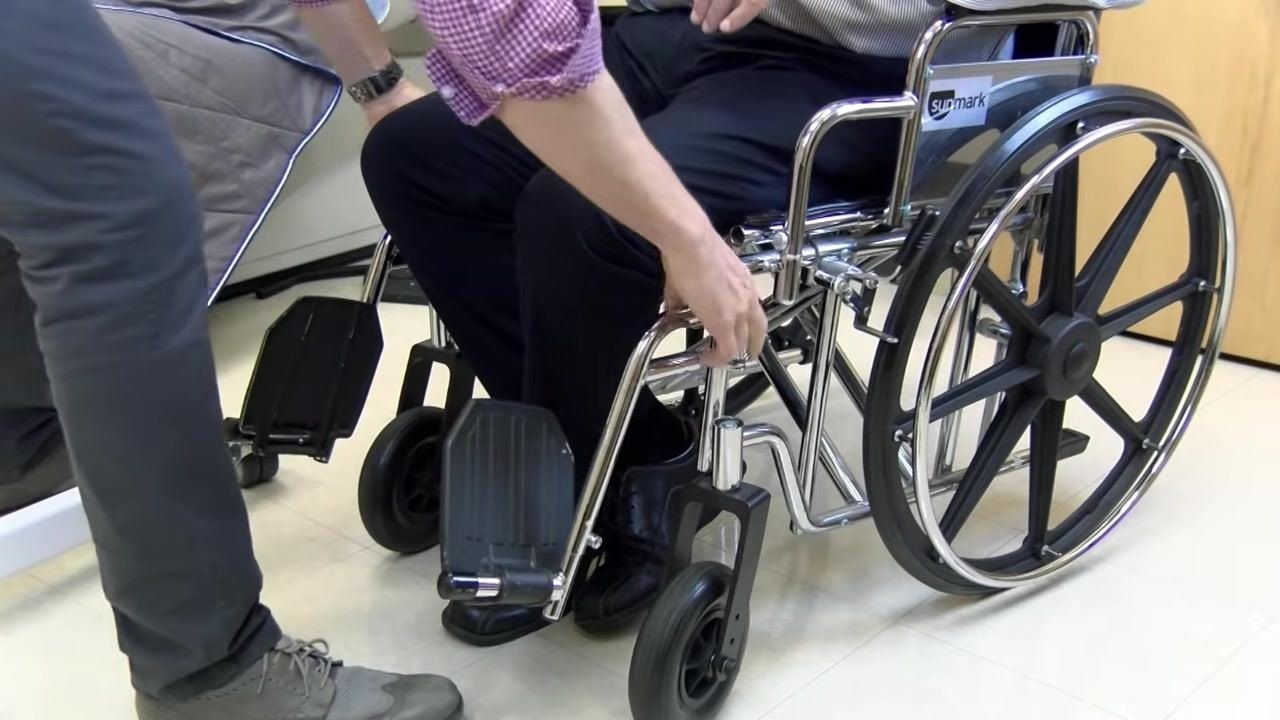
- Lock the brakes on the wheelchair to prevent movement during the transfer.
- Swing away or remove the leg rests to provide clear access to the patient's legs.
Position the sling under the patient
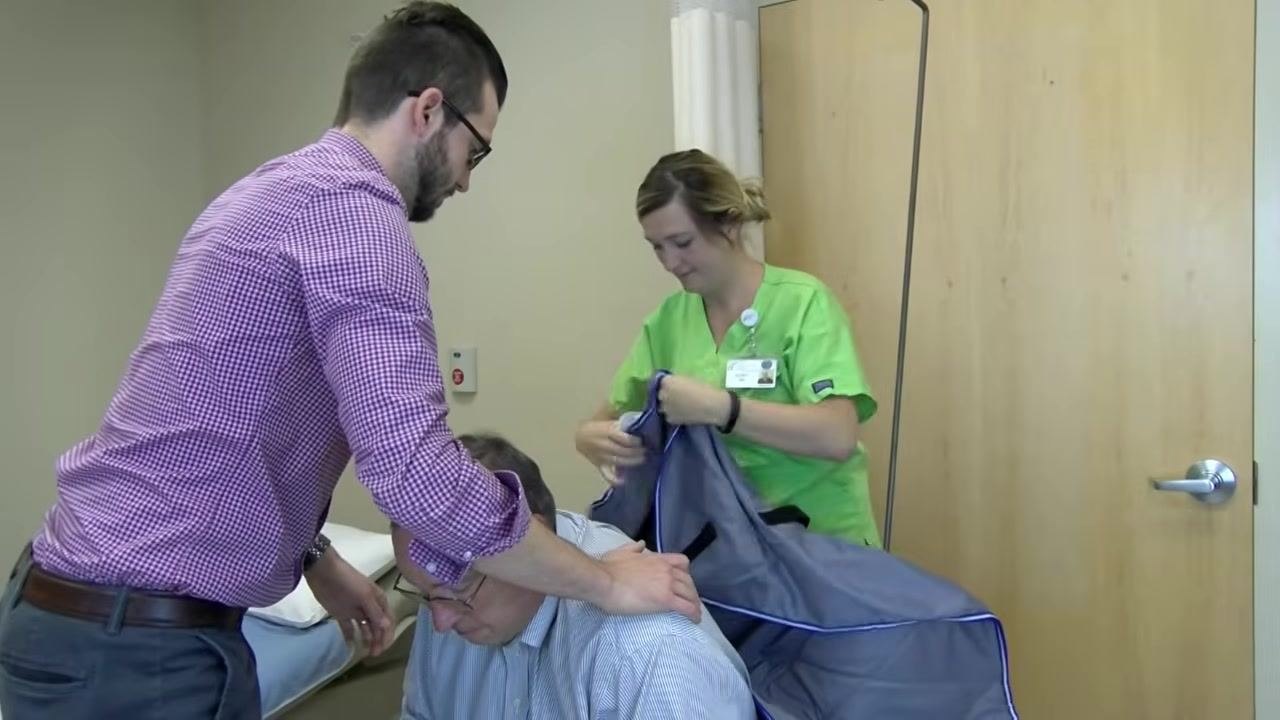
- Ask the patient to lean forward carefully. Do not let the patient lean too far forward or out of the chair; have someone stand in front of the patient for support if needed.
- Place the sling behind the patient with the smooth surface against their body and the handles on the outside.
- Position the opening of the sling close to the patient's bottom.
Arrange the sling straps
- Lean the patient back into the chair.
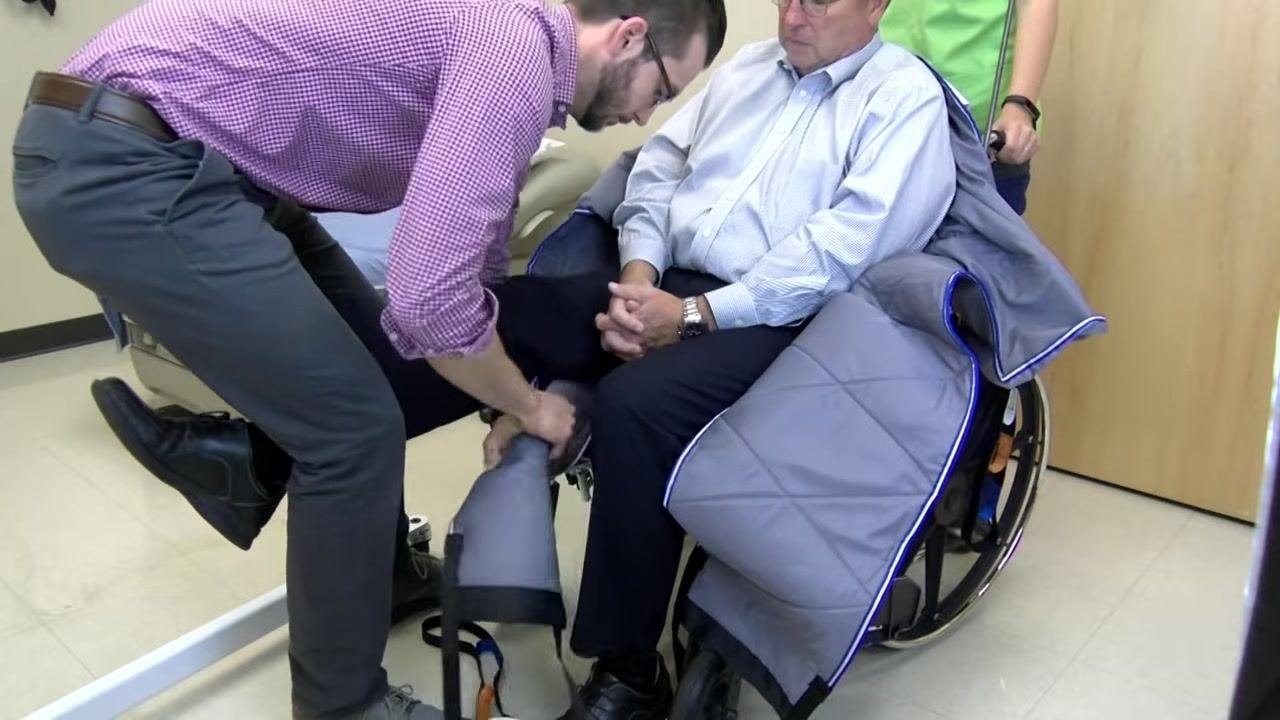
- Lift one of the patient's legs and pull one edge of the sling under the leg, just behind the knee.
- Repeat this process with the other leg.
- Ensure the straps are ready to be crisscrossed when attaching them to the Hoyer lift.
Position the Hoyer lift
- Move the Hoyer lift so it is directly over the patient's wheelchair.
- Open the legs of the lift for maximum stability.
- Lock the caster brakes to secure the lift in place.
Attach the sling to the lift
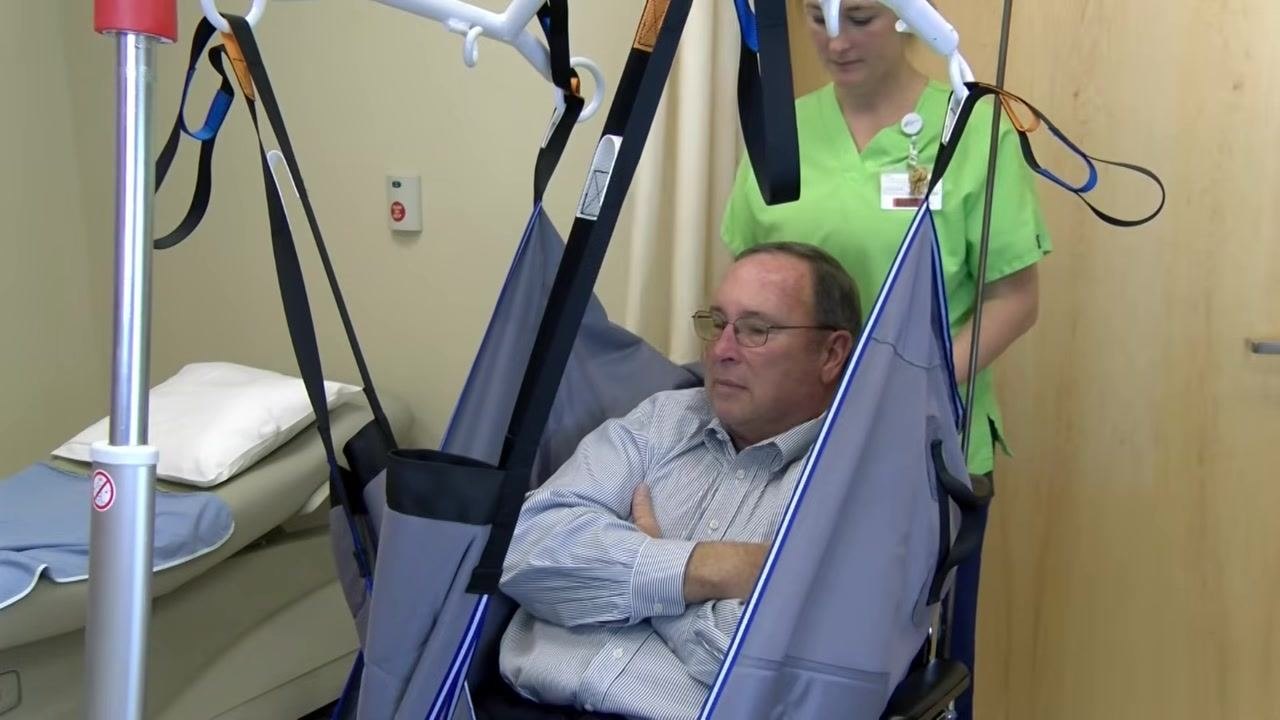
- Lower the boom and position it so the sling bar is parallel to the patient's shoulders.
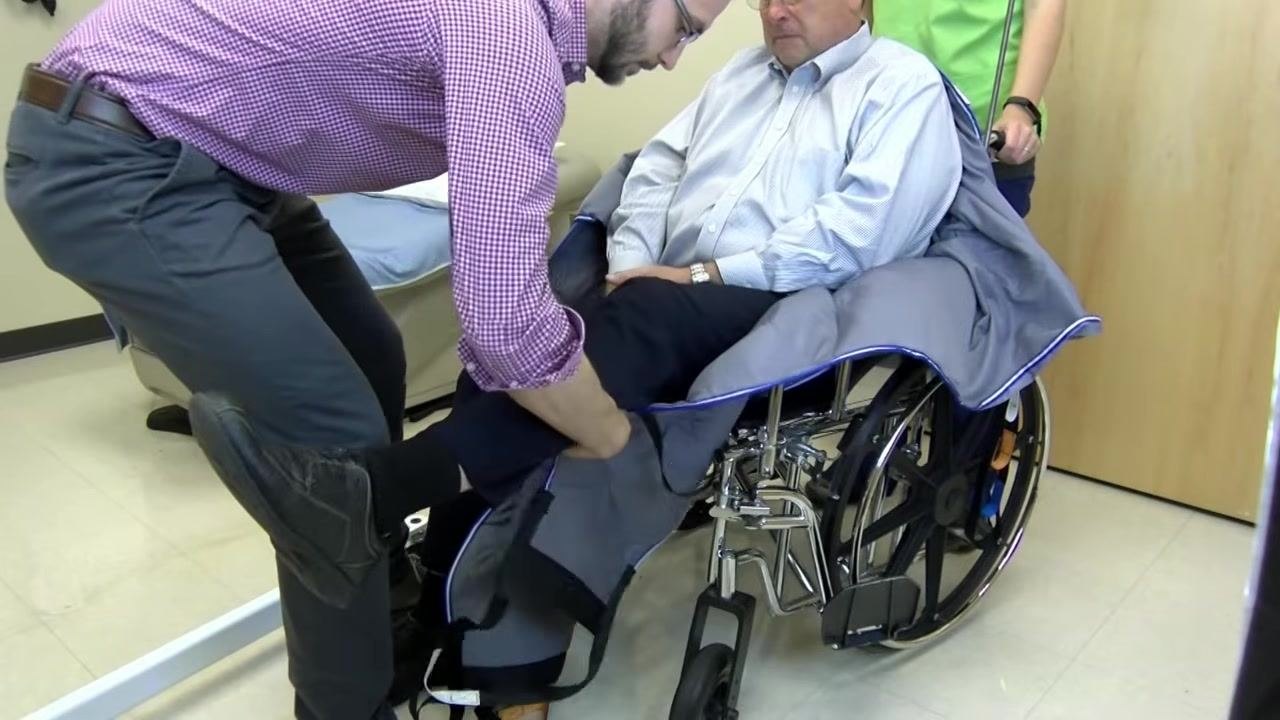
- Crisscross the straps under the patient's legs.
- Attach the straps by the patient's legs to the front of the sling bar, using the same color strap on both sides.
- Attach the top straps by the patient's shoulders to the sling bar, again matching the color on both sides.
Safety note: Always double-check that all straps are securely attached and that the sling is positioned correctly before operating the lift. Communicate with the patient throughout the process to ensure their comfort and safety.
Check strap positioning and patient safety
- Ensure the front straps under the patient's legs are attached one notch lower than the shoulder straps.
- Confirm that the patient's arms are crossed and remain inside the sling for safety.
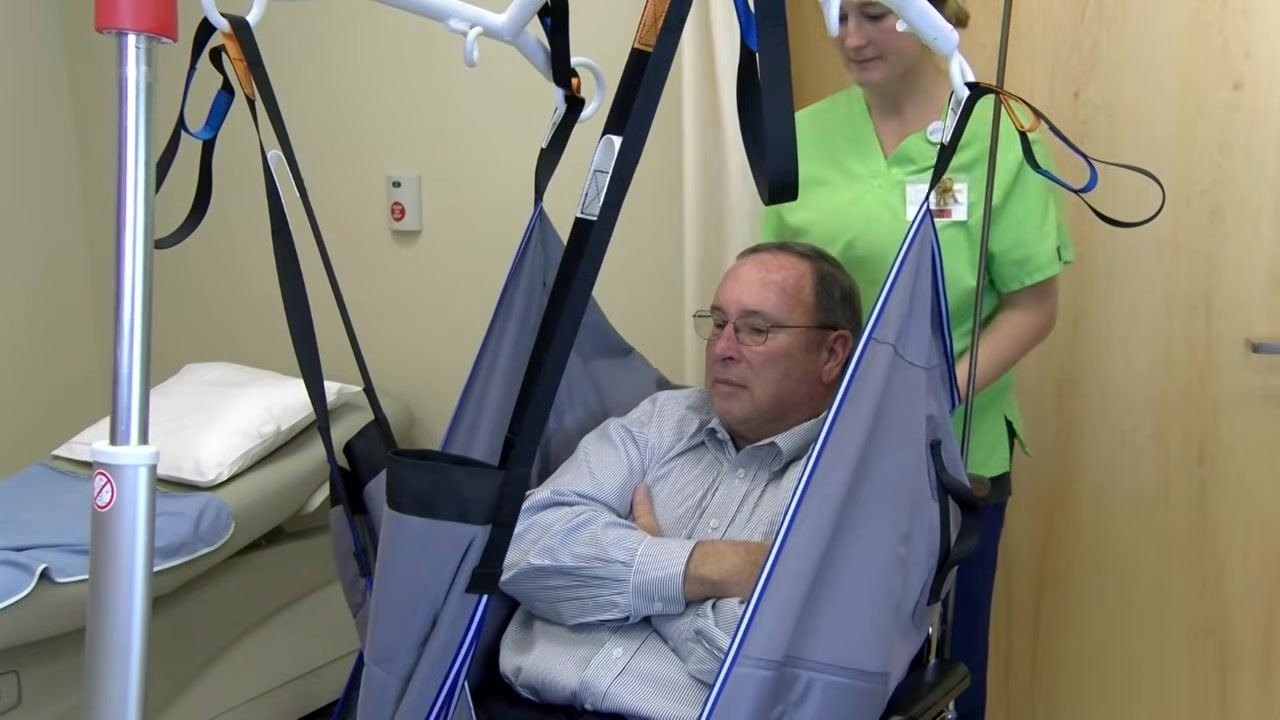
Unlock the rear casters of the Hoyer lift
Unlock the rear casters to allow the lift to move smoothly during the transfer.
Begin lifting the patient
- Slowly raise the patient using the lift until their bottom is almost off the chair.
- Pause and double-check that all sling straps are securely attached and the patient is stable.
Transfer the patient to the table or bed
- Gently turn the lift toward the table or bed.
- Position the patient so they are centered over the middle of the table or bed.
- Rotate and adjust the patient as needed to ensure proper alignment.
Lower the patient onto the table or bed
- Gradually lower the patient until their full weight is supported by the table or bed.
- Once the patient is fully supported, lock the casters on the lift to prevent movement.
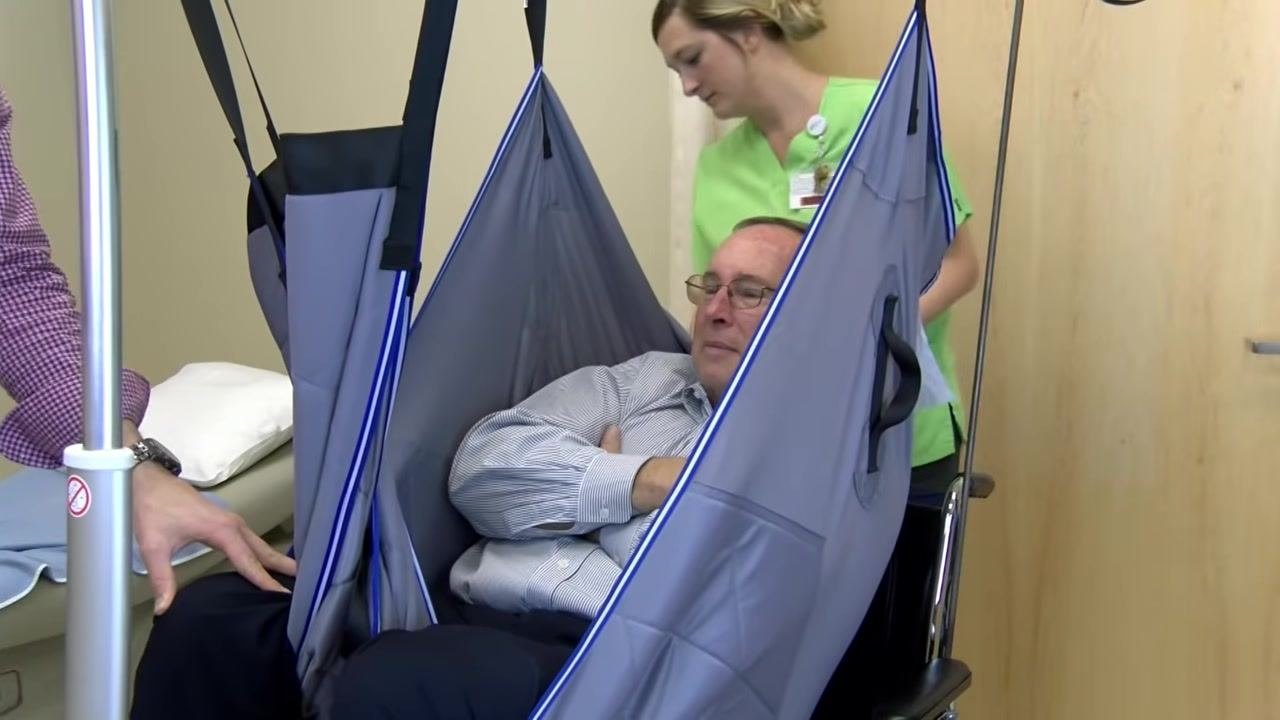
Detach the sling from the lift
Remove the sling straps from the lift bar carefully, ensuring the patient remains stable on the table or bed.
Remove the lift and sling
- Unlock the rear casters and carefully move the lift away from the patient.
- Gently remove the sling from underneath the patient, ensuring minimal disturbance.
Verification and summary
Confirm the transfer is complete, the patient is comfortable, and they are safely positioned on the table or bed. Provide any additional assistance the patient needs before concluding the procedure.
Safety note: Maintain clear communication with the patient throughout the transfer, and double-check all safety measures at each step to ensure a secure and comfortable experience.
Generation details: cost, quality tiers
Docsie billed 1,500 credits ($1.05) to analyze this 3-minute video at standard quality. The rewrite, template fill and Word/PDF exports were included. The same video at each quality tier:
| Quality | Frames sampled | Credits | Approx. cost |
|---|---|---|---|
| Draft | every 16-30 s | 750 | $0.52 |
| Standard (this guide) | every 8-15 s | 1,500 | $1.05 |
| Detailed | every 4-7 s | 3,000 | $2.10 |
| Ultra | every 1-3 s | 6,000 | $4.20 |
Credits priced at $0.70 per 1,000; plans include a monthly allowance. Enterprise customers on on-premise or bring-your-own-model deployments run this on their own inference and pay no per-video credits.
Generated by Docsie Video-to-Docs on 2026-09-09 from a 2-minute video. Screenshots are frames from the source video and belong to their creator, Springfield Clinic, whose original is embedded above. If you own this video and want the guide removed or credited differently, contact us and we will act within one business day.