
How to Remove an IV Line
This document explains how to remove an IV line safely and in line with current hospital protocols. It is intended as an educational reference for nursing and allied health staff and does not replace facility-specific clinical guidance. Before performing this or any nursing skill, confirm that you are following your institution's most current protocols, as medications and procedures may change over time.
Video: How to Remove an IV Catheter (Discontinue Peripheral IV in Dorsum of Hand) Nursing Skill by RegisteredNurseRN (2021). All credit for the demonstration goes to the creator; watch the original on YouTube. The written guide below was generated from this video by Docsie. Creator? Request a change or removal.
This document explains how to remove an IV line safely and in line with current hospital protocols. It is intended as an educational reference for nursing and allied health staff and does not replace facility-specific clinical guidance. Before performing this or any nursing skill, confirm that you are following your institution's most current protocols, as medications and procedures may change over time.
Purpose & scope
This procedure describes the steps for removing a peripheral intravenous (IV) line from a patient. It applies to patients who no longer require IV access and are having the cannula discontinued in a general hospital care setting. The content presented here is for educational purposes only; always verify the latest hospital protocols before practicing this skill, since medications and procedures may change.
Patient assessment
Before beginning IV removal, confirm your readiness with the following checklist:
| Assessment item | What to confirm |
|---|---|
| Protocol check | You are up to date with your hospital's current guidelines for IV removal |
| Supplies | Gauze, tape, and gloves are gathered and within reach |
| Hand hygiene | Hands are washed thoroughly according to hospital standards |
| Gloves | A clean pair of gloves is donned to maintain aseptic technique |
Vital sign monitoring frequency, a specific pain assessment scale, and neurovascular checks are not addressed in this procedure; these should be confirmed against your facility's standard pre-procedure assessment protocol.
Care protocol
The care protocol for removing an IV line is organized into three phases: preparation, removal, and completion.
Phase 1: Preparation
- Confirm you are following your hospital's current protocols before performing the skill.
- Gather gauze, tape, and gloves.
- Perform hand hygiene by washing your hands thoroughly.
- Don a clean pair of gloves to maintain aseptic technique.
Phase 2: Removing the IV line
- Remove all tape securing the IV. Gently peel off all pieces of tape from the IV site. Stabilize the IV with one hand while removing tape with the other hand to avoid accidental dislodgement.
-
Continue removing any remaining tape. Ensure all adhesive materials are fully detached from the patient's skin and the IV site.
-
Prepare to remove the cannula. Once all tape is removed, place a piece of gauze over the IV insertion site and position yourself to slide the cannula out in one smooth motion.
-
Remove the cannula. Hold the IV site steady with one hand. With the other hand, gently and smoothly withdraw the cannula while keeping the gauze in place over the site.
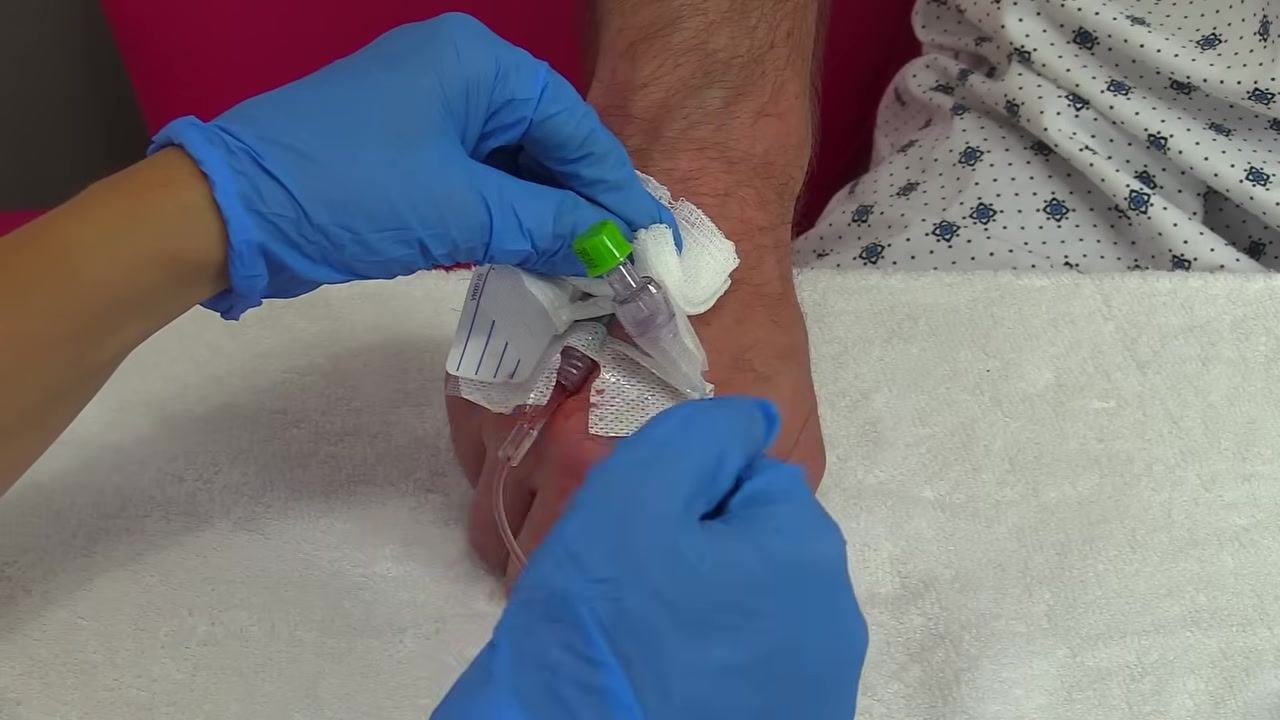
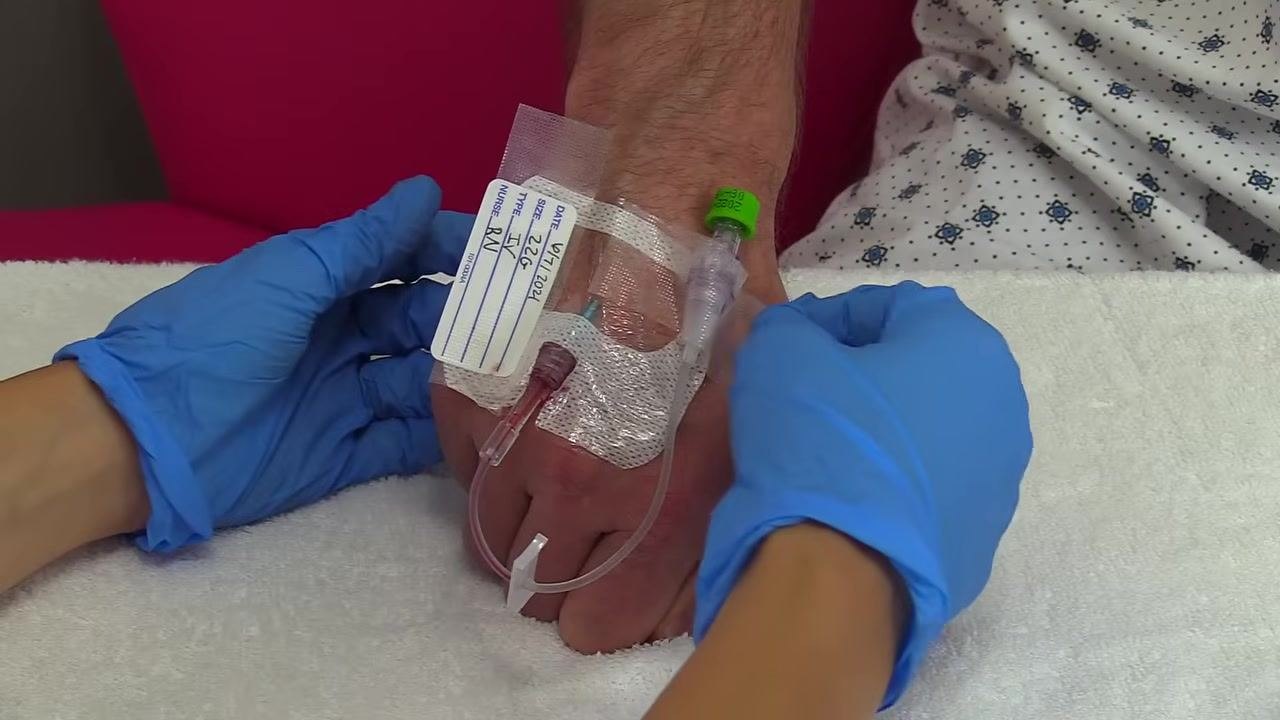
- Apply pressure to the site. Immediately after removing the cannula, apply firm pressure with the gauze for 2–3 minutes to prevent bleeding. Inspect the cannula to confirm it is intact and that no part remains in the patient.
Phase 3: Completion
-
Hold pressure for the appropriate duration. Maintain firm, consistent pressure on the site to prevent blood from seeping under the skin and causing a bruise. For patients on anticoagulants, hold pressure for a longer period as needed.
-
Dispose of used materials. Place used gauze and any other contaminated materials in the designated receptacle according to your facility's protocols.
-
Check the IV site. After holding pressure for the appropriate time, gently lift the gauze and inspect the site to confirm bleeding has stopped and the site appears healthy.
-
Secure the site with tape. Place a clean piece of gauze over the IV site and use medical tape to secure it completely.
-
Remove gloves and perform hand hygiene. Carefully remove your gloves and dispose of them per facility guidelines, then wash your hands thoroughly.
-
Document the procedure. Record in the patient's chart that the IV was removed, including the time, the condition of the site, and any relevant observations.
Always dispose of sharps and used materials according to your facility's safety protocols, and document the procedure as required by your institution.
Pain management
This procedure does not involve a specific pain management plan, medication table, or pain score targets; refer to your facility's standard pain management protocol if the patient reports discomfort during or after IV removal.
Mobility milestones
Mobility milestones and a phase-based mobility timeline are not addressed in this procedure, as IV removal does not itself affect patient mobility status; refer to the patient's overall care plan for mobility goals.
Complication monitoring
Monitor the IV site closely after cannula removal for the following:
- Active bleeding at the site, which should resolve with 2–3 minutes of firm pressure
- Bruising or blood seeping under the skin, which requires longer pressure application, particularly for patients on anticoagulants
- An intact cannula upon removal, confirming that no fragment remains in the patient
Escalation contacts and formal early warning criteria are not specified in this procedure; follow your facility's standard escalation pathway if bleeding does not resolve or if the cannula appears incomplete.
Discharge criteria
Specific measurable discharge criteria are not addressed in this procedure. In general, the IV site should show no active bleeding, appear healthy, and be covered with a secure clean dressing before considering the immediate post-removal care complete.
Patient education
Direct patient teaching points are not detailed in this procedure. Staff should document the removal in the patient's chart, including the time, site condition, and any observations, as part of ongoing care communication.
Note: Always follow your facility's most current protocols and safety guidelines when performing IV removal or any other clinical procedure.
Generation details: cost, quality tiers, downloads
Docsie billed 1,500 credits ($1.05) to analyze this 3-minute video at standard quality. The rewrite, template fill and Word/PDF exports were included. The same video at each quality tier:
| Quality | Frames sampled | Credits | Approx. cost |
|---|---|---|---|
| Draft | every 16-30 s | 750 | $0.52 |
| Standard (this guide) | every 8-15 s | 1,500 | $1.05 |
| Detailed | every 4-7 s | 3,000 | $2.10 |
| Ultra | every 1-3 s | 6,000 | $4.20 |
Credits priced at $0.70 per 1,000; plans include a monthly allowance. Enterprise customers on on-premise or bring-your-own-model deployments run this on their own inference and pay no per-video credits.
Generated by Docsie Video-to-Docs on 2026-09-14 from a 2-minute video. It was generated straight into Docsie's Patient Care Procedure template, so every section of that template is filled from the video. Screenshots are frames from the source video and belong to their creator, RegisteredNurseRN, whose original is embedded above. If you own this video and want the guide removed or credited differently, contact us and we will act within one business day.