
How to Program an IV Pump
This guide walks you through how to program an IV pump using the Alaris PC unit and Alaris Pump modules (CareFusion), from priming the primary tubing through configuring and starting a primary infusion, then setting up and running a secondary (piggyback) medication infusion. Follow each step in order, and always confirm settings against the medication order before starting any infusion.
Video: Alaris Pump Introduction with Primary and Secondary IV Infusion Programming by Nurse Stuff (2020). All credit for the demonstration goes to the creator; watch the original on YouTube. The written guide below was generated from this video by Docsie. Creator? Request a change or removal.
This guide walks you through how to program an IV pump using the Alaris PC unit and Alaris Pump modules (CareFusion), from priming the primary tubing through configuring and starting a primary infusion, then setting up and running a secondary (piggyback) medication infusion. Follow each step in order, and always confirm settings against the medication order before starting any infusion.

Note: This guide describes a demonstrated setup and programming sequence. Always follow your facility's policies and procedures to ensure accurate and safe nursing technique; this content does not replace facility-specific clinical guidance.
Device Overview
Device: Alaris PC unit with Alaris Pump modules (CareFusion brand).
Intended use: The Alaris PC unit, paired with one or more Alaris Pump modules, is an infusion system used to program and deliver intravenous (IV) fluids and medications. It supports both primary continuous infusions and secondary (piggyback) intermittent medication infusions in a clinical setting.
Principle of operation: The primary IV tubing is primed and loaded into a pump channel. The operator enters infusion parameters — rate (mL/h) and volume to be infused (VTBI) — on the Alaris PC touchscreen and keypad. The pump then delivers fluid at the programmed rate until the set volume has infused. For secondary infusions, the system pauses the primary channel, calculates the rate automatically from the entered volume and duration, and prompts the operator to confirm the secondary clamp is open before starting.
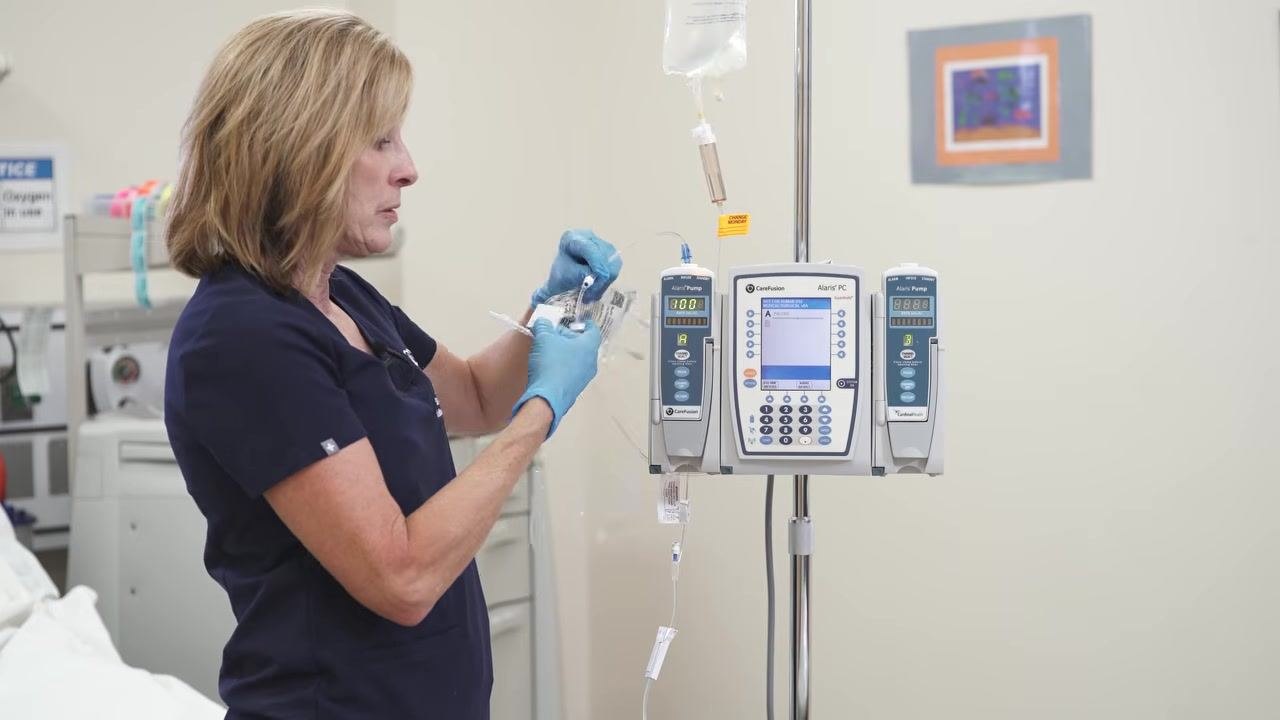
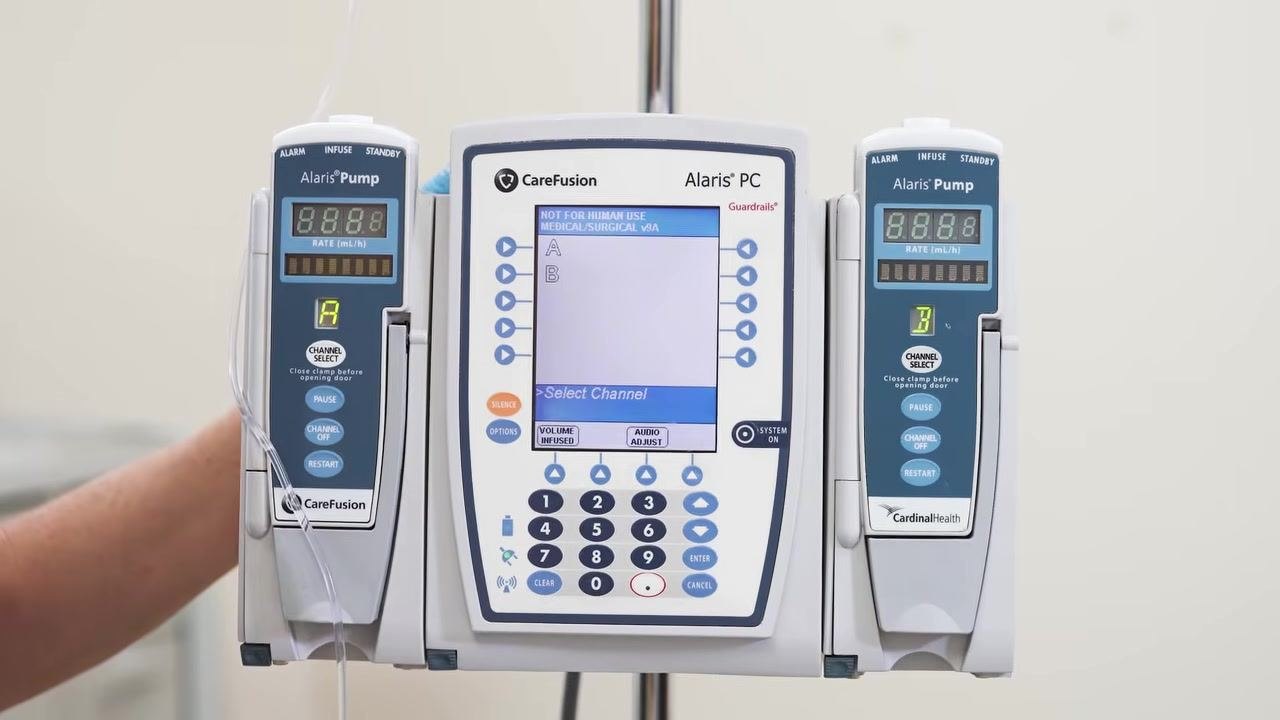
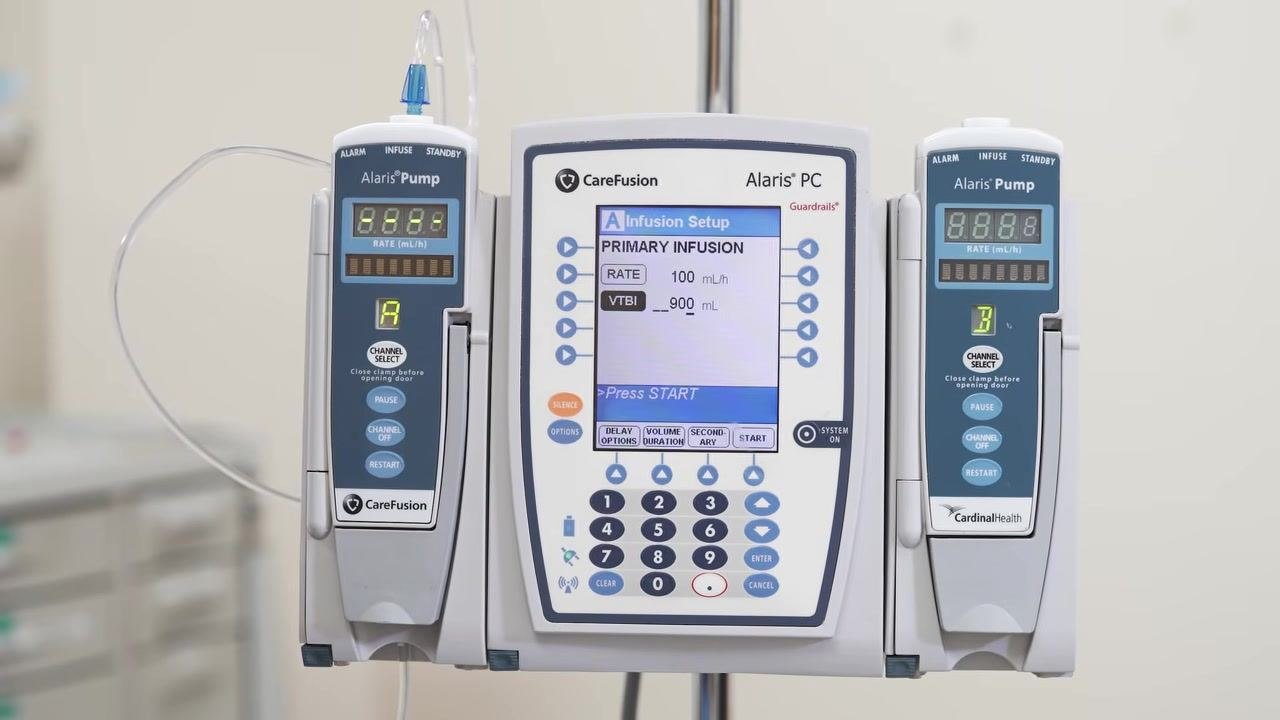
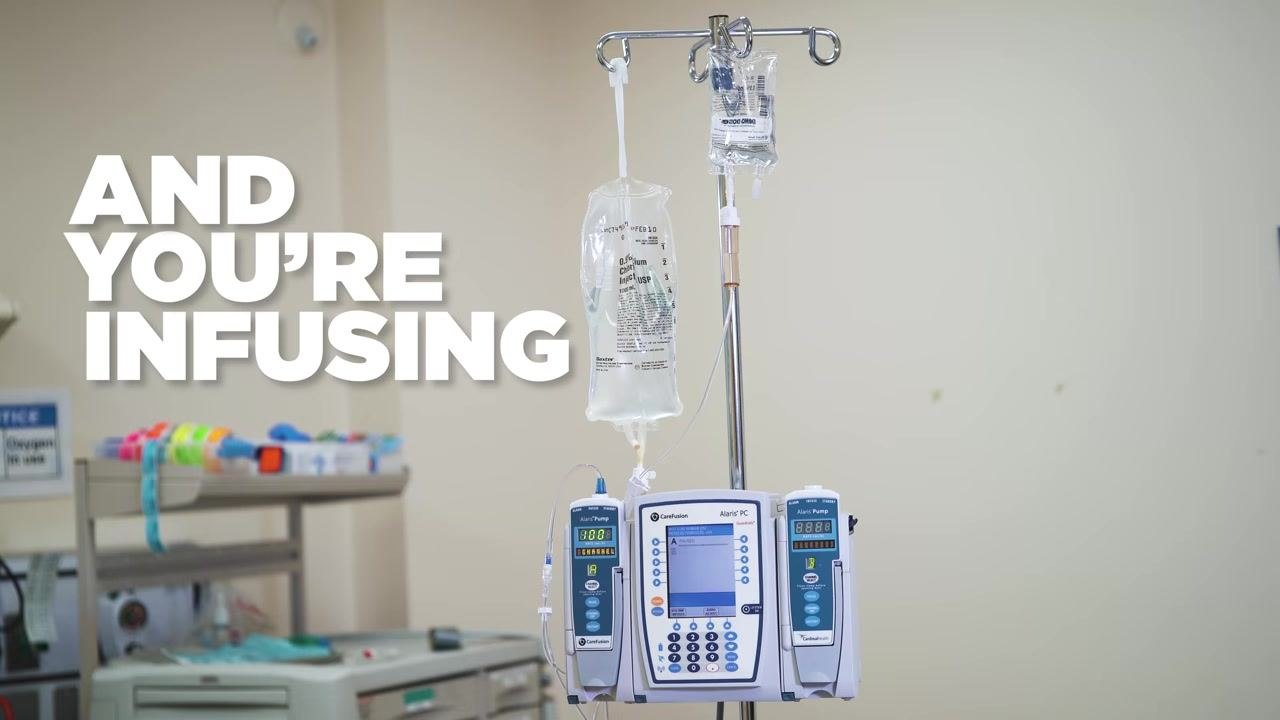
Labeled diagram description: The Alaris PC unit and two Alaris Pump modules are mounted together on an IV pole. The Alaris PC unit has a central touchscreen display, a keypad for numeric entry, and a System On button in its lower right corner. Each pump module below it has a hinged door for loading tubing, a Channel Select button, and its own digital display showing the channel's rate and status (for example, "100" and "PAUSE").
Indications & Contraindications
Demonstrated indications: As shown, the Alaris system is used for: - Primary continuous IV fluid infusion, programmed using the Basic Infusion mode - Secondary (piggyback) intermittent medication infusion, such as an antibiotic (Cefazolin) infusion for a medical-surgical patient
The Infusion Menu also offers Guardrails Drugs and Guardrails IV Fluids modes as selectable infusion types, though the demonstrated setup uses Basic Infusion.
Contraindications: The source material does not specify absolute or relative contraindications for use of the Alaris system; consult the manufacturer's full labeling and your facility's clinical policies for contraindication and patient-safety information.
Setup & Installation
Gathering supplies
Collect all necessary supplies for priming and piggyback infusion before starting, including the Alaris primary IV tubing set and alcohol prep pads.
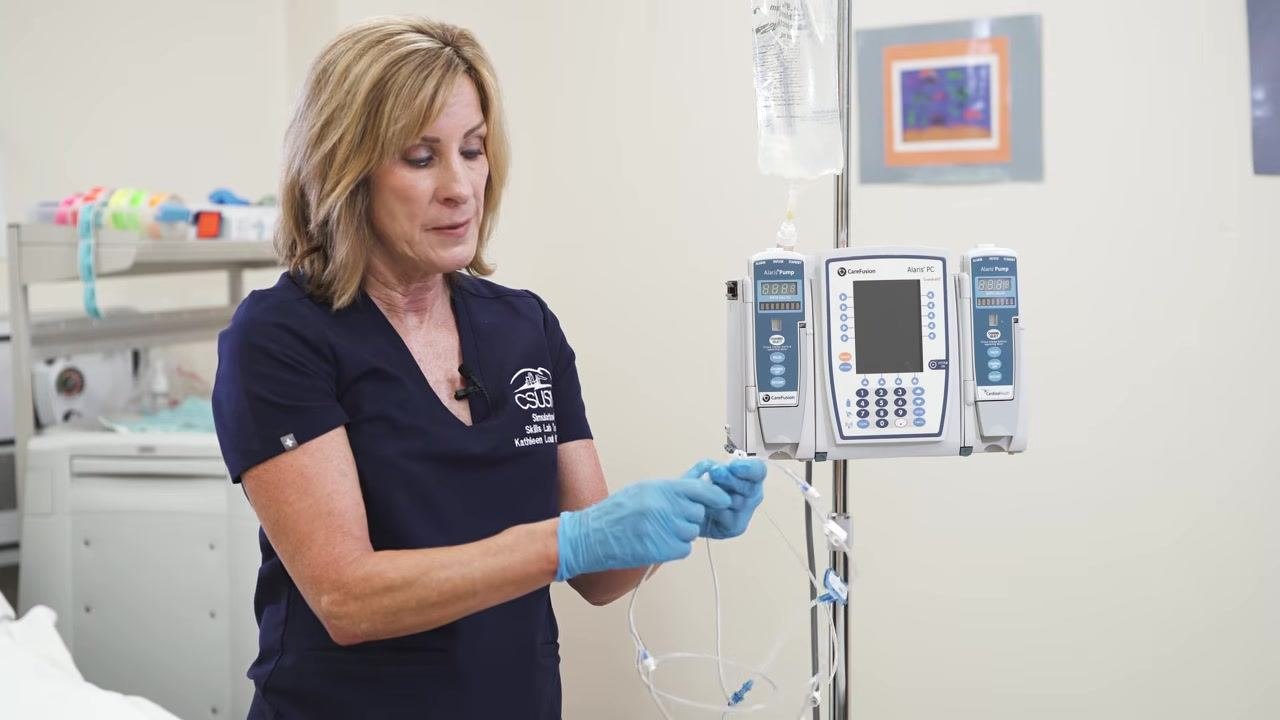
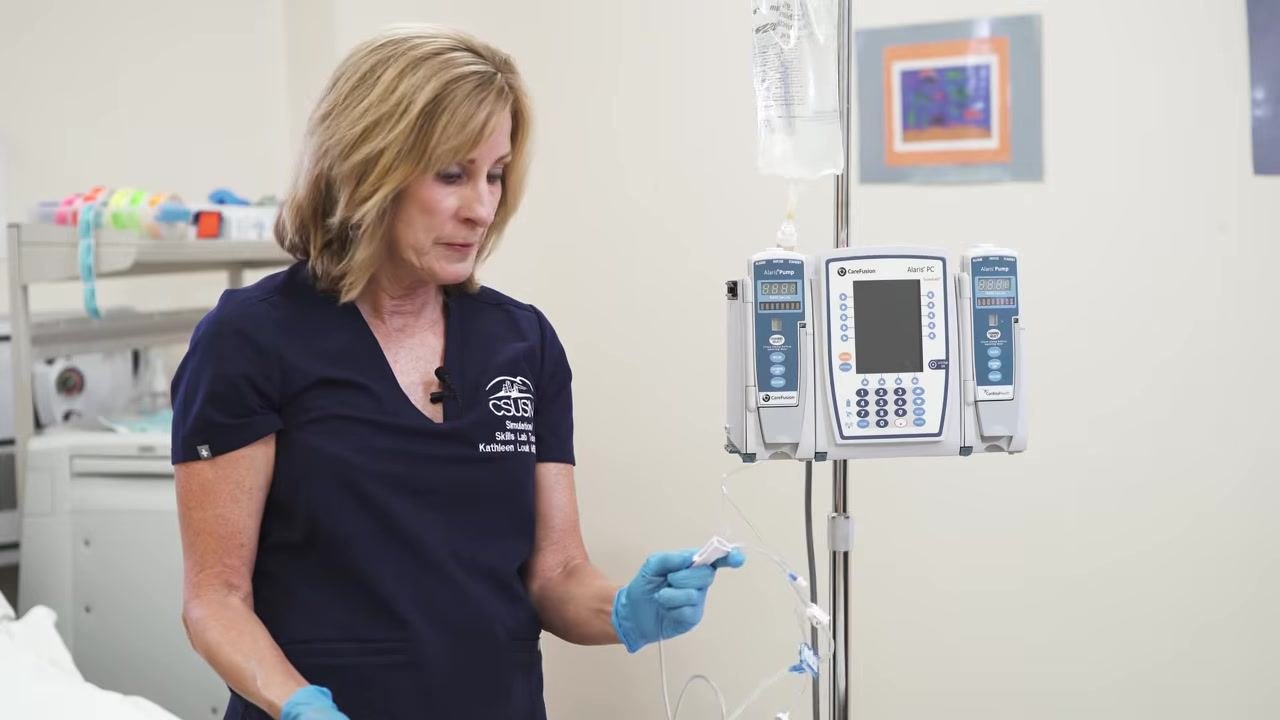
Opening the primary tubing
- Remove the Alaris primary tubing from its packaging.
- Inspect the tubing — the roller clamp is open by default.
- Immediately close the roller clamp to prevent fluid from flowing prematurely.

Preparing and spiking the IV bag
-
Hold the IV fluid bag securely and remove the protective tab from its entry port, maintaining sterility.
-
Take the sterile spike from the IV tubing set and insert it into the bag's entry port using a twisting motion, keeping the spike and port sterile throughout.
Caution: Maintain sterility of all tubing ends and port openings throughout setup; avoid touching sterile surfaces.
Filling the drip chamber and priming the tubing
- Hang the spiked IV bag on the IV pole hook.
-
Squeeze the drip chamber until it is approximately halfway full.
-
Loosen the cap at the end of the IV tubing slightly to allow air to escape.
-
Slowly open the roller clamp to let fluid flow through the tubing until all air bubbles are removed.
-
Inspect the tubing carefully and continue running fluid through it until it is completely primed and free of air.
Powering on the Alaris PC unit
- Locate the System On button in the lower right corner of the Alaris PC unit.
- Press System On to turn on the device.
- Wait for the system to boot up and display the initial prompts.
Loading tubing into the pump module
- Open the door of the selected pump module.
- Orient the primed tubing so the segment with the small edge is at the top and the blue filter sits below.
-
Insert the tubing into the pump channel until it clicks securely into place.
-
Gently close the pump door, ensuring the tubing is properly seated and the door is fully closed.
Pre-use check: Before proceeding to programming, confirm the tubing is fully primed and free of air, the door is securely closed, and clamps are in the correct position for the next step.
Power requirements: The source material does not specify the Alaris system's electrical input, voltage, or battery specifications; refer to the manufacturer's technical documentation for these details.
Programming & Operation
Starting a new patient profile
-
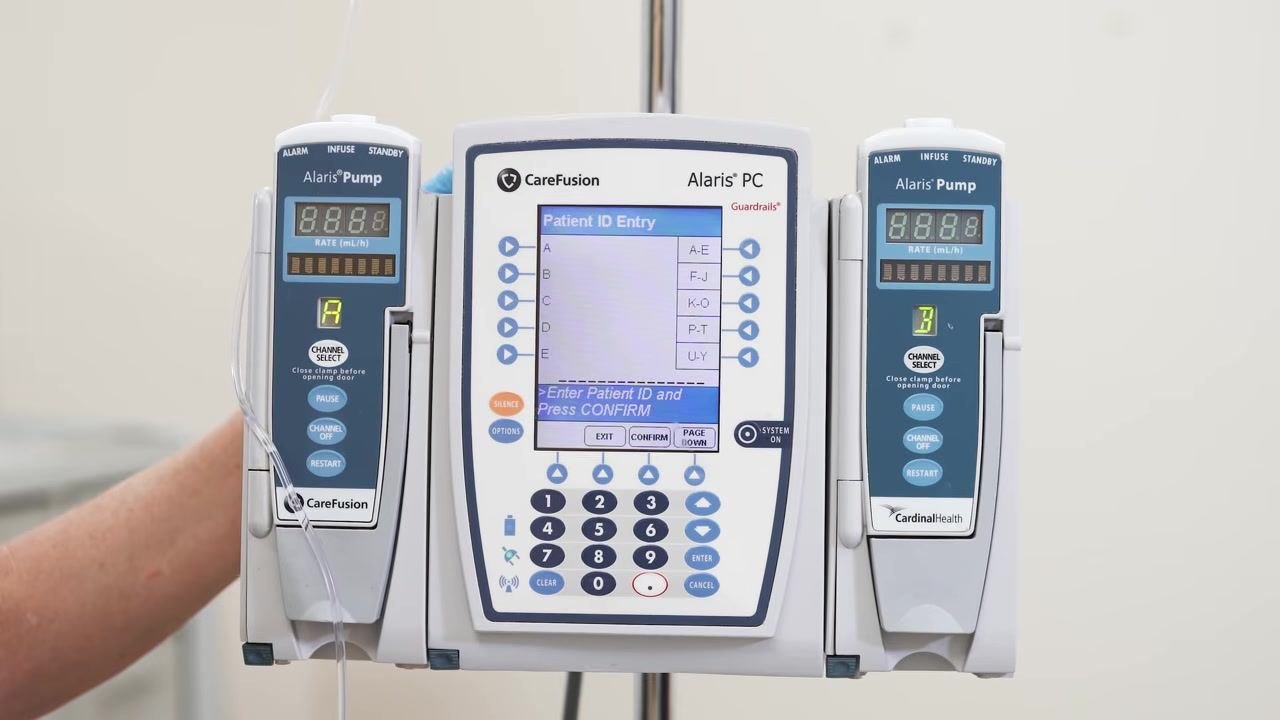
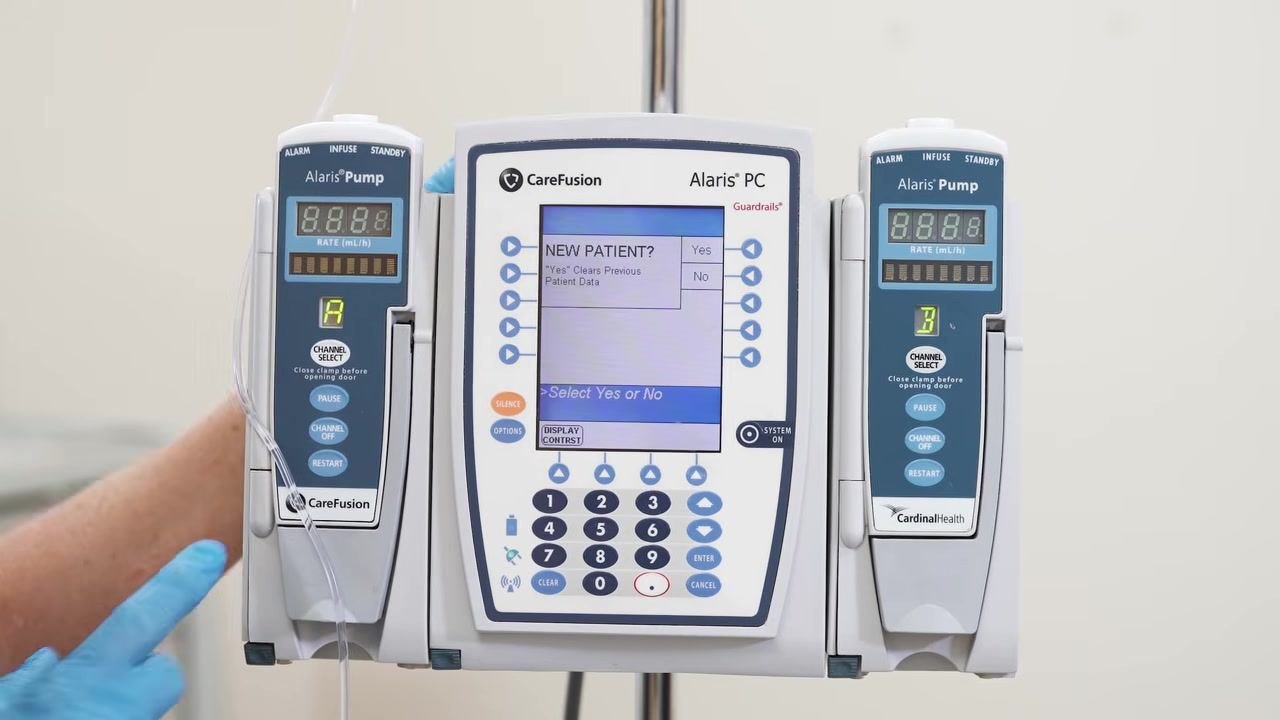
When prompted NEW PATIENT?, select Yes to clear previous patient data using the arrow keys and confirm.
-
When asked if this is a "med surge patient," select Yes using the arrow keys and confirm.
-
When prompted for Patient ID Entry, use the keypad to enter the patient's ID number, then press CONFIRM at the bottom of the screen.
Selecting the channel
- The screen displays available channels (for example, A and B). Choose the channel you wish to use.
- Press the Channel Select button on the corresponding pump module.
Selecting the infusion type
- On the Infusion Menu, three options appear: Guardrails Drugs, Guardrails IV Fluids, and Basic Infusion.
-
Highlight Basic Infusion and press the corresponding button to select it.
-
Confirm that Basic Infusion is selected before proceeding.
Entering infusion parameters
-
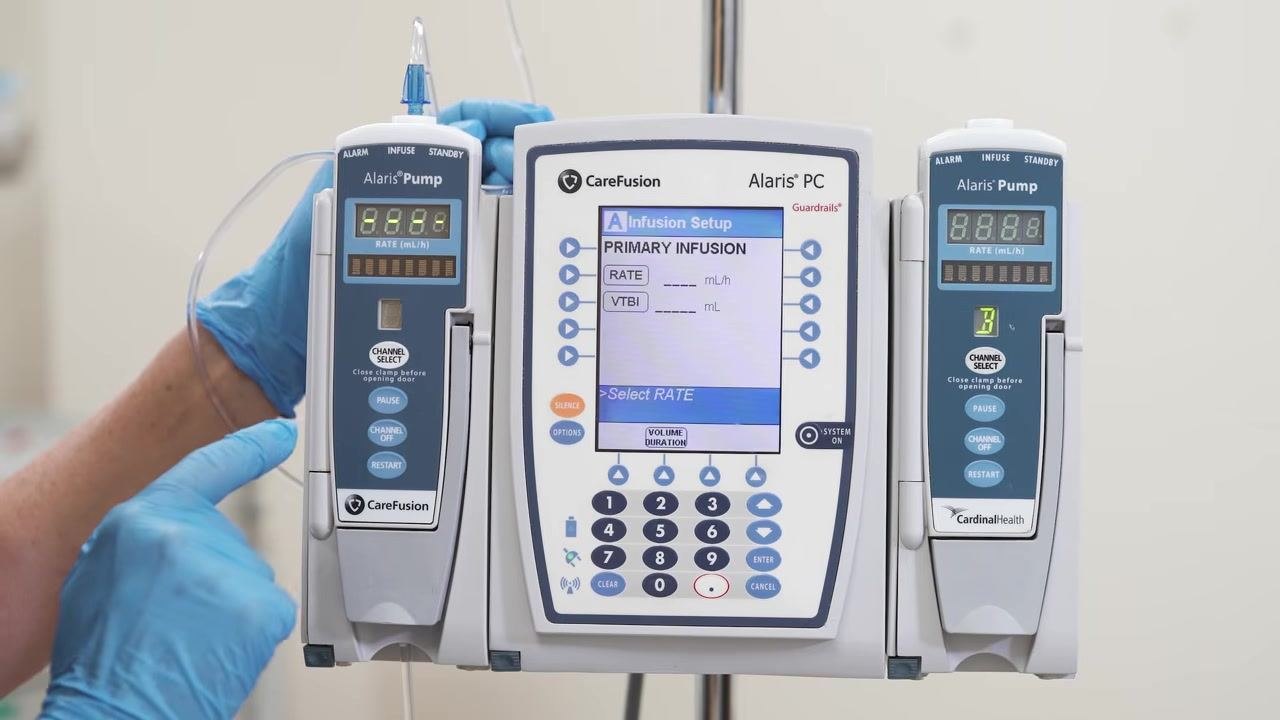
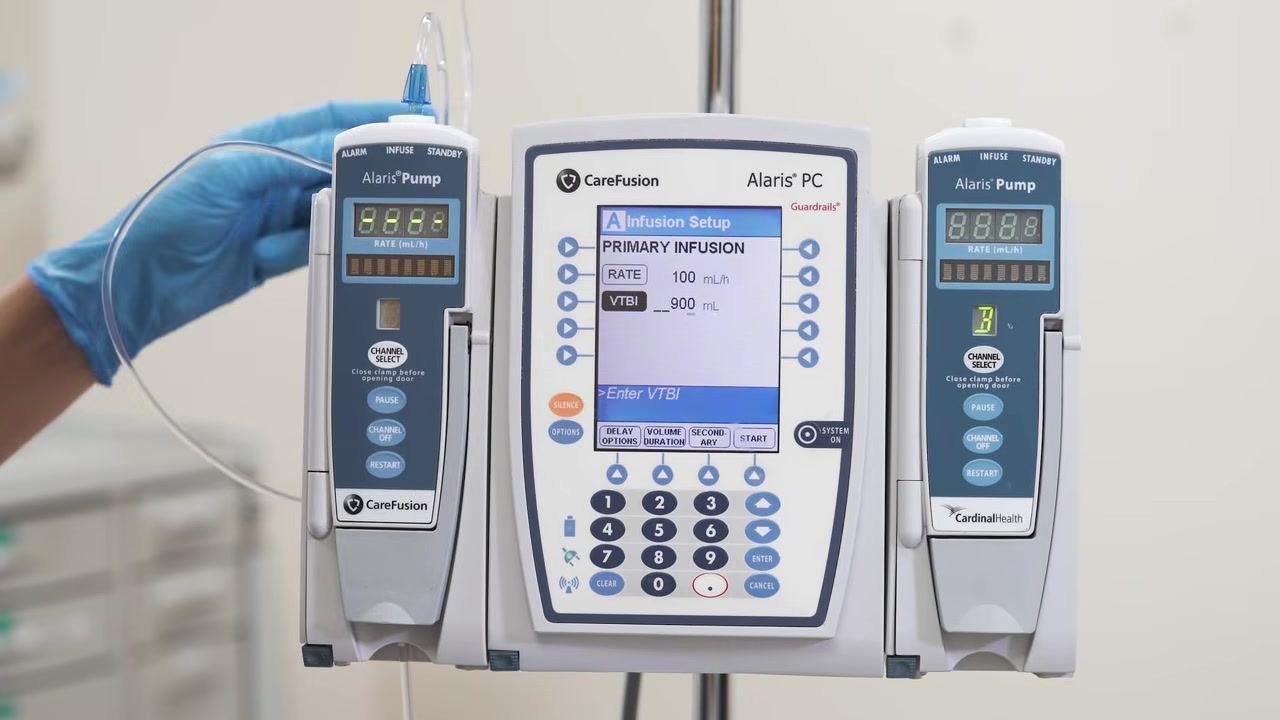
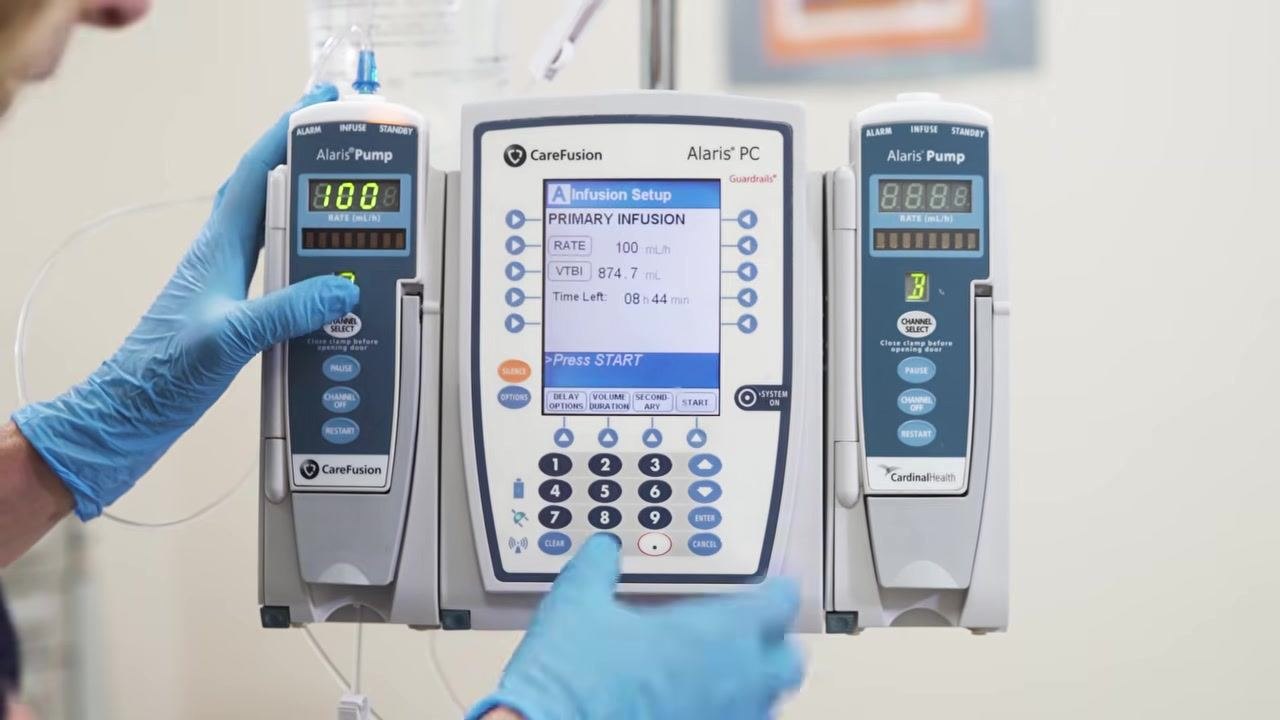
On the Infusion Setup screen, enter the RATE according to the physician's order (for example, 100 mL/h), then press Next.
-
When prompted, enter the VTBI (Volume To Be Infused) to match the volume in the IV bag (for example, 900 mL) and confirm the entry.
-
Verify that all IV line clamps are open to ensure proper flow.
Caution: Verify all clamps are open and confirm that the entered RATE and VTBI match the medication order before pressing START.
Starting the primary infusion
- Press START at the bottom right of the main Alaris PC screen to begin the infusion. The IV solution begins infusing at the programmed rate and volume.
Preparing the secondary (piggyback) medication
- Gather the secondary medication (for example, Cefazolin 2 grams) and secondary IV tubing.
-
Open the secondary tubing packaging, maintaining sterility, and ensure its clamp is closed before proceeding.
-
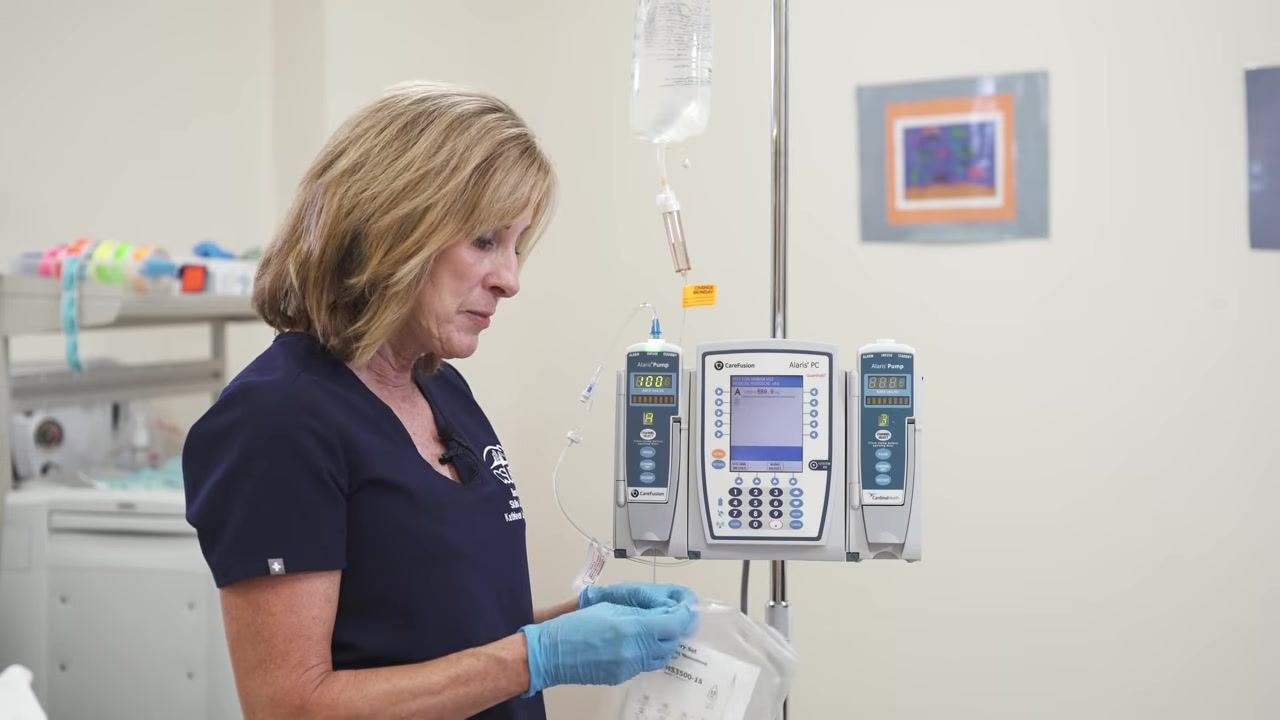
Hang the secondary medication bag on the IV pole above the primary infusion, and prime the secondary tubing, allowing fluid to flow through it until no air remains. Maintain sterility of both the medication port and the secondary tubing port throughout.
-
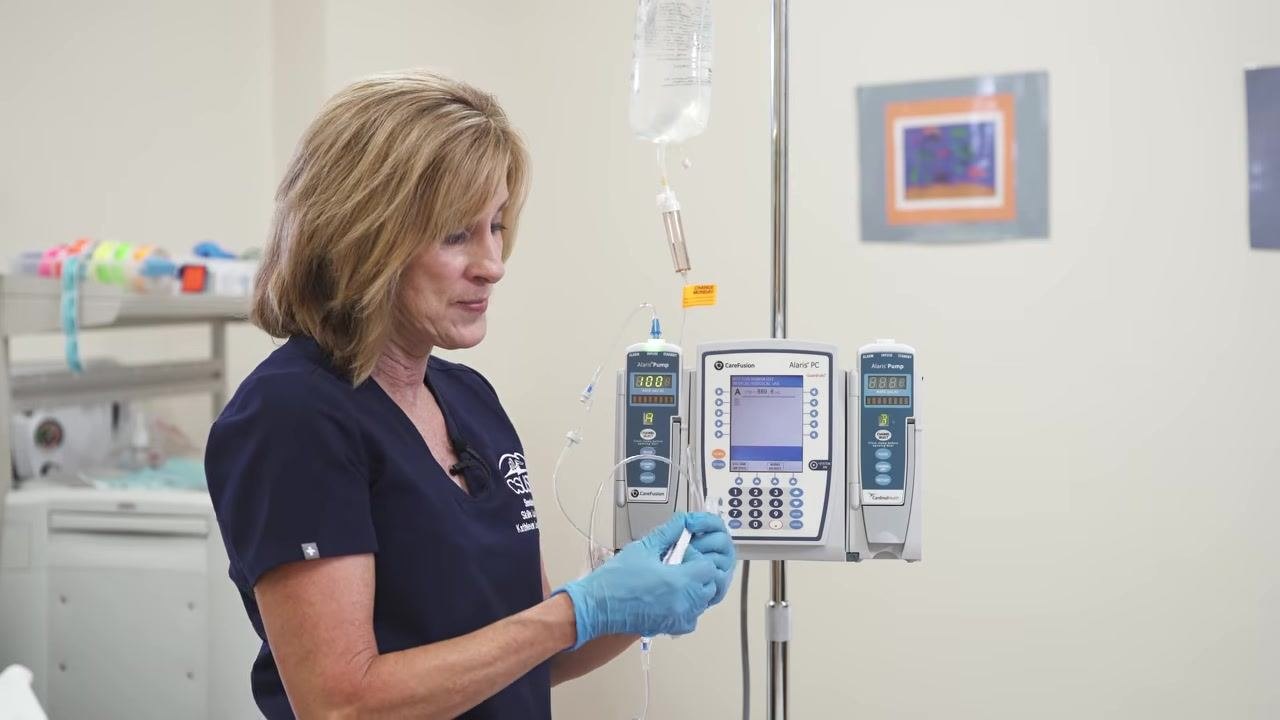
While connecting the secondary tubing, avoid touching the tubing ends or the medication port to maintain sterility.
-
Select the appropriate port on the primary IV setup and connect the secondary tubing, ensuring all connections are secure and sterile.
-
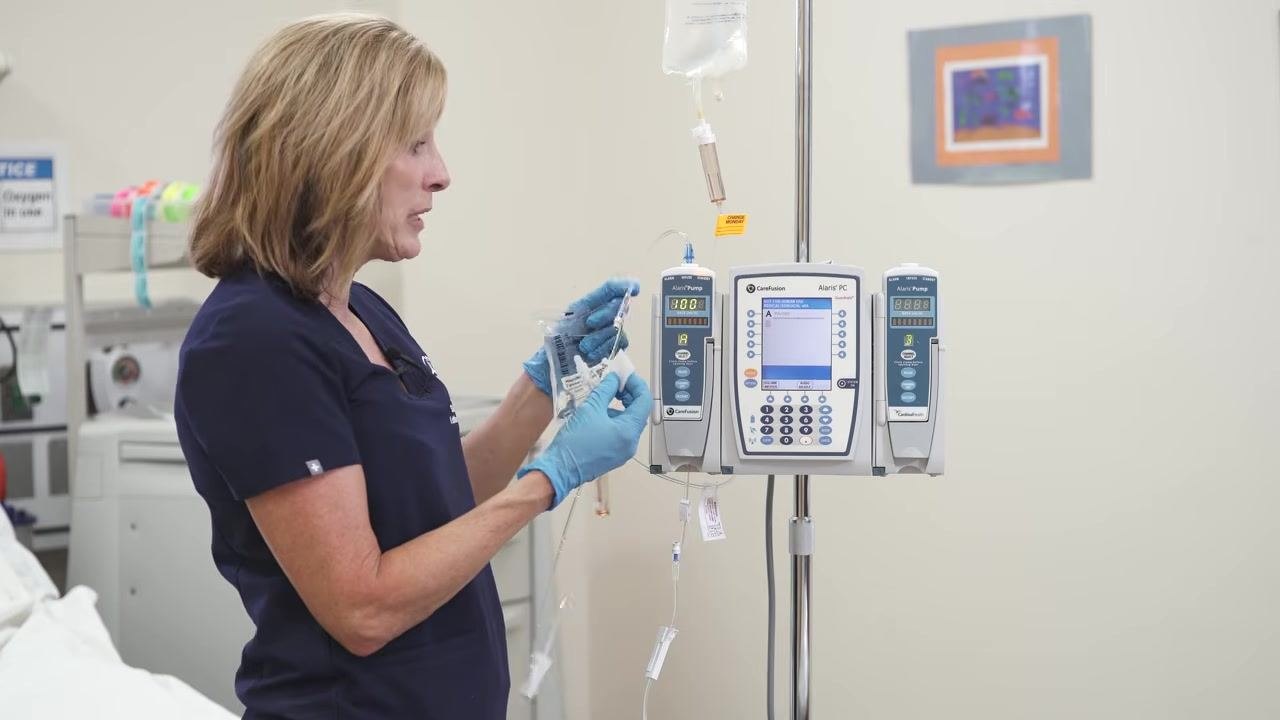
Identify the designated secondary medication port on the primary tubing, typically located above the primary drip chamber. Confirm the secondary bag hangs higher than the primary bag for proper flow, and keep the secondary tubing clamp closed until ready to infuse.
Programming the secondary infusion
-
Put on clean gloves, obtain a new alcohol swab, and cleanse the secondary port thoroughly.
-
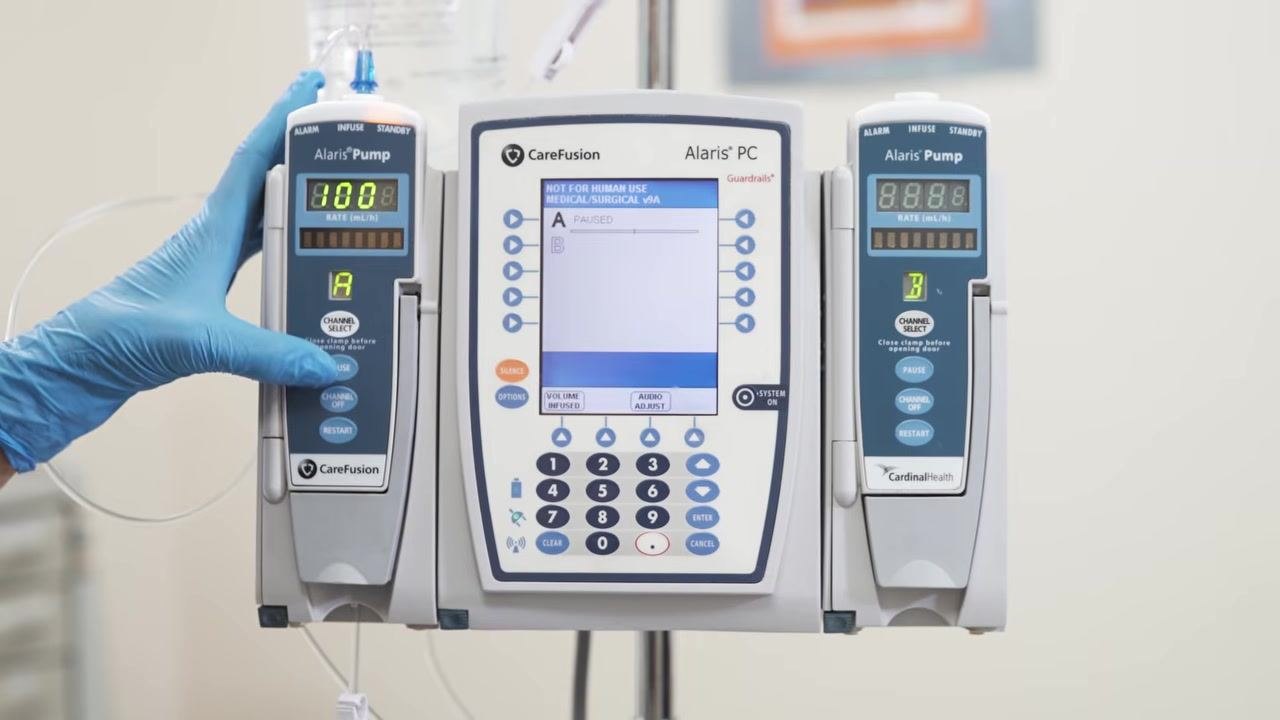
Pause the pump using the control panel, slowly open the clamp on the secondary tubing, and allow fluid to flow into the drip chamber until it is halfway full. Lower the primary bag to support proper gravity flow.
-
Hang the secondary IV bag higher than the primary bag on the IV pole, and confirm both bags are securely attached with tubing free of kinks.
-
Confirm the pump is paused (display reads PAUSED) and press Channel Select for the appropriate channel.
-
On the pump's main screen menu, press SECONDARY to begin programming the secondary infusion.
-
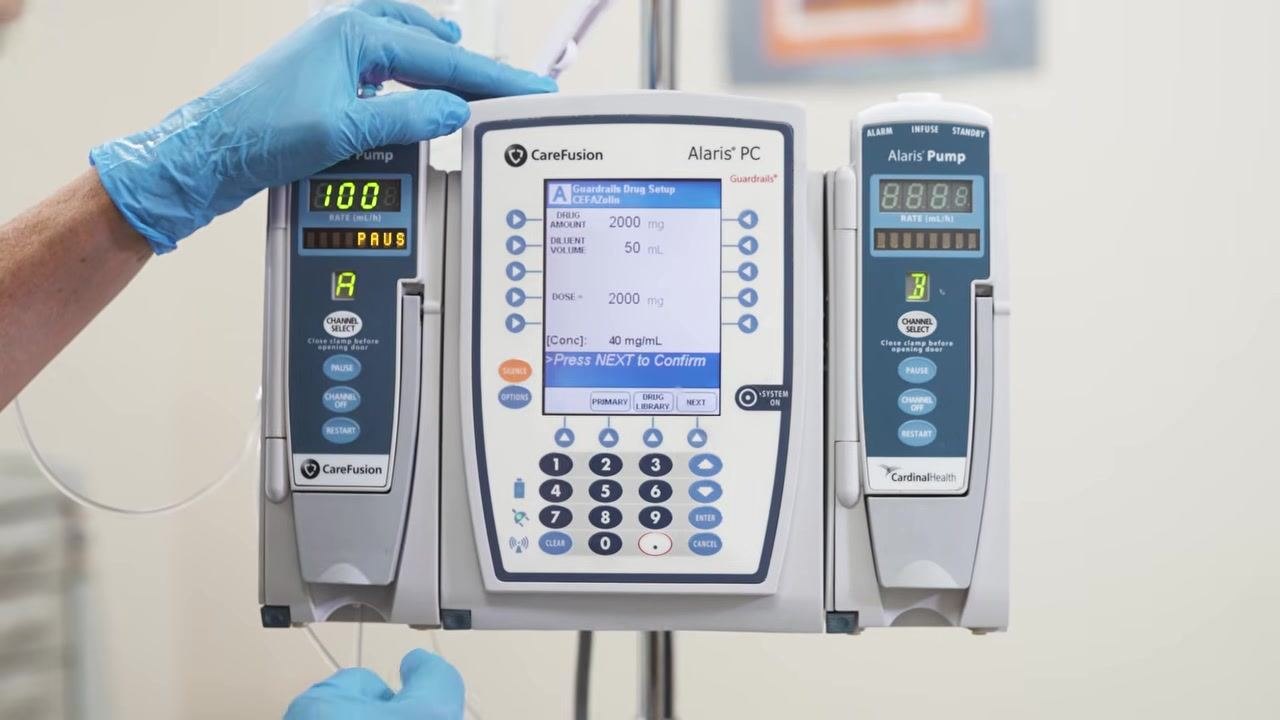
When prompted, select the correct drug concentration for the secondary medication (for example, 1,000 mg/50 mL or 2,000 mg/50 mL) as ordered.
-
Review the confirmation screen (drug amount, diluent volume, dose, and concentration) and press NEXT to confirm.
-
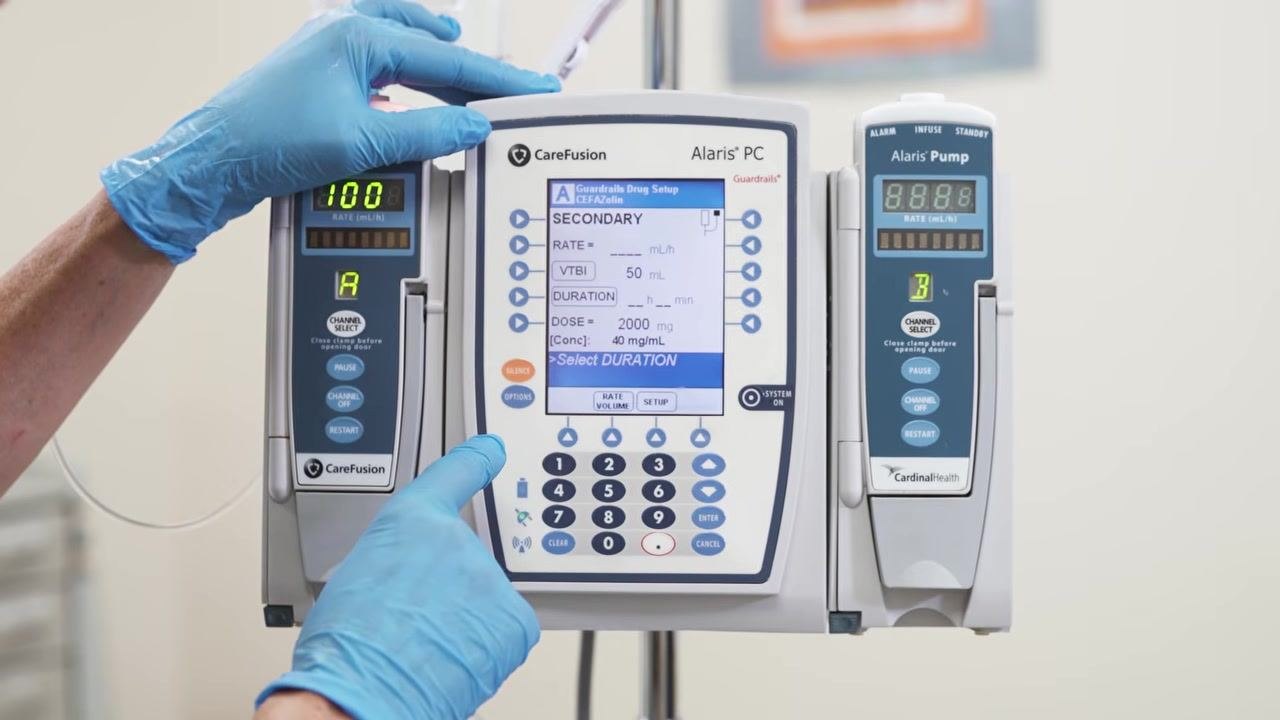
Enter the desired infusion rate or duration (for example, 30 minutes), and confirm VTBI (50 mL) and dose (2,000 mg).
Note: Always double-check medication orders, pump settings, and tubing connections before starting the infusion, following institutional protocols for medication administration and pump programming.
- Review the automatically calculated RATE (based on VTBI and duration), and confirm all displayed values — RATE, VTBI, DURATION, DOSE, and concentration — match the medication order before proceeding.
Starting the secondary infusion
- Verify the secondary clamp is open.
-
Press START at the bottom right of the Alaris PC main panel. The screen prompts: "Verify Secondary Clamp Open, Then Press START." Confirm the pump transitions from PAUSE to active infusion.
-
Step back and visually confirm both the primary and secondary IV bags are properly hung and infusion is running; the pump display should show the active rate and no longer show PAUSE.
Alarms & Alerts
The source material documents the following on-screen prompts observed during programming and operation:
| Prompt/Status | Priority | Description | Probable cause | Corrective action |
|---|---|---|---|---|
| NEW PATIENT? Yes/No | Informational | System asks to confirm starting a new patient profile | Beginning a new infusion setup | Select Yes to clear previous patient data, or No as appropriate |
| PAUSED | Operational status | Pump channel is not actively infusing | Channel selected but infusion not yet started, or paused for secondary programming | Verify settings, then press START to begin or resume infusion |
| Verify Secondary Clamp Open, Then Press START | Informational | System prompts confirmation before starting the secondary infusion | Secondary infusion has been fully programmed | Confirm the secondary clamp is open, then press START |
The source material does not document formal alarm codes, priority classifications (for example, high/medium/low), or fault conditions such as occlusion or air-in-line alarms; refer to the manufacturer's complete alarm reference for this information.
Cleaning & Maintenance
Port disinfection: Cleanse the secondary port thoroughly with a new alcohol swab before each connection, using clean gloves.
Tubing change interval: After hanging the tubing, attach a label indicating the next change date so future caregivers know when to replace it. Typical tubing change intervals are between 72 and 96 hours, but always follow your facility's policy.
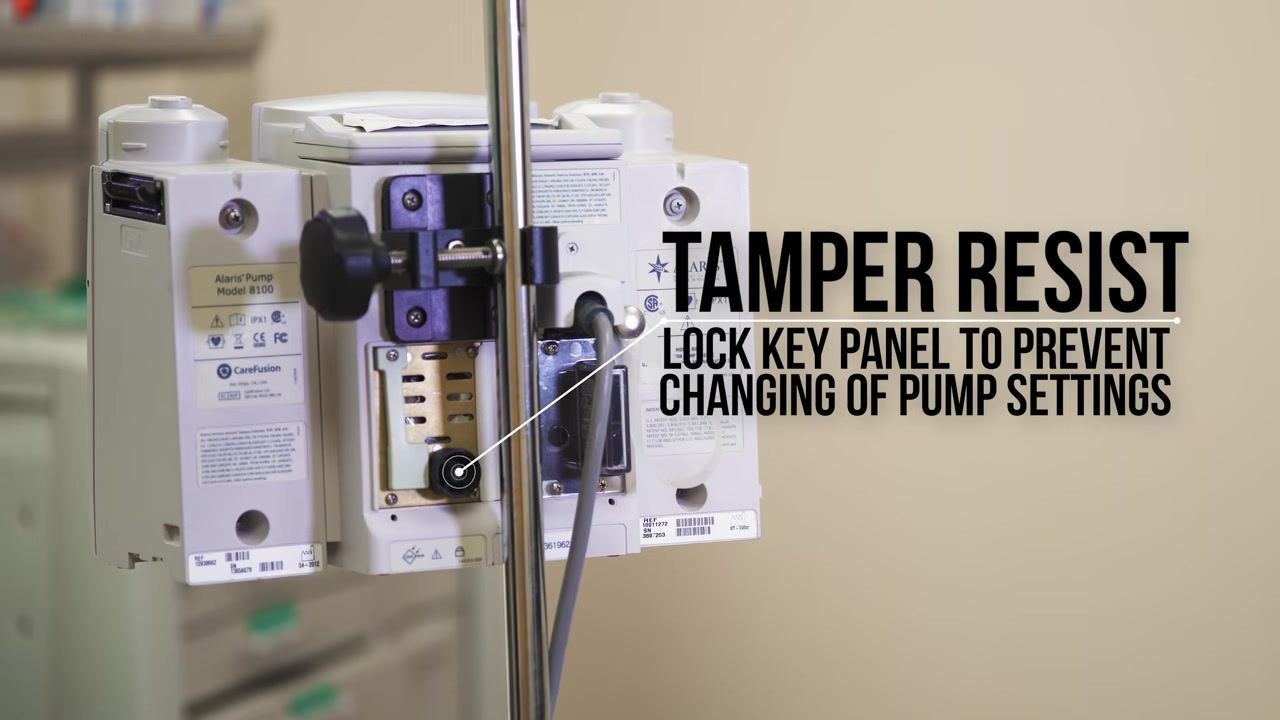
Securing pump settings: Locate the tamper-resistant lock on the back of the Alaris pump and lock the key panel to prevent unauthorized or accidental changes to pump settings. This is especially important in environments where pump security is a concern. The rear label identifies the device as "Alaris Pump Model 8100."
Calibration requirements: The source material does not specify a calibration schedule or procedure; consult the manufacturer's service documentation for calibration requirements.
Troubleshooting
| Symptom | Possible cause | Solution |
|---|---|---|
| Air bubbles remain visible in primary or secondary tubing after priming | Priming was stopped before all air cleared the line | Continue allowing fluid to flow through the tubing until it is completely free of air before loading it into the pump |
| Secondary infusion does not begin after pressing START | Secondary tubing clamp is closed | Verify the secondary clamp is open, then press START again |
| Fluid does not flow properly through secondary tubing | Secondary bag is not hung higher than the primary bag | Confirm the secondary bag is positioned higher than the primary bag on the IV pole |
The source material does not cover error codes, occlusion alarms, or other fault-driven troubleshooting scenarios; consult the manufacturer's service manual for these situations.
Technical Specifications
| Attribute | Value |
|---|---|
| Device model | Alaris Pump Model 8100 (per rear label) |
| Manufacturer | CareFusion |
| Configuration | Alaris PC unit with Alaris Pump modules mounted on an IV pole |
Physical dimensions, electrical specifications, environmental operating requirements, and regulatory classifications are not covered in the source material; refer to the manufacturer's technical specification sheet for this information.
What's Next
Once the primary and secondary infusions are running, regularly check the infusion site, tubing, and pump for any alarms, occlusions, or issues, and document the start time, medication, dose, and any observations per your institution's policy. When the procedure is complete, dispose of all supplies properly and continue to monitor the patient as directed by your facility's protocol.
Generation details: cost, quality tiers, downloads
Docsie billed 4,000 credits ($2.80) to analyze this 8-minute video at standard quality. The rewrite, template fill and Word/PDF exports were included. The same video at each quality tier:
| Quality | Frames sampled | Credits | Approx. cost |
|---|---|---|---|
| Draft | every 16-30 s | 2,000 | $1.40 |
| Standard (this guide) | every 8-15 s | 4,000 | $2.80 |
| Detailed | every 4-7 s | 8,000 | $5.60 |
| Ultra | every 1-3 s | 16,000 | $11.20 |
Credits priced at $0.70 per 1,000; plans include a monthly allowance. Enterprise customers on on-premise or bring-your-own-model deployments run this on their own inference and pay no per-video credits.
Generated by Docsie Video-to-Docs on 2026-09-14 from a 7-minute video. It was generated straight into Docsie's Medical Device IFU template, so every section of that template is filled from the video. Screenshots are frames from the source video and belong to their creator, Nurse Stuff, whose original is embedded above. If you own this video and want the guide removed or credited differently, contact us and we will act within one business day.