
How to Perform Tracheostomy Care
This standard operating procedure describes how to perform tracheostomy care using a standard trach care kit, including how to identify tracheostomy tube components, prepare a sterile field, clean the inner cannula, and dress the stoma site. Following this procedure ensures the airway remains patent, the stoma site stays clean, and the patient receives uninterrupted oxygen delivery throughout the process.
Video: Tracheostomy Care Tutorial by JSCC Simulation Lab (2016). All credit for the demonstration goes to the creator; watch the original on YouTube. The written guide below was generated from this video by Docsie. Creator? Request a change or removal.
This standard operating procedure describes how to perform tracheostomy care using a standard trach care kit, including how to identify tracheostomy tube components, prepare a sterile field, clean the inner cannula, and dress the stoma site. Following this procedure ensures the airway remains patent, the stoma site stays clean, and the patient receives uninterrupted oxygen delivery throughout the process.
Purpose
This procedure ensures that tracheostomy care is performed safely and consistently, using sterile technique to reduce infection risk, prevent accidental tube dislodgement, and maintain continuous oxygenation for the patient.
Scope
This procedure applies to caregivers and clinical staff responsible for cleaning and maintaining a patient's tracheostomy tube, stoma site, and associated oxygen delivery equipment.
Required equipment and supplies
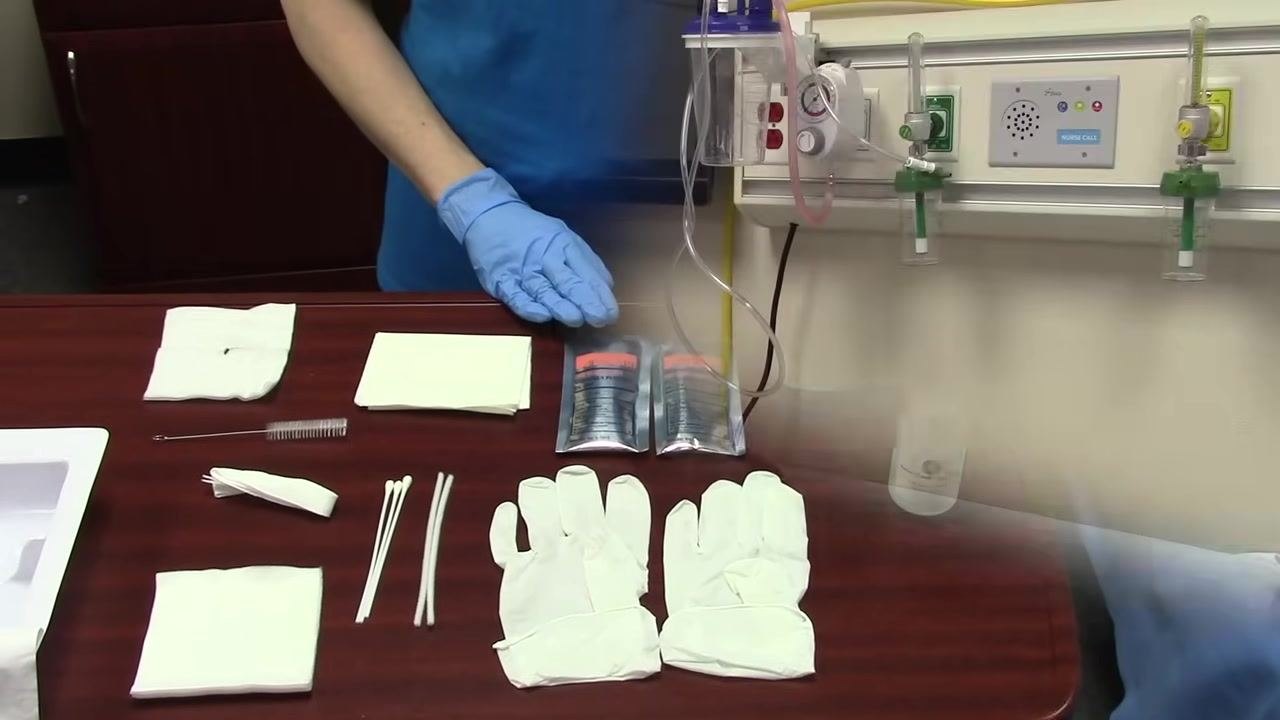
- Tracheostomy care kit (three-compartment tray with supplies)
- Fenestrated tracheostomy dressing (slit gauze pad)
- Gauze pads
- Trach ties (kit-supplied or commercial Velcro ties)
- Wire brush for cleaning the inner cannula
- Cotton-tipped applicators (Q-tips)
- Pipe cleaners
- At least two pairs of sterile gloves
- Sterile drape
- Hydrogen peroxide (packets or bottle)
- Sterile saline (small bottle from kit, plus an additional bottle if needed)
- Obturator (kept in the patient's room for emergency use)
Note: Always maintain sterile technique throughout the procedure and ensure all supplies are within easy reach before beginning tracheostomy care.
Gather and inspect the tracheostomy care kit
- Obtain the tracheostomy care kit.
- Confirm you have a complete trach care kit before beginning the procedure.
- Open the kit and lay out all supplies on a clean, flat surface for easy access.
-
Familiarize yourself with the kit contents.
- Note that the kit is organized into three compartments or buckets. Some kits have removable buckets, while others have fixed compartments.
- Lay out all items from the kit for inspection.
-
Identify each item in the kit:
- Tracheostomy dressing: A fenestrated gauze pad (with a slit) for placement around the trach site.
- Gauze pads: For cleaning and drying the area.
- Trach tie: Included in some kits, but often replaced by commercially available Velcro ties.
- Wire brush: For cleaning the inner cannula.
- Cotton-tipped applicators (Q-tips): For cleaning around the stoma.
- Pipe cleaners: For cleaning the cannula.
- Sterile gloves: At least two pairs for maintaining sterility during the procedure.
- Sterile drape: To create a sterile field.
- Hydrogen peroxide: Some kits include small packets; otherwise, obtain a separate bottle.
- Sterile saline: Some kits include a small bottle; you may need to provide an additional bottle.
-
Check for additional supplies if needed.
- If the kit does not include enough hydrogen peroxide or sterile saline, obtain extra bottles as required.
- Review the tracheostomy care supplies before starting the procedure.
- Confirm that all necessary items are present and within reach.
- Ensure a sterile environment and understand the use of each item before beginning trach care.
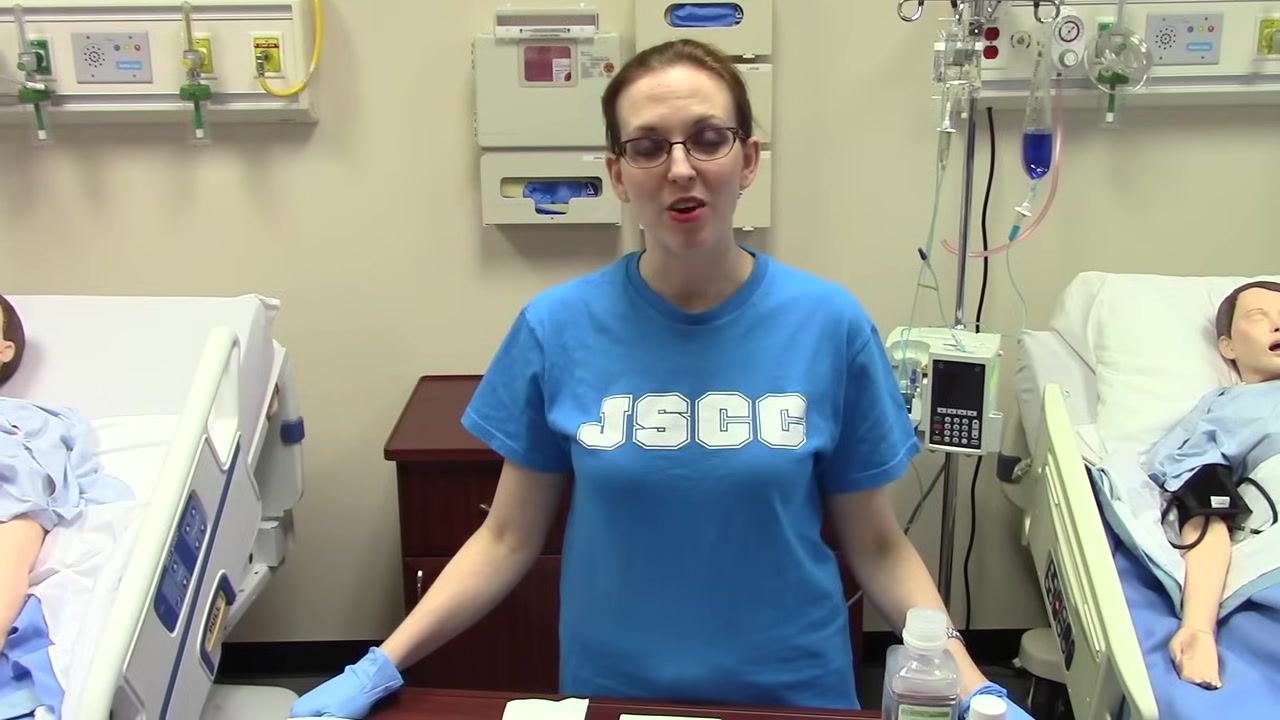
Identify the oxygen delivery system
- Locate and identify the oxygen delivery system on the patient.
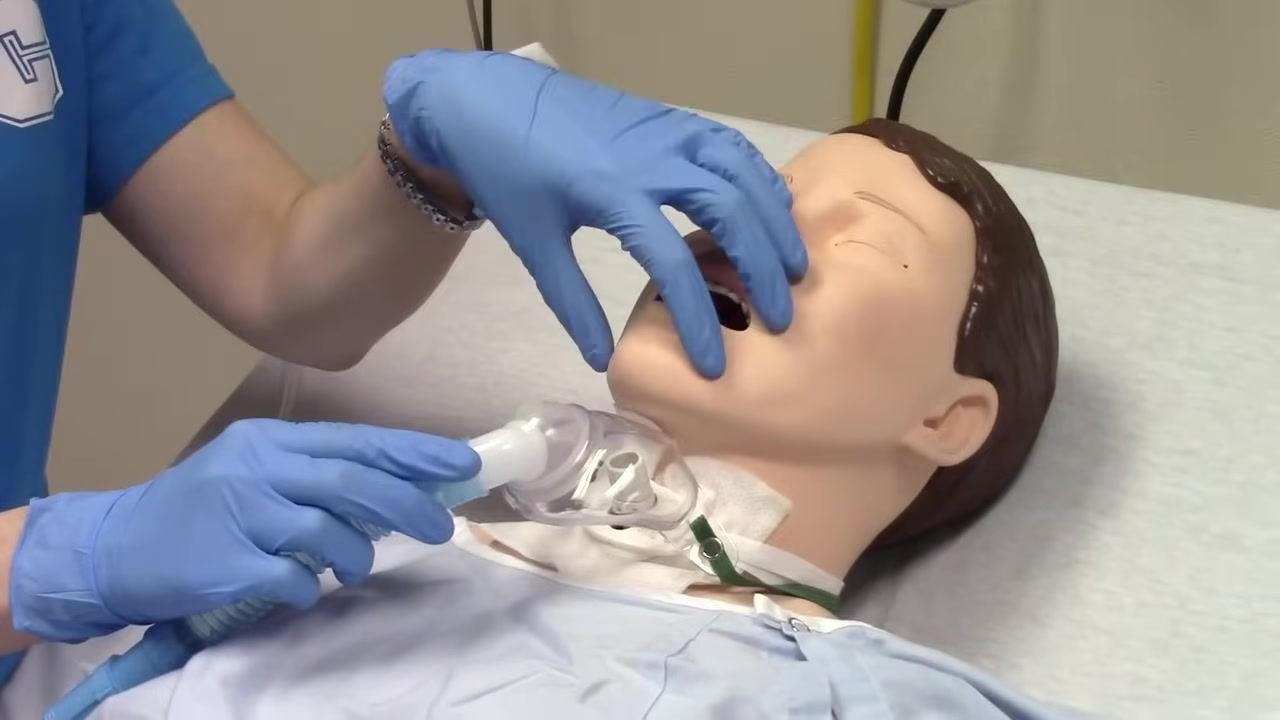
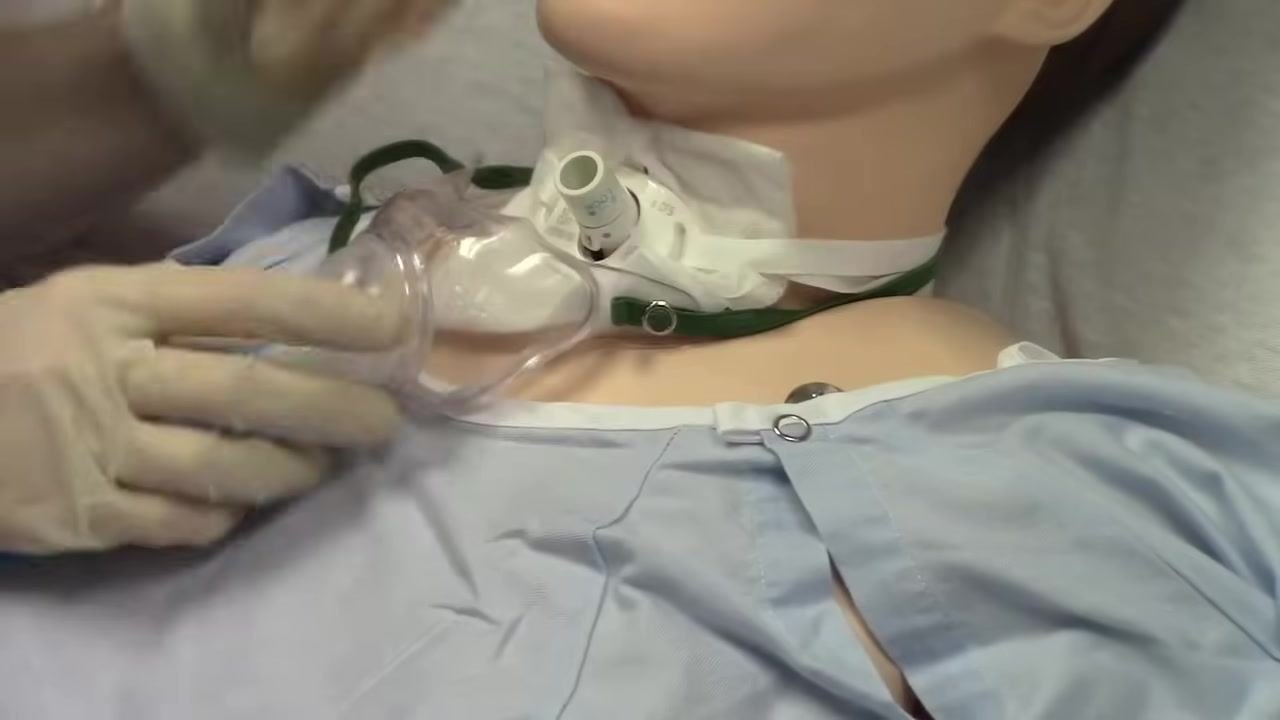
- Observe the trach collar in use. This is an oxygen face mask designed to fit over the tracheostomy site rather than the nose and mouth.
- Ensure the oxygen delivery system is functioning and properly positioned before starting trach care.
Note: Always maintain sterile technique throughout the procedure and ensure all supplies are within easy reach before beginning tracheostomy care.
Inspect the tracheostomy tube
- Identify the trach collar and oxygen delivery system.
- Observe that the oxygen mask is positioned directly over the tracheostomy site, not the mouth or nose.
- Recognize this device as a "trach collar," designed specifically for tracheostomy oxygen delivery.
-
Remove the trach collar to access the tracheostomy tube.
- Locate the snap or fastener on the trach collar.
- Unsnap or release the fastener to remove the collar and expose the tracheostomy tube for inspection and care.
-
Inspect the tracheostomy tube for key information.
- Examine the trach tube for manufacturer markings and important labels.
- On one side, look for the label "no cuff," indicating that this trach tube does not have an internal cuff to secure it in place.
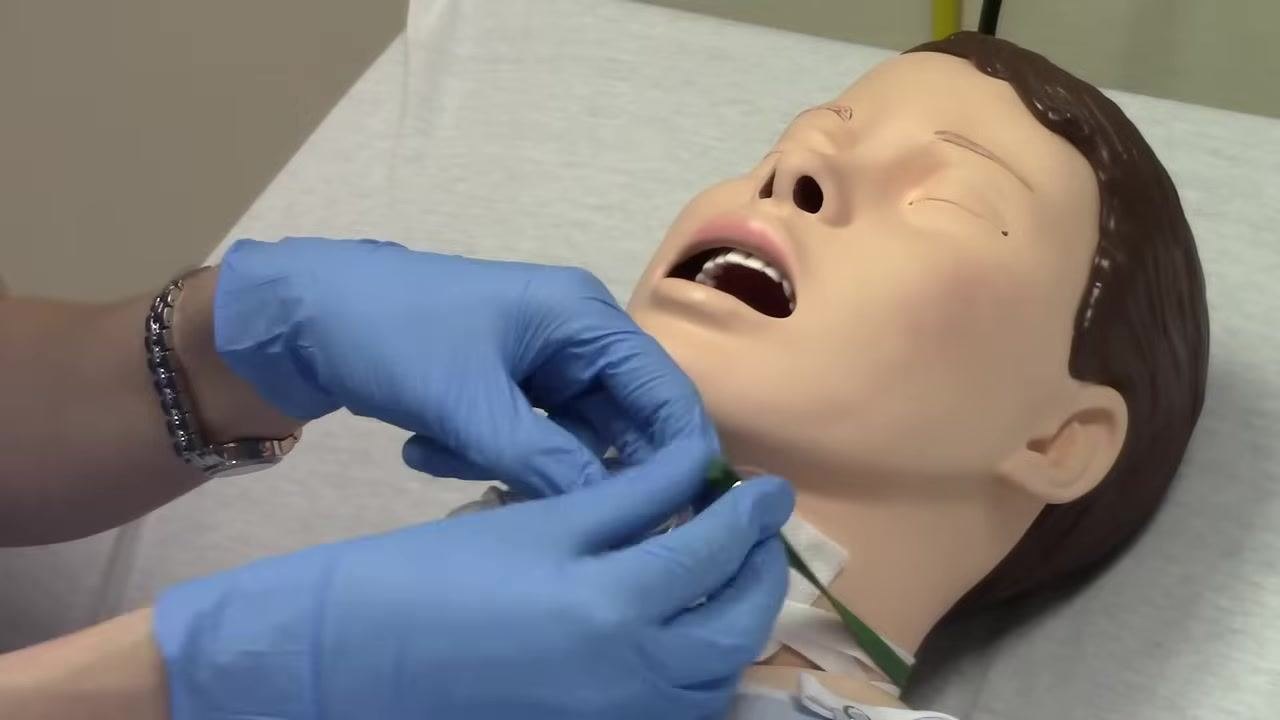
- Understand that, without a cuff, the trach ties are the only thing holding the trach in place and must be snug to prevent accidental dislodgement.
-
Determine the trach tube size.
- Locate the size marking on the trach tube, typically found on the flange or side of the tube.
- Confirm the size; in this example, the tube is marked as a "number six" (6).
- Note that adult trach tubes are commonly size 6 or 8 in hospital settings.
- Identify the locking mechanism and inner cannula.
- Observe the aquamarine (light blue-green) writing on the trach tube that says "lock."
- Understand that this indicates a twist-to-lock mechanism for the inner cannula.
- Twist the cannula to lock and unlock it, allowing for removal.
- Remove the inner cannula to show the difference between the inner and outer cannula.
- Understand the function of the inner and outer cannula.
- Recognize that the inner cannula can be removed for cleaning or in case of blockage (e.g., mucus plug).
- The outer cannula remains in place, allowing the patient to continue breathing even if the inner cannula is removed.
- This safety feature is critical for maintaining airway patency.
-
Review the trach tube after inner cannula removal.
- Confirm that the patient can still breathe through the outer cannula with the inner cannula removed.
- Ensure the trach site remains clean and unobstructed.
-
Differentiate between non-disposable and disposable inner cannulas.
- Note that a non-disposable inner cannula requires regular cleaning (typically twice daily or every eight hours).
- Understand that disposable inner cannulas are also available and may have different features, such as tabs for easy removal.
Note: Always check the trach tube for size, cuff status, and locking mechanism before performing tracheostomy care. Ensure the ties are secure and the airway is patent at all times.
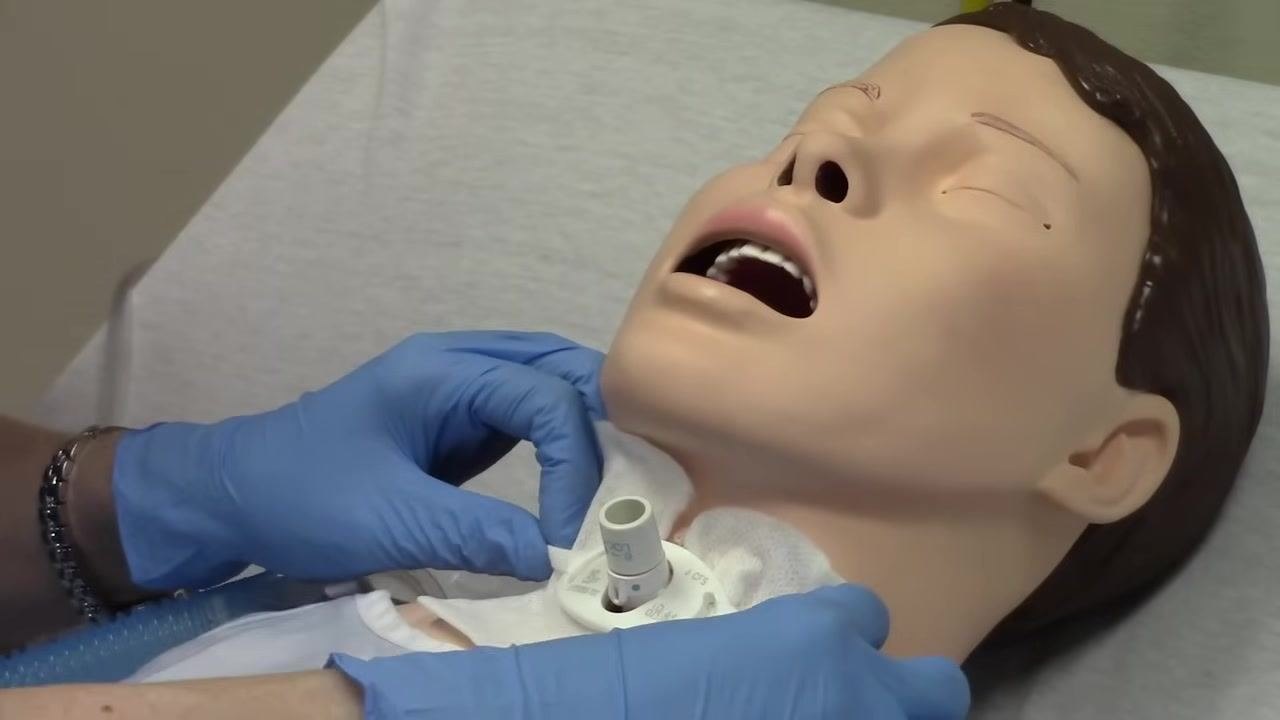
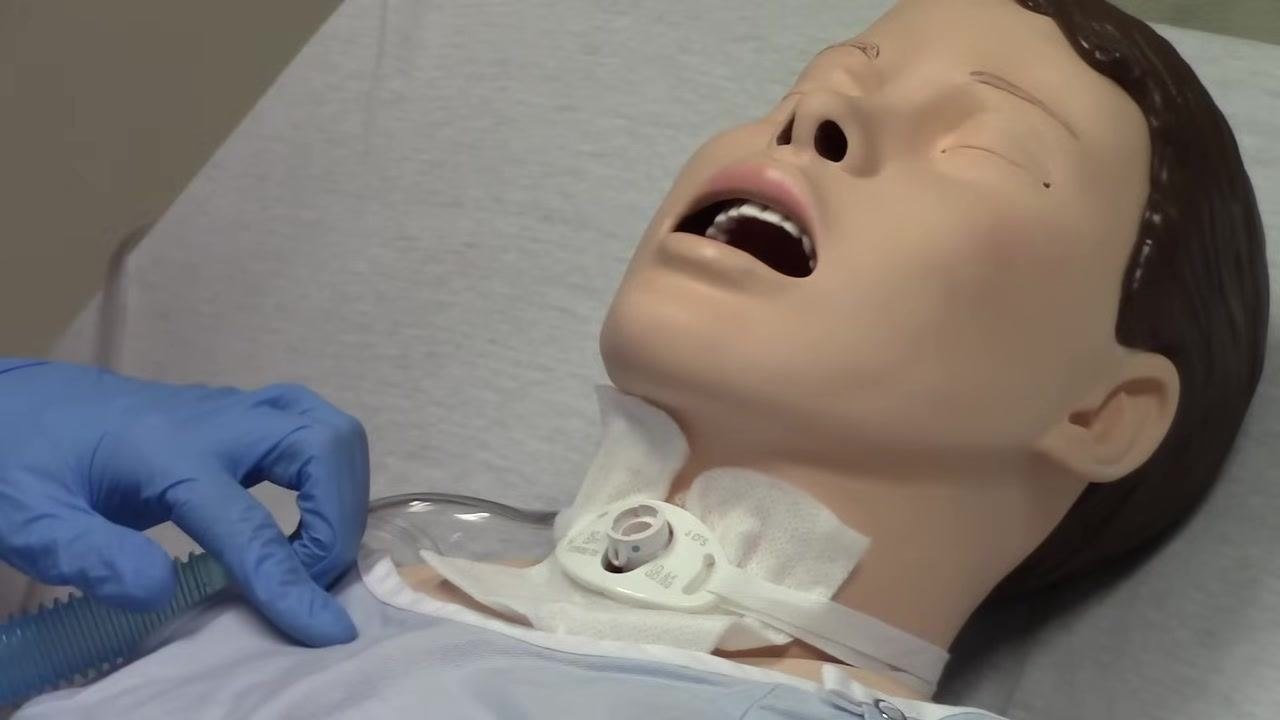
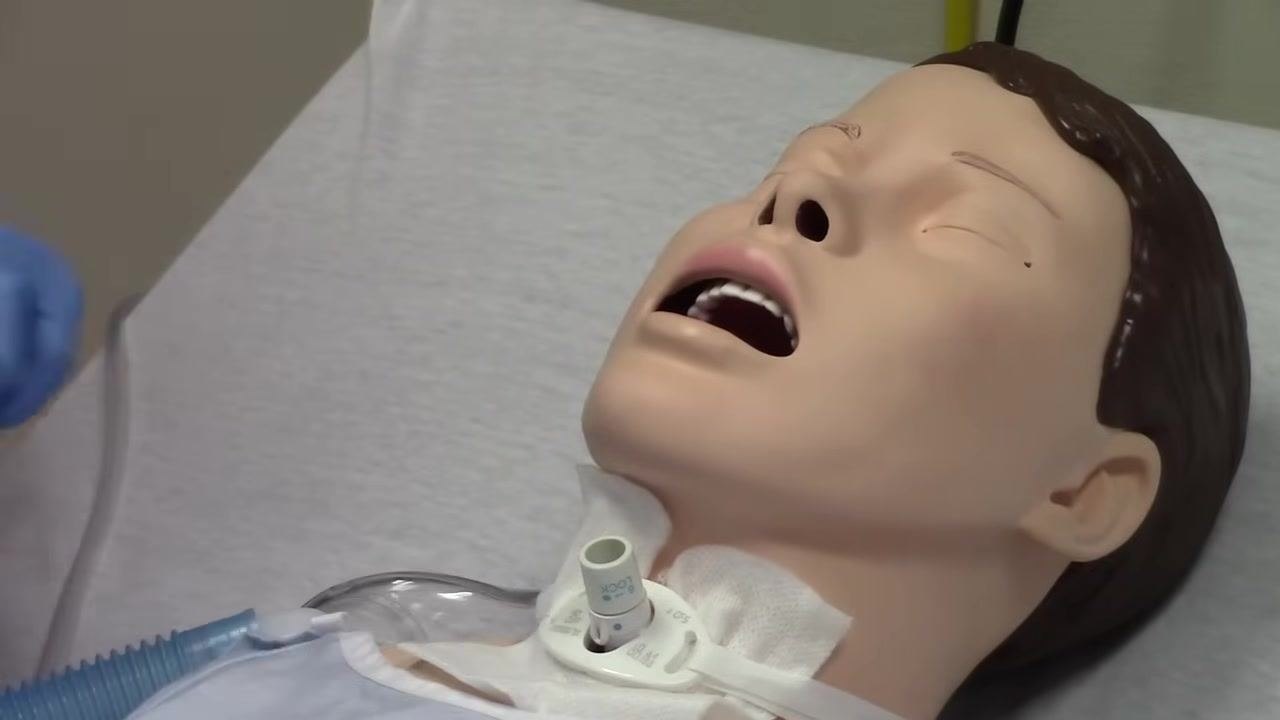
Understand disposable inner cannulas, the trach button, and the obturator
- Identify disposable inner cannulas and their features.
- Observe the inner cannula with small flanges on the side, which can be pinched for easy removal.
- Recognize that these inner cannulas are disposable and should be thrown away and replaced every day or twice a day, as per facility protocol.
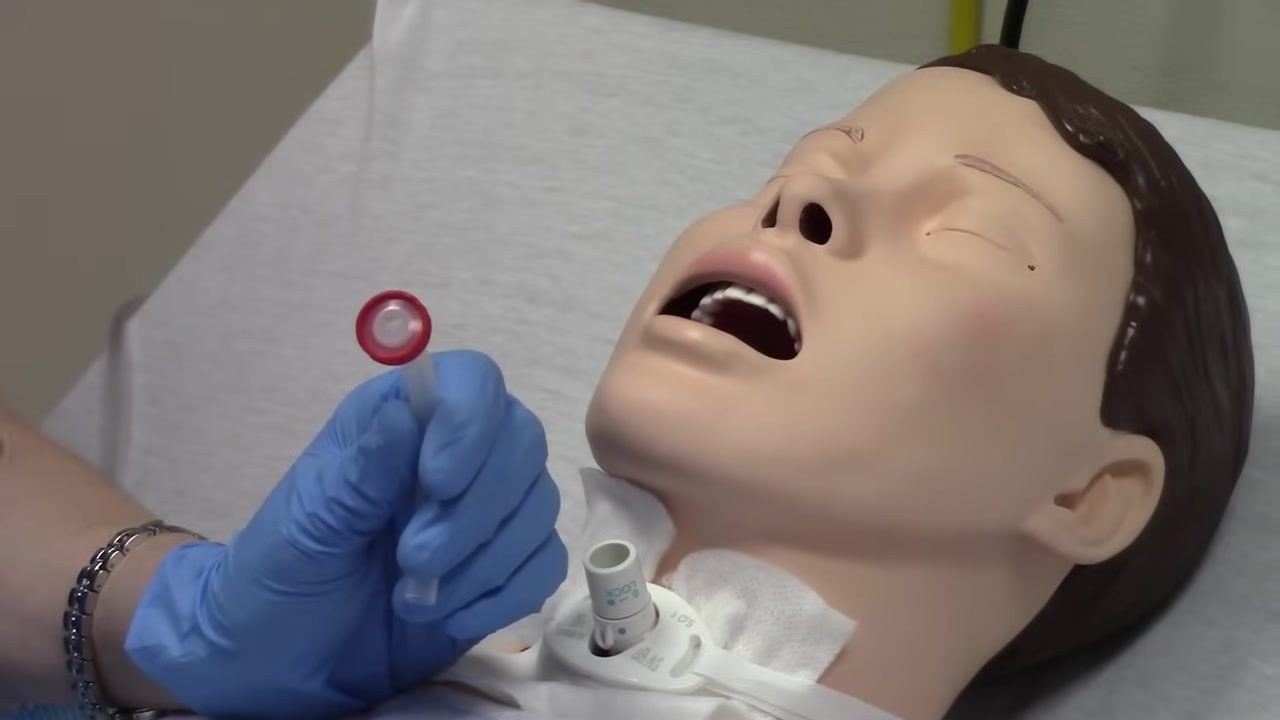
- Understand the purpose and identification of a trach button (red cap).
- Note the red cap, also known as a "trach button."
- Recognize that a red cap means the trach is completely blocked off.
- Understand that inserting the red cap into the patient's trach will block airflow through the trach tube.
- This is only used for patients who are doing very well and preparing for trach removal (decannulation).
-
Demonstrate blocking the trach with the red cap.
- Insert the red cap into the trach tube to show that the trach is now completely blocked.
- Only do this under specific medical guidance for patients ready for decannulation.
-
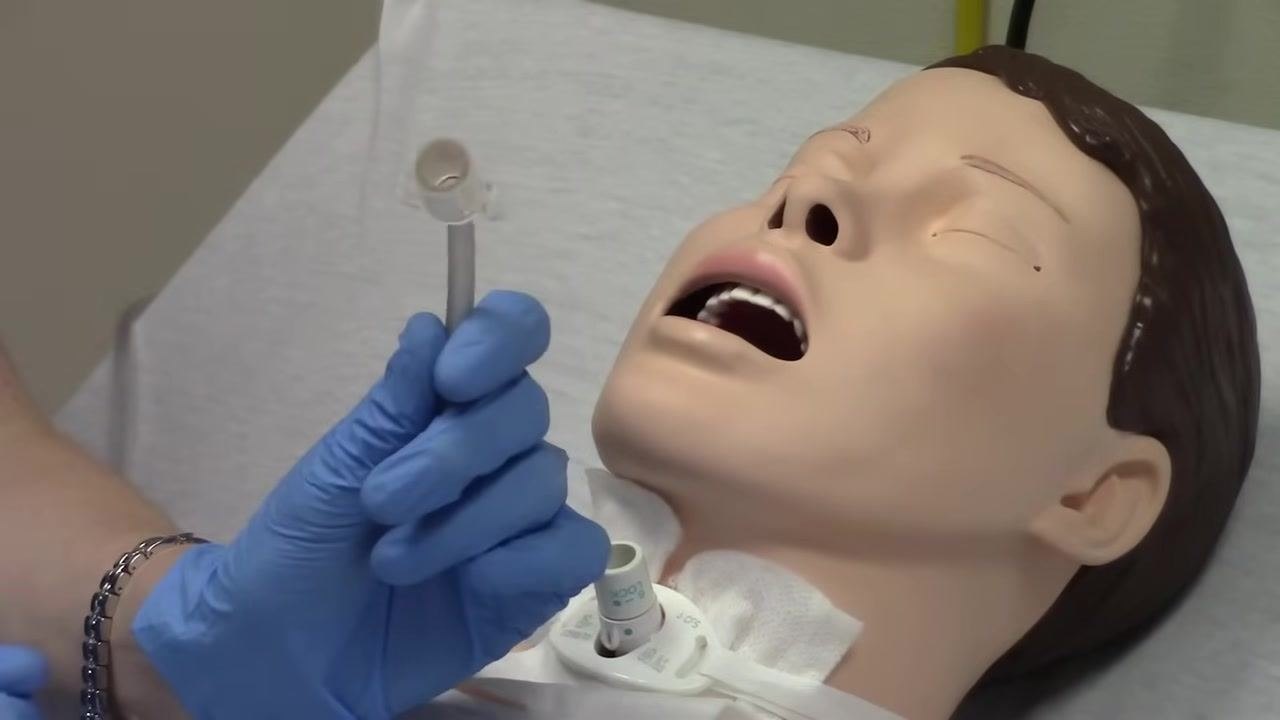
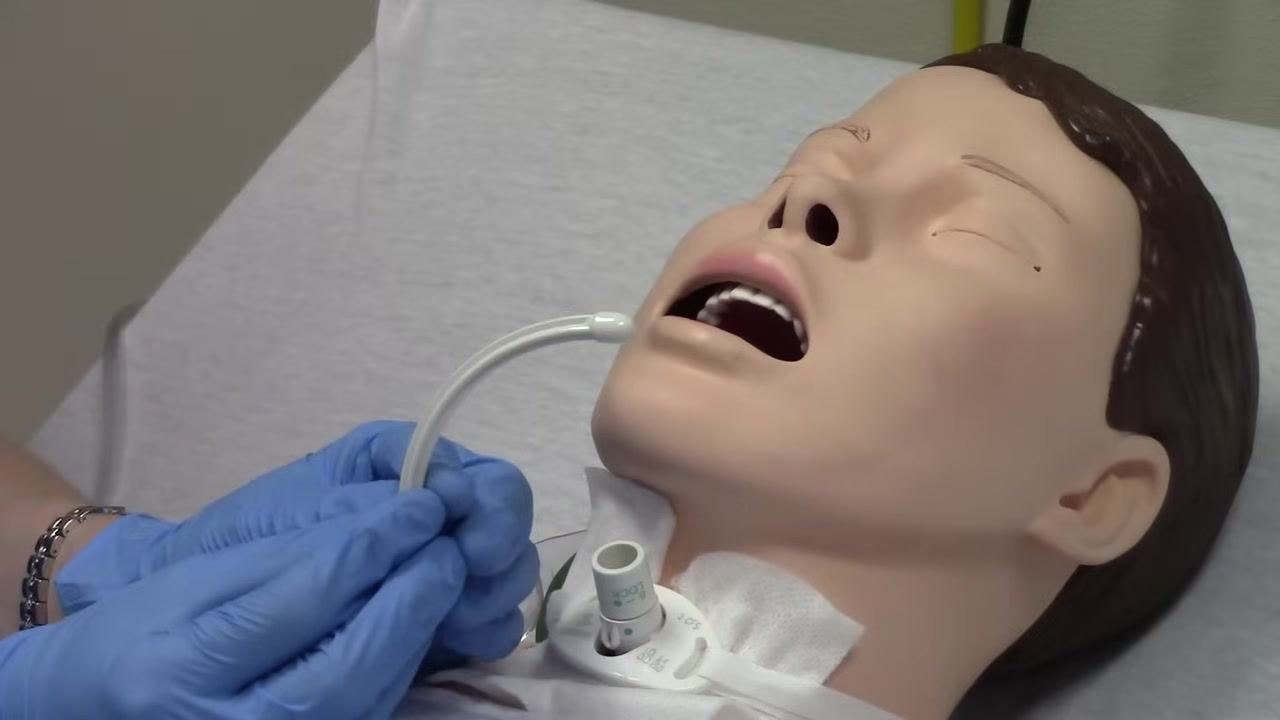
Introduce the obturator and its purpose.
- Note the obturator, a curved, solid device designed to assist with reinserting the outer cannula if the trach is accidentally dislodged.
- The obturator should always be available in the patient's room, typically stored in a ziplock bag taped to the bed or kept in a drawer.
- The obturator is for emergency use only and should not be left in the patient's trach.
- Clarify the use of the obturator in an emergency.
- If the patient coughs out the trach tube (outer cannula), use the obturator to guide the replacement of the tube.
- Remove the obturator immediately after the outer cannula is in place to restore airway patency.
Note: - Always ensure disposable inner cannulas are replaced according to protocol. - Only use the red trach button (cap) for patients who are medically cleared for trach removal. - Keep the obturator accessible in the patient's room for emergencies, but never leave it in the trach tube.
Open the trach care kit and prepare the sterile field
-
Gather the trach care kit and necessary supplies.
- Place the trach care kit on a clean, flat surface near the patient.
- Ensure all required items (gloves, cleaning solution, sterile supplies) are within reach.
-
Position yourself and the patient appropriately.
- Stand beside the patient, ensuring easy access to the trach site.
- Confirm the patient is lying comfortably in bed, with the trach site exposed and accessible.
-
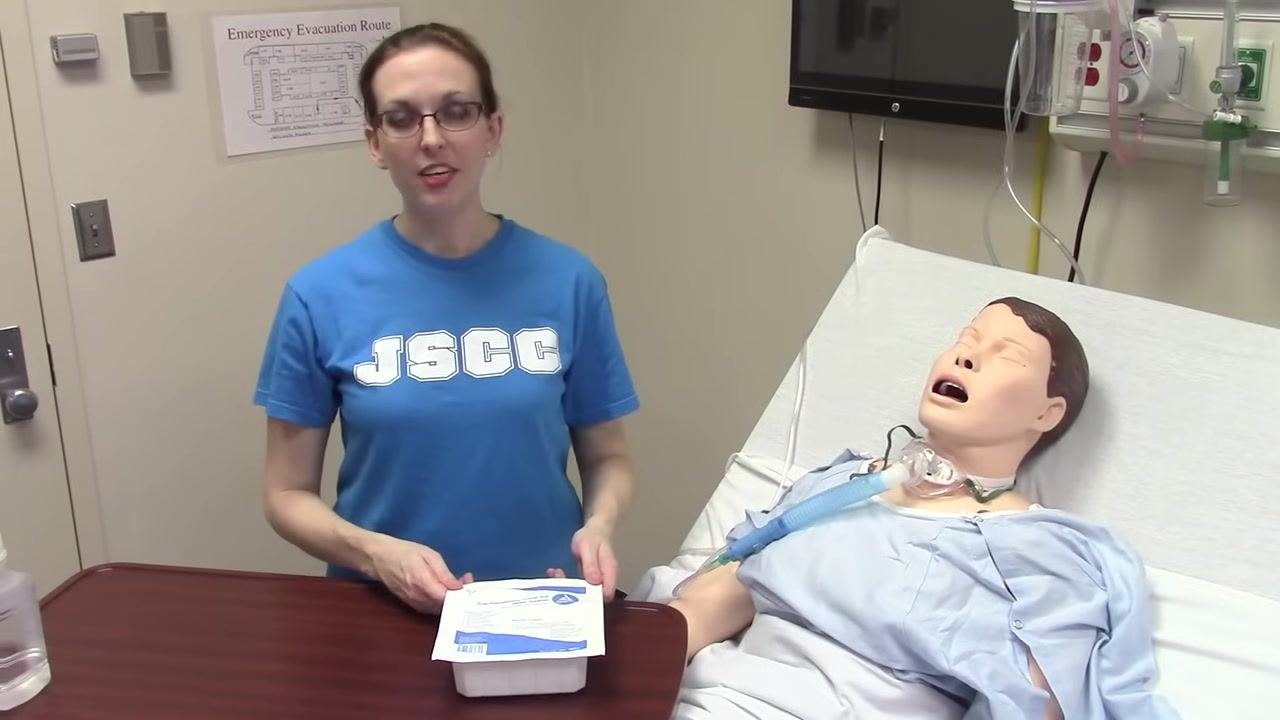
Identify the trach care kit packaging.
- Locate the sealed trach care kit on the table.
- Confirm the kit's labeling and ensure it is unopened and sterile.
-
Open the trach care kit using sterile technique.
- Grasp the outer edge of the kit's packaging.
- Open the kit by peeling the top layer away from yourself, not toward your body, to avoid contaminating the sterile contents.
- Ensure the inside of the kit remains untouched and sterile as you open it.
- Visually inspect the contents of the opened kit.
- Once the kit is open, check that all items are present and remain uncontaminated.
- Do not touch the inside of the kit or its contents with bare hands.
Note: - Always open sterile kits away from your body to maintain sterility. - Ensure the patient's environment is clean and organized before beginning trach care.
Don sterile gloves and prepare instruments
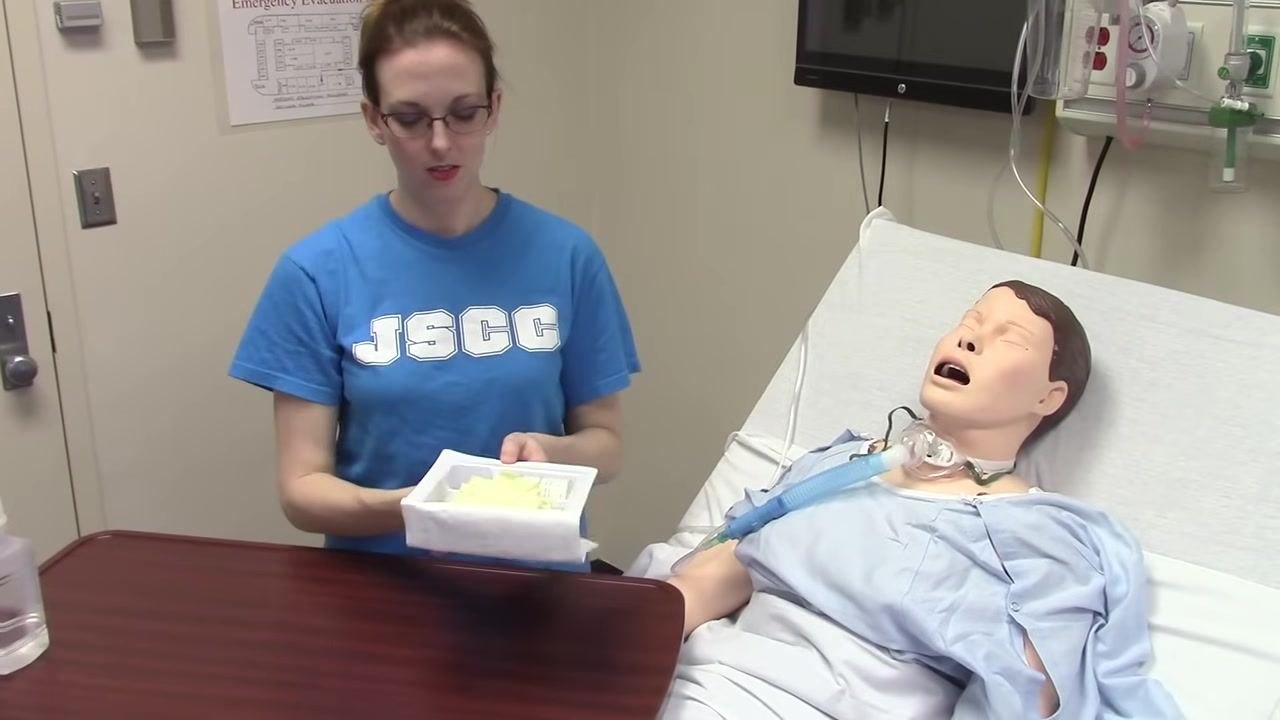
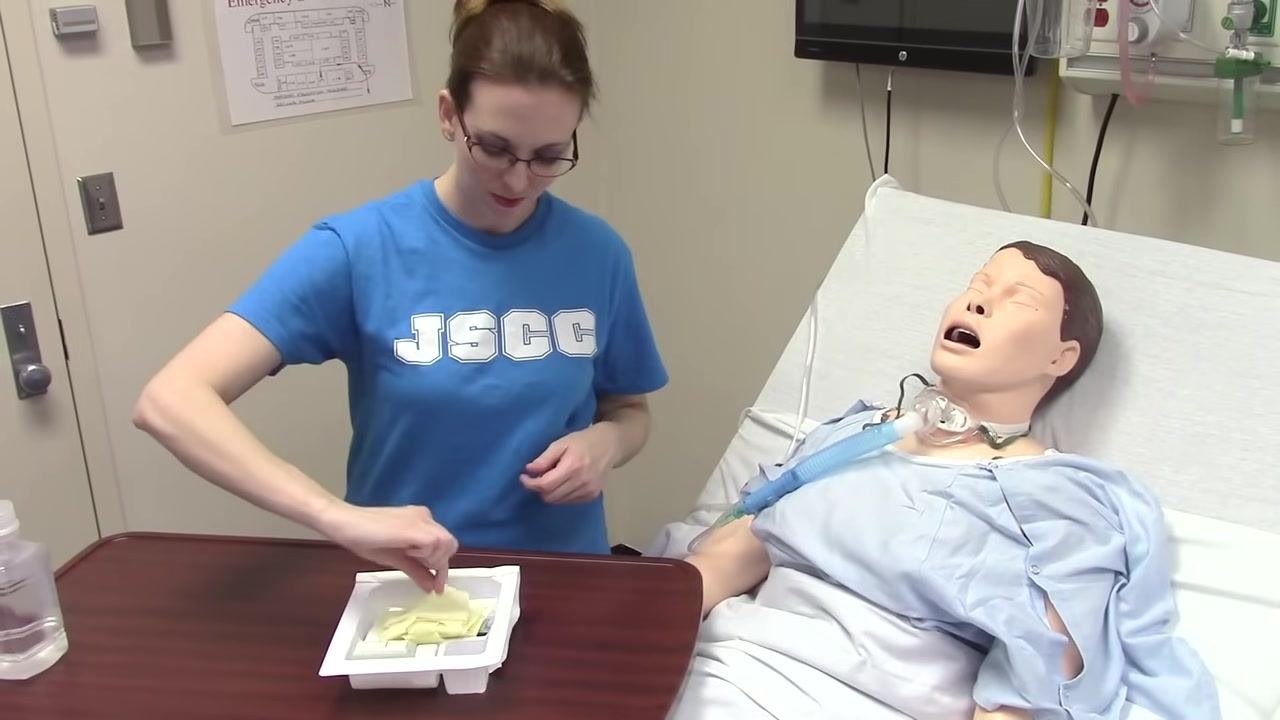
- Prepare the sterile gloves and supplies.
- Ensure you are in a clinical environment with the patient on the bed.
- Place a tray containing sterile gloves and other supplies on a clean, accessible surface near the patient.
- Confirm that all necessary equipment (sterile gloves, solution bottle, gauze, applicators, etc.) is present.
- Open the sterile glove package.
- Set the tray on the table.
- Use one hand to begin opening the sterile glove package, being careful not to touch the inside of the gloves or the sterile field with bare hands.
-
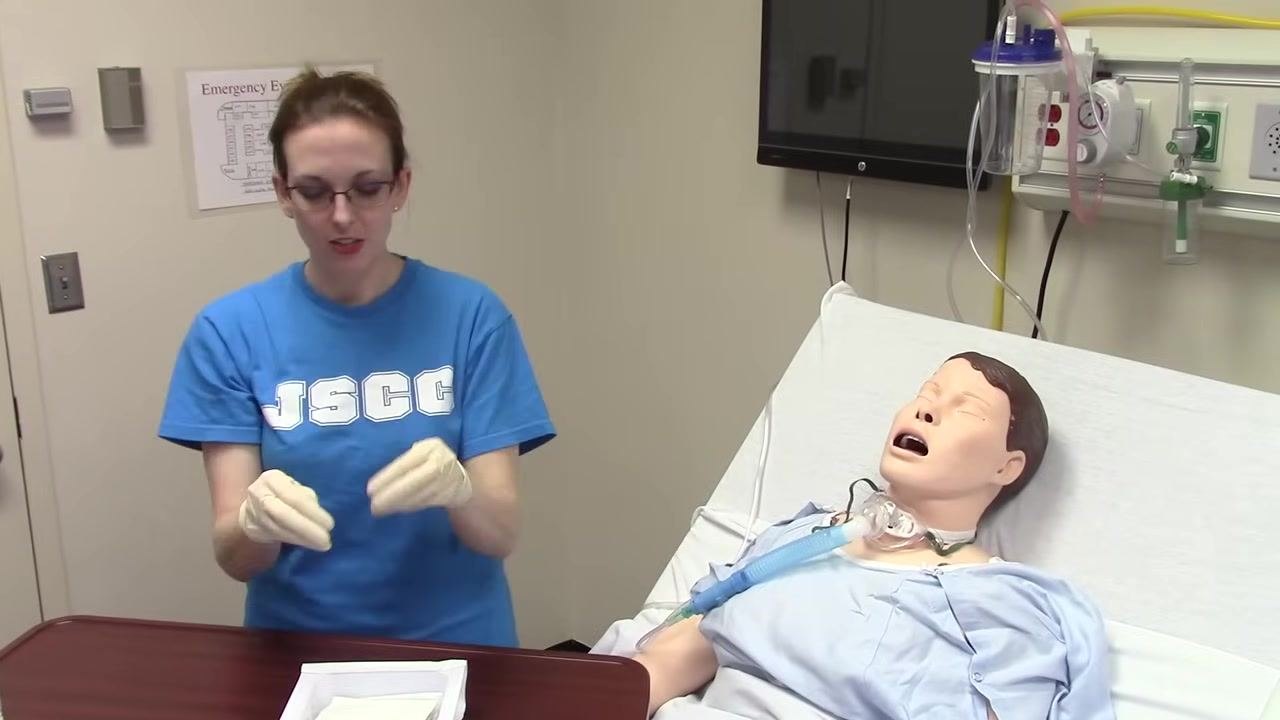
Remove the first sterile glove.
- Grasp the first glove by the inside cuff and lift it out of the package, touching only the inside surface.
-
Put on the first sterile glove.
- Insert your hand into the glove, touching only the inside surface.
- Pull the glove on completely, ensuring a snug fit.
-
Put on the second sterile glove.
- With the gloved hand, slide fingers under the cuff of the second glove.
- Insert the ungloved hand into the second glove, touching only the inside surface.
- Pull the glove on fully, ensuring both hands are now gloved and sterile.
-
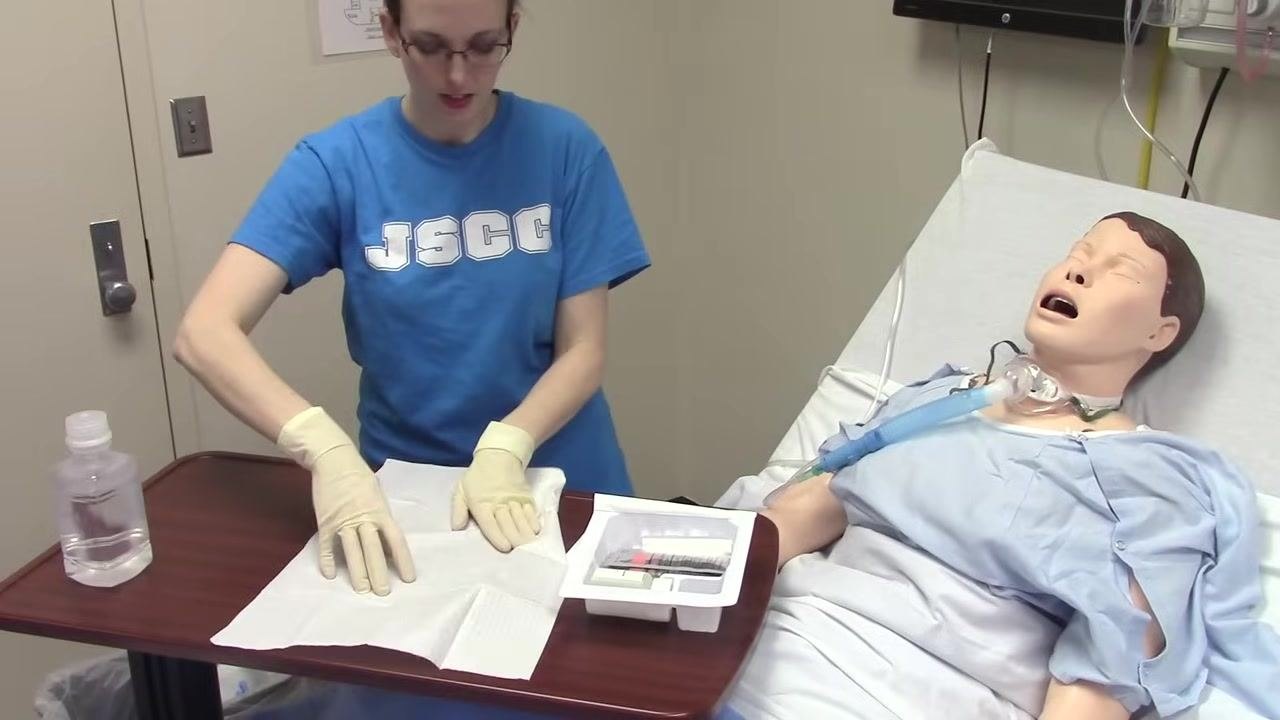
Move the tray or supplies as needed.
- With both hands gloved, slide the tray or any necessary items to a more convenient position on the sterile field.
-
Remain within the sterile field.
- Keep your gloved hands and any sterile instruments within the boundaries of the sterile field to maintain sterility.
- Avoid touching any non-sterile surfaces.
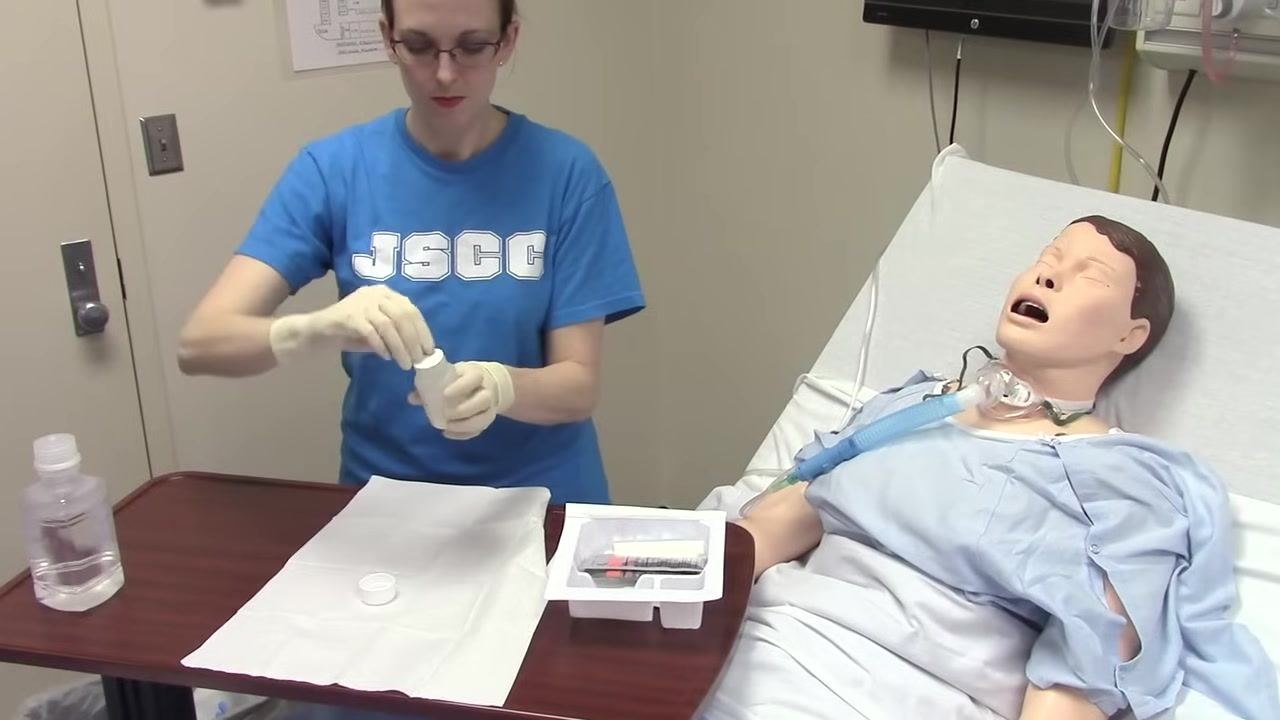
- Empty the contents onto the sterile field.
- Open any containers (bottles or tubes) as needed.
- Carefully pour or place the contents onto the sterile field, ensuring nothing contaminates the area.
- Arrange and prepare additional sterile instruments.
- Remove additional sterile instruments (forceps or applicators) from the tray.
- Place them onto the sterile field, ready for use.
Note: By following these steps, you ensure proper sterile technique when donning gloves and preparing a sterile field. Always maintain awareness of what is and is not sterile, and avoid contaminating the sterile field at all times.
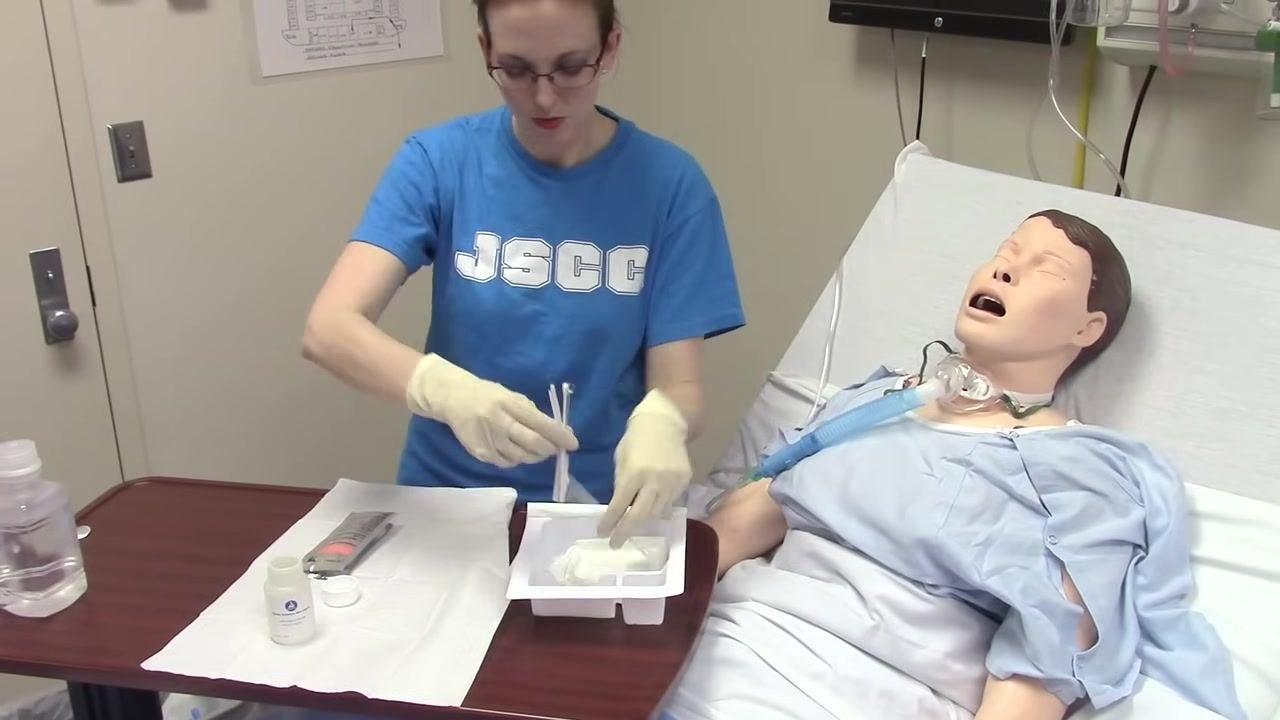
Prepare the sterile solution and remove the inner cannula
- Prepare to contaminate your non-dominant hand.
- Acknowledge that your non-dominant hand will become contaminated, as this is necessary for handling non-sterile items.
- Stand at the bedside with both hands gloved, maintaining awareness of which hand will remain sterile.
-
Open the non-sterile saline or peroxide bottle.
- Use your non-dominant (soon-to-be contaminated) hand to pick up the non-sterile bottle of saline or peroxide from the table.
- Open the bottle, taking care not to touch the sterile field or supplies with the contaminated hand.
-
Pour solution into the sterile tray compartments.
- Carefully pour the saline or peroxide into all three compartments of the sterile tray.
- Ensure the bottle and your non-dominant hand do not touch the inside of the tray or any sterile items.
- Fill each compartment with enough fluid for the procedure.
- Complete pouring solution.
- Continue pouring until all three compartments are filled.
- Set the bottle aside, keeping your dominant hand sterile.
-
Remove the oxygen mask and inner cannula.
- With your non-dominant (now contaminated) hand, remove the oxygen mask from the patient.
- Twist and pull down the inner cannula from the tracheostomy tube.
- On a real patient, turn the cannula toward yourself as you remove it to avoid contact with the patient's chest.
-
Place the inner cannula in the first compartment.
- Drop the removed inner cannula directly into the first compartment (bucket) of the sterile tray containing solution.
- Avoid touching any other surfaces or items with the contaminated cannula.
- Immediately return the oxygen mask to the patient to ensure they are not deprived of oxygen during the procedure.
- Maintain sterility of the dominant hand.
- Use only your dominant (still sterile) hand to handle sterile instruments and supplies.
- Do not allow your sterile hand to touch any contaminated surfaces or items.
Note: By following these steps, you ensure that only your non-dominant hand becomes contaminated for handling non-sterile items, while your dominant hand remains sterile for critical parts of the procedure. Always prioritize patient safety by promptly returning oxygen and maintaining a clear distinction between sterile and non-sterile technique.
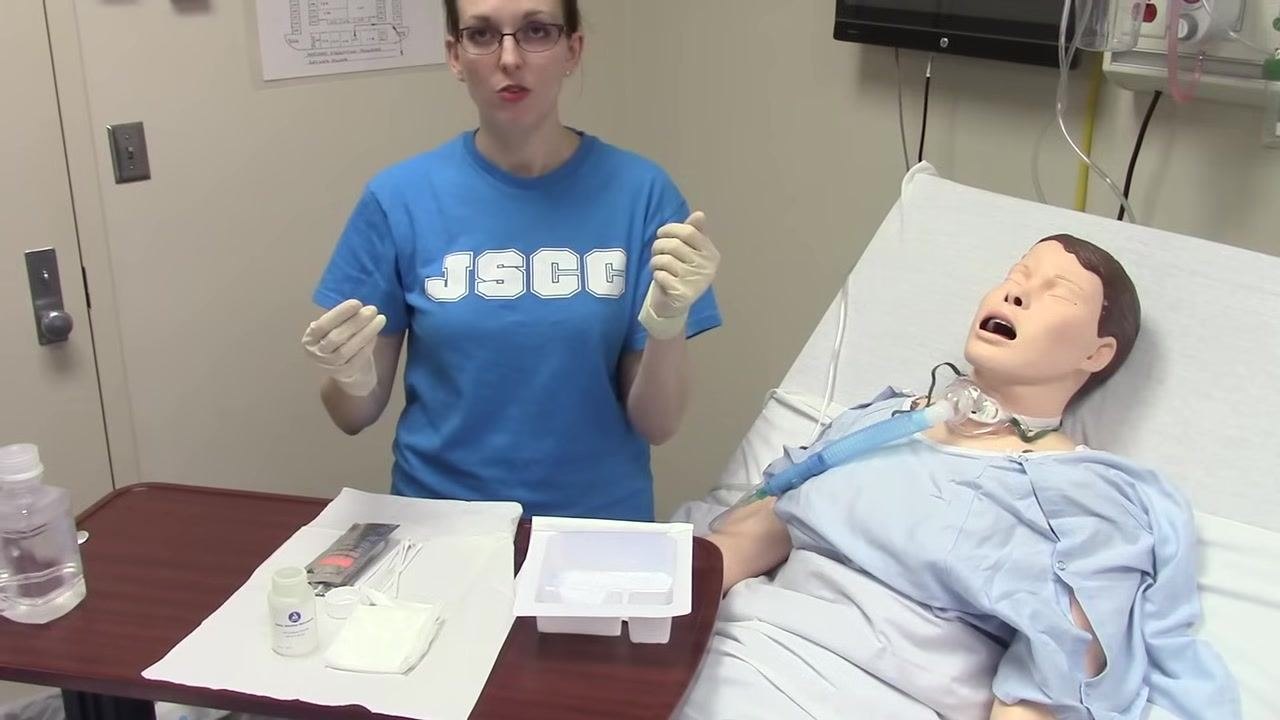
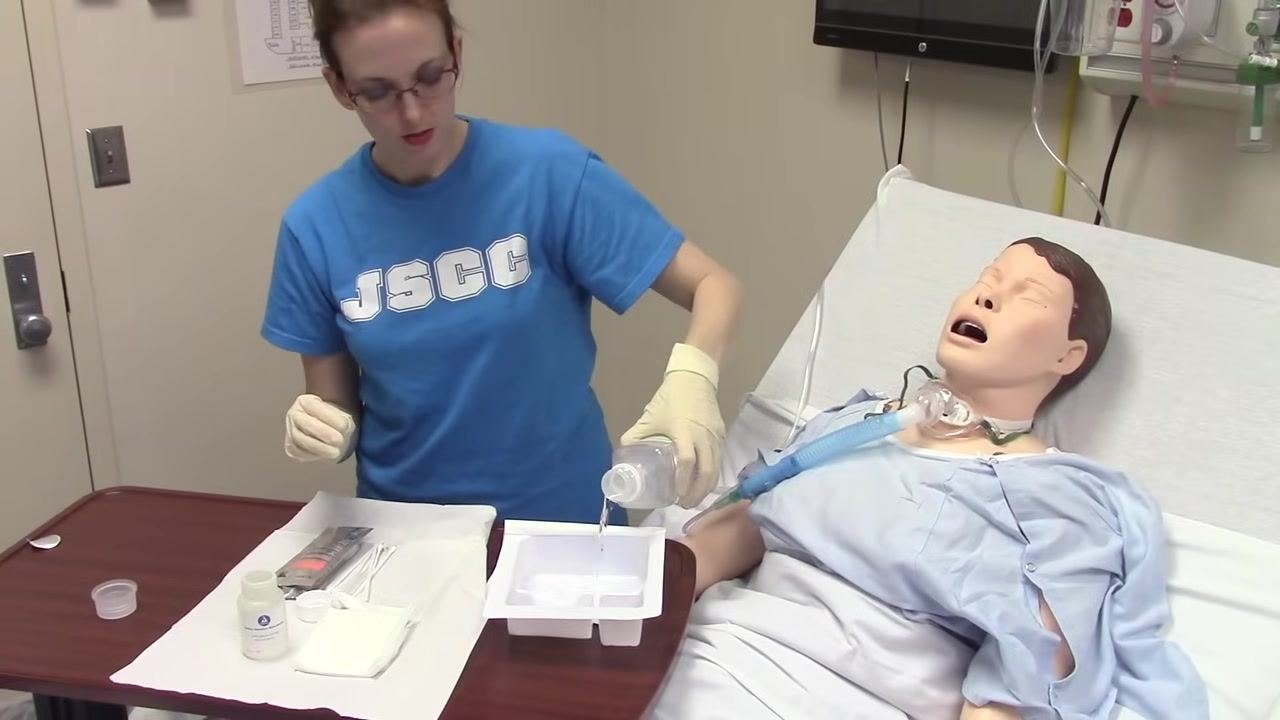
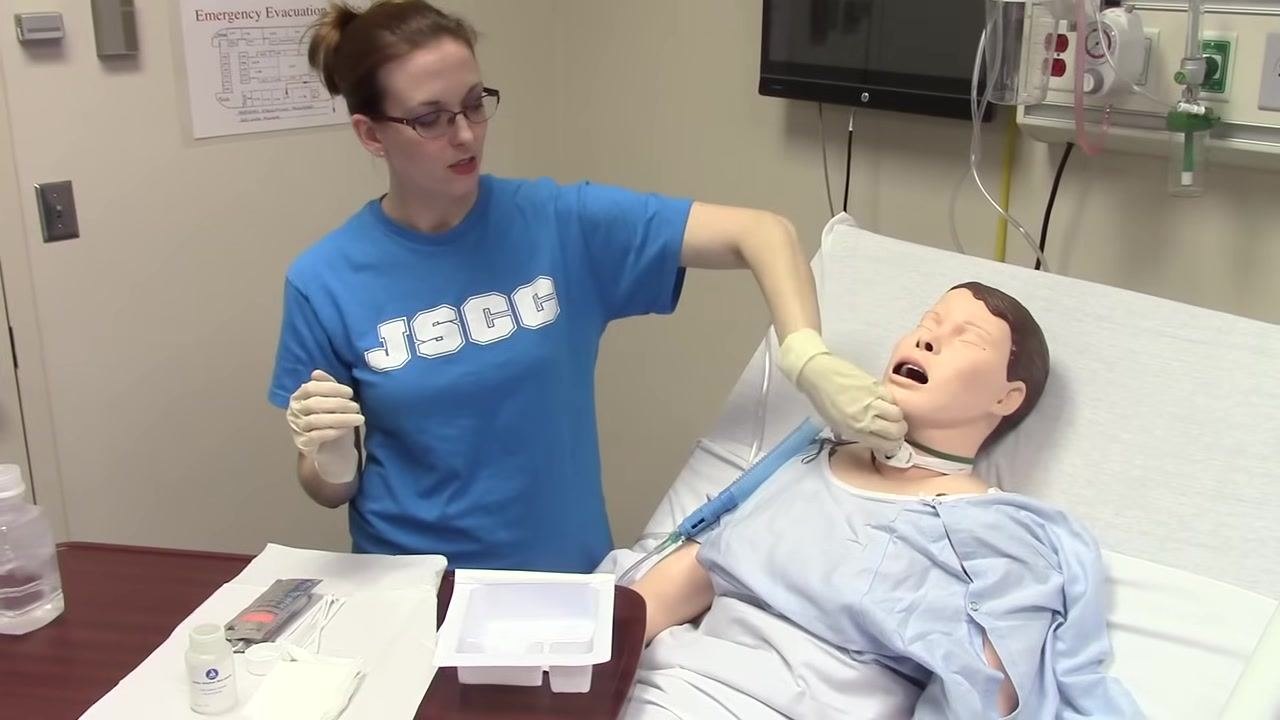
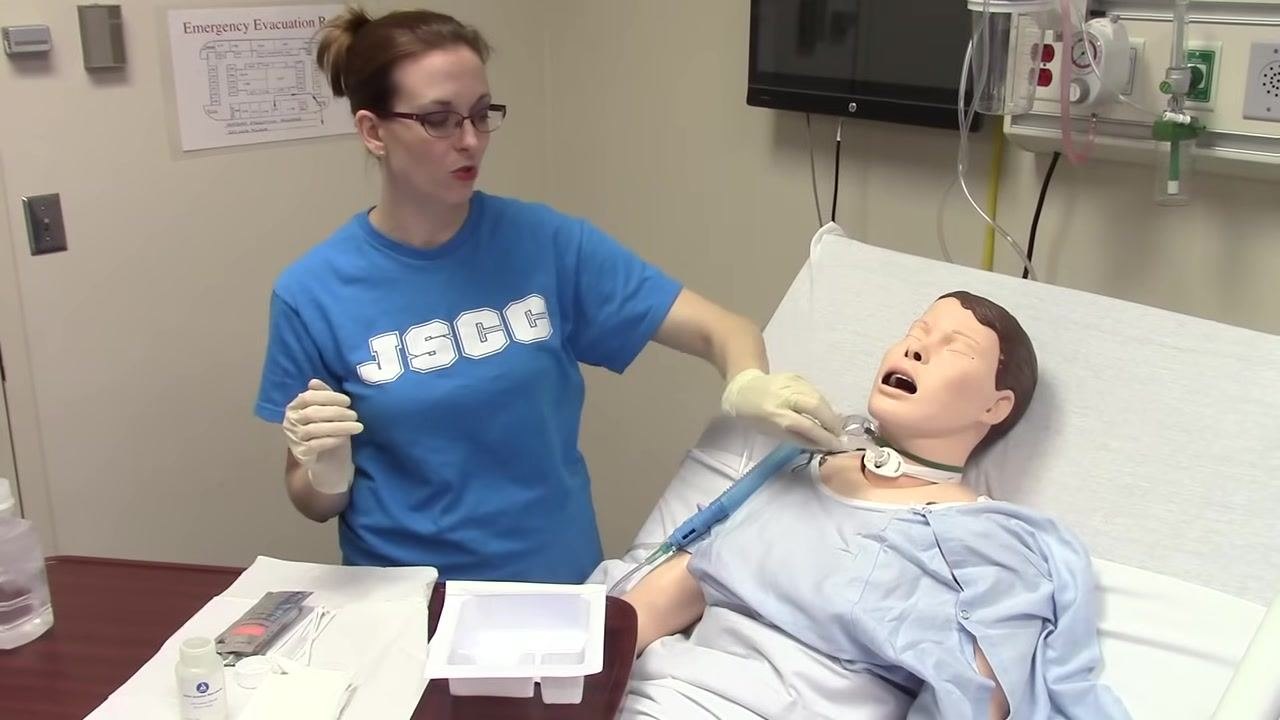
Clean the inner cannula and return oxygen
- Clean the inner cannula with the wire brush.
- Pick up the sterile wire brush with your dominant (sterile) hand.
- Insert the wire brush into the solution in the first compartment of the sterile tray.
- Begin cleaning the inner cannula by scrubbing its interior and exterior surfaces with the brush while it is submerged in the solution.
- Ensure thorough cleaning to remove any debris or secretions.
-
Rinse the inner cannula in the second compartment.
- Once cleaning is complete, transfer the inner cannula to the second compartment (the rinse bucket) of the sterile tray.
- Tap or gently agitate the cannula in the rinse solution to remove any remaining debris or cleaning solution.
- Set the wire brush aside in the tray.
-
Return oxygen to the patient.
- After the sterile cleaning steps are complete, return the oxygen mask to the patient.
- Lock the oxygen mask back in place over the tracheostomy site to ensure the patient receives adequate oxygen.
Note: By following these steps, you ensure the tracheostomy tube is thoroughly cleaned using sterile technique while keeping the patient's oxygen supply uninterrupted.
Clean the stoma site and neck plate
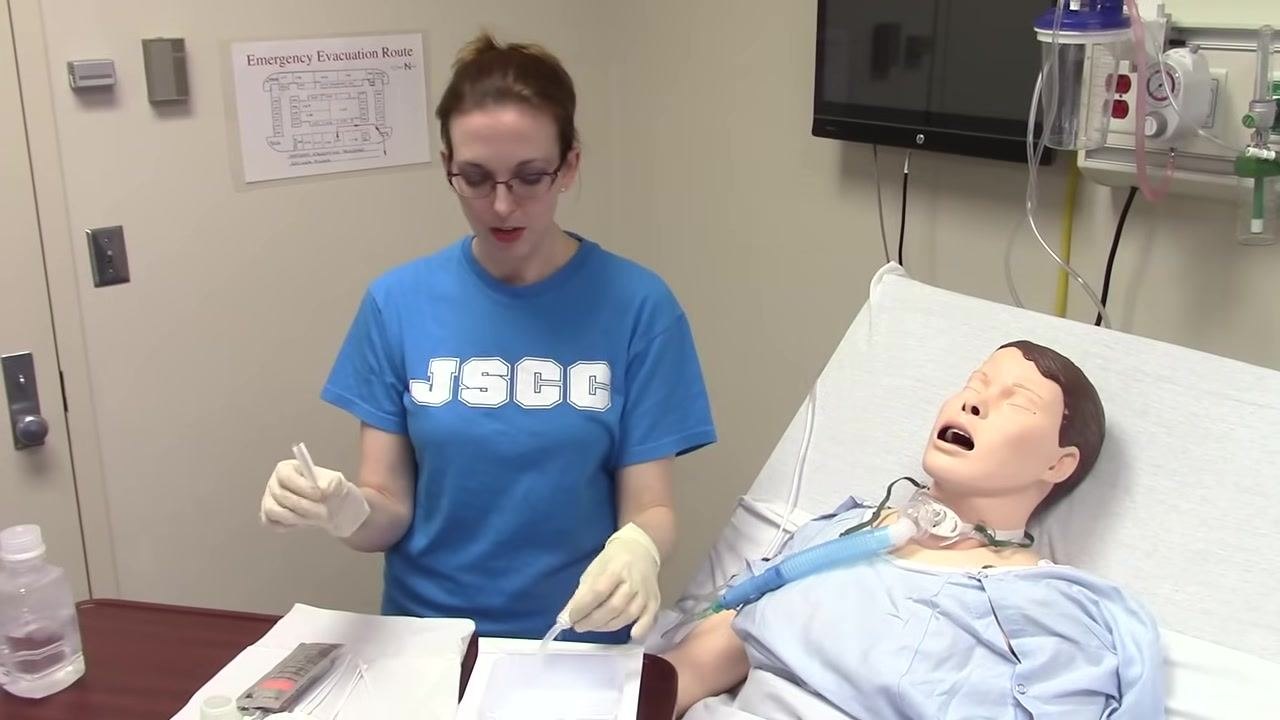
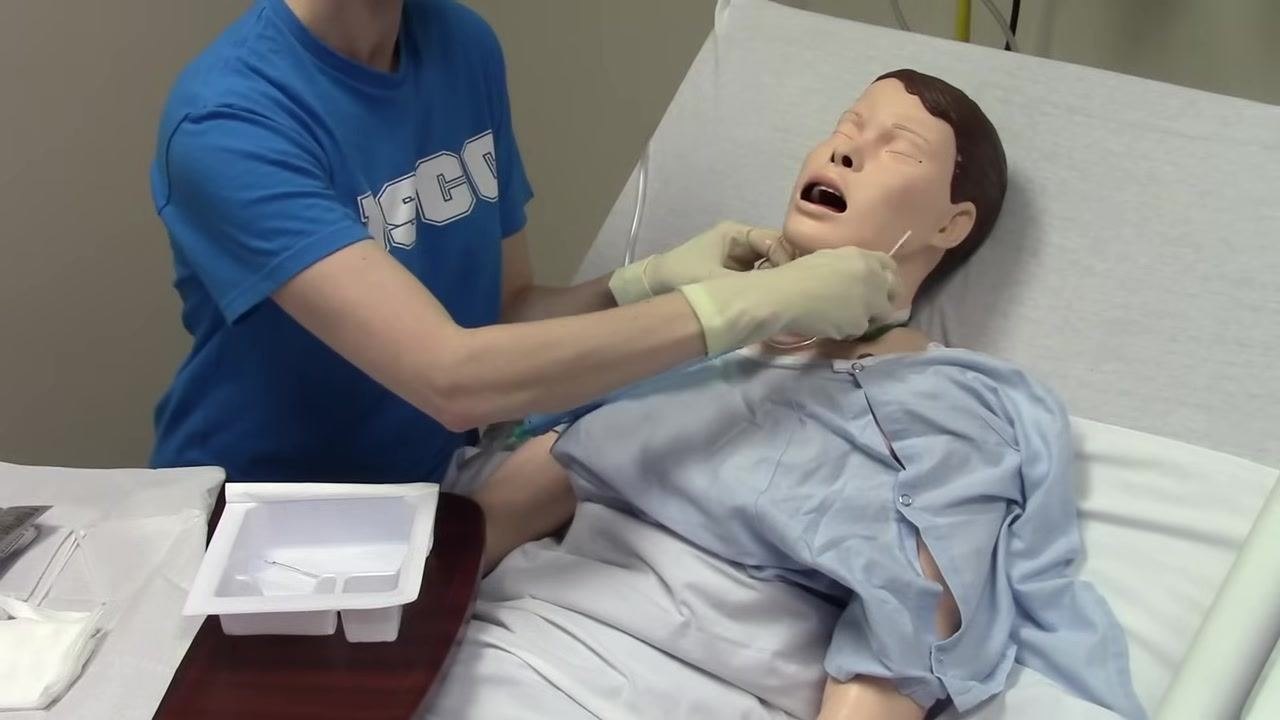
- Clean the tracheostomy site and neck plate.
- Use a fresh cotton-tipped applicator or swab from the kit.
- Dip the applicator into the third (unused) compartment of the sterile tray containing clean solution.
- Wipe behind the neck plate and around the area where the tracheostomy tube enters the patient's neck.
- Discard the used applicator after cleaning each area.
-
Clean the underside of the neck plate.
- Use a new applicator to clean the underside of the neck plate.
- Discard the applicator after use to maintain cleanliness and prevent cross-contamination.
-
Use gauze for excess secretions.
- If the patient has a lot of secretions, take a piece of gauze from the kit.
- Use the gauze to absorb and clean any excess secretions around the tracheostomy site.
- Dispose of the used gauze appropriately.
- Thoroughly clean the area with gauze.
- Use the gauze to wipe and clean the tracheostomy site and surrounding skin, ensuring the area is free of secretions and debris.
- Discard the gauze after use.
Note: By following these steps, you ensure the tracheostomy tube and surrounding area are thoroughly cleaned using sterile technique, and the patient's airway remains clear and protected. Always use fresh applicators and gauze for each cleaning step to prevent infection and maintain patient safety.
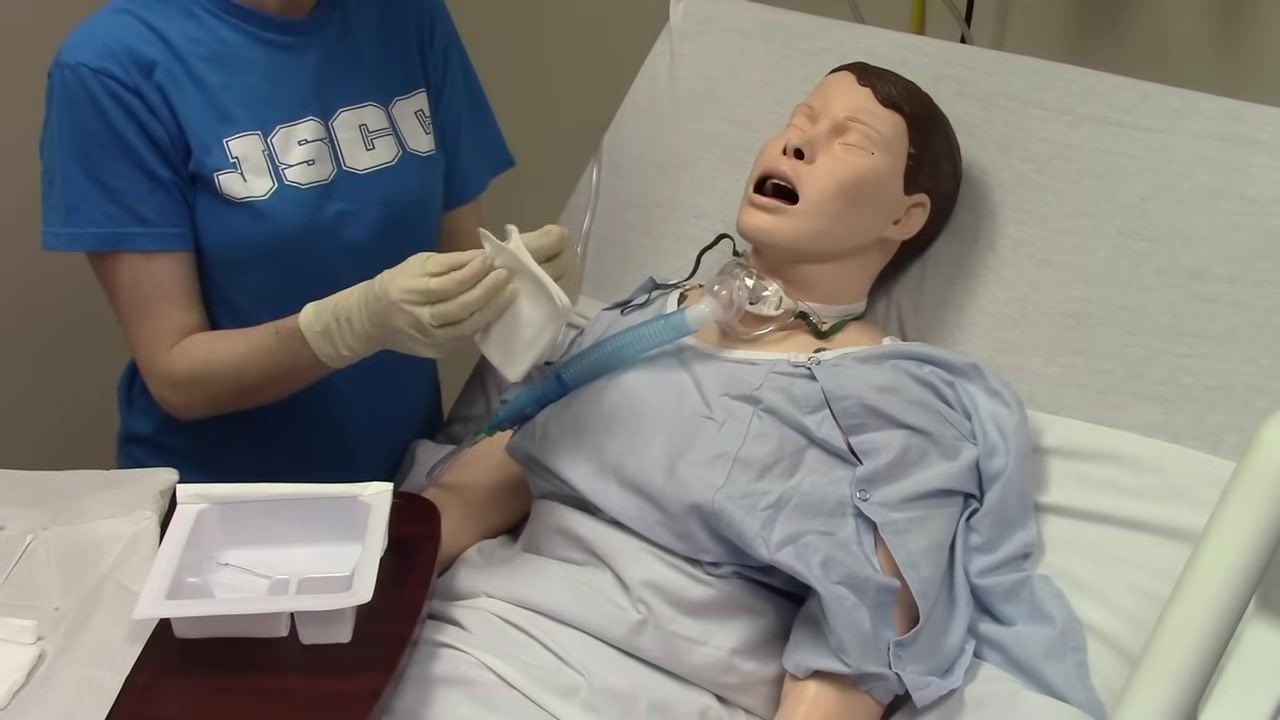
Apply the dressing and secure the tube
-
Prepare and don sterile gloves.
- Ensure the sterile gloves are arranged neatly on your sterile field.
- Turn the glove package around as needed to access the gloves.
- Put on your sterile gloves, touching only the inside of the gloves and avoiding contact with any non-sterile surfaces.
- Stand away from your sterile field while donning gloves to prevent contamination.
-
Prepare the sterile drape.
- Pick up the sterile drape by the edges.
- Place the drape on your sterile field with the shiny side facing down.
- Avoid using any area of the drape that has become unfolded or potentially contaminated.
-
Add sterile saline to the field.
- Open the container of sterile saline.
- Pour the entire contents of the saline onto your sterile field, ensuring it only contacts the sterile area.
-
Prepare the fenestrated trach dressing.
- Take the fenestrated trach dressing from the kit.
- Ensure the dressing is ready for placement and remains within the sterile field.
-
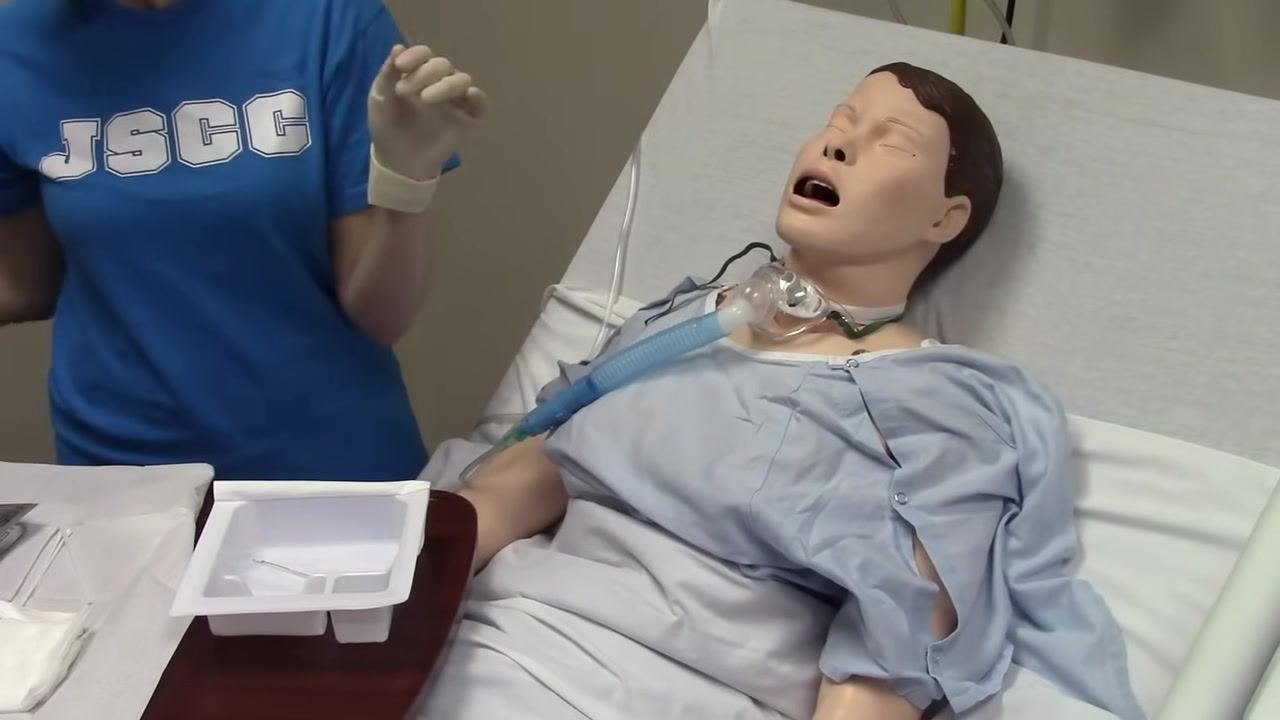
Apply the fenestrated trach dressing.
- Carefully place the fenestrated trach dressing around the tracheostomy tube at the stoma site.
- Ensure the dressing fits securely and covers the area to absorb secretions and protect the skin.
-
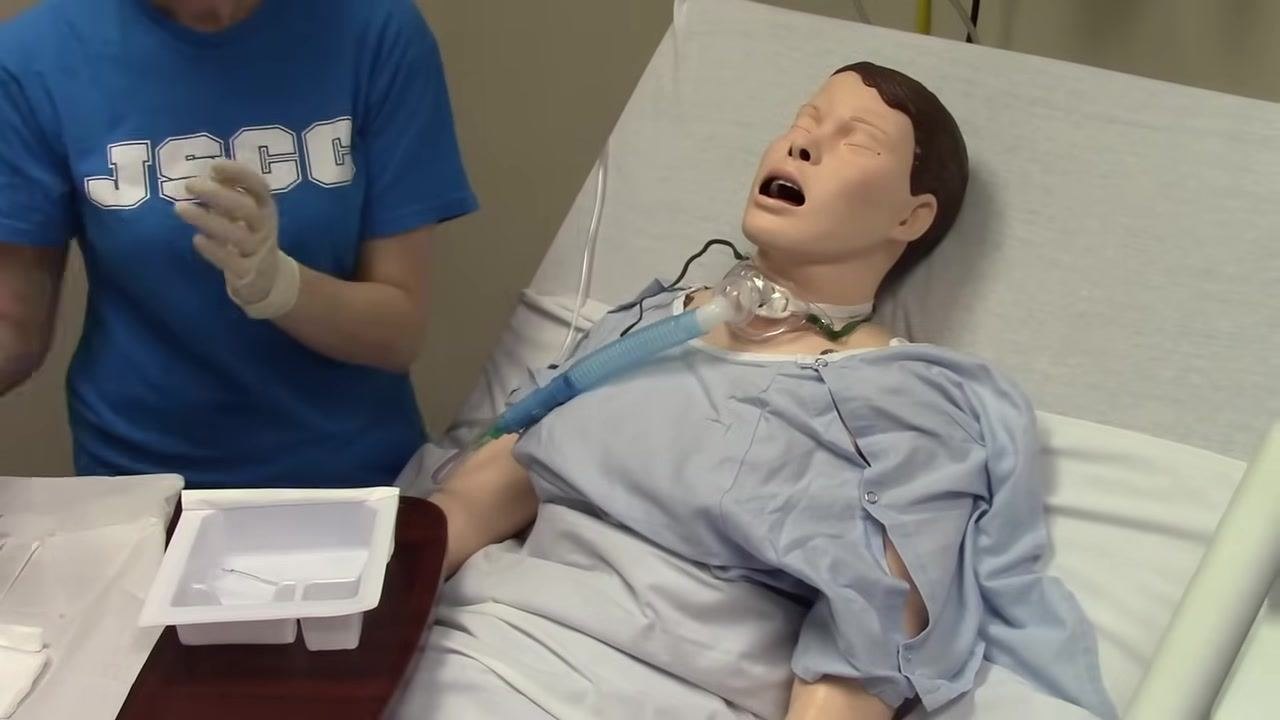
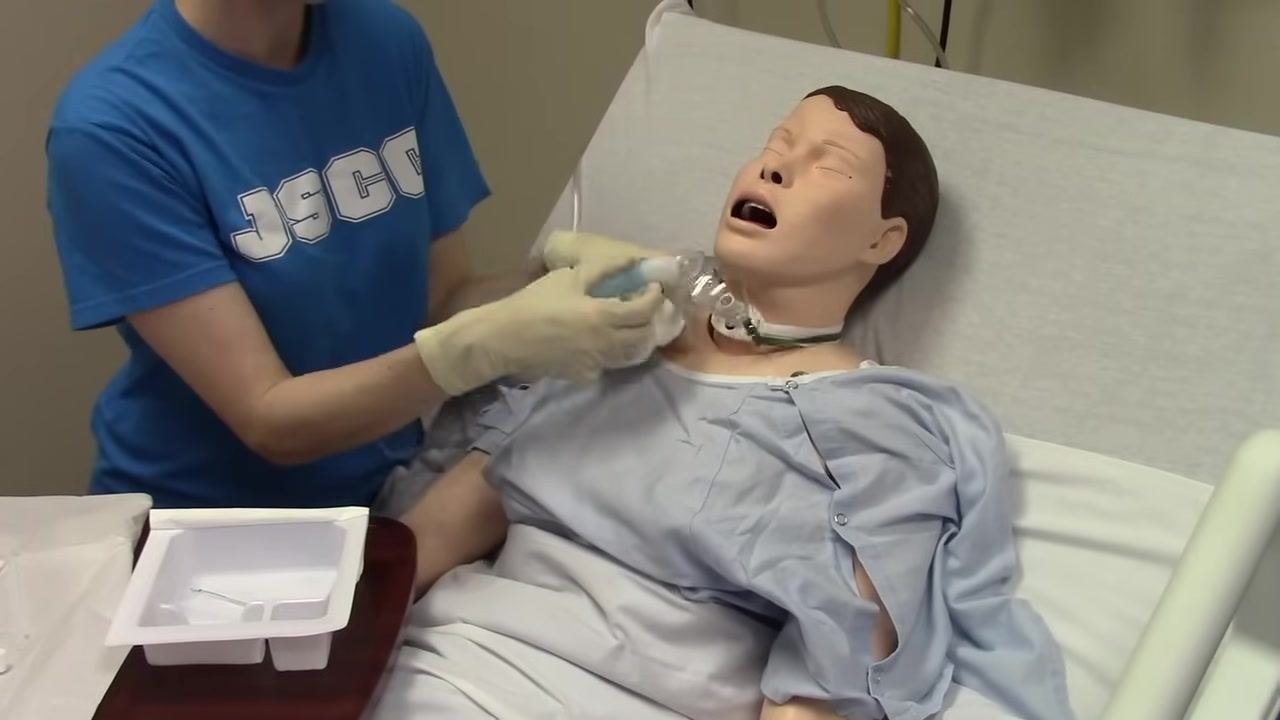
Secure the tracheostomy tube and provide oxygen.
- Hold the tracheostomy tube in place while applying the dressing to prevent accidental dislodgement.
- If the oxygen mask becomes dislodged during dressing application, promptly return it to the patient to maintain oxygenation.
- Ensure the oxygen mask is properly positioned over the tracheostomy tube.
-
Confirm oxygen delivery.
- Double-check that the oxygen mask is securely in place and the patient is receiving adequate oxygen.
- Adjust the mask as needed to ensure a proper fit.
Verification and completion
-
Complete the procedure.
- Dispose of all used supplies (applicators, gauze, gloves, packaging) in the appropriate waste containers.
- Remove and discard your gloves using proper technique to avoid contamination.
- Ensure the patient is comfortable and all equipment is functioning correctly.
- Document the procedure in the patient's medical record, noting the condition of the stoma site, the type of dressing applied, and any observations.
-
Confirm completion.
- The procedure is complete when the patient's tracheostomy site is clean and protected, and oxygen delivery is confirmed.
- Clean up the area and wash your hands thoroughly.
Note: By following these steps, you maintain sterile technique, ensure patient safety, and provide effective tracheostomy care. Always monitor the patient for signs of respiratory distress and document all actions taken.
Generation details: cost, quality tiers
Docsie billed 5,500 credits ($3.85) to analyze this 11-minute video at standard quality. The rewrite, template fill and Word/PDF exports were included. The same video at each quality tier:
| Quality | Frames sampled | Credits | Approx. cost |
|---|---|---|---|
| Draft | every 16-30 s | 2,750 | $1.92 |
| Standard (this guide) | every 8-15 s | 5,500 | $3.85 |
| Detailed | every 4-7 s | 11,000 | $7.70 |
| Ultra | every 1-3 s | 22,000 | $15.40 |
Credits priced at $0.70 per 1,000; plans include a monthly allowance. Enterprise customers on on-premise or bring-your-own-model deployments run this on their own inference and pay no per-video credits.
Generated by Docsie Video-to-Docs on 2026-09-09 from a 10-minute video. Screenshots are frames from the source video and belong to their creator, JSCC Simulation Lab, whose original is embedded above. If you own this video and want the guide removed or credited differently, contact us and we will act within one business day.