
How to Perform the 7 Steps of Hand Hygiene
This procedure provides step-by-step instructions for performing proper hand hygiene. Correct hand washing technique is essential for preventing the transmission of infection, particularly in healthcare and clinical settings.
Video: 7 steps of Hand Hygiene by jeffrey ordoñez (2016). All credit for the demonstration goes to the creator; watch the original on YouTube. The written guide below was generated from this video by Docsie. Creator? Request a change or removal.
Purpose
This procedure provides step-by-step instructions for performing proper hand hygiene. Correct hand washing technique is essential for preventing the transmission of infection, particularly in healthcare and clinical settings.
Scope
This procedure applies to any individual required to perform hand hygiene at a sink equipped with liquid soap, running water, and hand-drying materials, including personnel in clinical or healthcare environments.
Required equipment/PPE
- Sink with a functioning faucet and running water
- Liquid soap dispenser (pink soap)
- Hand hygiene instructional posters (for reference)
- Tissue paper dispenser
- Clean basin or sink area free of contamination
Procedure
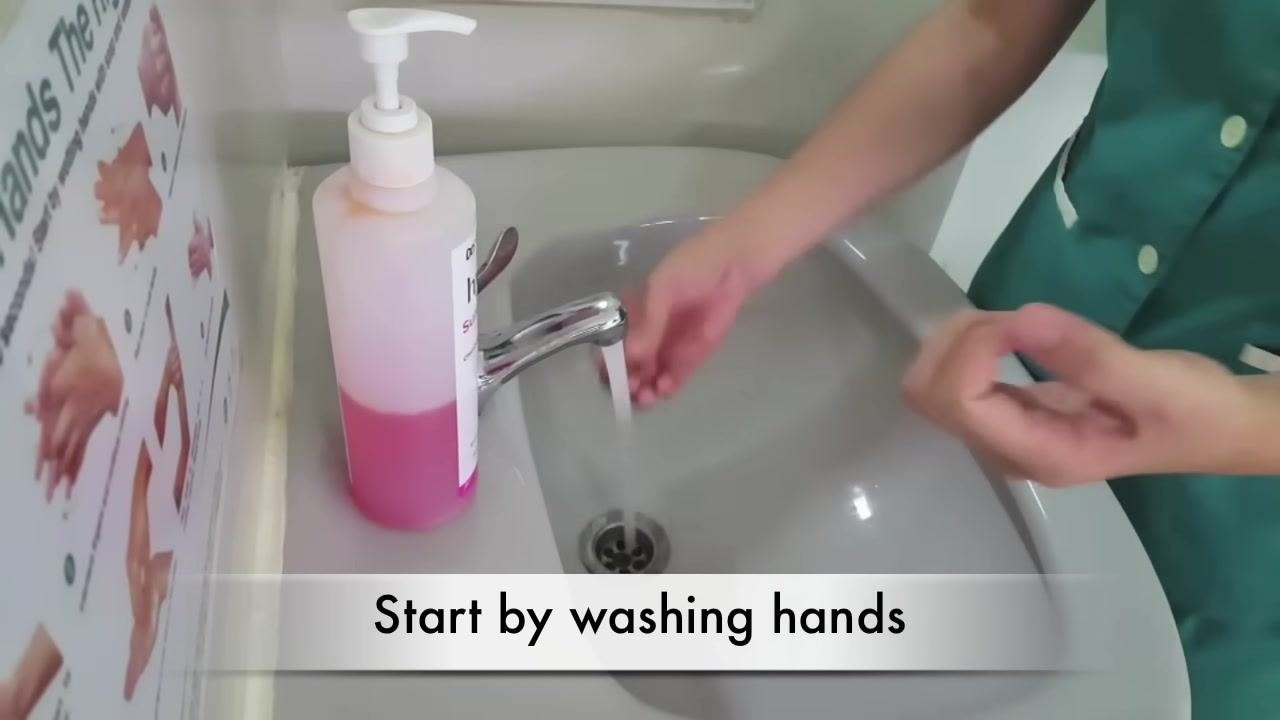
Step 1: Start by washing hands
Approach a sink equipped with a faucet, liquid soap dispenser, and hand hygiene instructional posters. Turn on the water and wet your hands thoroughly under the running tap, ensuring water flows over all surfaces of your hands.
Step 2: Apply soap
Dispense soap by pressing down on the pump of the liquid soap bottle and collect it in one palm. Use enough soap to cover all surfaces of both hands.
Step 3: Rub hands palm to palm
Rub your hands together palm to palm to create a lather, ensuring both palms are fully covered with soap.
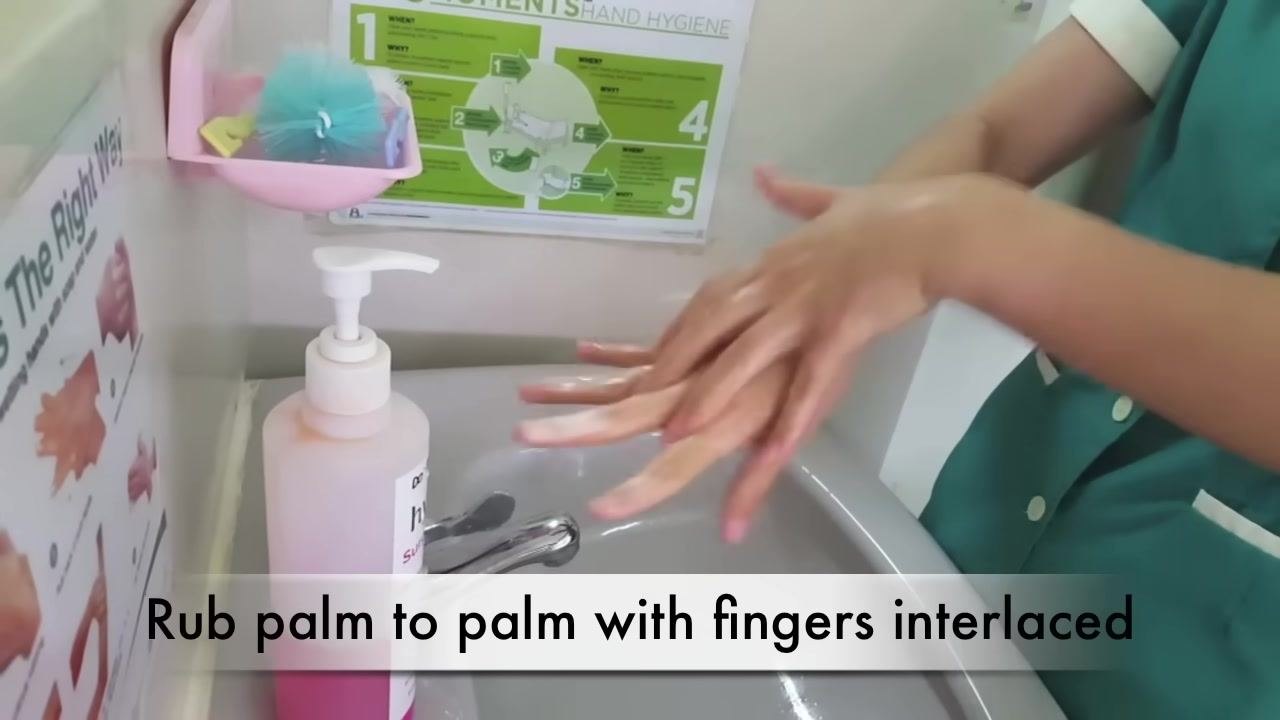
Step 4: Rub palm to palm with fingers interlaced
Interlace your fingers and rub your hands together, ensuring soap reaches between all fingers. Continue this motion until the spaces between all fingers are cleaned.
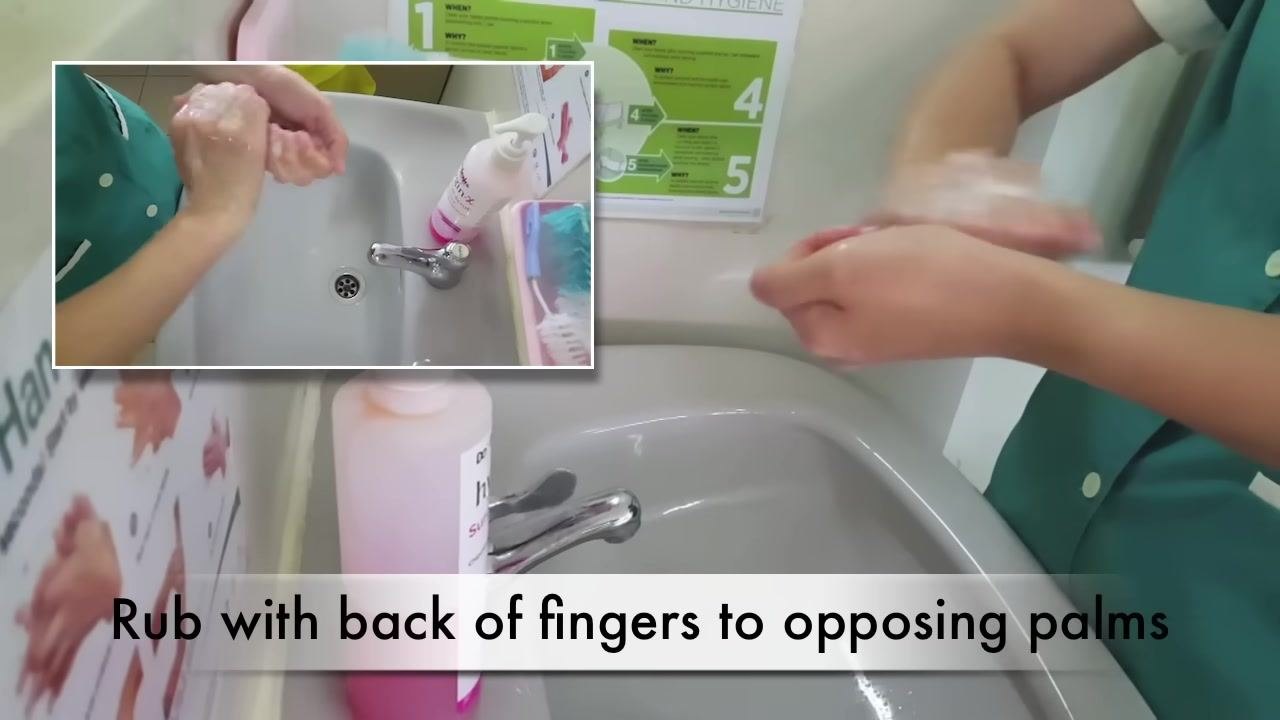
Step 5: Rub with back of fingers to opposing palms
Place the backs of your fingers against the opposing palm and rub them together. Alternate hands to ensure both are cleaned thoroughly. An inset image shows a close-up of this action from a different angle for clarity.
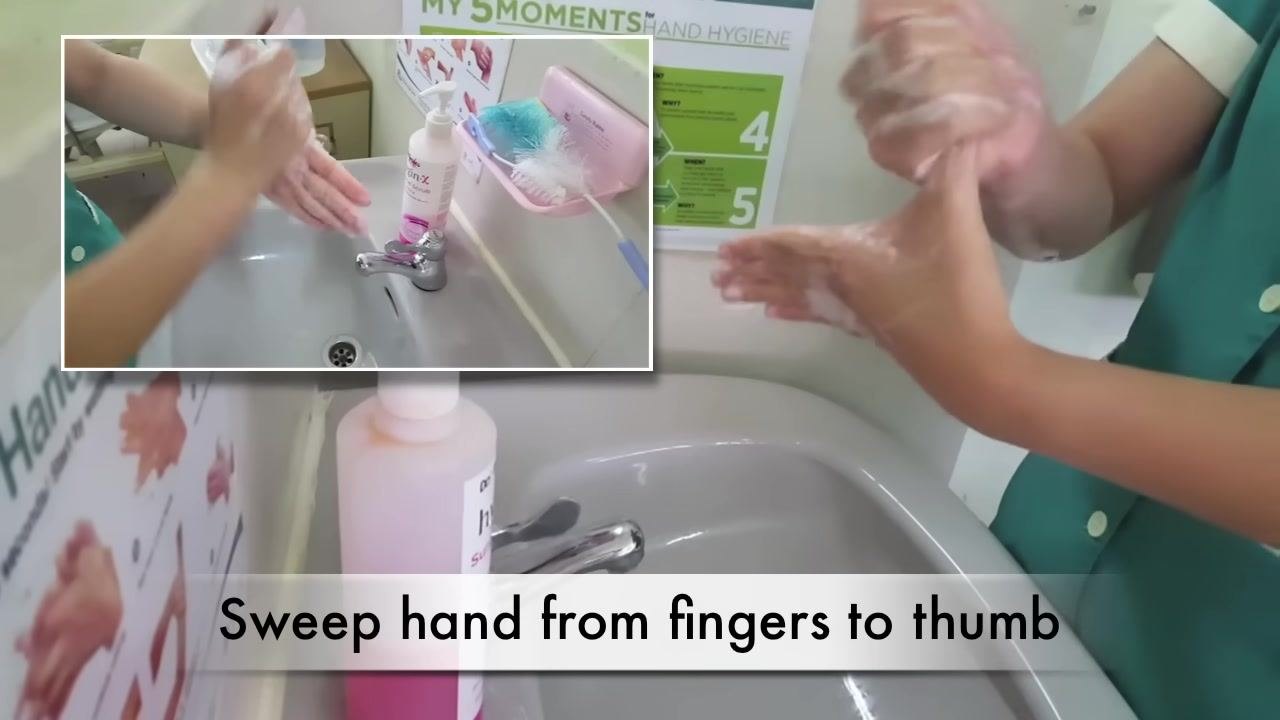
Step 6: Sweep hand from fingers to thumb
Use a sweeping motion to clean from the fingers down to the thumb, and repeat this action for both hands. An inset image provides an additional perspective of the sweeping motion.
Step 7: Rub tips of fingers in opposite palm
Place the tips of your fingers into the opposite palm and rub in a circular motion. Repeat for both hands to ensure fingertips and the areas under the nails are cleaned.
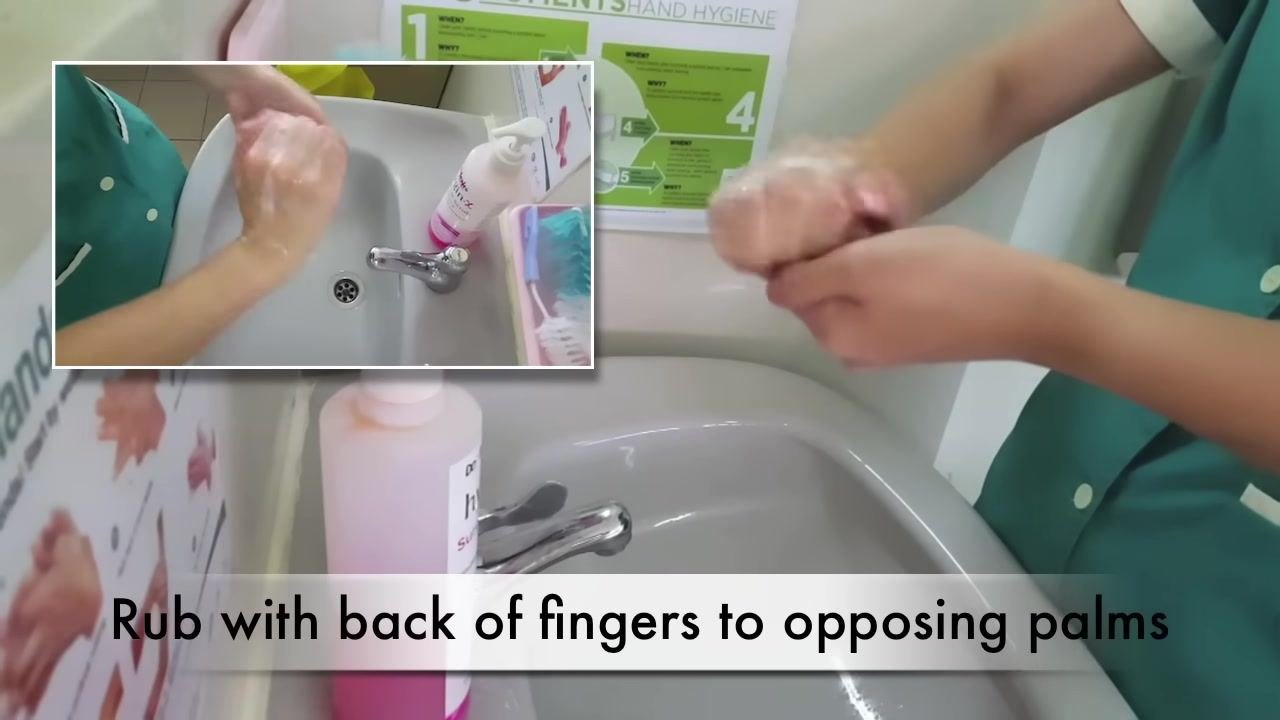
Note: Each of the steps above should be visually verified against the demonstrated technique to ensure proper coverage of every hand surface. Follow all steps in sequence for optimal hand hygiene.
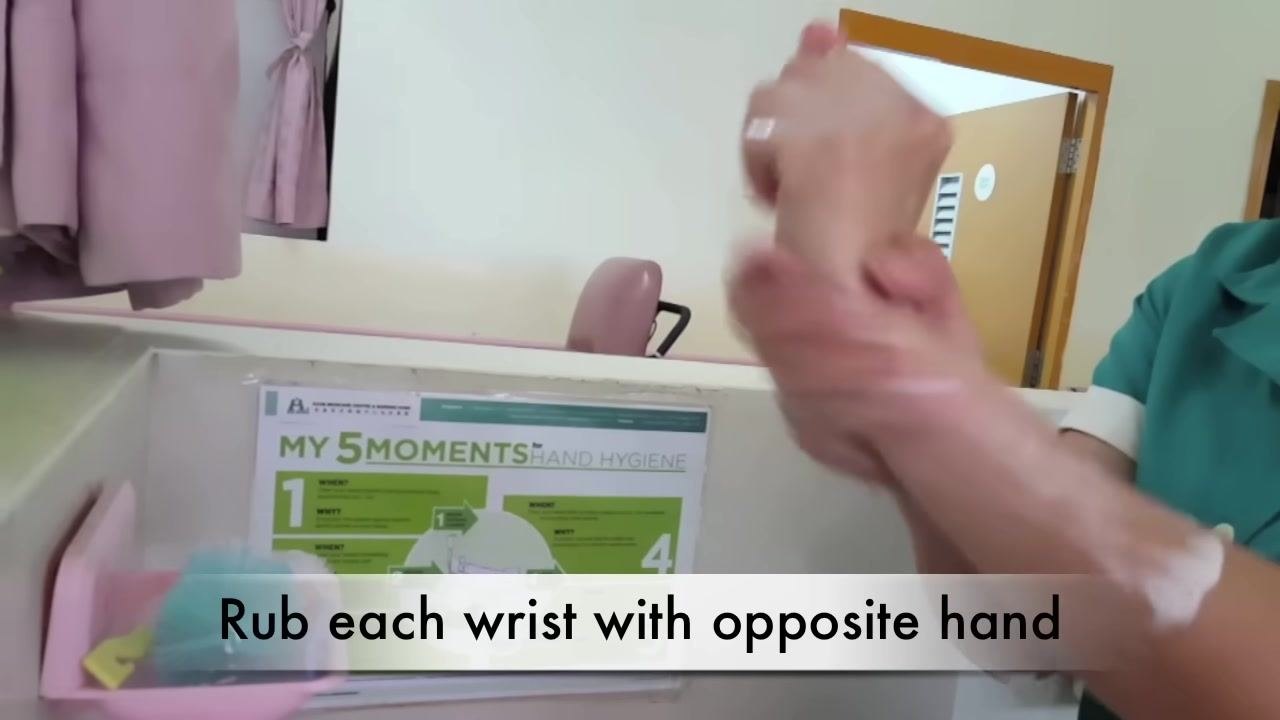
Step 8: Rub each wrist with the opposite hand
Grasp your right wrist with your left hand and rub thoroughly, ensuring soap covers the entire wrist area. Repeat by grasping your left wrist with your right hand and rubbing thoroughly. This step ensures that wrists, which are often missed, are also cleaned.
Step 9: Rinse hands with water
Place your hands under running water from the faucet and ensure all soap is rinsed off from your hands and wrists.
Step 10: Use elbow to turn off tap
Safety note: After rinsing, use your elbow — not your hands — to turn off the faucet. This prevents re-contaminating your clean hands.

Step 11: Wipe each hand with a separate tissue paper
Take a tissue paper from the dispenser. Dry your right hand with one tissue and your left hand with a separate tissue to prevent cross-contamination.

Key reminders
Clean hands save lives. Proper hand hygiene plays a critical role in preventing the transmission of infection.

Acknowledgments
The instructional video concludes with credits listing the director, demonstrator, supervisors, and contributors, recognizing the team involved in producing this hand hygiene instructional material.
Verification and summary
By following all steps above in sequence, you ensure thorough and effective hand hygiene, reducing the risk of infection transmission. Always use proper technique at each stage, and avoid re-contaminating your hands after washing.
Generation details: cost, quality tiers
Docsie billed 1,500 credits ($1.05) to analyze this 3-minute video at standard quality. The rewrite, template fill and Word/PDF exports were included. The same video at each quality tier:
| Quality | Frames sampled | Credits | Approx. cost |
|---|---|---|---|
| Draft | every 16-30 s | 750 | $0.52 |
| Standard (this guide) | every 8-15 s | 1,500 | $1.05 |
| Detailed | every 4-7 s | 3,000 | $2.10 |
| Ultra | every 1-3 s | 6,000 | $4.20 |
Credits priced at $0.70 per 1,000; plans include a monthly allowance. Enterprise customers on on-premise or bring-your-own-model deployments run this on their own inference and pay no per-video credits.
Generated by Docsie Video-to-Docs on 2026-09-08 from a 2-minute video. Screenshots are frames from the source video and belong to their creator, jeffrey ordoñez, whose original is embedded above. If you own this video and want the guide removed or credited differently, contact us and we will act within one business day.