
How to Collect a Blood Culture Specimen
This procedure describes how to collect a blood culture specimen using aseptic venepuncture technique with paired aerobic and anaerobic culture bottles. It covers patient preparation, site and bottle disinfection, specimen collection into both bottle types, and safe disposal and labeling of the completed specimen. Following each step in sequence minimizes contamination risk and ensures the specimen is suitable for microbiological analysis.
Video: Blood Culture Collection - OSCE Guide | UKMLA | CPSA | PLAB 2 by Geeky Medics (2020). All credit for the demonstration goes to the creator; watch the original on YouTube. The written guide below was generated from this video by Docsie. Creator? Request a change or removal.
This procedure describes how to collect a blood culture specimen using aseptic venepuncture technique with paired aerobic and anaerobic culture bottles. It covers patient preparation, site and bottle disinfection, specimen collection into both bottle types, and safe disposal and labeling of the completed specimen. Following each step in sequence minimizes contamination risk and ensures the specimen is suitable for microbiological analysis.
Test overview
- Test name: Blood Culture Collection
- Methodology: Peripheral venepuncture performed with a butterfly needle or intravenous cannula connected to an adapter, through which blood is drawn directly into an aerobic bottle followed by an anaerobic bottle.
- Analytes measured: Presence of microbial growth in the bloodstream, used to identify infection.
- Clinical utility: The sample is sent to test for infection within the blood, as explained to the patient prior to collection.
- CPT code: Not specified in the source material. Refer to your institution's coding reference for the applicable billing code.
Specimen requirements
| Parameter | Detail |
|---|---|
| Specimen type | Whole blood, collected by peripheral venepuncture |
| Collection container | One aerobic blood culture bottle (blue cap) and one anaerobic blood culture bottle (typically purple or black cap) |
| Minimum volume | Approximately 10 mL for the anaerobic bottle, filled to the measurement markings on the bottle; the aerobic bottle should be filled to its required volume before detaching |
| Patient preparation | Confirm patient identity (name and date of birth), explain the procedure, and obtain verbal consent before proceeding |
| Transport conditions | Not specified in the source material; follow local laboratory protocols for sample transport |
| Stability | Not specified in the source material |
| Rejection criteria | Not specified in the source material; ensure each bottle is correctly labeled with patient details and filled to the appropriate volume |
Equipment & reagents
Gather all equipment on a clean surface before beginning the procedure. Items used in this procedure include:
- Nitrile examination gloves (box labeled "SAFETOUCH")
- Yellow sharps disposal bin (labeled "SHARPSGUARD")
- Blue tray
- Documentation/forms
- Green packet of wipes
- Aerobic and anaerobic blood culture bottles (distinguished by cap color)
- Clear container holding venepuncture supplies (adapter, needle/butterfly device, tourniquet)
- Hand sanitizing gel (Clinell)
- Blue sterile drape or pack
- 2% chlorhexidine in 70% isopropyl alcohol wipes
- Sterile gauze
- Patient identification labels
Catalog/part numbers and specific storage requirements are not specified in the source material. Consult manufacturer instructions and your institution's supply records for this information.
Calibration & QC
This document addresses specimen collection technique rather than an analytical test, so calibration frequency, QC levels, acceptable ranges, and corrective actions for out-of-range QC are not covered in the source material. Consult your laboratory's quality management documentation for blood culture instrumentation (such as continuous-monitoring blood culture systems) for this information.
Procedure steps
Preparation and patient consent
- Perform hand hygiene and introduce yourself Wash your hands thoroughly before approaching the patient. Introduce yourself by name and role, and sit facing the patient in a clean clinical environment.

-
Confirm patient identity Politely ask the patient to confirm their name and date of birth, and verify this against the patient's records.
-
Explain the procedure and obtain consent Explain that a blood sample will be taken by inserting a small needle into a vein, and that the sample will be tested for infection in the blood. Ask for the patient's consent and wait for verbal confirmation before proceeding.
-
Don gloves Put on a pair of nitrile examination gloves to maintain aseptic technique. This step is optional at this stage but recommended for safety.
-
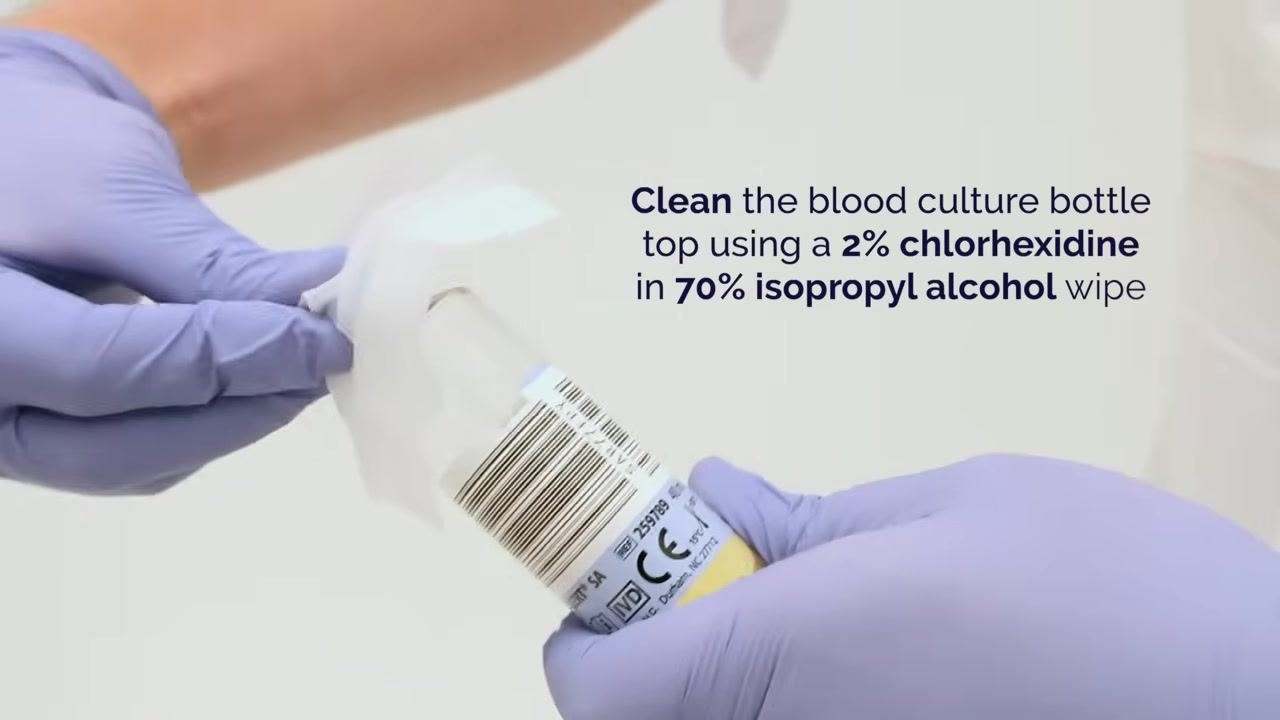
Clean the blood culture bottle tops Take a 2% chlorhexidine in 70% isopropyl alcohol wipe and thoroughly clean the top of the first blood culture bottle, ensuring the wipe contacts the entire rubber stopper surface to reduce contamination risk.
-
Repeat cleaning for the second bottle Clean the top of the remaining blood culture bottle in the same manner, ensuring both bottles are disinfected before use.
-
Perform hand hygiene again After preparing the bottles, dispense an adequate amount of hand sanitizing gel and rub hands thoroughly before proceeding to the venepuncture site.
-
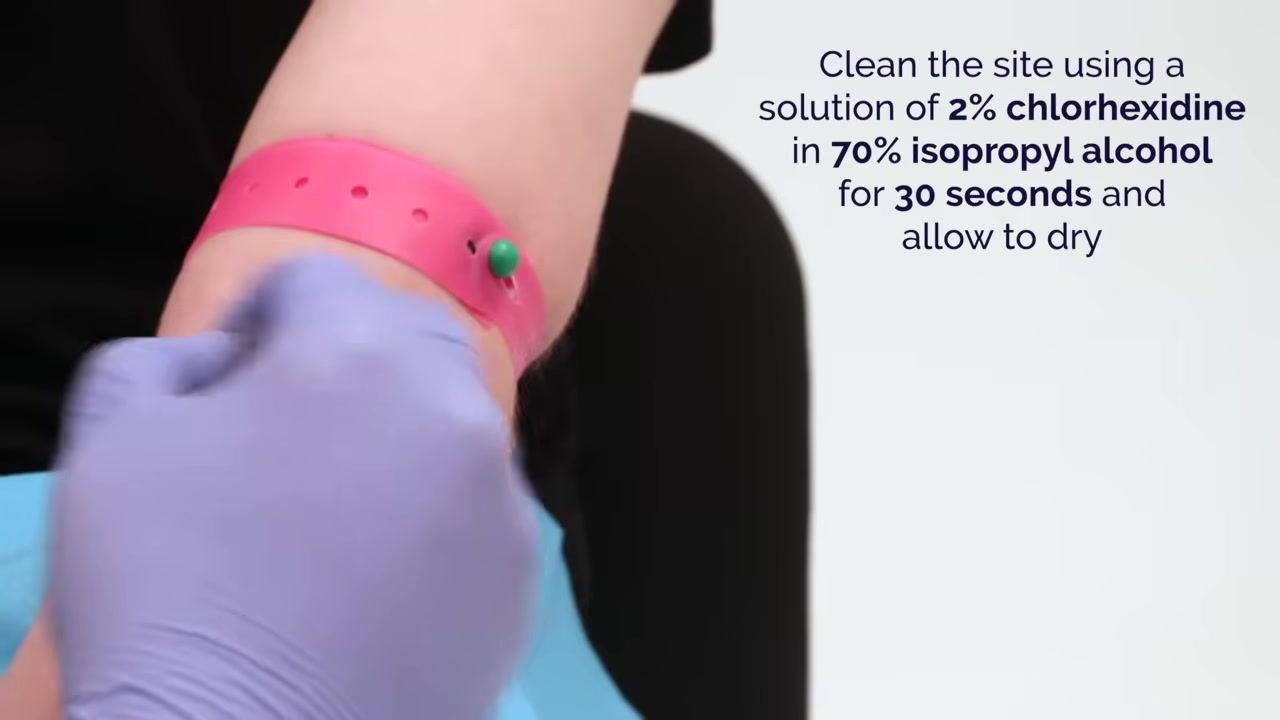
Clean the venepuncture site Apply a tourniquet to the patient's upper arm. Clean the chosen venepuncture site with a solution of 2% chlorhexidine in 70% isopropyl alcohol, scrubbing for 30 seconds, and allow the site to dry completely before inserting the needle.
Venepuncture and specimen collection
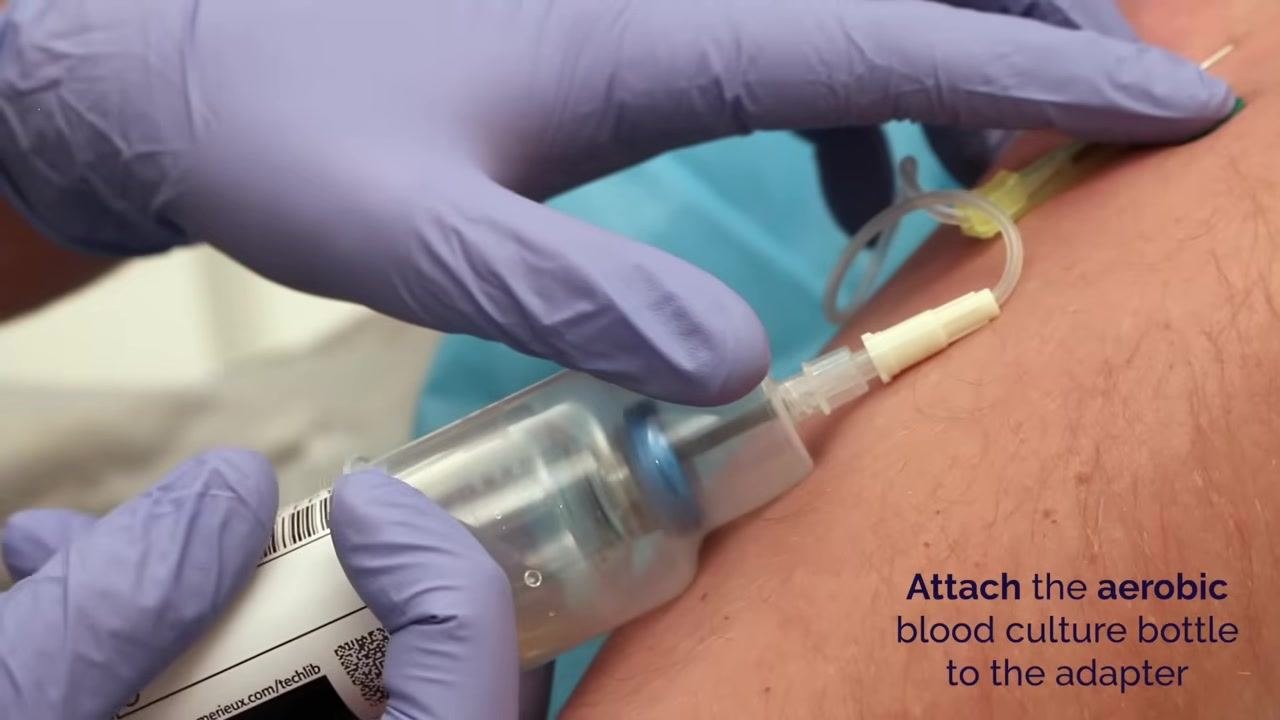
- Attach the aerobic blood culture bottle to the adapter With gloved hands, hold the adapter connected to the patient's needle or cannula. Attach the aerobic bottle (blue cap) securely to the adapter and confirm it is upright and ready to receive blood.
-
Allow the aerobic bottle to fill Observe blood flowing into the aerobic bottle and monitor the fill level to avoid overfilling.
-
Detach the aerobic bottle once filled Once the aerobic bottle reaches the required volume, carefully detach it from the adapter while maintaining aseptic technique.
-
Attach the anaerobic blood culture bottle to the adapter Take the anaerobic bottle (typically purple or black cap) and attach it securely to the adapter in the same manner as the aerobic bottle.
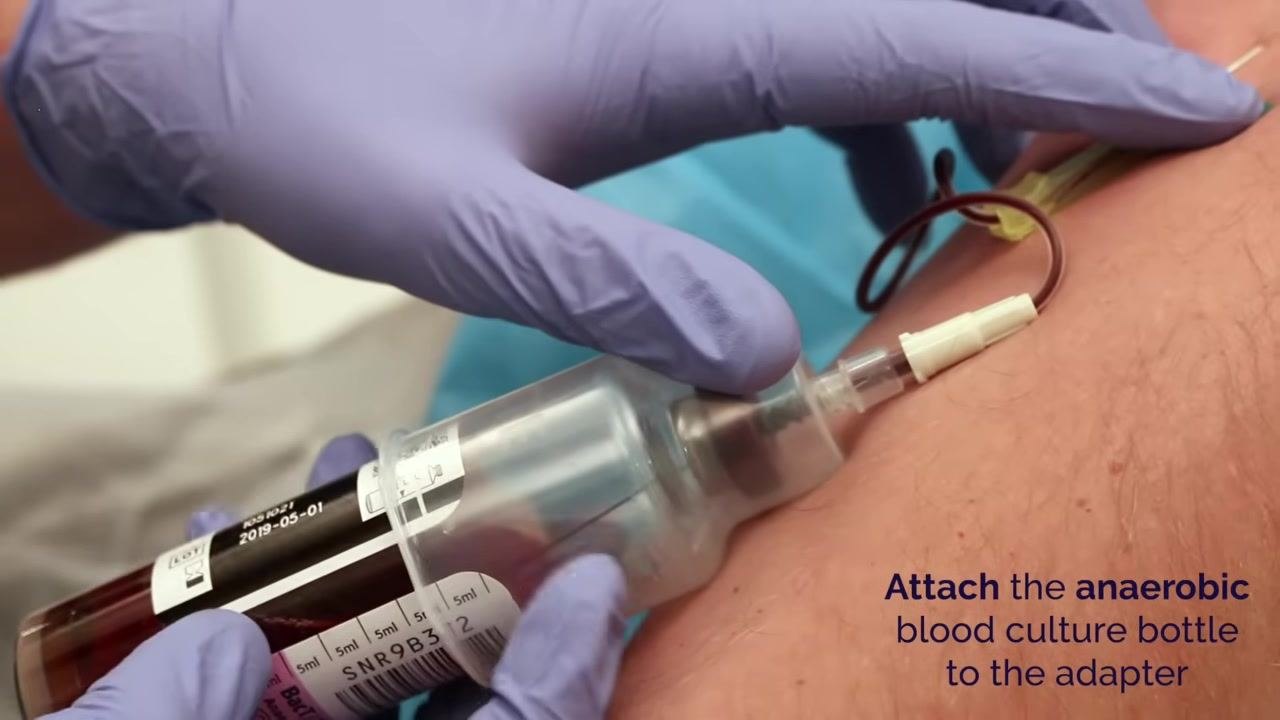
- Fill the anaerobic bottle with approximately 10 mL of blood Allow blood to flow into the anaerobic bottle and monitor the fill level, aiming for approximately 10 mL as indicated on the bottle's measurement markings.
-
Remove the needle and apply pressure Once both bottles are filled, remove the needle from the patient's vein and immediately apply pressure to the venepuncture site with sterile gauze to minimize bleeding and promote clotting.
-
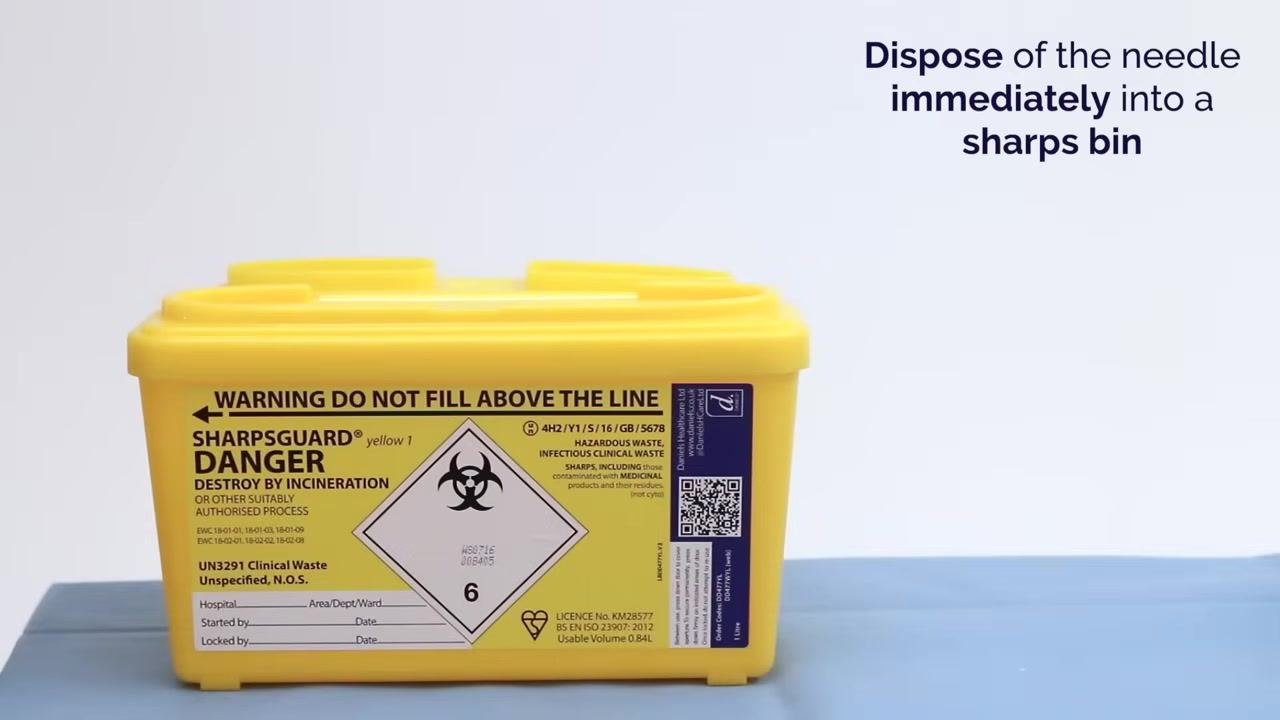
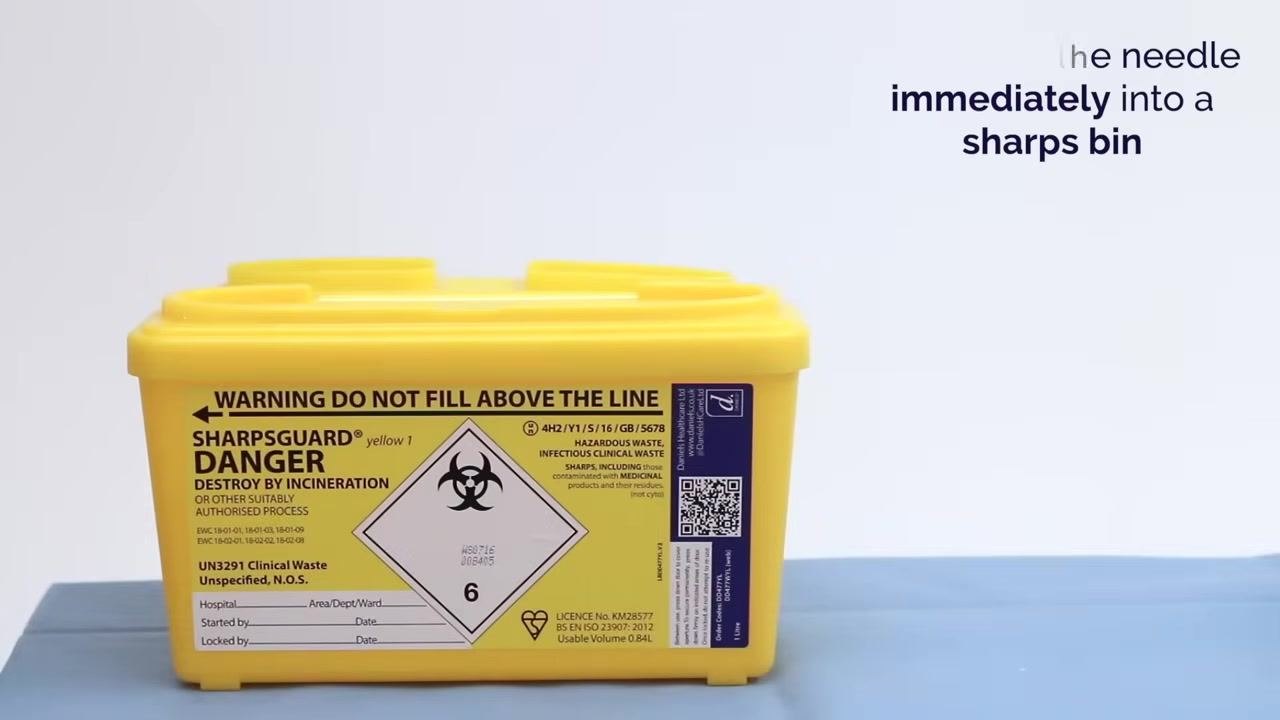
Dispose of the needle immediately into a sharps bin Place the used needle directly into the yellow sharps disposal bin. Do not fill the bin above the indicated line, and ensure it is closed securely after use.
-
Label each blood culture bottle with the patient's details Affix the patient's identification label to each filled bottle and double-check that the details are correct and legible.
-
Dispose of all used equipment Place all used materials, including gloves, gauze, wipes, and packaging, into the designated clinical waste bins according to local protocols.
Completion
- End the procedure and thank the patient Inform the patient that the procedure is complete, thank them for their cooperation, and ensure they are comfortable before leaving. Confirm all documentation is complete and follow local protocols for sample transport and patient aftercare.
Reference ranges
Blood culture collection is a qualitative specimen collection procedure, and the source material does not provide reference range data, since this document addresses collection technique rather than result interpretation.
| Age group | Sex | Reference range | Critical/panic value |
|---|---|---|---|
| Not specified | Not specified | Not specified in source material | Not specified in source material |
Consult your microbiology laboratory's reporting protocol for critical value definitions and required notification procedures.
Result interpretation
The purpose of the test, as explained to the patient, is to check for infection within the blood. The source material emphasizes that thorough disinfection of the bottle tops and the venepuncture site is necessary to reduce contamination risk, as inadequate aseptic technique can introduce skin flora into the specimen and interfere with accurate interpretation of culture results. Beyond this, detailed clinical interpretation guidance is not covered in the source material.
Troubleshooting
| Issue | Corrective action |
|---|---|
| Risk of contaminated bottle tops | Clean each bottle top thoroughly with a 2% chlorhexidine in 70% isopropyl alcohol wipe, ensuring full contact with the entire rubber stopper surface |
| Risk of specimen contamination from skin flora | Scrub the venepuncture site with 2% chlorhexidine in 70% isopropyl alcohol for 30 seconds and allow it to dry completely before inserting the needle |
| Overfilling the anaerobic bottle | Monitor the fill level closely and stop at approximately 10 mL as indicated by the bottle's markings |
| Underfilling the aerobic bottle | Monitor the fill level and detach only once the bottle has reached the required volume |
| Sharps injury risk after needle removal | Dispose of the needle immediately into the sharps bin, ensuring it is not filled above the indicated line |
What's next
After completing the blood culture collection, ensure all documentation is finished and the labeled bottles are handled according to local protocols for sample transport. Confirm the patient is comfortable before concluding the encounter.

Generation details: cost, quality tiers, downloads
Docsie billed 2,000 credits ($1.40) to analyze this 4-minute video at standard quality. The rewrite, template fill and Word/PDF exports were included. The same video at each quality tier:
| Quality | Frames sampled | Credits | Approx. cost |
|---|---|---|---|
| Draft | every 16-30 s | 1,000 | $0.70 |
| Standard (this guide) | every 8-15 s | 2,000 | $1.40 |
| Detailed | every 4-7 s | 4,000 | $2.80 |
| Ultra | every 1-3 s | 8,000 | $5.60 |
Credits priced at $0.70 per 1,000; plans include a monthly allowance. Enterprise customers on on-premise or bring-your-own-model deployments run this on their own inference and pay no per-video credits.
Generated by Docsie Video-to-Docs on 2026-09-14 from a 3-minute video. It was generated straight into Docsie's Lab Test Procedure template, so every section of that template is filled from the video. Screenshots are frames from the source video and belong to their creator, Geeky Medics, whose original is embedded above. If you own this video and want the guide removed or credited differently, contact us and we will act within one business day.