
How to Change a Tracheostomy Tube
This procedure describes how to change a tracheostomy tube safely at home or in a care setting. It covers preparing supplies, removing the existing tube, inserting a new tube, and confirming the patient is breathing normally afterward. Two trained caregivers should always perform this procedure together.
Video: Routine Trach Tube Change by Pediatric Home Service (2016). All credit for the demonstration goes to the creator; watch the original on YouTube. The written guide below was generated from this video by Docsie. Creator? Request a change or removal.
This procedure describes how to change a tracheostomy tube safely at home or in a care setting. It covers preparing supplies, removing the existing tube, inserting a new tube, and confirming the patient is breathing normally afterward. Two trained caregivers should always perform this procedure together.
Purpose & Scope
This procedure applies to patients with an established tracheostomy who require a routine trach tube change. It is intended for use in the home care setting by trained caregivers, though the same principles apply in ward or outpatient settings.
Confirm with the patient's doctor how often a routine trach tube change should be performed before beginning this procedure. A routine change always requires two caregivers present to perform the tube change safely.
Patient assessment
Before starting the trach tube change, complete the following preparation and assessment steps.
| Step | Action |
|---|---|
| Hand hygiene | Wash your hands thoroughly with soap and water, or apply hand gel, to ensure cleanliness. |
| Work surface | Clean your work surface using soap and water or a disinfecting wipe to maintain a sterile environment. |
| Personal protective equipment | Put on non-sterile gloves before handling any equipment or supplies. |
| Tube inspection | Inspect the new trach tube for any tears or damage. |
| Cuff check (if applicable) | If using a cuffed trach tube, check that the cuff inflates properly using a syringe to inflate and deflate it. |
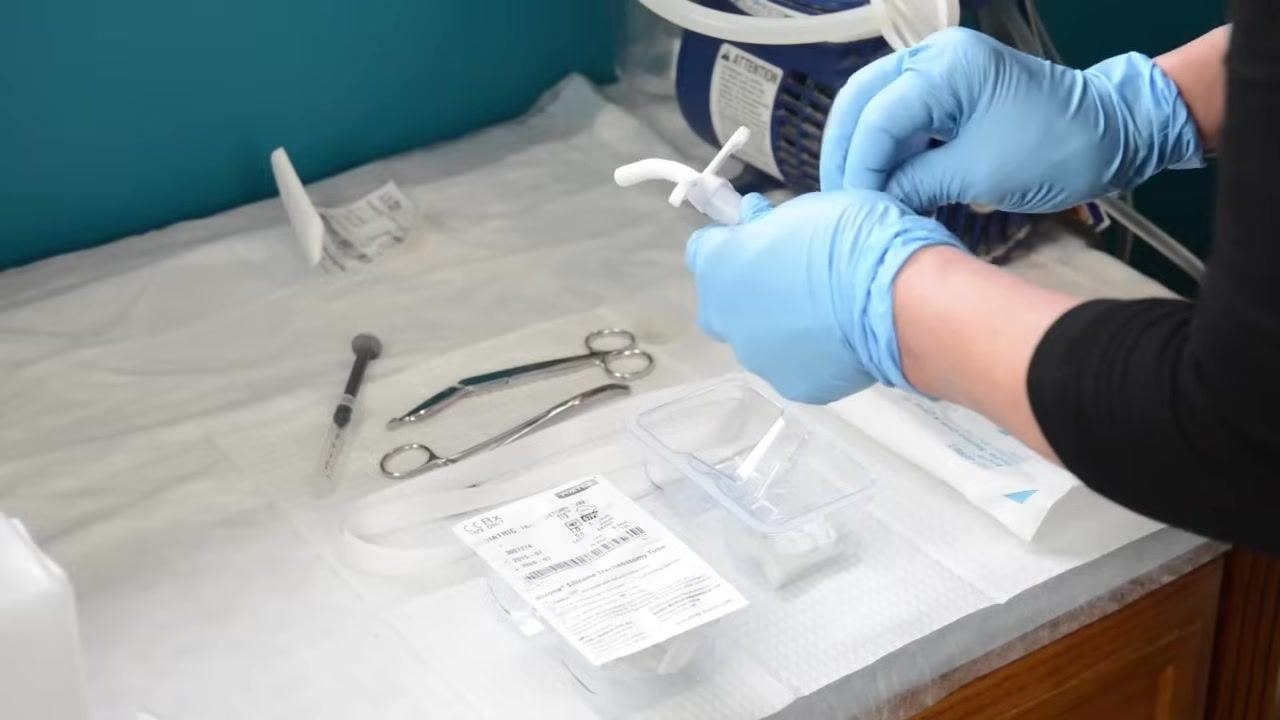
| Lubrication | Lubricate the trach tube with sterile lubricating jelly to ease insertion. |
| Airway suctioning | The first caregiver suctions the patient's trach tube to the safe suction depth using the suction machine and catheter. Suction the mouth and nose as needed to clear secretions. |

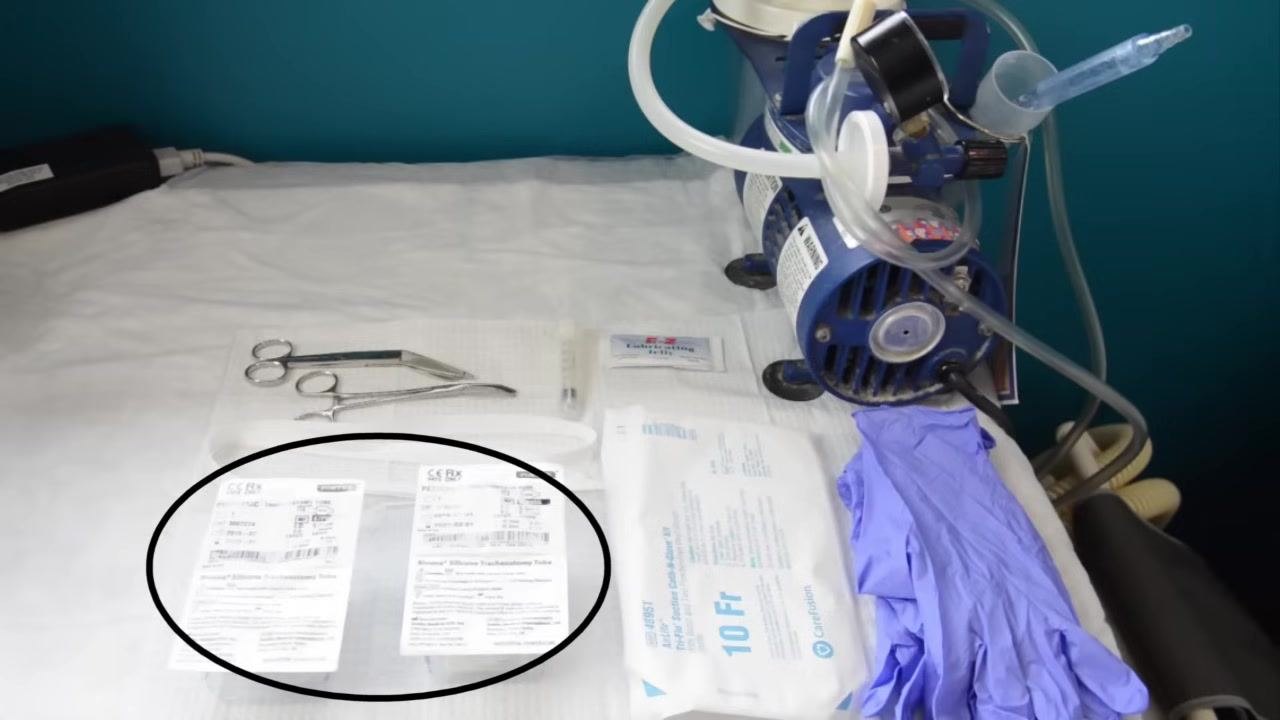
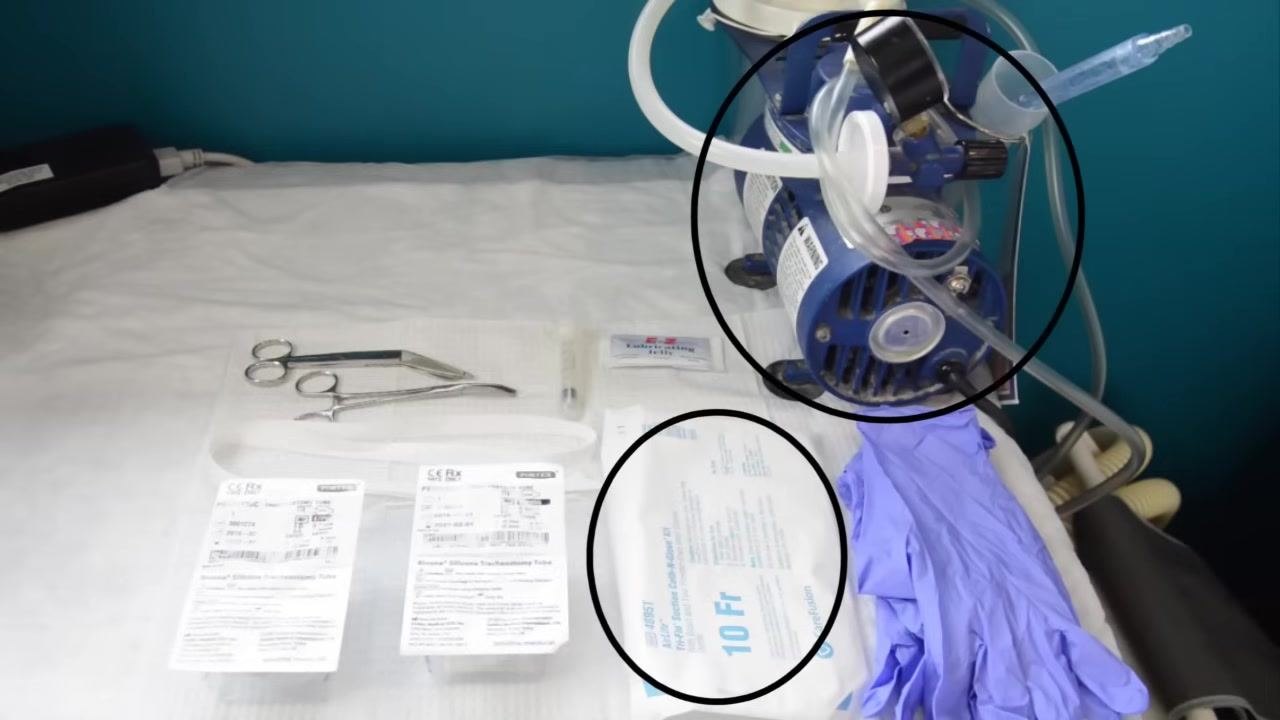
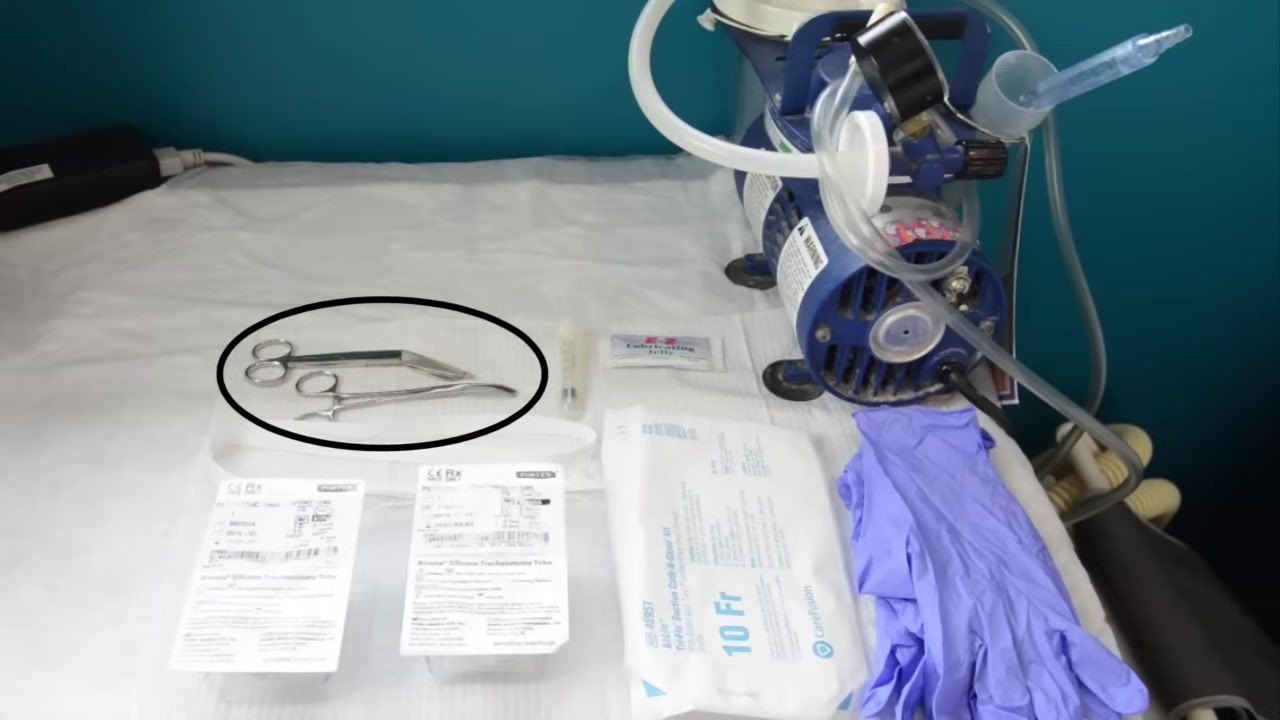
Assemble all required supplies before starting the procedure:
- A clean, current-sized trach tube
- A clean trach tube one size smaller
- Non-sterile gloves
- Suction machine and catheter
- Clean and dry trach tube tie or twill tape
- Sterile lubricating jelly
- Scissors
- Tweezers or Kelly clamp (if preferred)
- Syringe (if the trach tube has a cuff)
Care protocol
Perform the trach tube change in the following phases once preparation and assessment are complete.
Phase 1: Confirm patient readiness
Wait until the patient is comfortable before proceeding. Ensure the patient is calm and ready, and communicate with the patient as appropriate to confirm comfort.
Phase 2: Remove the existing tube
- The second caregiver gently holds the trach tube flanges to keep the tube securely in place.
- The first caregiver removes the trach tie or twill tape, using scissors if necessary, while the second caregiver keeps the tube stabilized.
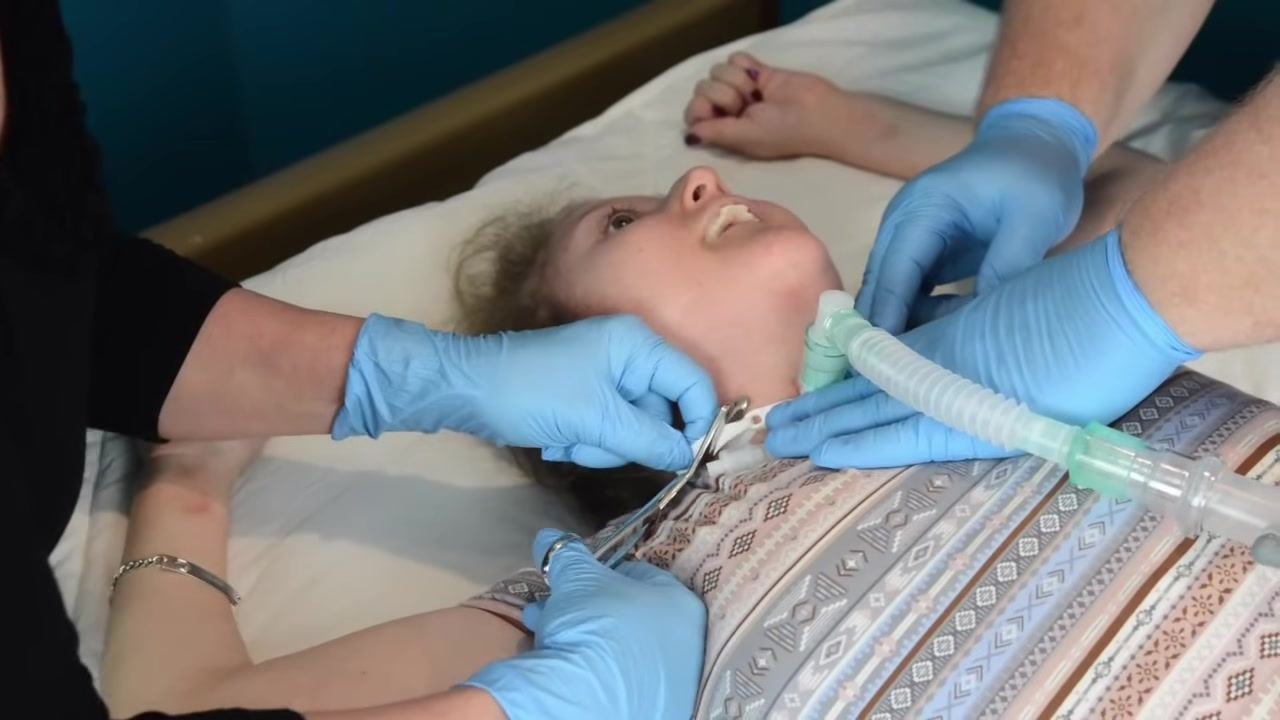
- If the patient has a cuffed trach tube, the first caregiver uses a syringe to remove all water or air from the cuff and confirms it is fully deflated before proceeding.
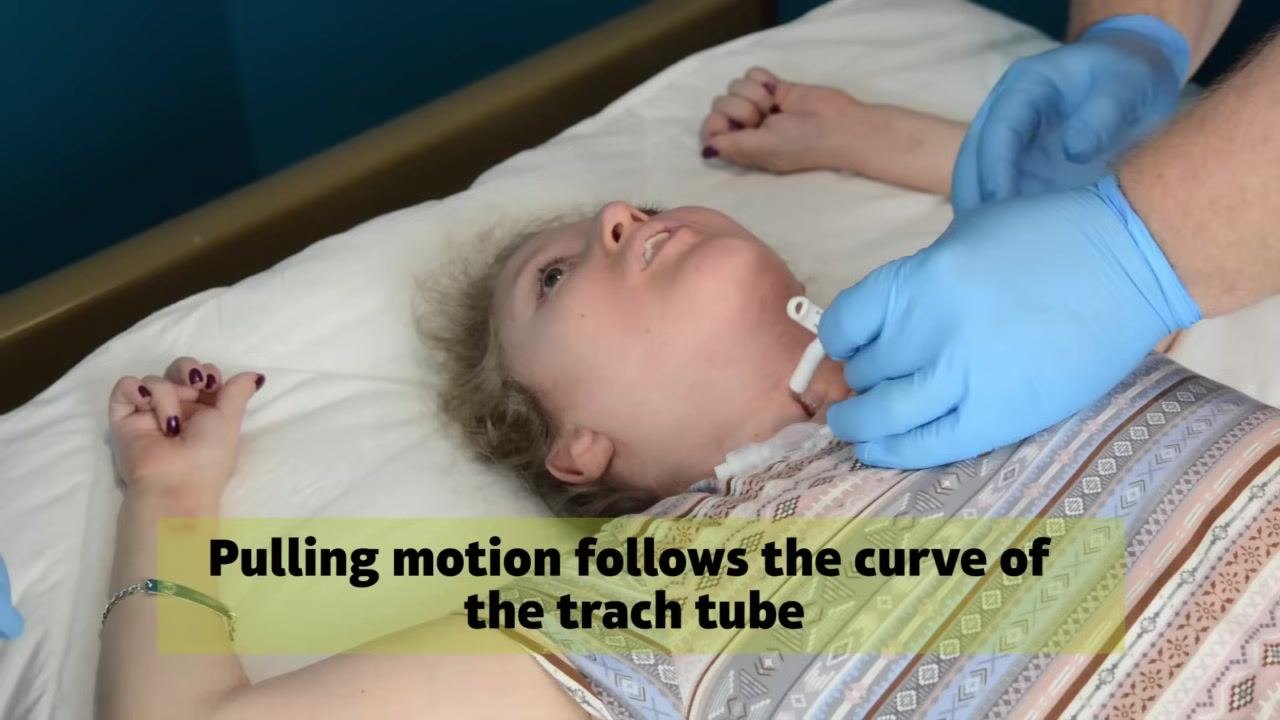
- If the patient is on a ventilator, the first caregiver gently disconnects the ventilator tubing from the trach tube connector while the second caregiver continues to stabilize the tube.
- The second caregiver gently pulls the trach tube from the stoma, following the natural curve of the tube to minimize discomfort and trauma.
Phase 3: Insert the new tube
-
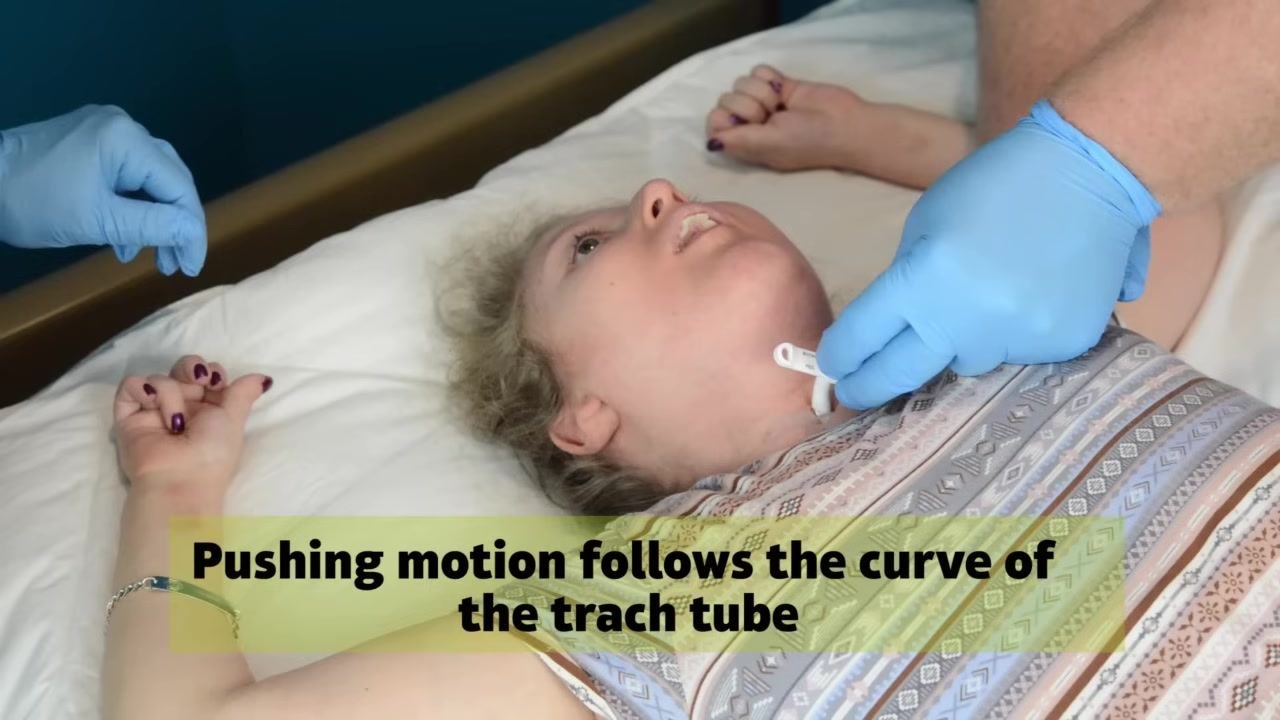
The second caregiver immediately inserts the new or clean trach tube into the stoma, using a gentle pushing motion that follows the curve of the tube and inserting smoothly without force.
-
While holding the trach tube in place, immediately remove the obturator from the new tube.
-
If the patient uses a ventilator, the first caregiver reconnects the ventilator tubing, ensuring a secure connection between the tubing and the new trach tube.
-
If the patient has a cuffed trach tube, the first caregiver inflates the cuff to the prescribed volume using a syringe, while the second caregiver continues to hold the trach tube in place and soothes the patient as needed.
Phase 4: Secure the tube
- Attach the trach tie or twill tape (such as a Velcro trach tie) to the trach tube flanges, ensuring it is properly threaded and attached on both sides.
- Ensure the tie or twill tape lies flat around the patient's neck and is not twisted, and confirm it is not too tight by fitting one or two fingers under it.
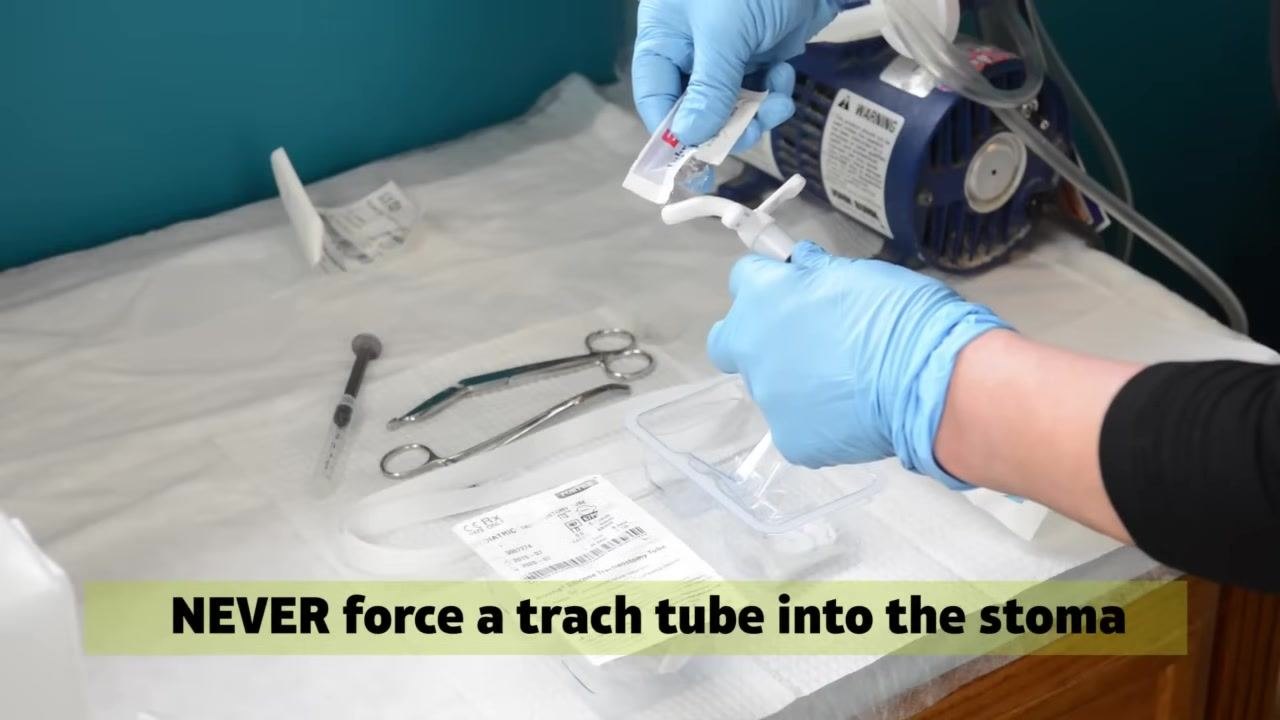
If the trach tube does not go in easily at any point, never force it into the stoma. Apply more lubricating gel and reposition the patient for better alignment; if it still does not insert easily, use the smaller trach tube and repeat the insertion with adequate lubrication.
Pain management
This procedure does not involve a medication-based pain management plan; instead, caregiver reassurance and gentle handling are used to keep the patient calm throughout the tube change. A formal pain management protocol with medication table, dosing, and escalation pathway would be documented separately if the patient requires analgesia related to the tracheostomy site.
Mobility milestones
Mobility progression is not addressed in this procedure, as the trach tube change is performed with the patient lying in bed. A mobility milestone plan, if applicable to the patient's broader care plan, would be documented in a separate care protocol.
Complication monitoring
After inserting the new tube, check the patient's breathing and oxygenation before considering the procedure complete.
- Observe whether the chest rises and falls with each breath.
- Listen for air movement through the trach tube.
- Use a stethoscope to confirm air movement in the lungs on both sides of the chest.
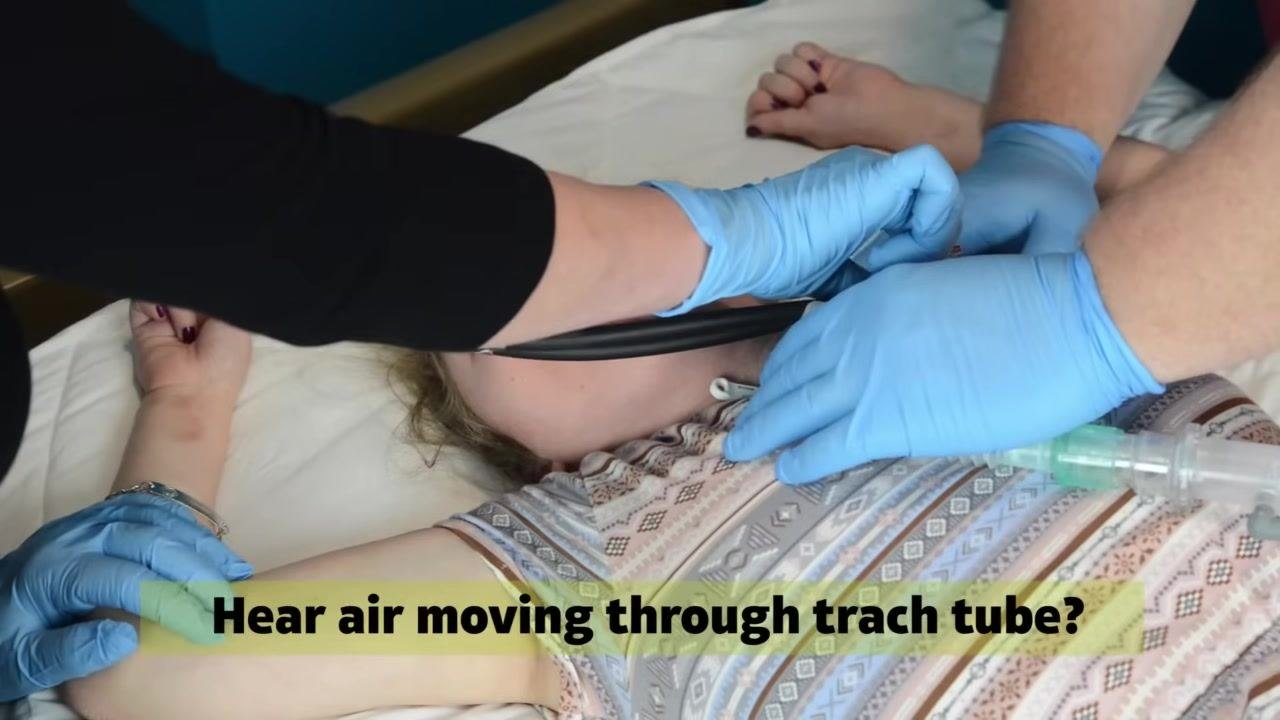
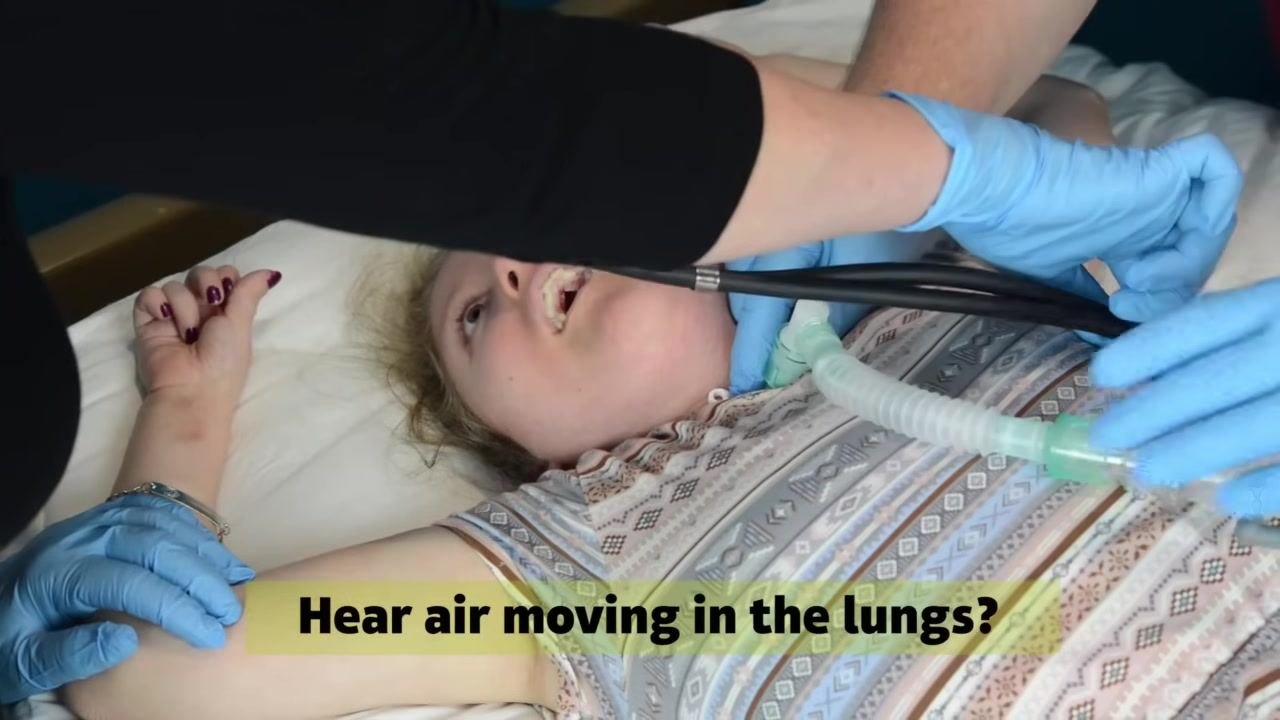
- Check that the patient's skin color is normal.
- If available, use an oximeter to verify the patient's oxygen saturation is within their normal range.
- Address any abnormal findings immediately.
Be aware that changing the trach tube may cause the patient to cough before the ties are reattached. The second caregiver should gently but securely hold the trach tube in place during any coughing episode to prevent accidental dislodgement.

If the patient shows signs of distress, coughing, or audible secretions, the first caregiver should suction the trach tube or airway with a suction catheter as needed.
Discharge criteria
Specific discharge criteria are not part of this procedure, since the trach tube change is a routine maintenance task rather than an inpatient admission. Discharge readiness, if relevant to the patient's overall care episode, would be assessed against measurable clinical criteria documented in the patient's broader care plan.
Patient education
For further assistance or clinical support, contact your healthcare provider or refer to the services offered by your care team. These services may include respiratory therapy, infusion nursing and pharmacy, home care nursing, and clinical support.
Always monitor the patient closely throughout the trach tube change and seek professional assistance if you encounter any difficulties or complications while learning how to change a tracheostomy tube.
Generation details: cost, quality tiers, downloads
Docsie billed 2,500 credits ($1.75) to analyze this 5-minute video at standard quality. The rewrite, template fill and Word/PDF exports were included. The same video at each quality tier:
| Quality | Frames sampled | Credits | Approx. cost |
|---|---|---|---|
| Draft | every 16-30 s | 1,250 | $0.88 |
| Standard (this guide) | every 8-15 s | 2,500 | $1.75 |
| Detailed | every 4-7 s | 5,000 | $3.50 |
| Ultra | every 1-3 s | 10,000 | $7.00 |
Credits priced at $0.70 per 1,000; plans include a monthly allowance. Enterprise customers on on-premise or bring-your-own-model deployments run this on their own inference and pay no per-video credits.
Generated by Docsie Video-to-Docs on 2026-09-14 from a 4-minute video. It was generated straight into Docsie's Patient Care Procedure template, so every section of that template is filled from the video. Screenshots are frames from the source video and belong to their creator, Pediatric Home Service, whose original is embedded above. If you own this video and want the guide removed or credited differently, contact us and we will act within one business day.