
How to Reset Ice Machine
This standard operating procedure explains how to reset an ice machine that has locked out with a Code 3 error, specifically a Scotsman Prodigy Plus (D model) unit. Code 3 indicates the machine could not fill its reservoir quickly enough, a condition most often caused by inadequate water flow due to a clogged or expired water filter. Following this procedure will help you identify the cause, clear the fault, and restore the machine to normal ice-making operation.
Video: Resetting a Scotsman Prodigy Cuber by Scotsman Ice Parts and Service (2016). All credit for the demonstration goes to the creator; watch the original on YouTube. The written guide below was generated from this video by Docsie. Creator? Request a change or removal.
Purpose
This standard operating procedure explains how to reset an ice machine that has locked out with a Code 3 error, specifically a Scotsman Prodigy Plus (D model) unit. Code 3 indicates the machine could not fill its reservoir quickly enough, a condition most often caused by inadequate water flow due to a clogged or expired water filter. Following this procedure will help you identify the cause, clear the fault, and restore the machine to normal ice-making operation.
Scope
This procedure applies to Scotsman Prodigy Plus (D model) ice machines displaying a Code 3 lockout on the control panel. It covers diagnosis of the lockout condition, water filter replacement, controller reset, and interpretation of the control panel's indicator lights and error codes.
Required equipment
- Replacement water filter compatible with your Scotsman Prodigy Plus model
- Access to the machine's water supply line and drain
- The model number and revision label on the unit (for verification)
Step-by-step instructions
Step 1: Identify the lockout condition
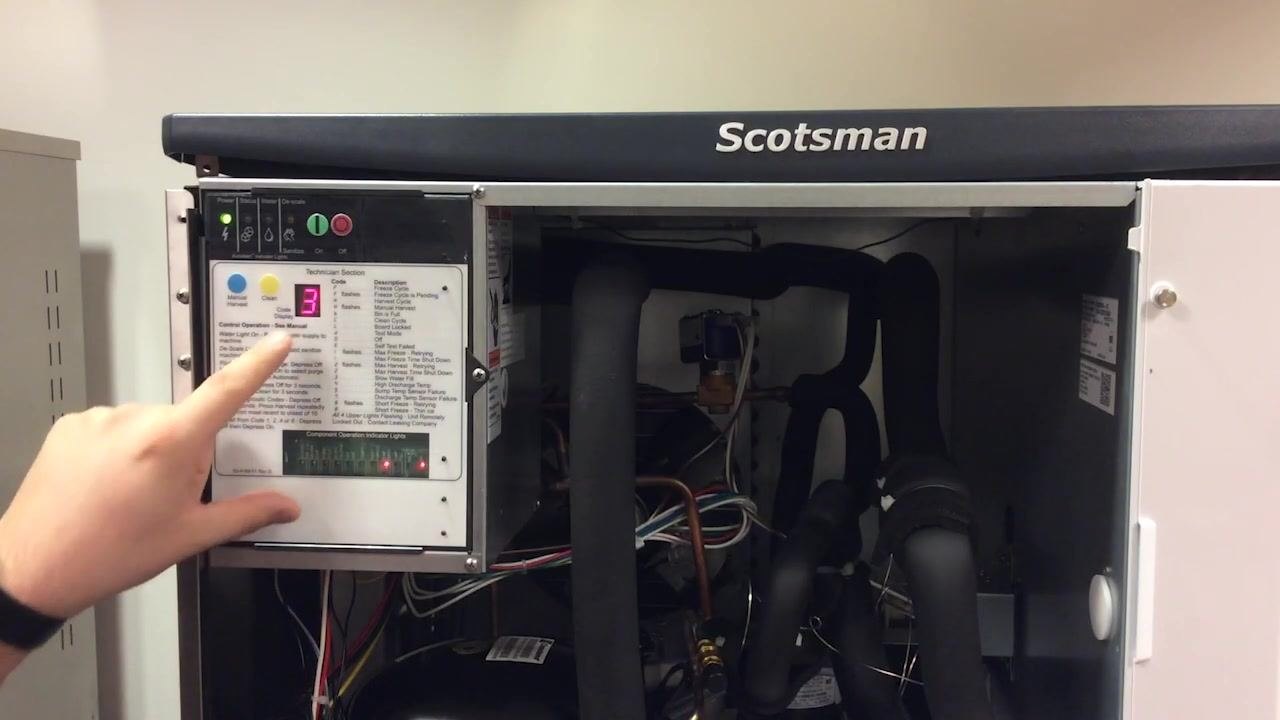
Observe the control panel on the ice machine. Confirm that the code display shows "3," the status light is blinking red, and the water light is also blinking red. These indicators together confirm the machine is locked out due to Code 3, a water flow issue.
Step 2: Understand the cause of Code 3
Code 3 means the machine did not receive adequate water flow to fill the reservoir within the required time. The most common cause of this condition is a clogged or expired water filter.
Step 3: Replace the water filter
Locate and replace the water filter according to the manufacturer's instructions. After installing the new filter, purge it to flush out any loose debris into the drain before continuing.
Step 4: Verify the machine model
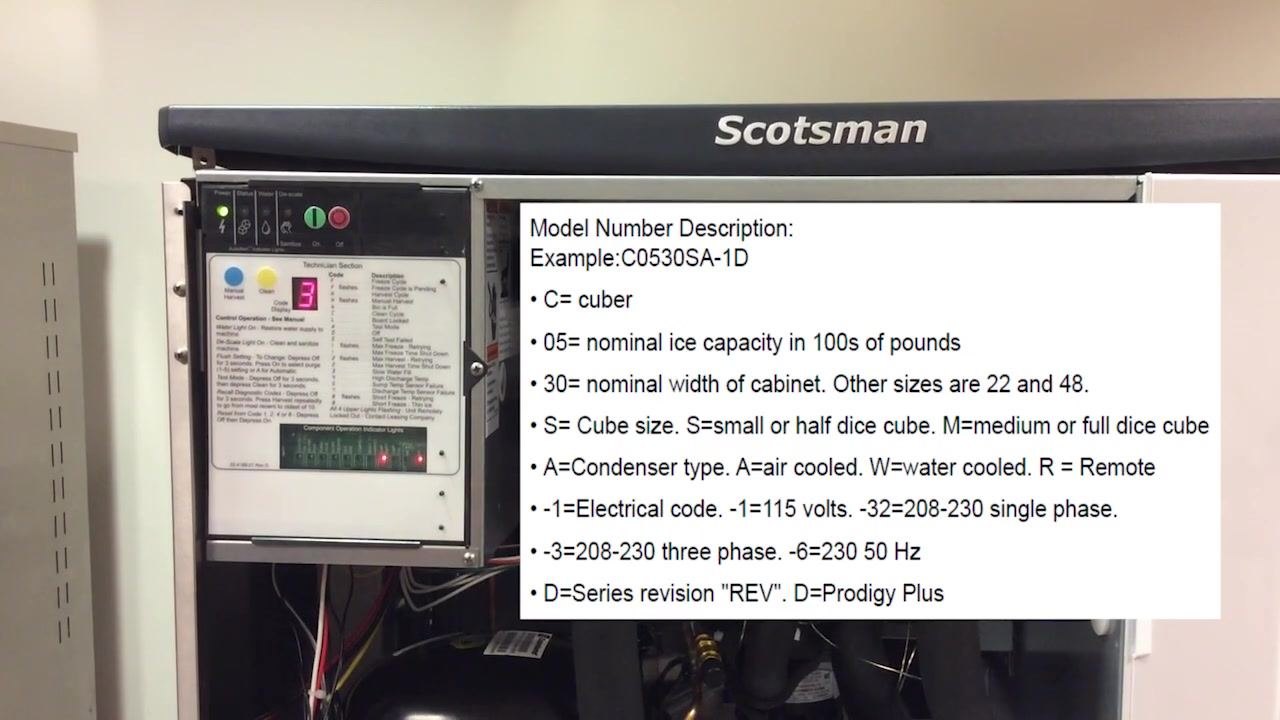
Confirm you are working on a Scotsman Prodigy Plus (D model) by checking the model number and revision on the unit. The model number breaks down as follows:
- C = cuber
- 05 = nominal ice capacity in 100s of pounds
- 30 = nominal width of cabinet
- S = cube size (small/half dice); M = medium/full dice
- A = air cooled; W = water cooled; R = remote
- -1 = 115 volts; -32 = 208–230 single phase
- -3 = 208–230 three phase; -6 = 230 volts, 50 Hz
- D = Prodigy Plus (series revision)
Example: C0530SA-1D
Step 5: Check the lower remote panel (if equipped)
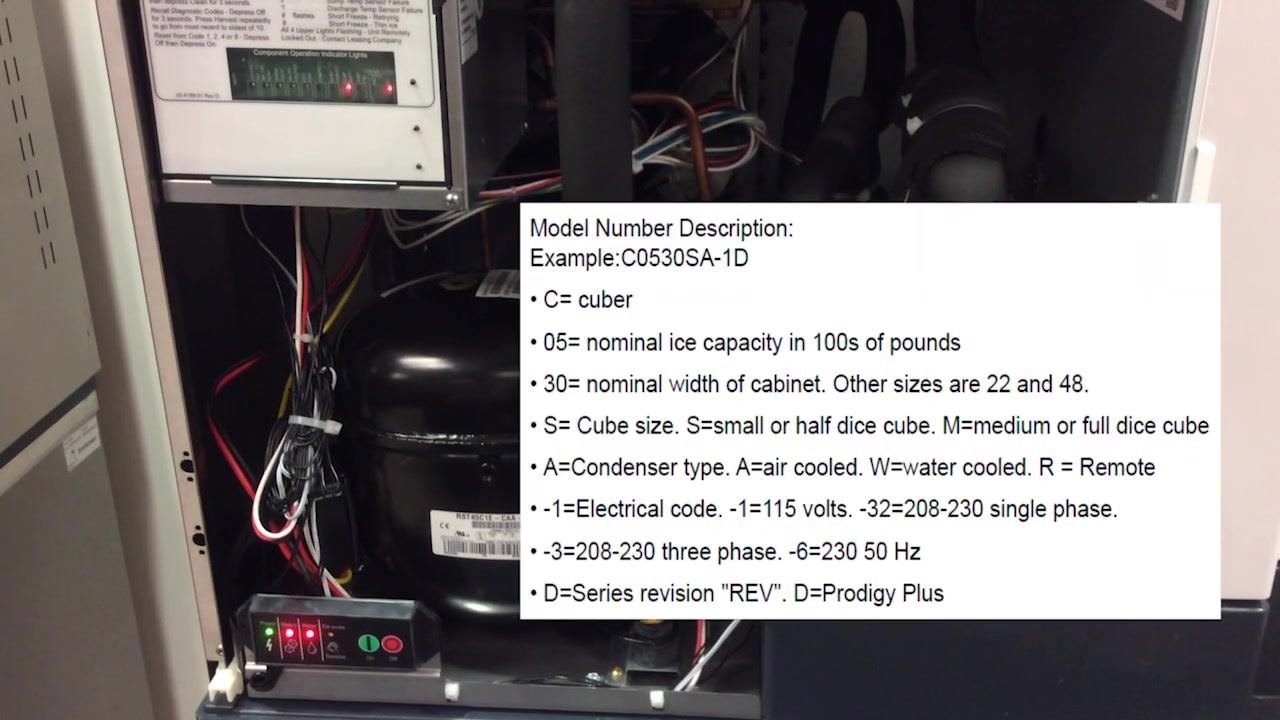
If your unit has a lower remote panel, inspect it for additional status indicators. Confirm that both the status and water lights are blinking red, matching what you observed on the main control panel.
Step 6: Reset the controller
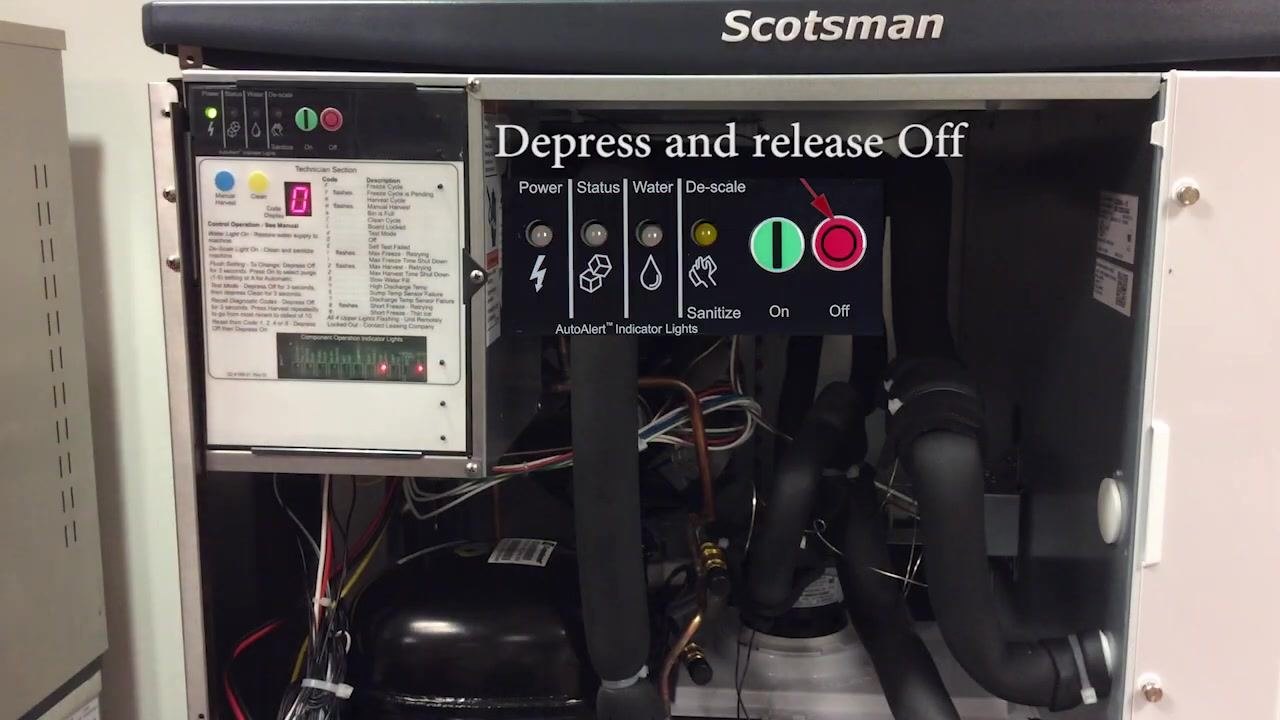
Locate the red "Off" button on the control panel. Press and release it to reset the controller. The code display should change from "3" to "0," confirming the reset was successful.
Understanding the control panel indicators
Step 7: Review the indicator lights and their meanings
Observe the row of indicator lights at the top of the control panel:
- Power light: Illuminates when the machine has proper power.
- Status light: Should be green during normal operation.
- Water light: Normally off; illuminates red if there is a water issue, such as during a Code 3 error.
- De-scale light: Illuminates when the machine is due or overdue for cleaning.
In the "off" position, only the power light is on and the status light is off, as shown by the solid zero on the display.
Step 8: Understand the status light function
The status light is the second indicator from the left. When green, it confirms normal operation. If it is off, the machine is not running. If it is red or blinking, refer to the error code chart to troubleshoot the issue.
Step 9: Understand the water and de-scale lights
The water light, third from the left, is typically off. If it turns red, there is a water supply issue. The de-scale light, on the far right, indicates when the machine needs cleaning or is overdue for cleaning.
Restarting the machine
Step 10: Turn the machine back on to reset the unit
Ensure the machine is in the "off" position, with the display showing zero. Press and release the green "On" button to restart the machine. The display will change and the machine will begin its startup sequence.
Step 11: Observe the startup sequence
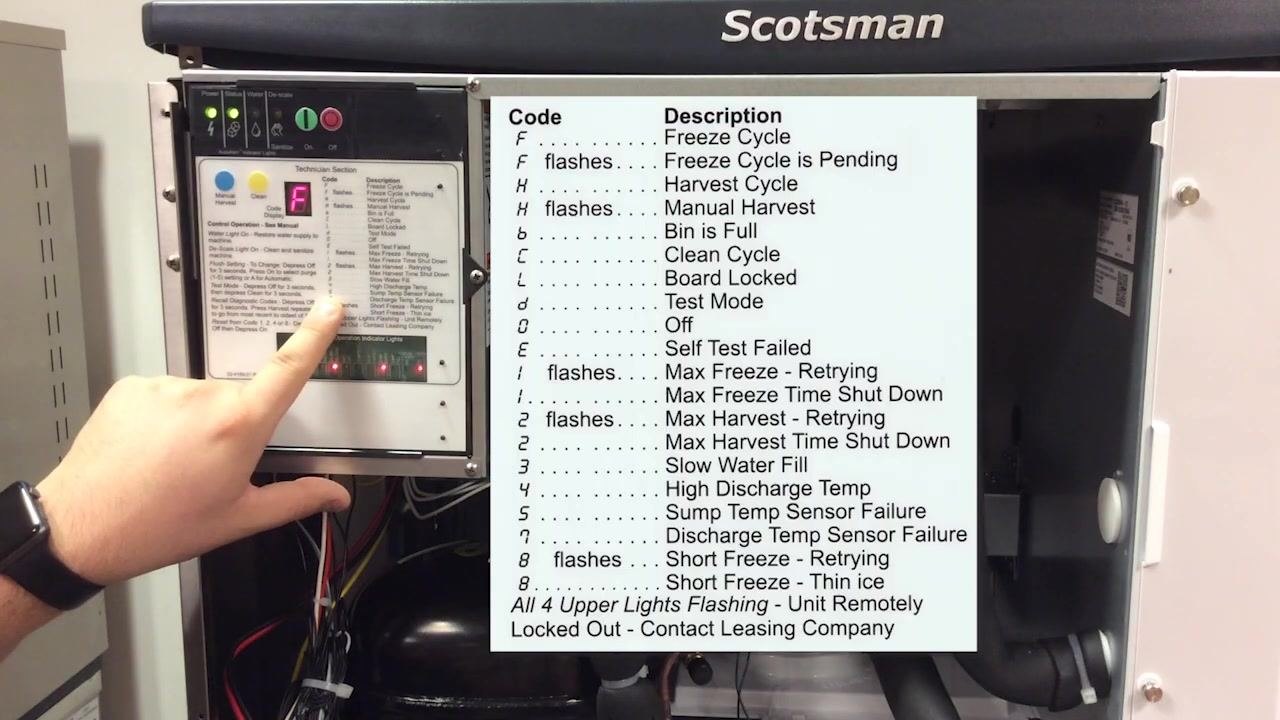
After pressing the "On" button, the display will show a blinking "F," which stands for Freeze Cycle. A blinking "F" means the machine is pending the start of a freeze cycle and is performing a self-check. If the self-check passes, the "F" will become solid and the machine will begin making ice.
Step 12: Reference the error code chart
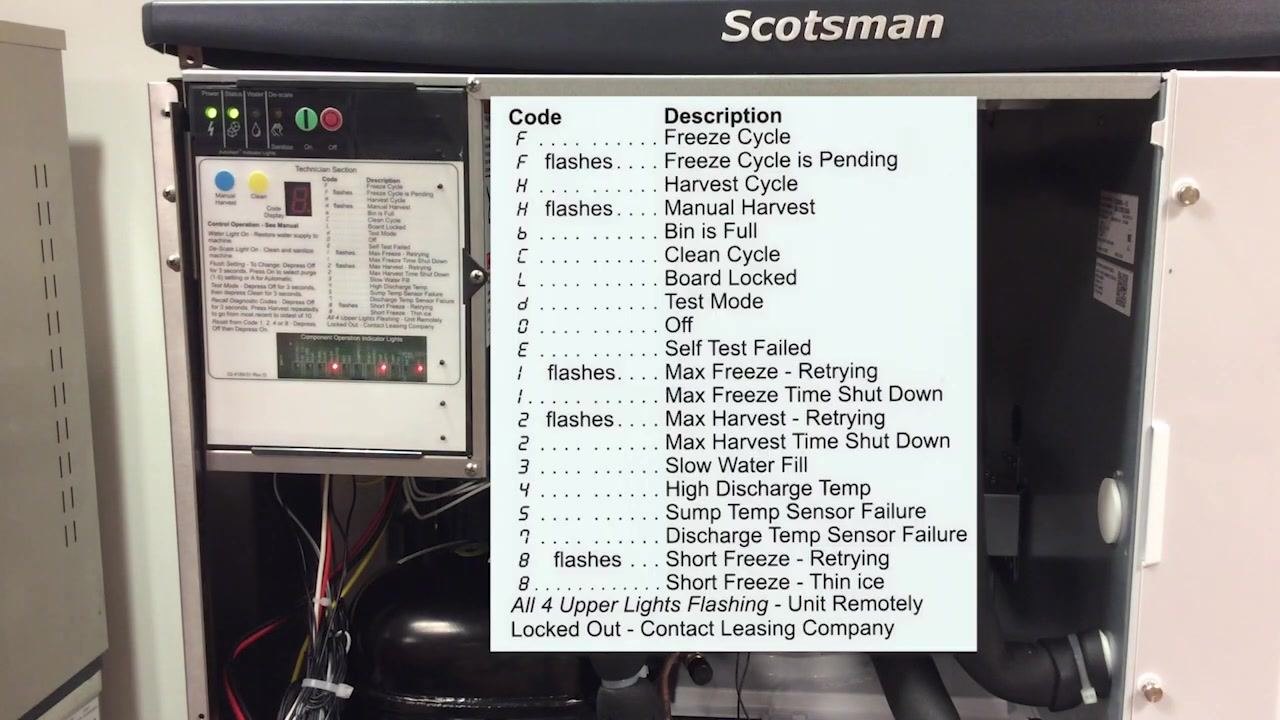
Use the chart on the face of the controller to interpret any display codes:
- F = Freeze Cycle
- F (flashing) = Freeze Cycle is Pending
- H = Harvest Cycle
- b = Bin is Full
- C = Clean Cycle
- L = Board Locked
- d = Test Mode
- 0 = Off
- E = Self Test Failed
- 1 = Max Freeze Time Shut Down
- 2 = Max Harvest Time Shut Down
- 3 = Slow Water Fill (Code 3)
- 4 = High Discharge Temp
- 5 = Sump Temp Sensor Failure
- 6 = Discharge Temp Sensor Failure
- 7 = Short Freeze – Retrying
- 8 = Short Freeze – Thin Ice
- All 4 upper lights flashing = Unit Remotely Locked Out
Refer to this chart whenever a code appears on the display.
Step 13: Wait for the machine to complete its self-check
The machine will remain in a pending freeze cycle, with "F" flashing, while it checks all systems. If all checks pass, the display will show a solid "F" and the machine will start making ice.
Verification and summary
- Code 3 lockout is typically caused by insufficient water flow, often due to a clogged water filter.
- Replace and purge the water filter as instructed.
- Reset the controller by pressing and releasing the red "Off" button, and confirm the display returns to "0."
- Turn the machine back on using the green "On" button and confirm the display progresses from a blinking "F" to a solid "F," indicating normal ice production has resumed.
By following these steps, you can successfully diagnose the Code 3 lockout, reset your Scotsman Prodigy Plus ice machine, and confirm it has returned to normal operation.
Service and support
If you need further assistance, contact Scotsman Technical Service at 1-800-533-6006. You can also visit the Scotsman service website for manuals, parts breakdowns, cleaning and maintenance guides, and technical tools at www.scotsman-ice.com/service. Scan the QR code on the service support card for quick access to the mobile-ready website.
What's next
For persistent lockouts or codes not resolved by this procedure, consult the error code chart on the controller or contact Scotsman Technical Service using the contact details above.
Generation details: cost, quality tiers
Docsie billed 2,000 credits ($1.40) to analyze this 4-minute video at standard quality. The rewrite, template fill and Word/PDF exports were included. The same video at each quality tier:
| Quality | Frames sampled | Credits | Approx. cost |
|---|---|---|---|
| Draft | every 16-30 s | 1,000 | $0.70 |
| Standard (this guide) | every 8-15 s | 2,000 | $1.40 |
| Detailed | every 4-7 s | 4,000 | $2.80 |
| Ultra | every 1-3 s | 8,000 | $5.60 |
Credits priced at $0.70 per 1,000; plans include a monthly allowance. Enterprise customers on on-premise or bring-your-own-model deployments run this on their own inference and pay no per-video credits.
Generated by Docsie Video-to-Docs on 2026-09-10 from a 3-minute video. Screenshots are frames from the source video and belong to their creator, Scotsman Ice Parts and Service, whose original is embedded above. If you own this video and want the guide removed or credited differently, contact us and we will act within one business day.