
How to Run Reports in Epic Hyperspace
This guide shows you how to run reports in EPIC Hyperspace by walking through the full process of creating a Team View report, adding participants, and downloading the finished report from your EPIC Administrator account.
Video: How to Generate a Report - in EPIC by Intégro Learning Company (2024). All credit for the demonstration goes to the creator; watch the original on YouTube. The written guide below was generated from this video by Docsie. Creator? Request a change or removal.
This guide shows you how to run reports in EPIC Hyperspace by walking through the full process of creating a Team View report, adding participants, and downloading the finished report from your EPIC Administrator account.
Prerequisites
- An active EPIC Administrator account.
- Access to
admin.wiley-epic.com. - Your administrator login credentials.
Access the EPIC Administrator site
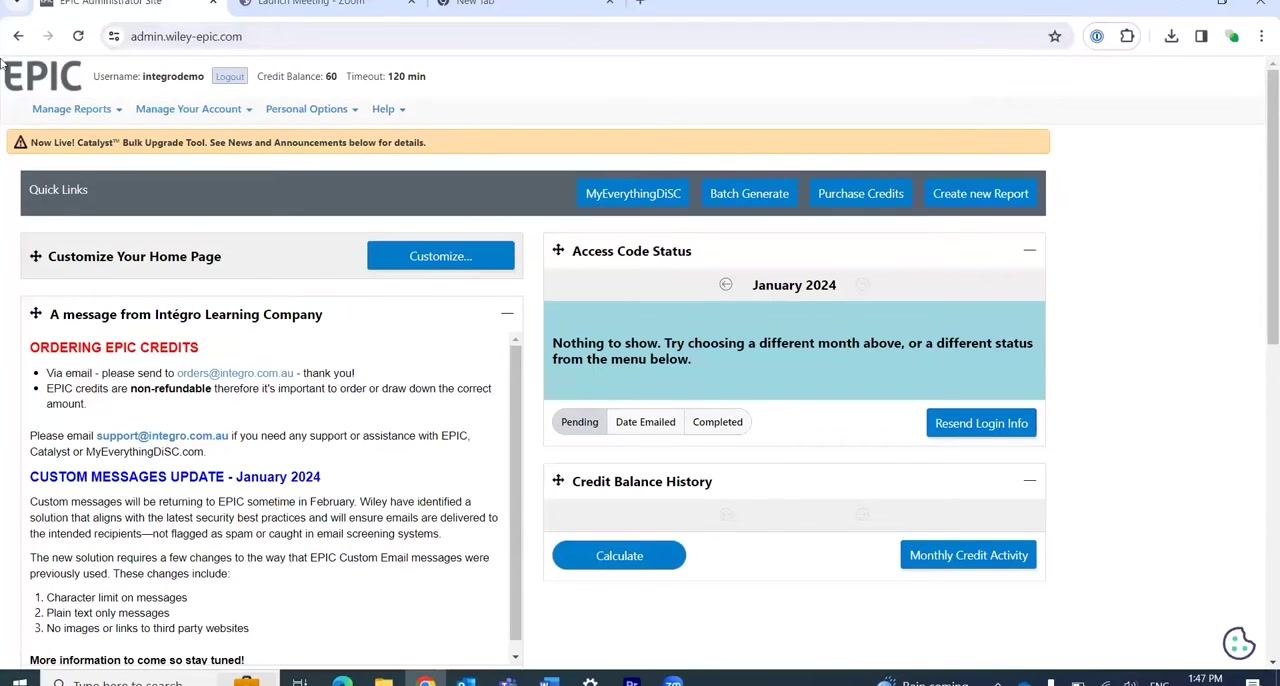
Open your web browser and navigate to admin.wiley-epic.com, then log in with your administrator credentials. Once logged in, confirm you are on the EPIC dashboard, where you can see your username, credit balance, and menu options.
Navigate to create new report
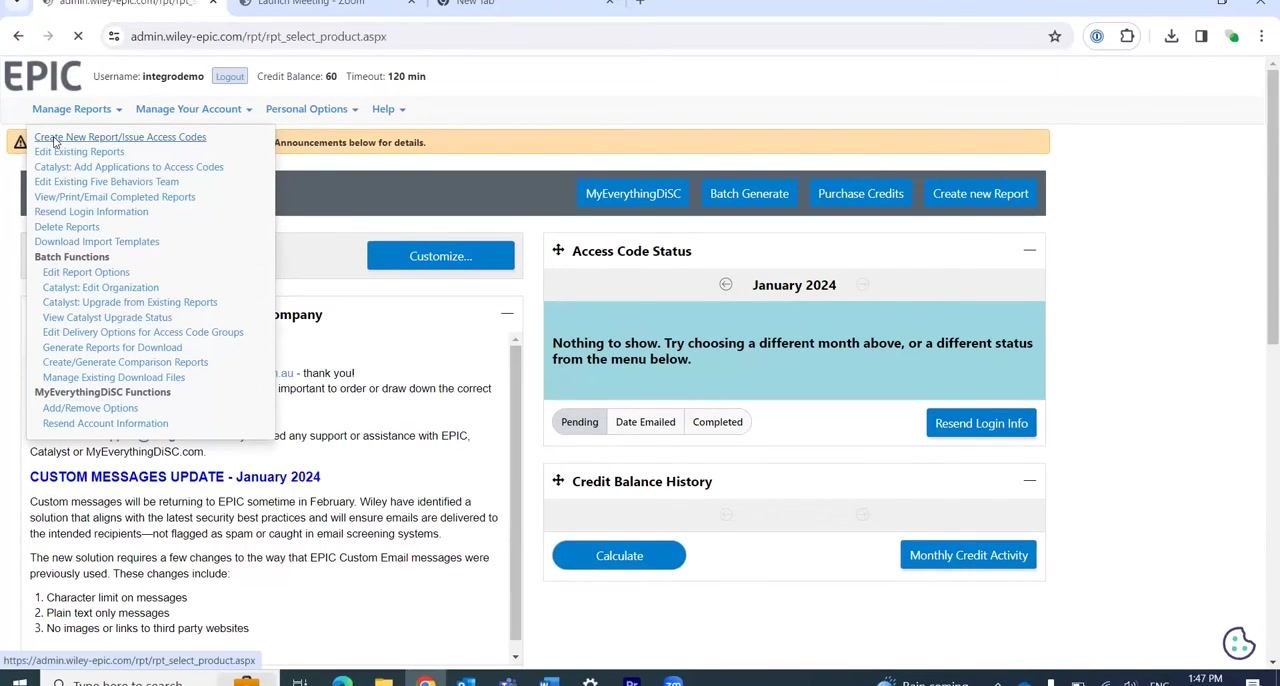
Hover over the Manage Reports menu at the top of the page. In the dropdown that appears, click Create New Report/Issue Access Codes to begin setting up your report.
Select the product family and report type
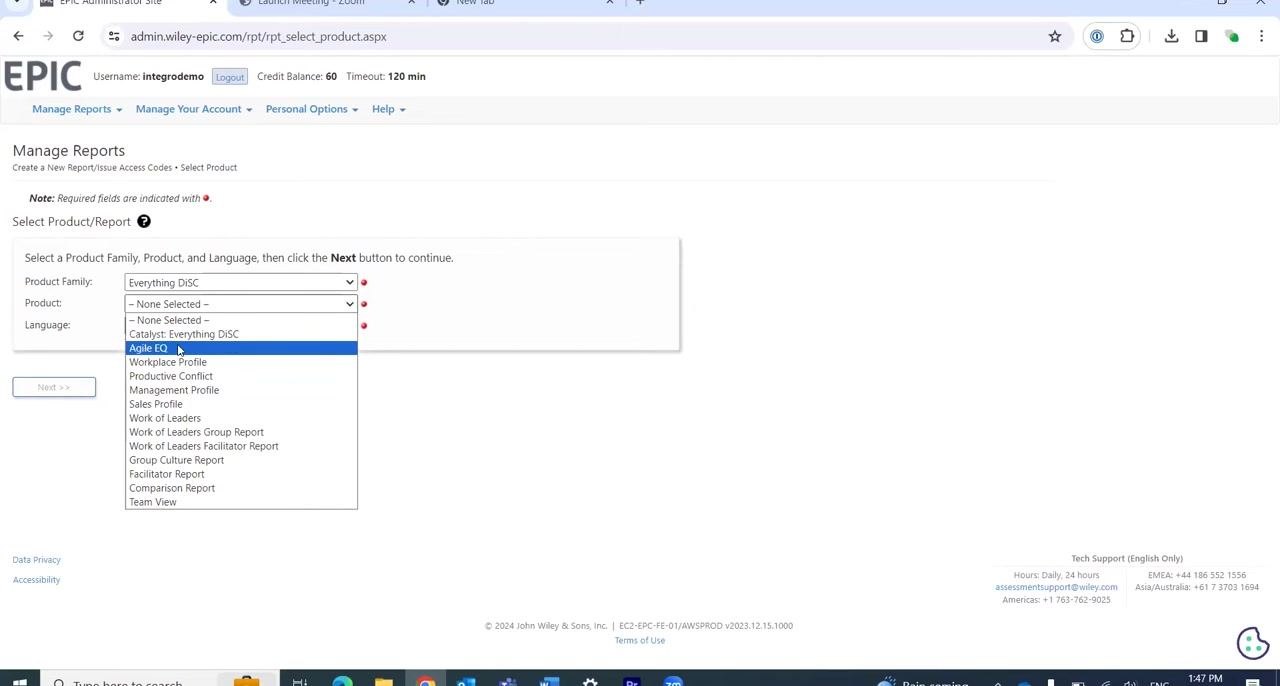
On the Manage Reports page, locate the section for selecting a Product Family, Product, and Language.
- Set Product Family to
Everything DiSC. - In the Product dropdown, scroll past the profile options and select a report type. For this guide, choose
Team View. - Leave Language as required (for example, English).
Proceed to the next step
After selecting Team View as the product, click the Next button to continue to the report details.
Assign folders and name the report
On the Report Details screen, select an EPIC Folder (for example, Integro Demonstration) and an EPIC Sub Folder (for example, 2012 Participants). You can also create a new folder or subfolder if needed. This organization helps you easily find and download reports in the future.
Next, enter a Report Name in the provided field (for example, Integrity). Note that the main title "Team View" is added automatically to the finished report, so you don't need to repeat it in your custom name — choose something that helps you identify the team or department instead.
Add participants to the report
Click the Add button under the Participants section to open the search window, where you can find people to include in your report.
Set search criteria for participants
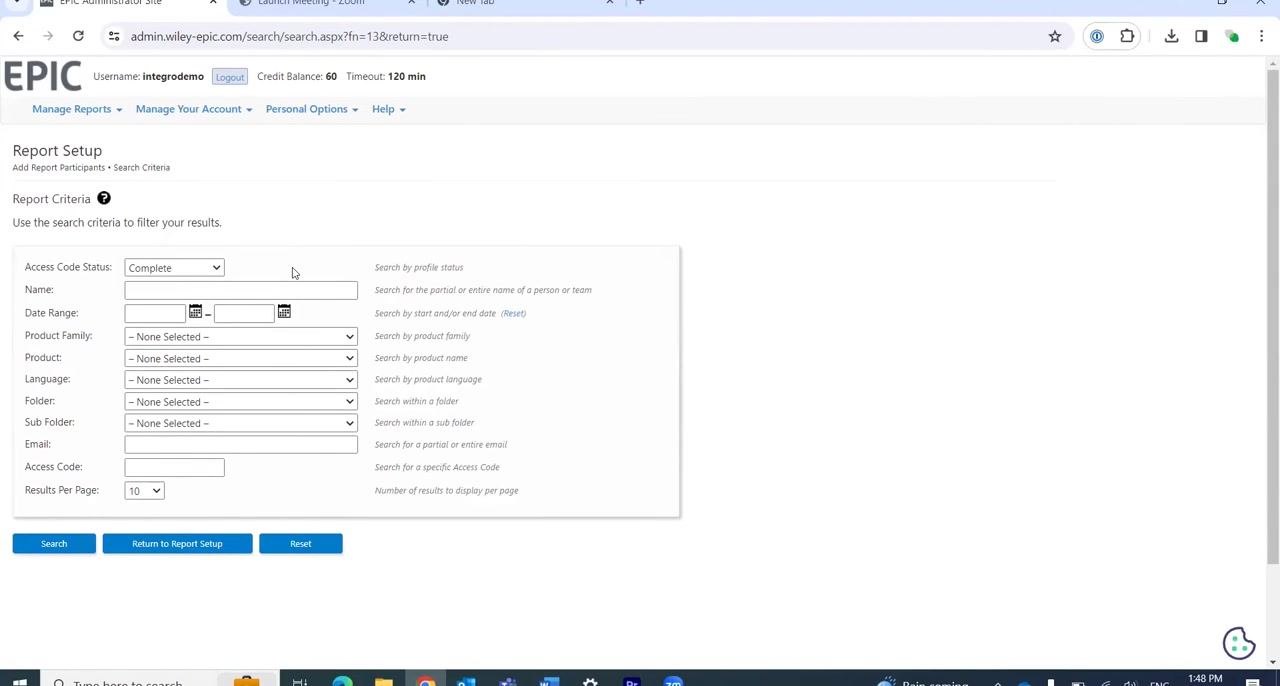
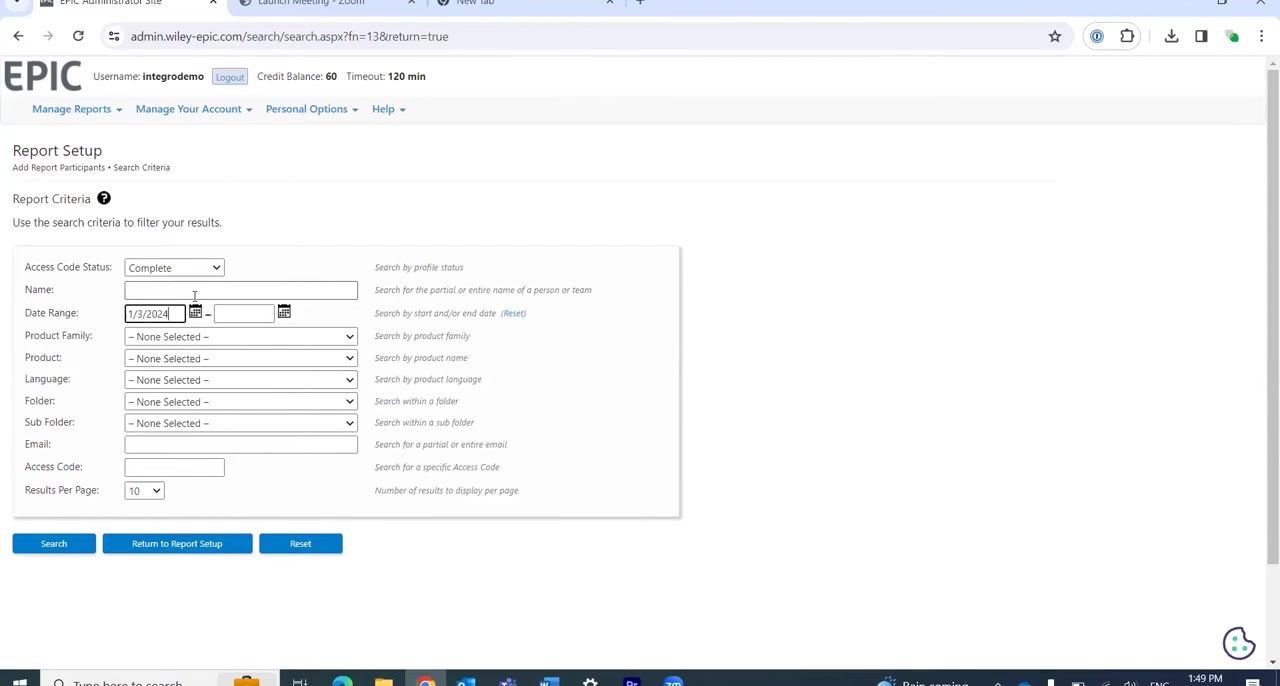
In the Report Setup window, use the search criteria to filter participants:
- Set Access Code Status to
Complete. - Optionally enter a Name, or leave the field blank for a broader search.
- For a wide search, set the Date Range from a past date (for example, 14 years ago) to today.
- Filter further by Product Family, Product, Language, Folder, Sub Folder, Email, or Access Code as needed.
- Set Results Per Page as desired (the default is 10).
Enter a date range for a wide search
In the Date Range field, enter a start date (for example, 1/3/2010) and an end date (for example, today's date) to include all relevant participants from the past 14 years.
Filter participants by product
In the Product dropdown, select Workplace Profile if you only want participants who completed this specific profile within your chosen date range. Confirm your search criteria are set as follows:
- Access Code Status: Complete
- Date Range: 1/3/2010 – 1/3/2024
- Product Family: Everything DiSC
- Product: Workplace Profile
Other fields, such as Language, Folder, Sub Folder, Email, and Access Code, can remain blank unless further filtering is needed. Click the Search button to display matching participants.
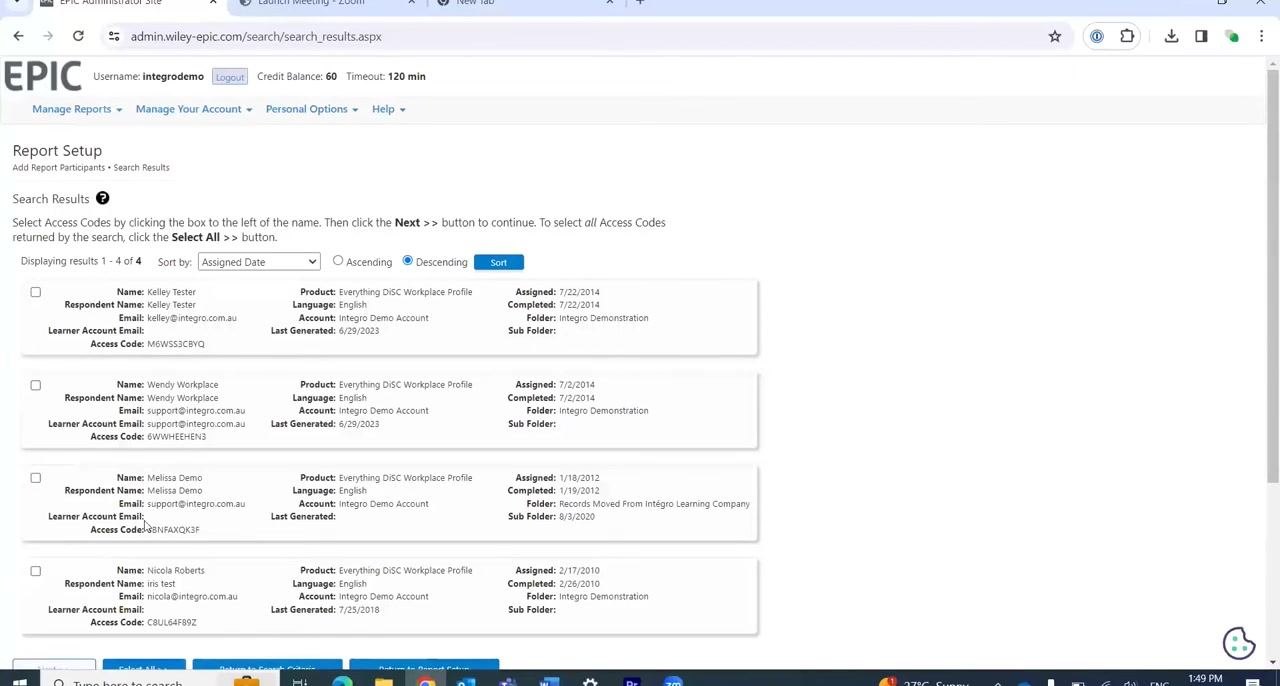
Select participants for the report
Review the list of participants returned by your search. You can select participants individually by checking the box next to each name, or click Select All >> to include everyone listed.
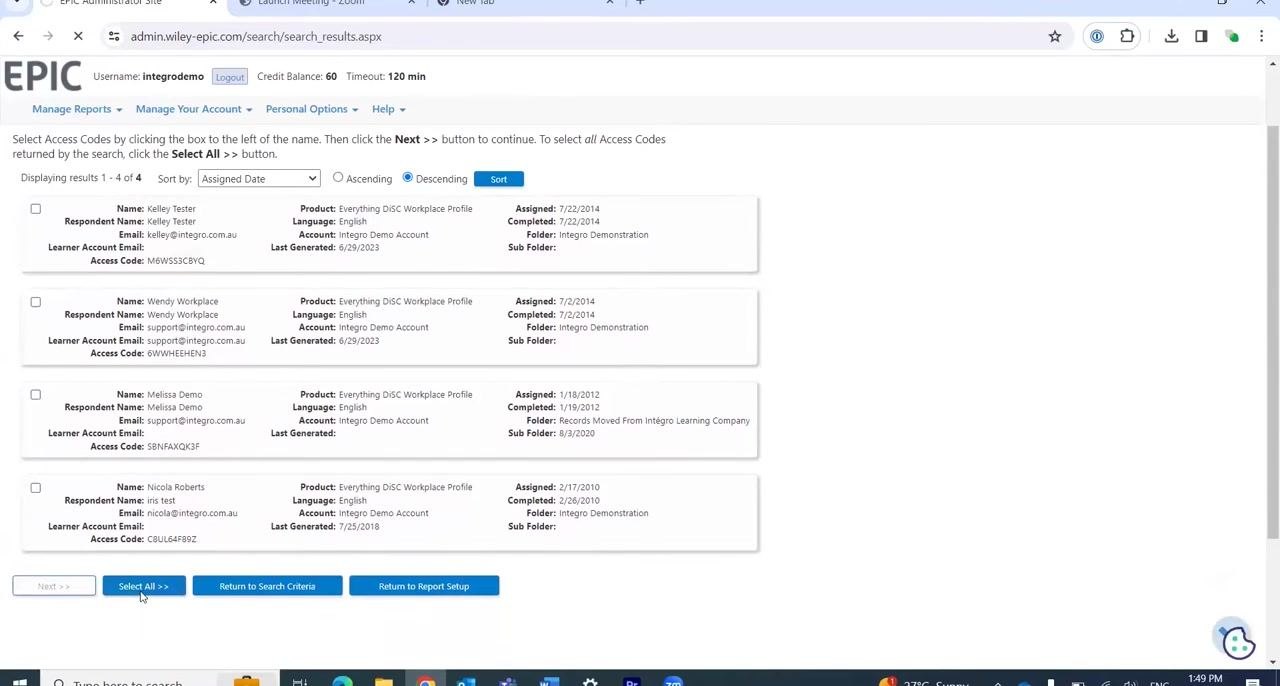
Add selected participants to the report
After selecting the desired participants, click the Next >> button to add them to your report.
Review and edit the participant list
On the report setup screen, review the list of participants you have added.
- If you included someone by mistake, remove them by clicking the X next to their email address.
- If you forgot to add someone, click the Add button to return to the search and include additional participants.
Finalize the participant list
Once your participant list is accurate and complete, click the Next >> button to proceed.
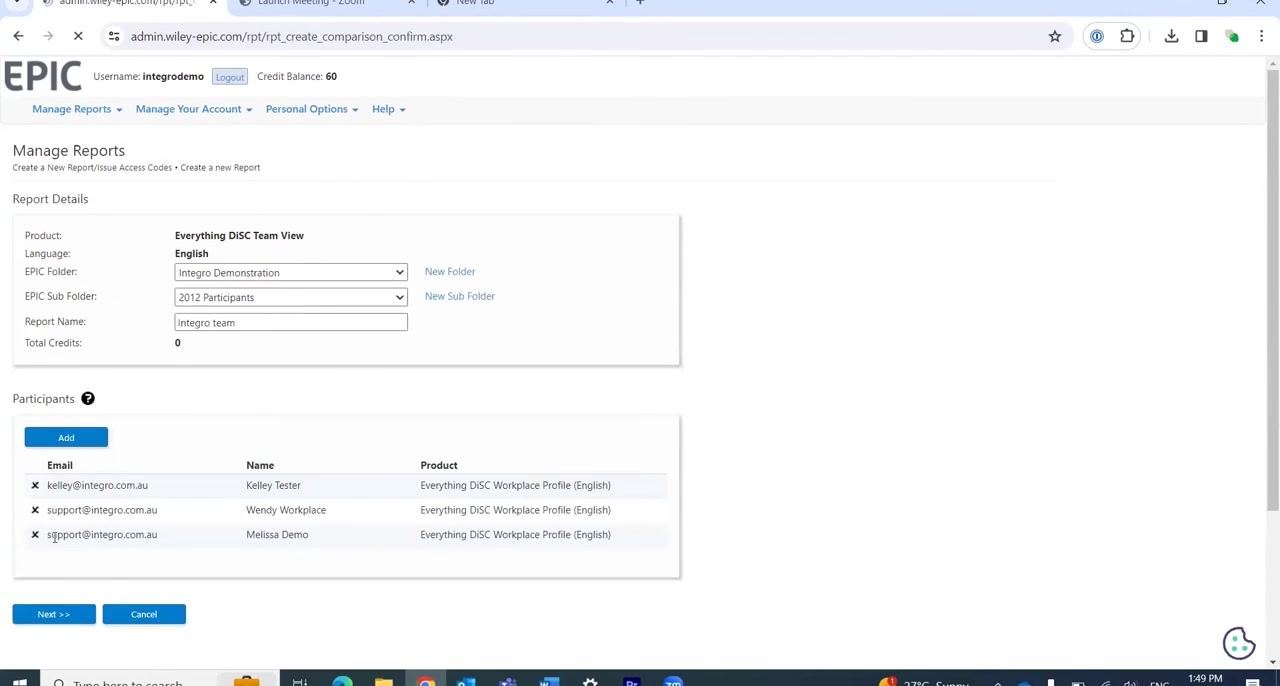
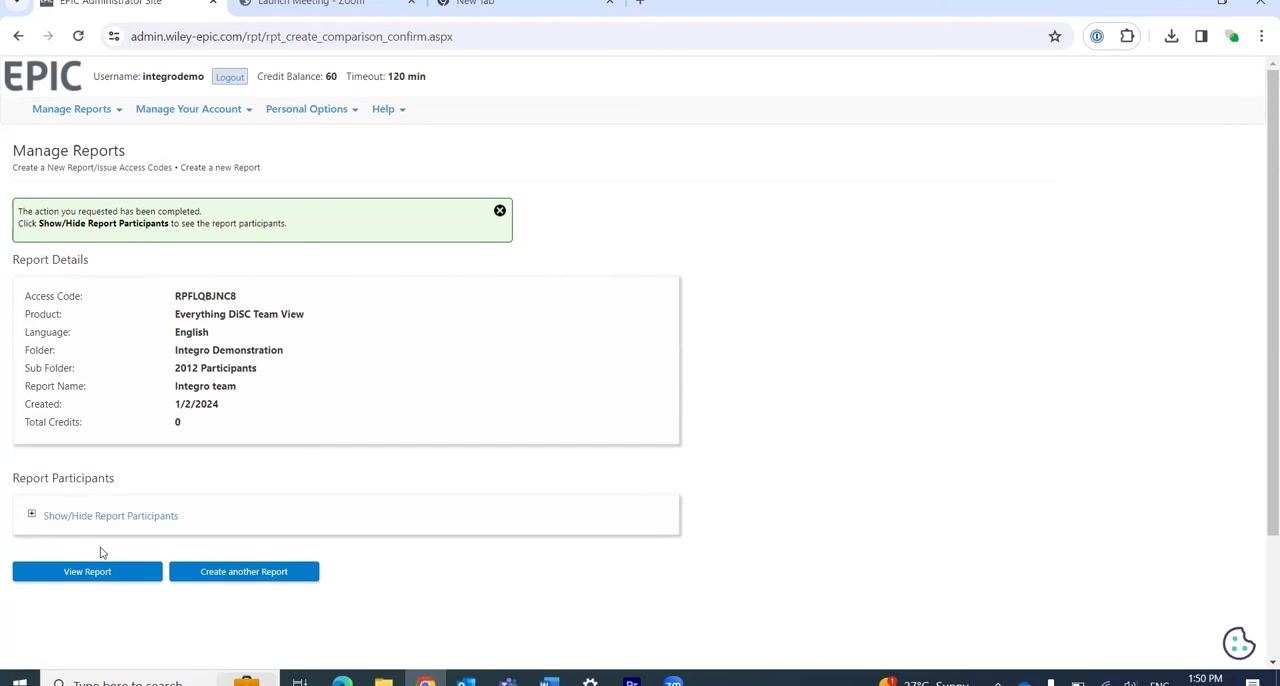
Review the report summary
Review the summary of your report, including:
- Access Code
- Product: Everything DiSC Team View
- Language: English
- Folder: Integro Demonstration
- Sub Folder: 2012 Participants
- Report Name: Integro team
- Created: 1/2/2024
- Total Credits: 0 (Team View reports do not use credits)
If you were generating a Facilitator or Group Culture report instead, a pop-up would appear to confirm the use of 25 credits before you reach this screen.
View or download the report
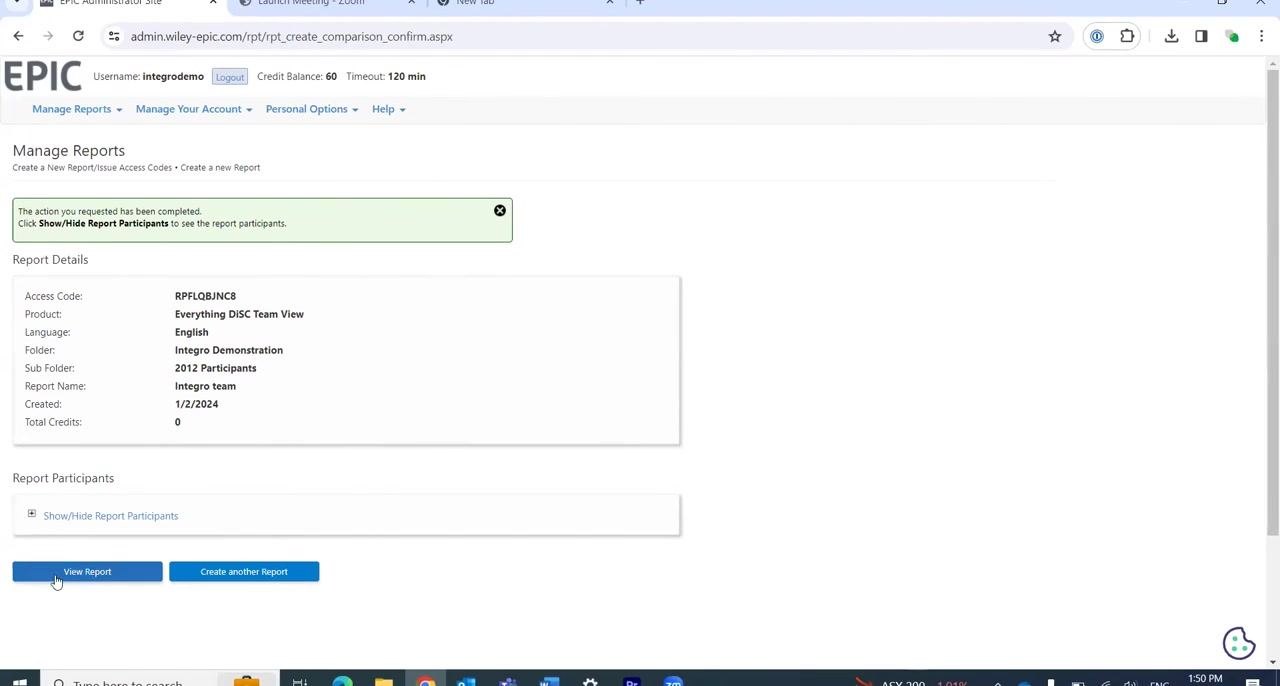
Click View Report to open the Team View report. You will have the option to view the report online, save it to your computer, or print it.
Open the generated report
After clicking View Report, a new browser tab or window opens displaying your completed Team View report as a PDF. You will see three main options for your report:
- View: Opens the report in your browser.
- Save: Downloads the report to your computer.
- Email: Sends the report via email.
Click View to open the report online.
Review the report title and details
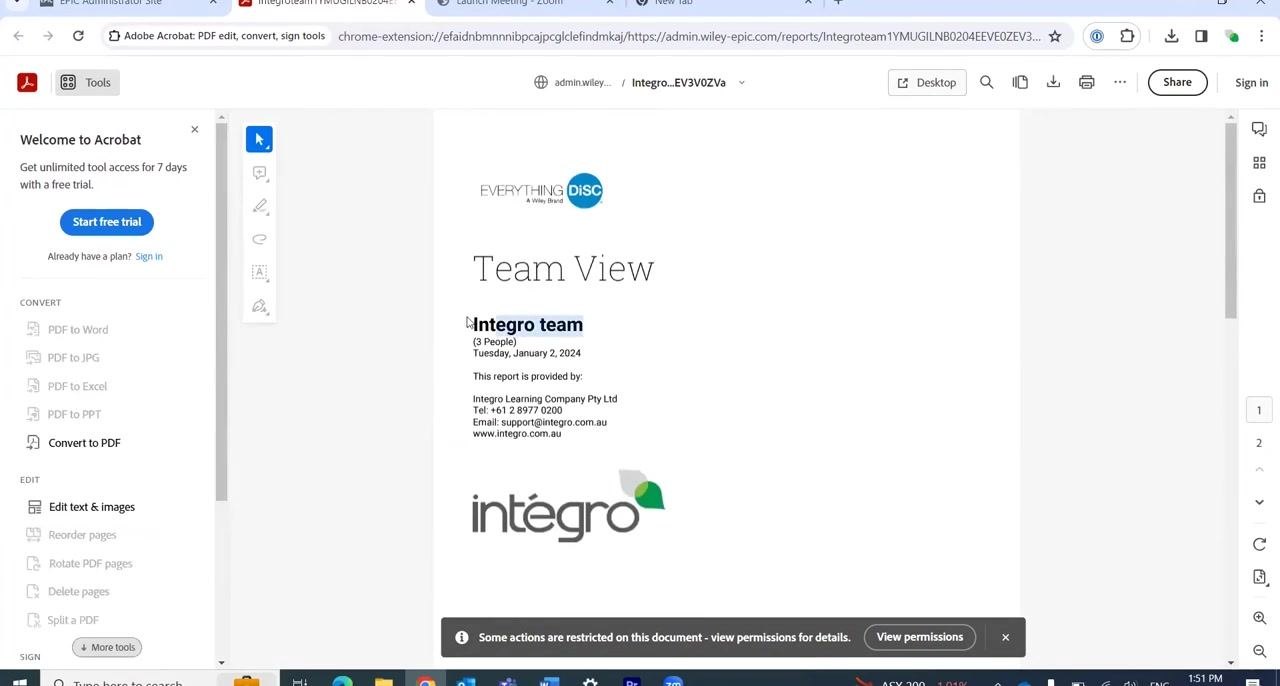
In the new tab, review the cover page of your Team View report and confirm the following details:
- The main title reads Team View.
- Your assigned report name (for example, Integro team) appears under the title.
- The number of people included (for example, 3 People).
- The report creation date (for example, Tuesday, January 2, 2024).
- Provider information, including company name, phone number, email, and website.
- The company logo (for example, integro).
View team member DiSC styles
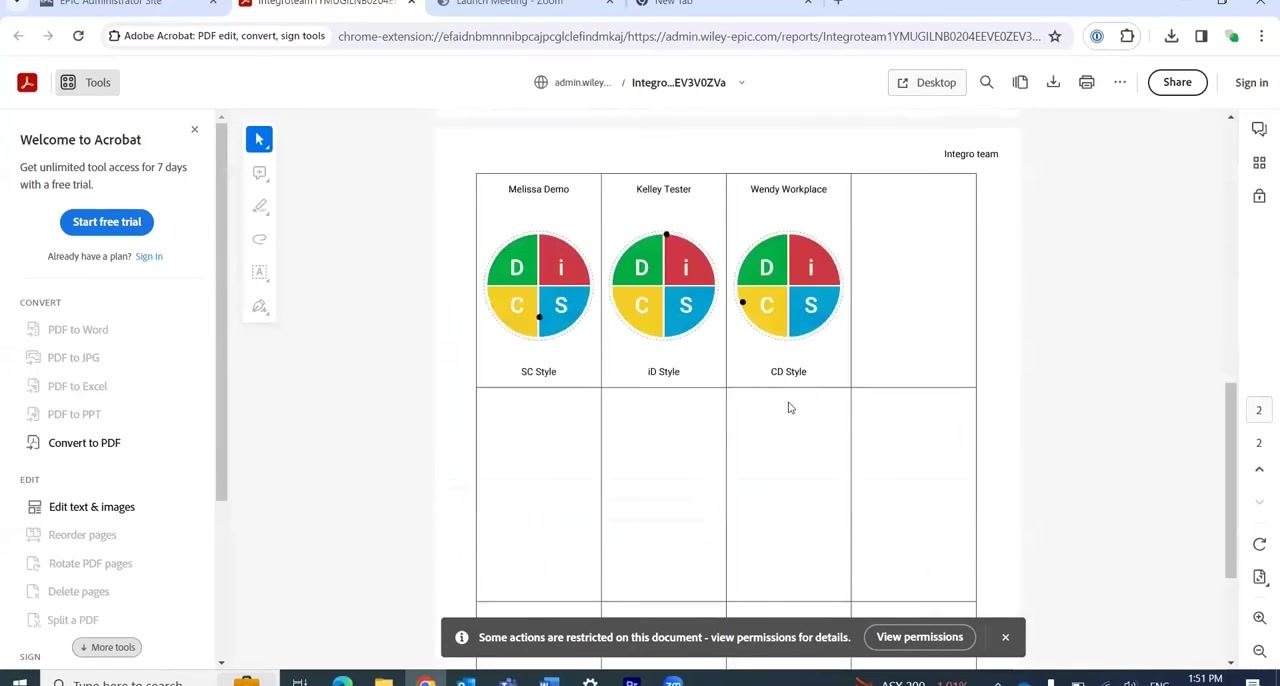
Scroll to the next page of the report to see a summary of the included team members and their DiSC styles. Each participant is listed with:
- Their name (for example, Melissa Demo, Kelley Tester, Wendy Workplace).
- Their DiSC style (for example, SC Style, iD Style, CD Style).
- A visual representation of their DiSC profile.
Use this summary to quickly understand the composition of your team.
What's next
You now know how to run reports in EPIC Hyperspace, from creating a Team View report and adding participants to reviewing and downloading the finished PDF. You can save, print, or email the report as needed, and use the included DiSC style information to support your team's or department's development.
Generation details: cost, quality tiers
Docsie billed 2,000 credits ($1.40) to analyze this 4-minute video at standard quality. The rewrite, template fill and Word/PDF exports were included. The same video at each quality tier:
| Quality | Frames sampled | Credits | Approx. cost |
|---|---|---|---|
| Draft | every 16-30 s | 1,000 | $0.70 |
| Standard (this guide) | every 8-15 s | 2,000 | $1.40 |
| Detailed | every 4-7 s | 4,000 | $2.80 |
| Ultra | every 1-3 s | 8,000 | $5.60 |
Credits priced at $0.70 per 1,000; plans include a monthly allowance. Enterprise customers on on-premise or bring-your-own-model deployments run this on their own inference and pay no per-video credits.
Generated by Docsie Video-to-Docs on 2026-09-08 from a 3-minute video. Screenshots are frames from the source video and belong to their creator, Intégro Learning Company, whose original is embedded above. If you own this video and want the guide removed or credited differently, contact us and we will act within one business day.