
How to Create a Purchase Order in Business Central
This guide walks you through how to create a purchase order in Business Central, from opening the dashboard to posting a completed order. You'll learn how vendor and item selections automatically populate order details, and how to review totals before finalizing the transaction.
Video: How to create a purchase order in Dynamics 365 Business Central by Microsoft Dynamics 365 (2019). All credit for the demonstration goes to the creator; watch the original on YouTube. The written guide below was generated from this video by Docsie. Creator? Request a change or removal.
This guide walks you through how to create a purchase order in Business Central, from opening the dashboard to posting a completed order. You'll learn how vendor and item selections automatically populate order details, and how to review totals before finalizing the transaction.
Prerequisites
Before you begin, make sure you have access to Microsoft Dynamics 365 Business Central with permissions to create purchasing documents. You should also know which vendor and items you intend to purchase.
Access the Business Central dashboard
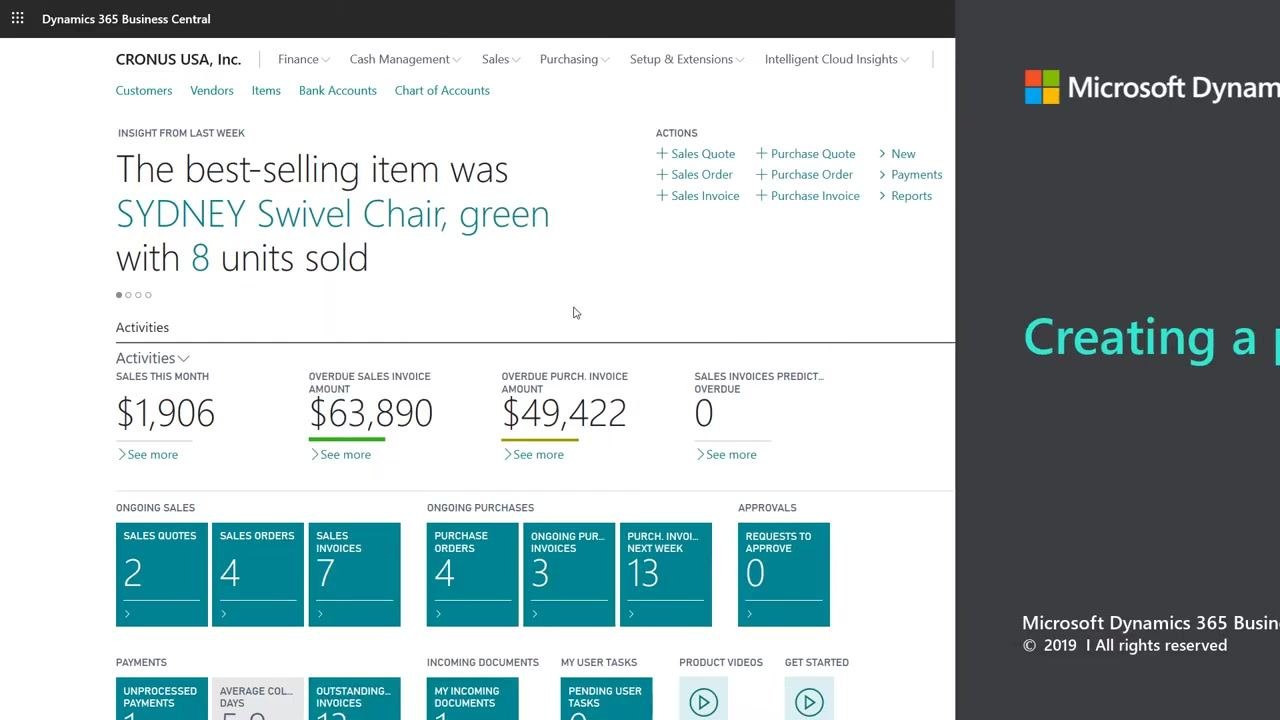
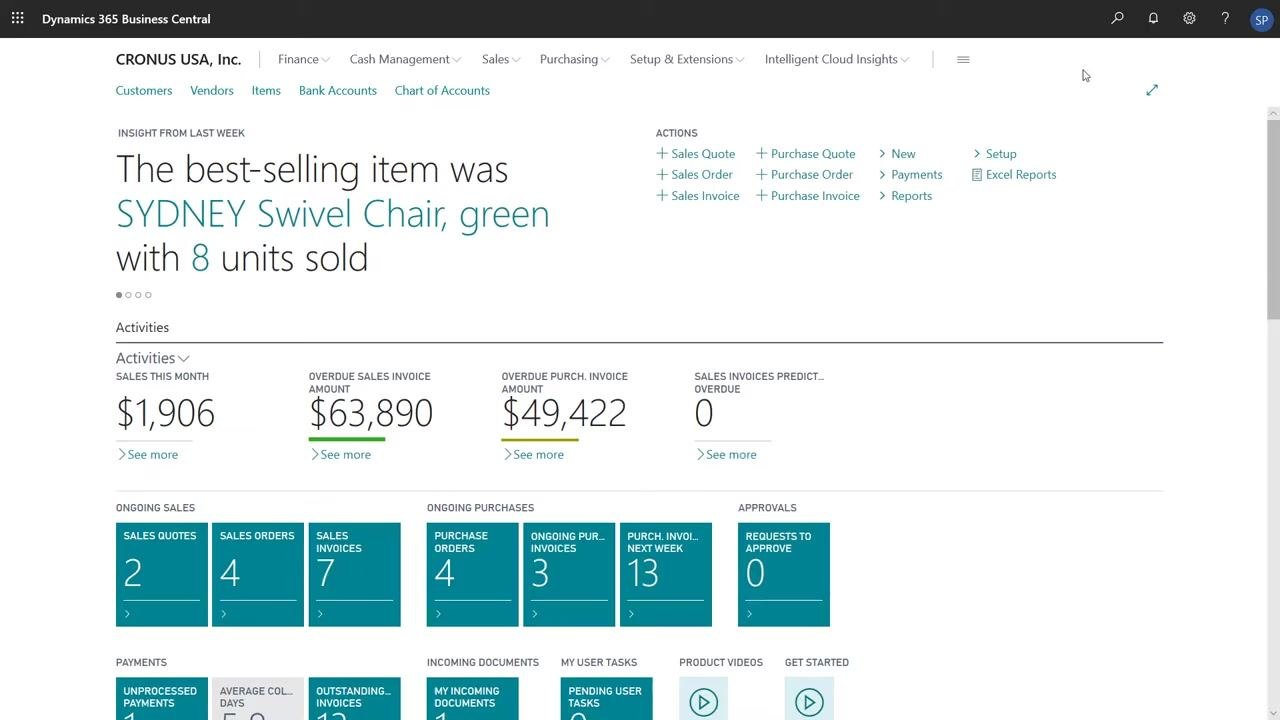
Open Microsoft Dynamics 365 Business Central and confirm you are on the main dashboard. Here you'll see company information (such as CRONUS USA, Inc.), navigation menus including Finance, Cash Management, Sales, and Purchasing, along with activity summaries for sales, purchases, and overdue invoices.
The right side of the screen displays insights such as best-selling items and quick action links for sales and purchase documents.
Understand purchase document types
Business Central offers two main purchase documents: Purchase Invoices and Purchase Orders. Use a purchase order when the supplier will only partially ship your order. Both document types are similar, but this partial-shipment capability is the key distinction.
Search for purchase orders
Use the search function at the top of the dashboard and type Purchase Orders into the search bar. In the search results, select the Purchase Orders link to navigate to the purchase orders list.
Create a new purchase order
On the Purchase Orders page, click New to start a new purchase order.
Select the vendor
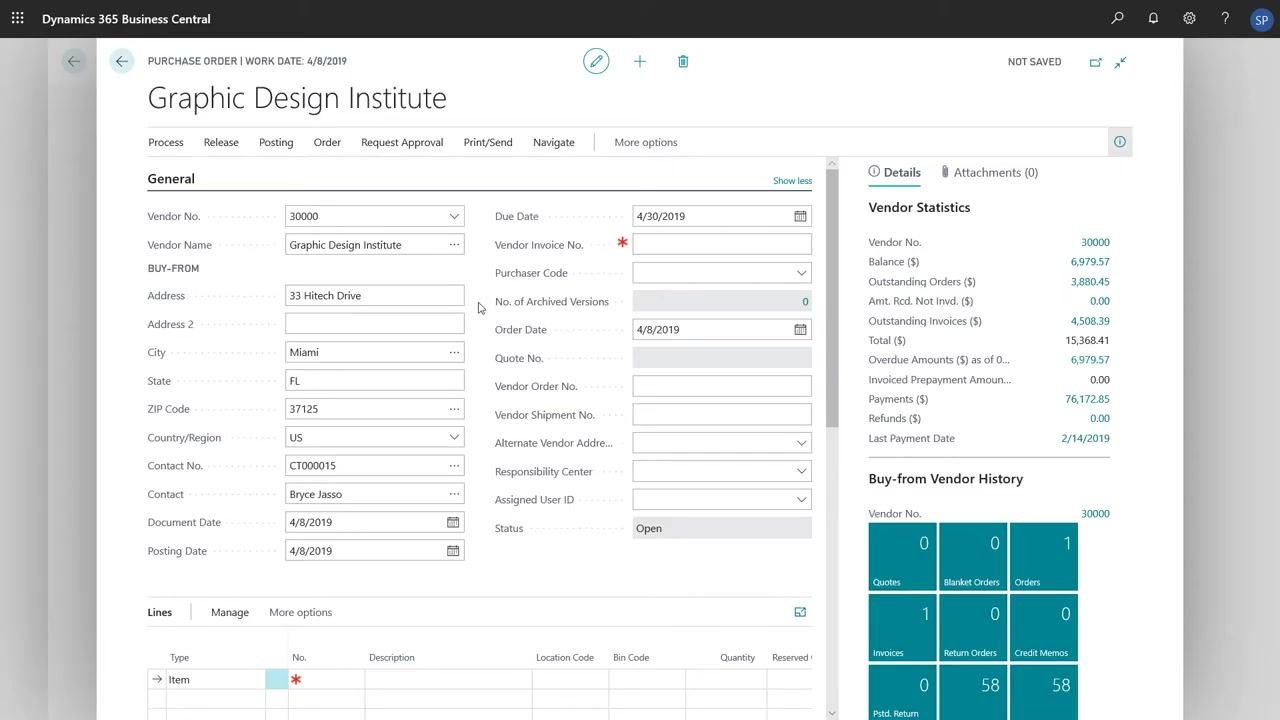
In the new purchase order form, choose the vendor you are buying from. When you select a vendor, Business Central automatically fills in the purchase header fields using information from the vendor card, including:
- Vendor name (for example, Graphic Design Institute)
- Contact (for example, Bryce Jasso)
- Address (for example, 33 Hitech Drive, Miami, FL, 37125, US)
- Payment terms and posting details
You can edit any of these fields if necessary.
Review the automatically filled fields
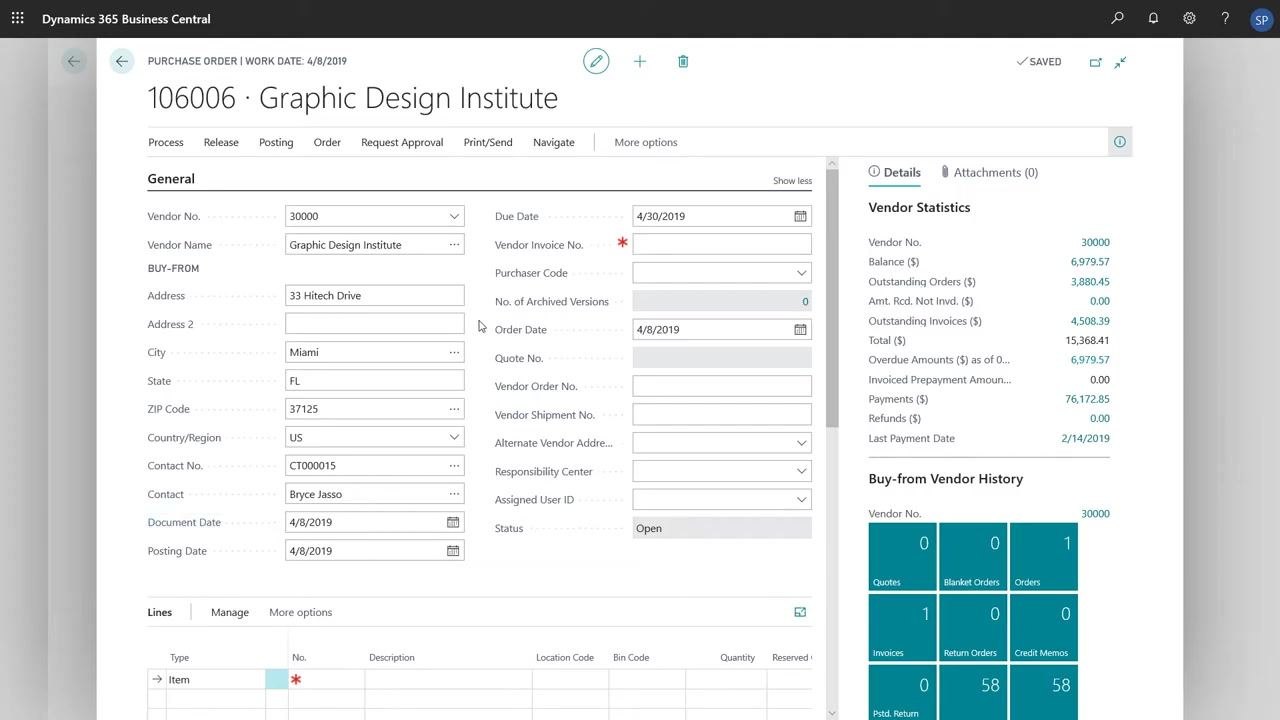
Check that the following fields are populated based on the work date and vendor information:
- Document Date (for example, 4/8/2019)
- Posting Date (for example, 4/8/2019)
- Order Date (for example, 4/8/2019)
- Due Date, calculated from the document date and payment terms (for example, 4/30/2019)
Adjust any of these fields as needed before proceeding.
Add purchase lines
Scroll to the Lines section of the purchase order and click to add a new line. A dropdown will appear for the line type. Business Central supports five types of purchase lines:
- Comment
- General Ledger (G/L) Account
- Item
- Fixed Asset
- Charge (Item)
Select the type that matches your purchase. For example, choose Comment if you want to add a message to your vendor in the description field.
Choose the line type for your item purchase
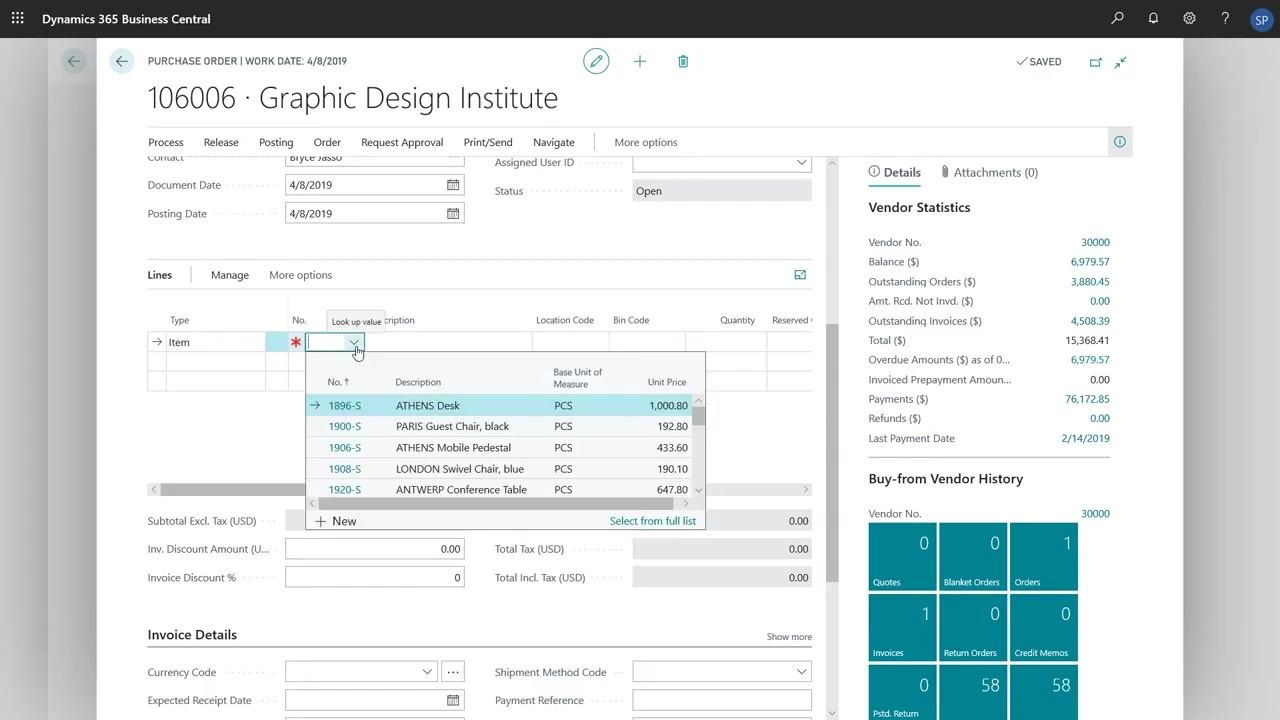
Click the dropdown under the Type column in the Lines section and select Item from the list. Use G/L Account instead if you are purchasing services or non-inventory items. For this example, select Item to purchase an inventory item.
Select the item to purchase
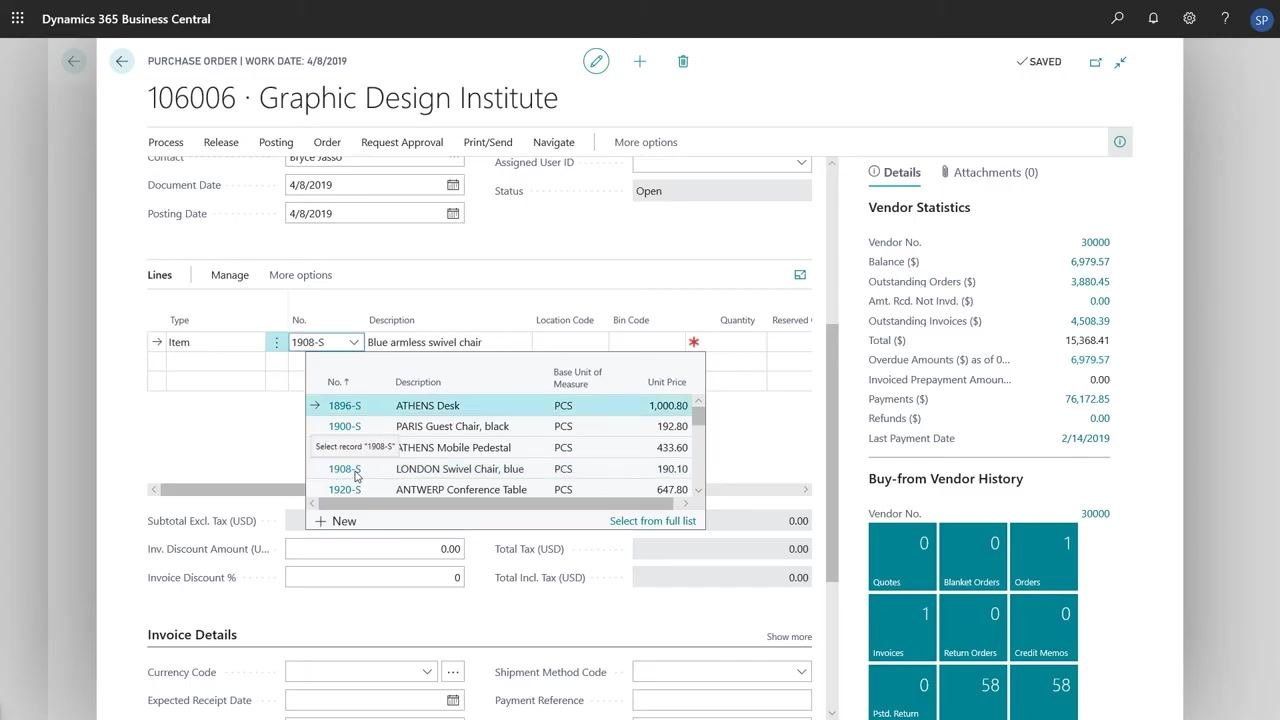
In the No. field, click the lookup button to open the list of available items. Browse or search for the item you want to purchase, then click to select it (for example, "1908-S LONDON Swivel Chair, blue"). Business Central automatically fills in related fields such as Description, Base Unit of Measure, and Unit Price.
Review and complete the line details
Confirm that the following fields are auto-filled based on the selected item:
- Description (for example, "Blue armless swivel chair")
- Unit of Measure Code (for example, "PCS")
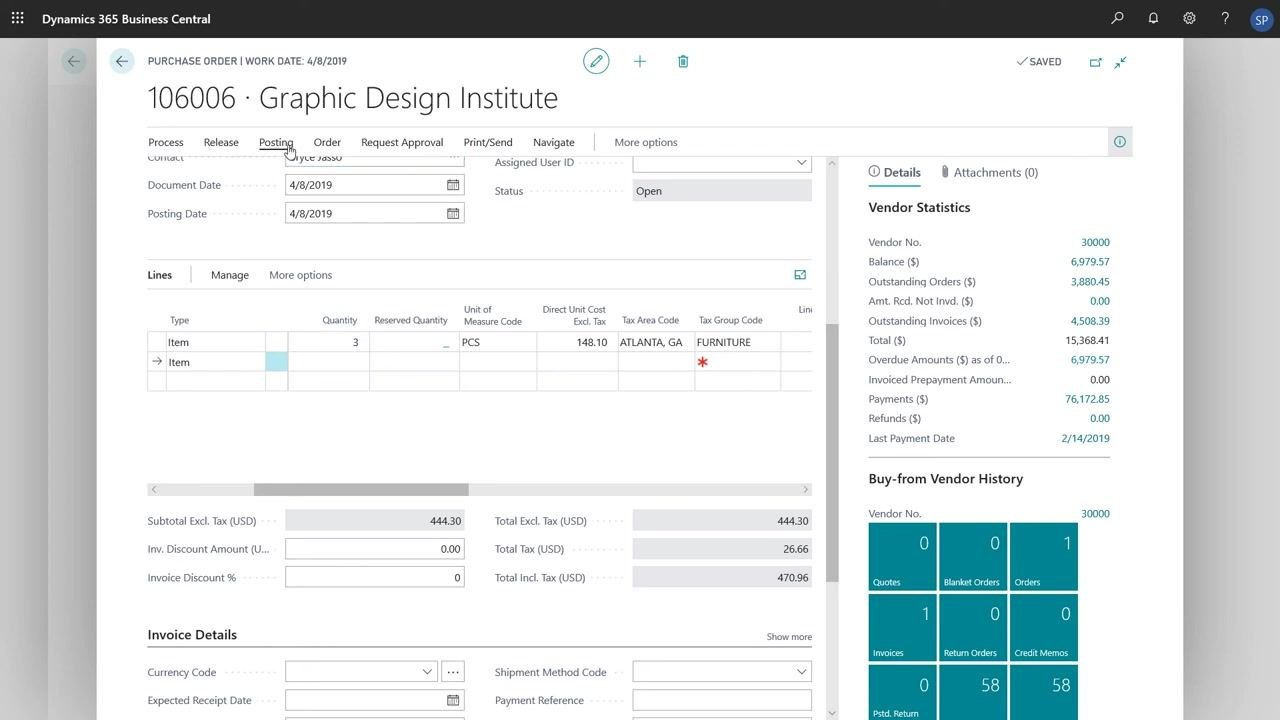
- Direct Unit Cost Excl. Tax (for example, "148.10")
- Tax Area Code (for example, "ATLANTA, GA")
- Tax Group Code (for example, "FURNITURE")
Enter the desired quantity in the Quantity field (for example, "3"), and double-check that the unit cost and other details are correct.
Add additional items (optional)
To purchase more items, add new lines by clicking below the existing line. Repeat the process: select Item as the type, choose the item, and enter the quantity. Each new line is auto-filled with the relevant item details.
Review the purchase order summary
Before posting, check the summary fields at the bottom of the form:
- Subtotal Excl. Tax (USD) (for example, "444.30")
- Total Excl. Tax (USD) (for example, "444.30")
- Total Tax (USD) (for example, "26.66")
- Total Incl. Tax (USD) (for example, "470.96")
Confirm that other invoice details, such as currency code and expected receipt date, are correct.
Post the purchase order
Once all lines and details are correct, click Posting at the top of the screen. Choose the appropriate action, such as Post or Post and Print, to finalize the purchase order. The screen will clear or update to confirm the order has been posted.
Summary
By following these steps, you have successfully created and posted a purchase order in Microsoft Dynamics 365 Business Central. Your vendor details, item lines, and order totals are now accurately recorded in the system.
Generation details: cost, quality tiers
Docsie billed 1,500 credits ($1.05) to analyze this 3-minute video at standard quality. The rewrite, template fill and Word/PDF exports were included. The same video at each quality tier:
| Quality | Frames sampled | Credits | Approx. cost |
|---|---|---|---|
| Draft | every 16-30 s | 750 | $0.52 |
| Standard (this guide) | every 8-15 s | 1,500 | $1.05 |
| Detailed | every 4-7 s | 3,000 | $2.10 |
| Ultra | every 1-3 s | 6,000 | $4.20 |
Credits priced at $0.70 per 1,000; plans include a monthly allowance. Enterprise customers on on-premise or bring-your-own-model deployments run this on their own inference and pay no per-video credits.
Generated by Docsie Video-to-Docs on 2026-09-08 from a 2-minute video. Screenshots are frames from the source video and belong to their creator, Microsoft Dynamics 365, whose original is embedded above. If you own this video and want the guide removed or credited differently, contact us and we will act within one business day.