
How to Send Claims in Dentrix
This guide shows you how to send claims in Dentrix using the Ledger and Office Manager. You'll learn how to create insurance claims for posted procedures, batch and transmit them electronically, verify that no procedures were missed, and post insurance payments once an Explanation of Benefits (EOB) arrives.
Video: Dentrix Ledger Tutorial (Part 2) | Create, Batch, Send Insurance Claims & Post Insurance Payments by Dental Tech with Jaime (2026). All credit for the demonstration goes to the creator; watch the original on YouTube. The written guide below was generated from this video by Docsie. Creator? Request a change or removal.
This guide shows you how to send claims in Dentrix using the Ledger and Office Manager. You'll learn how to create insurance claims for posted procedures, batch and transmit them electronically, verify that no procedures were missed, and post insurance payments once an Explanation of Benefits (EOB) arrives.
Prerequisites
- You are working in the patient's ledger within Dentrix.
- All procedures performed during the visit (for example, exam, bitewings, prophy) have already been posted to the ledger.
For a general overview of Dentrix Ledger or guidance on posting procedures, refer to part one of this series.
Create insurance claims
Step 1: Confirm posted procedures before creating a claim
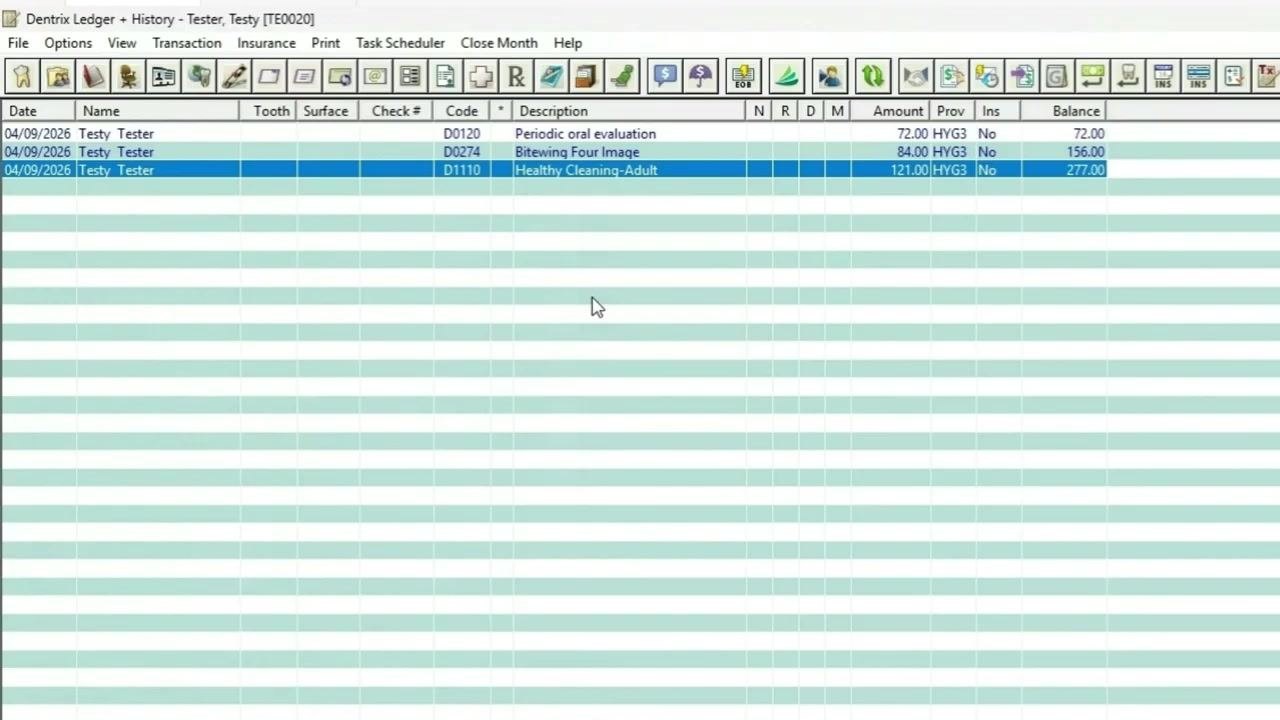
Before you create a claim, confirm that every procedure from the visit has been posted to the patient's ledger. In this example, the following procedures were posted for provider HYG3:
- D0120 – Periodic oral evaluation – $72.00
- D0274 – Bitewing Four Image – $84.00
- D1110 – Healthy Cleaning-Adult – $121.00
Step 2: Open the Insurance menu
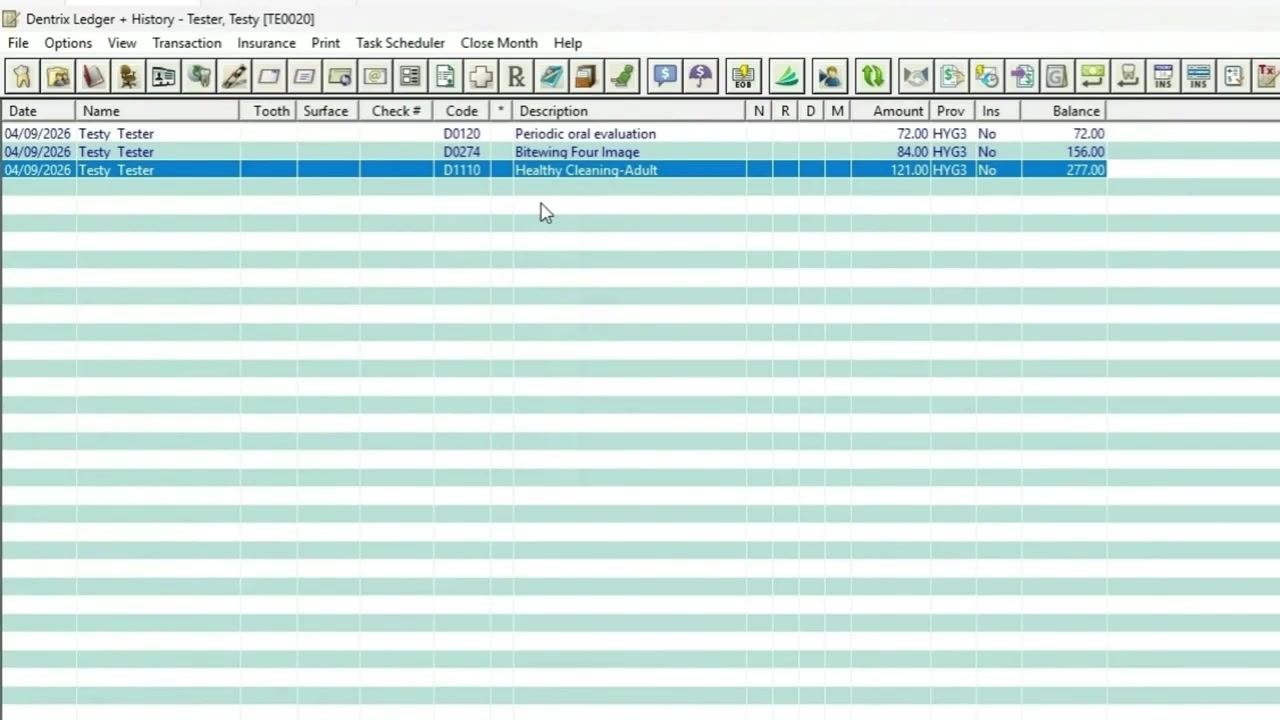
Go to the top toolbar and click the Insurance menu. From here you can see all the available claim-creation options, including:
- Today's Procedures
- Selected Procedures
- Today's Procedures - Batch
- Selected Procedures - Batch
- Today's Procedures - Send Electronically
- Selected Procedures - Send Electronically
- Today's Procedures - Direct Print
- Selected Procedures - Direct Print
Step 3: Choose how to create the claim
Select Today's Procedures to create a claim that includes every procedure posted that day. To create a claim for only specific procedures, select those procedures in the ledger first, then choose Selected Procedures.
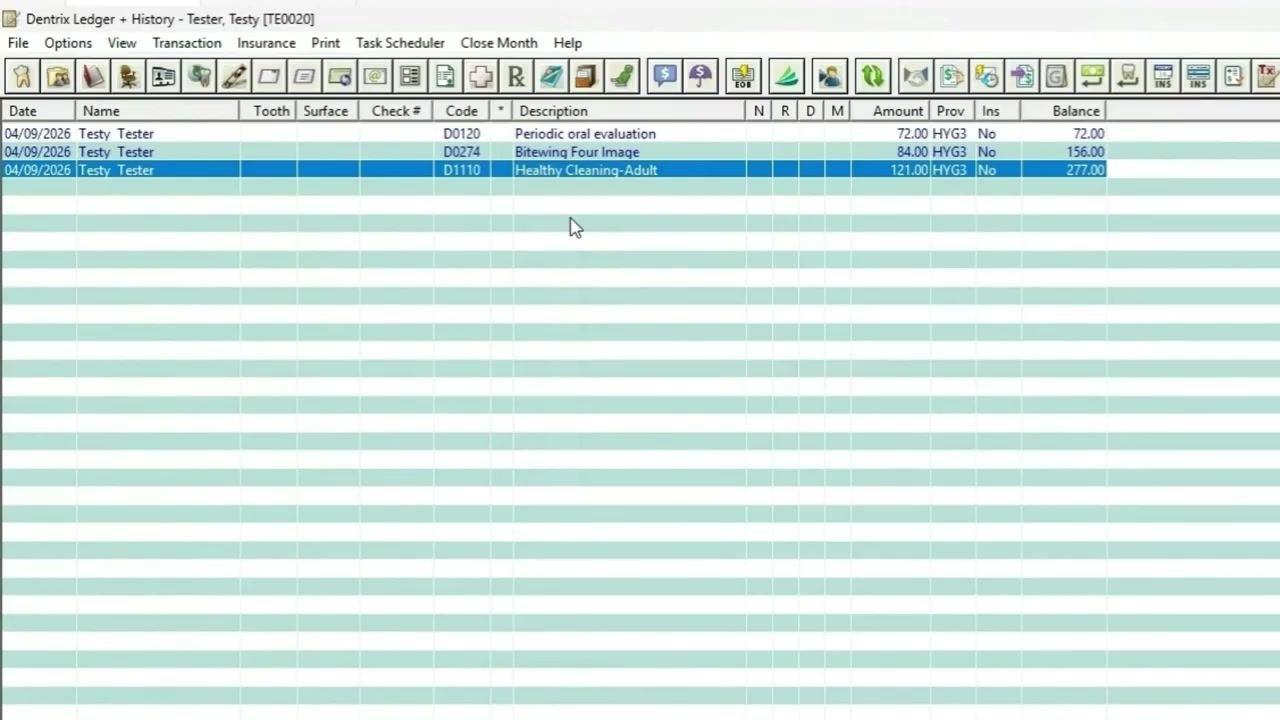
You can also use the toolbar icons for quicker access:
- Ins. Today's Proc. batches all of today's procedures into a single claim.
- Ins. Selected Proc. creates a claim limited to the procedure(s) you've selected.
Step 4: Create and batch the claim
If you only want to bill a single procedure (for example, just the exam), select that procedure in the ledger and click the Ins. Selected Proc. icon. In this example, a claim is created for all of today's procedures instead, using the appropriate toolbar icon or menu option.
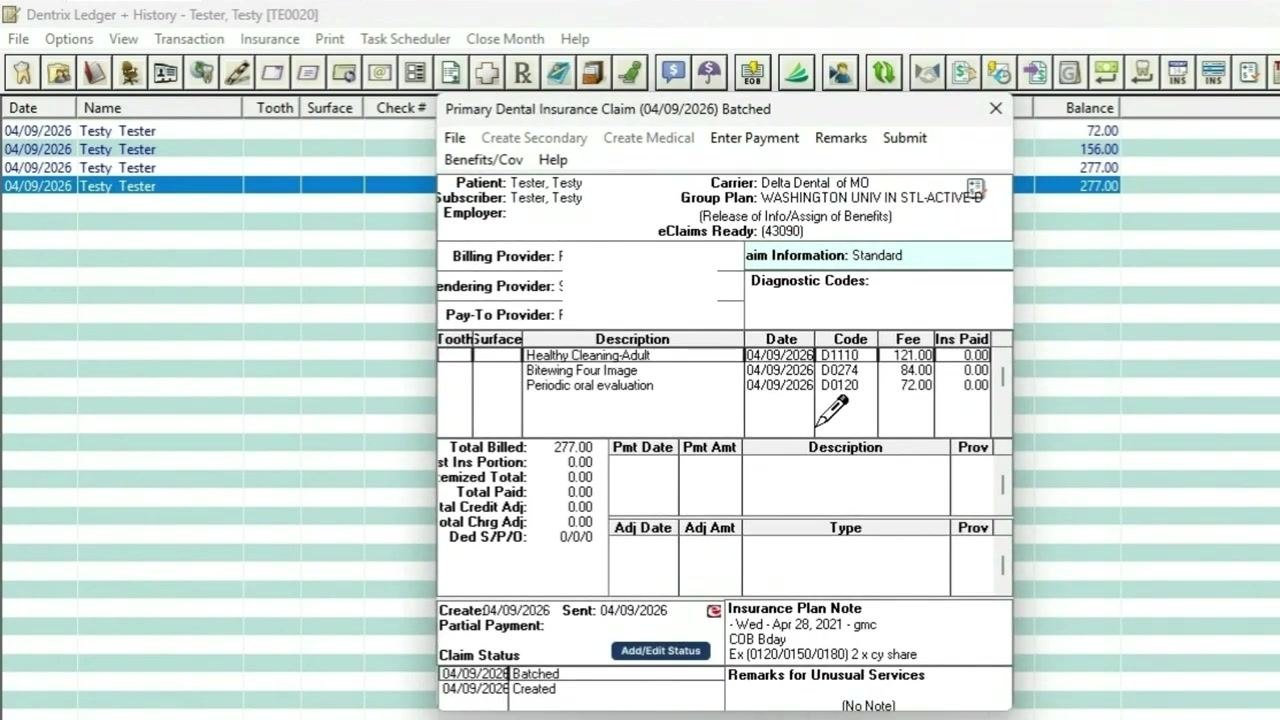
Once the claim is created, a new line appears in the ledger reading "Pr Dental Claim - Batched 277.00," confirming the claim has been batched. Double-click this new entry to review the claim details, including the patient, carrier, group plan, procedures, codes, and total billed amount.
Batch and send claims electronically
Step 5: Open the Office Manager to review batched claims
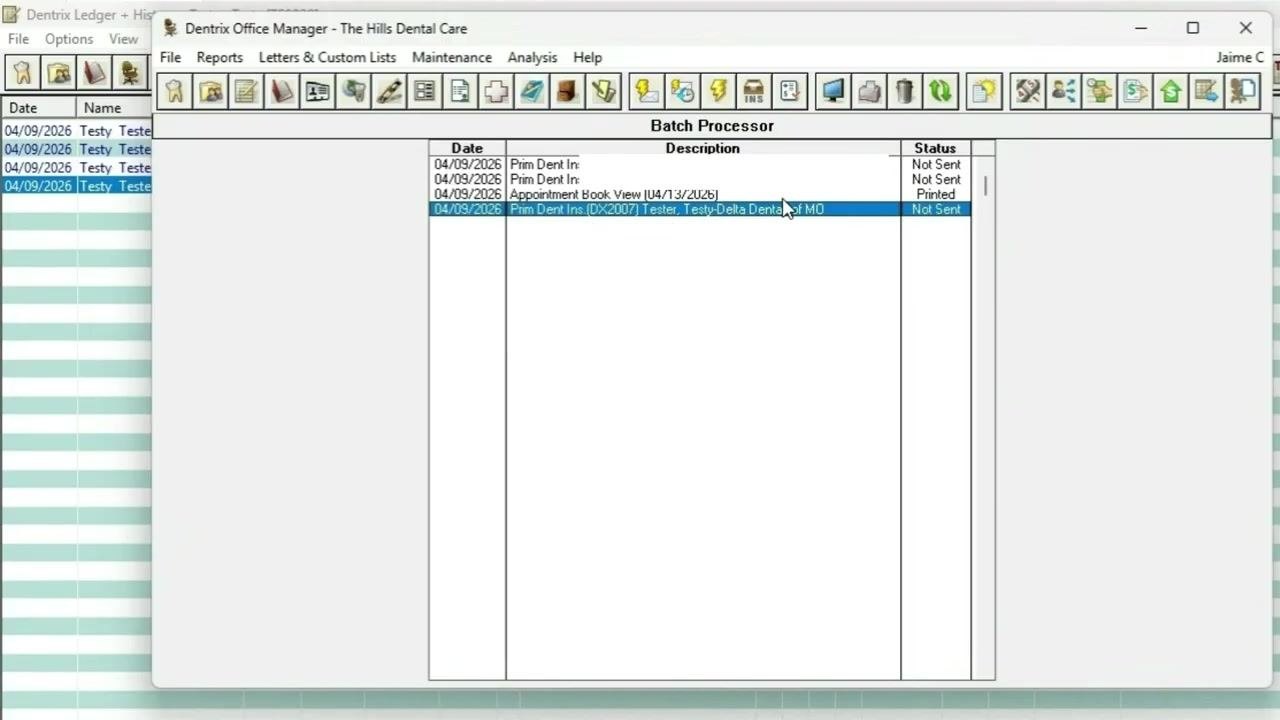
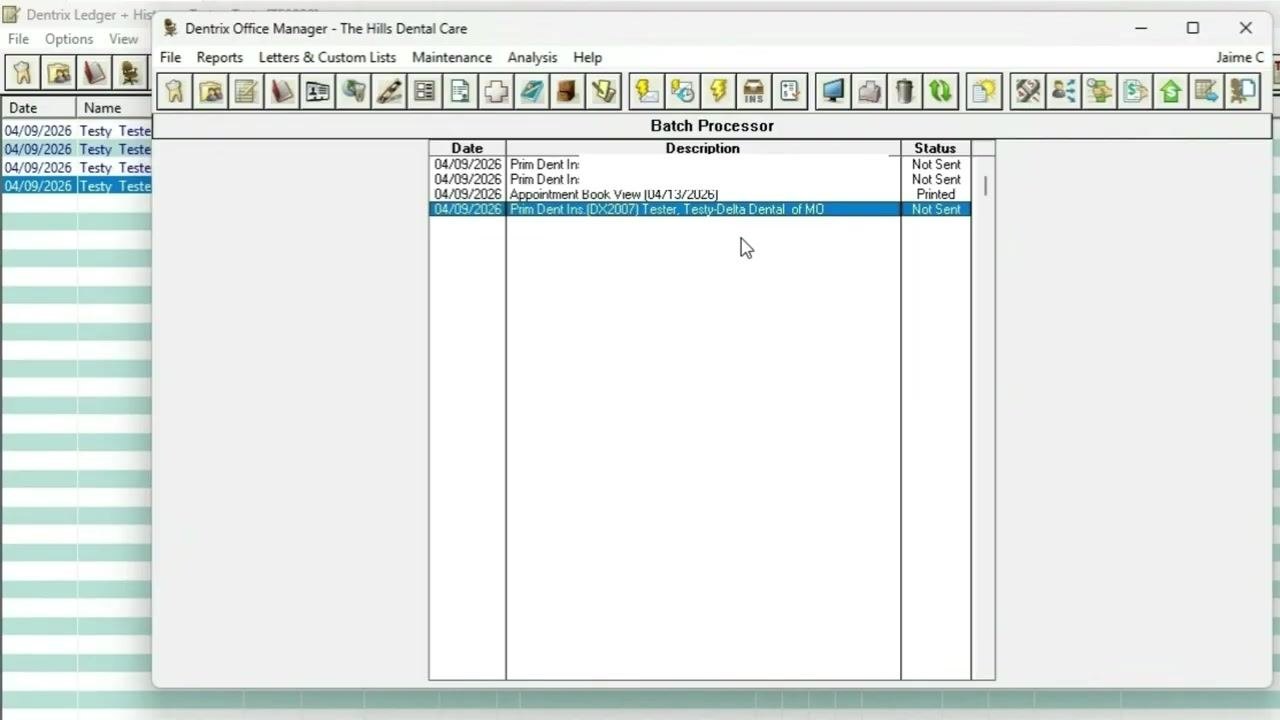
At the end of the day, open the Office Manager to batch all claims for electronic submission. Click the Office Manager icon in the toolbar, then locate the Batch Processor section. Confirm that the claim you just created appears in the list with the status "Not Sent."
Step 6: Send the claim electronically
To send claims, click the lightning bolt icon labeled "Electronic Claim Submission" in the Office Manager toolbar. This opens the Electronic Claims Submission dialog, where you choose a sending option:
- Select Selected Dental Claim Forms to send only the highlighted claim.
- Select All Dental Claim Forms to send every claim currently in the batch processor.
Click OK to submit the selected claims electronically.
Note: Repeat this workflow for each patient as they come in. At the end of the day, use the Office Manager to batch and send all claims electronically for efficient processing. If you need help setting up electronic claims, consult your Dentrix documentation.
Step 7: Print claims for mailing (if not sending electronically)
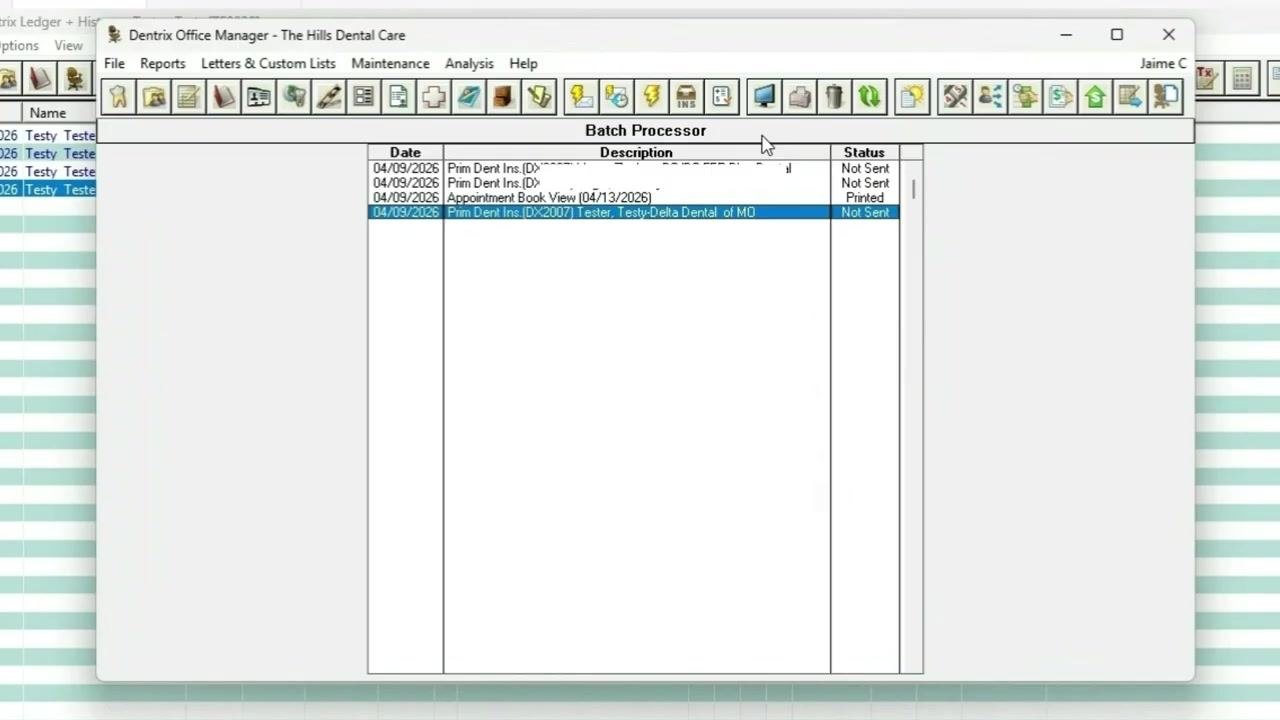
If you're not submitting claims electronically, select the claim in the batch processor list and click the Print icon (printer symbol) in the toolbar. Use the printed claim to mail it to the insurance carrier.
Check for procedures not attached to insurance claims
Step 8: Run the "Procedures Not Attached To Insurance" report
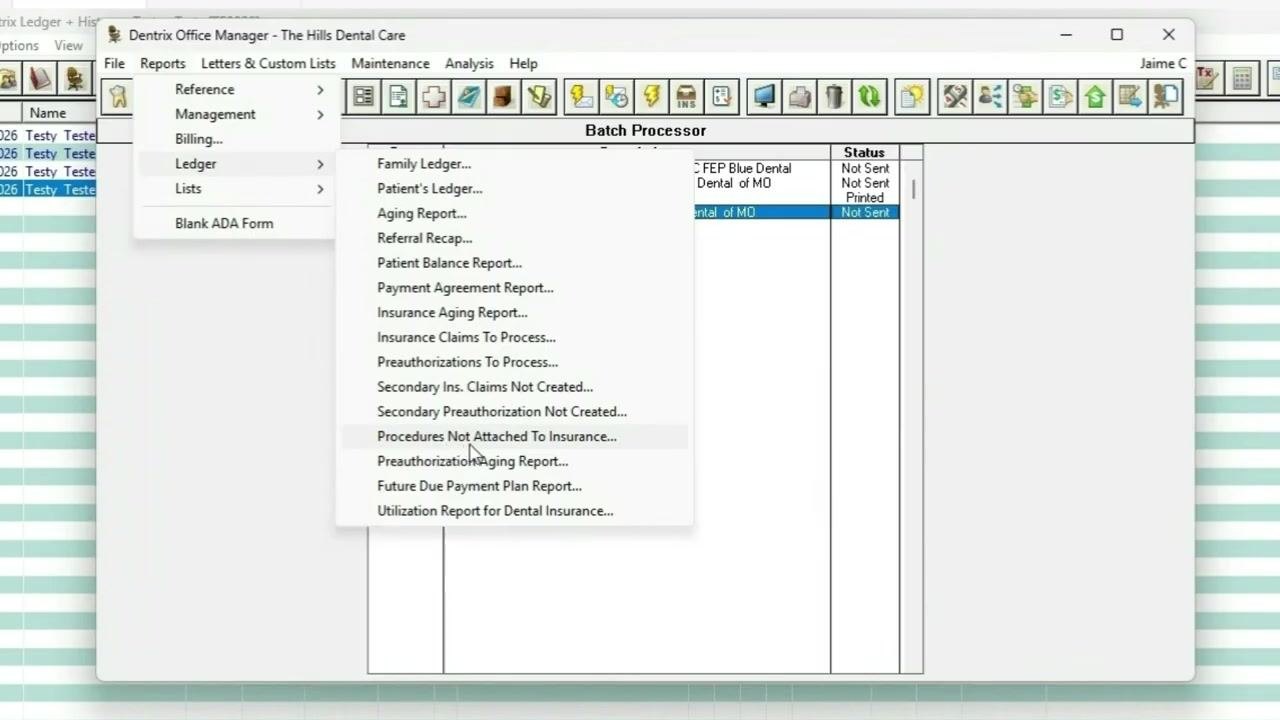
To make sure all procedures are properly batched to claims, run a report that flags any missed items. In the Office Manager, click Reports, hover over Ledger, and select Procedures Not Attached To Insurance.
Step 9: Set the date range and generate the report
When prompted, Dentrix automatically selects the last seven days as the default date range. Adjust this range if needed—for example, set it to today's date for a daily check—then click OK to run the report.
Step 10: Review the report results
After the report generates, locate the new entry in the batch processor list labeled Procedures Not Attached To Insurance Claims and double-click it to open the report. It lists every procedure completed within the selected date range that isn't attached to a claim, including:
- Patient name
- Date
- Tooth (if applicable)
- Procedure code
- Description
- Amount
- Expiration date
Use this report to double-check your work, especially at the end of the day or week, to make sure no procedures are missed.
Enter and adjust insurance payments
Step 11: Itemize payment by procedure
Once you're ready to post an insurance payment, open the Primary Dental Insurance Claim window, click Enter Payment on the top toolbar, and select Itemize by Procedure from the dropdown. This opens a detailed entry screen so you can apply payment to each procedure on the claim.
The claim window shows patient and subscriber information, a list of procedures with dates, codes, descriptions, and fees, the insurance paid amounts (initially $0.00), totals for billed amount, insurance portion, and adjustments, plus the claim status and plan notes. Use this screen to match each procedure with the payment shown on the Explanation of Benefits (EOB).
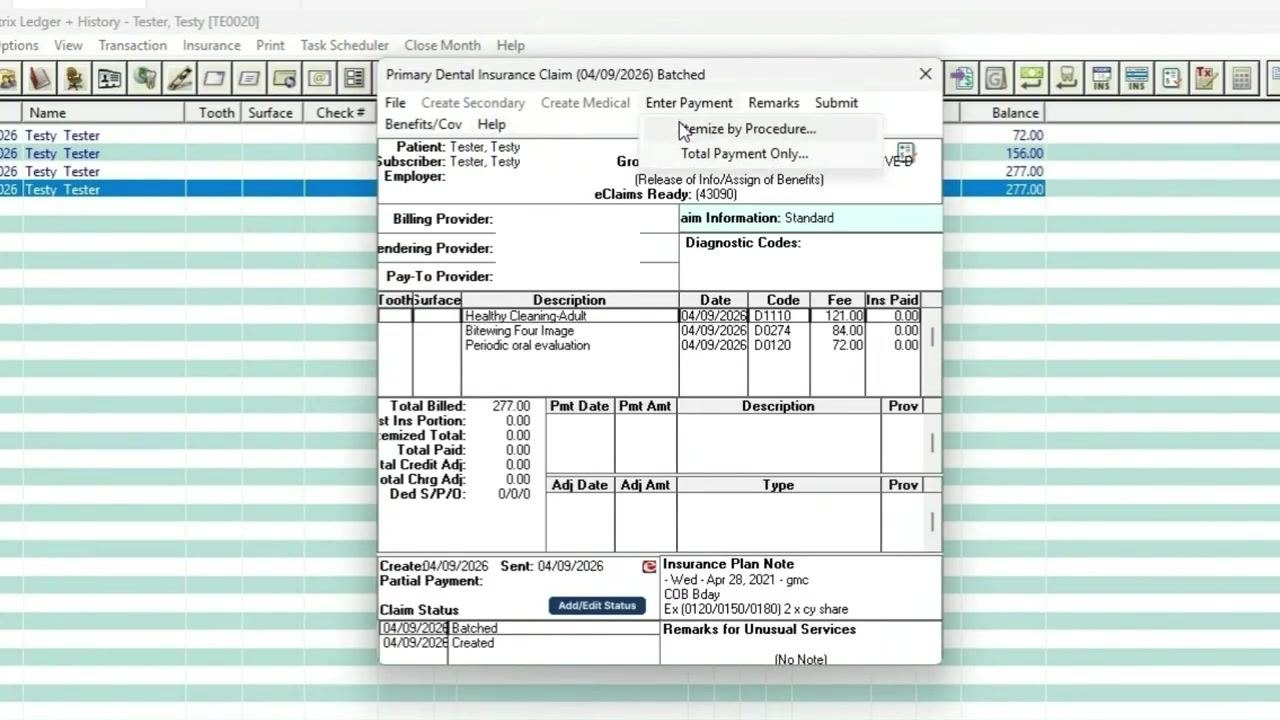
Tip: Always use "Itemize by Procedure" to ensure payments are distributed correctly across all procedures, preventing errors in patient balances and insurance records.
Step 12: Enter payment details for the first procedure
In the Itemize Payment window, enter the figures from the EOB for the selected procedure:
- Amount Paid: the amount insurance paid (for example, 0.00)
- Payment Table: the payment table value, if applicable (for example, 0.00)
- Allowed Amount: the allowed amount per the EOB (for example, 85.00)
Click OK to proceed.
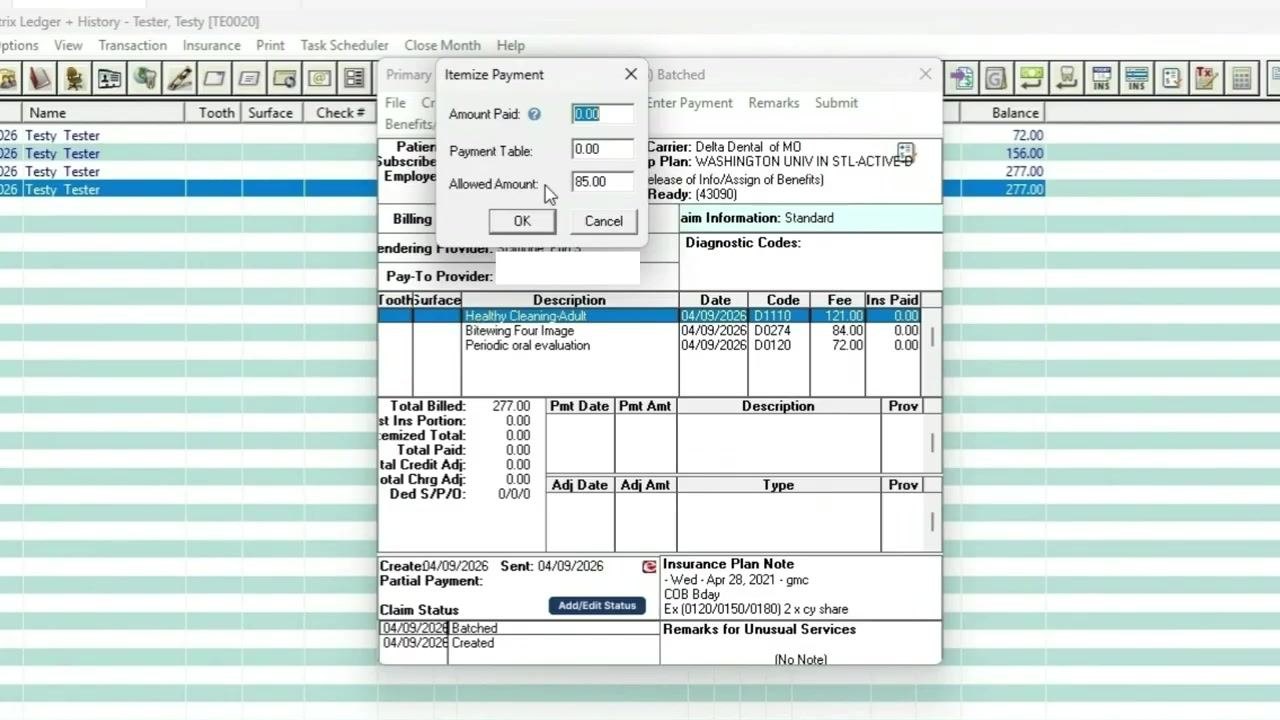
Step 13: Itemize payment for the next procedure
Dentrix automatically highlights the next procedure (for example, "Bitewing Four Image"). Enter the payment details shown on the EOB—for example, Amount Paid: 75.00 and Allowed Amount: 70.00—then click OK to confirm.
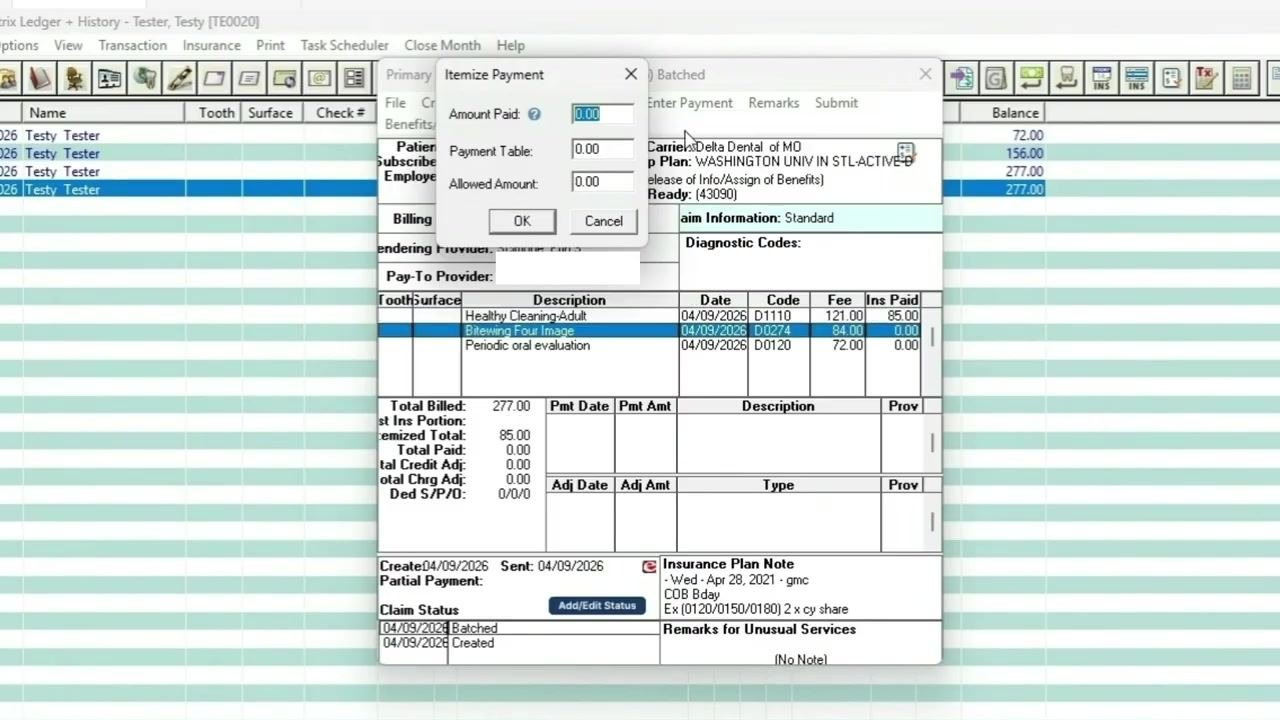
Step 14: Review the payment summary
After you've entered payments for all procedures, a summary appears showing the insurance paid amount for each. Confirm the figures are correctly reflected—for example, "Bitewing Four Image" should show an Ins Paid amount of 75.00.
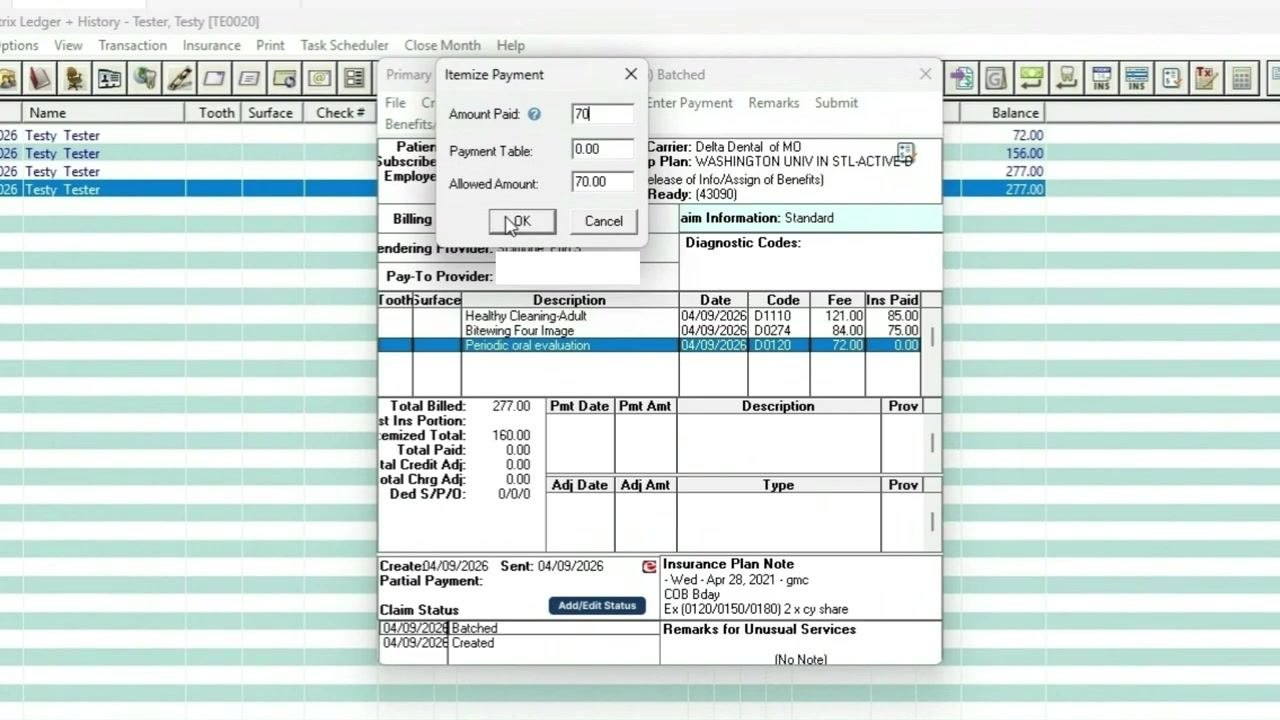
Step 15: Select the payment type
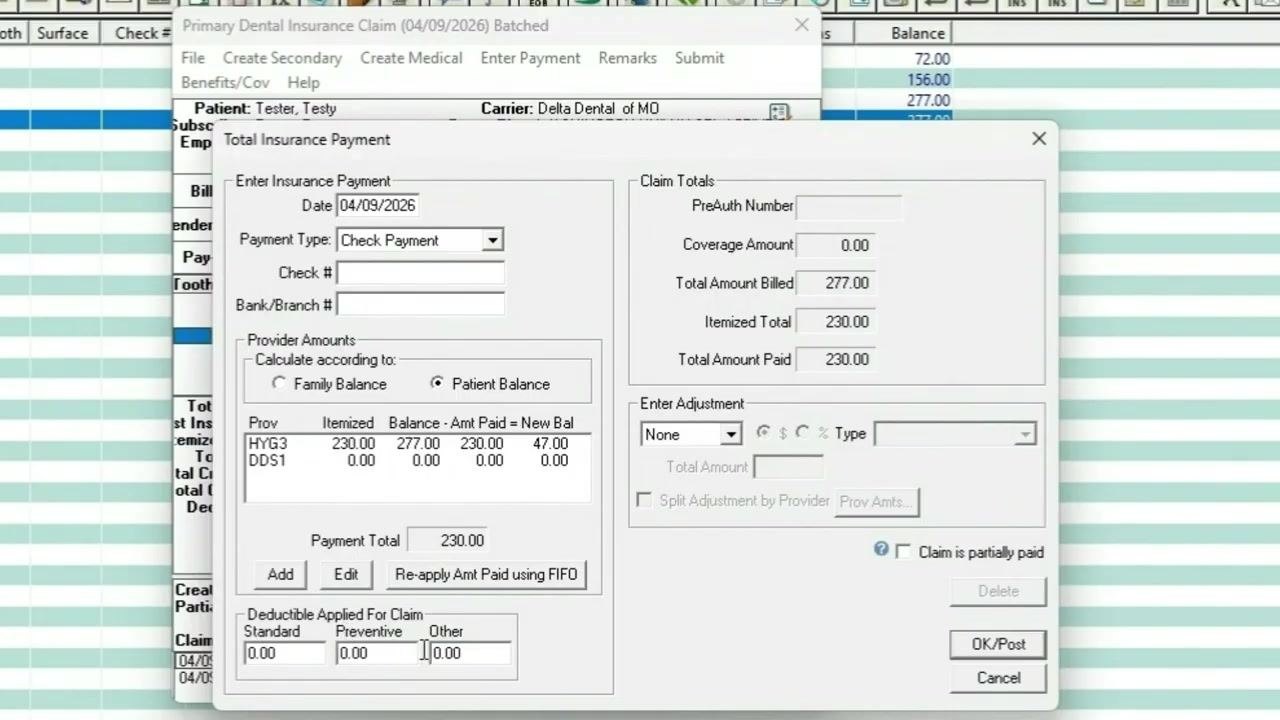
In the Total Insurance Payment window, choose a payment type from the dropdown:
- Check Payment
- Electronic Payment
- Credit Card Payment
Enter the check number or bank/branch number if applicable.
Step 16: Choose the calculation method
Select whether the payment should calculate according to Family Balance or Patient Balance, based on your office policy, and confirm the correct radio button is selected.
Step 17: Enter deductible information
Input any deductible amounts applied to the claim under the appropriate categories: Standard, Preventive, or Other. For example, enter 50.00 under Standard if applicable.
Step 18: Make adjustments if needed
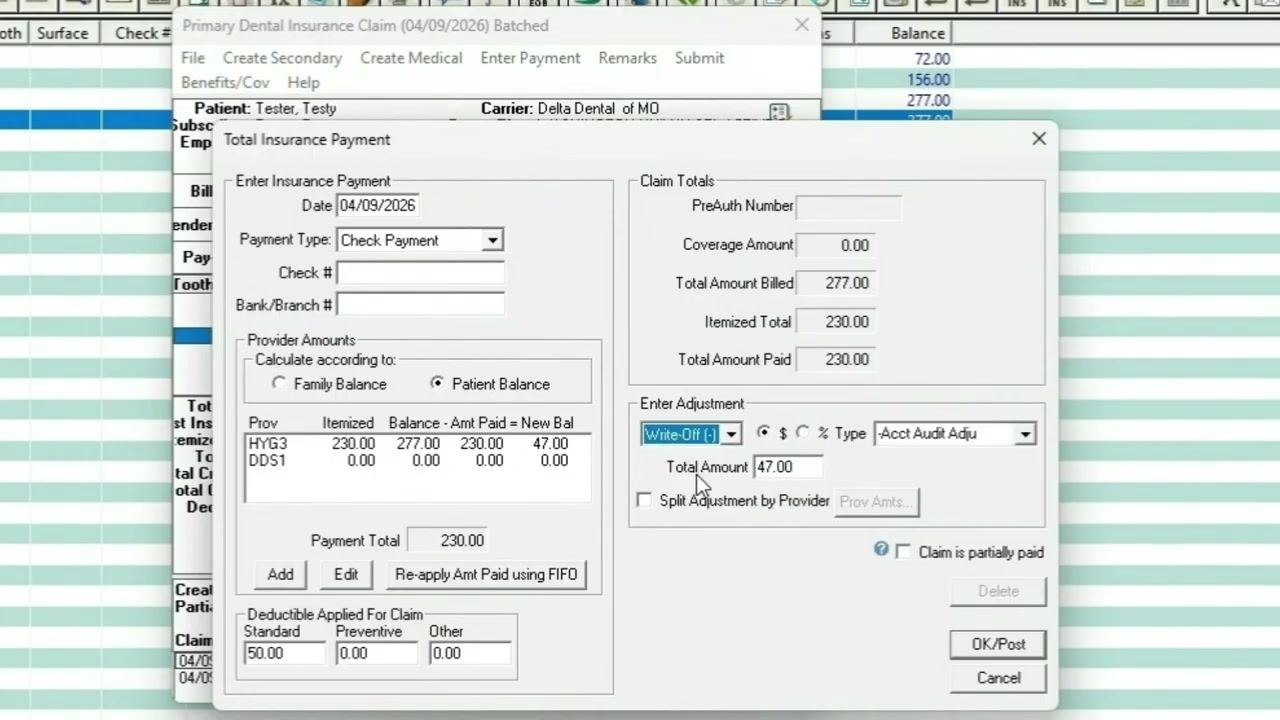
In the Enter Adjustment section, select an adjustment type (for example, Write-Off), enter the total adjustment amount (for example, 47.00), and specify whether it's a dollar amount or a percentage. Select the adjustment reason from the dropdown (for example, Acct Audit Adju).
Step 19: Split the adjustment by provider (optional)
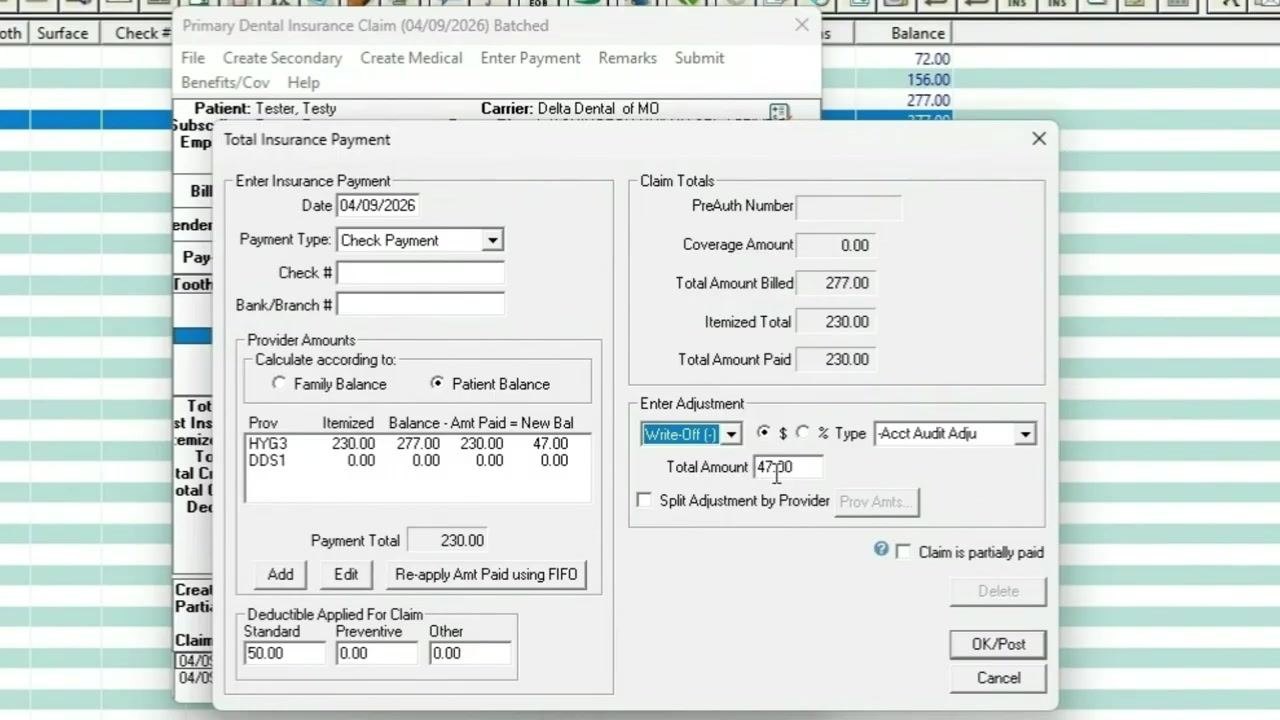
If needed, check the Split Adjustment by Provider box to allocate the write-off or adjustment across multiple providers. Dentrix will distribute the amount automatically.
Step 20: Review all entered details before posting
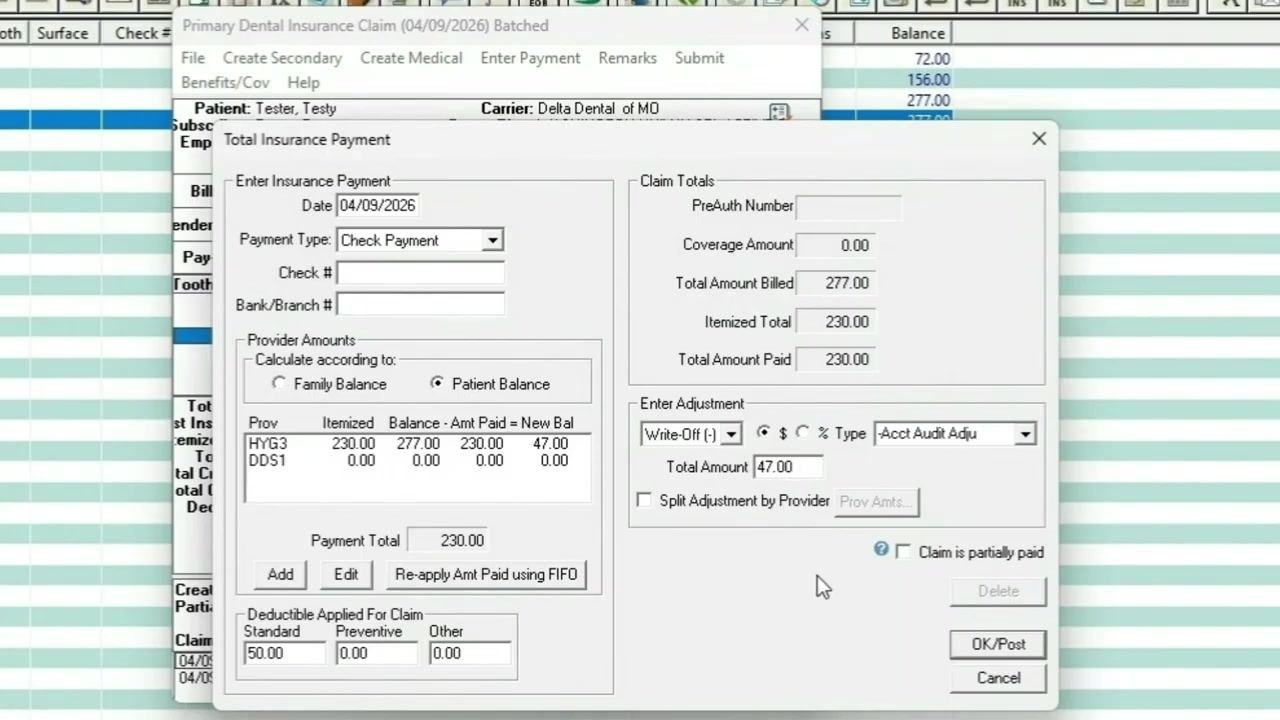
Before posting, confirm every field in the Total Insurance Payment window, including:
- Date: 04/09/2026
- Payment Type: Check Payment
- Check # and Bank/Branch #, if applicable
- Provider Amounts: for example, HYG3 – Itemized 230.00, Balance 277.00, Amt Paid 230.00, New Bal 47.00
- Deductible Applied for Claim: Standard 50.00, Preventive 0.00, Other 0.00
- Claim Totals: Total Amount Billed 277.00, Itemized Total 230.00, Total Amount Paid 230.00
- Enter Adjustment: Write-Off (-), Total Amount 47.00, Type Acct Audit Adju
- Split Adjustment by Provider: checked if the adjustment should be distributed across providers
- Claim is partially paid: checked if only part of the claim is being paid
Step 21: Post the payment
Click OK/Post at the bottom right of the Total Insurance Payment window to finalize the payment. This updates the patient ledger and reflects the payment, deductible, and adjustment entries.
What's next
Now that you know how to send claims in Dentrix—from creating and batching claims to verifying nothing was missed and posting insurance payments—repeat this workflow for each patient as they come in. At the end of each day, use the Office Manager to batch and send all outstanding claims electronically. For additional details on posting procedures or a general ledger overview, refer to part one of this series.
Generation details: cost, quality tiers
Docsie billed 4,000 credits ($2.80) to analyze this 8-minute video at standard quality. The rewrite, template fill and Word/PDF exports were included. The same video at each quality tier:
| Quality | Frames sampled | Credits | Approx. cost |
|---|---|---|---|
| Draft | every 16-30 s | 2,000 | $1.40 |
| Standard (this guide) | every 8-15 s | 4,000 | $2.80 |
| Detailed | every 4-7 s | 8,000 | $5.60 |
| Ultra | every 1-3 s | 16,000 | $11.20 |
Credits priced at $0.70 per 1,000; plans include a monthly allowance. Enterprise customers on on-premise or bring-your-own-model deployments run this on their own inference and pay no per-video credits.
Generated by Docsie Video-to-Docs on 2026-10-14 from a 7-minute video. Screenshots are frames from the source video and belong to their creator, Dental Tech with Jaime, whose original is embedded above. If you own this video and want the guide removed or credited differently, contact us and we will act within one business day.