
How to Add Procedure Buttons in Dentrix
Procedure buttons in Dentrix let you quickly chart common treatments from the Patient Chart without manually searching for procedure codes each time. This guide walks you through how to add procedure buttons in Dentrix, customize their appearance and tooltips, organize them, and save a button set that can be shared across every computer in your office.
Video: How to Setup Procedure Buttons in Dentrix by Dental Tech with Jaime. All credit for the demonstration goes to the creator; watch the original on YouTube. The written guide below was generated from this video by Docsie. Creator? Request a change or removal.
Procedure buttons in Dentrix let you quickly chart common treatments from the Patient Chart without manually searching for procedure codes each time. This guide walks you through how to add procedure buttons in Dentrix, customize their appearance and tooltips, organize them, and save a button set that can be shared across every computer in your office.
Prerequisites
- Access to the Dentrix Patient Chart module.
- Permission to modify procedure button setup for your practice.
- The procedure codes you want to add (for example, D2740 for a porcelain/ceramic crown).
Open the Patient Chart
Launch Dentrix and navigate to the Patient Chart module. Make sure you are in the correct patient's chart before proceeding, since this is where you'll access the setup tools.
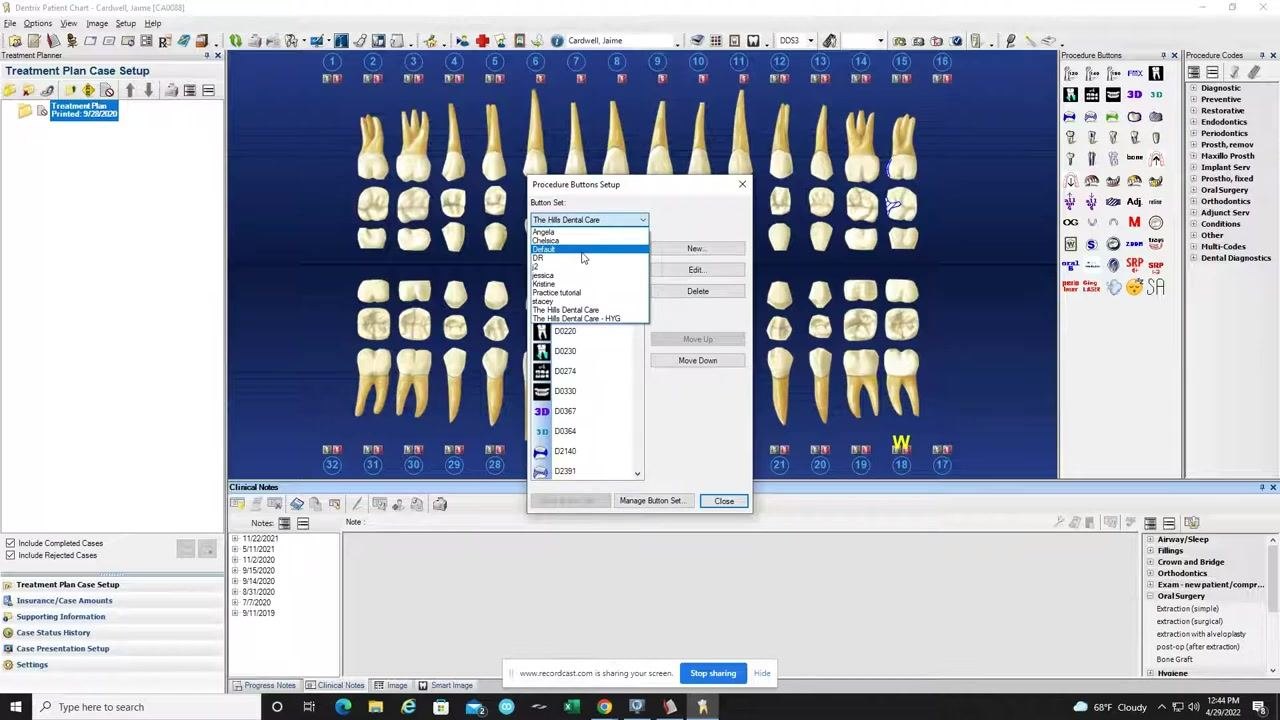
Access the Procedure Button Setup window
In the top toolbar, click Setup, then select Procedure Button Setup from the dropdown menu. This opens the Procedure Buttons Setup dialog box, where you'll manage your button sets.
Review the default procedure buttons
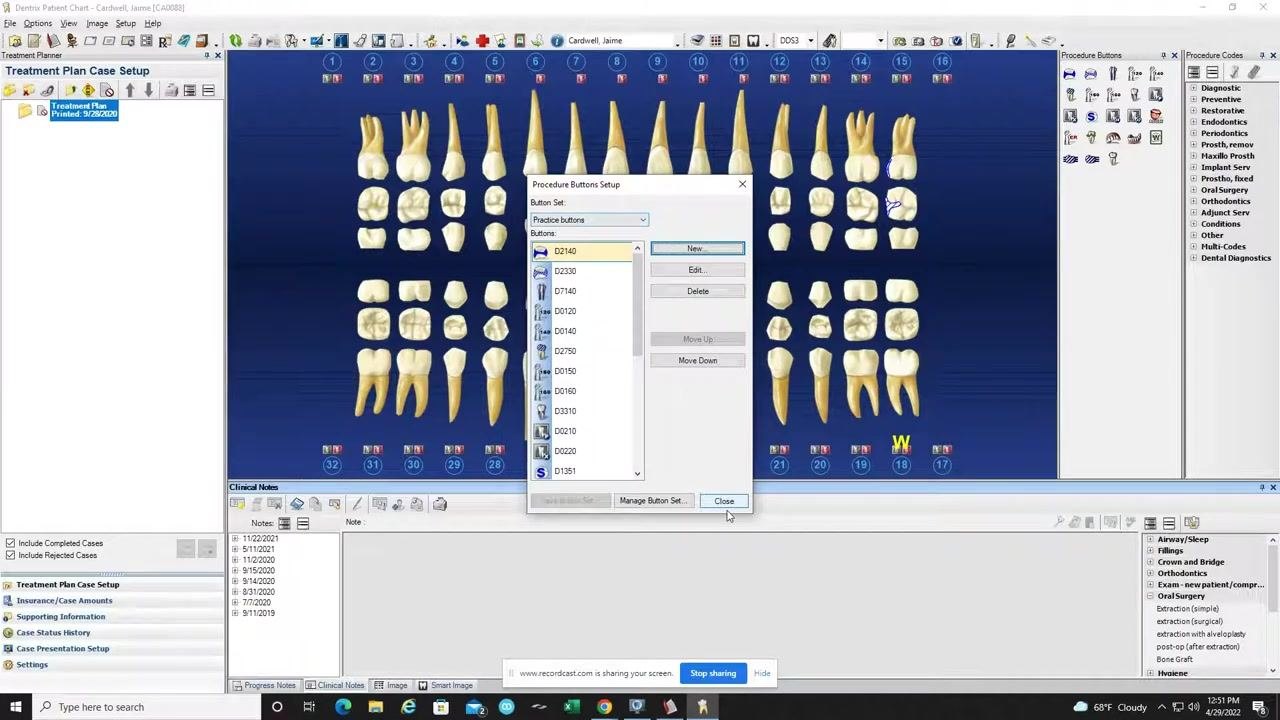
In the Procedure Buttons Setup window, review the default button set that Dentrix provides. This set includes several pre-configured procedure buttons, each tied to a specific code (for example, D2140 and D2330).
You can keep these default buttons as-is, delete any you don't need, or add new ones to match your practice's workflow.
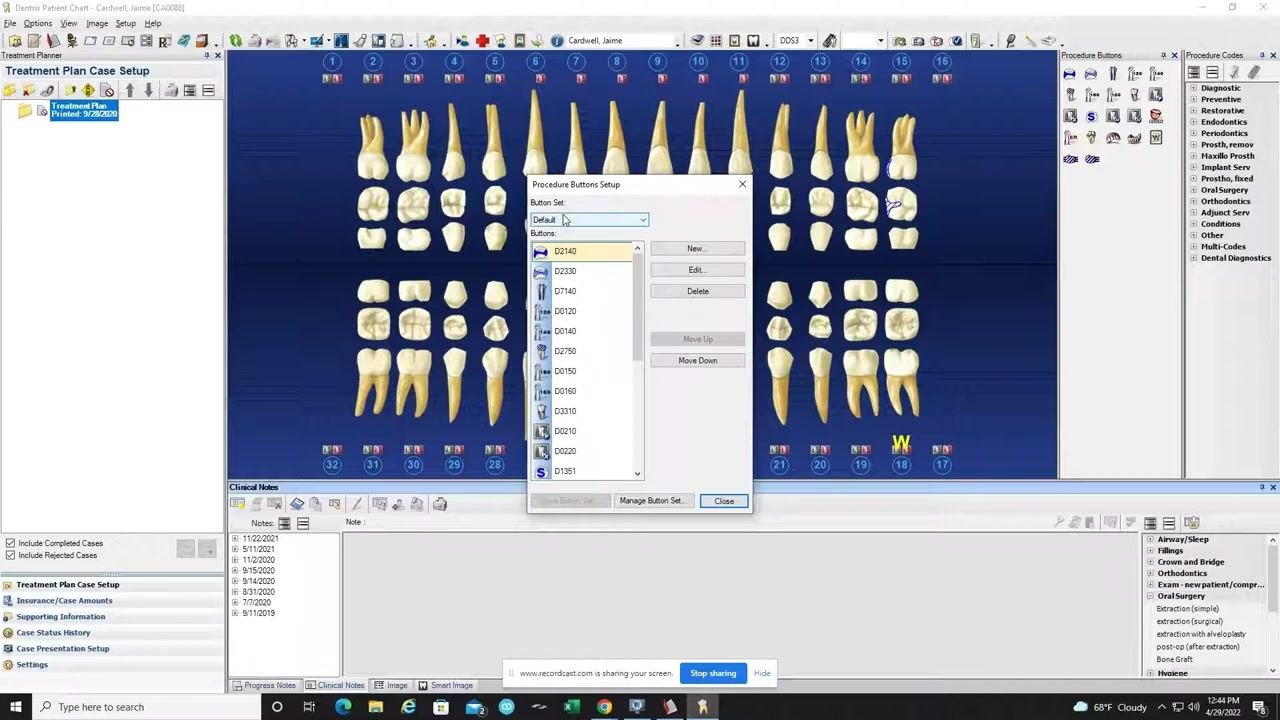
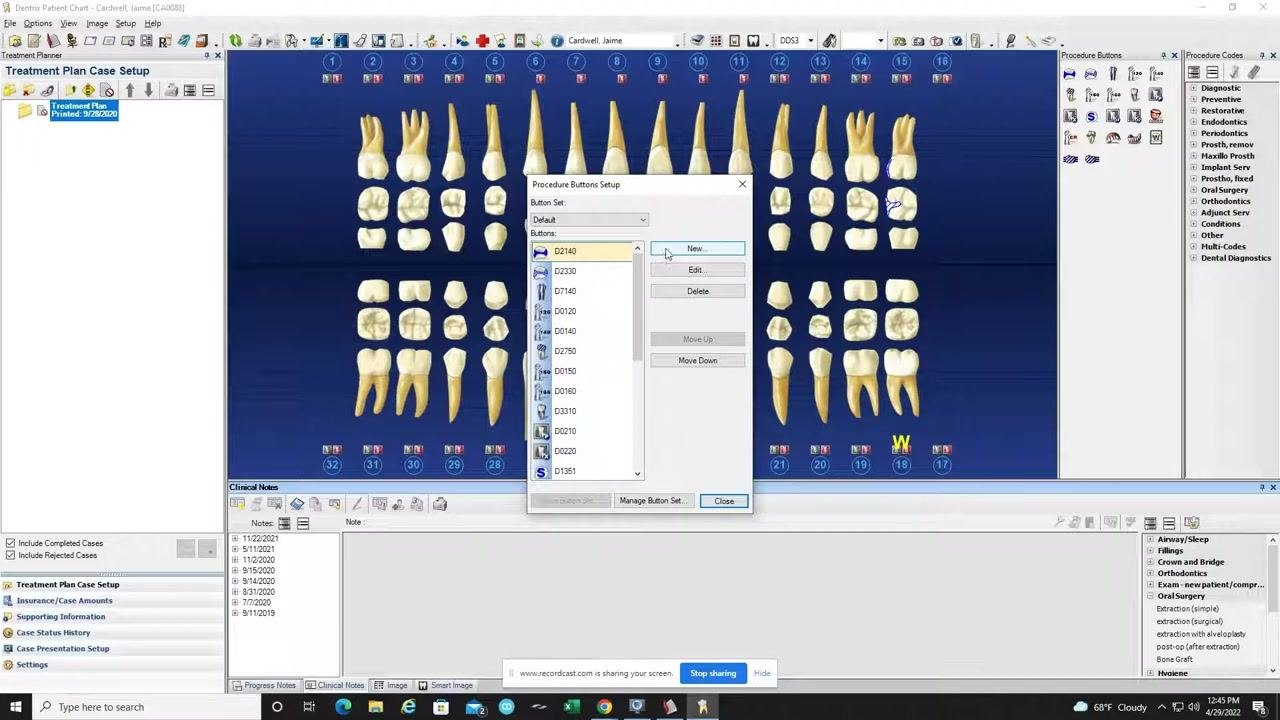
Add a new procedure button
Click the New button on the right side of the Procedure Buttons Setup window. This opens the New Procedure Button Setup dialog, where you'll configure the new button.
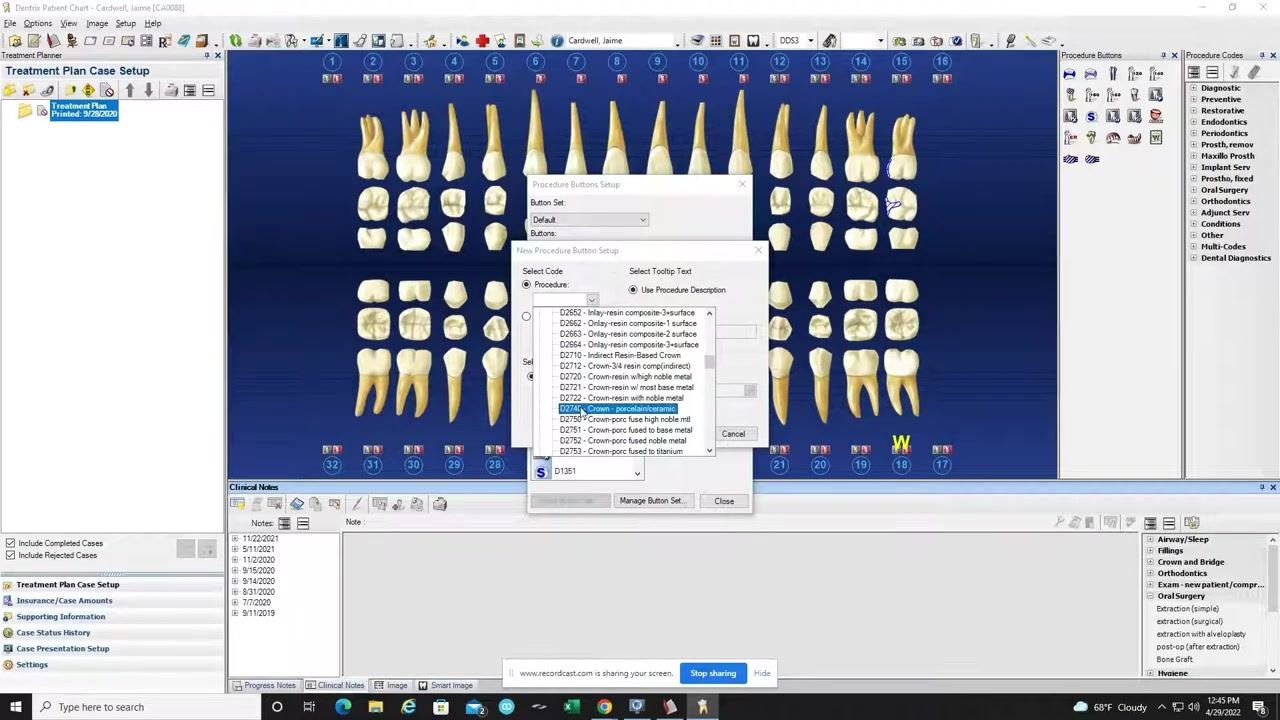
Select the procedure code for the new button
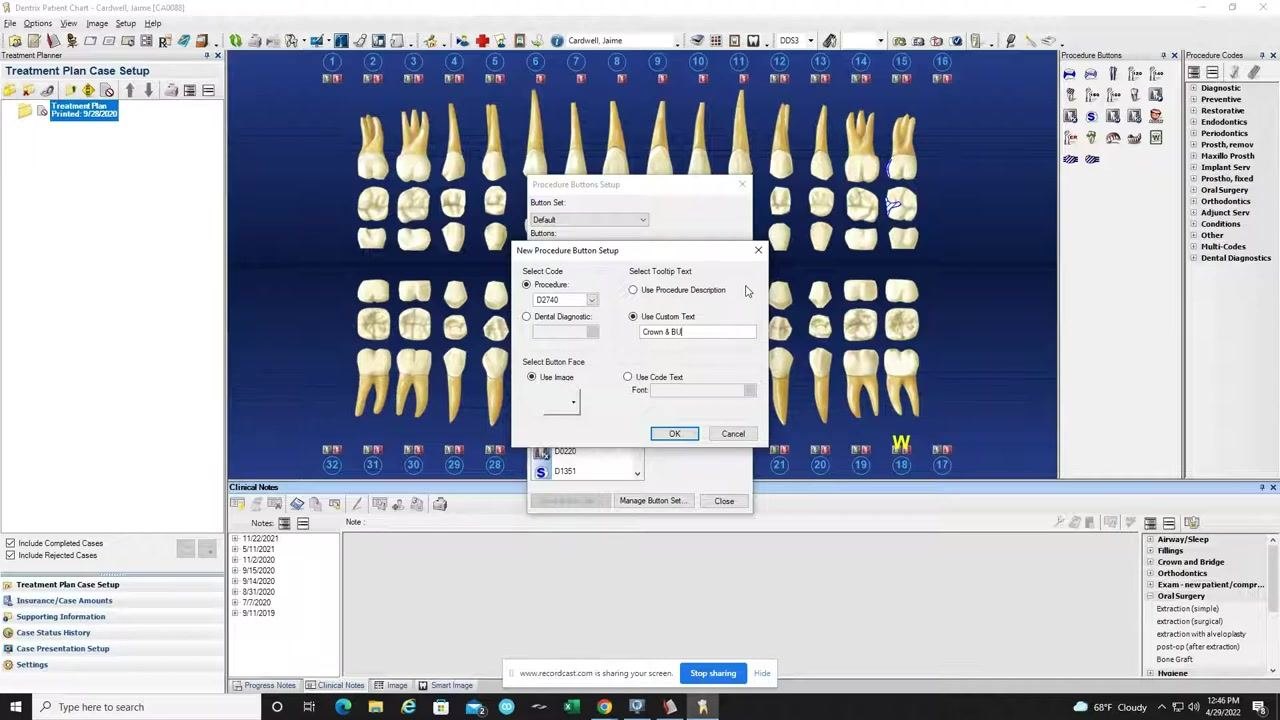
In the New Procedure Button Setup window, click the dropdown menu under Procedure and browse through the categories, such as Diagnostic, Preventive, and Restorative.
For this example, scroll to the Restorative section and select code D2740 – Crown-porcelain/ceramic, then click the code to select it.
Set the tooltip text for the button
In the New Procedure Button Setup window, locate the Select Tooltip Text section. You have two options:
- Use Procedure Description: Displays the default procedure description (for example, "Crown-porcelain/ceramic") when you hover over the button.
- Use Custom Text: Lets you enter your own text, such as
Crown & Build Up, for a multi-code or specific workflow. This is especially useful if you use Dentrix Multi Codes to combine procedures, such as a single button covering both crown and build-up work.
Choose the button face
In the same window, find the Select Button Face section and choose one of the following:
- Use Image: Displays an icon on the button. This is the recommended option for clarity and easier organization.
- Use Code Text: Displays the procedure code (for example,
D2740) and lets you choose a font for the text.
Select or create an icon
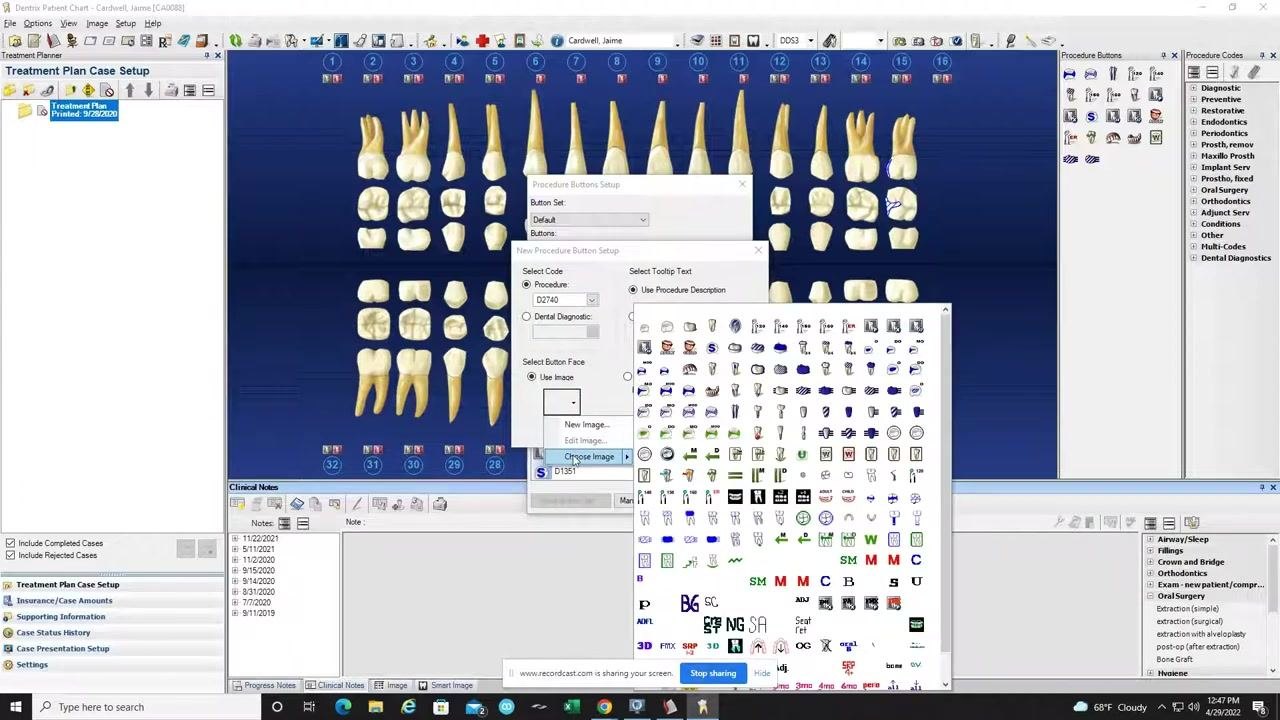
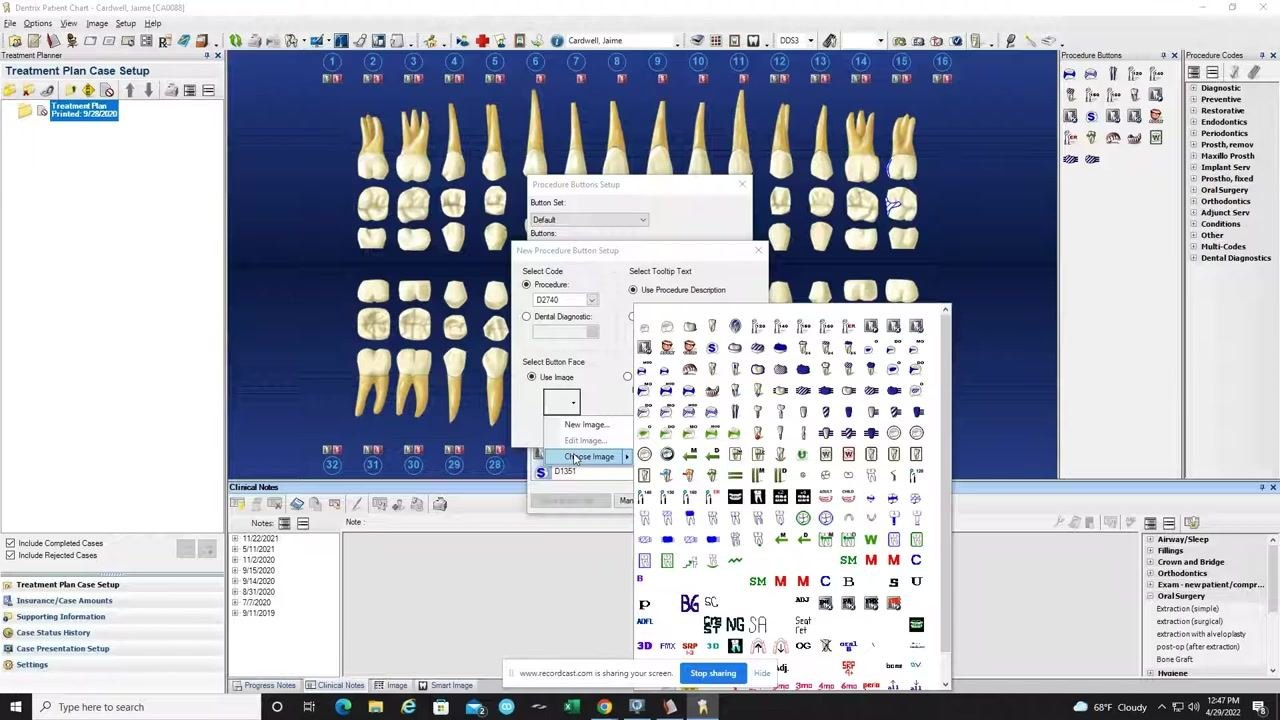
If you chose Use Image, click the dropdown menu below it to see your options:
- New Image: Create your own custom icon.
- Edit Image: Modify an existing icon.
- Choose Image: Select from approximately 80 default icons provided by Dentrix.
Click Choose Image to open the icon selection window, then browse the available icons and select the one that best represents your procedure.
Create a custom icon with the Image Editor (optional)
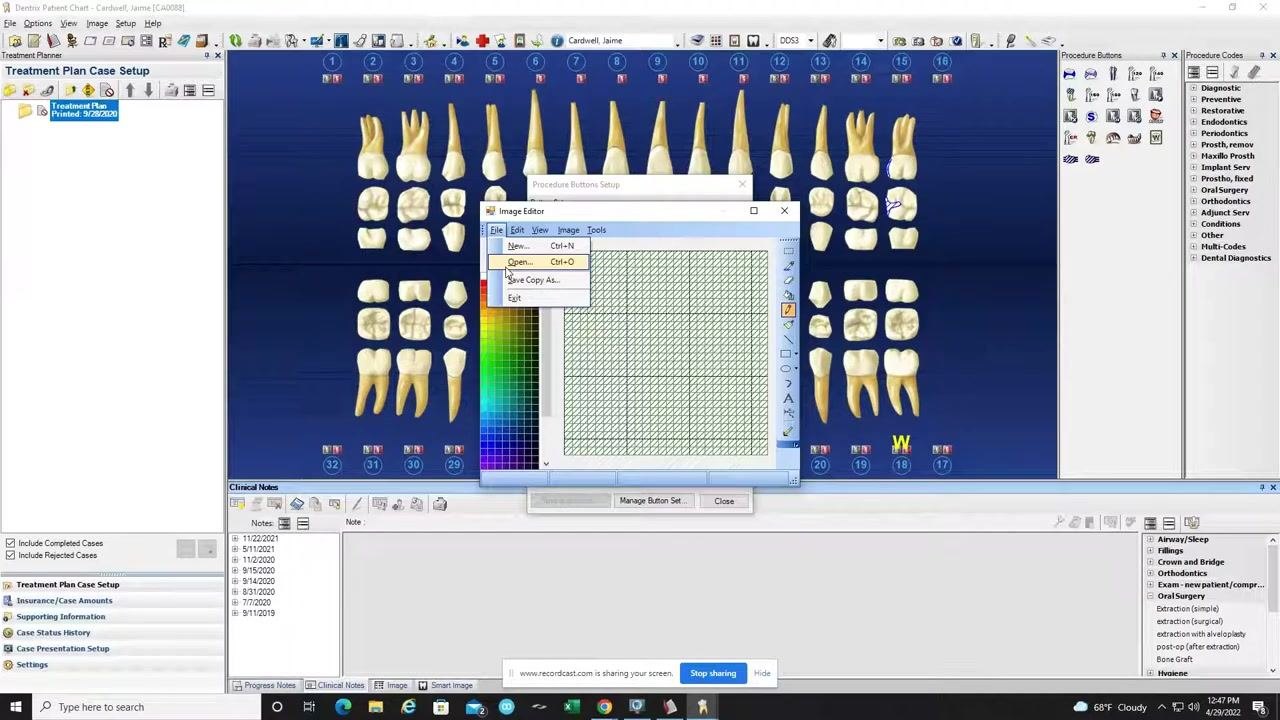
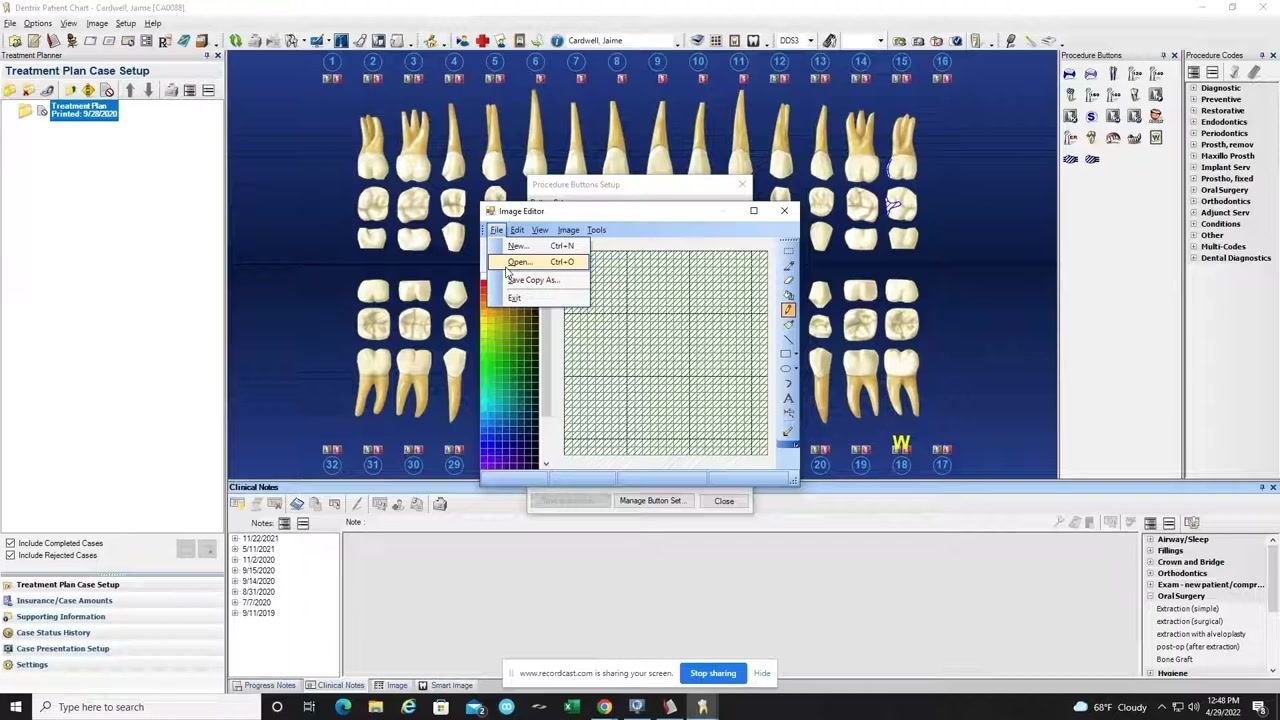
If you want a unique icon, select New Image in the New Procedure Button Setup window to open the Image Editor. From here you can:
- Draw a custom picture using the drawing tools.
- Add text to the icon.
- Use the color palette to select custom colors.
- Upload your own image by clicking File > Open.
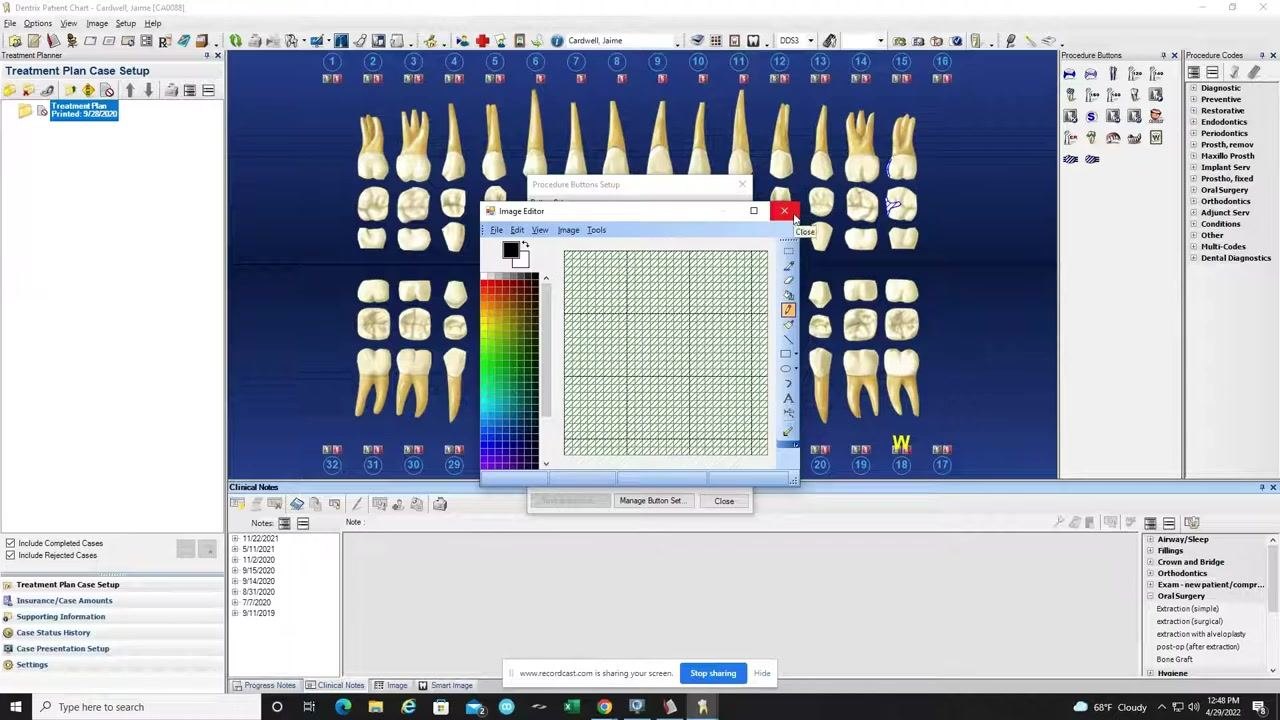
If you have ready-made icon files saved to your computer, use File > Open in the Image Editor to select them. When you're finished, click the Close button (red X) to exit the Image Editor.
Finalize and save the new procedure button
Before saving, review the settings in the New Procedure Button Setup window:
- Confirm the correct procedure code is selected (for example,
D2740). - Confirm your tooltip text (for example,
Crown & BU). - Verify the button face is set to Use Image and your chosen icon is displayed.
Click OK to create the button. The new procedure button appears in the Procedure Buttons panel and at the bottom of the button list.
Organize your procedure buttons
In the Procedure Buttons Setup window, locate your new button in the list (for example, D2740). Use the Move Up and Move Down buttons to reorder the procedure buttons so they match your office's workflow and stay organized.
Set up composite filling buttons
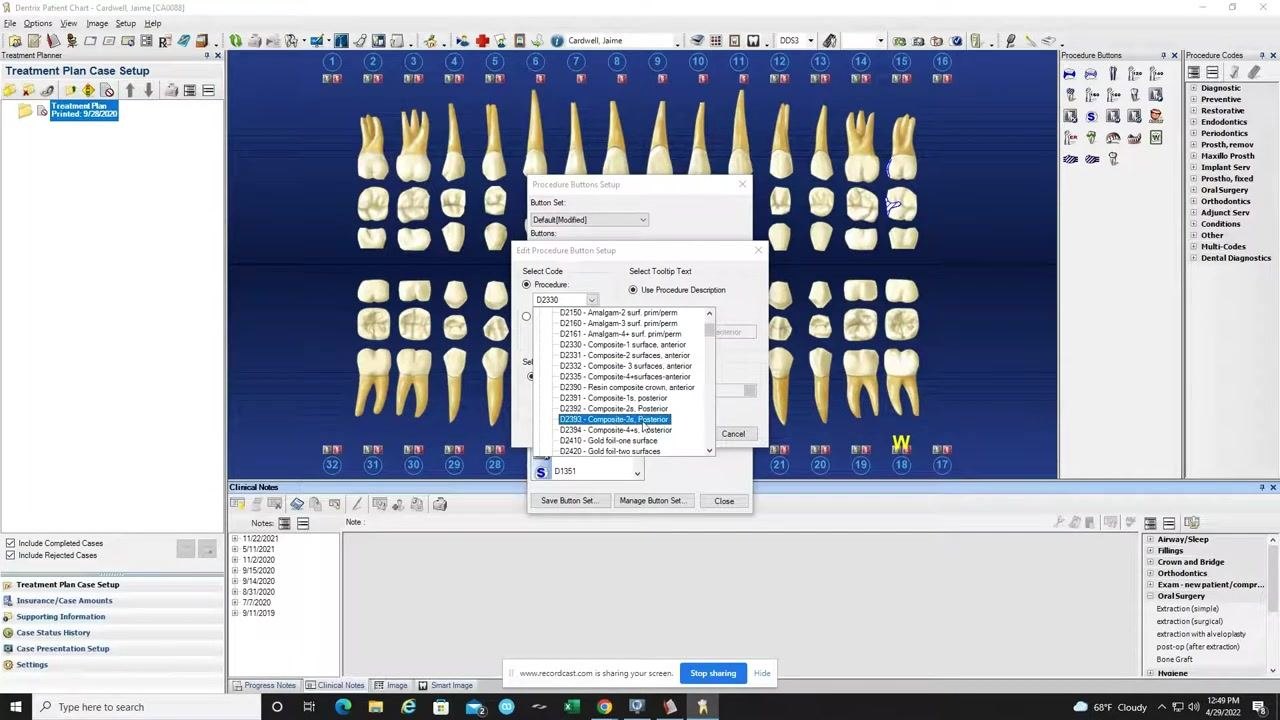
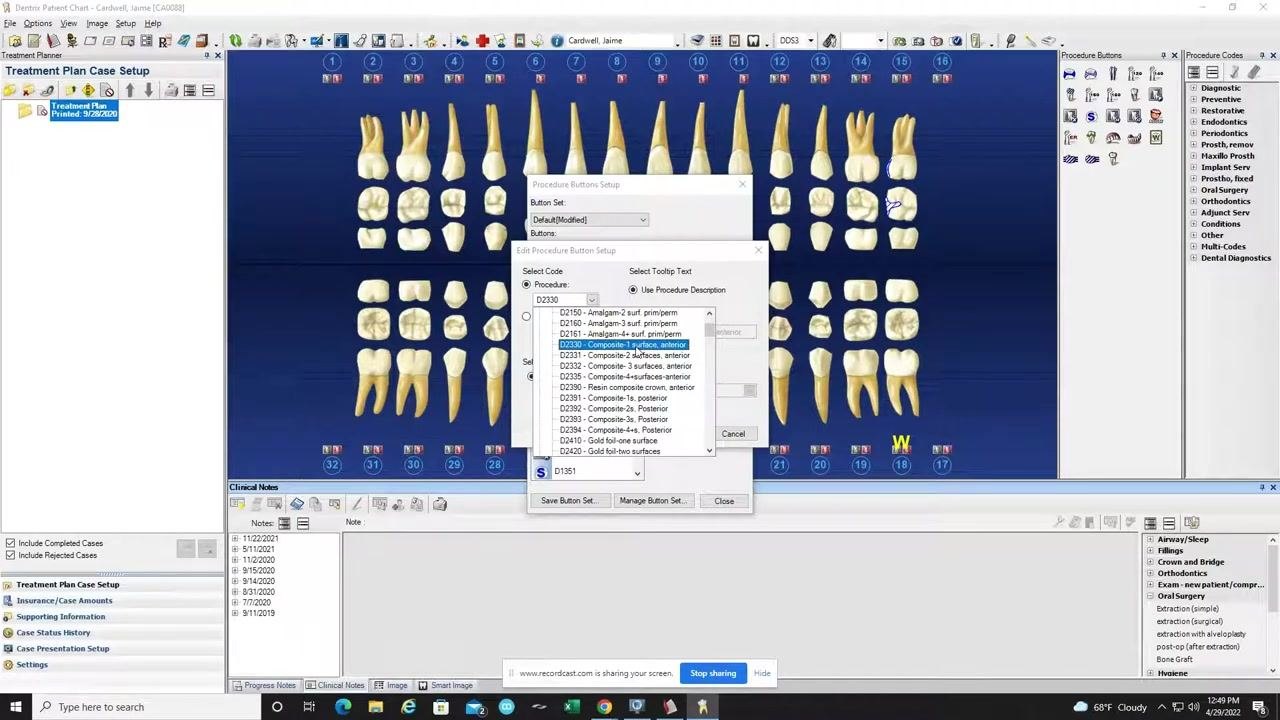
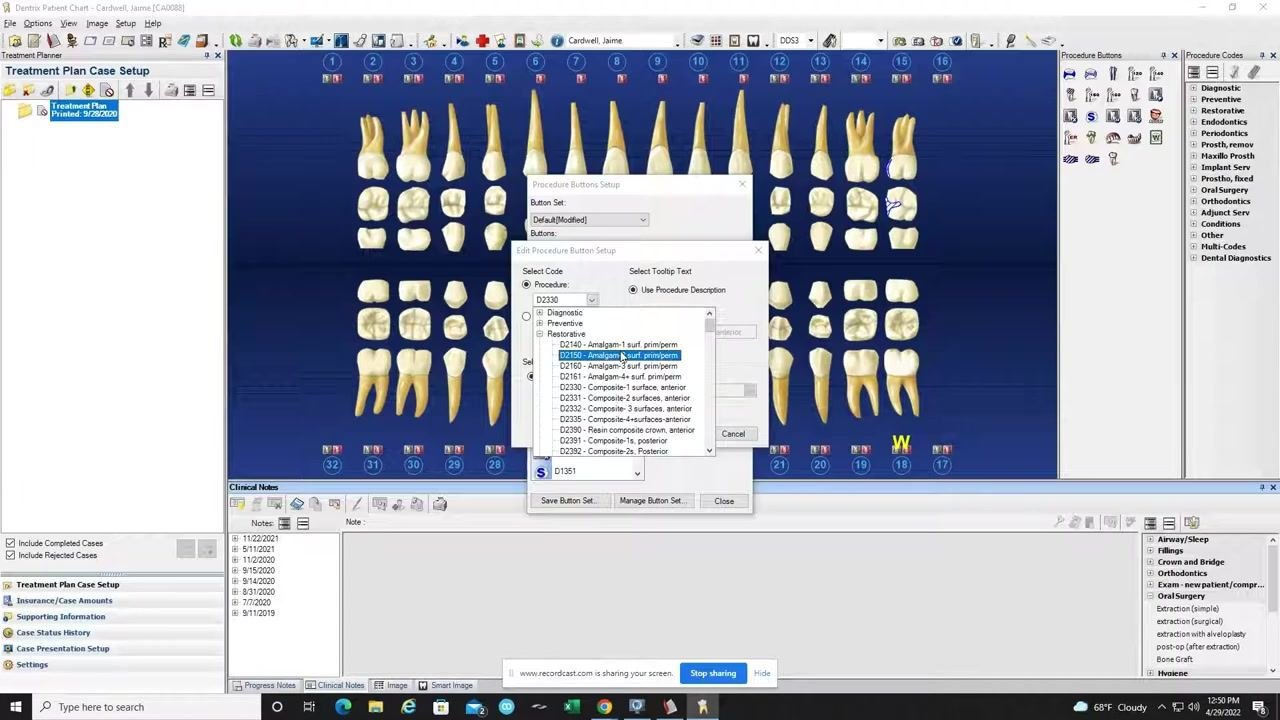
Click Edit to modify an existing procedure button, or New to create one. This opens the Edit Procedure Button Setup dialog, where the Select Code section lists procedure codes, including composite and amalgam options such as D2330 (Composite-1 surface, anterior), D2391 (Composite-1 surface, posterior), and D2140 (Amalgam-1 surf prim/perm).
In Dentrix, you only need to create one button to represent composite fillings rather than a separate button for every variation. Highlight any one of the composite codes, such as D2330, D2331, D2332, D2335, D2391, D2392, D2393, or D2394 — it does not matter which specific code you choose, since any of them will work for this purpose.
Set up an amalgam filling button
Repeat the same process for amalgam fillings. Even if your office no longer places amalgam fillings, keep an amalgam button available so you can chart existing restorations for new patients.
Select an amalgam code from the list, such as D2140, D2150, D2160, or D2161.
Save your button set
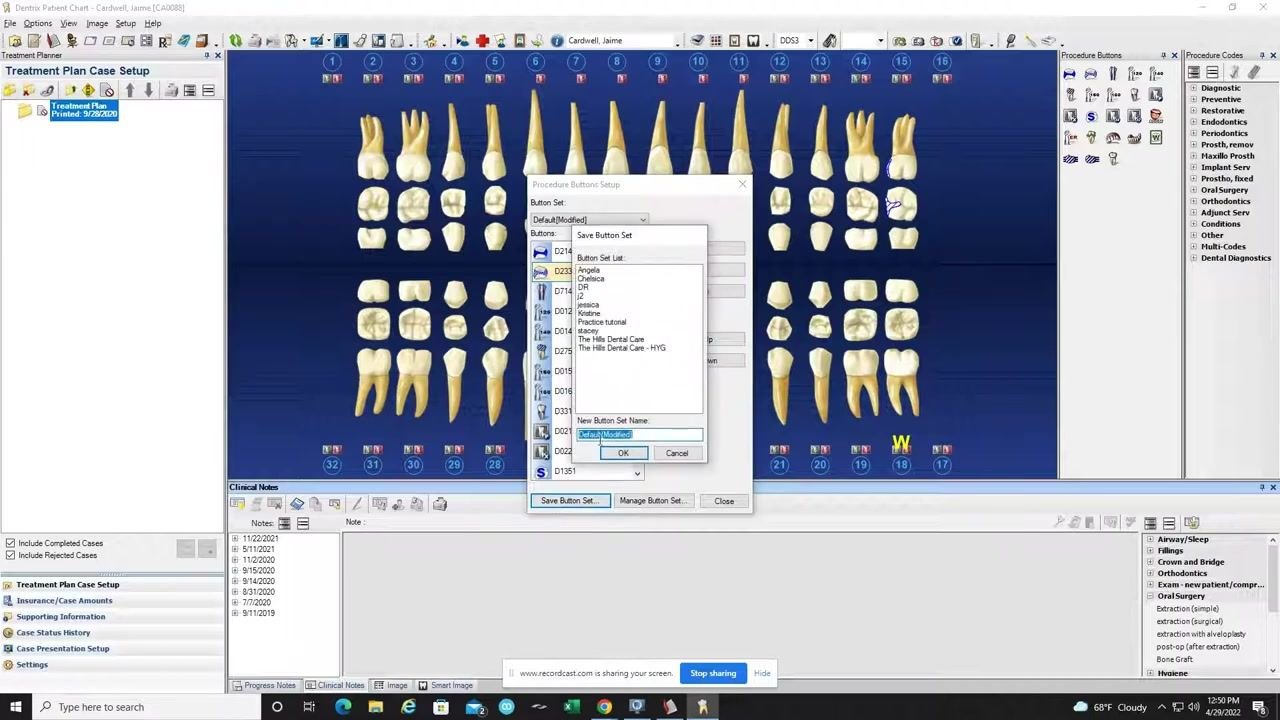
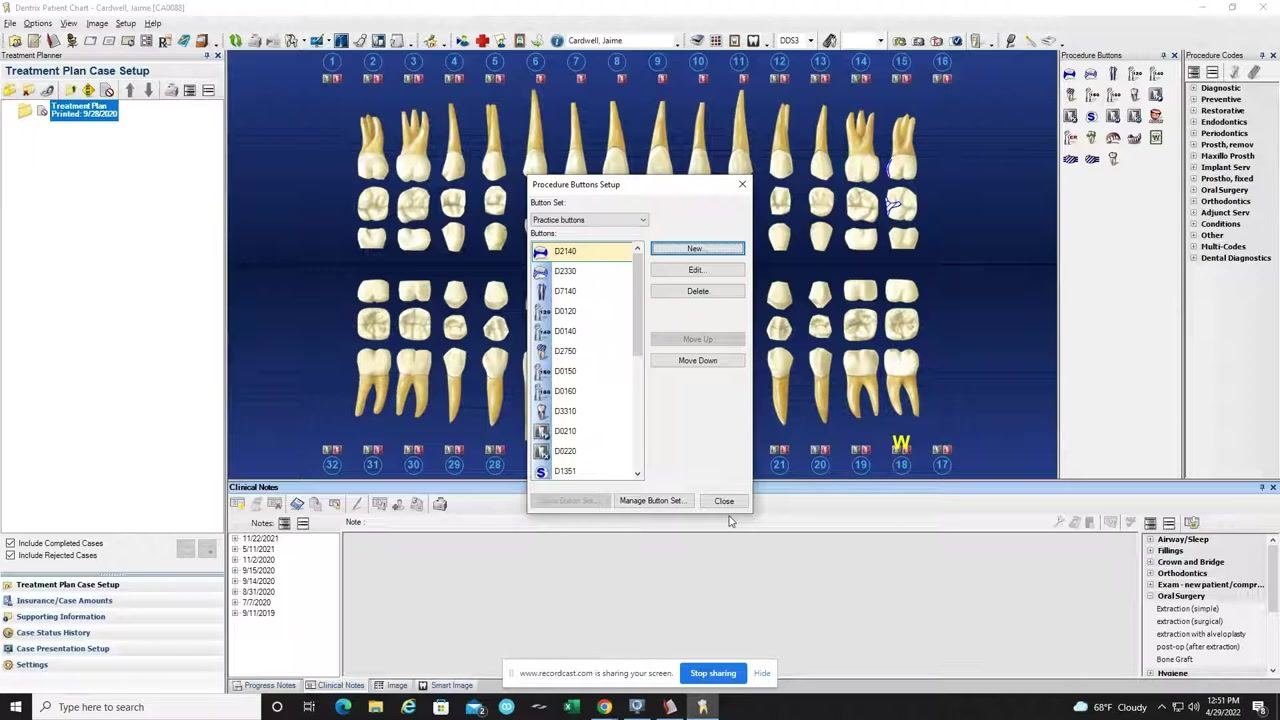
In the Procedure Buttons Setup window, click Save Button Set to open the Save Button Set dialog. In the New Button Set Name field, enter a name for your set — for example, Practice buttons. The dialog also displays a list of existing button sets for reference.
Click OK to save the new button set.
Verify the button set name change
After saving, confirm that the button set name at the top of the Procedure Buttons Setup window now reads Practice buttons. The list of procedure codes remains visible, confirming that your button set is intact and saved.
Apply the button set across your office
A saved button set can be used on every computer in your office, making it easy to maintain uniformity across workstations.
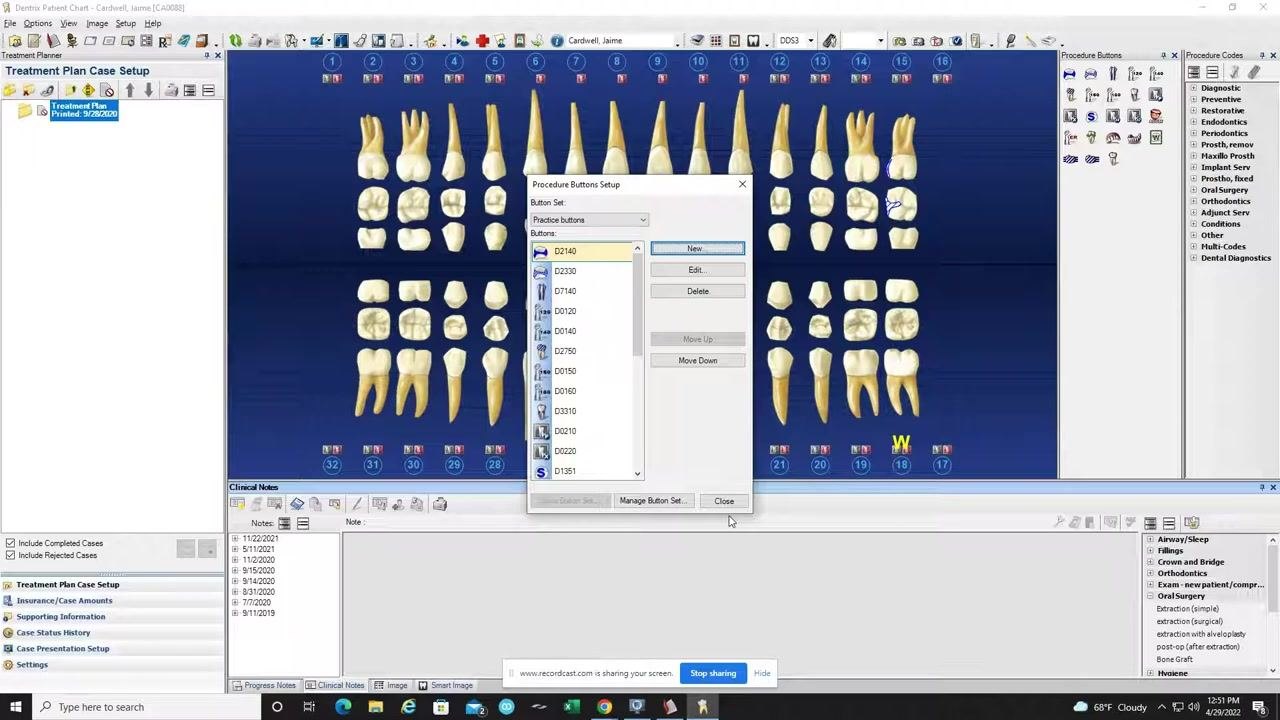
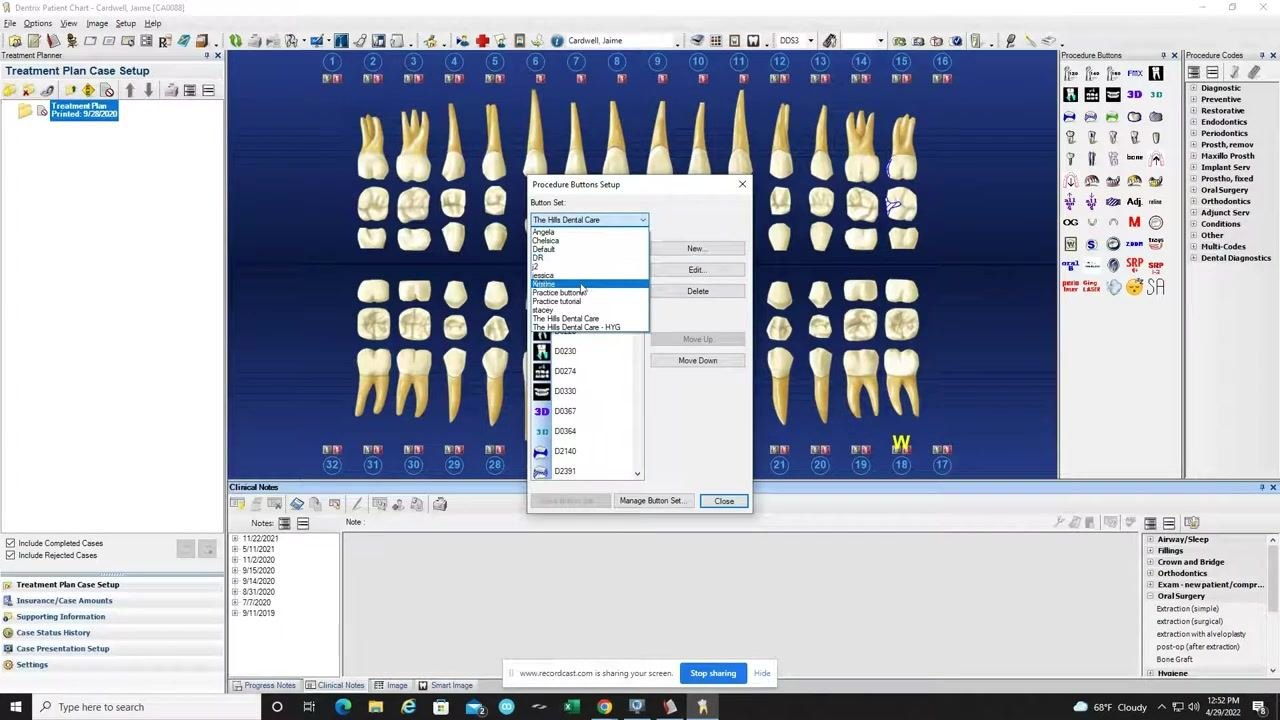
To standardize your setup, repeat the process on each computer in your office: open the Procedure Buttons Setup window on each workstation and select the newly created Practice buttons set from the dropdown list. This ensures all staff use the same procedure buttons for consistency and efficiency.
Confirm the button set is active
After selecting Practice buttons on a workstation, confirm that the procedure button list updates accordingly and displays the correct codes and configuration for your office.
Summary
You now know how to add procedure buttons in Dentrix, customize their tooltips and icons, organize them for an efficient workflow, and save a button set that can be applied consistently across every computer in your practice. With composite and amalgam buttons in place alongside your custom procedures, your team can chart treatments faster and more consistently.
Generation details: cost, quality tiers
Docsie billed 4,500 credits ($3.15) to analyze this 9-minute video at standard quality. The rewrite, template fill and Word/PDF exports were included. The same video at each quality tier:
| Quality | Frames sampled | Credits | Approx. cost |
|---|---|---|---|
| Draft | every 16-30 s | 2,250 | $1.57 |
| Standard (this guide) | every 8-15 s | 4,500 | $3.15 |
| Detailed | every 4-7 s | 9,000 | $6.30 |
| Ultra | every 1-3 s | 18,000 | $12.60 |
Credits priced at $0.70 per 1,000; plans include a monthly allowance. Enterprise customers on on-premise or bring-your-own-model deployments run this on their own inference and pay no per-video credits.
Generated by Docsie Video-to-Docs on 2026-10-12 from a 8-minute video. Screenshots are frames from the source video and belong to their creator, Dental Tech with Jaime, whose original is embedded above. If you own this video and want the guide removed or credited differently, contact us and we will act within one business day.