
How to Add a New Patient in Dentrix
Adding a new patient in Dentrix starts in the Family File module, where you create a head-of-household record and then add any additional family members under that account. This guide walks you through accessing the Family File, entering head-of-house information, confirming provider and demographic details, and adding extra family members to complete the patient record.
Video: Dentrix New Patient Registration by Roberta Wirth (2014). All credit for the demonstration goes to the creator; watch the original on YouTube. The written guide below was generated from this video by Docsie. Creator? Request a change or removal.
Adding a new patient in Dentrix starts in the Family File module, where you create a head-of-household record and then add any additional family members under that account. This guide walks you through accessing the Family File, entering head-of-house information, confirming provider and demographic details, and adding extra family members to complete the patient record.
Prerequisites
- You must be logged into Dentrix before beginning.
- A provider (dentist) must be available for selection; Dentrix will not let you save a new patient record without one assigned.
- Use only fictitious data (SSNs, phone numbers, etc.) when registering patients for training or demonstration purposes.
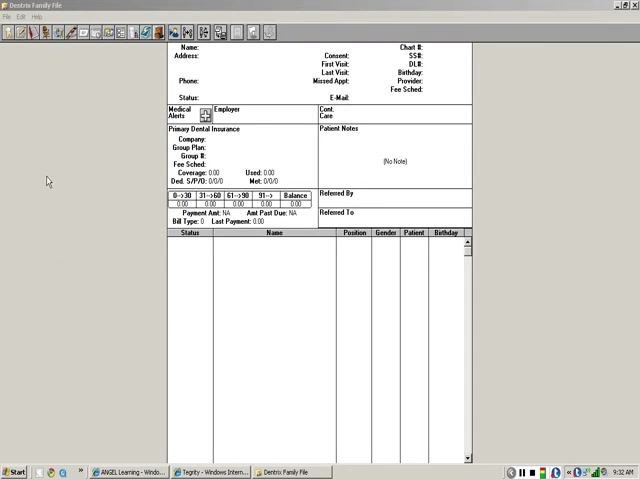
Open the Dentrix Family File
Locate the Family File icon on your icon bar. It appears as a file folder with two small people in the corner. Click this icon to open the Family File screen.
Open the new patient registration dialog
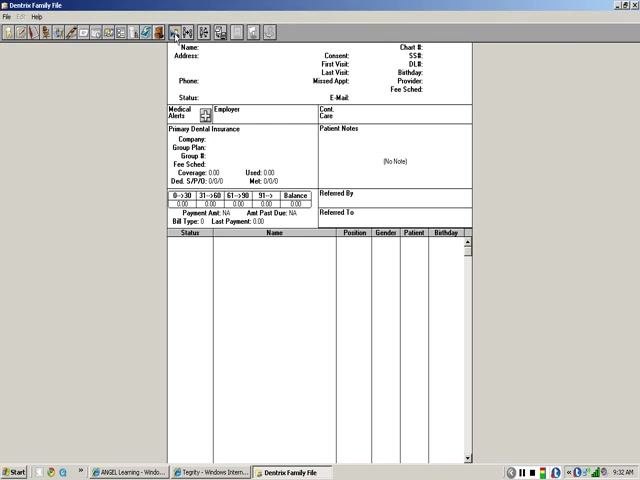
On the Family File screen, find the icon showing a blue boy figure, typically used to add a new patient or family. Click this icon to open the Select a Patient dialog.
Start a new family entry
In the Select a Patient dialog, click New Family to open the new patient registration form.
Enter head-of-house information
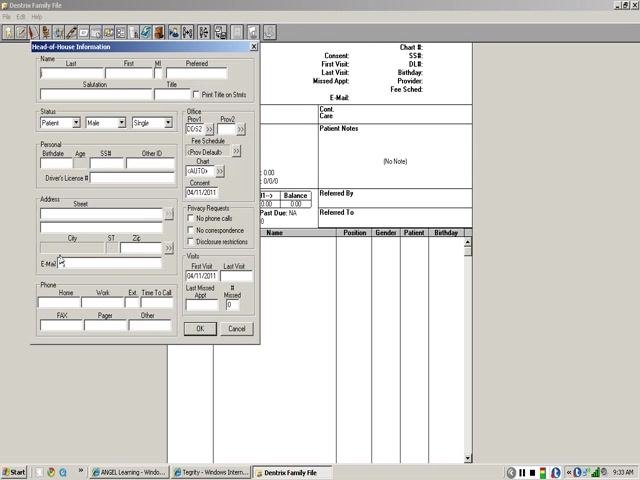
A Head-of-House Information window opens. Fill in the following fields as needed:
- Last Name – enter the patient's last name (for example, type "hunter" without capitalizing the "H"; Dentrix will capitalize it automatically)
- First Name – enter the patient's first name
- Preferred Name – enter a preferred name if applicable
- Status – select the appropriate status (for example, Patient, Male, Single)
- Other details – complete fields such as Age, SS#, Driver's License #, Address, City, State, Zip, Email, and phone numbers
Use the Tab key to move between fields; Dentrix assists with formatting as you go.
Set patient status and demographics
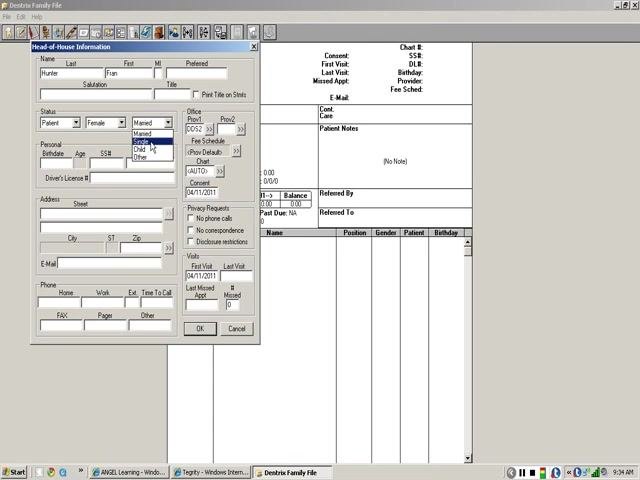
In the Status section of the Head-of-House Information window:
- Confirm Patient is selected in the first dropdown.
- Select the appropriate gender (for example, Female).
- In the marital status dropdown, choose the correct status. It defaults to Single; select Married if applicable.
Assign a provider
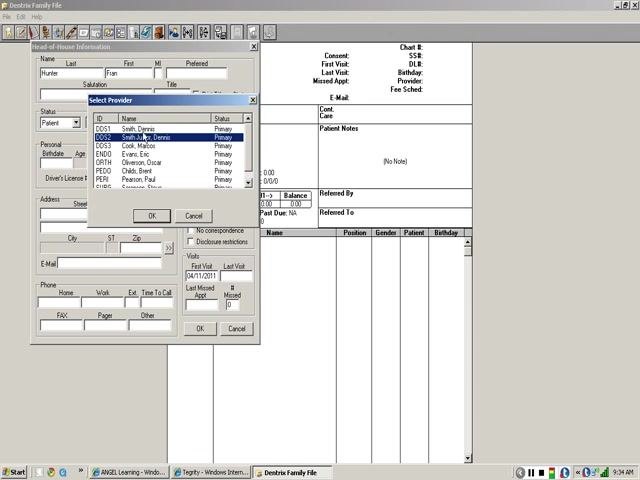
Locate the Provider field (often labeled Prov1). If a provider is not automatically filled in, click the box with two chevron marks next to the field to open the Select Provider dialog. Choose a provider with "DDS" in the name (for example, "DDS1 Smith, Dennis" or "DDS2 Smith, Marco, Dennis") and click OK to confirm.
Note: A provider selection is required. Dentrix will not allow you to register the patient without this field completed.
Enter the patient's birth date
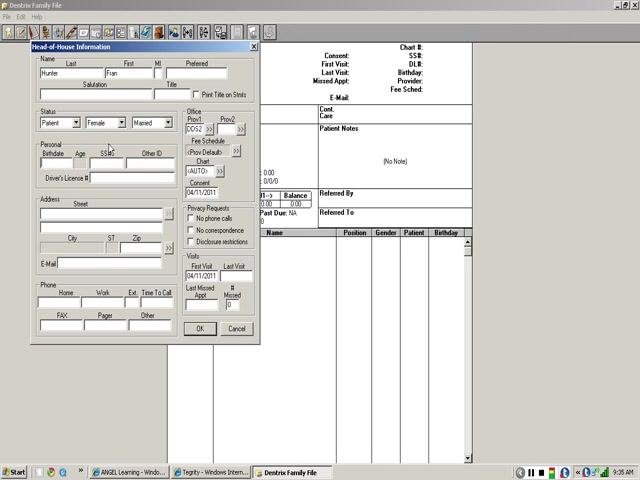
In the Personal section, locate the Birthdate field. Enter the date of birth using numbers only, with no slashes or dashes (for example, type "01012011" for January 1, 2011). Dentrix formats the date automatically.
Enter a Social Security number
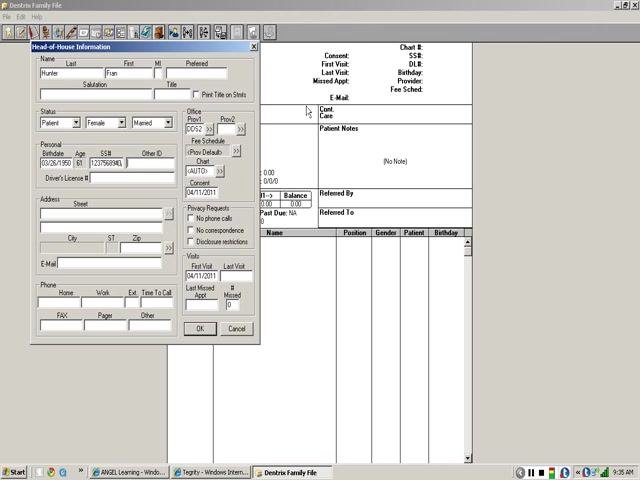
In the Personal section, locate the SS# field. Enter a fictitious eight-digit number (for example, 12345678). Never use a real SSN for demonstration or training purposes. Press Tab to move to the next field, and correct the entry if you type too many digits.
Enter the street address
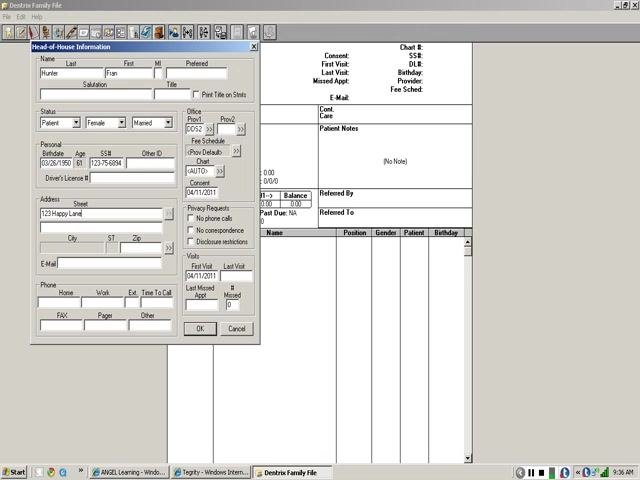
Click into the Street field under the Address section and type the patient's street address (for example, 123 Happy Lane). Press Tab to move to the next line.
If the patient has an apartment, suite, or unit number, enter it on the second address line that appears after pressing Tab. Otherwise, press Tab again to move to the City and Zip fields.
Enter the zip code
Type the patient's zip code in the Zip field (for example, 98367) and press Tab. If this zip code has already been used on this computer, Dentrix automatically fills in the corresponding city and state.
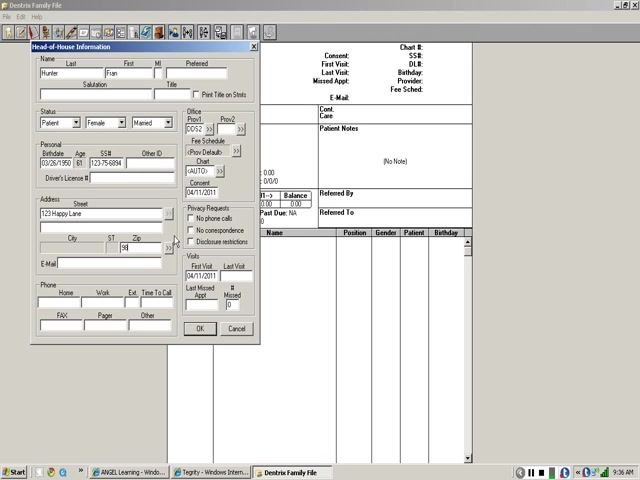
Handle an unrecognized zip code
If the zip code is not recognized, a New City Information dialog appears. Type the city name (for example, Port Orchard) in the City field, and select or type the correct state abbreviation in the ST field (for example, change the default UT to WA for Washington). Confirm the zip code is correct, then click OK to save the new city and state information.
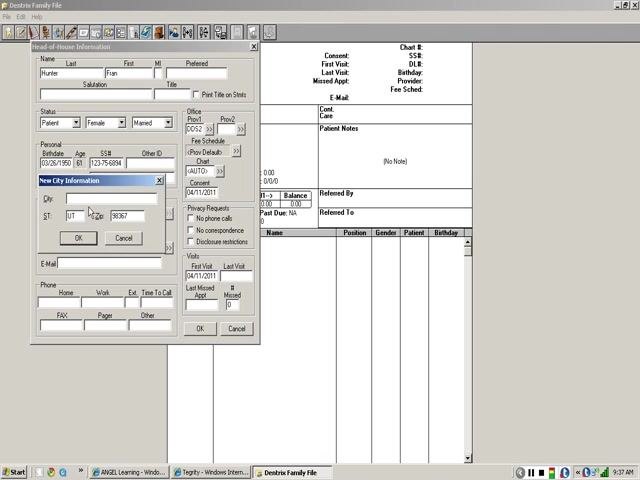
Skip the email field if needed
An email address is optional during patient registration. You can leave this field blank and continue; Dentrix does not require it to complete the record.
Enter a phone number
At least one phone number is required for each patient. Enter the number without dashes (for example, "3608765432"). Use test data only—never a real phone number for demonstration or training. After entering the number and pressing Tab, Dentrix formats it automatically.
Review and save the head-of-house record
Before saving, confirm that all required fields are complete: name, status, gender, marital status, provider, birthdate, SS#, address, and at least one phone number. Click OK to save the information and continue with registration.
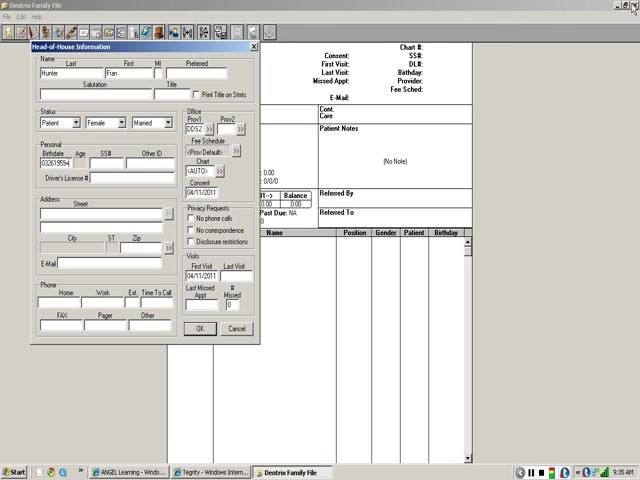
Verify the saved information
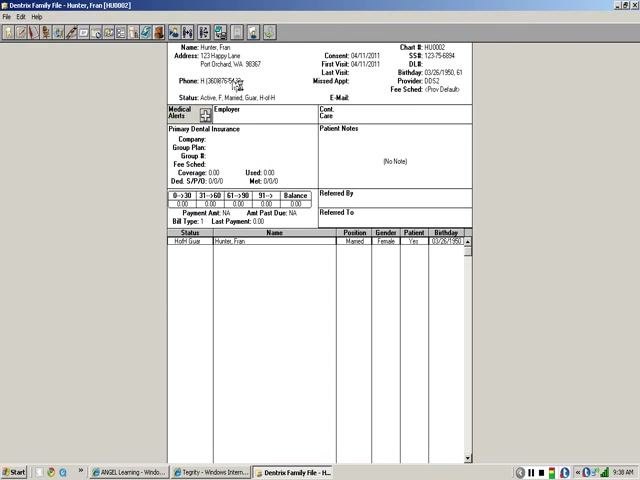
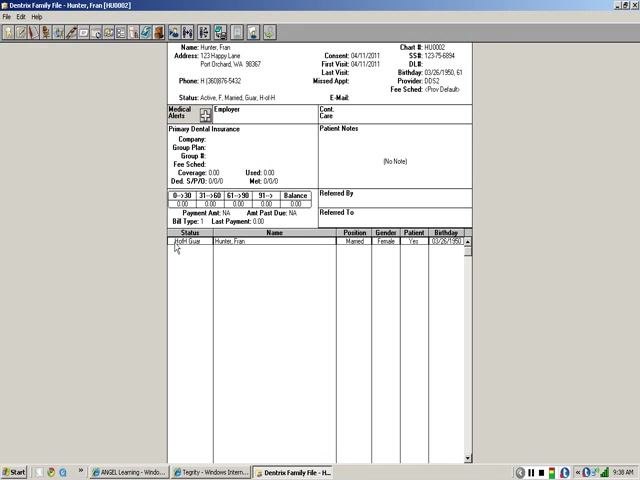
After saving, the main Family File window displays the entered information, for example:
- Name: Hunter, Fran
- Address: 1234 Happy Lane, Port Orchard, WA 98367
- Phone: 3608765432
Confirm that all details appear correctly in the summary pane.
Understand the head-of-household status
The first person entered into a new family file is always designated the "head of household" and acts as the guarantor for the account. This status appears in the main Family File window under the Status column as "HoH Guar" (Head of Household Guarantor). The summary pane displays the head-of-household's name, address, phone, and status.
Add a new family member
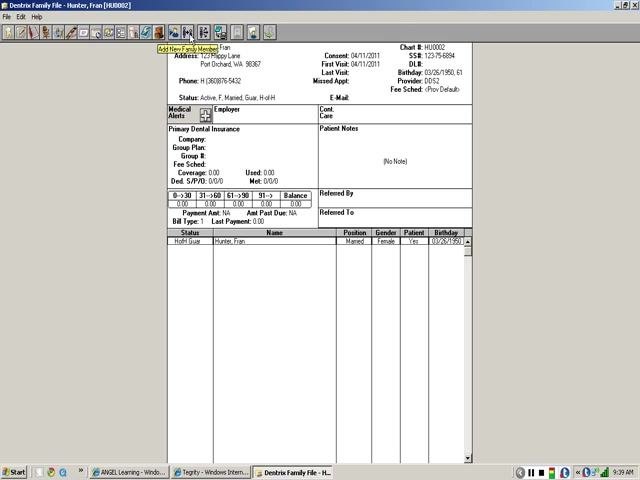
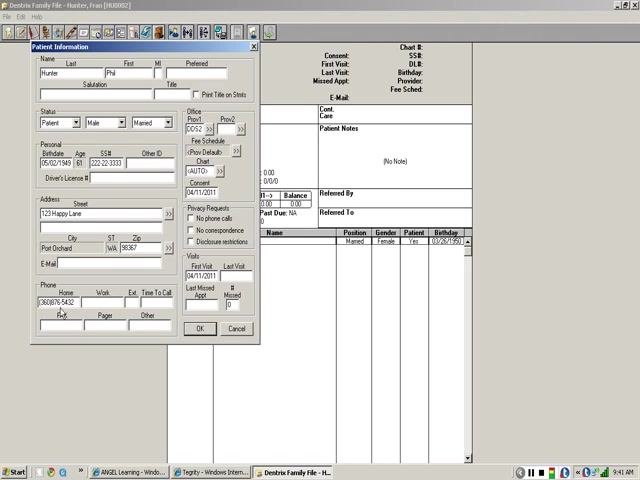
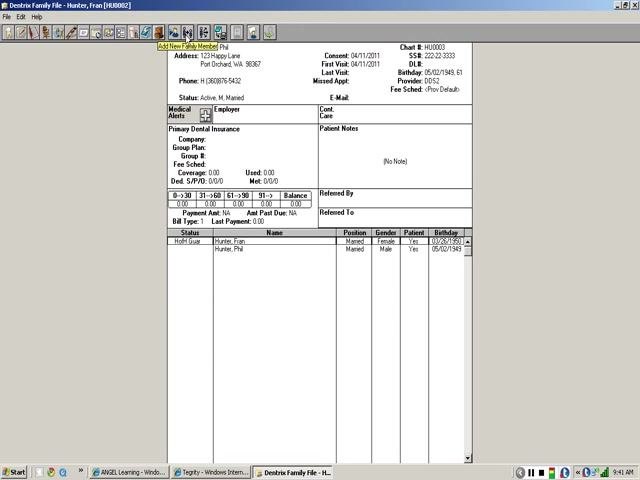
To add another person to the same family file, locate the icon next to the blue boy in the toolbar—this is the Add New Family Member button. Hovering over it displays a tooltip confirming its function. Click the button to open a new Patient Information dialog, pre-filled with the family's shared address and other details.
Enter the new family member's information
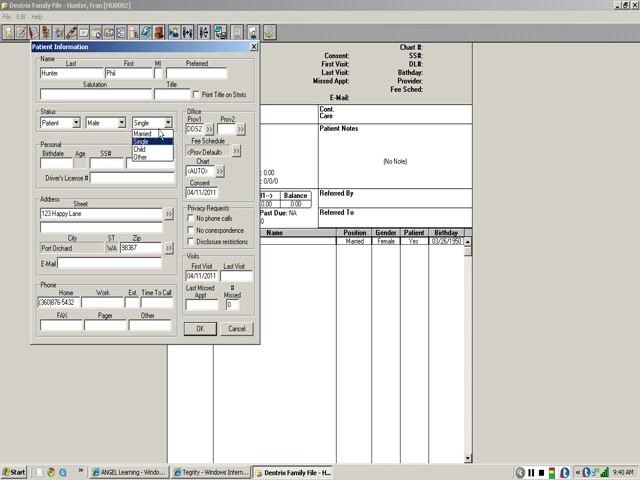
In the Patient Information dialog, complete the fields for the new family member:
- Last Name – enter the last name (pre-filled if it matches the head of household)
- First Name – enter the first name
- Status – select Patient
- Gender – select the appropriate gender
- Marital Status – select the appropriate status
- Birthdate – enter the appropriate date
- SS# – enter a fictitious number
- Address – confirm the pre-filled address is correct
- Phone – confirm the pre-filled number is correct
Additional fields such as Work, FAX, Pager, or Other are optional.
Verify and edit phone numbers
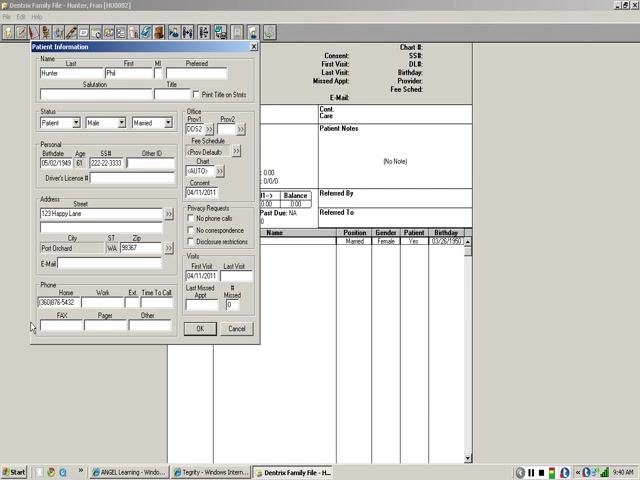
Review the Phone section in the Patient Information dialog. The Home number is pre-filled from the family's shared information. If you need to add a mobile or cell number, use the Other field, since there is no dedicated Cell field. You can also enter numbers for Work, FAX, or Pager if applicable. Not all phone fields are required, but having at least one accessible number is recommended.
Save the new family member's record
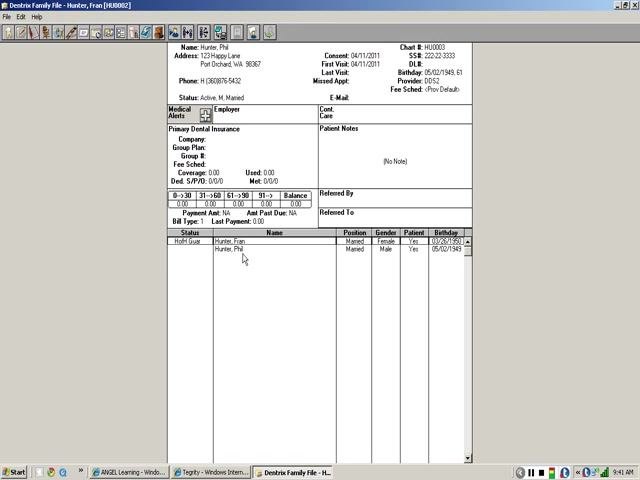
Double-check all entered information for accuracy, including name, status, gender, marital status, SS#, address, and phone numbers. Click OK to save the new family member's information and close the dialog. The Family File window updates to show the new member in the family list.
Verify the family member was added
After saving, confirm the new family member appears in the Family File list under the head-of-household. The list displays each member's status, name, position, gender, patient status, and birthday. The summary pane at the top shows the details of the currently selected member.
Add additional family members as needed
To add more family members, such as children, click the Add New Family Member button again and repeat the same entry process. The steps are identical for each additional member, regardless of age or relationship.
Summary
You have now learned how to add a new patient in Dentrix by creating a head-of-household record in the Family File, assigning a provider, entering demographic and contact details, and adding additional family members to the same account. Always use fictitious data for training and demonstration purposes, and double-check required fields—especially provider, birthdate, and phone number—before saving each record.
Generation details: cost, quality tiers
Docsie billed 5,500 credits ($3.85) to analyze this 11-minute video at standard quality. The rewrite, template fill and Word/PDF exports were included. The same video at each quality tier:
| Quality | Frames sampled | Credits | Approx. cost |
|---|---|---|---|
| Draft | every 16-30 s | 2,750 | $1.92 |
| Standard (this guide) | every 8-15 s | 5,500 | $3.85 |
| Detailed | every 4-7 s | 11,000 | $7.70 |
| Ultra | every 1-3 s | 22,000 | $15.40 |
Credits priced at $0.70 per 1,000; plans include a monthly allowance. Enterprise customers on on-premise or bring-your-own-model deployments run this on their own inference and pay no per-video credits.
Generated by Docsie Video-to-Docs on 2026-10-14 from a 10-minute video. Screenshots are frames from the source video and belong to their creator, Roberta Wirth, whose original is embedded above. If you own this video and want the guide removed or credited differently, contact us and we will act within one business day.