
How to Create a Treatment Plan in Dentrix
This guide walks you through how to create a treatment plan in Dentrix, from setting up a multi-phased treatment plan case to scheduling related appointments. You'll learn how to organize procedures into separate visits, attach treatment plan items to scheduled appointments, and verify that all details are accurate before saving.
Video: Creating a Multi-phased Treatment Plan in Dentrix by Mohammad Mokhtari. All credit for the demonstration goes to the creator; watch the original on YouTube. The written guide below was generated from this video by Docsie. Creator? Request a change or removal.
This guide walks you through how to create a treatment plan in Dentrix, from setting up a multi-phased treatment plan case to scheduling related appointments. You'll learn how to organize procedures into separate visits, attach treatment plan items to scheduled appointments, and verify that all details are accurate before saving.
Prerequisites
- An existing patient chart with a treatment plan already entered.
- Access to the Dentrix Patient Chart and Appointment Book modules.
Treatment Plan Case Setup
Open the patient chart
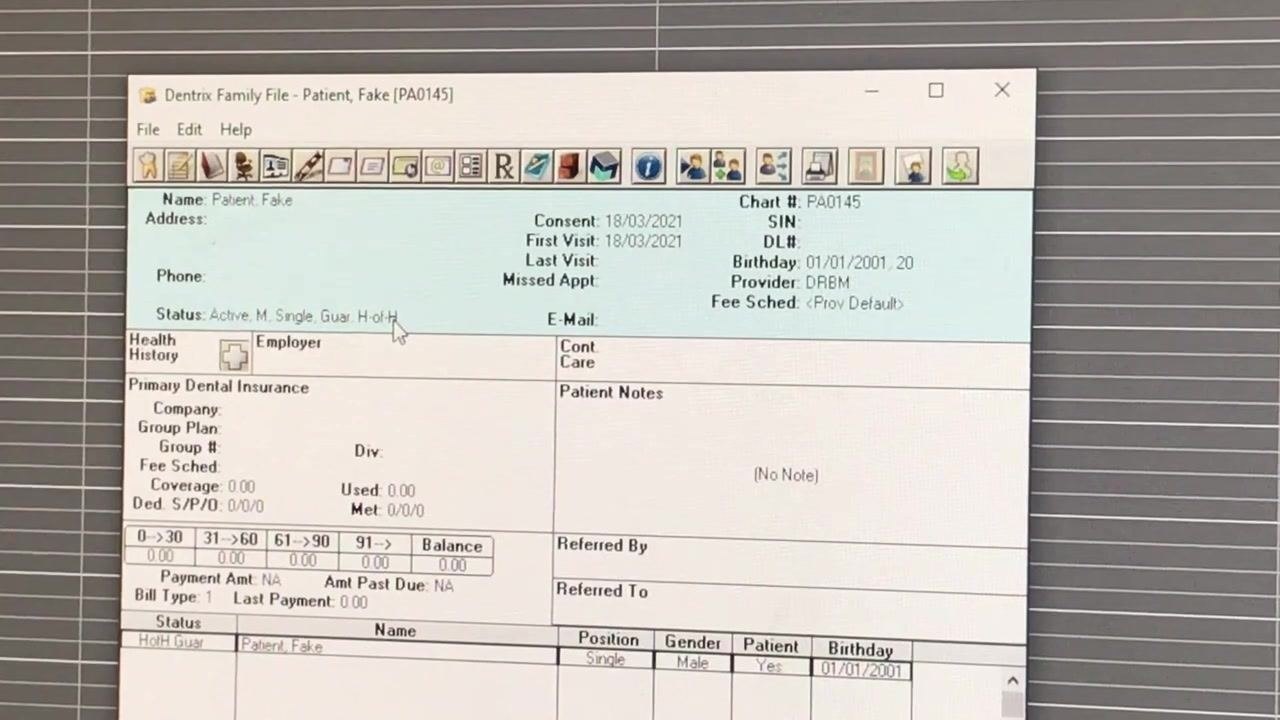
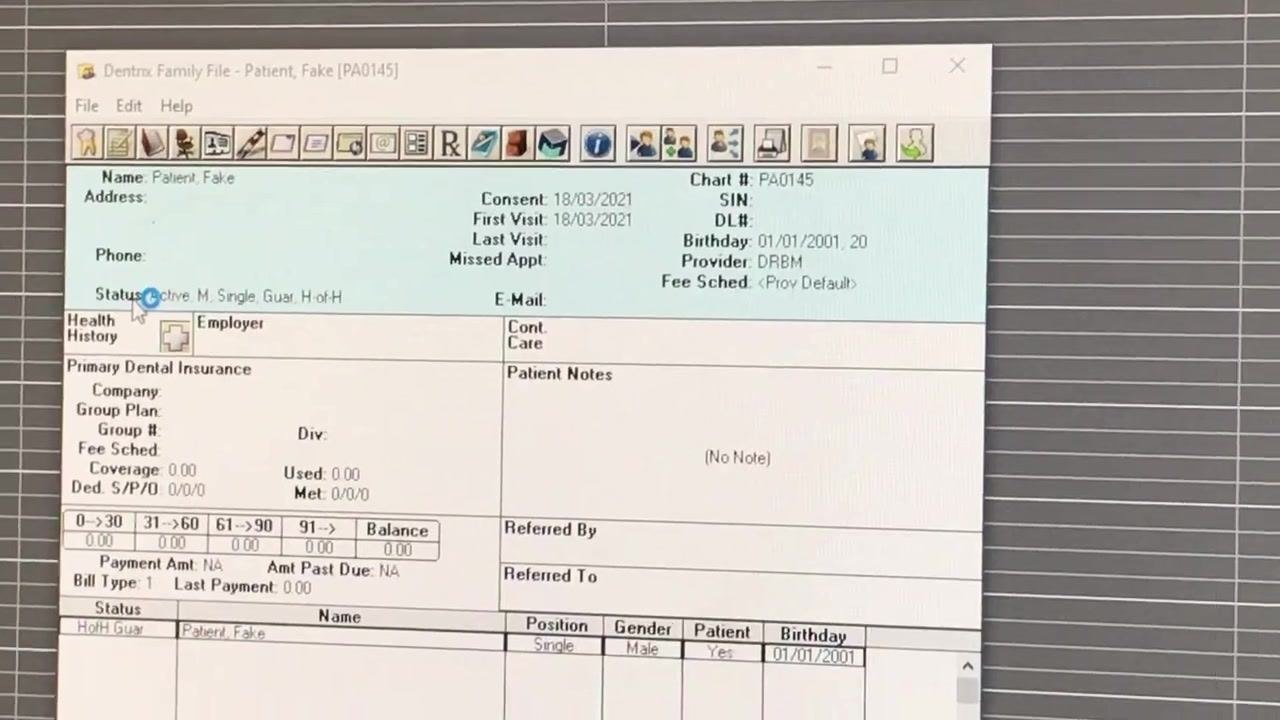
Locate and open the patient's chart. In this example, the patient is named "Fake Patient." Confirm you are in the correct patient file by checking the name and chart number at the top of the window, and review patient details such as consent date, first visit, provider, and status (for example, Active, Single, Guar: H-of-H).
Verify the existing treatment plan
Ensure that a treatment plan has already been entered for the patient. The patient's chart should display the treatment plan section for you to work with.
Access the Treatment Plan Case Setup panel
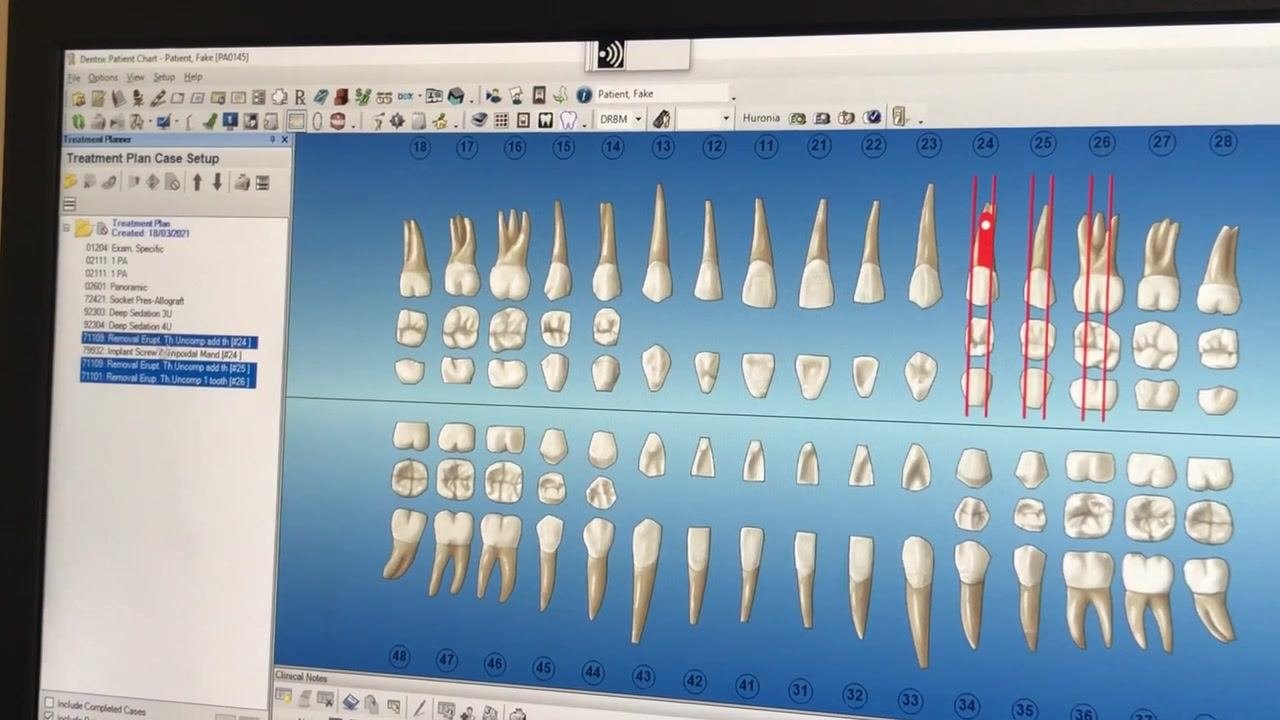
On the left side of the screen, locate the Treatment Plan Case Setup panel. Click the plus sign (+) next to Treatment Plan to expand it and view the treatment plan details.
Review and highlight treatment items
In the Treatment Plan Case Setup panel, review the list of planned procedures. Highlight the procedures for the first treatment appointment. In this example, select:
- Extraction of teeth 2-4, 2-5, and 2-6 (codes: 71109, 71109, 71101)
- Allograft placement (code: 72421)
- Sedation (codes: 92304, 92304)
Assign procedures to the first visit
With the desired procedures highlighted, right-click on the selection and choose Move to Visit One from the context menu. Confirm that Visit One is created and that the selected procedures are now grouped under it.
Assign procedures to the second visit
For the second visit, select the procedure for implant placement (code: 79932). If you want to add the allograft to this visit as well, highlight the allograft procedure (code: 72421). Right-click and select Move to Visit Two to assign these procedures.
Include panoramic and PA X-rays in the treatment plan
In the Treatment Plan Case Setup panel, highlight the procedures for a panoramic X-ray (code: 02601) and a periapical (PA) X-ray (code: 02111). Assign the panoramic X-ray to Visit Two and the PA X-ray to Visit Three. Confirm that the treatment plan now displays three visits, each with the appropriate procedures grouped under them.
Scheduling Appointments
Open the Appointment Book
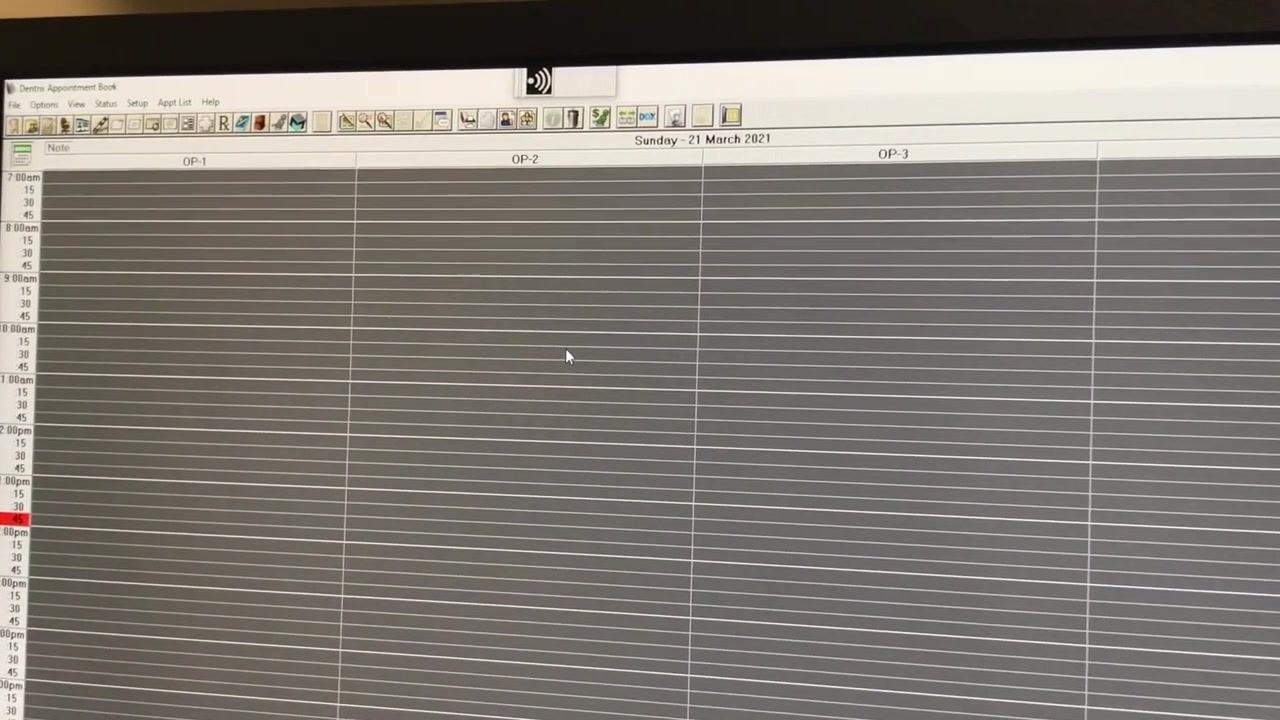
Navigate to the Dentrix Appointment Book to begin scheduling appointments for the patient. The Appointment Book displays available operatories (OP-1, OP-2, OP-3) and time slots for the selected date (for example, Sunday, 21 March 2021).
Open Appointment Information for the patient
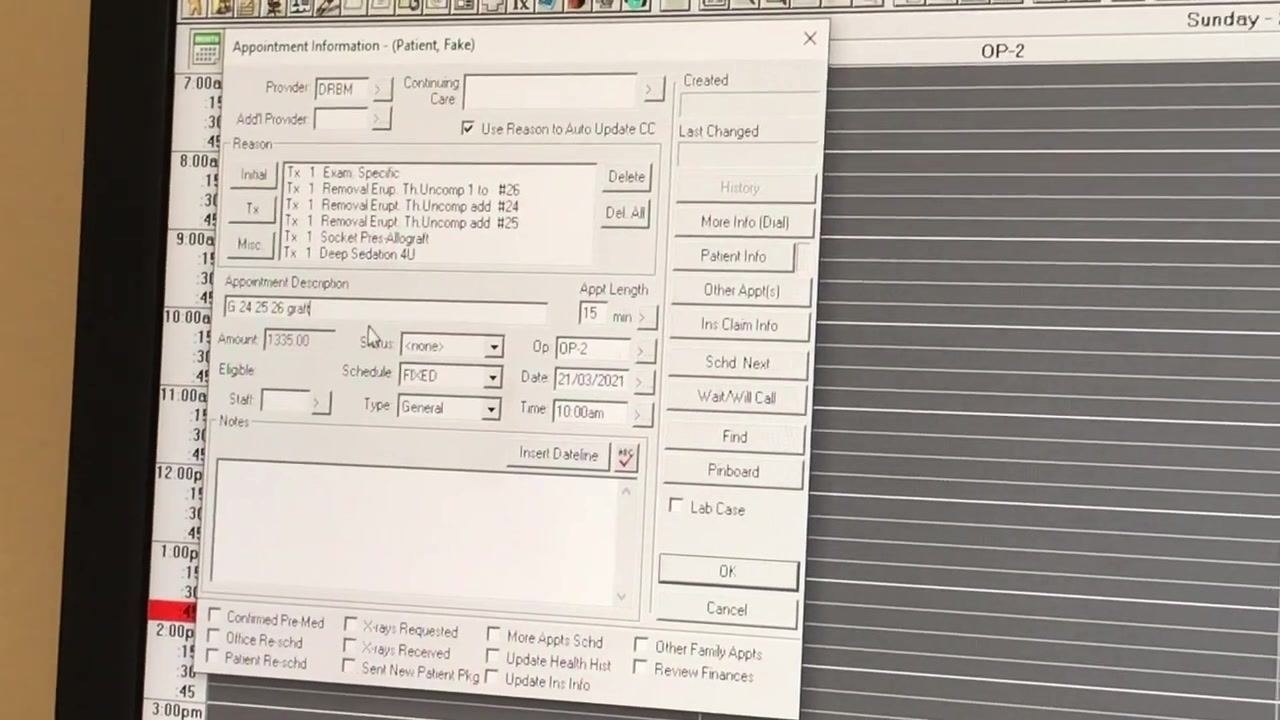
Double-click the desired time slot to open the Appointment Information window for the patient "Fake." Confirm the provider (for example, DRBM), operatory (for example, OP-2), date (for example, 21/03/2021), and time (for example, 10:00am).
Enter the appointment reason and description
In the Appointment Description field, enter the procedures for the first visit — for example, type G 24 25 26 graft. Ensure the correct operatory, date, and time are selected.
Attach treatment plan procedures to the appointment
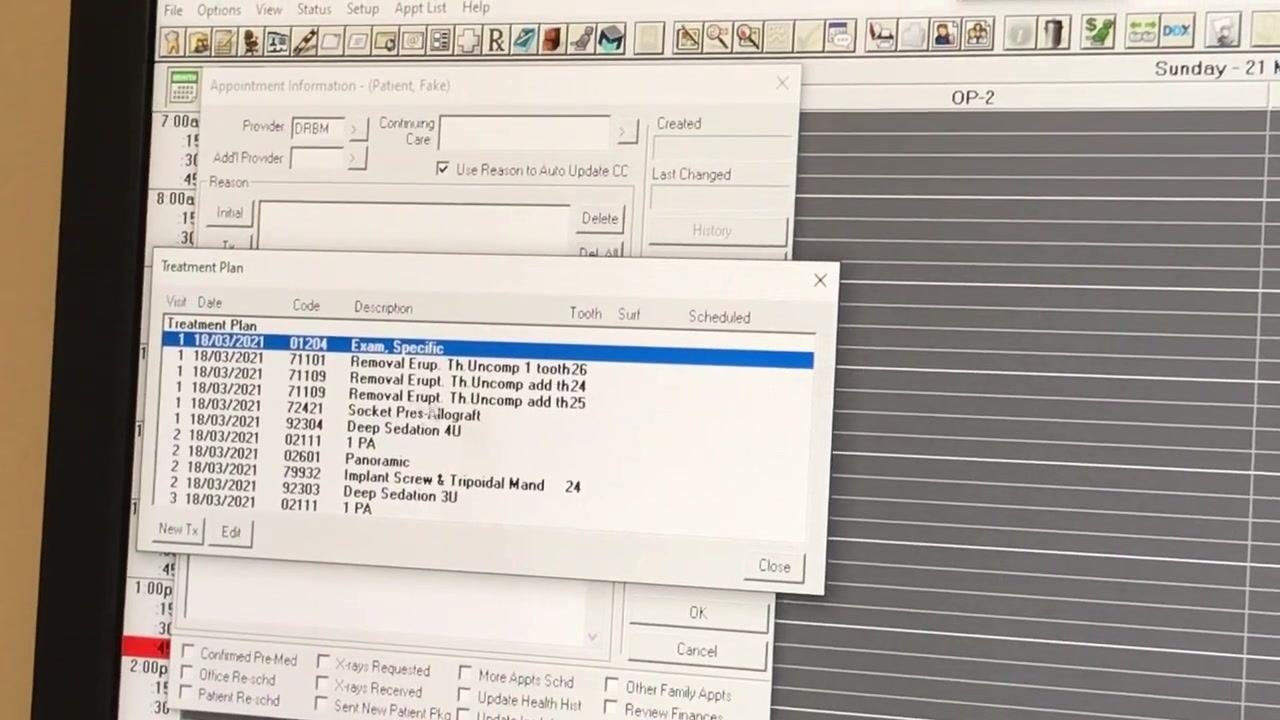
Click the Tx (Treatment Plan) button to open the list of planned procedures. In the Treatment Plan window, highlight the procedures for the first visit:
- Exam, Specific (01204)
- Removal Erupt. Th. Uncomp 1 tooth 26 (71101)
- Removal Erupt. Th. Uncomp add th 24 (71109)
- Removal Erupt. Th. Uncomp add th 25 (71109)
- Socket Pres-Allograft (72421)
- Deep Sedation 4U (92304)
Click Close to attach these procedures to the appointment.
Confirm the procedures are attached
Verify that the selected procedures now appear in the Reason section of the Appointment Information window. The appointment description should list all attached procedures, and the total amount (for example, 1335.00) should be calculated.
Save the appointment
Review all details for accuracy, including procedures, date, time, operatory, and provider. Click OK to save the appointment for the first visit.
Adding Implant and CI Appointments
Start a new appointment for the implant procedure
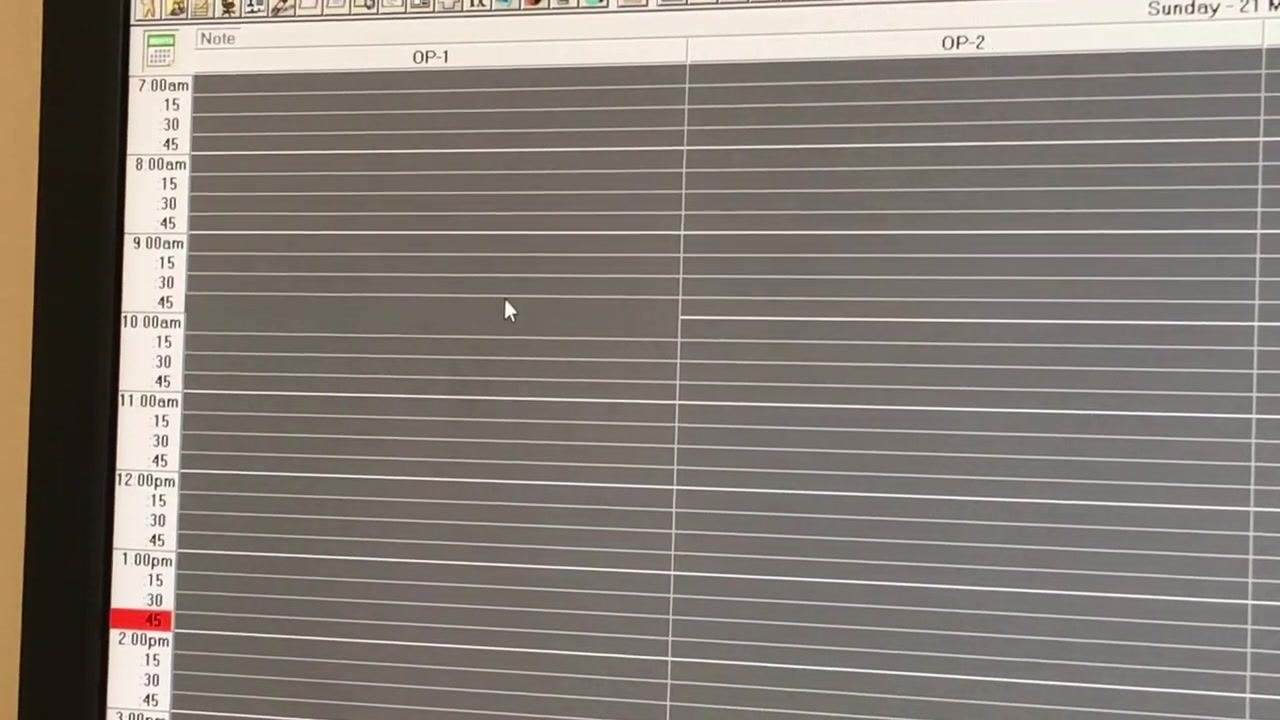
In the Appointment Book, select an available time slot for the new implant appointment. Double-click the desired slot to open the Appointment Information window for the patient.
Enter appointment details for the implant
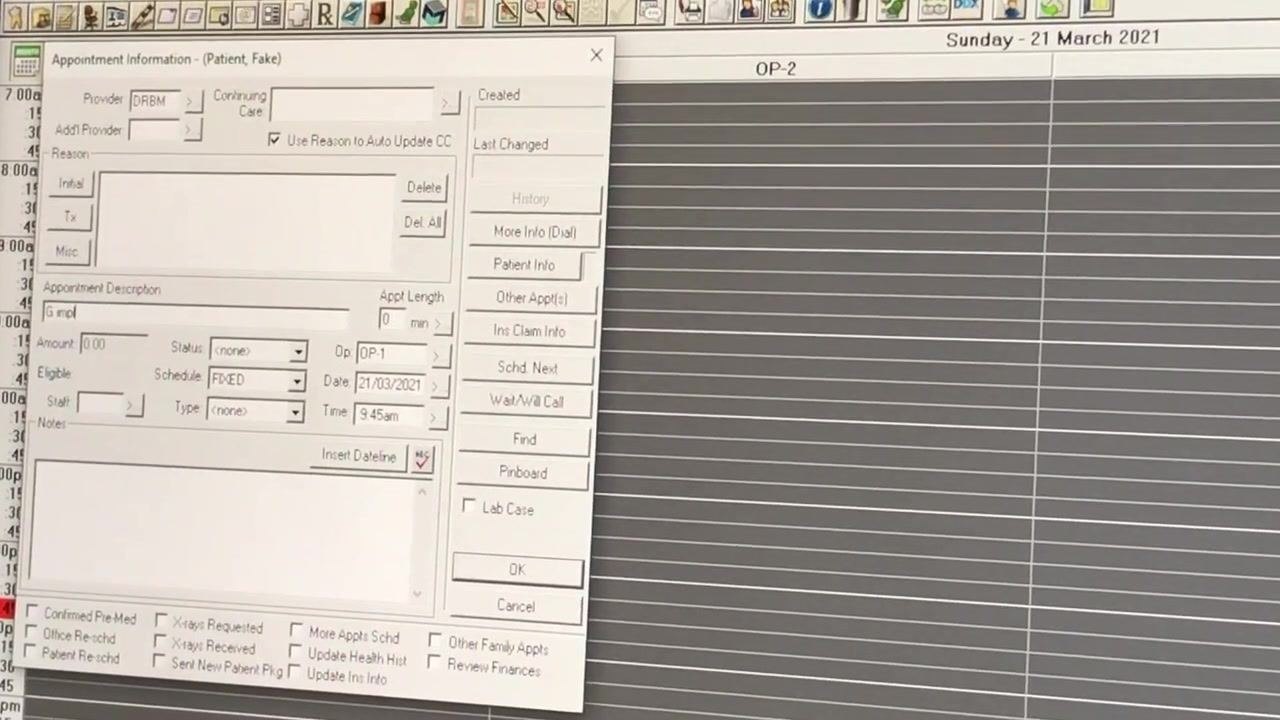
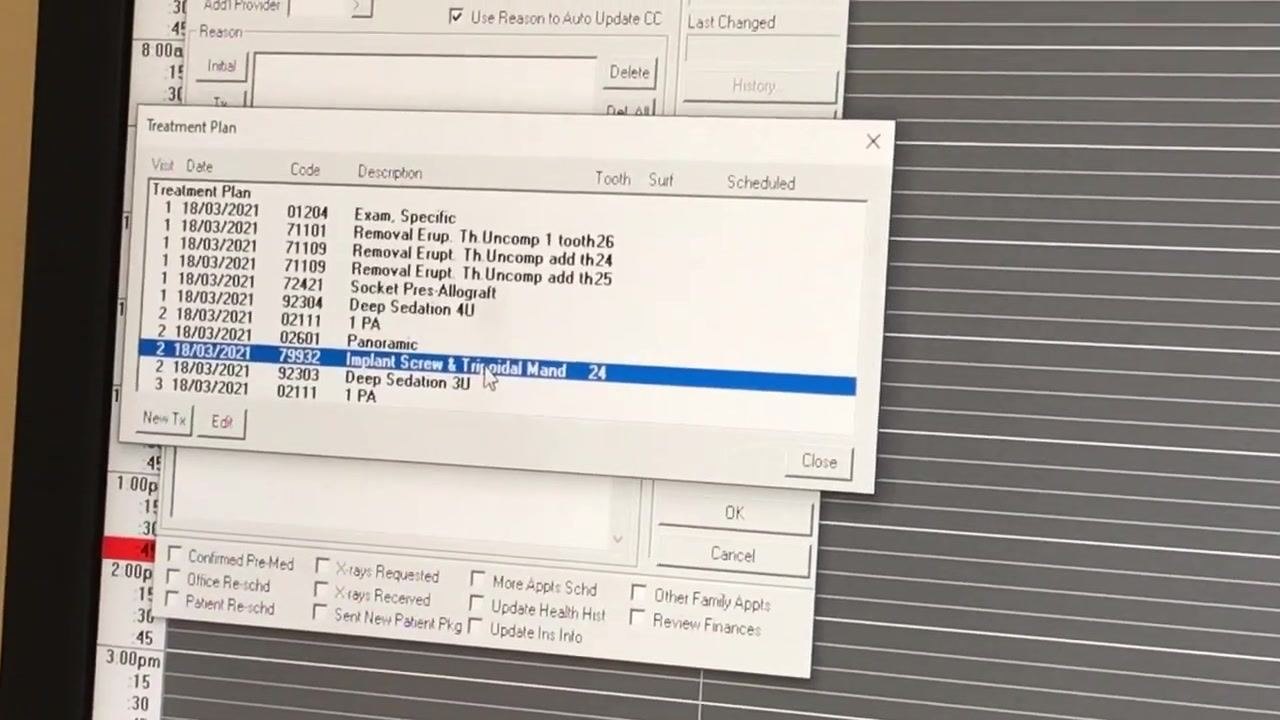
In the Appointment Information window, enter the description G implant. Set the provider (for example, DRBM), operatory (for example, OP-1), date (for example, 21/03/2021), and time (for example, 9:45am). Leave the amount at 0.00 for now — this updates after you attach procedures.
Verify attached procedures and update the description
Confirm that the selected procedures now appear in the Reason section of the Appointment Information window. Update the appointment description to G implant 24. Ensure the amount field updates to reflect the total for the attached procedures (for example, 2760.00), and set the appointment length (for example, 15 min), operatory, date, and time as needed.
Save the implant appointment
Review all details for accuracy, then click OK to save the appointment.
Schedule the CI appointment and add a PA
If a warning appears indicating the patient has an unscheduled or broken appointment, select No to continue scheduling.
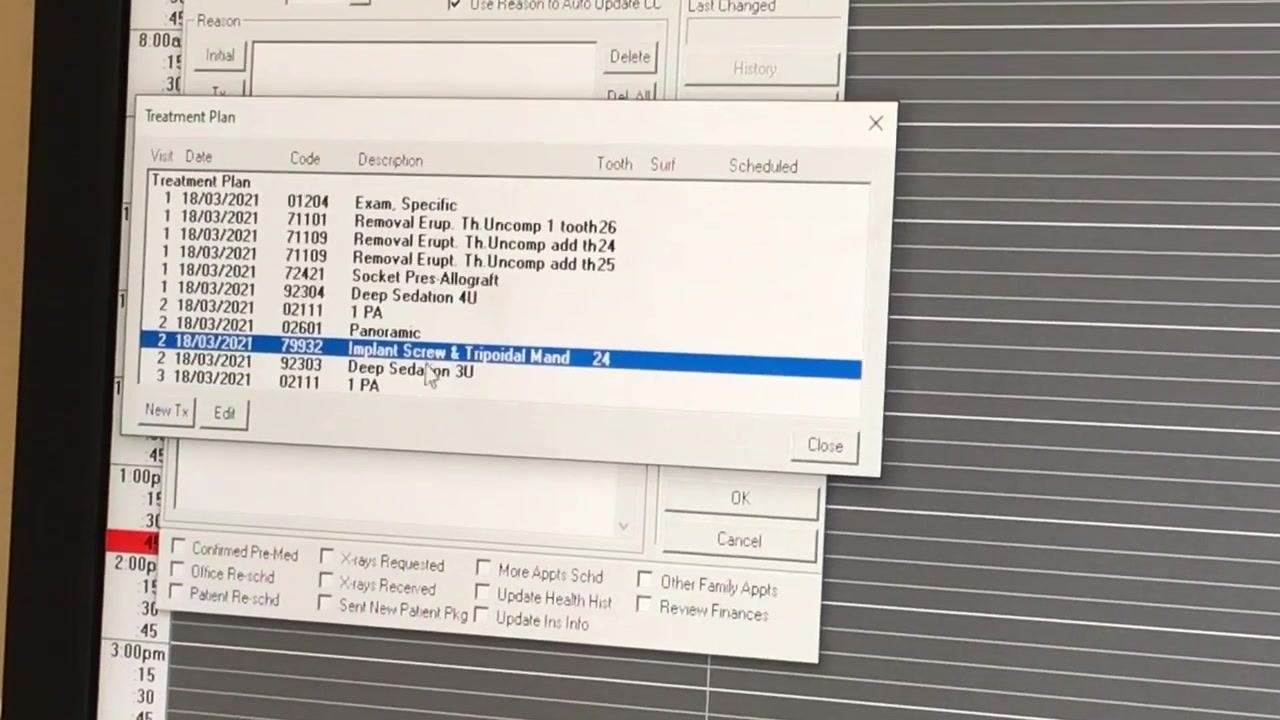
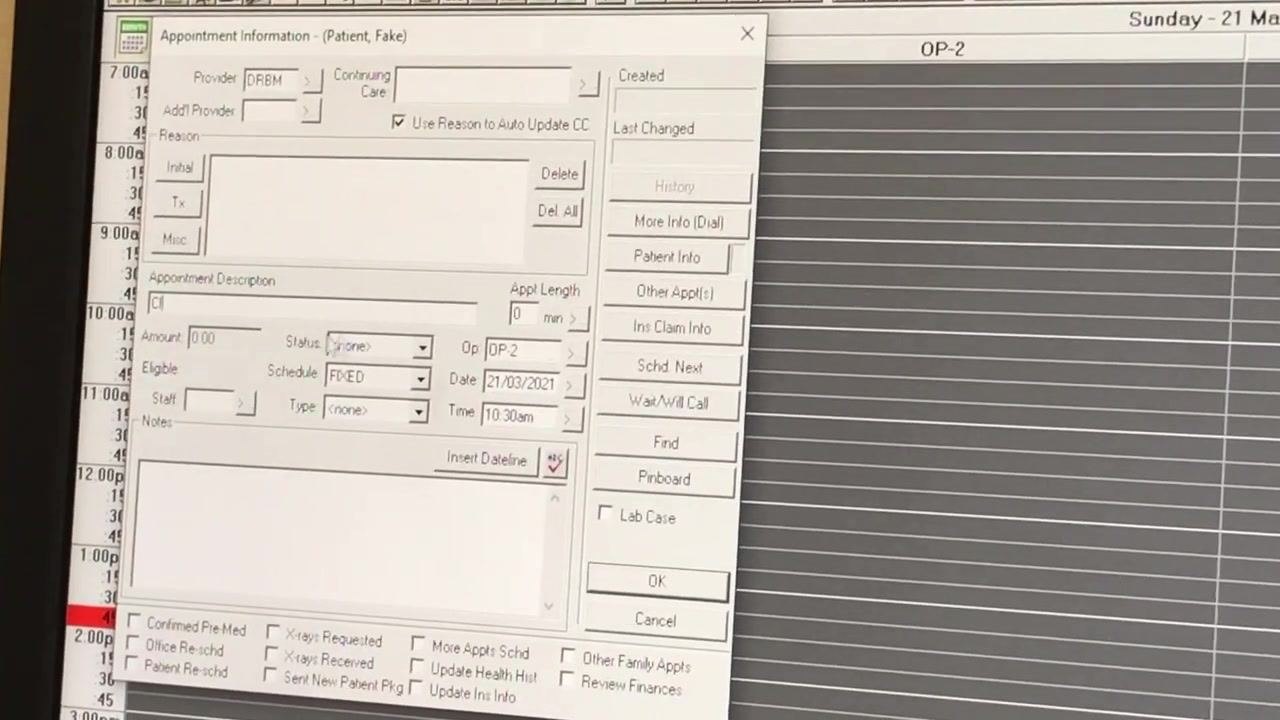
In the Appointment Book, select a new time slot for the CI appointment (for example, OP-2, 10:30am). Double-click to open the Appointment Information window, enter CI in the Appointment Description field, and set the provider, operatory, date, and time as appropriate.
Attach the PA procedure to the CI appointment
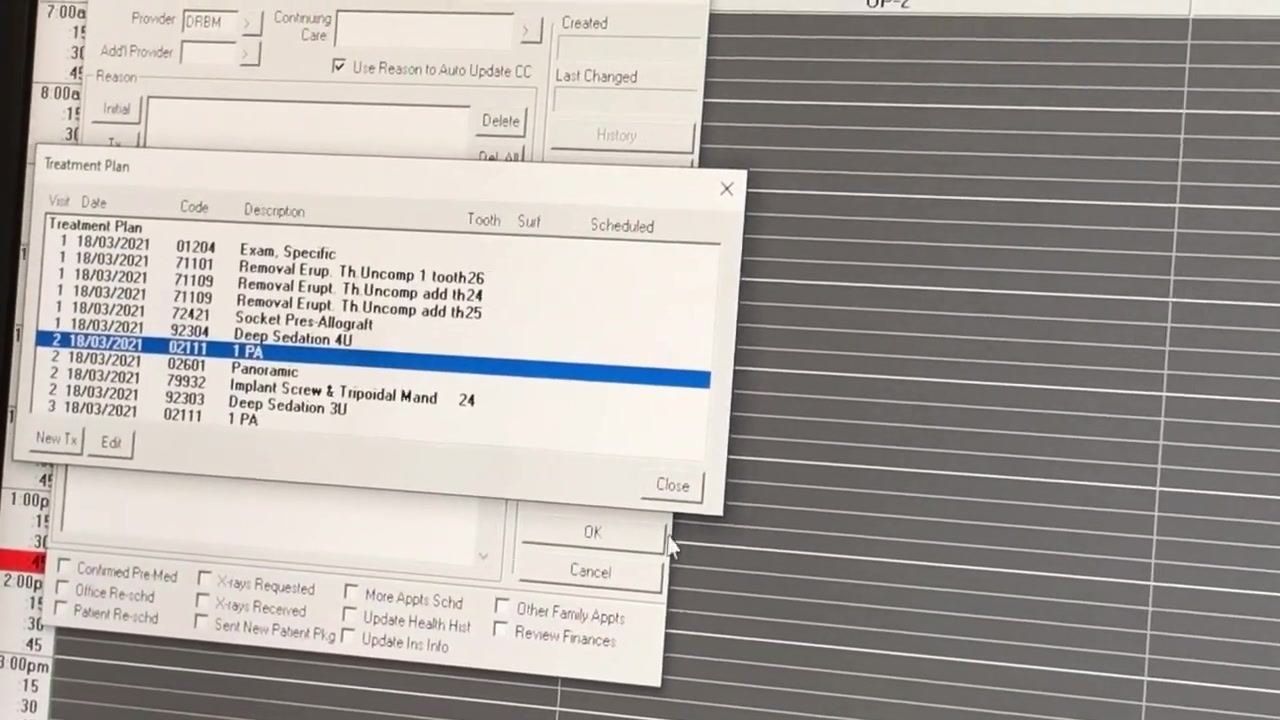
Click the Tx (Treatment Plan) button to open the Treatment Plan window. Highlight the PA procedure (code: 02111) for Visit Three, then click Close to attach it to the CI appointment.
Finalize and save the CI appointment
Confirm that the PA procedure is listed in the Reason section. Review all appointment details for accuracy, then click OK to save the CI appointment.
Summary
Now that you know how to create a treatment plan in Dentrix, keep the following in mind when working through your own cases:
- Ensure each appointment has the correct procedures attached and that all details (provider, operatory, date, time, and amount) are accurate.
- Repeat these steps for any additional visits or procedures required by the treatment plan.
Generation details: cost, quality tiers
Docsie billed 2,500 credits ($1.75) to analyze this 5-minute video at standard quality. The rewrite, template fill and Word/PDF exports were included. The same video at each quality tier:
| Quality | Frames sampled | Credits | Approx. cost |
|---|---|---|---|
| Draft | every 16-30 s | 1,250 | $0.88 |
| Standard (this guide) | every 8-15 s | 2,500 | $1.75 |
| Detailed | every 4-7 s | 5,000 | $3.50 |
| Ultra | every 1-3 s | 10,000 | $7.00 |
Credits priced at $0.70 per 1,000; plans include a monthly allowance. Enterprise customers on on-premise or bring-your-own-model deployments run this on their own inference and pay no per-video credits.
Generated by Docsie Video-to-Docs on 2026-10-12 from a 4-minute video. Screenshots are frames from the source video and belong to their creator, Mohammad Mokhtari, whose original is embedded above. If you own this video and want the guide removed or credited differently, contact us and we will act within one business day.