
How to Create an Eib in Workday
An Inbound EIB (Enterprise Interface Builder) lets you load data into Workday in bulk, using a spreadsheet template instead of entering records one at a time. This guide walks you through how to create an EIB in Workday, from setting up the integration system through generating, populating, and uploading the spreadsheet template.
Video: Configured Workday Integration EIB System | Workday EIB Tutorial | Cyberbrainer by CyberBrainer (2024). All credit for the demonstration goes to the creator; watch the original on YouTube. The written guide below was generated from this video by Docsie. Creator? Request a change or removal.
An Inbound EIB (Enterprise Interface Builder) lets you load data into Workday in bulk, using a spreadsheet template instead of entering records one at a time. This guide walks you through how to create an EIB in Workday, from setting up the integration system through generating, populating, and uploading the spreadsheet template.
Prerequisites
- You need authorized access to run or configure EIB processes. Not every Workday user has this functionality available.
- You should know which Web Service Operation you want to use (for example, Create Position (Web Service)).
- If you plan to deliver data via SFTP, have your SFTP host, port, and credentials ready, and confirm the endpoint is whitelisted on your network.
Creating the inbound EIB
-
Navigate to the EIB creation screen Use the search bar at the top of Workday to search for "create EIB," then select the appropriate EIB template or process from the results.
-
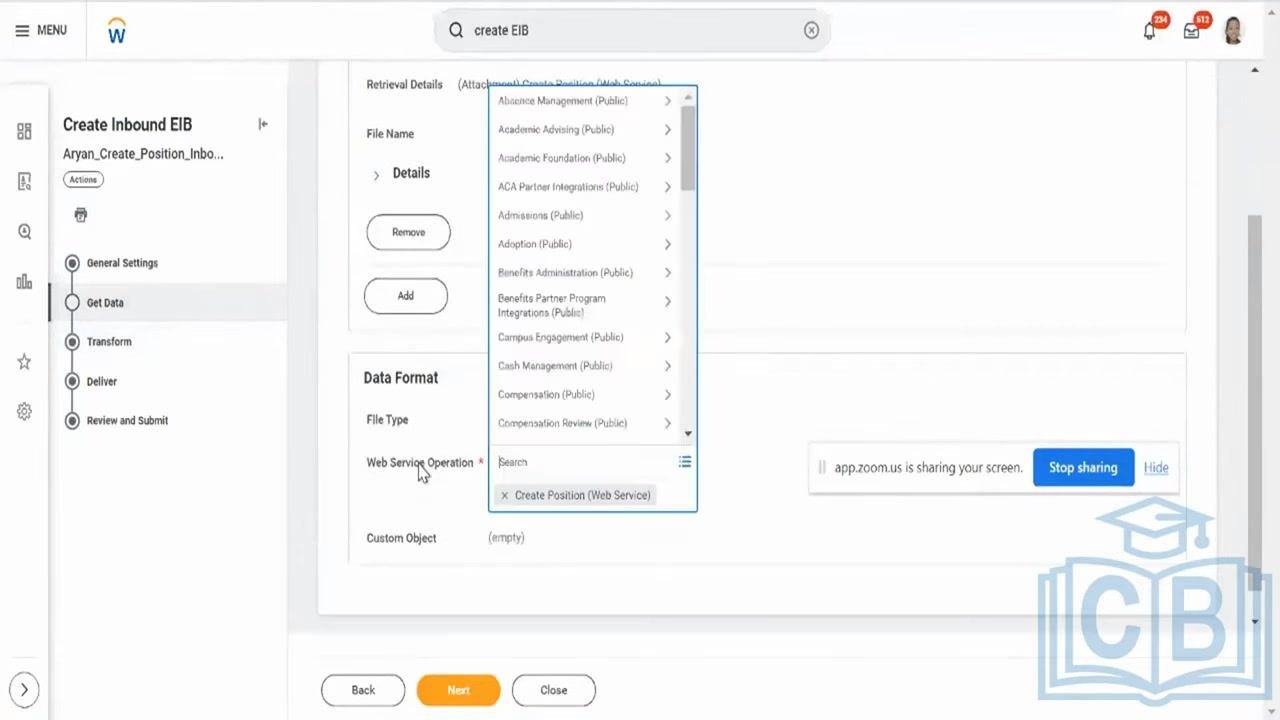
Enter the EIB details On the Create Inbound EIB screen, enter a unique File Name for your EIB (for example,
Aryan_Create_Position_Inbo...). Optionally specify a value in Restricted To if you want to limit access. Under Data Format, set File Type toWeb Service Spreadsheet Templateand select your Web Service Operation (for example,Create Position (Web Service)). Leave Custom Object empty unless you need one. You do not need to modify other default options unless your process requires it.

-
Review the security groups Confirm that the Initiating Action matches your selected Web Service Operation (for example,
Create Position (Web Service)), and review the list of associated security groups to ensure appropriate access. -
Confirm the Transform step settings Click Next to move through the setup. On the Transform step, leave Transformation Type set to
Template Model. You can leave the remaining transformation fields (Template Model from Web Service Operation, Transformation for Custom Object, Custom Transformation, Delivered Transformation) empty unless customization is needed.
-
Verify the Web Service Operation If prompted, use the dropdown or search field to confirm that Web Service Operation is set to the required value (for example,
Create Position (Web Service)). -
Advance to the next step Click Next to continue. If no additional configuration is needed, proceed through the remaining steps using the default settings.
Reviewing and submitting the EIB
- Set the delivery method
On the Deliver step, select
Workday Web Service Operationfrom the Delivery Method dropdown. Confirm Workday Web Service Operation matches your intended operation (for example,Create Position (Web Service)), and leave Custom Object empty unless required.
-
Review and submit the configuration Click Next to reach the Review and Submit step. Confirm that Transformation Type is
Template Model, Template Model from Web Service Operation displays your selected operation, Delivery Method isWorkday Web Service Operation, and Custom Object is empty unless specified. Click OK to finalize and create the EIB integration system. -
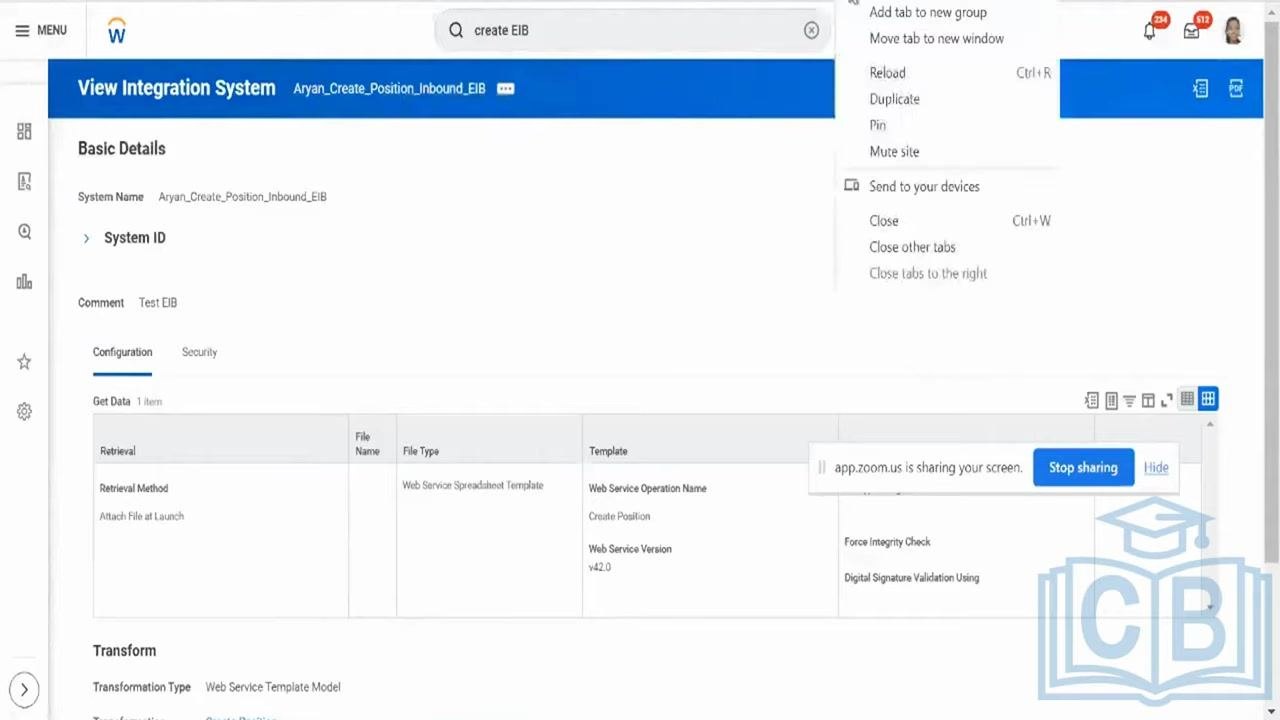
Verify the integration system was created After submission, Workday takes you to the View Integration System screen. Confirm the System Name matches your EIB name, the Comment field shows any notes you entered, the Retrieval Method is
Attach File at Launch, the File Type isWeb Service Spreadsheet Template, the Web Service Operation Name and Web Service Version are correct, and the Transformation Type isWeb Service Template Model. -
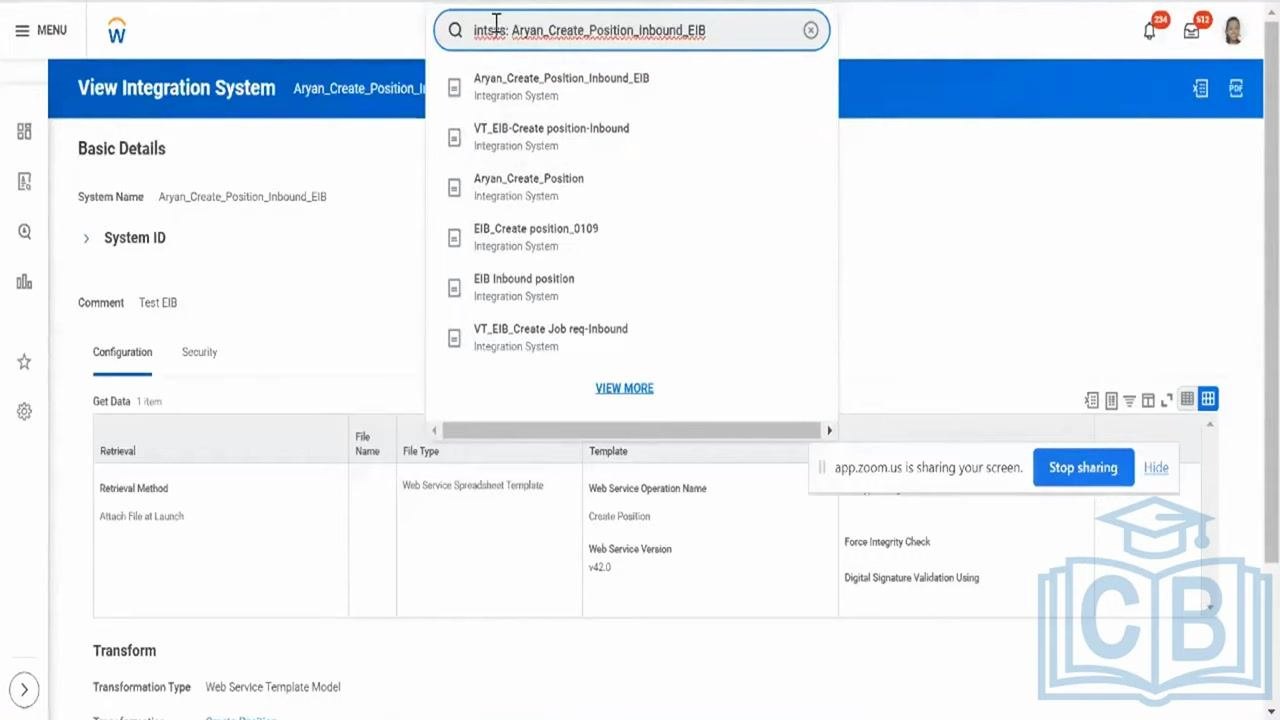
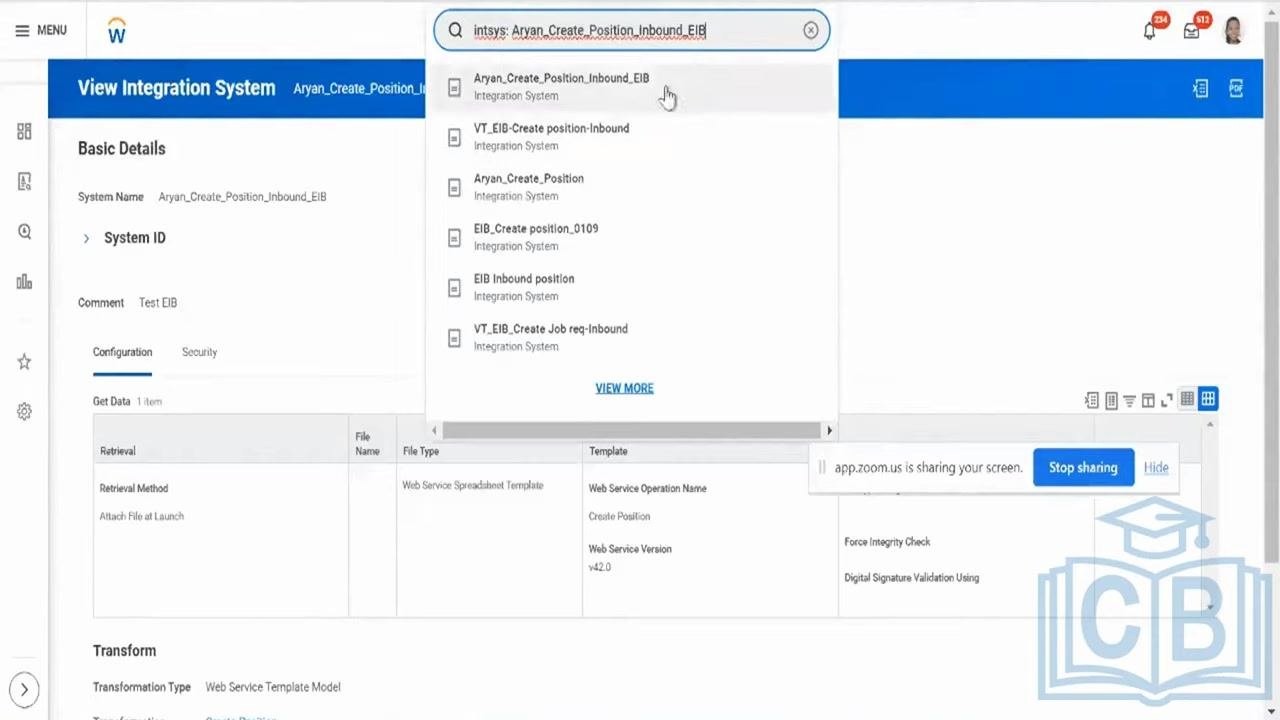
Search for your integration system using a prefix In the Workday search bar, type
intsys:followed by your EIB name (for example,intsys: Aryan_Create_Position_Inbound_EIB) to filter results to integration systems only, making it easier to locate your EIB.
- Confirm the retrieval method under Get Data
In the View Integration System screen, under Get Data, confirm the Retrieval Method is
Attach File at Launch, meaning you will attach your data file when launching the EIB process. Alternative methods, such as SFTP, can be configured if needed, but this is the default.
Configuring security and generating the spreadsheet template
- Review assigned security groups Open the Security tab of your integration system to review the list of assigned integration system security segments (for example, Development Team, iPhone iOS Development Project, NSAWORKDAY, Pixel IT, or Rohini IT Services Integration Security System). If you plan to use SFTP delivery, provide all required SFTP details, confirm the endpoint is whitelisted, and assign the appropriate security groups here.
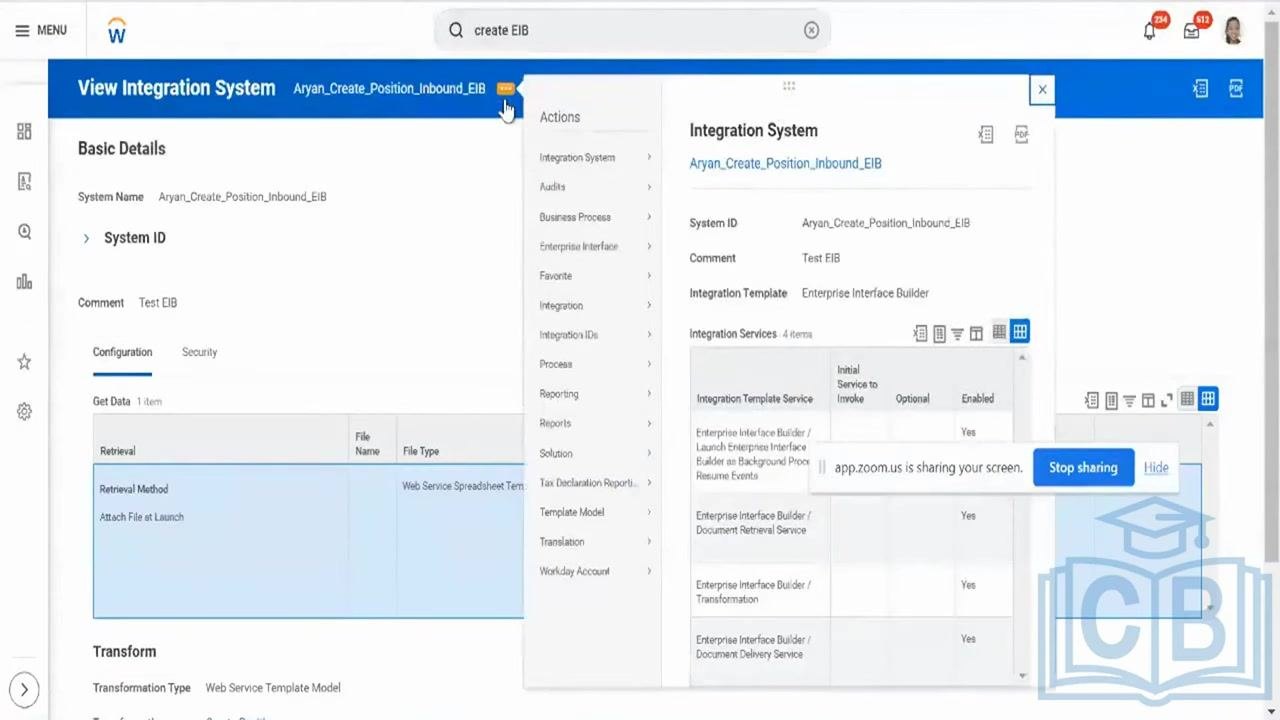
- Open the related actions menu
Go to your integration system (for example,
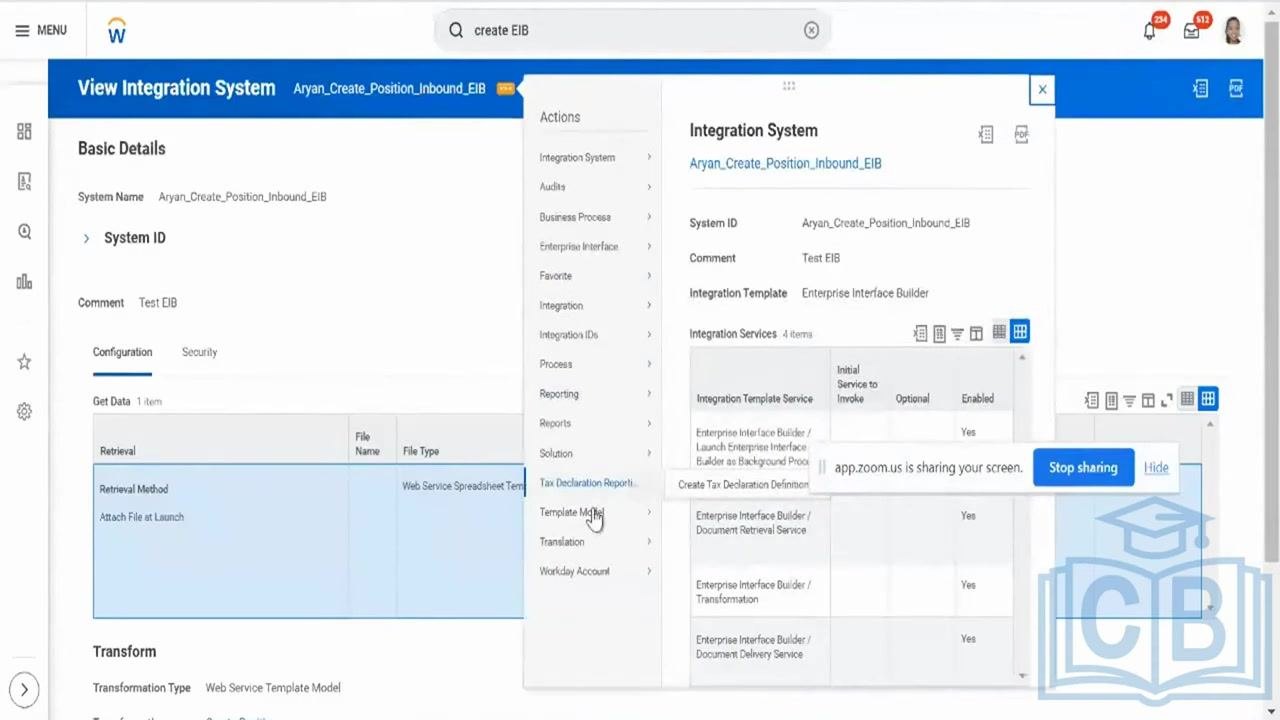
Aryan_Create_Position_Inbound_EIB) and click the related actions icon (three dots) next to the integration system name. Navigate to Template Model > Generate Spreadsheet Template.
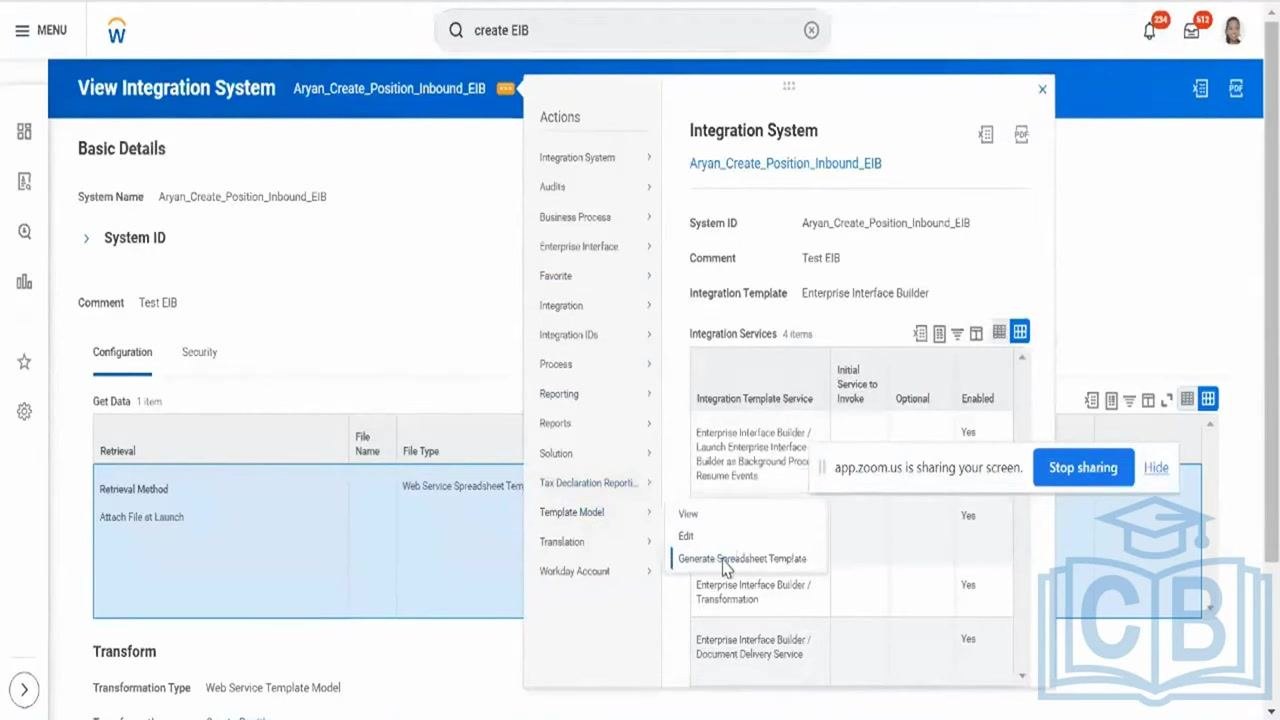
- Choose the spreadsheet format and generate the template
On the Confirm Spreadsheet Generation screen, select a Spreadsheet Generation Format:
XLSXfor a user-friendly Excel file, orXMLif you need to integrate with third-party or Java-based applications. Confirm your selection and click Submit to generate the template.
Monitoring the background process and downloading the template
- Check the background process status On the View Background Process screen, confirm the Process is "Generate Spreadsheet Template" and the Request Name is "Create Position (XLSX)." The Status field initially shows "Processing," and the Current Processing Time and Average Processing Time both start at "00:00:00." The Integration Details tab is selected by default, showing Parent Event, Integration Event, Event Type, Integration System, Initiated By, Initiated At, Ran As, Response Message, and Template Model.
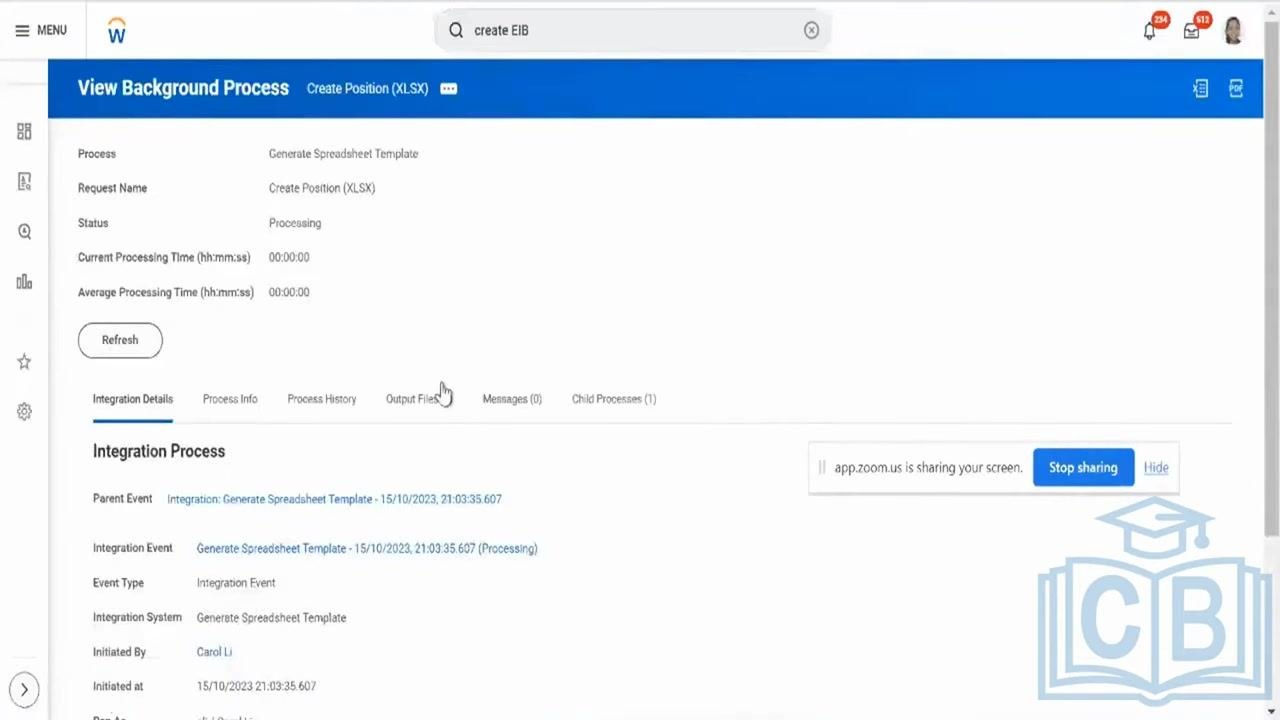
- Refresh to update the status Click the Refresh button to get the latest completion percentage and status of the spreadsheet template generation process.
-
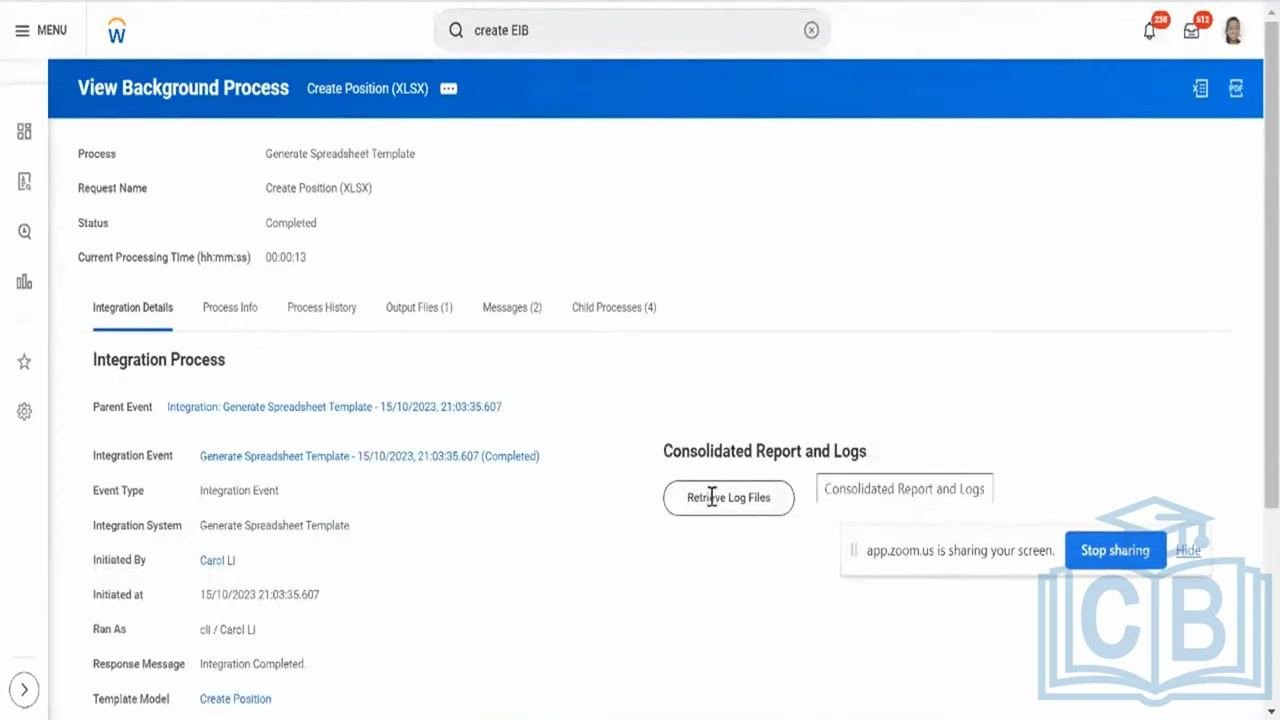
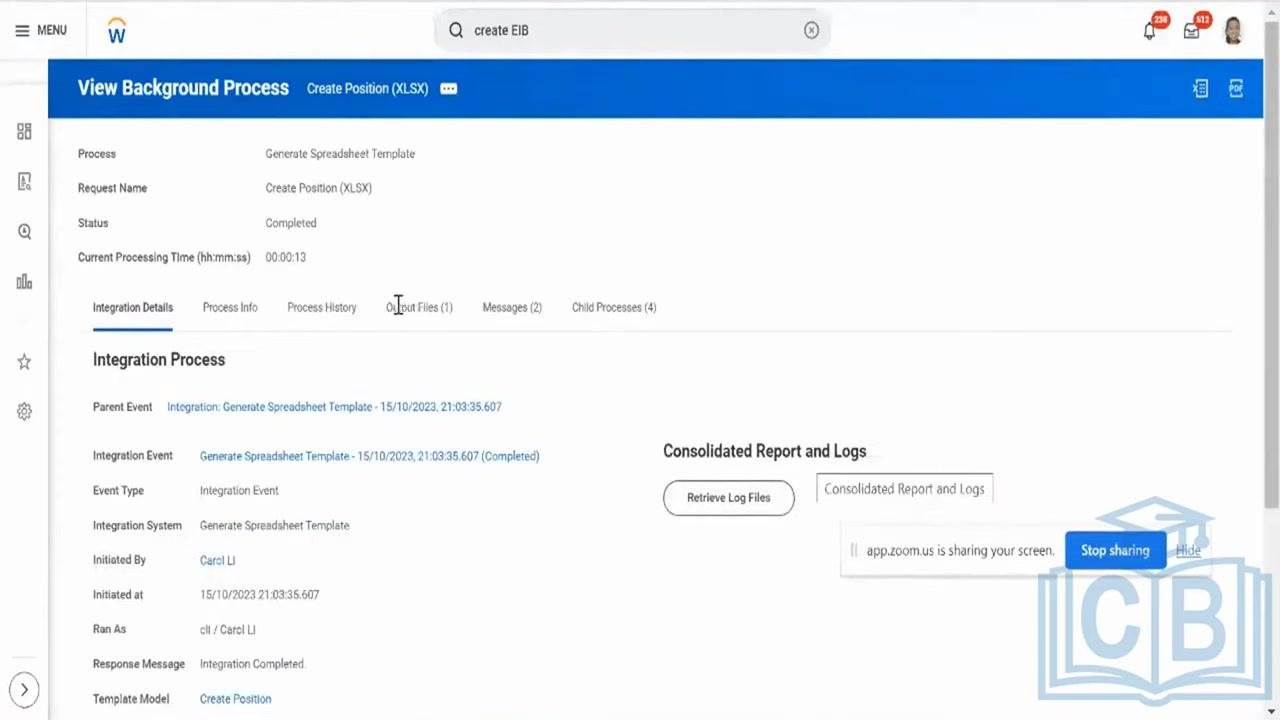
Wait for the process to complete Once finished, the Status field updates to "Completed" and the Current Processing Time displays the total time taken (for example, "00:00:13"). The Integration Details tab also shows a Retrieve Log Files button under Consolidated Report and Logs.
-
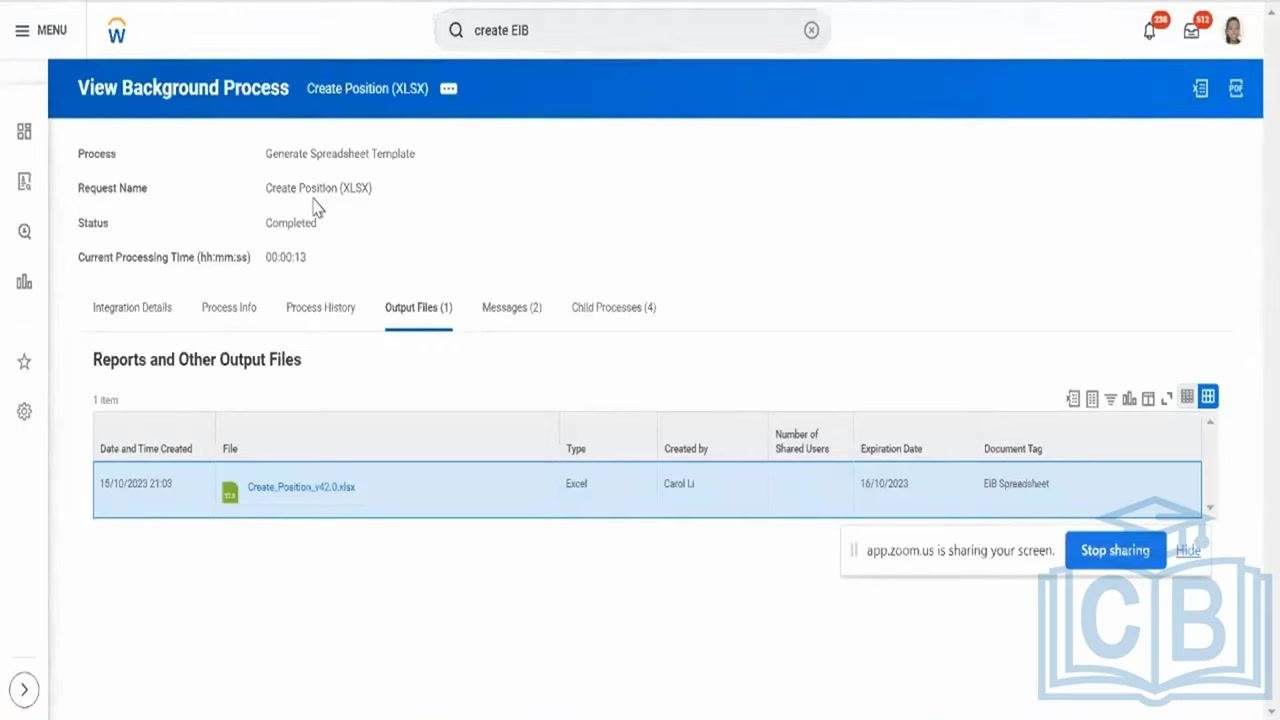
Open the Output Files tab Click the Output Files tab to view the generated spreadsheet. Under Reports and Other Output Files, locate the file named in the format "Create_Position_v42.0.xlsx," which shows the file type (Excel), the creator, an expiration date, and the document tag "EIB Spreadsheet."
-
Confirm you have the latest version Workday periodically releases new versions of the EIB or web service operation; the current version appears in the file name (for example, "v42.0"). Previous versions may still be listed, so always select the latest one shown in the output files list.
- Stay aware of version updates Regularly check for new versions released by Workday so you remain compatible with the latest template and features.
- Download the spreadsheet template Click the file name (for example, "Create_Position_v42.0.xlsx") in the Output Files tab to start the download to your local desktop; it saves to your default downloads location.
- Confirm the download completed Check your browser's Recent Downloads panel to confirm the file (for example, "Create_Position_v42.0 (1).xlsx") downloaded successfully; you may see prior downloads of related files listed as well.
Preparing your data in the spreadsheet template
-
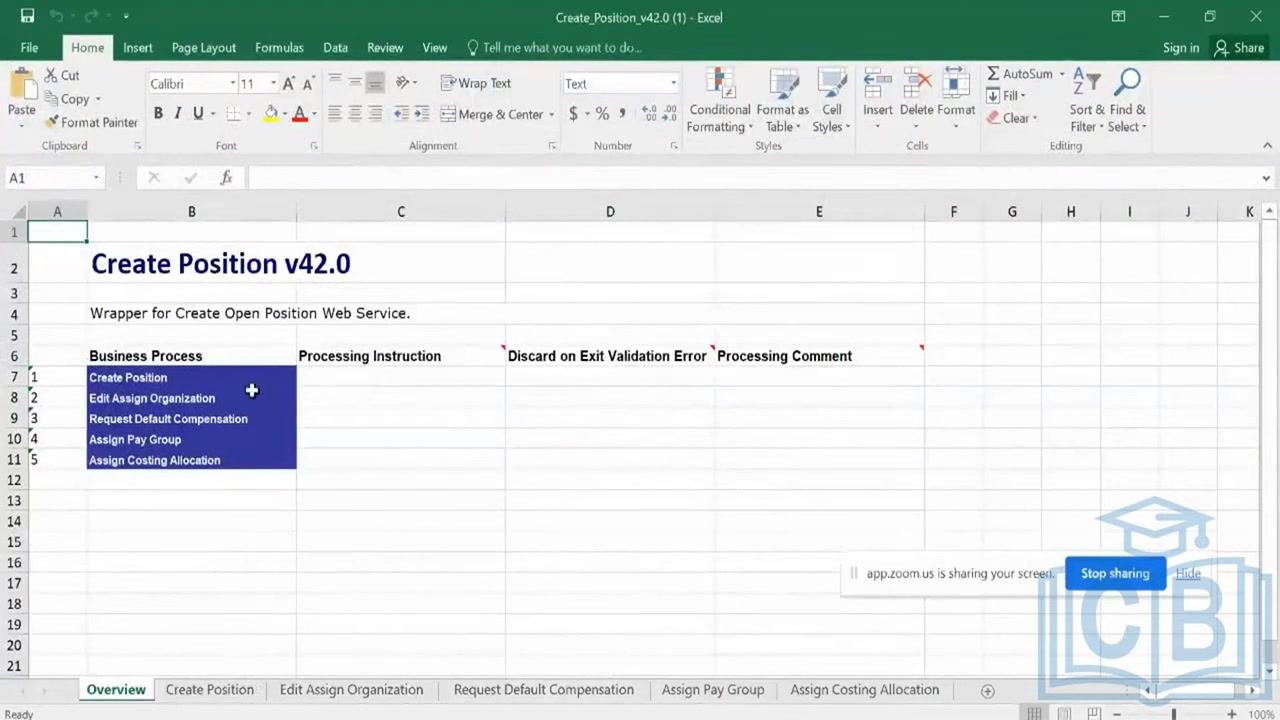
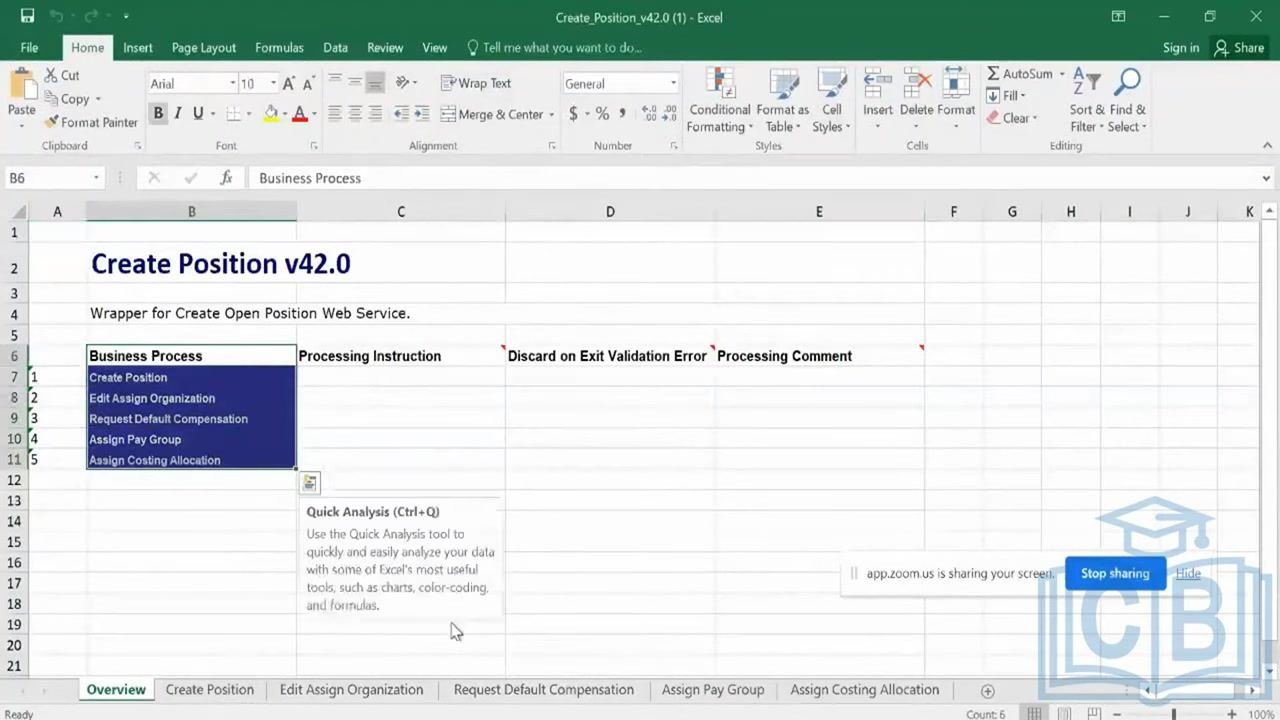
Open the downloaded template Double-click the downloaded file to open it in Microsoft Excel. The Overview tab lists the available business processes, including Create Position, Edit Assign Organization, Request Default Compensation, Assign Pay Group, and Assign Costing Allocation, with columns for Business Process, Processing Instruction, Discard on Exit Validation Error, and Processing Comment.
-
Review the business process structure The Overview tab summarizes all available business processes and their instruction and comment columns. The first row under Business Process is "Create Position," the primary process for this template.
-
Open the Create Position tab Click the Create Position tab at the bottom of the Excel window to see the detailed data entry table, which includes Area, Restrictions, Format, and fields such as Spreadsheet, Supervisory Organization, Position Request Reason, Position ID, Job Posting Title, Job Description Summary, Job Description, Critical Job, Difficulty to Fill, Available for Overlap, and Delete. Required fields are marked in the Restrictions row.
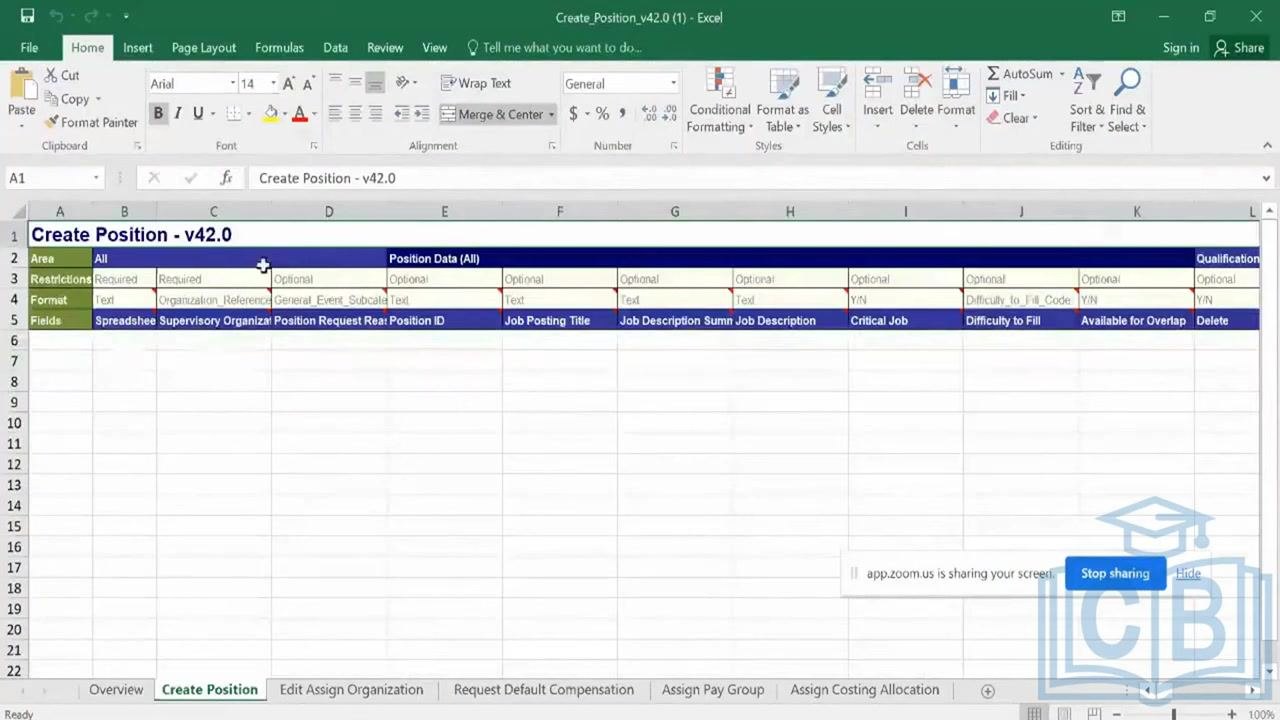
- Identify required and optional fields Only fields marked as Required in the Restrictions row must be filled in for successful processing; optional fields can be left blank if they don't apply.
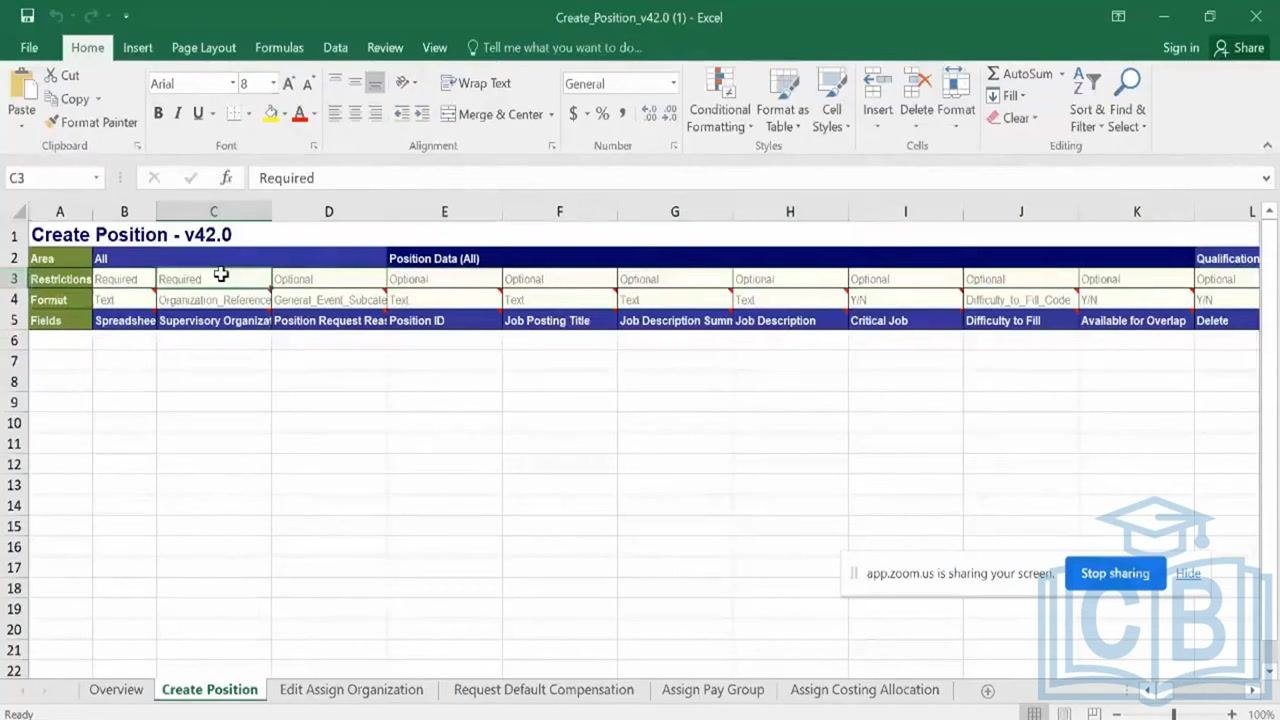
- Enter your data Fill in the required fields, such as Supervisory Organization and Position Request Reason, along with any additional optional fields your business process needs. Save the completed spreadsheet for later upload into Workday.
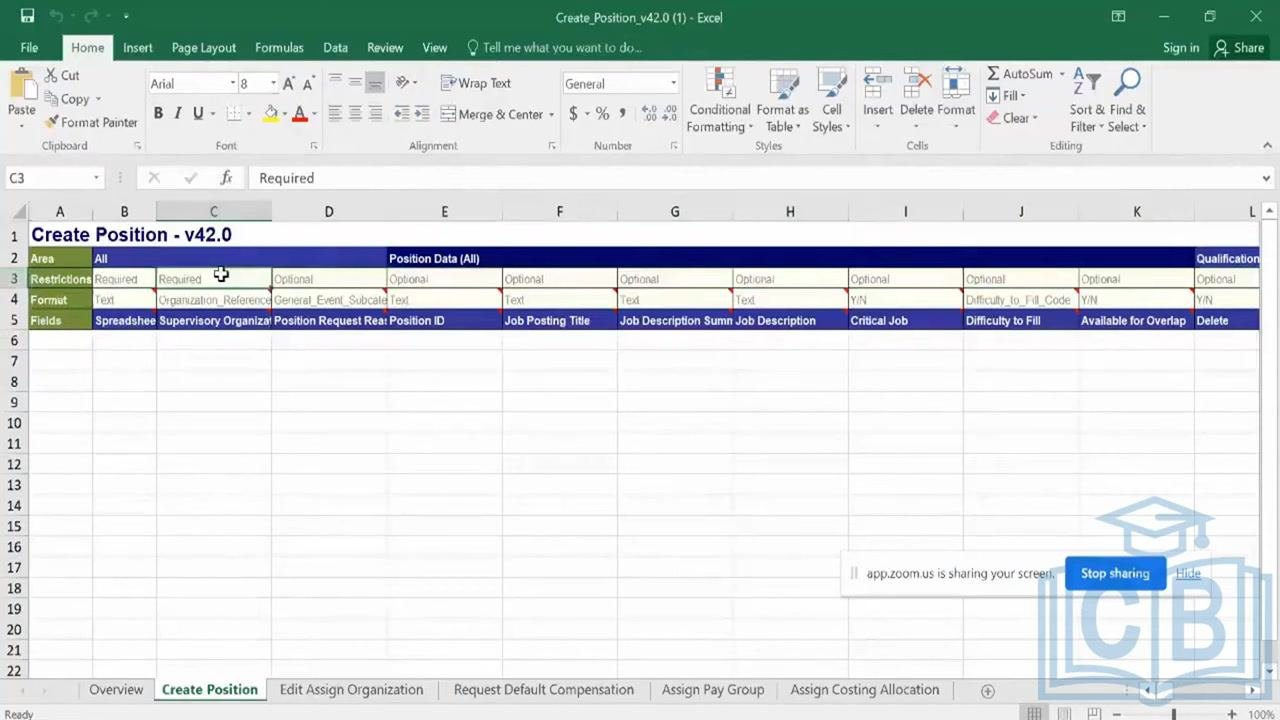
- Understand self-generated fields Note that the Position ID field is marked Optional; if you leave it blank, Workday automatically generates a value during upload, letting you skip manual entry for system-generated fields.
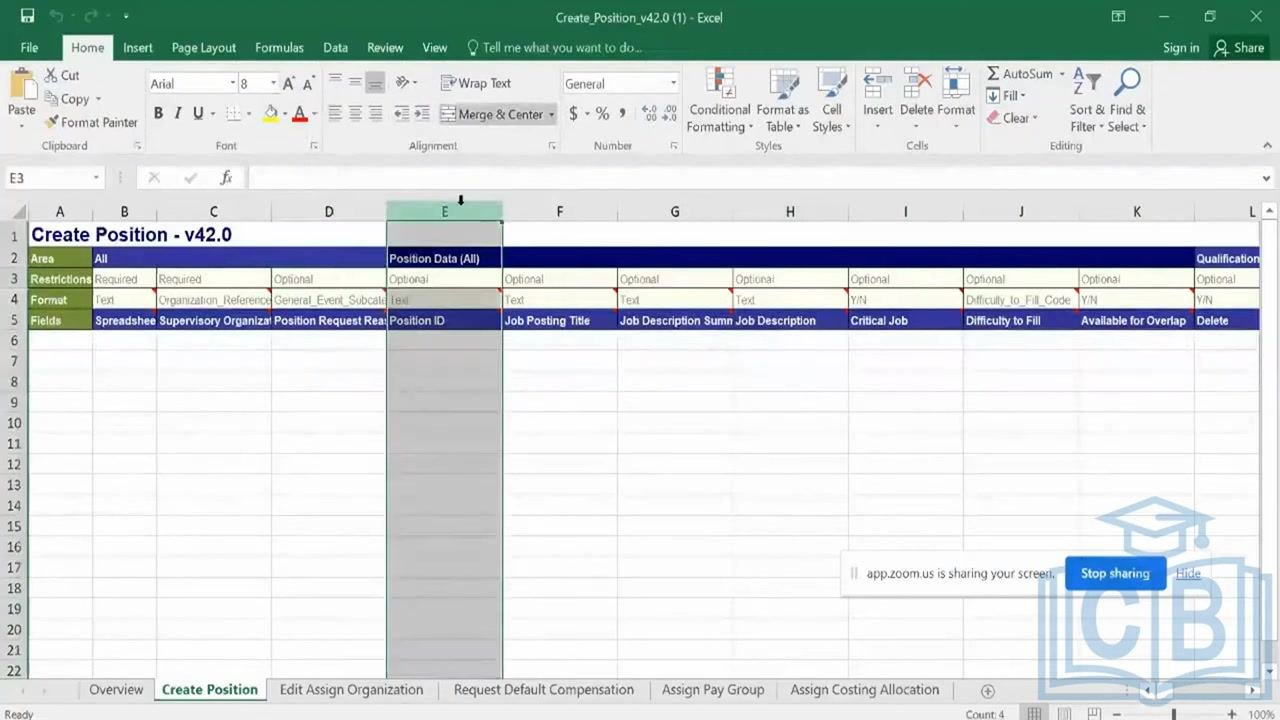
- Use the Restrictions row as your guide Refer to the Restrictions row to determine which fields are Required versus Optional, and only complete the required ones unless your process needs more.
-
Compare the spreadsheet to the Workday UI The Excel template mirrors the fields you'd complete in the Workday user interface, with the key difference being that the spreadsheet supports bulk entry while the UI is for single records. In the UI, required fields such as Job Posting Title are marked with a red asterisk and show an error if left blank.
-
Take advantage of bulk processing The Excel template lets you load up to a million positions in a single batch, limited only by Excel's row capacity, making it ideal for mass data uploads.
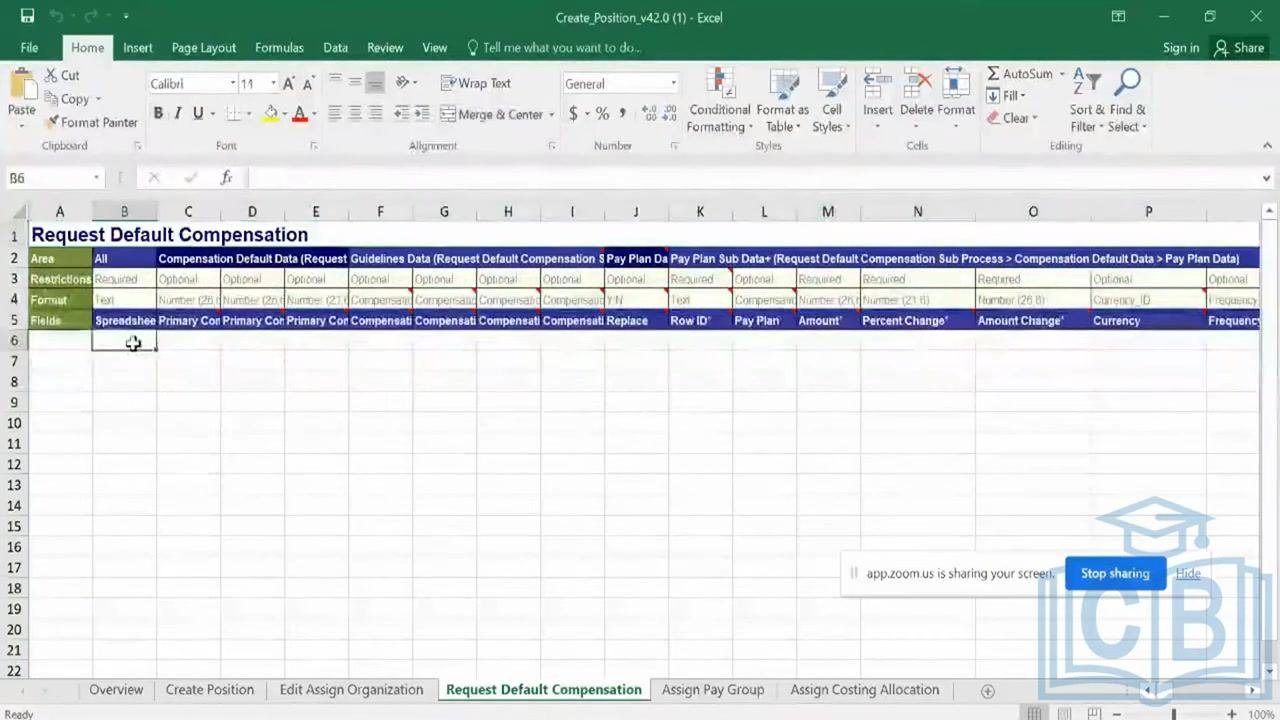
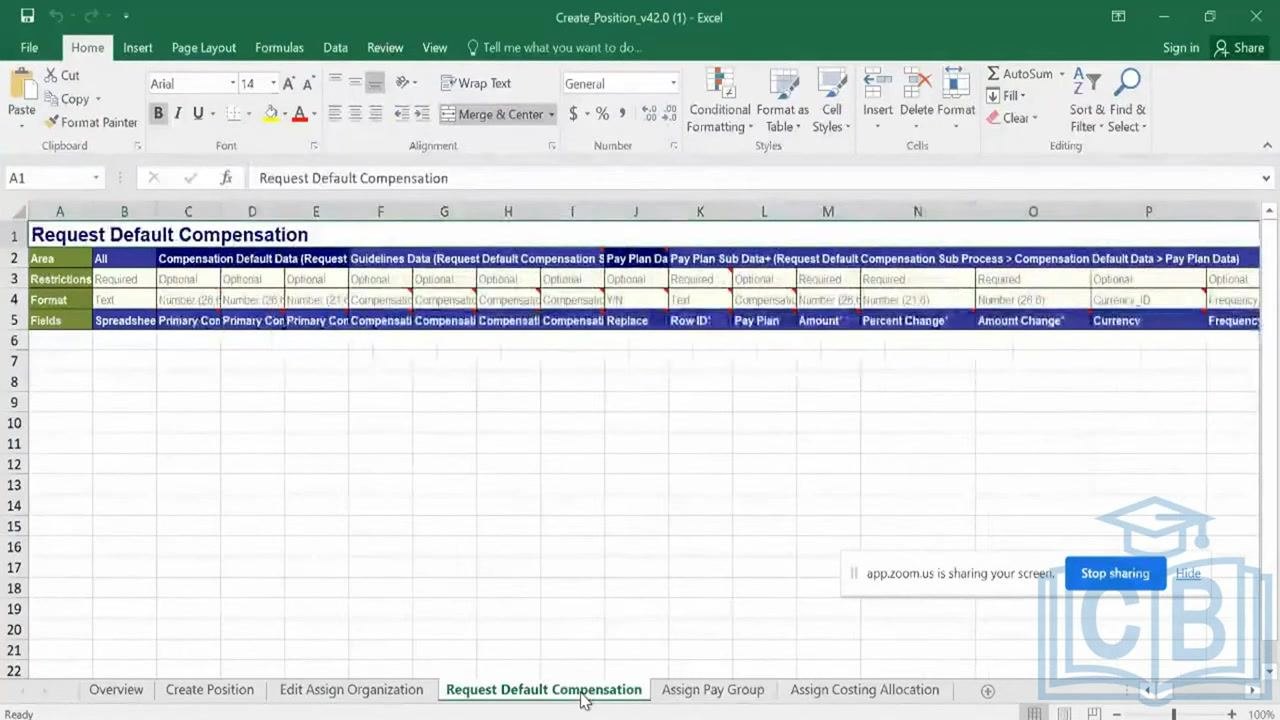
- Complete additional business process tabs Use the tabs at the bottom of the spreadsheet (such as Create Position, Request Default Compensation, and Assign Pay Group) to enter data for each business process. Each tab has its own required and optional fields shown in the Restrictions row; complete all required fields in every relevant tab before uploading.
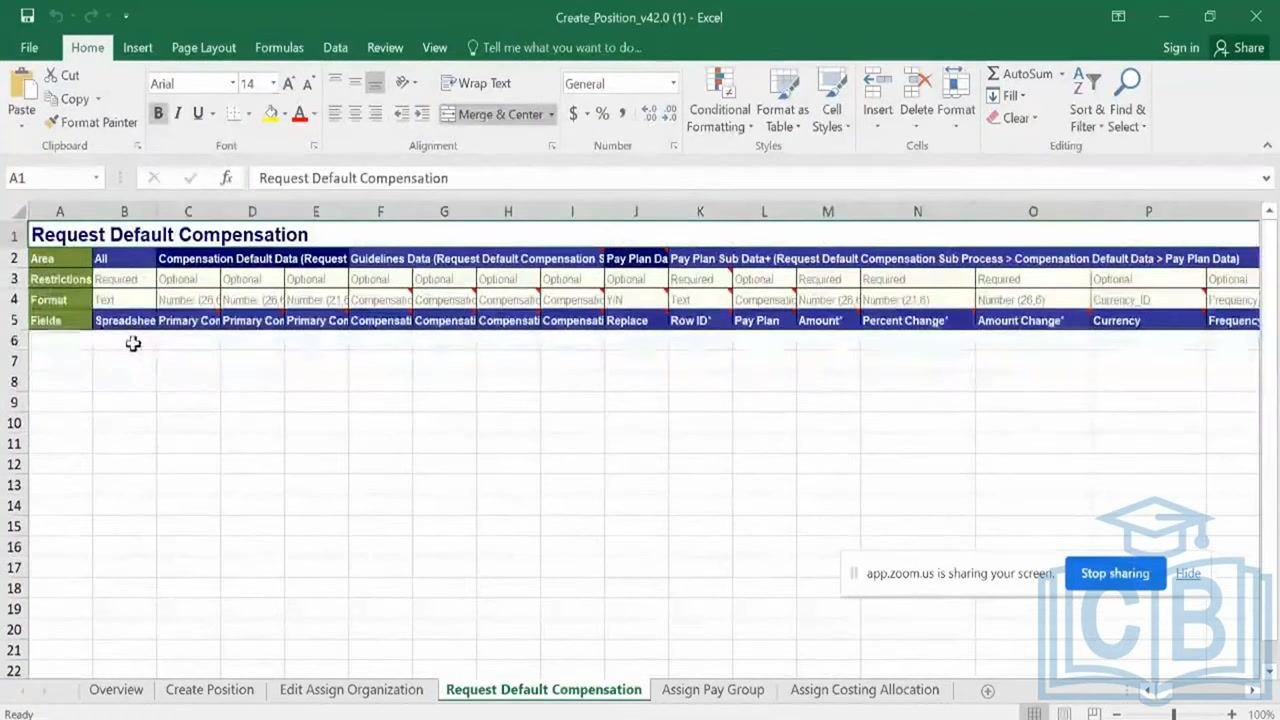
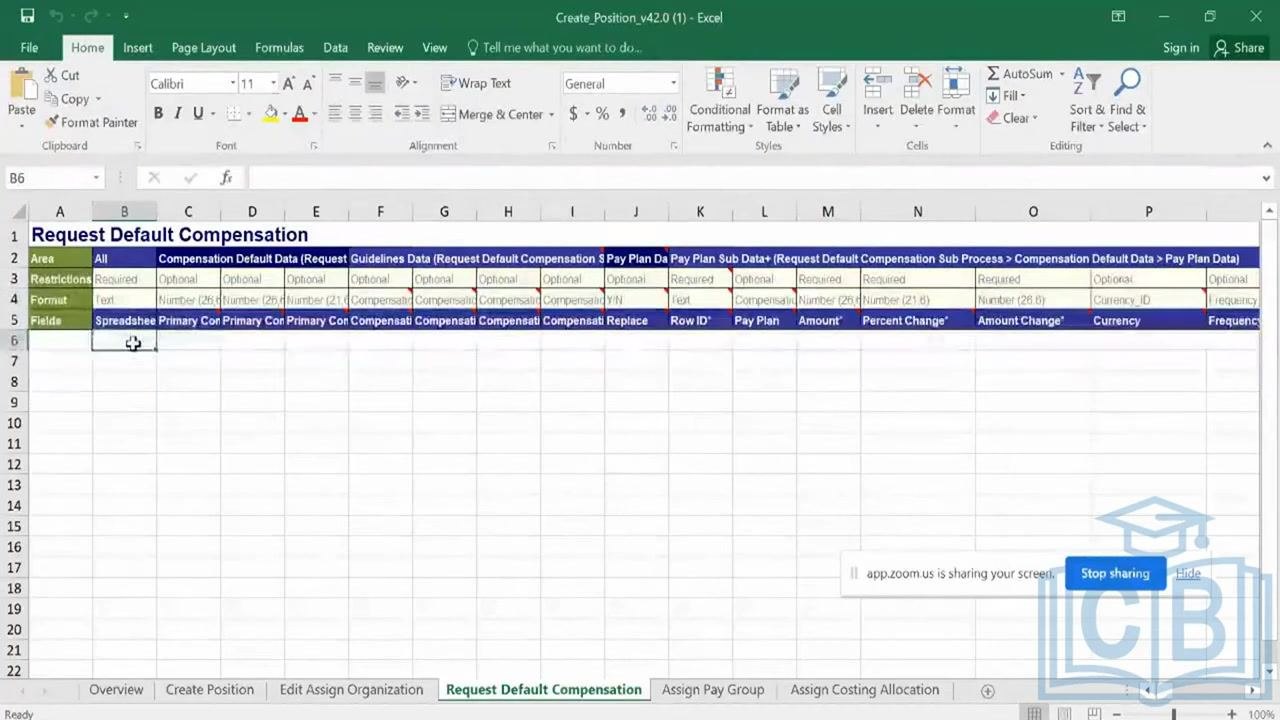
- Fill in compensation data On the Request Default Compensation tab, refer to the Restrictions row to identify required fields (for example, Row ID, Pay Plan, Amount, Percent Change, Amount Change), then complete the required and any relevant optional fields.
Uploading and monitoring the EIB
-
Confirm and submit your upload In the Workday EIB upload interface, check the confirmation checkbox to acknowledge your data is ready, then click Submit to begin the upload process.
-
Monitor the upload's background process Navigate to View Background Process to track the upload. Click Refresh to update the status and review the completion percentage as your spreadsheet template upload progresses.
-
Access the output files after completion Once the background process finishes, open the Output Files section and locate the output file (for example, "Create Position_v42.0"), noting the version shown in the file name.
-
Watch for version updates Each EIB or web service operation carries a version number (for example, v42.0), and Workday periodically releases new versions. Always use the latest version to avoid errors — if you try to upload an obsolete version, Workday displays an error instructing you to use the current one.
What's next
Once your data is uploaded successfully, Workday processes the records according to the business process rules configured for each tab. If you encounter a version error, download the latest spreadsheet template from your integration system and re-enter your data before resubmitting. The overall process for preparing and uploading data through an EIB is comparable to other HRIS systems, so the structure and steps should feel familiar if you've used similar platforms before.
Generation details: cost, quality tiers
Docsie billed 5,500 credits ($3.85) to analyze this 11-minute video at standard quality. The rewrite, template fill and Word/PDF exports were included. The same video at each quality tier:
| Quality | Frames sampled | Credits | Approx. cost |
|---|---|---|---|
| Draft | every 16-30 s | 2,750 | $1.92 |
| Standard (this guide) | every 8-15 s | 5,500 | $3.85 |
| Detailed | every 4-7 s | 11,000 | $7.70 |
| Ultra | every 1-3 s | 22,000 | $15.40 |
Credits priced at $0.70 per 1,000; plans include a monthly allowance. Enterprise customers on on-premise or bring-your-own-model deployments run this on their own inference and pay no per-video credits.
Generated by Docsie Video-to-Docs on 2026-09-14 from a 10-minute video. Screenshots are frames from the source video and belong to their creator, CyberBrainer, whose original is embedded above. If you own this video and want the guide removed or credited differently, contact us and we will act within one business day.