
How to Upload a Document in Veeva Vault
This guide walks you through how to upload a document in Veeva Vault, from navigating to the Documents tab through completing metadata, saving, and releasing the document for regulatory or operational use. You will also learn how to link related documents and verify the final released state.
Video: Documents: Uploading a Document by Envu's Guide Through Veeva Vault. All credit for the demonstration goes to the creator; watch the original on YouTube. The written guide below was generated from this video by Docsie. Creator? Request a change or removal.
This guide walks you through how to upload a document in Veeva Vault, from navigating to the Documents tab through completing metadata, saving, and releasing the document for regulatory or operational use. You will also learn how to link related documents and verify the final released state.
Prerequisites
- Access to the Veeva Vault application with permissions to create and upload documents.
- The file you want to upload, available on your desktop or a shared drive.
- Relevant document details on hand (version, type, subtype, title, date, author, territory, ownership, and related product/specification numbers) to complete the metadata fields.
Documents
Navigate to the Documents tab
Open the Veeva Vault application and make sure you are on the home screen. Click Documents in the top navigation bar. This opens the "All Documents" view, which lists all available documents in the library.
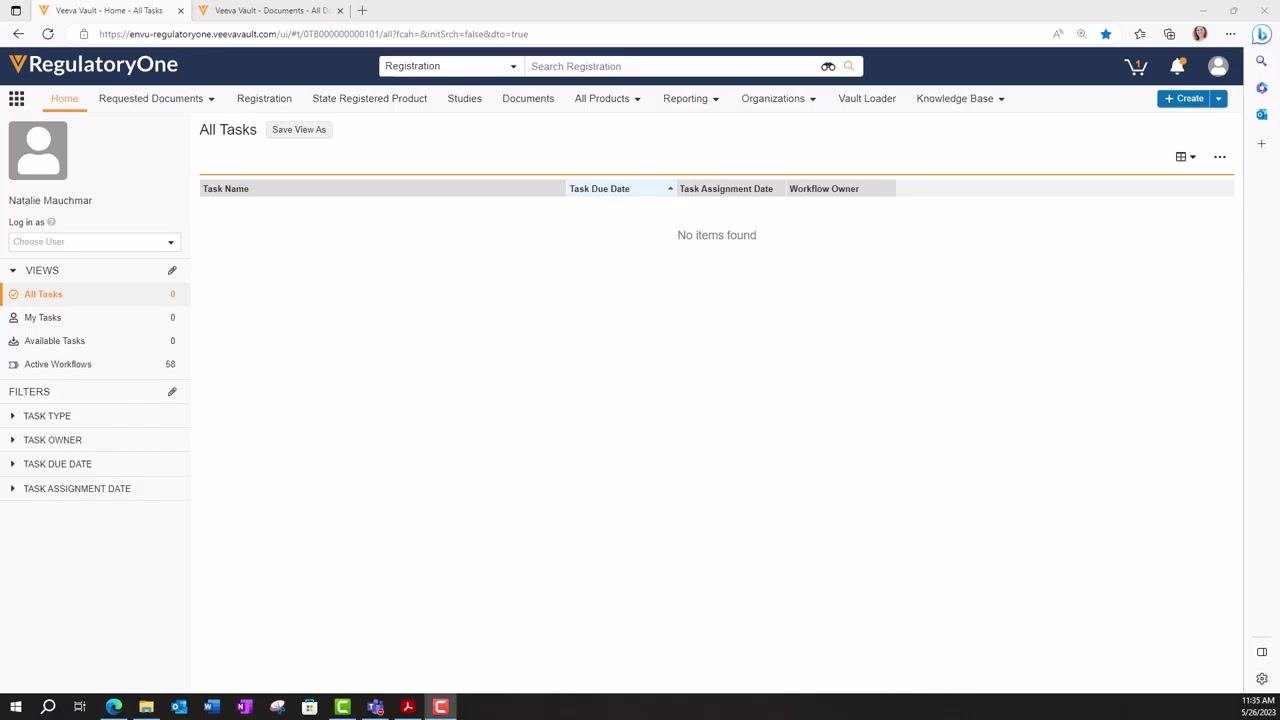
Access the Create menu
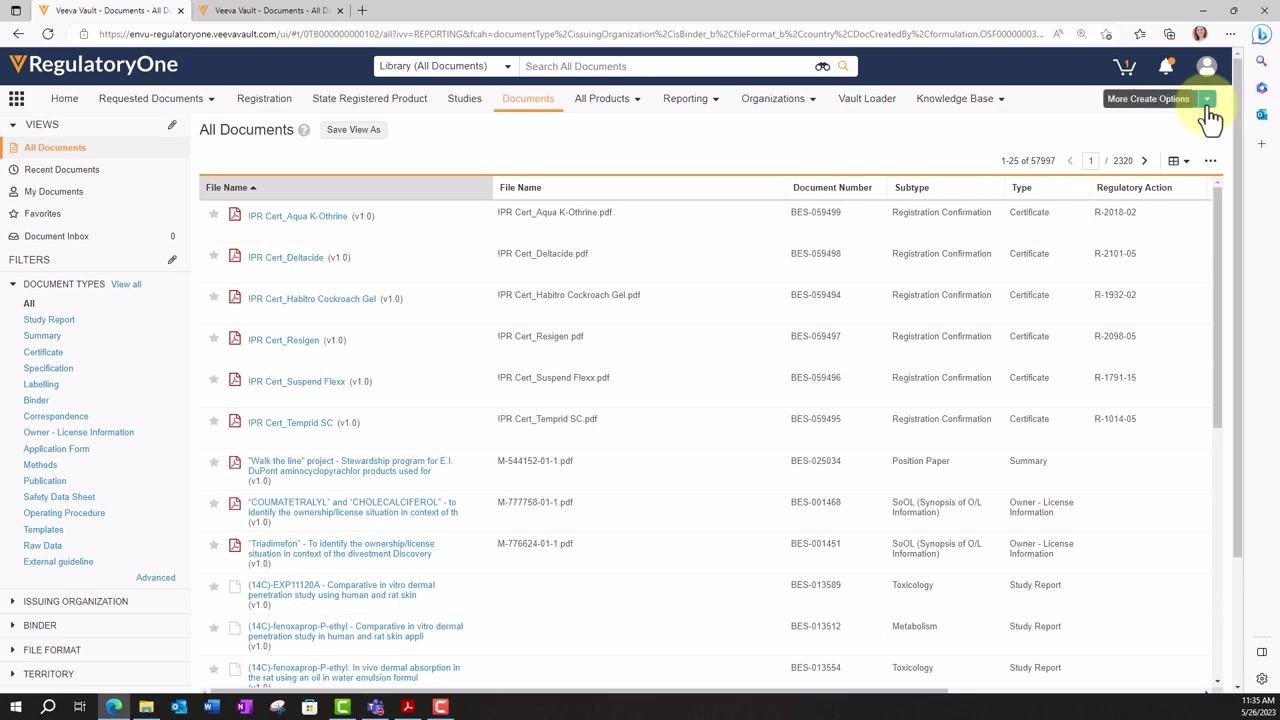
In the All Documents view, locate the + Create button in the upper right corner of the screen. Click + Create to open a dropdown menu with document creation options.
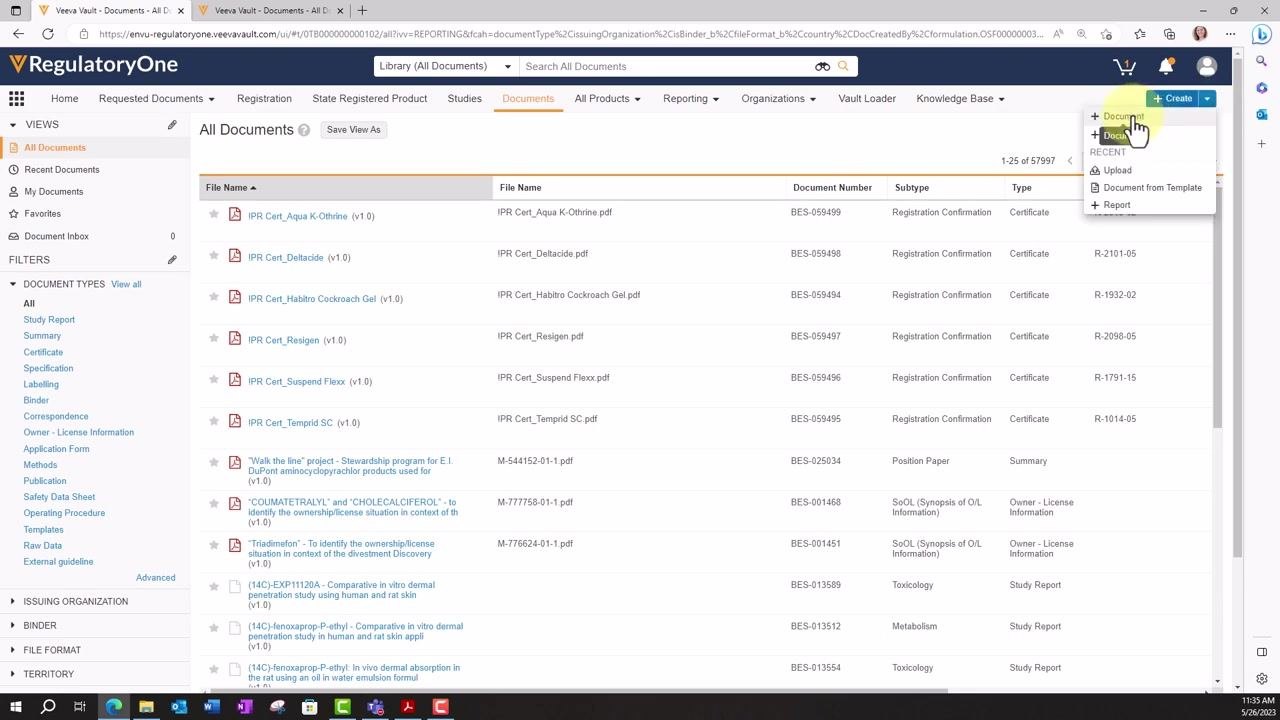
Select the upload option
From the dropdown menu, select Document to open the "Create Document" dialog. In the dialog, choose the Upload option, which is listed first, then click Continue to proceed.
Upload your file
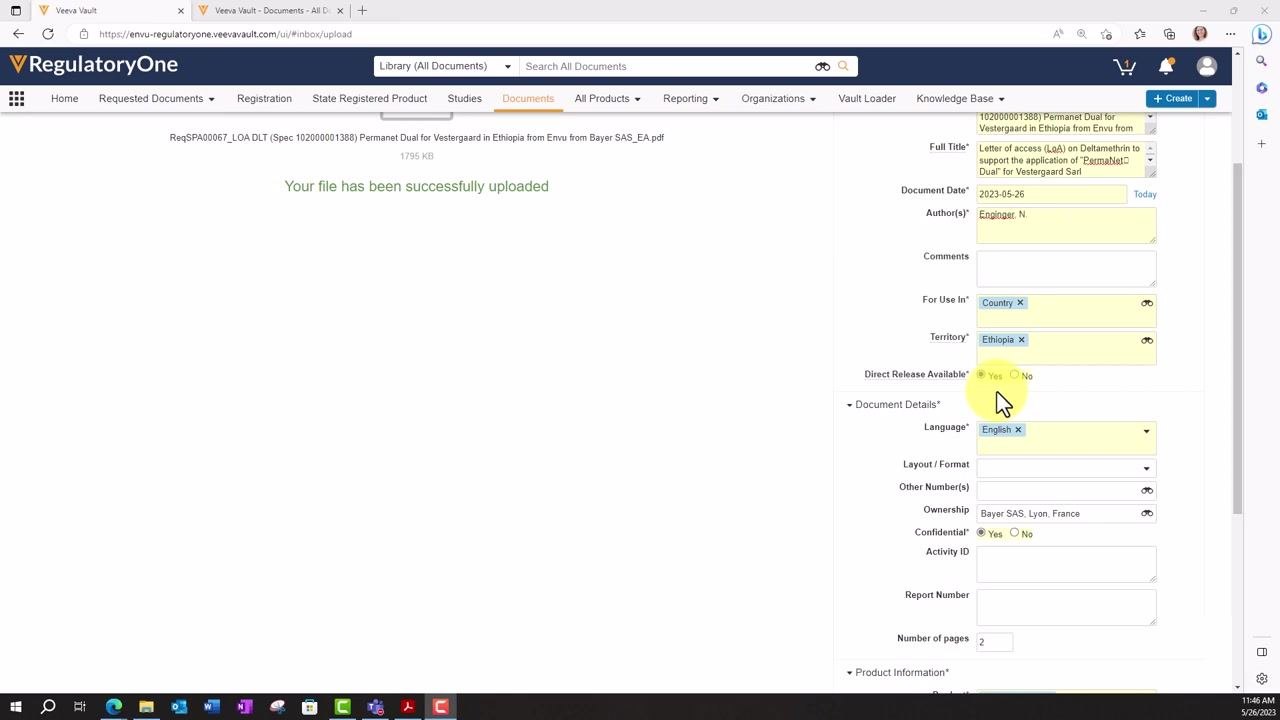
A file selection dialog appears. Browse your desktop or shared drive and select the document you want to upload. Once the upload completes, you see a confirmation message stating "Your file has been successfully uploaded." The file name is displayed, and you are prompted to enter metadata.
Metadata
Complete and review the metadata entry
Fill out all required and relevant metadata fields for the uploaded document. The following example shows typical values and guidance for each field:
- Version: 0.1
- Type: Owner - License Information
- Subtype: LoA (Letter of Access)
- File Name: ReqSPA00067_LOA DLT (Spec 102000001388) Permanet Dual for Vestergaard in Ethiopia from Envu from Bayer SAS_EA.pdf — leave as is unless instructed otherwise
- Full Title: Letter of access (LoA) on Deltamethrin to support the application of "PermaNet® Dual" for Vestergaard Sarl — include any additional pertinent information as needed
- Document Date: 2023-05-26 — use the date shown in the document
- Author(s): Enginger, N. — use the author listed in the document
- For Use In: Country
- Territory: Ethiopia — select if applicable
- Direct Release Available: Yes — select "No" if the document requires review by someone else
- Language: English
- Layout / Format: leave blank if not applicable
- Other Number(s): leave blank if not applicable
- Ownership: Bayer SAS, Lyon, France
- Confidential: Yes
- Activity ID: enter if applicable
- Report Number: enter if applicable
- Number of pages: 2
- Product: 108000008403 — the Product field should always be a 108 number
- Specification + Main Version: 102000001388-03 — the Specification field should always be a 102 number
- Batch: depends on product, leave blank if not applicable
- UVP: depends on specification type, leave blank if not applicable
- Regulatory Action: depends on registration object type, leave blank if not applicable
- Regulatory Request: REQ-003234
- Legacy Document Number: enter if applicable
Double-check all entries for accuracy and completeness before proceeding.
Tip: Always fill out all required (yellow) fields and as many optional (white) fields as possible. Accurate metadata ensures documents are easily searchable and compliant with regulatory requirements.
Save the document
After entering all required and relevant metadata, click Save in the upper right corner to complete the upload process.
Verify document upload and draft status
After saving, the document is uploaded into the Veeva Vault library in the Draft state. Review the document information summary on the right panel to confirm all metadata is correct. The document preview displays the uploaded file, and the status bar shows "Draft."
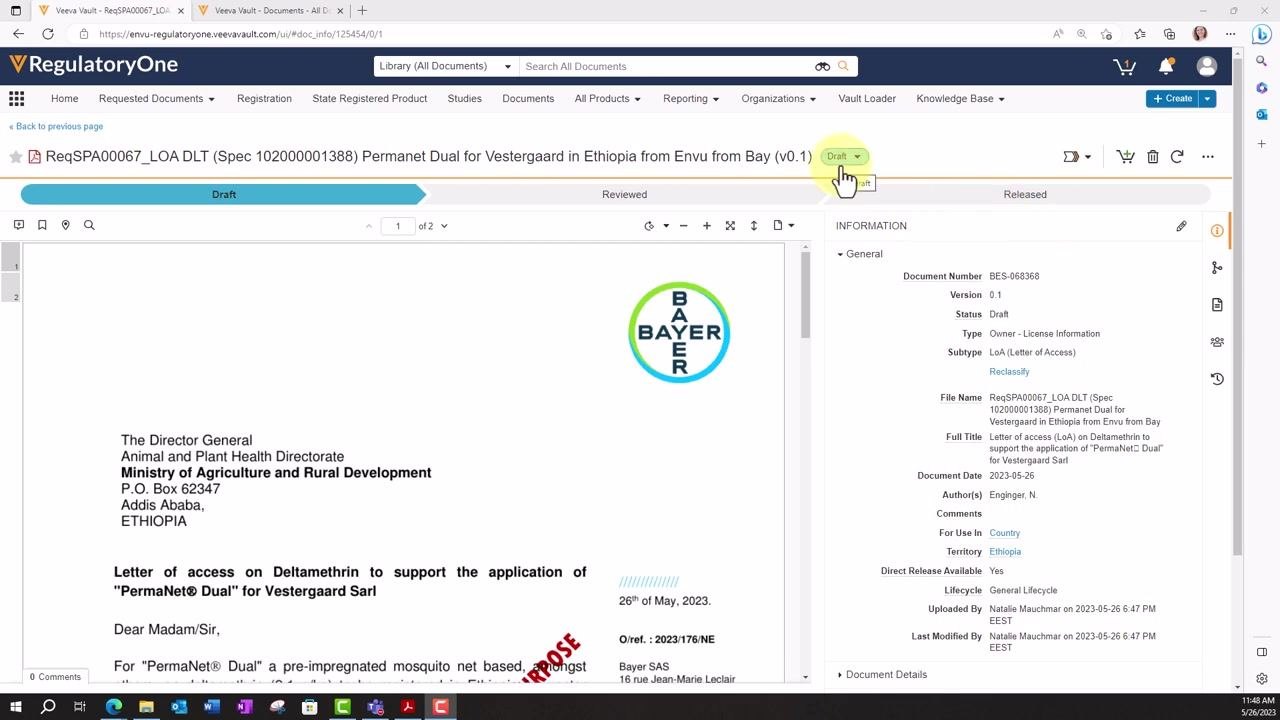
Edit metadata if needed
If you need to change any metadata field, click the pencil (edit) icon next to the relevant field in the information panel. Update the information as required and save your changes.
Tips: - Always ensure the Product field contains a 108 number and the Specification field contains a 102 number. - Use the Direct Release Available option carefully: select "Yes" only if the document does not require further review. - Review all metadata for accuracy before saving to maintain compliance and searchability.
Additional document management options
Explore additional document management options
Locate the vertical toolbar on the right side of the document information panel. Hover over or click the icons to reveal additional options. Click the Relationships icon to access options for linking related documents, including:
- Other versions of the document
- Redacted versions
- Supporting documents
- Translations
This feature helps you maintain traceability and context for all related documentation within Veeva Vault.
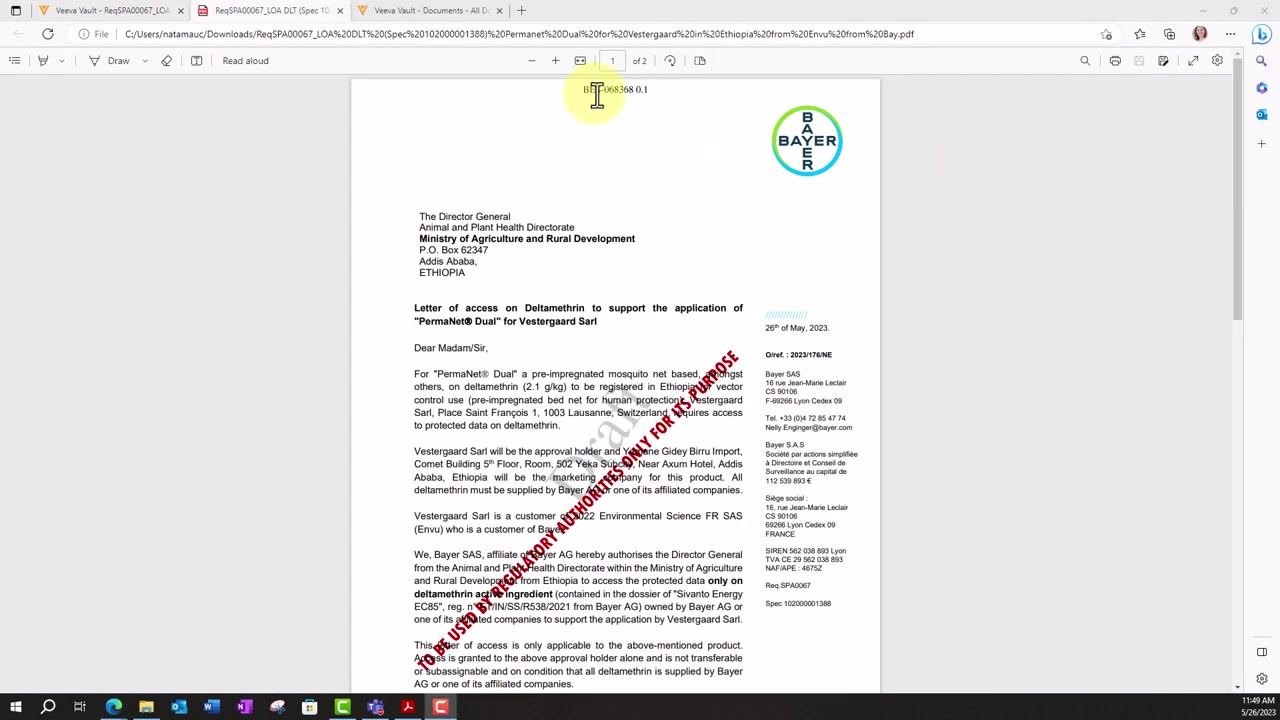
Access document files and the viewable rendition
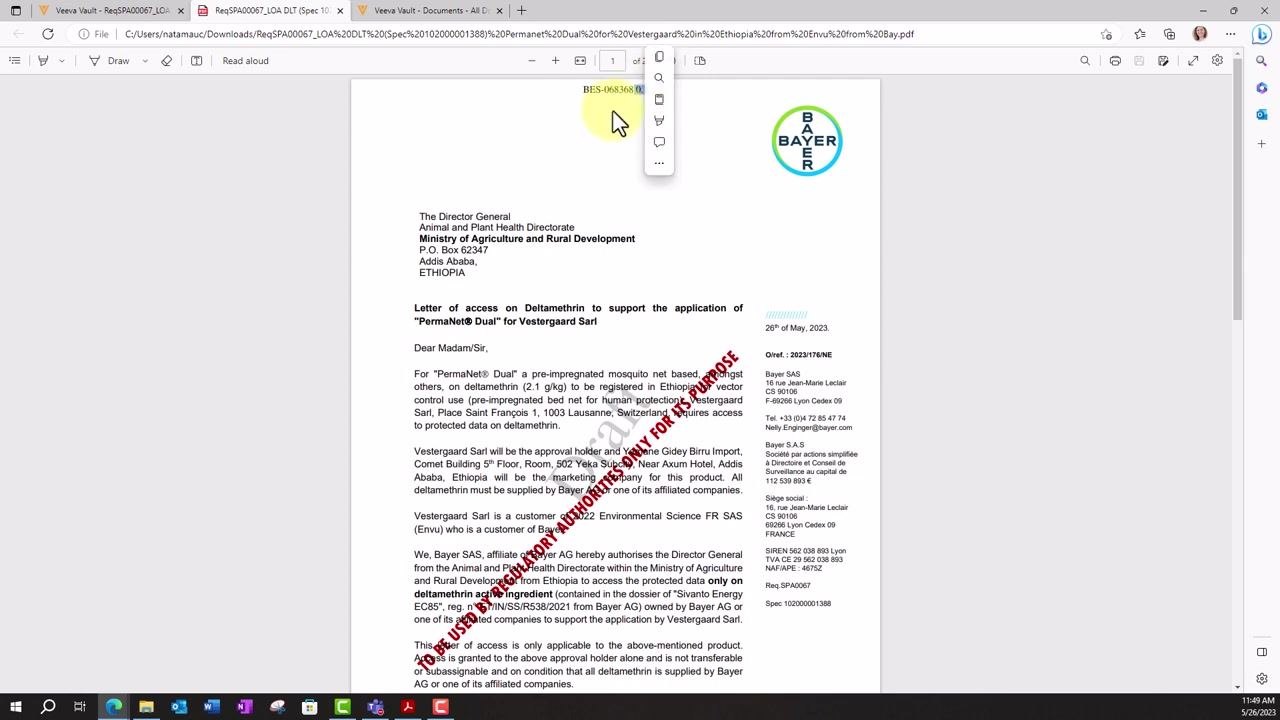
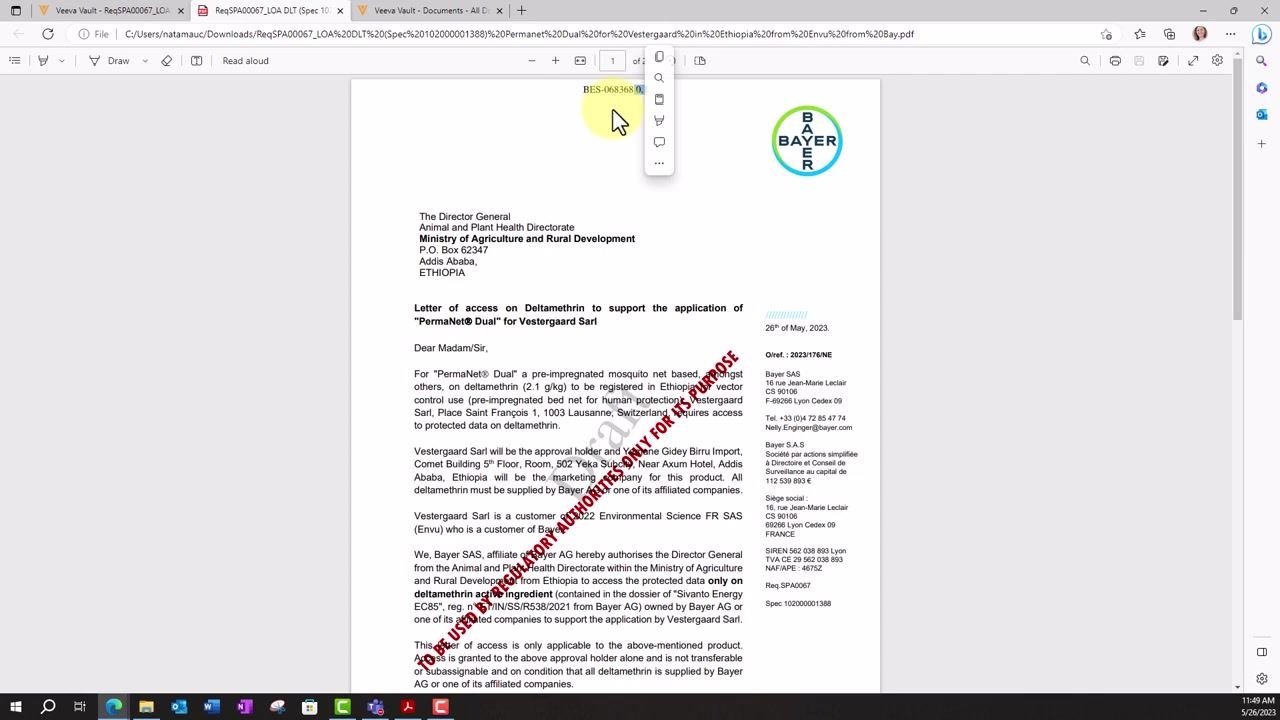
Click the Document Files icon in the right toolbar to access downloadable and viewable renditions of the document. Open the viewable rendition to review the document as it will appear to external authorities. The system automatically adds the document number (for example, BES-063868) and version (for example, 0.1) to the top of the document for traceability.
It is recommended to use this viewable rendition when submitting documents to authorities, so the document can be traced back within the Veeva system.
Direct release
Start the direct release workflow
If Direct Release Available was set to "Yes" during metadata entry, you have the option to start the direct release process. Click the workflow dropdown menu, typically labeled "Start Workflow" or similar, in the upper right area of the document screen. Choose from the following options based on your needs:
- Send for Editing: Route the document for further editing.
- Send for Review: Route the document for review by other users.
- Send for Release: Route the document for a standard release process.
- Start Direct Release: Begin the direct release process immediately if no further review is required.
In this example, select Start Direct Release to proceed.
Confirm your selection to start the direct release process. The document status updates from "Draft" to "Released," and the version increments (for example, from 0.1 to 1.0). The document is now in a steady, released state and available for regulatory or operational use.
Tips: - Always use the viewable rendition for submissions to ensure traceability. - Use the Relationships tab to maintain links between related documents, supporting compliance and audit requirements. - Select the appropriate workflow based on your organization's document review and release policies.
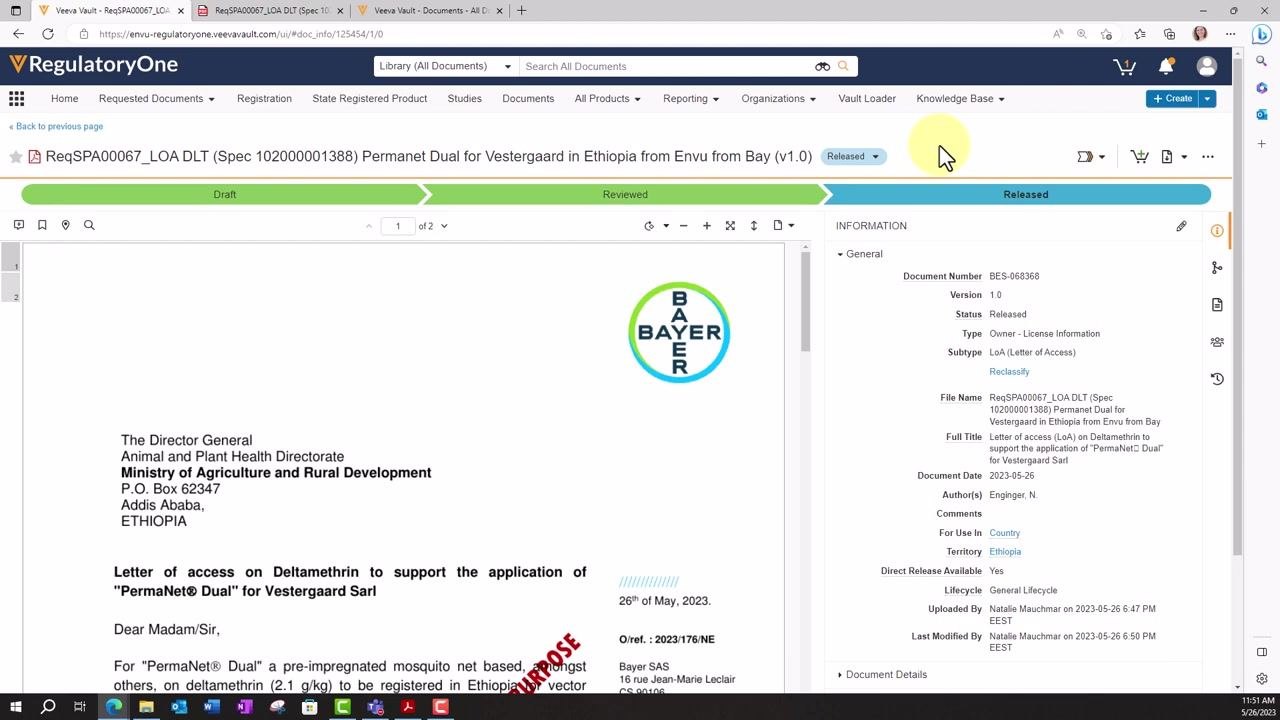
Verify the document release and final state
After completing the direct release process, confirm the document status has updated to "Released" and the version has incremented to 1.0. Review the document information panel on the right side of the screen, which should show:
- Document Number: BES-063868
- Version: 1.0
- Status: Released
- Type: Owner - License Information
- Subtype: LoA (Letter of Access)
- File Name: ReqSPA00067_LOA DLT (Spec 10200001388) Permanent Dual for Vestergaard in Ethiopia from Envu from Bay
- Full Title: Letter of access (LoA) on Deltamethrin to support the application of "PermaNet® Dual" for Vestergaard Sarl
- Document Date: 2023-05-26
- Author(s): Enginger, N.
- Territory: Ethiopia
- Direct Release Available: Yes
- Lifecycle: General Lifecycle
- Uploaded By: Natalie Maucharan on 2023-05-26 6:47 PM EEST
- Last Modified By: Natalie Maucharan on 2023-05-26 6:50 PM EEST
Ensure the green "Released" status bar is visible at the top of the document screen, confirming the document is in a steady, released state. The document is now ready for regulatory or operational use.
Link the document with regulatory actions or dossiers (optional)
Use the available options in Veeva Vault to link the released document with regulatory actions, dossiers, or other relevant records as needed. Alternatively, leave the document in the system for later use if no immediate linkage is required.
What's next
With your document successfully uploaded, indexed, and released in Veeva Vault, you can:
- Use the Relationships tab to add related versions, redacted copies, supporting documents, or translations.
- Reference the viewable rendition whenever you submit the document to external authorities.
- Link the released document to regulatory actions or dossiers, or retain it in the system for future reference.
Generation details: cost, quality tiers
Docsie billed 3,000 credits ($2.10) to analyze this 6-minute video at standard quality. The rewrite, template fill and Word/PDF exports were included. The same video at each quality tier:
| Quality | Frames sampled | Credits | Approx. cost |
|---|---|---|---|
| Draft | every 16-30 s | 1,500 | $1.05 |
| Standard (this guide) | every 8-15 s | 3,000 | $2.10 |
| Detailed | every 4-7 s | 6,000 | $4.20 |
| Ultra | every 1-3 s | 12,000 | $8.40 |
Credits priced at $0.70 per 1,000; plans include a monthly allowance. Enterprise customers on on-premise or bring-your-own-model deployments run this on their own inference and pay no per-video credits.
Generated by Docsie Video-to-Docs on 2026-10-12 from a 5-minute video. Screenshots are frames from the source video and belong to their creator, Envu's Guide Through Veeva Vault, whose original is embedded above. If you own this video and want the guide removed or credited differently, contact us and we will act within one business day.