
How to Export Files in Teamcenter
Exporting an assembly outside of Teamcenter allows you to share NX assembly files and their associated data with users or systems that do not have direct Teamcenter access. This guide walks you through how to export files in Teamcenter using the Export Assembly dialog in Siemens NX, covering revision rules, naming conventions, output locations, and verification of the final export.
Video: How to Export an Assembly from Teamcenter by Saratech. All credit for the demonstration goes to the creator; watch the original on YouTube. The written guide below was generated from this video by Docsie. Creator? Request a change or removal.
Exporting an assembly outside of Teamcenter allows you to share NX assembly files and their associated data with users or systems that do not have direct Teamcenter access. This guide walks you through how to export files in Teamcenter using the Export Assembly dialog in Siemens NX, covering revision rules, naming conventions, output locations, and verification of the final export.
Prerequisites
Before you begin, confirm that Siemens NX is integrated with your Teamcenter environment. This integration is required for the export functionality to work correctly.
Open the assembly in NX
Launch Siemens NX and open the assembly you want to export. In this example, the assembly is a desk lamp model.

Open the export assembly dialog
Click the File menu in the top left corner of the NX window, then select Export Assembly Outside Teamcenter from the dropdown.
Selecting this option opens the Export Assembly dialog box. This dialog contains several tabs: Main, Load Options, Naming, Non Masters/Associated Files, Checkouts, Log Files, and DFA Files.
Add the assembly to export
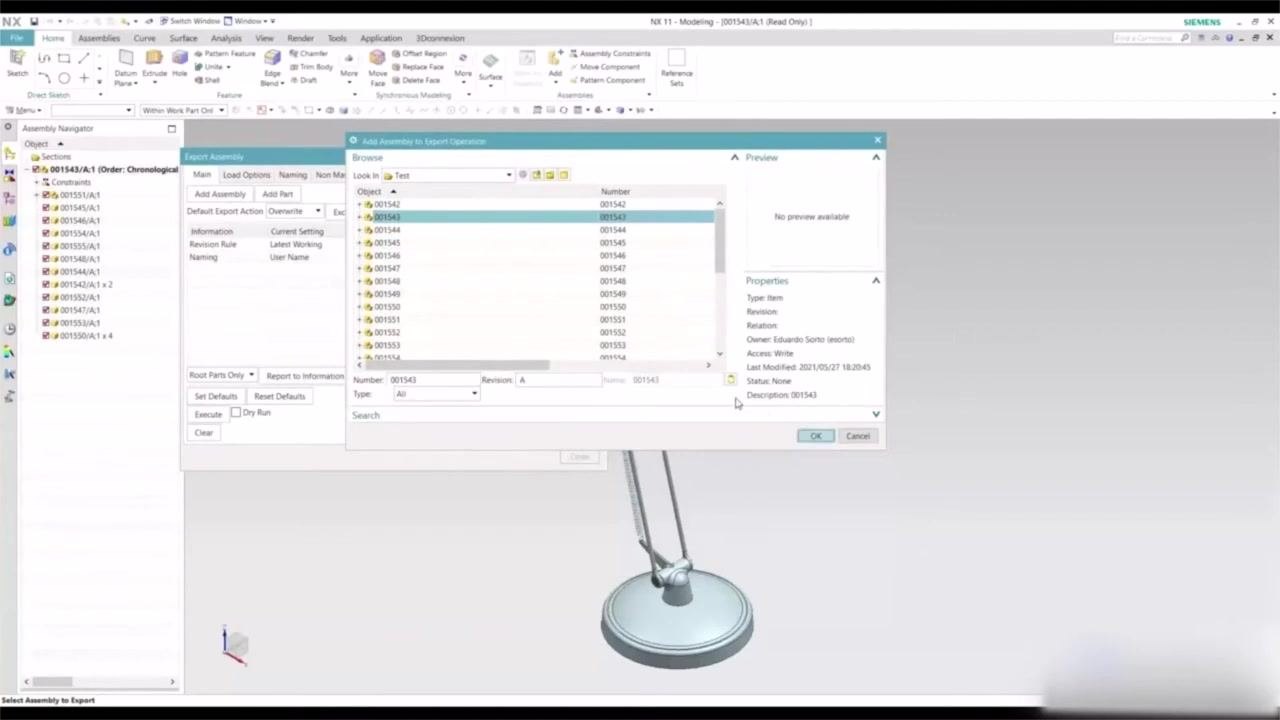
In the Export Assembly dialog, click the Add Assembly button.
A file browser window appears. Navigate to and select the assembly you want to export—in this example, assembly number 001543—then click OK to confirm your selection. The selected assembly then appears in the Export Assembly dialog. Note that the larger the assembly, the longer the export process may take.
Set revision rules
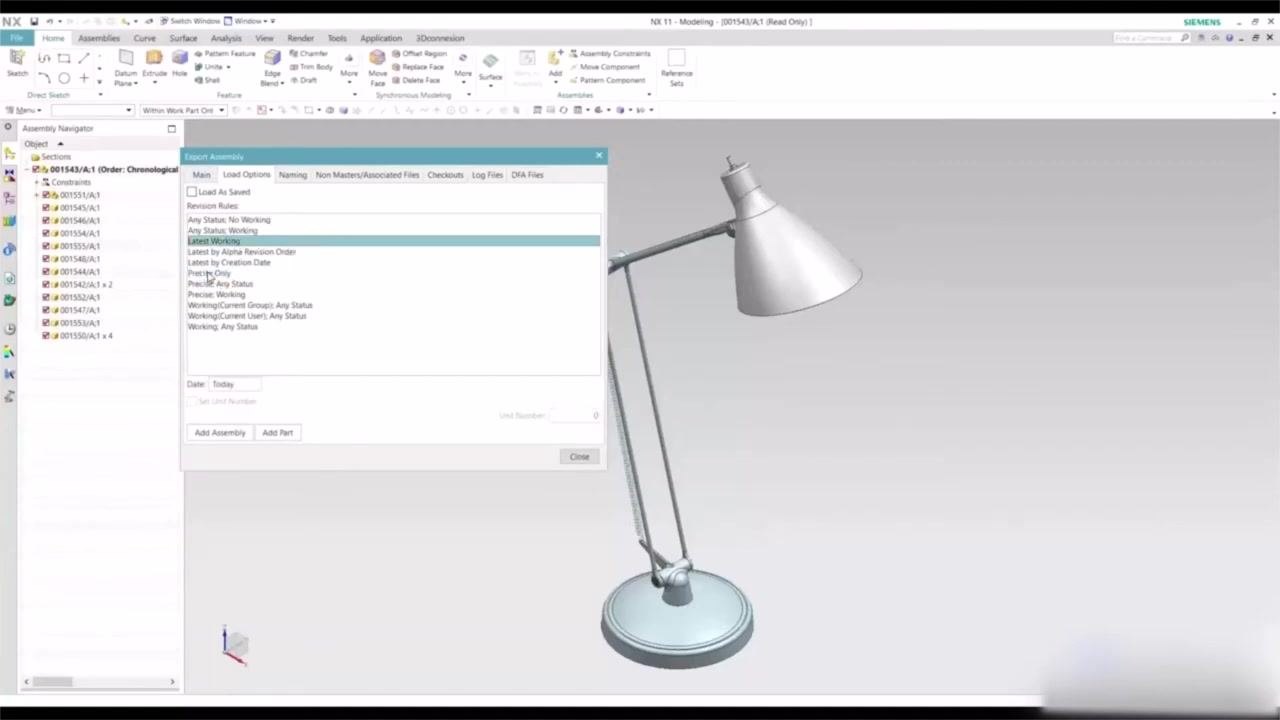
Switch to the Load Options tab and review the Revision Rules section. The default is typically set to Latest Working, which ensures the export uses the most up-to-date revision of each part regardless of release status. Other available options include Any Status, No Working; Any Status, Working; and Latest by Creation Date.
The "Latest Working" revision rule is recommended if your assembly contains parts in various states, such as released, in work, or hardware not released. Leave other settings at their default values unless your export scenario requires specific changes.
Review the available revision rules in more detail to choose the one that matches your needs:
- Latest Working: Exports the most recent working revision, regardless of release status.
- Precise Only: Exports only released revisions. If a part has a working revision that is not released, the previous released revision is exported instead.
- Any Status, No Working / Any Status, Working: Provide additional flexibility for including or excluding working revisions.
- Latest by Creation Date, Latest by Alpha Revision Order, and other options are available for specific scenarios.
If your assembly contains hardware or parts that are not released, using Precise Only may exclude those parts from the export. Always verify that your chosen revision rule matches your export intentions.
Set naming conventions for export
Switch to the Naming tab and set the Export Name field. In this example, "User Number" is selected, which appends the user's specific number as a suffix to the exported files. The Default Output is set to Auto Translate, which automatically uses part numbers for naming. You can define exception rules if needed by clicking the Exceptions button.
Using "Auto Translate" is recommended for consistent and clear file naming. If you do not want the default suffix—such as the underscore and revision letter, for example _A—in your exported file names, define a custom naming rule during the export process so the output matches your organizational standards.
Choose the output directory
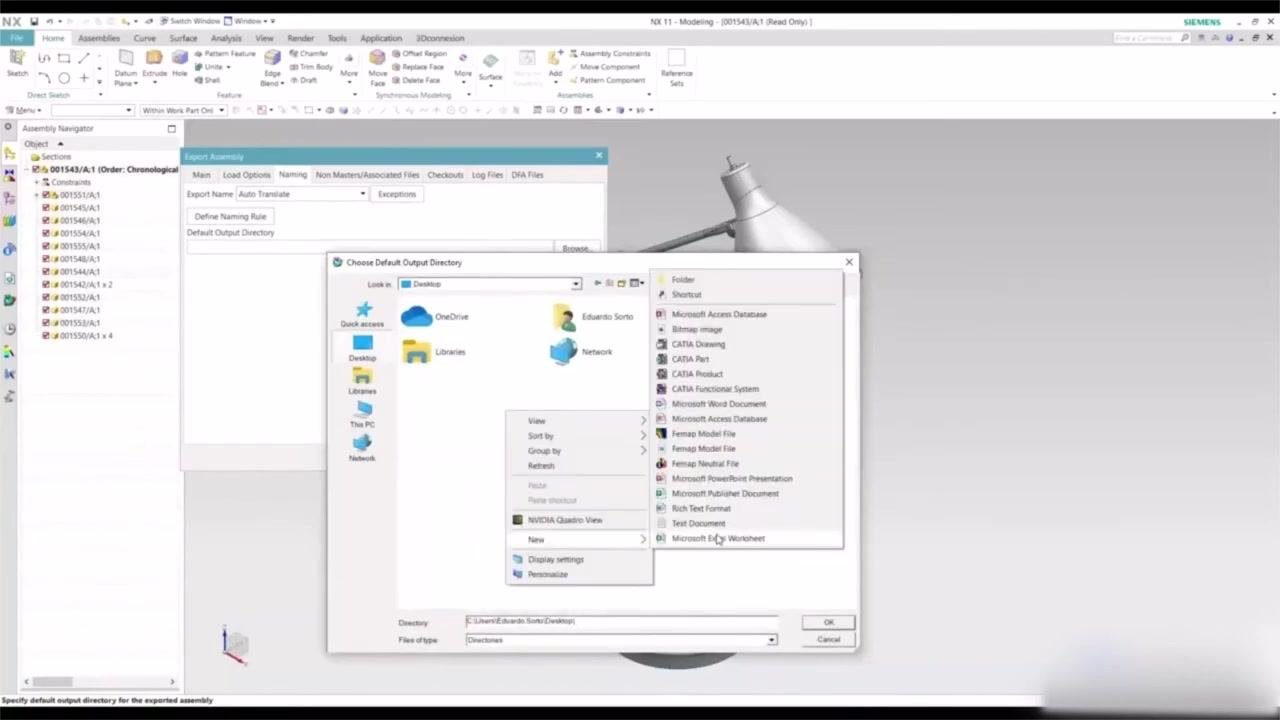
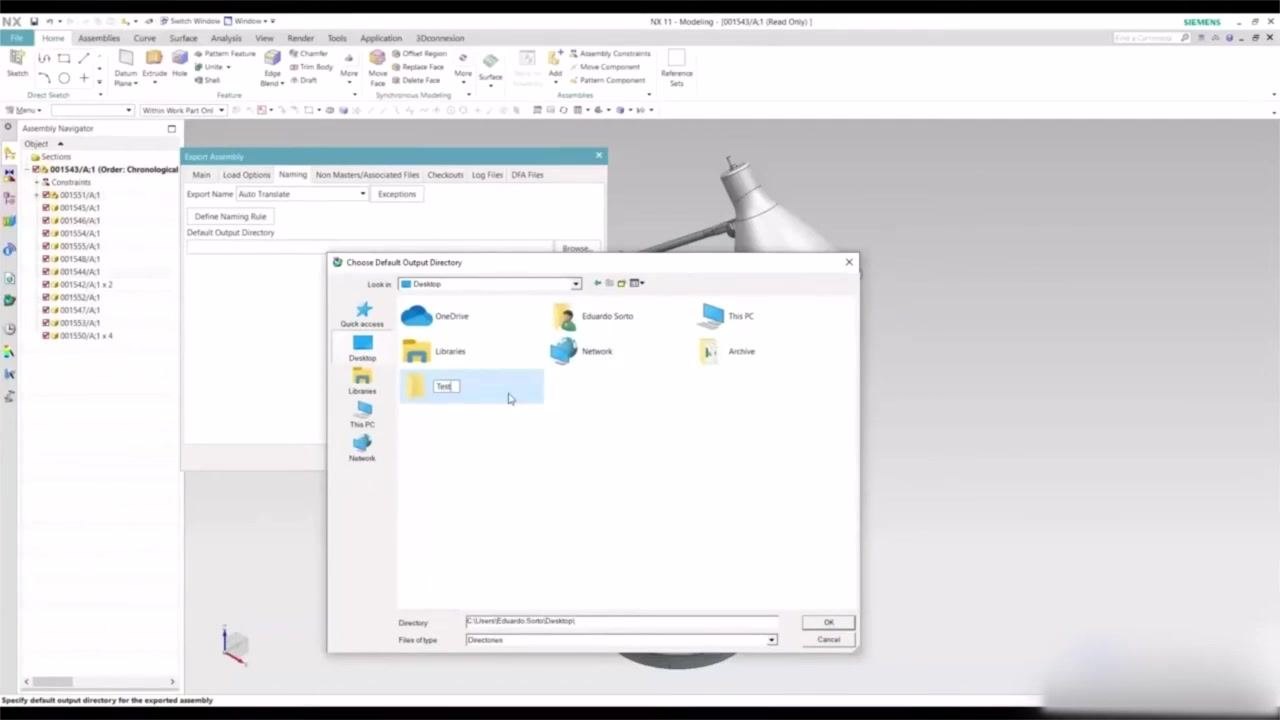
In the Naming tab, click the Browse button next to the Default Output Directory field. In the file browser window, navigate to the desired location for your export. You can create a new folder if needed by right-clicking and selecting "New Folder." In this example, a folder named Test is created and selected on the Desktop. Click OK to confirm your selection.
Add non-masters/associated files (optional)
Switch to the Non Masters/Associated Files tab. If your assembly has associated files, such as drawings, FEA models, or other supporting documents, you can add them here by checking the relevant boxes for Drawings, CAE, Simulations, or Idealized Parts. In this example, None is selected since there are no associated drawings or files for this part.
Always double-check your revision rule and associated file selections to ensure the export includes all necessary data. The output directory should also have sufficient permissions and storage space for the exported files.
Review checkout options
Switch to the Checkouts tab. Leave the Check Out Exported Parts option unchecked, since this is rarely used unless you specifically want to check out the exported parts for further editing.
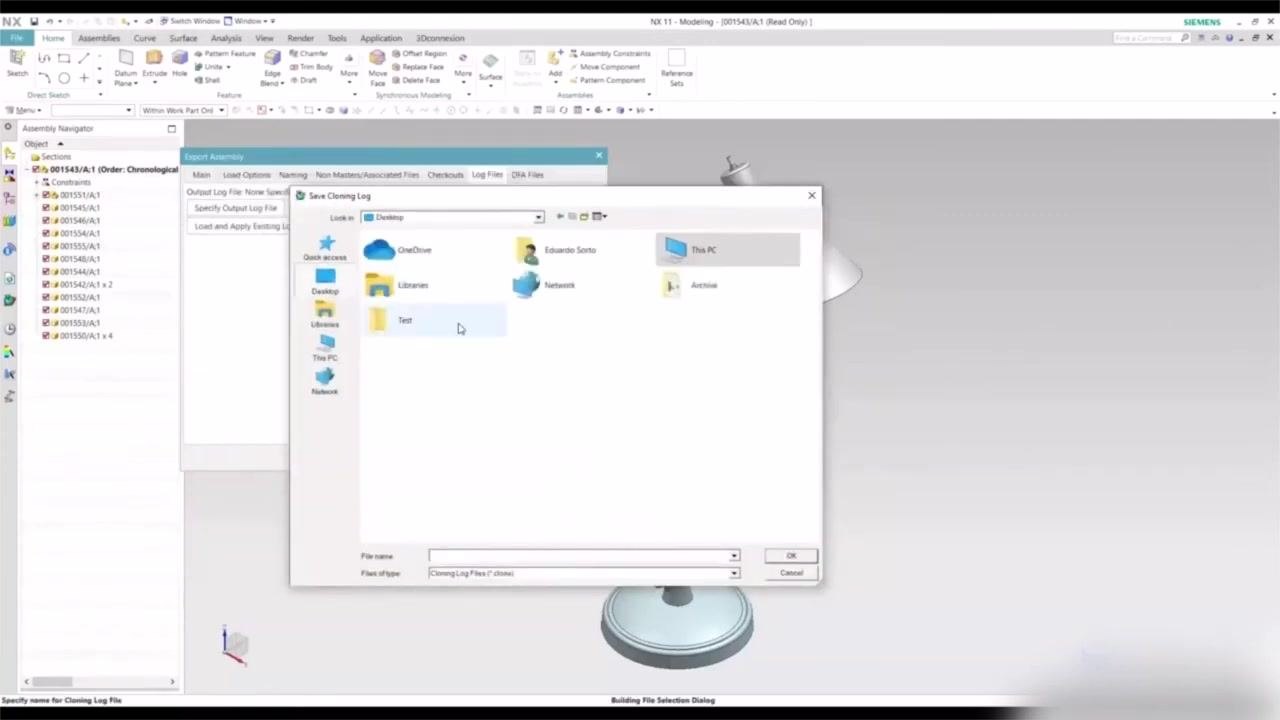
Configure log file output
Switch to the Log Files tab and click the Browse button to specify the output location for the log file. Navigate to the same folder you selected for your exported assembly files, such as the Test folder on your Desktop.
Enter a generic name for the log file, for example TestLogfile.clone, and confirm by clicking OK.
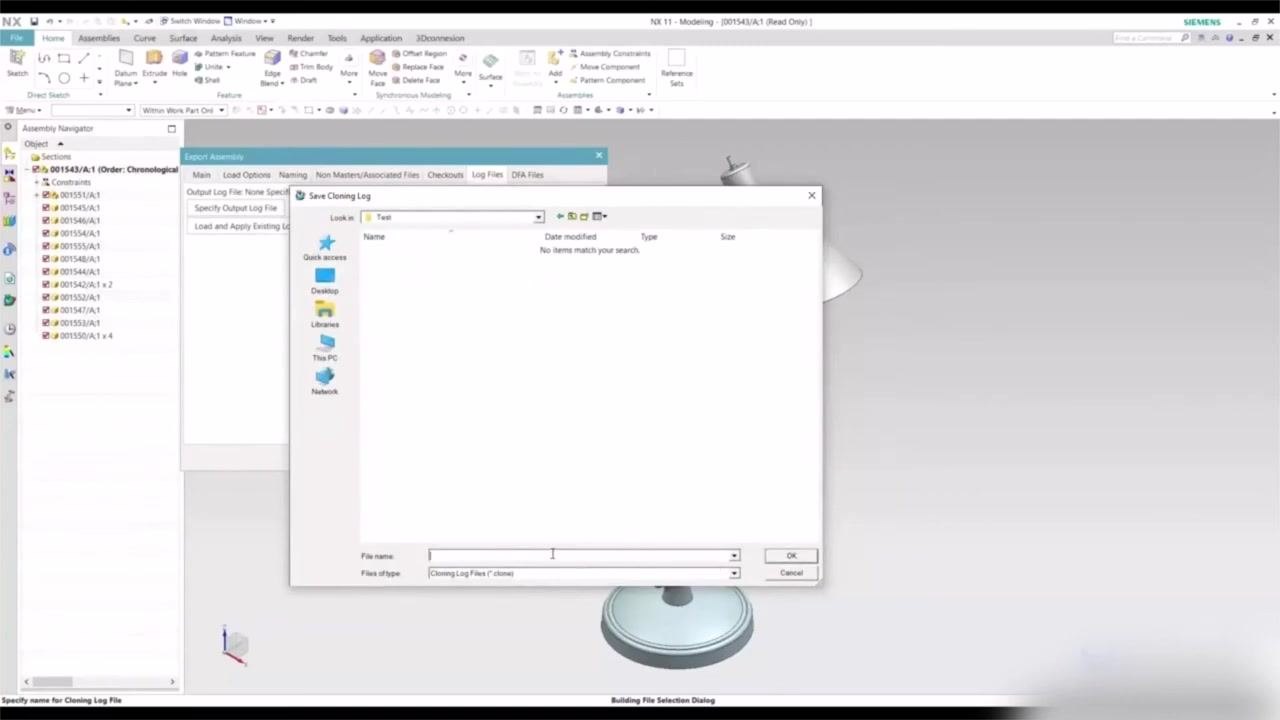
Add a DFA file (optional)
If you need to add a DFA (Design for Assembly) file, switch to the DFA Files tab. This option is rarely used, but you can add one here if required.
Verify export settings
Return to the Main tab and review all settings:
- Default Export Action: Overwrite
- Revision Rule: Latest Working
- Naming: Auto Translate
- Assembly: Your assembly name
- Output Directory: Path to your selected folder (for example,
C:\Users\[User]\Desktop\Test) - Log File: Path to your log file (for example,
C:\Users\[User]\Desktop\Test\TestLogfile.clone)
Make sure all conditions are set as desired before proceeding.
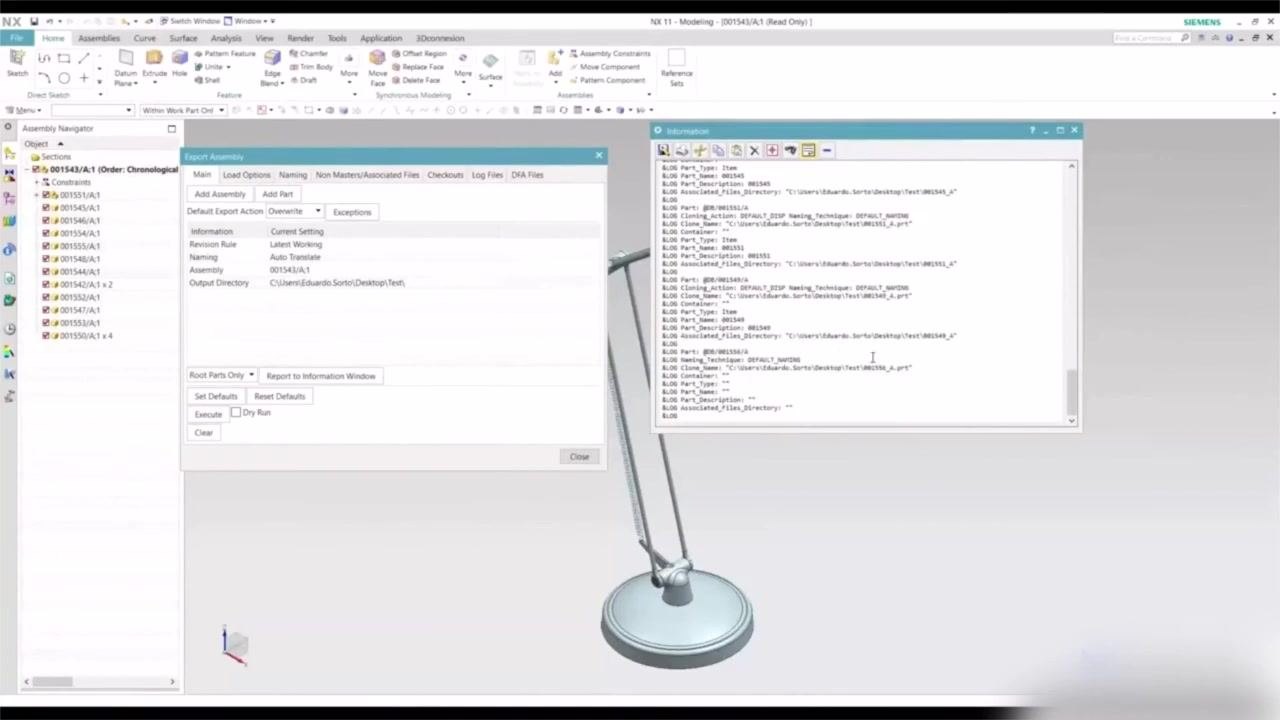
Perform a dry run (optional)
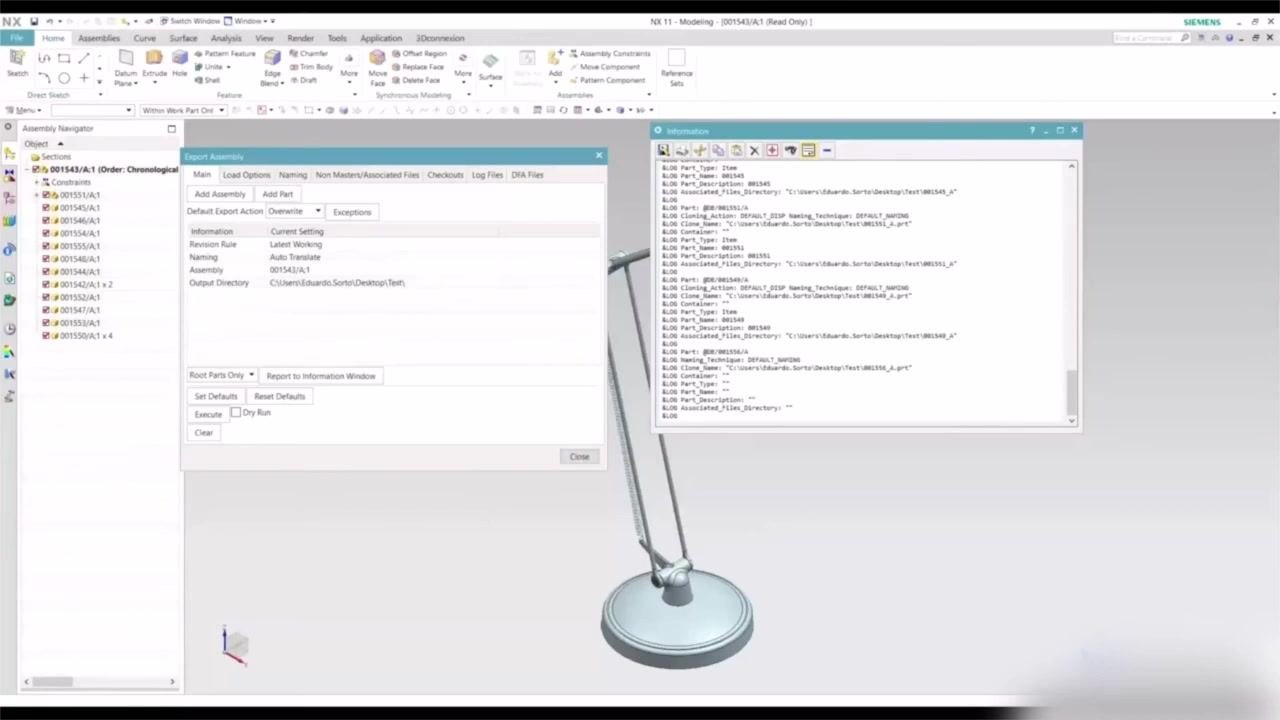
Check the Dry Run box to simulate the export process without actually writing files, then click Execute. Wait for the process to complete and verify that no errors are reported in the log window.
Execute the actual export
Uncheck the Dry Run box and click Execute to perform the actual export. The exported files are written to your selected output directory.
Verify exported files
Open the output directory, such as the Test folder on your Desktop, and confirm that all exported part files and the log file are present. Check that the file names include revision information, as specified by the Auto Translate naming convention, which helps distinguish between different revisions of the same part.
Always review the log file for any warnings or errors after export. Including revision information in file names is especially useful when managing multiple revisions of assemblies or parts.
Summary
By following these steps, you will have configured and executed a complete export of your assembly outside of Teamcenter, with revision rules, naming conventions, output directory, associated files, log files, and final output all correctly set and verified.
Generation details: cost, quality tiers
Docsie billed 3,000 credits ($2.10) to analyze this 6-minute video at standard quality. The rewrite, template fill and Word/PDF exports were included. The same video at each quality tier:
| Quality | Frames sampled | Credits | Approx. cost |
|---|---|---|---|
| Draft | every 16-30 s | 1,500 | $1.05 |
| Standard (this guide) | every 8-15 s | 3,000 | $2.10 |
| Detailed | every 4-7 s | 6,000 | $4.20 |
| Ultra | every 1-3 s | 12,000 | $8.40 |
Credits priced at $0.70 per 1,000; plans include a monthly allowance. Enterprise customers on on-premise or bring-your-own-model deployments run this on their own inference and pay no per-video credits.
Generated by Docsie Video-to-Docs on 2026-10-12 from a 5-minute video. Screenshots are frames from the source video and belong to their creator, Saratech, whose original is embedded above. If you own this video and want the guide removed or credited differently, contact us and we will act within one business day.