
How to Update a Treatment Plan in SimplePractice
Keeping a client's diagnosis and treatment plan current is essential for accurate clinical documentation and compliance. This guide walks you through how to update a treatment plan in SimplePractice, from locating the client record to saving your revised goals, objectives, and interventions.
Video: How to Update a Treatment Plan in SimplePractice [2026 Full Guide] by Shortcut Academy. All credit for the demonstration goes to the creator; watch the original on YouTube. The written guide below was generated from this video by Docsie. Creator? Request a change or removal.
Keeping a client's diagnosis and treatment plan current is essential for accurate clinical documentation and compliance. This guide walks you through how to update a treatment plan in SimplePractice, from locating the client record to saving your revised goals, objectives, and interventions.
Prerequisites
- An active SimplePractice account with login credentials.
- Access to the client record whose diagnosis and treatment plan you want to update.
Log in to SimplePractice
Open your web browser and navigate to secure.simplepractice.com. Enter your credentials to log in to your account.
Access the main dashboard
After logging in, you land on the main dashboard with a calendar view. The left sidebar provides navigation options including Calendar, Clients, Billing, Insurance, Analytics, Activity, and Settings, along with access to Notifications, Tasks, Requests, and Inquiries.
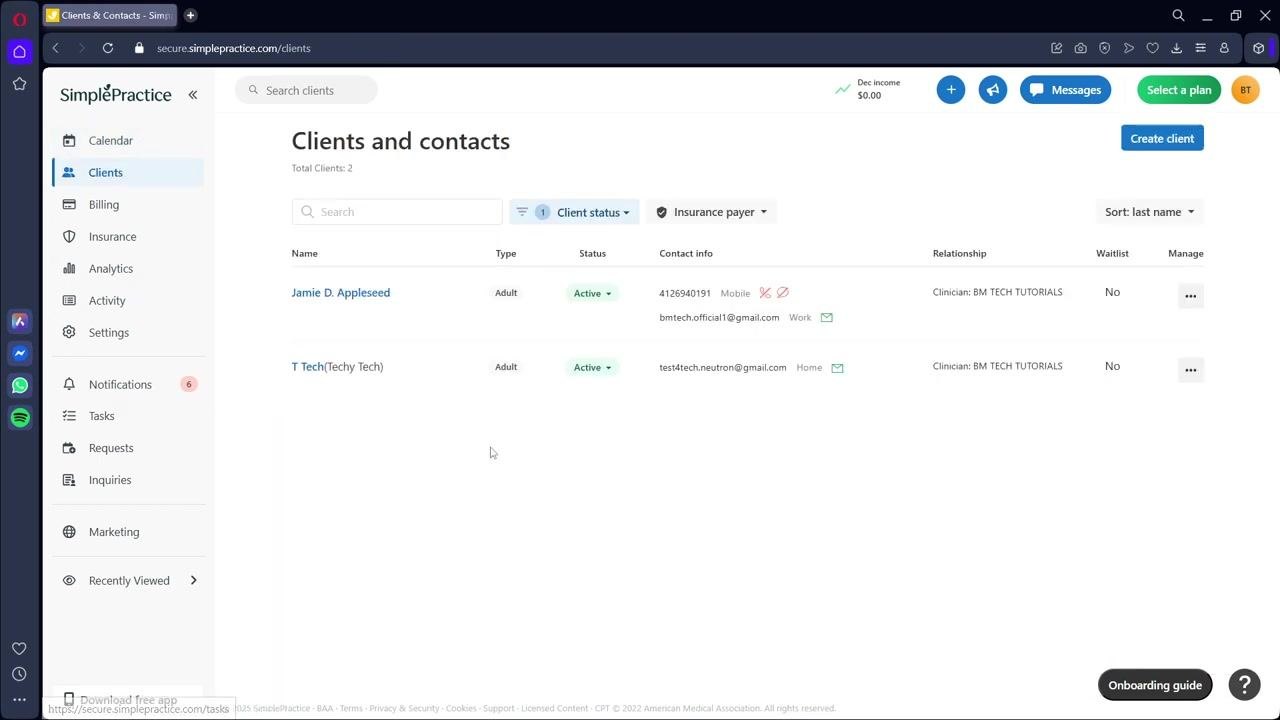
Navigate to the Clients tab
In the left sidebar, click Clients to view your client list.
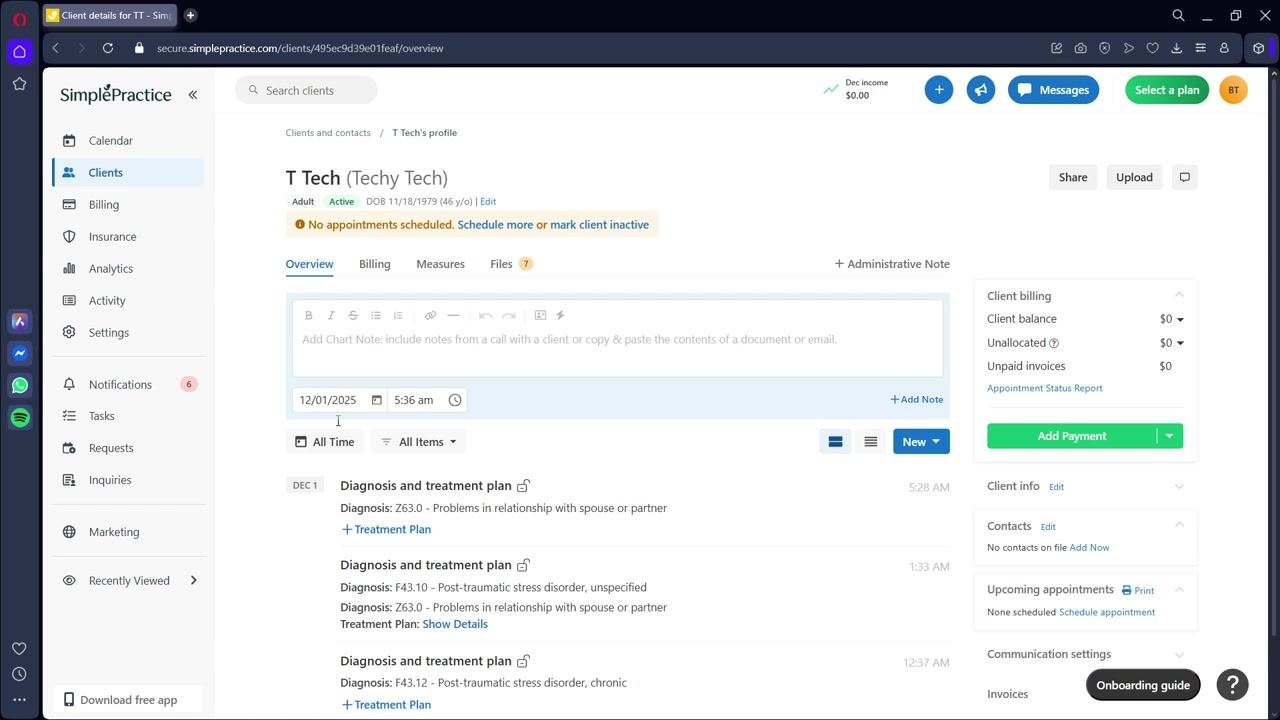
Select the client
In the "Clients and contacts" list, locate and click the name of the client whose plan you want to update. This list displays each client's status, contact information, and relationship to the clinician.
Selecting a client opens their overview page — the hub for all core details and documentation, including chart notes, billing, measures, and files. Look for the section labeled Diagnosis and treatment plan.
Open the plan for editing
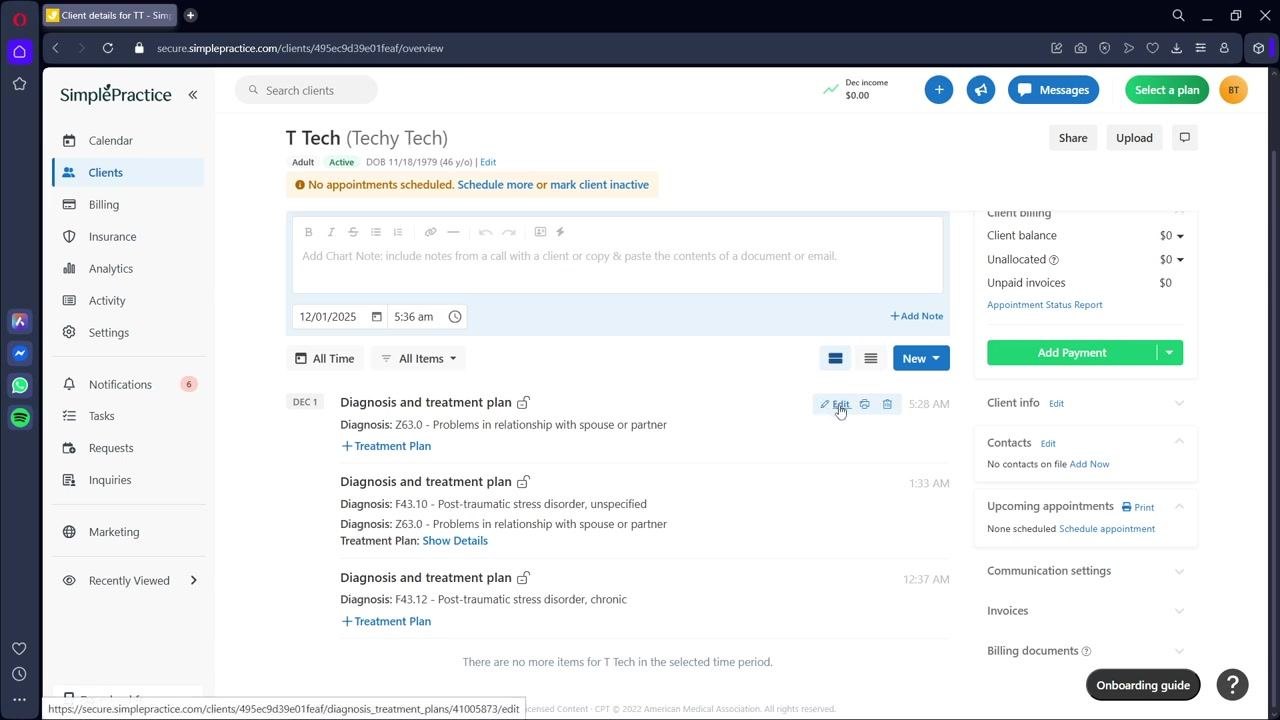
If a plan is already on file, hover your cursor over the diagnosis and treatment plan entry. Depending on your view, you'll see either an Edit button or a small pencil icon. Click it to open the plan for editing.
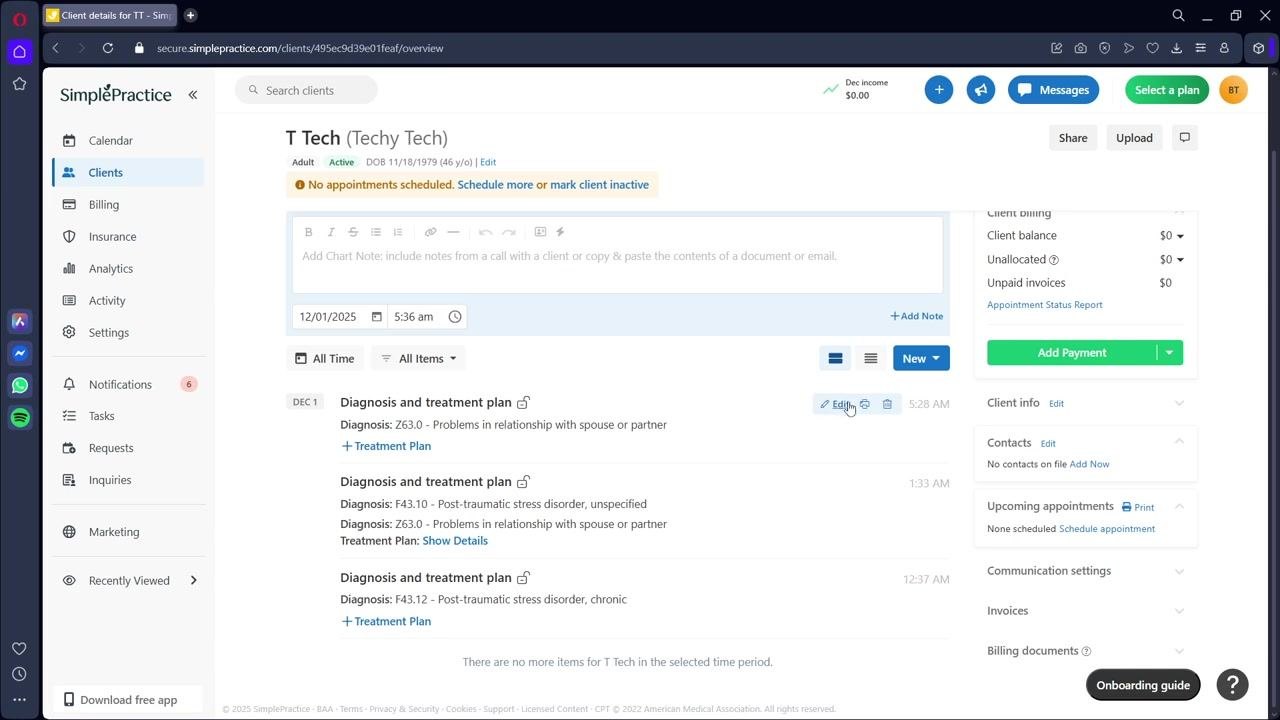
Update the diagnosis
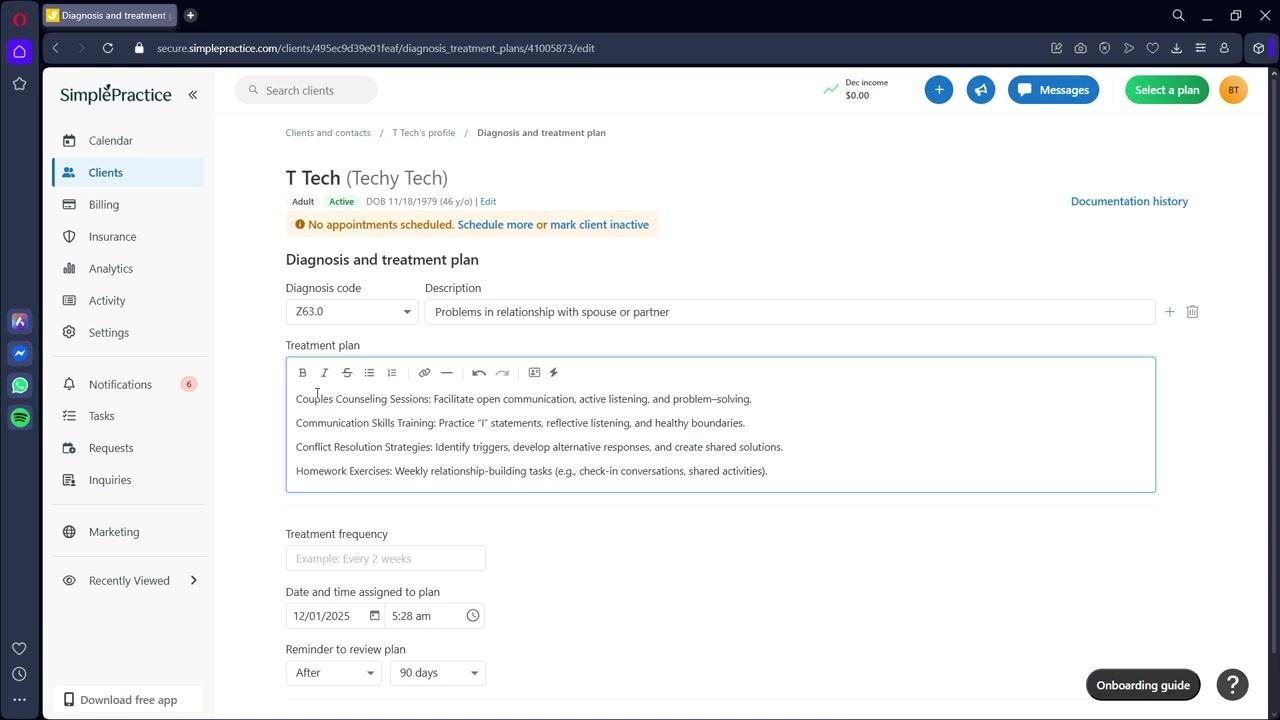
On the editing screen, update the diagnosis code and description so they reflect the most accurate clinical picture. For example:
- Diagnosis code: Z63.0
- Description: Problems in relationship with spouse or partner
- Date and time of diagnosis: 12/01/2025, 5:28 am
Click Update to save your changes to the diagnosis.
Choose a treatment plan template
Select the treatment plan template that fits your documentation needs:
- Simple: Capture the plan in a single text box.
- Basic: Write quick plans broken out by problem, goal, and objective.
- Advanced: Create step-by-step plans with multiple fields.
- Wiley: Use prewritten plans from Wiley PracticePlanners®.
Revise the treatment plan details
Write goals, objectives, and interventions using language that is clear and behaviorally specific. Include phrases that describe frequency, duration, and measurable change so progress can be demonstrated over time. For example, instead of "improve communication," write "Client will use 'I' statements in weekly sessions for 8–12 weeks." If you work with insurance payers, make sure your goals and timeframes align with their requirements.
Only include information that is clinically necessary — avoid adding sensitive or extraneous details that aren't required for treatment or documentation.
Enter or update the following:
- Goals: Make them measurable and realistic, specifying what the client can accomplish within a set timeframe.
- Objectives: Break goals into smaller, observable steps.
- Interventions: List the approaches you're using (for example, CBT techniques, exposure work, skills training) and tie them back to the objectives.
Example interventions:
- Couples Counseling Sessions: Facilitate open communication, active listening, and problem-solving.
- Communication Skills Training: Practice "I" statements, reflective listening, and healthy boundaries.
- Conflict Resolution Strategies: Identify triggers, develop alternative responses, and create shared solutions.
- Homework Exercises: Weekly relationship-building tasks (for example, check-in conversations, shared activities).
Set treatment frequency and reminders
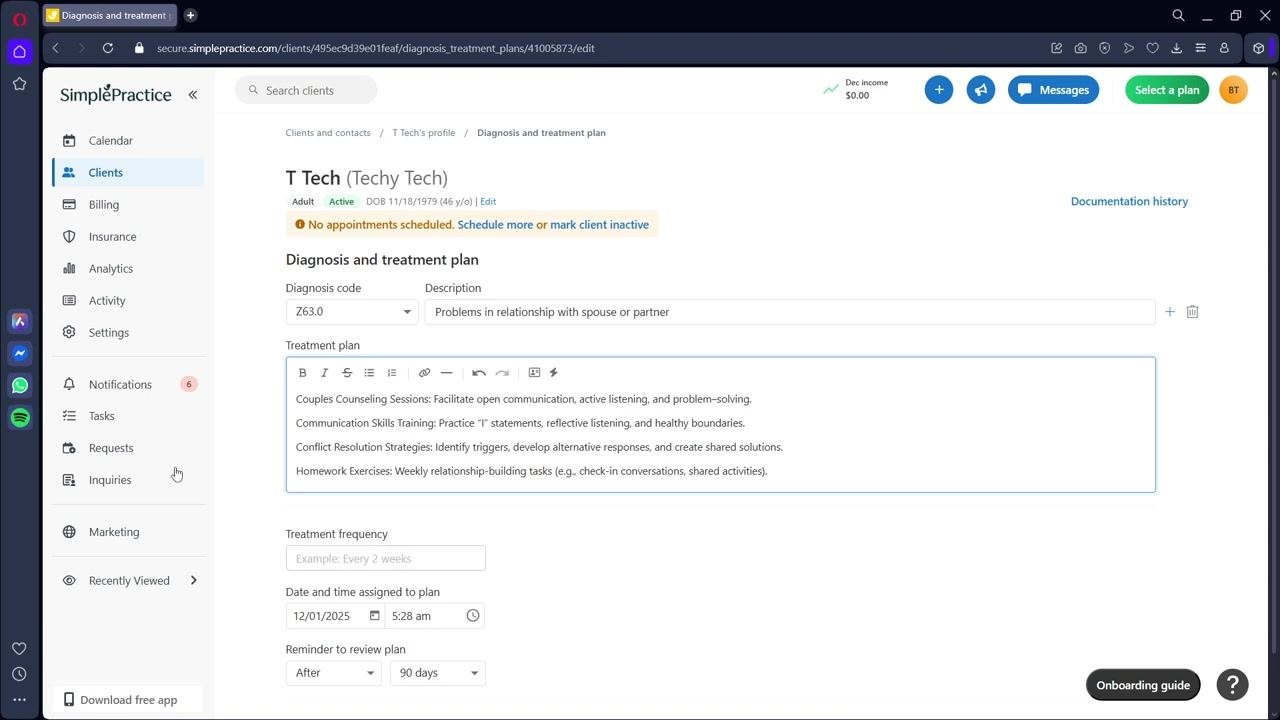
Specify the treatment frequency (for example, "Every 2 weeks") and adjust the date and time assigned to the plan as needed. Set a reminder to review the plan (for example, "After 90 days") so you're prompted for timely check-ins and updates.
Review all plan details before saving
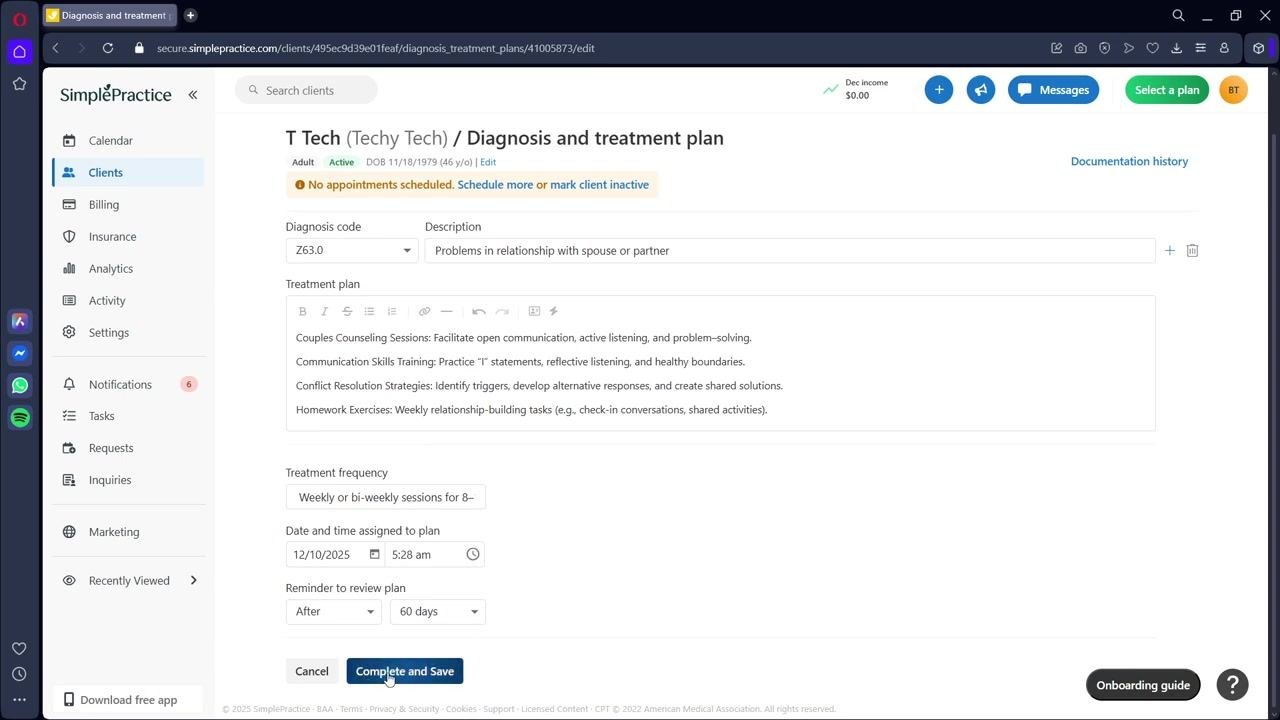
Before saving, double-check the following for accuracy and completeness:
- Diagnosis code and description (for example, Z63.0, Problems in relationship with spouse or partner)
- Goals, objectives, and interventions
- Treatment frequency (for example, "Weekly or bi-weekly sessions for 8–12 weeks")
- Date and time assigned to the plan (for example, 12/10/2025, 5:28 am)
- Reminder to review the plan (for example, "After 60 days")
Confirm the plan tells a coherent story of treatment and expected outcomes.
Save or complete and save the plan
When you're satisfied with your updates, click Save or Complete and Save at the bottom of the screen.
- Save records your changes.
- Complete and Save may mark the plan as finalized, depending on your settings.
Confirm the update on the client overview page
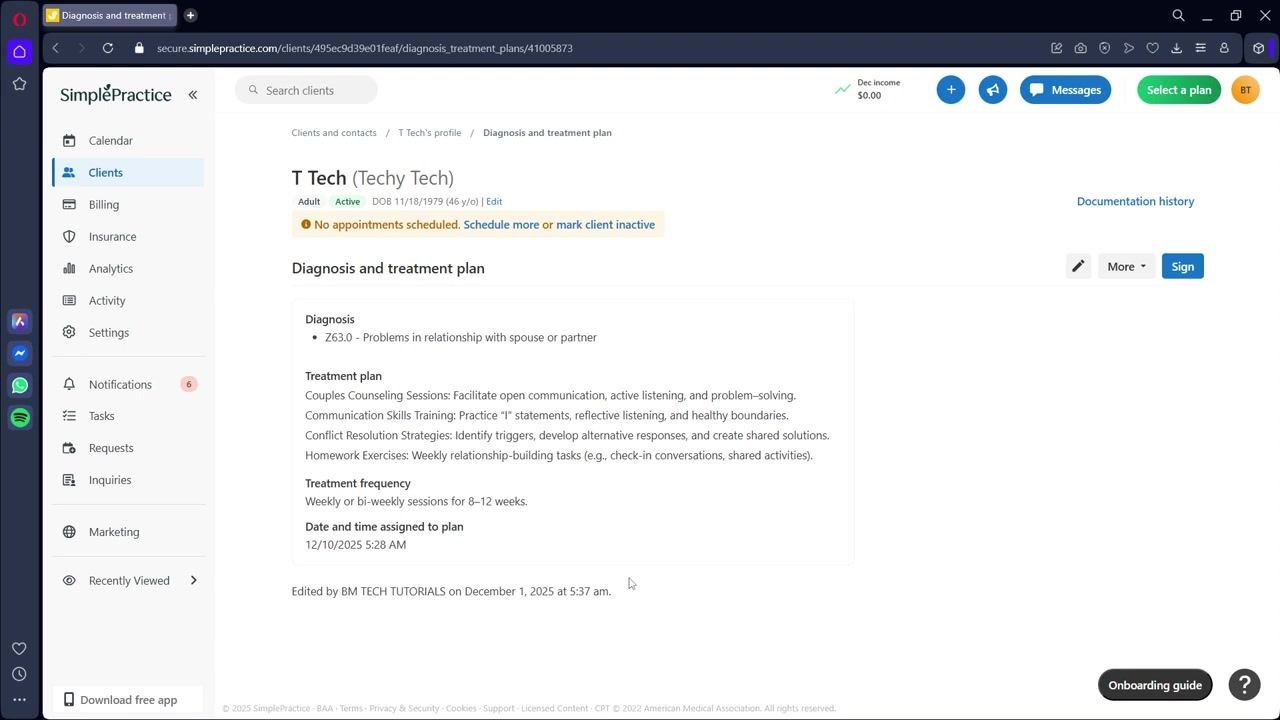
After saving, you're automatically returned to the client's overview page, where the updated diagnosis and treatment plan now appears in the Diagnosis and treatment plan section. Review the summary to confirm all changes have been applied as intended.
Summary
By following these steps to update a treatment plan in SimplePractice, you keep your documentation accurate, timely, and useful for both clinical decision-making and compliance. Consistent updates support effective care by ensuring plans stay current and aligned with best practices.
Tip: Regularly review and update treatment plans to reflect your client's evolving needs and progress. This supports clinical outcomes and helps ensure compliance with payer and regulatory requirements.
Generation details: cost, quality tiers
Docsie billed 1,500 credits ($1.05) to analyze this 4-minute video at standard quality. The rewrite, template fill and Word/PDF exports were included. The same video at each quality tier:
| Quality | Frames sampled | Credits | Approx. cost |
|---|---|---|---|
| Draft | every 16-30 s | 1,000 | $0.70 |
| Standard (this guide) | every 8-15 s | 2,000 | $1.40 |
| Detailed | every 4-7 s | 4,000 | $2.80 |
| Ultra | every 1-3 s | 8,000 | $5.60 |
Credits priced at $0.70 per 1,000; plans include a monthly allowance. Enterprise customers on on-premise or bring-your-own-model deployments run this on their own inference and pay no per-video credits.
Generated by Docsie Video-to-Docs on 2026-10-12 from a 3-minute video. Screenshots are frames from the source video and belong to their creator, Shortcut Academy, whose original is embedded above. If you own this video and want the guide removed or credited differently, contact us and we will act within one business day.