
How to Create a Retention Label in SharePoint
This guide explains how to create a retention label in SharePoint using the Office 365 Security & Compliance Center, publish it to your SharePoint sites, and apply it to documents. Retention labels help you manage how long content is kept and, when configured as records, prevent business users from deleting important files.
Video: Data Governance: creating labels and publishing retention action to SharePoint by Microsoft 365 (2017). All credit for the demonstration goes to the creator; watch the original on YouTube. The written guide below was generated from this video by Docsie. Creator? Request a change or removal.
This guide explains how to create a retention label in SharePoint using the Office 365 Security & Compliance Center, publish it to your SharePoint sites, and apply it to documents. Retention labels help you manage how long content is kept and, when configured as records, prevent business users from deleting important files.
Prerequisites
- Administrator credentials for Office 365.
- Access to the Office 365 Security & Compliance Center.
- A SharePoint site where the label will be applied (for example, an HR Project Site).
Access the Office 365 Security & Compliance Center
Open your web browser and navigate to the Office 365 Security & Compliance Center. Log in using your administrator credentials.
Navigate to the labels section
In the left navigation pane, select Classifications, then select Labels. You'll see a list of existing labels along with their creators, retention periods, and last modified dates. Click Create a label to start a new retention label.
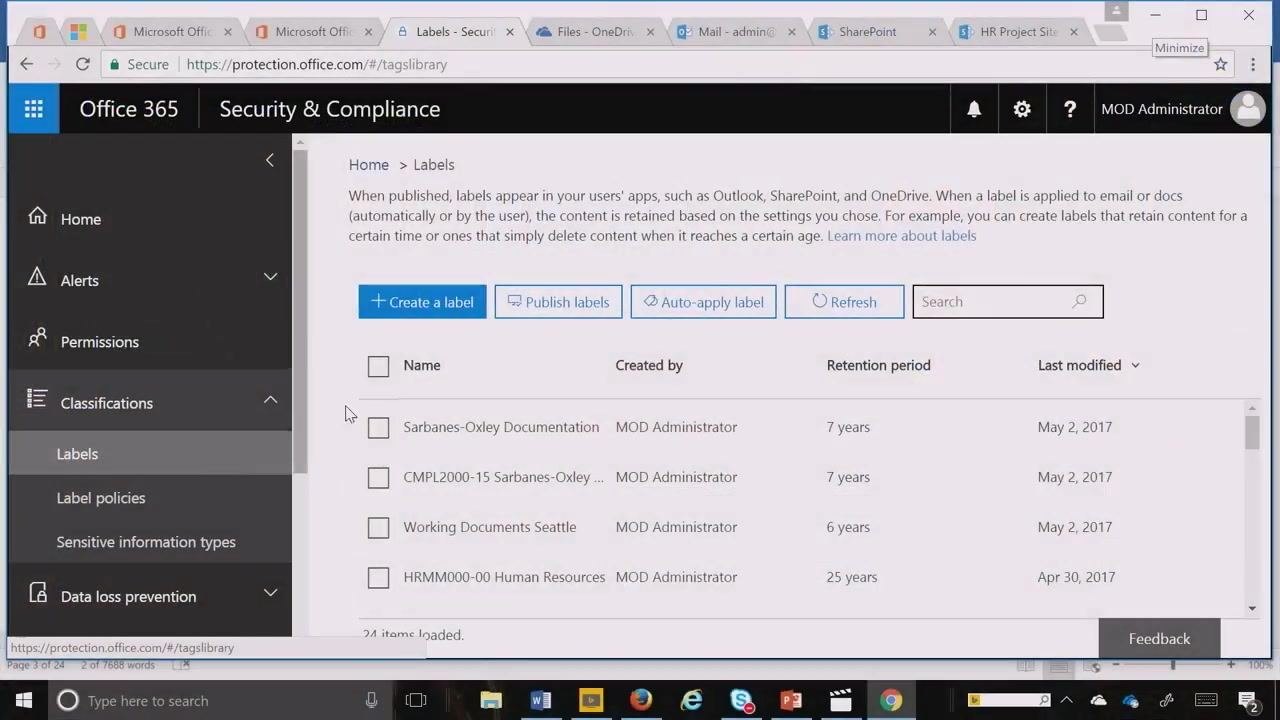
Name your label
Enter a name for the label, such as HR Docs. Click Next to proceed.
Configure label settings
Set the retention period—for example, 10 years. Under "Do you want us to delete it after this time?", select No to retain the content instead of deleting it.
In the "Retain or delete the content based on" dropdown, choose when it was last modified.
Optionally, to make the label immutable so that business users cannot delete the content, check Use label to classify content as a "Record". Click Next to continue.
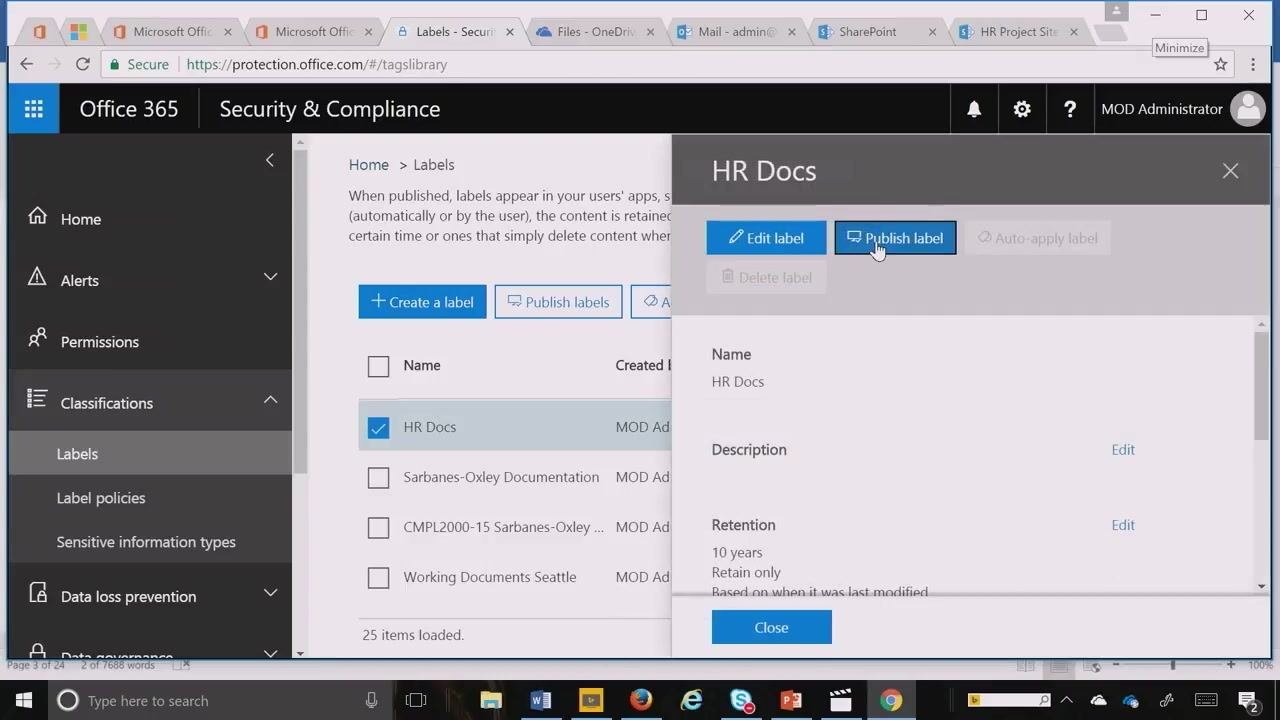
Review and create the label
Review your settings for accuracy, then click Create to finalize the label.
Publish the label
After creating the label, select it from the list (for example, HR Docs), then click Publish label.
Choose locations to publish the label
In the "Choose locations" step, select Let me choose specific locations. Turn on the toggle for SharePoint sites.
Optionally, turn off other locations such as OneDrive accounts and Office 365 groups if you only want to target SharePoint. Click Next.
Name your policy
Enter a name for the policy, such as HR Docs, then click Next.
Review your settings and publish
Review the summary, which should show: - Choose labels to publish: HR Docs, 10 years keep - Publish to these locations: SharePoint sites - Policy name: HR Docs
Click Publish labels to complete the process.
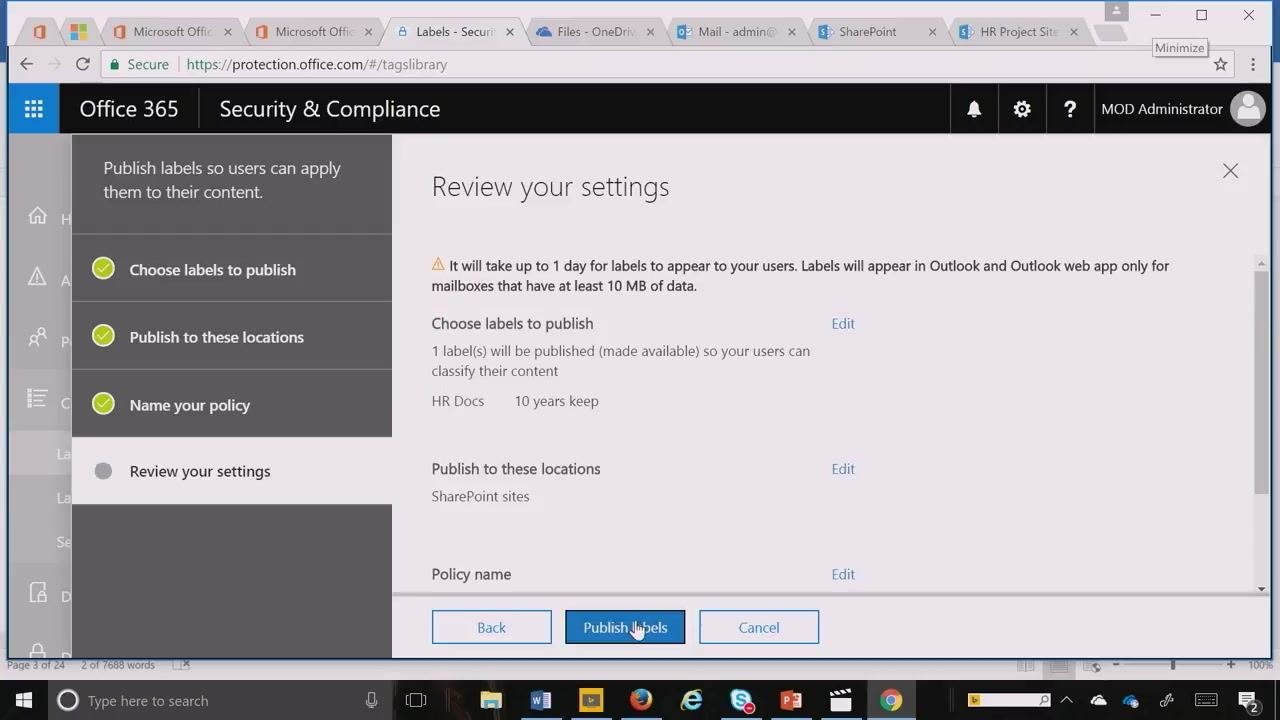
Verify the label in SharePoint
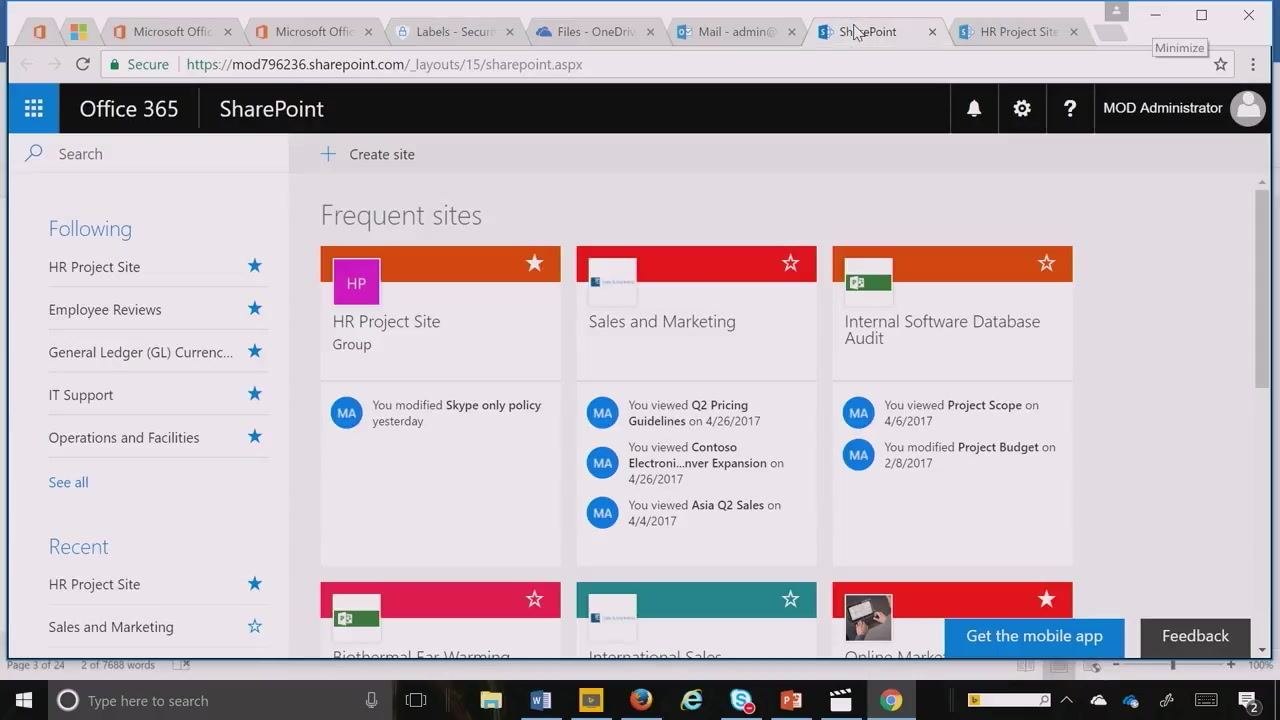
Go to your Office 365 SharePoint portal. Navigate to the site where you published the label, such as the HR Project Site. Confirm that the retention label is now available for use on documents within the site.
At this point, you have created and published a retention label for SharePoint. The label retains documents based on their last modified date and, if configured as a record, prevents business users from deleting them.
Applying the retention label to a document
Once your label is published, you can apply it directly to documents in SharePoint. The following steps walk through applying and verifying the label on a specific file.
Step 1: Navigate to your SharePoint site
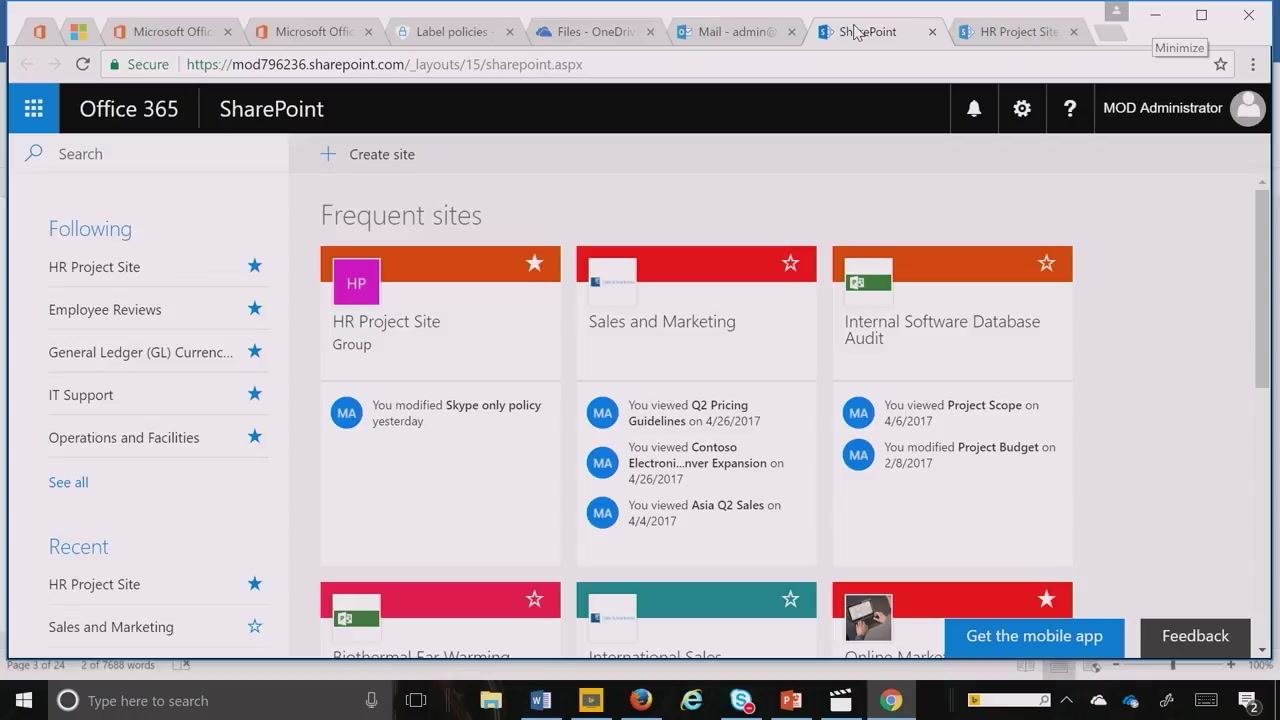
Open your web browser and go to your Office 365 SharePoint portal. Locate and click your target site, such as HR Project Site, from the "Frequent sites" section.
Step 2: Access the document library
In the left navigation pane, click Documents to open the document library for your site. Review the list of available documents.
Step 3: Select the document to apply retention
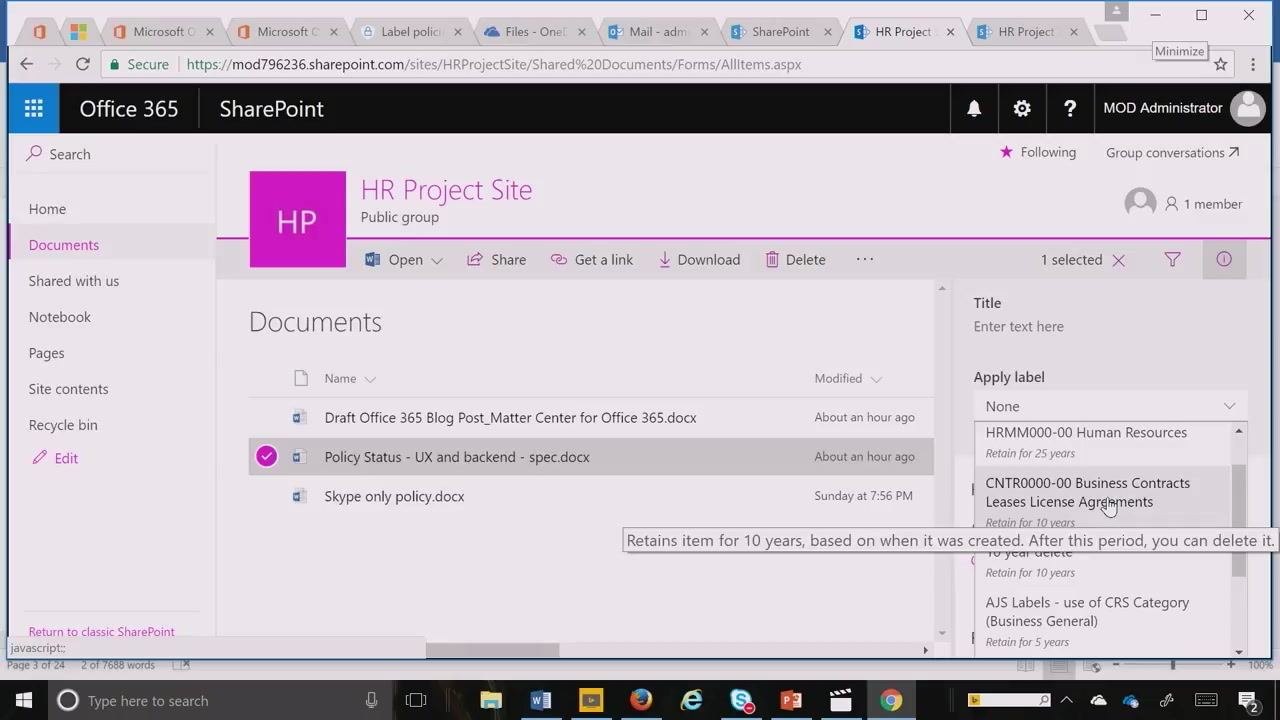
Click the document you want to label—for example, Policy Status - UX and backend - spec.docx. The document will be highlighted, and additional options will appear.
Step 4: Open the information panel
With the document selected, an information panel appears on the right side of the screen. Locate the Apply label dropdown within this panel.
Step 5: Apply the retention label
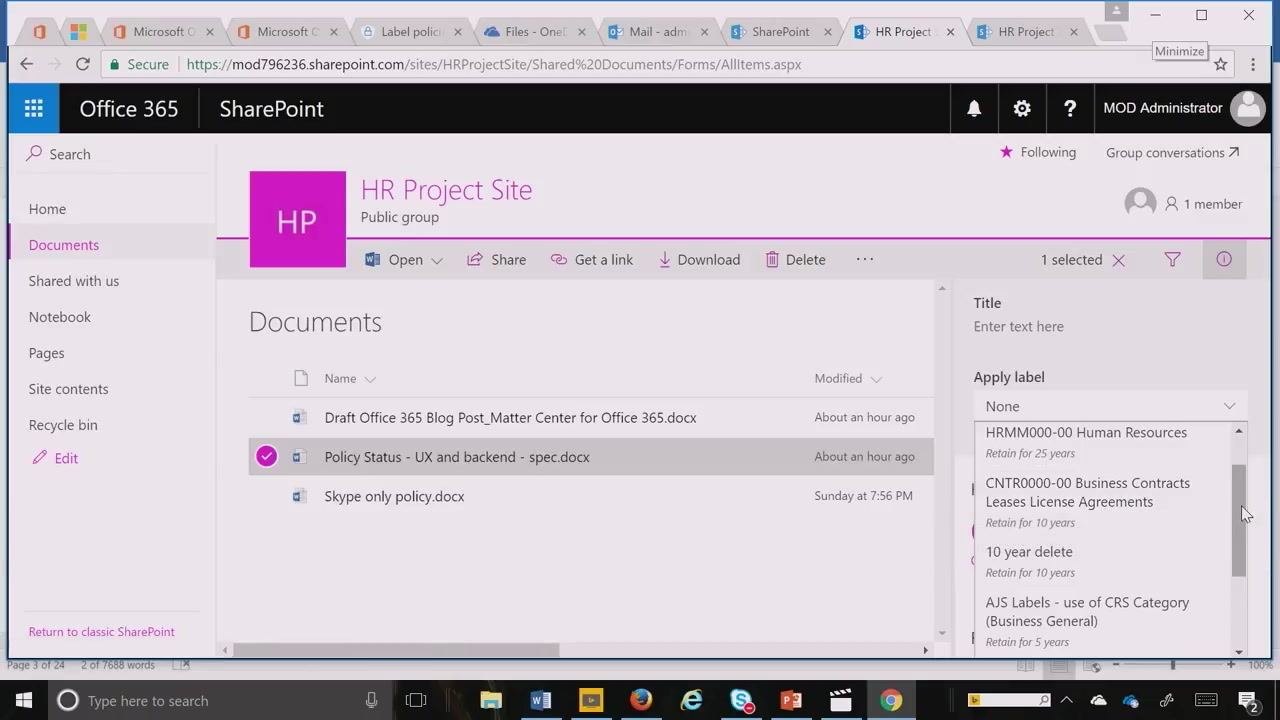
Click the Apply label dropdown and select the appropriate label from the list—for example, HR Docs, or another relevant label such as "HRMM0000-00 Human Resources" or "CNTR0000-00 Business Contracts Leases License Agreements." The label is applied to the selected document.
Step 6: Verify the label application
After applying the label, confirm it appears in the Labels column for the document. A tooltip or message may indicate the retention period and policy details, such as "Retains item for 10 years, based on when it was created. After this period, you can delete it."
Step 7 (optional): Check immutability or record status
If the label was configured to classify content as a "Record," check the Item is a Record column. If the document is now a record, this column displays "Yes," indicating the document is immutable and cannot be deleted by business users.
Step 8: Repeat for additional documents as needed
Repeat the selection and labeling steps for any other documents that require retention labels.
Summary
You have now learned how to create a retention label in SharePoint, publish it to specific SharePoint sites, and apply it to individual documents. This process ensures documents are retained according to your organization's policies and, when configured for immutability, protects records from deletion by business users.
Generation details: cost, quality tiers
Docsie billed 2,000 credits ($1.40) to analyze this 4-minute video at standard quality. The rewrite, template fill and Word/PDF exports were included. The same video at each quality tier:
| Quality | Frames sampled | Credits | Approx. cost |
|---|---|---|---|
| Draft | every 16-30 s | 1,000 | $0.70 |
| Standard (this guide) | every 8-15 s | 2,000 | $1.40 |
| Detailed | every 4-7 s | 4,000 | $2.80 |
| Ultra | every 1-3 s | 8,000 | $5.60 |
Credits priced at $0.70 per 1,000; plans include a monthly allowance. Enterprise customers on on-premise or bring-your-own-model deployments run this on their own inference and pay no per-video credits.
Generated by Docsie Video-to-Docs on 2026-09-14 from a 3-minute video. Screenshots are frames from the source video and belong to their creator, Microsoft 365, whose original is embedded above. If you own this video and want the guide removed or credited differently, contact us and we will act within one business day.