
How to Create an Update Set in ServiceNow
This guide walks you through how to create an update set in ServiceNow and move changes from the default global update set into it. Following this process ensures your customizations are tracked in the correct update set, which makes future migrations and reviews much easier.
Video: How to Move Updates Between Update Sets | ServiceNow Tutorials by Everforth GlideFast (2022). All credit for the demonstration goes to the creator; watch the original on YouTube. The written guide below was generated from this video by Docsie. Creator? Request a change or removal.
This guide walks you through how to create an update set in ServiceNow and move changes from the default global update set into it. Following this process ensures your customizations are tracked in the correct update set, which makes future migrations and reviews much easier.
Prerequisites
- Administrator or developer access to your ServiceNow instance.
- Familiarity with the System Settings menu and the Local Update Sets module.
Understanding the common mistake
As a ServiceNow administrator or developer, it is common to accidentally make changes while the Default [Global] update set is active instead of the update set you intended to use. If this happens, you can move those changes to the correct update set with just a few clicks.
Enable the update set and application pickers
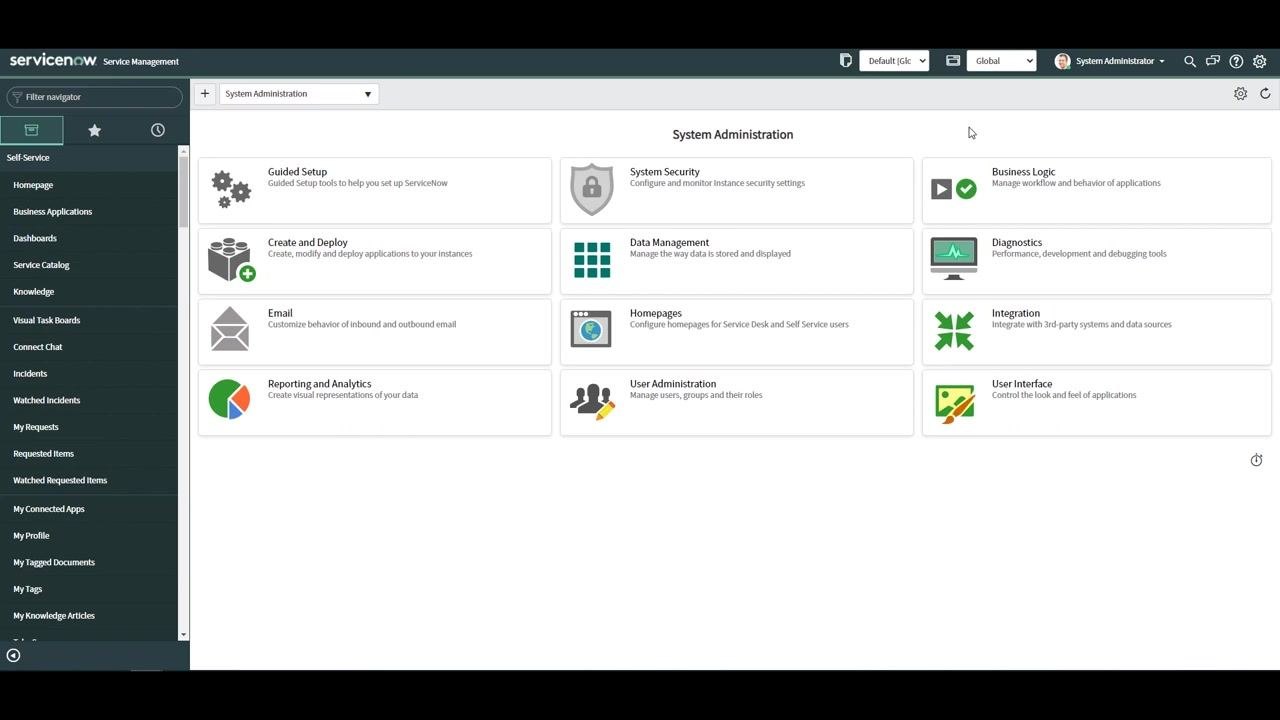
- Click the System Settings gear icon in the top right corner of the ServiceNow interface.
- Open the Developer tab within System Settings.
- Enable the following toggles:
- Show Application picker and header
- Show update set picker and header
Turning on these options displays the current application and update set in the header, so you can always see which update set you are working in.
Verify the current update set
Check the header to confirm you are currently working in the Default [Global] update set. This is the state you want to avoid working in when making intentional changes.
Make a change in the wrong update set (demo)
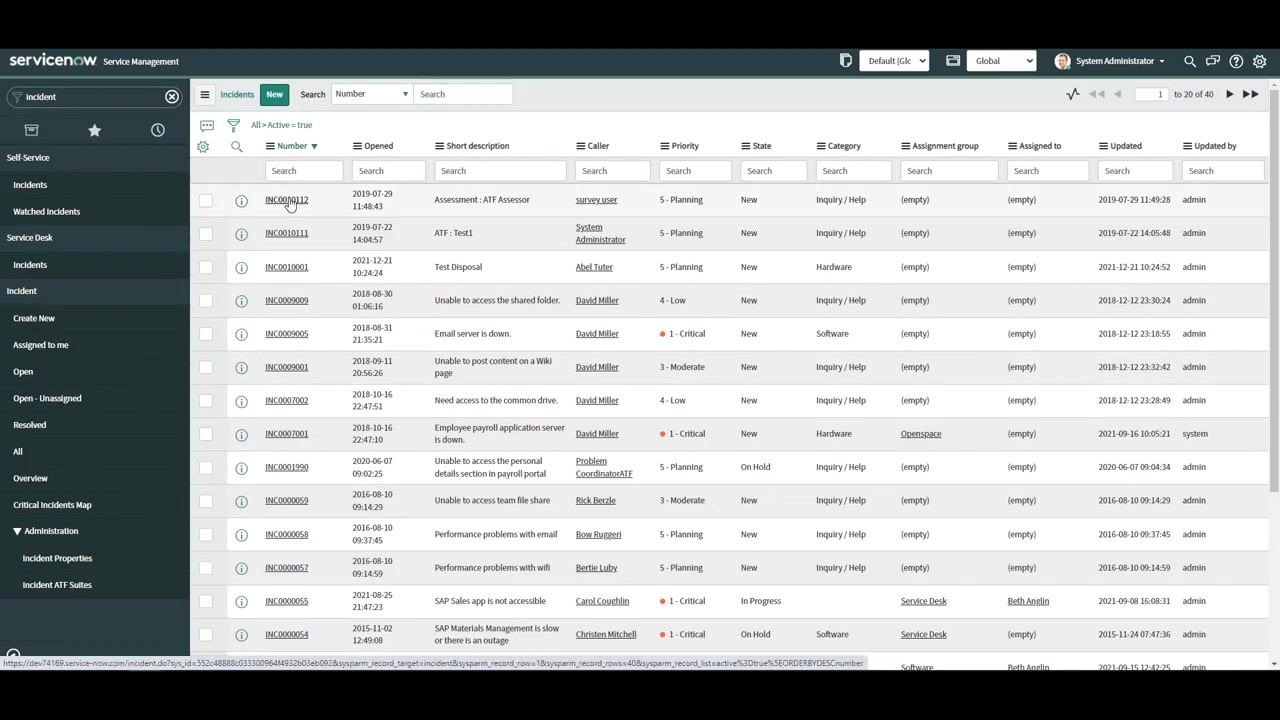
- Use the left navigation pane to open Incident under the Service Desk section.
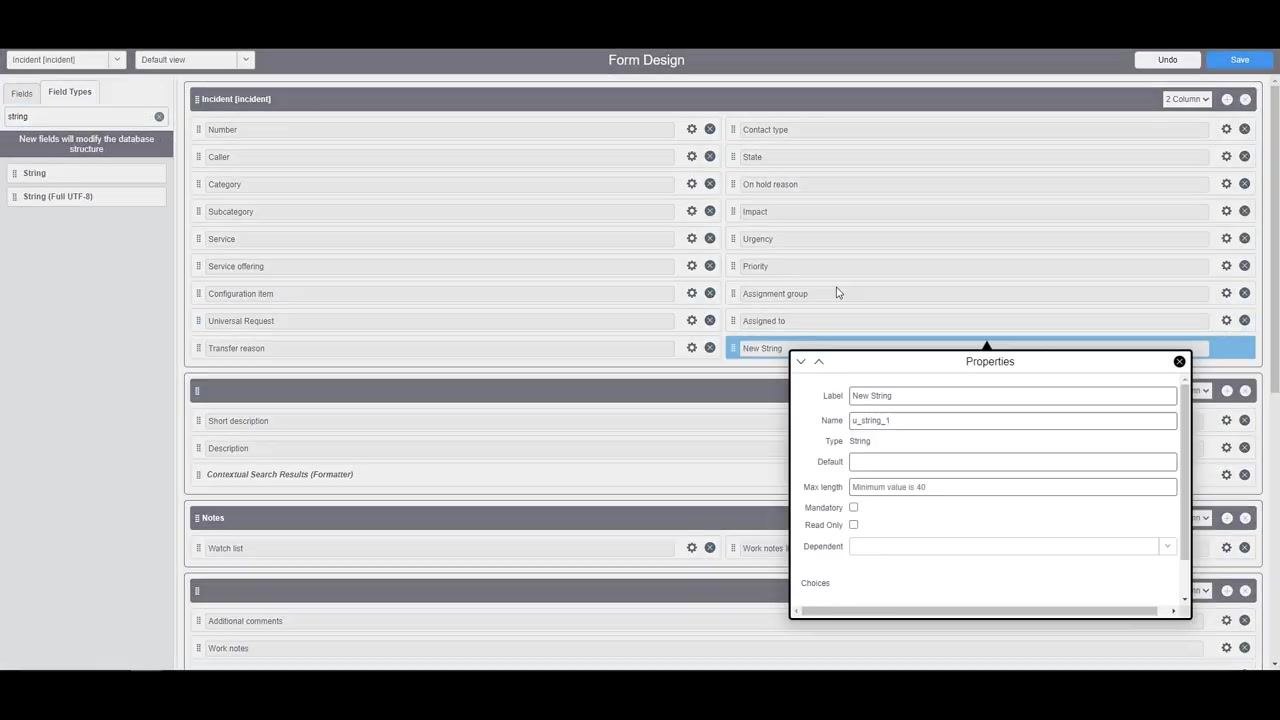
- On the Incident form, add a new string field named demo field.
This creates an update that is recorded in the currently active update set — in this case, the Default global update set.
Create a new update set
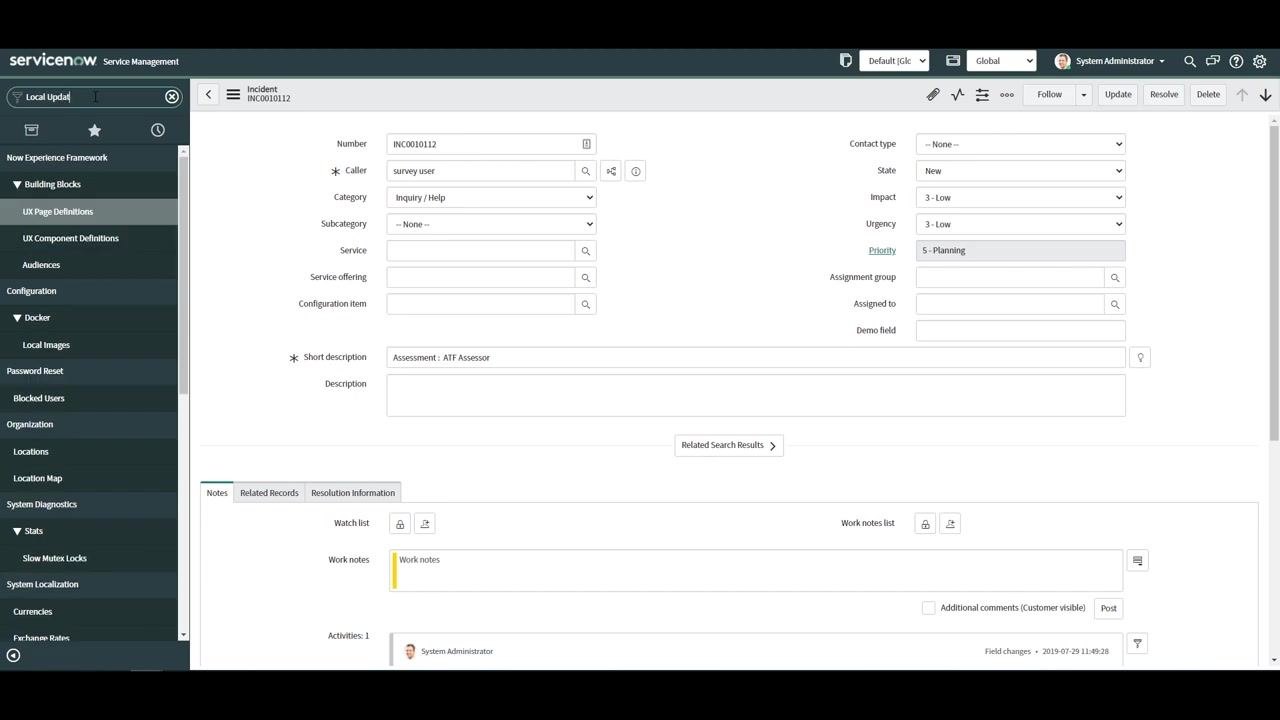
- In the left navigation pane, open the Local Update Sets module under the System Update Sets application.
- Click the green New button at the top of the list view to open a new update set form.
- Fill in the update set details:
- Name:
New Field on the Incident Form - State:
In progress - Application:
Global - Leave Parent, Release date, and Description blank unless your requirements call for them.
- Name:
- Click Submit at the bottom left of the form to create the update set.
- Confirm that
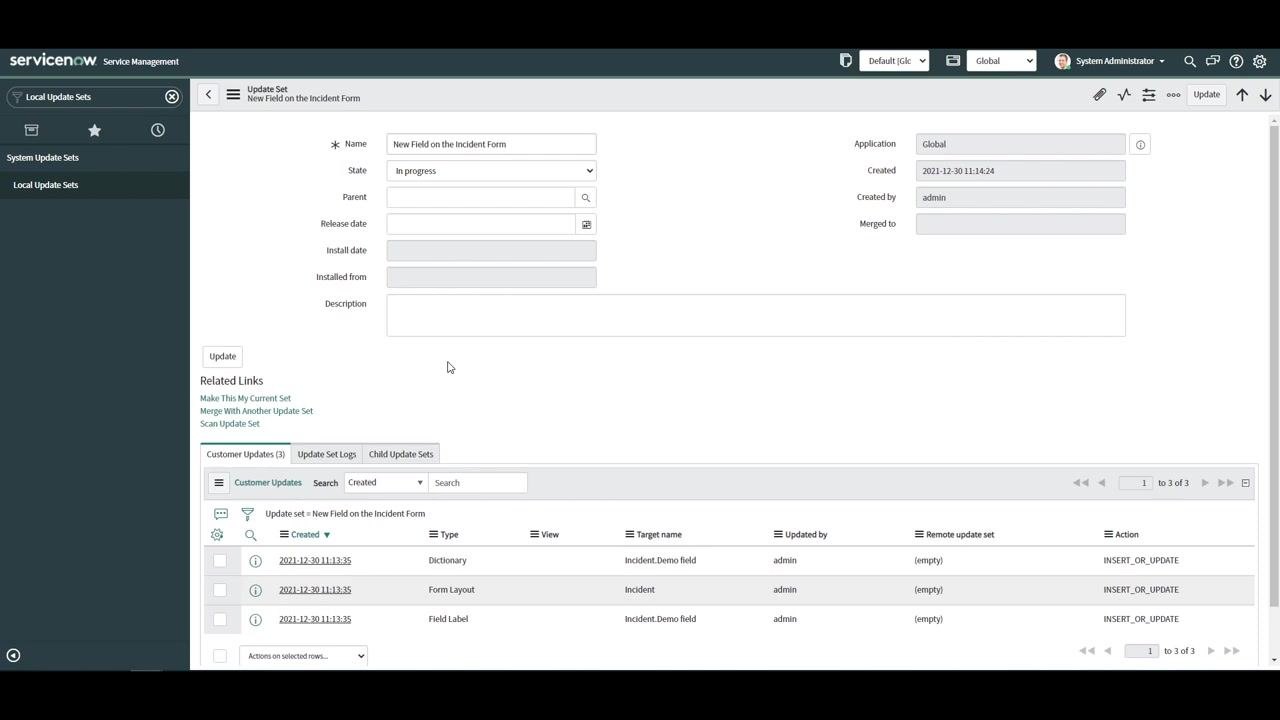
New Field on the Incident Formnow appears in the Local Update Sets list, with the state In progress and application Global.
Locate the updates in the default update set
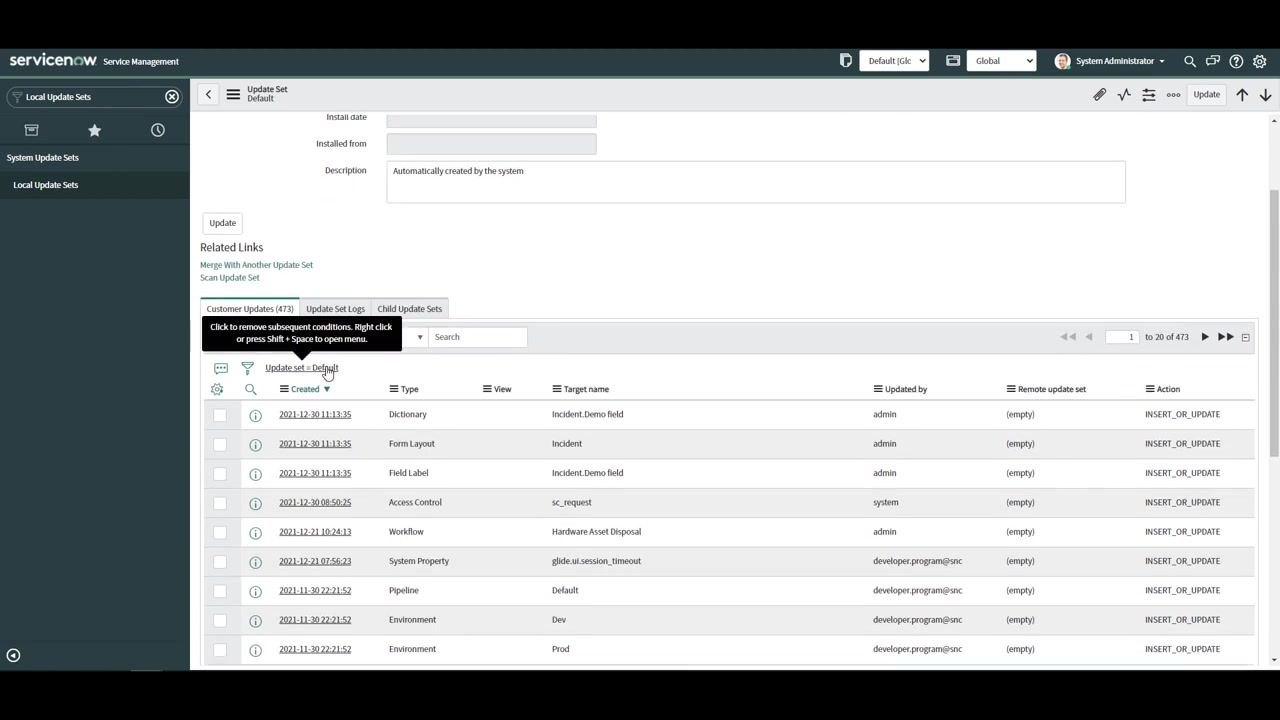
- In the Local Update Sets list, click the Default update set to open its details.
- Scroll down to the Customer Updates related list, which shows all updates currently tracked in the Default update set (such as Dictionary, Form Layout, and Field Label entries).
- Right-click the Update set = Default filter condition in the Customer Updates list.
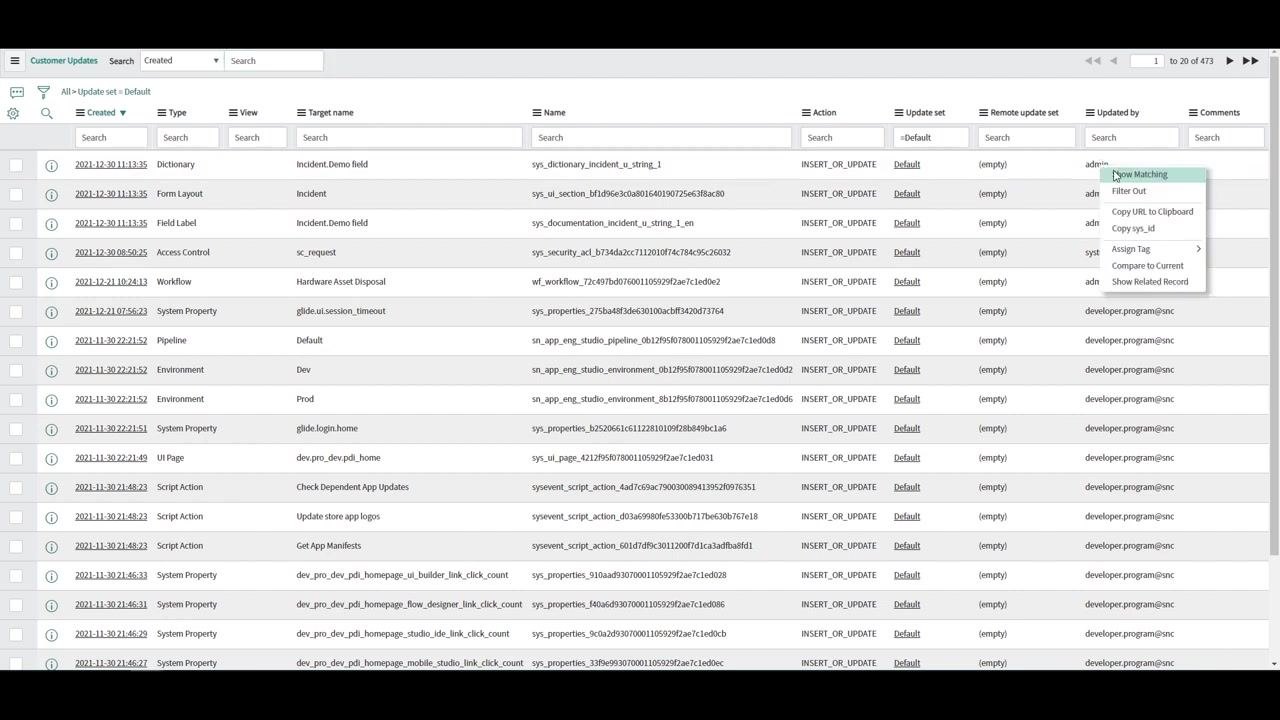
- Select Open new window from the context menu to view and filter the updates in a separate window.
Filter updates by user and date
In the new window, filter the list so it only shows updates relevant to your session:
- Use the Updated by column to enter your username (for example,
admin). - Use the Created column to filter for today's date.
This narrows the list down to only the updates you made during your session.
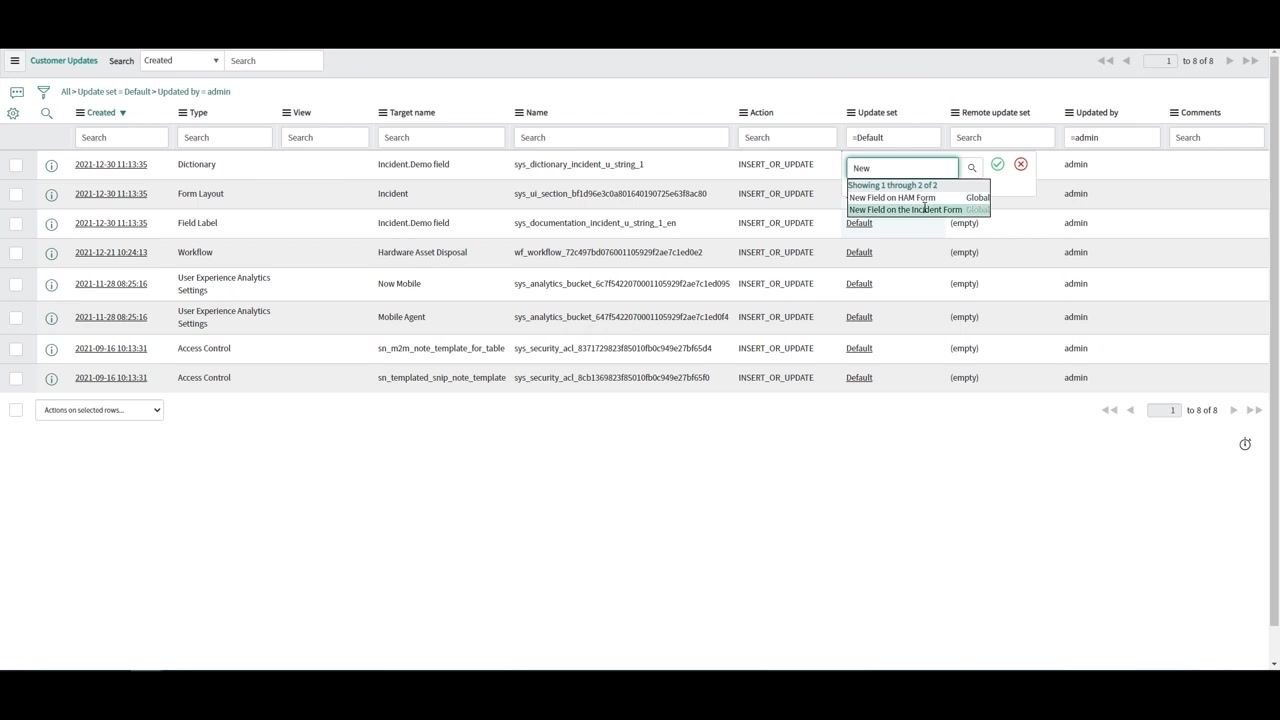
Move the updates to the new update set
- Highlight the cells in the Update set column for the updates you want to move. Use Shift + Down Arrow to select multiple rows at once.
- Change the value in the Update set column from
DefaulttoNew Field on the Incident Form.
This reassigns the selected updates to your new update set.
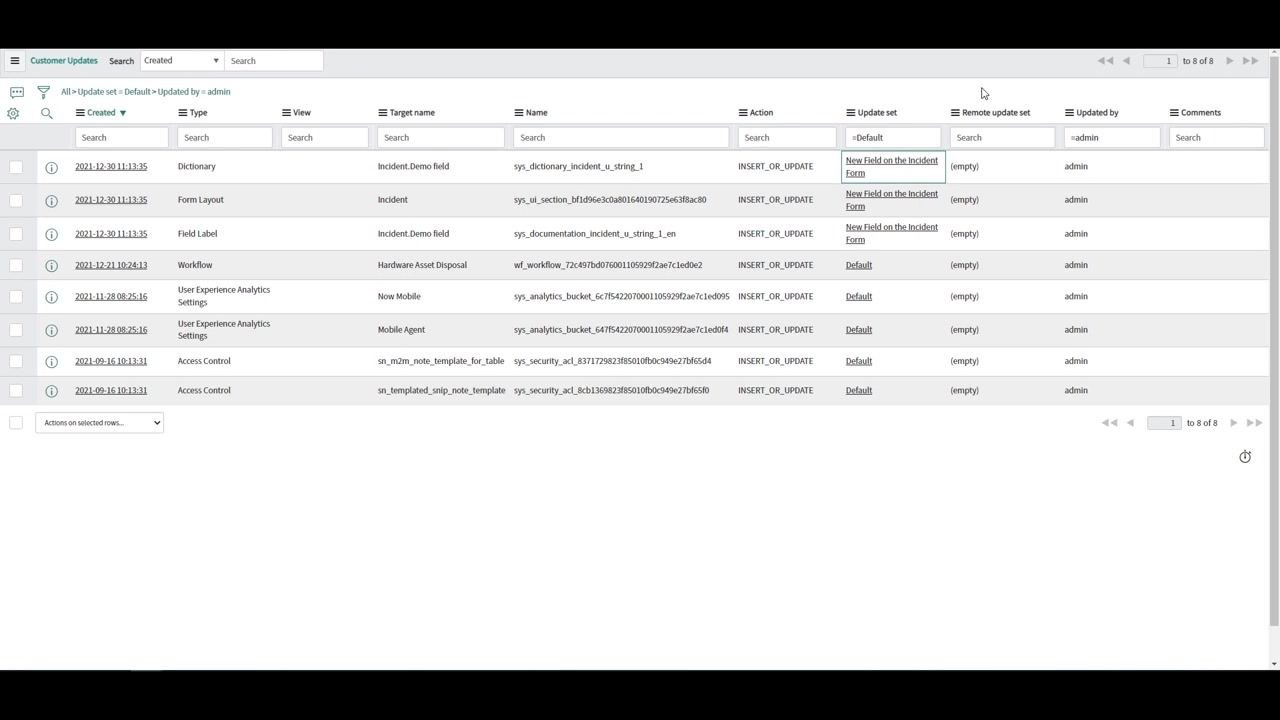
Verify the updates moved correctly
- In the Customer Updates list, confirm that the Update set column for the relevant updates now displays
New Field on the Incident Forminstead ofDefault.
- Navigate back to the Local Update Sets list and open the
New Field on the Incident Formupdate set. - Scroll down to the Customer Updates related list and verify that all the moved updates (such as Dictionary, Form Layout, and the Field Label for
Incident.Demo field) are now listed under this update set.
Confirm the final update set details
Review the update set to make sure everything is correct:
- Name:
New Field on the Incident Form - State:
In progress - Application:
Global - Created by:
admin - Customer Updates tab lists all relevant updates.
Summary
You have learned how to create an update set in ServiceNow, filter and select updates from the default global update set, move them into your new update set, and verify that the updates are correctly tracked. Following this process helps you follow best practices for managing and migrating changes across your ServiceNow environments.
What's next
With your changes now properly tracked in a dedicated update set, you can continue development work, complete the update set when ready, and move it through your instance migration process as needed.
Generation details: cost, quality tiers
Docsie billed 2,500 credits ($1.75) to analyze this 5-minute video at standard quality. The rewrite, template fill and Word/PDF exports were included. The same video at each quality tier:
| Quality | Frames sampled | Credits | Approx. cost |
|---|---|---|---|
| Draft | every 16-30 s | 1,250 | $0.88 |
| Standard (this guide) | every 8-15 s | 2,500 | $1.75 |
| Detailed | every 4-7 s | 5,000 | $3.50 |
| Ultra | every 1-3 s | 10,000 | $7.00 |
Credits priced at $0.70 per 1,000; plans include a monthly allowance. Enterprise customers on on-premise or bring-your-own-model deployments run this on their own inference and pay no per-video credits.
Generated by Docsie Video-to-Docs on 2026-09-14 from a 4-minute video. Screenshots are frames from the source video and belong to their creator, Everforth GlideFast, whose original is embedded above. If you own this video and want the guide removed or credited differently, contact us and we will act within one business day.