
How to Create a Flow in Flow Designer in ServiceNow
This guide shows you how to create a flow in Flow Designer in ServiceNow that adds incident tasks in a strict order, so that each task finishes before the next one starts. You'll build a flow that creates Task A, conditionally creates Task B if Task A is skipped, creates Task C, and finally updates the parent incident's work notes once all tasks are done. Along the way, you'll see what happens when the flow is misconfigured to run in parallel, how to fix it using the Wait option, and how to extend that behavior with scripting.
Video: How to Create Sequential Tasks in ServiceNow Flow Designer by Robert, The Duke, Fedoruk (2022). All credit for the demonstration goes to the creator; watch the original on YouTube. The written guide below was generated from this video by Docsie. Creator? Request a change or removal.
This guide shows you how to create a flow in Flow Designer in ServiceNow that adds incident tasks in a strict order, so that each task finishes before the next one starts. You'll build a flow that creates Task A, conditionally creates Task B if Task A is skipped, creates Task C, and finally updates the parent incident's work notes once all tasks are done. Along the way, you'll see what happens when the flow is misconfigured to run in parallel, how to fix it using the Wait option, and how to extend that behavior with scripting.
Prerequisites
- Access to ServiceNow with permissions to open and edit flows in Flow Designer.
- An existing incident record you can use for testing, or the ability to create one.
- Familiarity with the Incident Task [incident_task] and Incident [incident] tables.
Define the scenario and objective
Before building the flow, clarify what you want it to do:
- Create Task A and relate it to the parent incident.
- If Task A is closed in a skipped state, create Task B.
- Once Task A is finished, create Task C.
- After Task C is complete, update the parent incident's work notes to confirm that all subtasks are done.
This sequence only works correctly if each step waits for the previous one to finish, which you'll configure in the following steps.
Create the flow and set the trigger
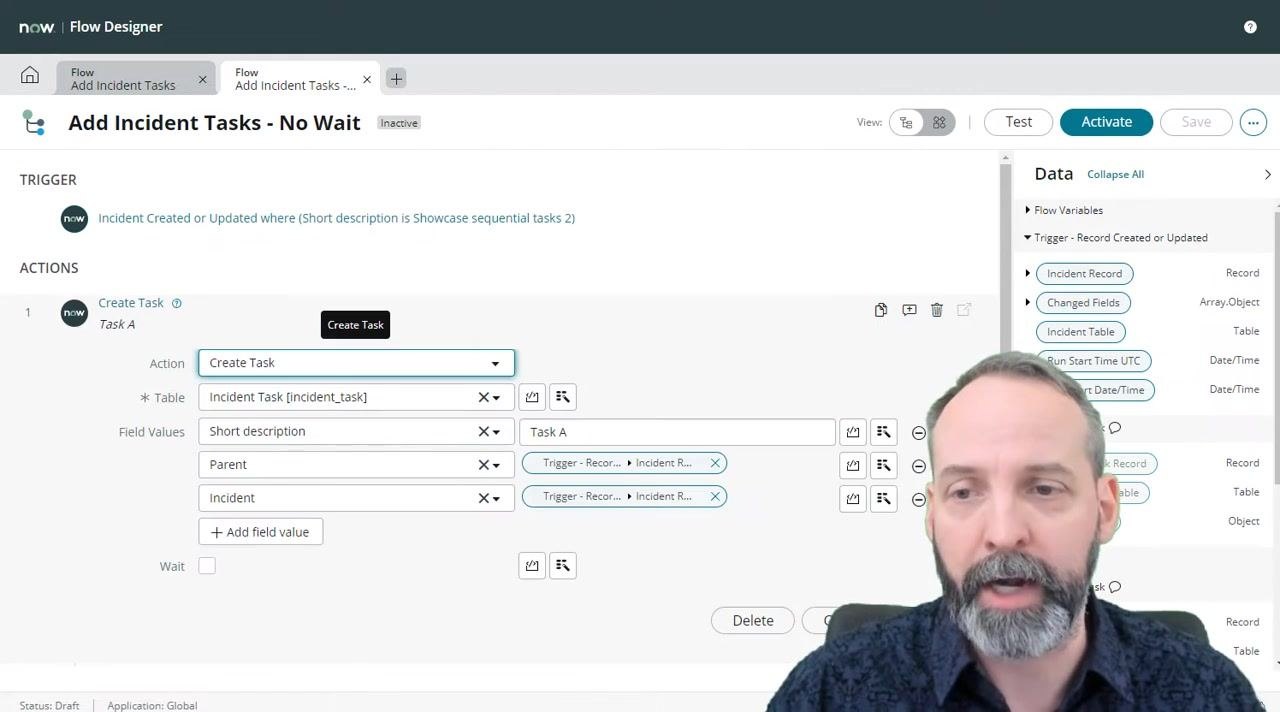
Open Flow Designer and create a new flow named "Add Incident Tasks - No Wait". Set the trigger to Incident Created or Updated, with a condition that the short description equals "Showcase sequential tasks 2".
Define the following actions in the flow: Create Task (Task A), If Task A skipped, Create Task B, Create Task (Task B), Create Task (Task C), and Update Incident Record (add work notes).
Configure the Task A creation action
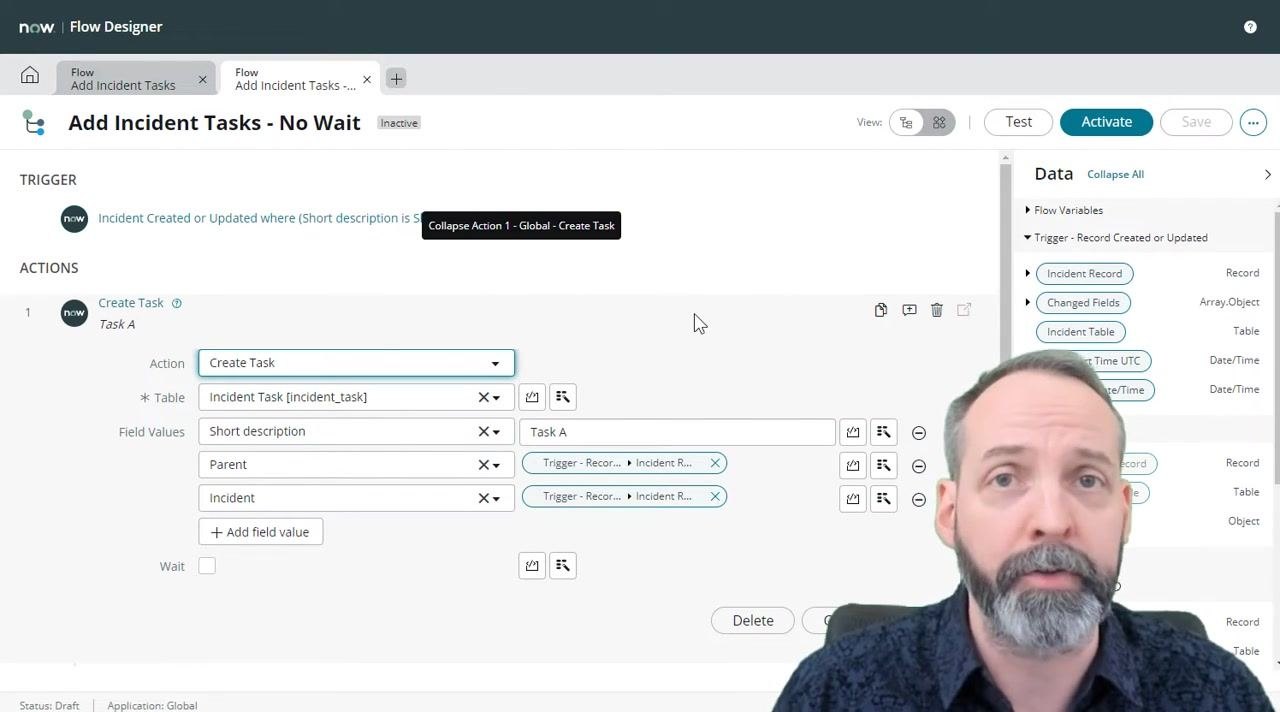
Open the Create Task action for Task A and set the table to Incident Task [incident_task]. Set the field values: Short description = "Task A", Parent = Trigger - Record - Incident Record, and Incident = Trigger - Record - Incident Record. Leave the Wait option unchecked for now — this omission is intentional, to demonstrate a common configuration mistake.
Add conditional logic for Task B
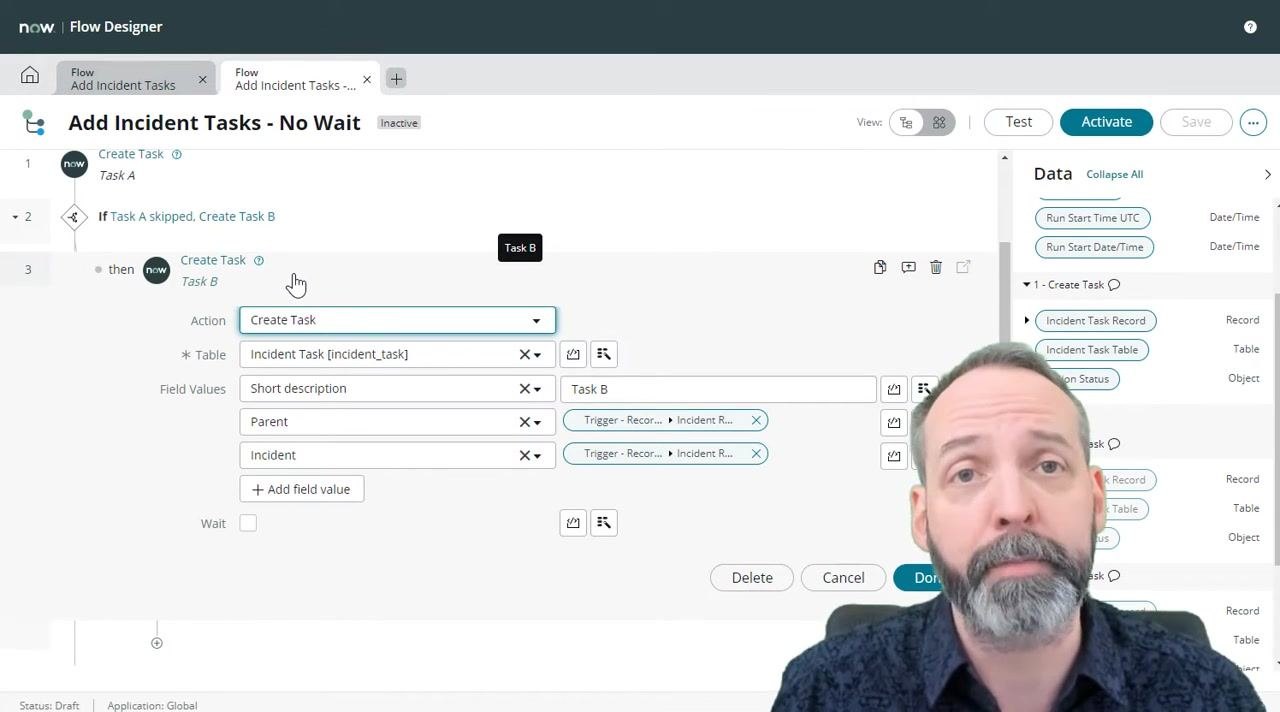
Insert a flow logic step that checks whether Task A is in a closed skip state. If it is, add a Create Task action with table Incident Task [incident_task] and field values: Short description = "Task B", Parent = Trigger - Record - Incident Record, and Incident = Trigger - Record - Incident Record.
Add Task C and update the incident record
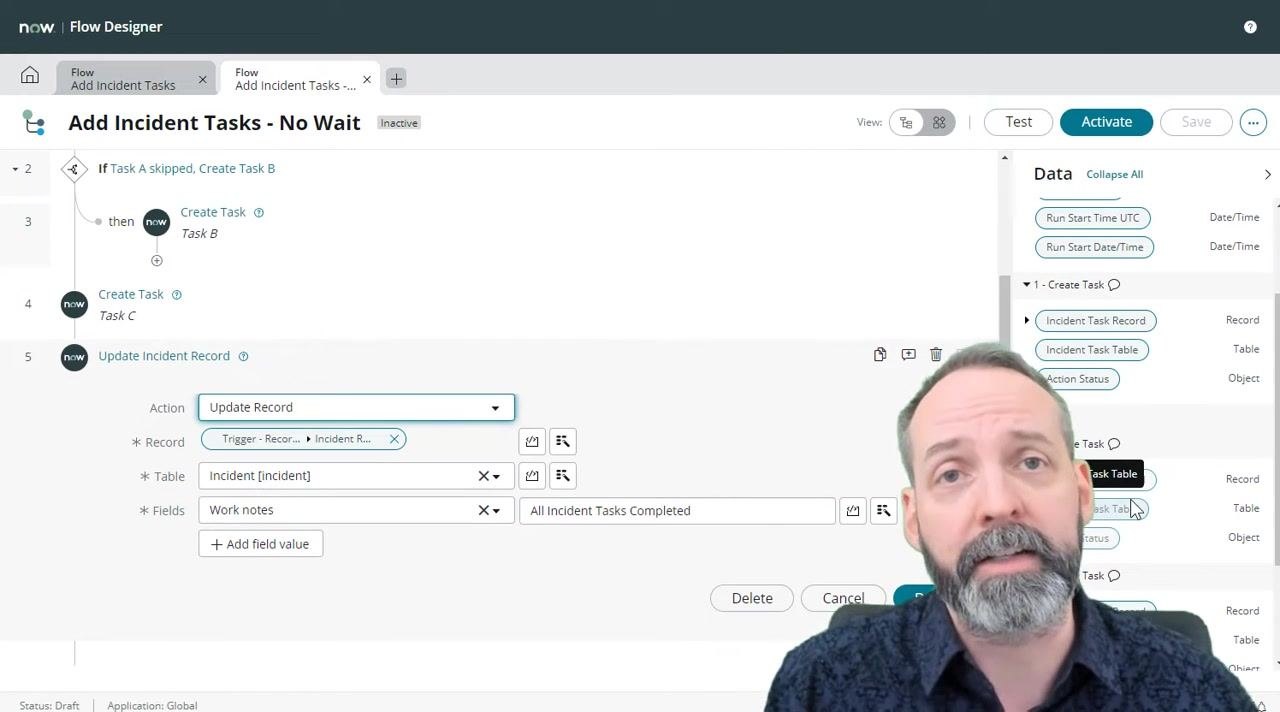
Add a Create Task action for Task C with the same table and parent/incident references, setting Short description = "Task C". Then add a final Update Record action on the Incident [incident] table, referencing Trigger - Record - Incident Record, and set the Work notes field to "All Incident Tasks Completed".
Test the flow
Click the Test button in Flow Designer and select an existing incident to run the test against. Run the test and review the execution results.
Analyze the test results
Review the test run summary. Task A is created as expected, and the "If Task A skipped" logic is evaluated but doesn't run, because Task A wasn't skipped. However, Task C is created immediately after Task A, without waiting for Task A to complete, and the incident record is updated immediately after Task C, without waiting for Task C to complete.
Review the incident record for confirmation
Open the incident record used in the test. The work note reads "All Incident Tasks Completed," and the Incident Tasks tab shows only Task A and Task C — Task B is missing because Task A was never closed in a skipped state. This confirms the flow didn't run sequentially as intended.

Understand why the flow ran in parallel
The root cause is the Wait checkbox in each task creation action. When Wait is not enabled, the flow doesn't pause for the task to finish before moving to the next step. As a result, Task A is created and the "If Task A skipped" condition is evaluated immediately (since Task A is still open, Task B isn't created), Task C is created right after Task A without waiting for it to finish, and the incident is updated right after Task C is created rather than after it's completed. All of this happens in parallel rather than in sequence.
Inspect the Wait settings on each action
Check each action individually to confirm the issue. In the Create Task action for Task A, the Wait checkbox is unchecked. The conditional logic for Task B checks whether Task A's state is "Closed Skipped," but that condition can't be true immediately after creation.
The Create Task action for Task C also has Wait unchecked.
The Update Incident Record action runs immediately after Task C is created, not after Task C is actually completed.
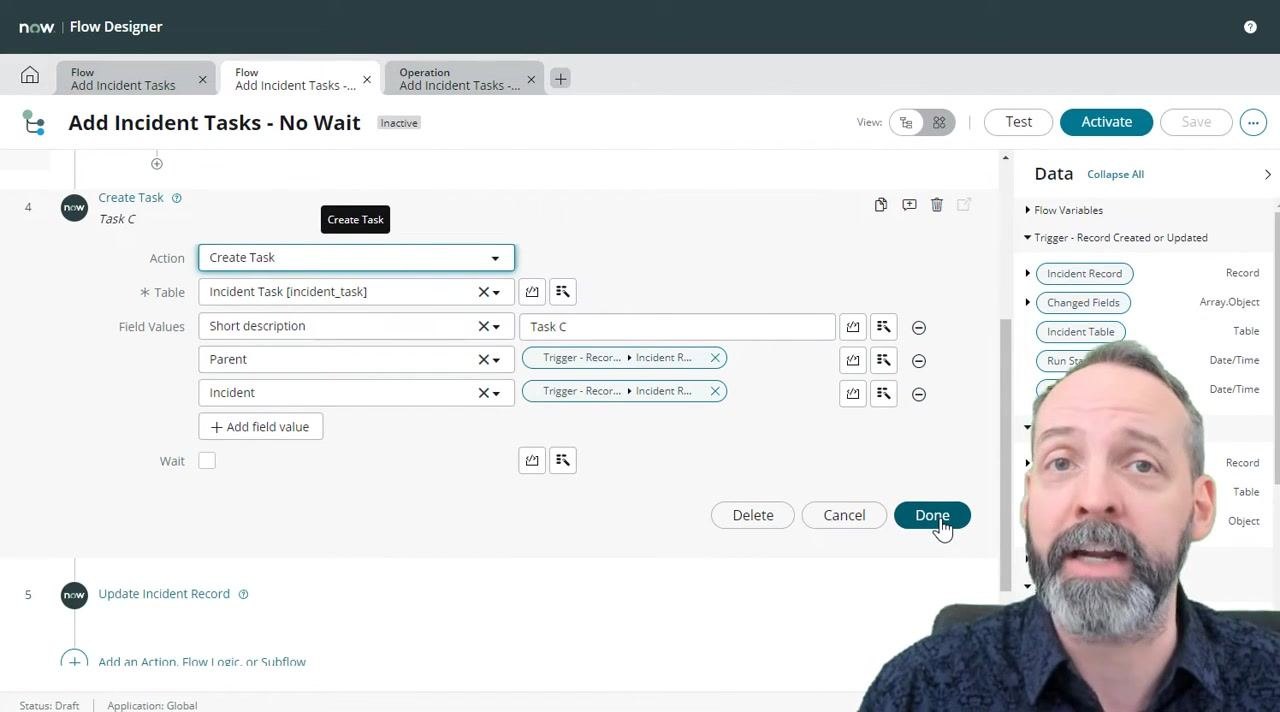
Switch to a correctly configured flow
Open a flow that's set up for proper sequential execution and check the Wait checkbox for the Task A creation action. Enabling Wait forces the flow to pause at this step until Task A is completed before moving on.
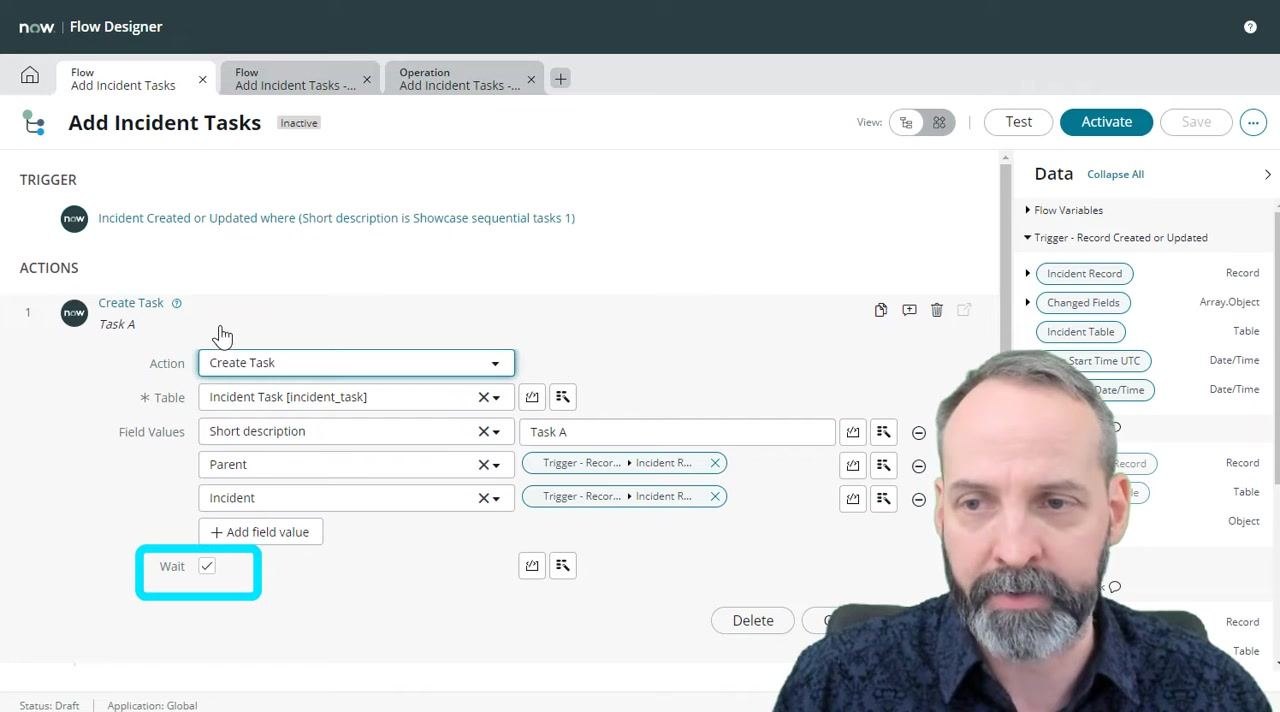
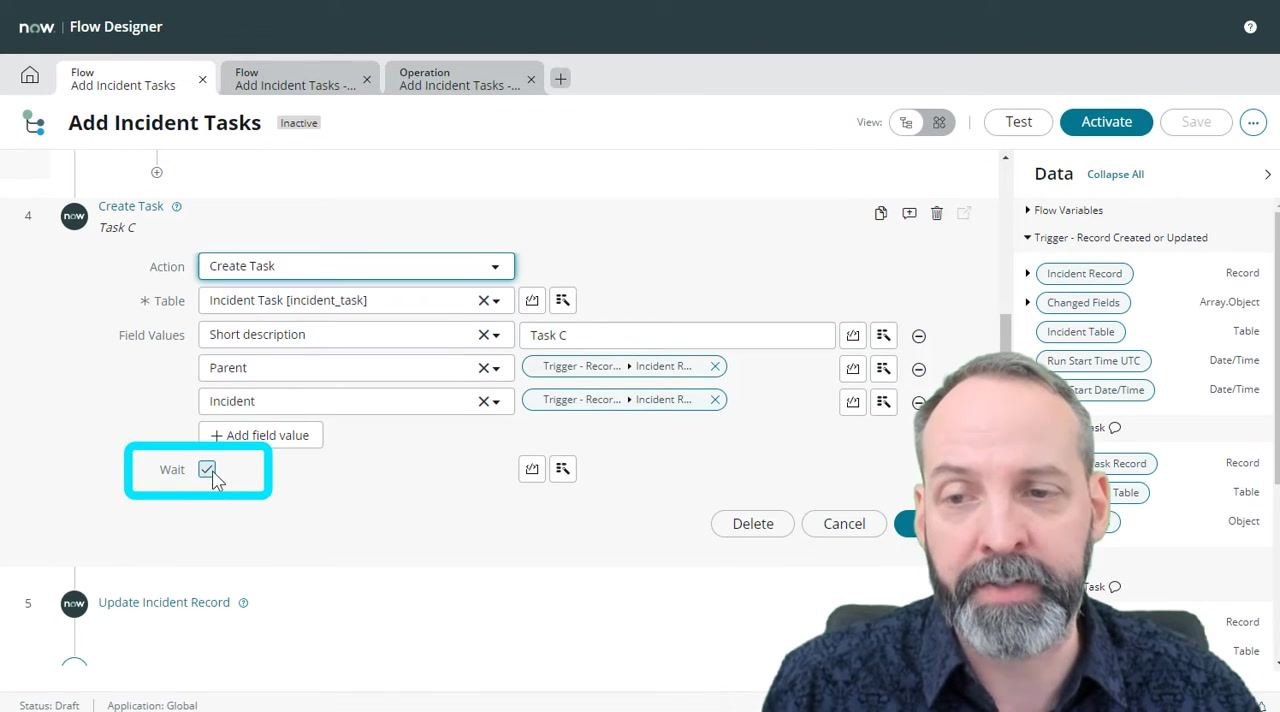
Enable Wait for Task C
In the Create Task (Task C) action, check the Wait checkbox as well. This ensures the flow pauses at Task C until it's completed before the incident record is updated.
Run a test of the corrected flow
Click Test, select an incident to test against, and run the test. With Wait now enabled, Task B won't proceed until Task A finishes, Task C won't proceed until the prior tasks are complete, and the Update Incident Record action will only run after Task C is completed.
Monitor the flow's waiting state
Review the test execution log. The flow shows a Waiting state, confirming it's paused and waiting for a task to complete. Task A has run, but the flow is still waiting for it to finish.
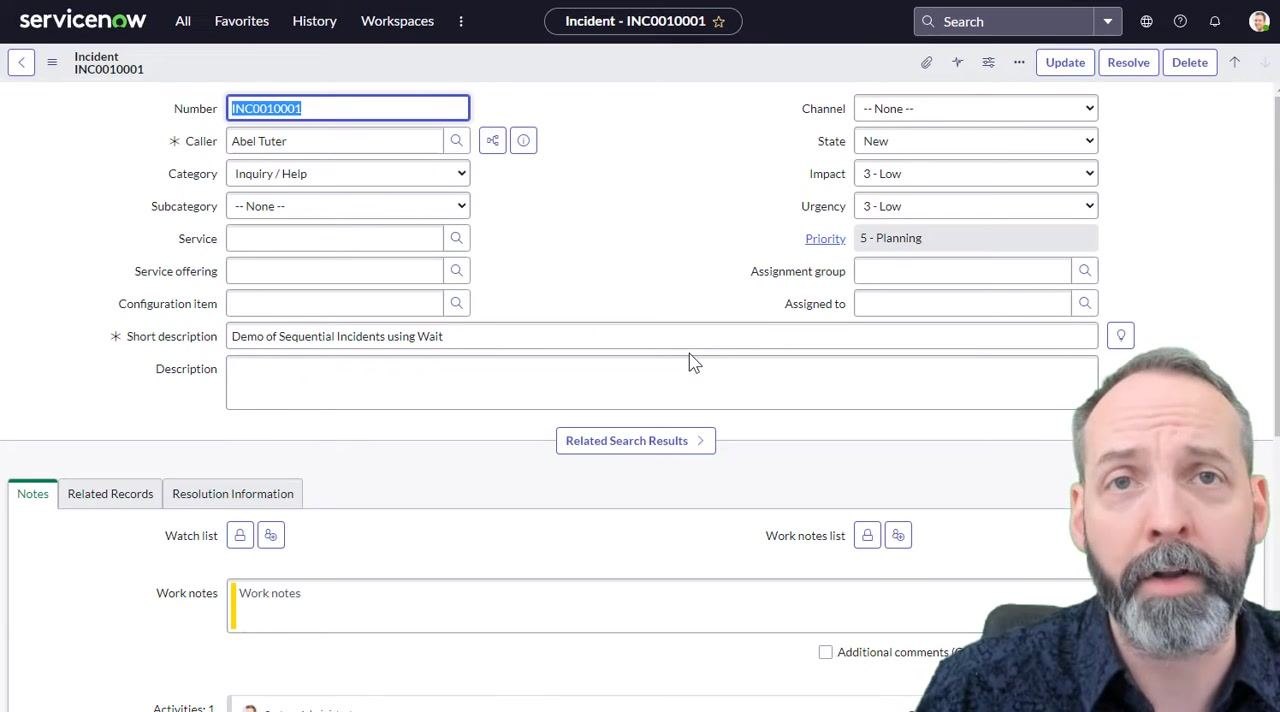
Check Task A's state on the incident
Open the incident record used for testing and go to the Incident Tasks tab. Confirm that Task A is present and its state is Open.
Manually update Task A
Change Task A's state to Closed Skipped (or another appropriate closed state) and click Save to update the task.
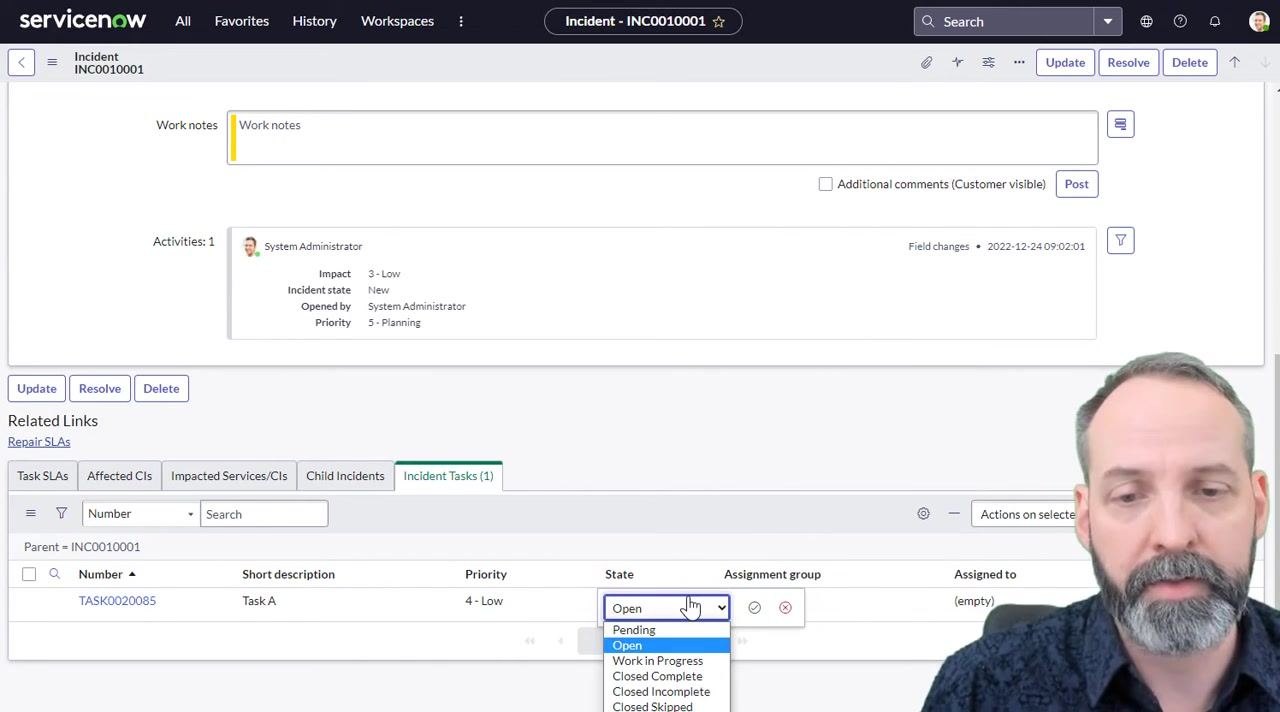
Refresh the test execution
Return to Flow Designer and refresh the test flow execution details. Task A is now marked Completed, the flow evaluates the Task B condition and proceeds to create Task B and Task C, and Task C now shows a Waiting state until it's completed.
Complete the remaining tasks
Go back to the incident record and open the Incident Tasks tab. Confirm that Task B and Task C are now present and both are in the Open state.
Change the state of both Task B and Task C to Closed Complete and click Save.
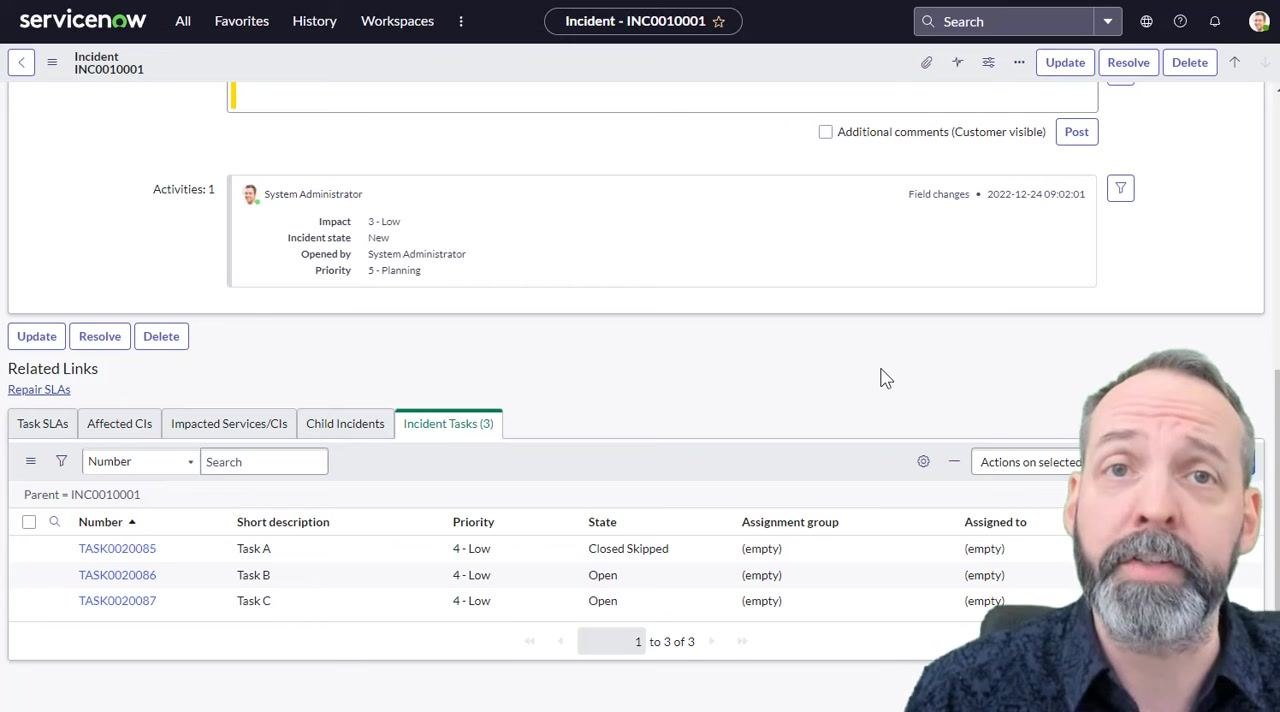
Confirm flow completion
Return to Flow Designer, refresh the test execution details, and verify that the Create Task C and Update Incident Record actions have completed.
Verify the final work notes
Go back to the incident record and check the Work notes section. Confirm that the note "All Incident Tasks Completed" has been added, indicating the flow executed sequentially and finished successfully.
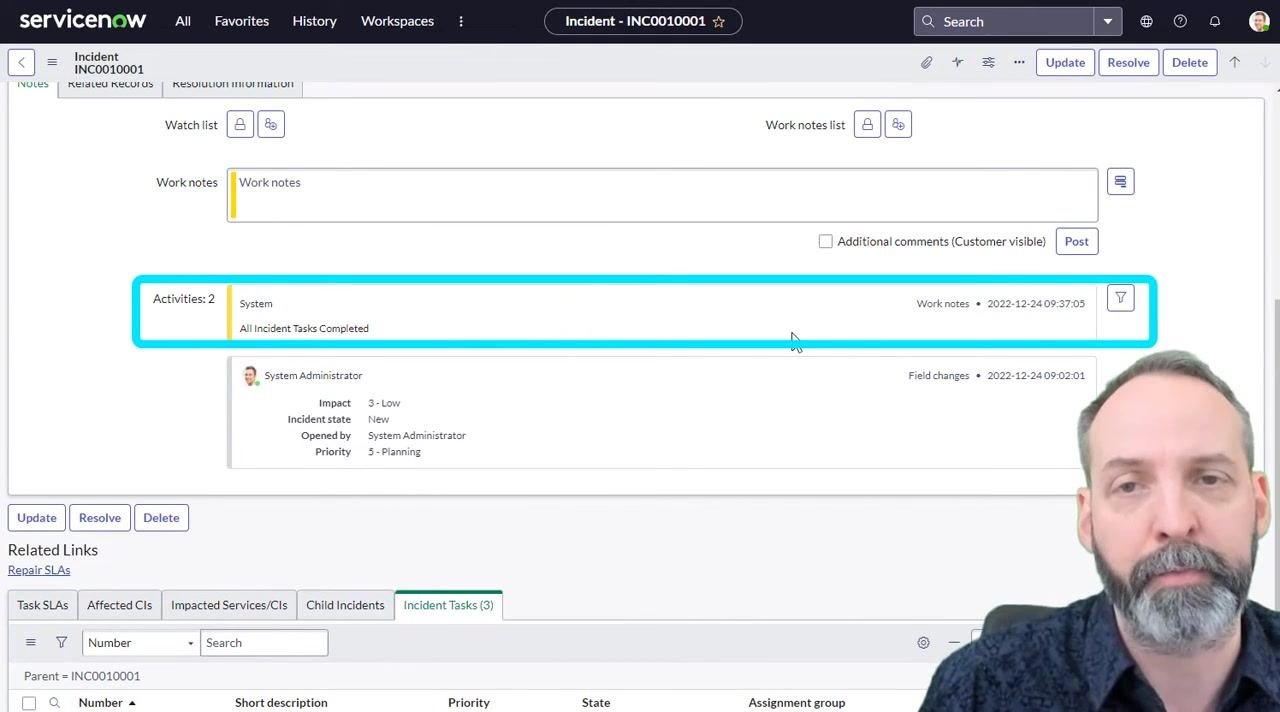
Use scripting for dynamic wait conditions
Beyond a simple checkbox, the Wait field in the Create Task action can be toggled to scripting mode. This lets you use code to decide, dynamically, whether the flow should wait for a task to complete, based on data or logic relevant to your workflow — for example, waiting only when the incident priority is high.
Open the Wait scripting interface
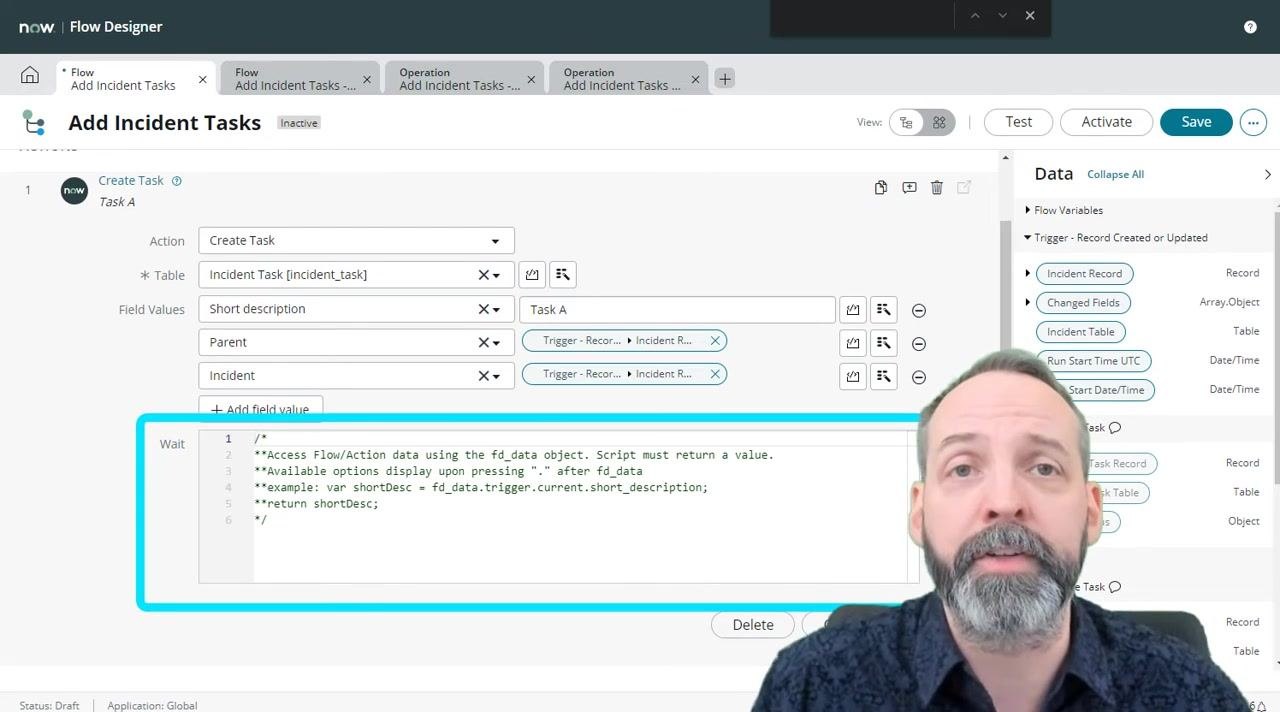
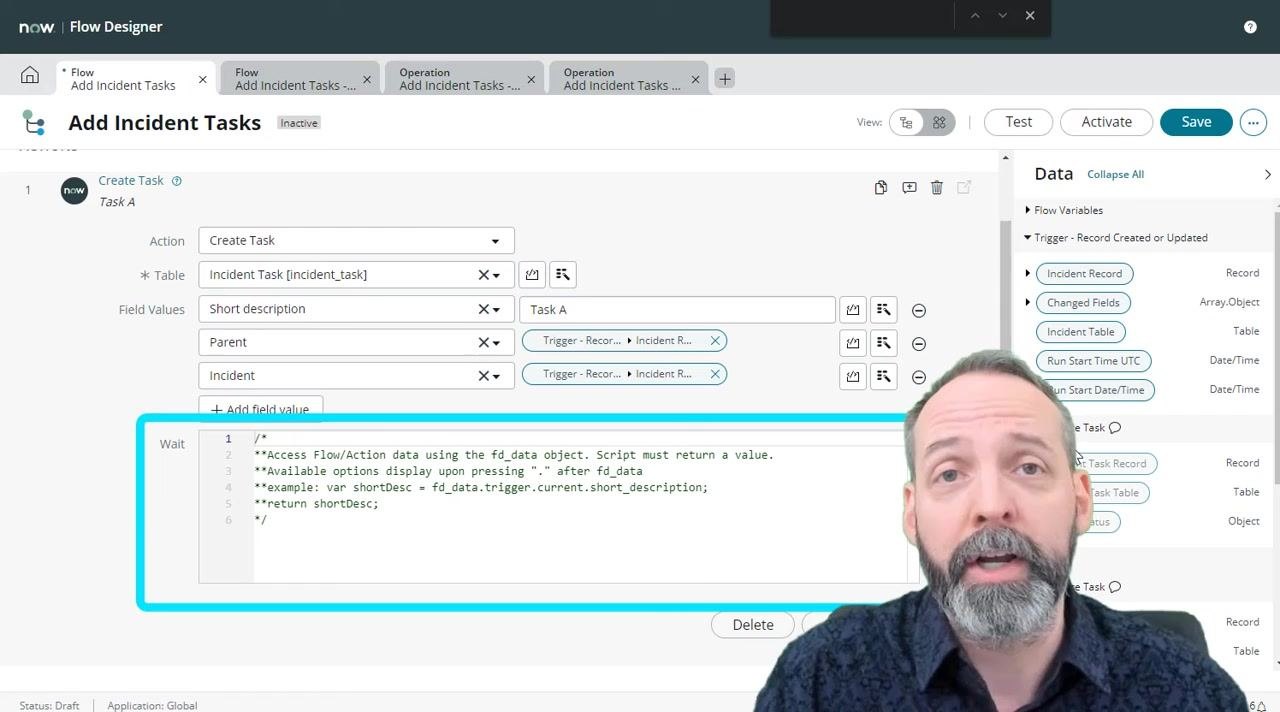
In the Create Task action, locate the Wait field and click the toggle or scripting icon next to it to open the scripting editor. The editor accepts JavaScript code that must return a boolean value (true or false) determining whether the flow should wait.
Write your wait condition script
Use the fd_data object to access flow and action data. The scripting interface provides a starter template:
/*
**Access Flow/Action data using the fd_data object. Script must return a value.
**Available options display upon pressing "." after fd_data
**example: var shortDesc = fd_data.trigger.current.short_description;
**return shortDesc;
*/
Replace the example with your own logic that returns true or false based on your requirements.
Save and test your scripted logic
Click Save to store your script, then use the Test button to validate that your scripted wait condition behaves as expected. Monitor the flow execution to confirm tasks are processed according to your dynamic wait logic.
Summary
You've now seen how to create a flow in Flow Designer in ServiceNow that adds incident tasks in sequence. The key takeaway is that the Wait checkbox on each task creation action determines whether steps run in parallel or truly wait for one another. Without it, subsequent actions fire immediately after a task is created rather than after it's completed, causing logic like the Task B condition to be skipped and records to be updated prematurely. With Wait enabled — either as a simple checkbox or through a script that evaluates a condition dynamically — you can build workflows where each task genuinely completes before the next begins.
Generation details: cost, quality tiers
Docsie billed 3,000 credits ($2.10) to analyze this 6-minute video at standard quality. The rewrite, template fill and Word/PDF exports were included. The same video at each quality tier:
| Quality | Frames sampled | Credits | Approx. cost |
|---|---|---|---|
| Draft | every 16-30 s | 1,500 | $1.05 |
| Standard (this guide) | every 8-15 s | 3,000 | $2.10 |
| Detailed | every 4-7 s | 6,000 | $4.20 |
| Ultra | every 1-3 s | 12,000 | $8.40 |
Credits priced at $0.70 per 1,000; plans include a monthly allowance. Enterprise customers on on-premise or bring-your-own-model deployments run this on their own inference and pay no per-video credits.
Generated by Docsie Video-to-Docs on 2026-09-14 from a 5-minute video. Screenshots are frames from the source video and belong to their creator, Robert, The Duke, Fedoruk, whose original is embedded above. If you own this video and want the guide removed or credited differently, contact us and we will act within one business day.