
How to Link Courses in Schoology
Learning how to link courses in Schoology lets you manage multiple sections of the same class—such as two sections of Mathematics 5—from a single course profile. Once linked, all students receive the same materials and assignments, while their individual grades and submissions remain private to their own section. This guide walks you through preparing for, performing, and verifying the linking process.
Video: Linking Courses in Schoology by Natalie Skibinski. All credit for the demonstration goes to the creator; watch the original on YouTube. The written guide below was generated from this video by Docsie. Creator? Request a change or removal.
Learning how to link courses in Schoology lets you manage multiple sections of the same class—such as two sections of Mathematics 5—from a single course profile. Once linked, all students receive the same materials and assignments, while their individual grades and submissions remain private to their own section. This guide walks you through preparing for, performing, and verifying the linking process.
Prerequisites
Before you link your courses, keep the following in mind:
- Check with your district, team, or administrator to confirm whether linking your sections is required. Requirements can vary by school or district policy.
- Have your Schoology login credentials ready for your district's login page (for example,
schoology.kleinisd.net).
Prepare to link your courses
Log in to Schoology
Open your web browser, navigate to your Schoology login page, and enter your credentials to sign in.
Review your recent activity
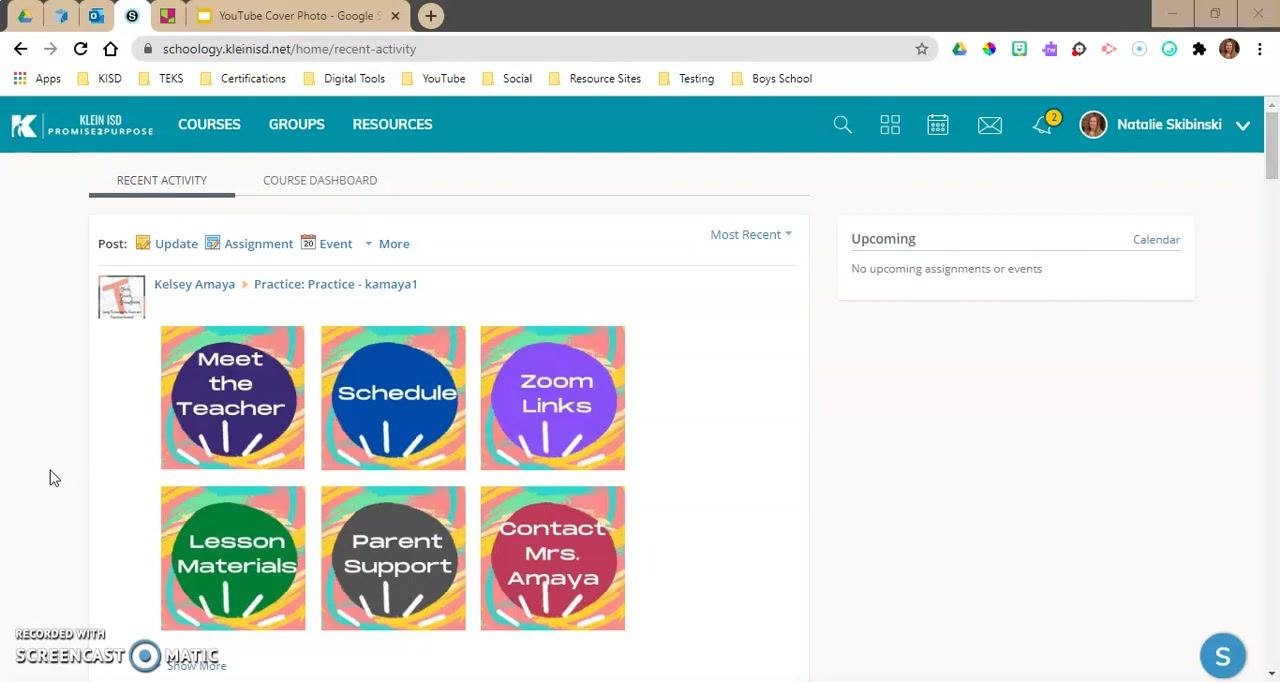
After logging in, you land on either the Recent Activity or Course Dashboard tab. The Recent Activity tab displays posts, updates, and resources such as Meet the Teacher, Schedule, Zoom Links, Lesson Materials, Parent Support, and Contact information. An Upcoming panel on the right shows any pending assignments or events, if available.
Switch to the Course Dashboard
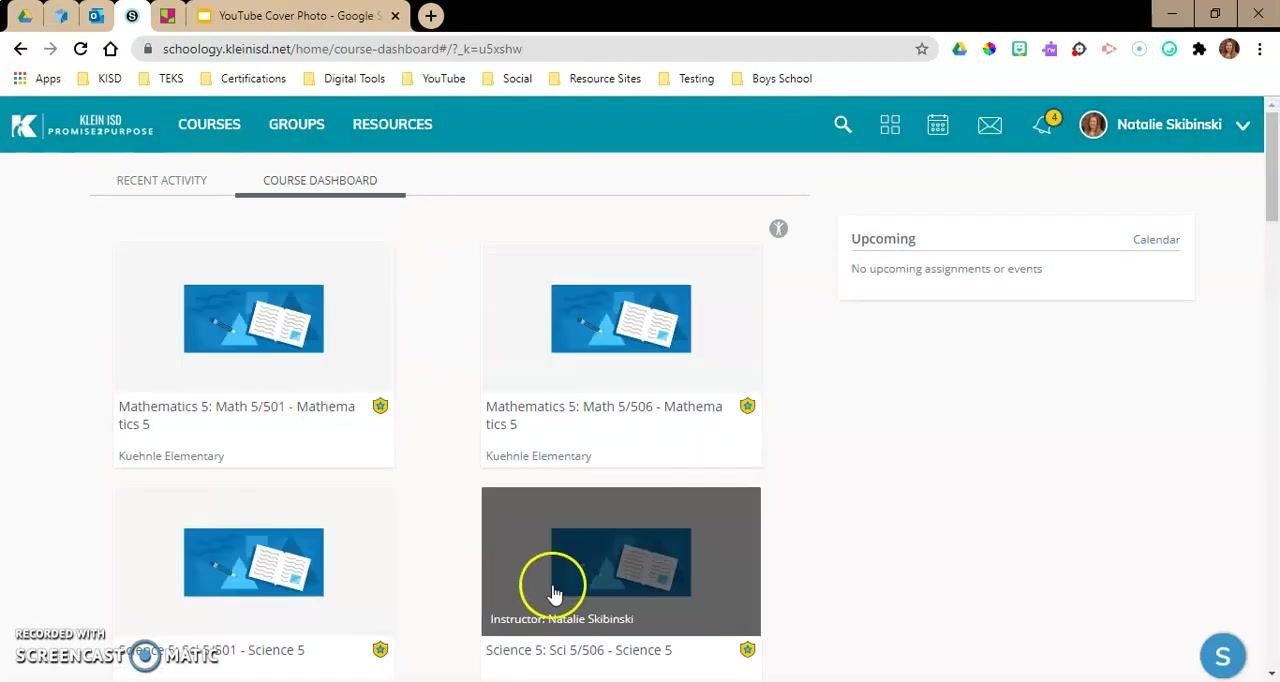
Click the Course Dashboard tab to see all your courses for the upcoming year. Courses appear as tiles—using a default image if you haven't customized them—each showing the course name, section, and instructor.
Identify your courses and sections
Review your course list to confirm which classes and sections you teach. For example:
- Mathematics 5: Math 5/501 and Math 5/506
- Science 5: Sci 5/501 and Sci 5/506
- Social Studies 5: SS 5/501 and SS 5/506
- Homeroom 5: HRM5/506
If you teach multiple sections of the same subject, each section appears as a separate tile. Linking these sections lets you manage them together so all students receive the same activities and assignments, while you can still personalize instruction within each course if needed.
Link course sections
Access your full course list
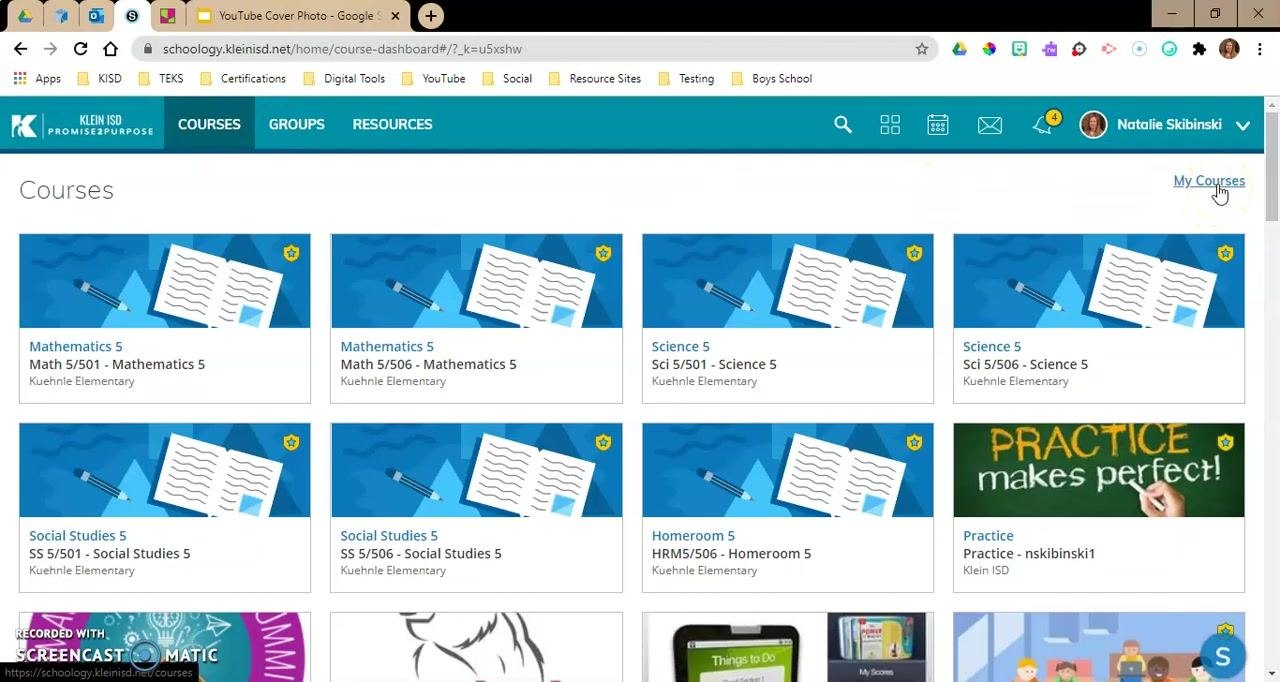
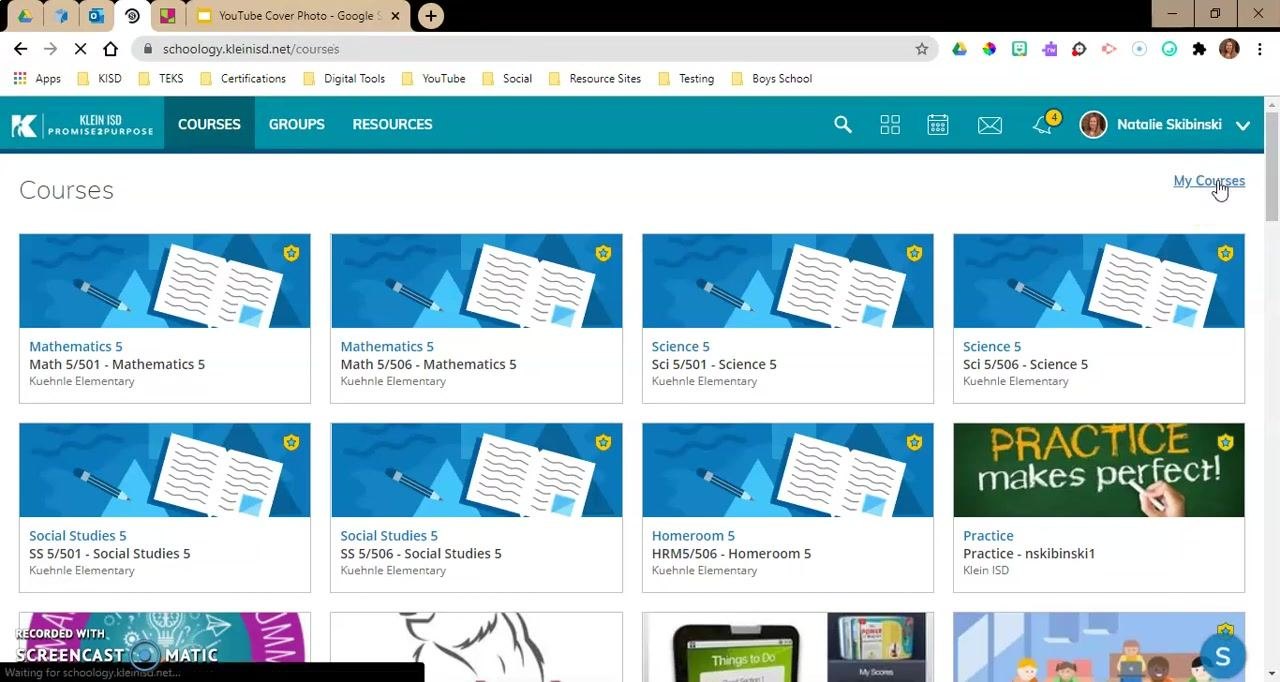
In the dropdown, click My Courses on the right side of the menu. This opens a page listing every course you're enrolled in or administer. Courses where you are an admin display a gear icon next to them.
Identify the sections to link
Locate the sections you want to link. For example, if you teach two sections of Mathematics 5 (Math 5/501 and Math 5/506), find both entries in the list.
Start the linking process
Click the gear icon next to the section you want to use as the primary section (for example, Math 5/501 - Mathematics 5). In the dropdown menu, select Link Existing Section.
Select the sections to link
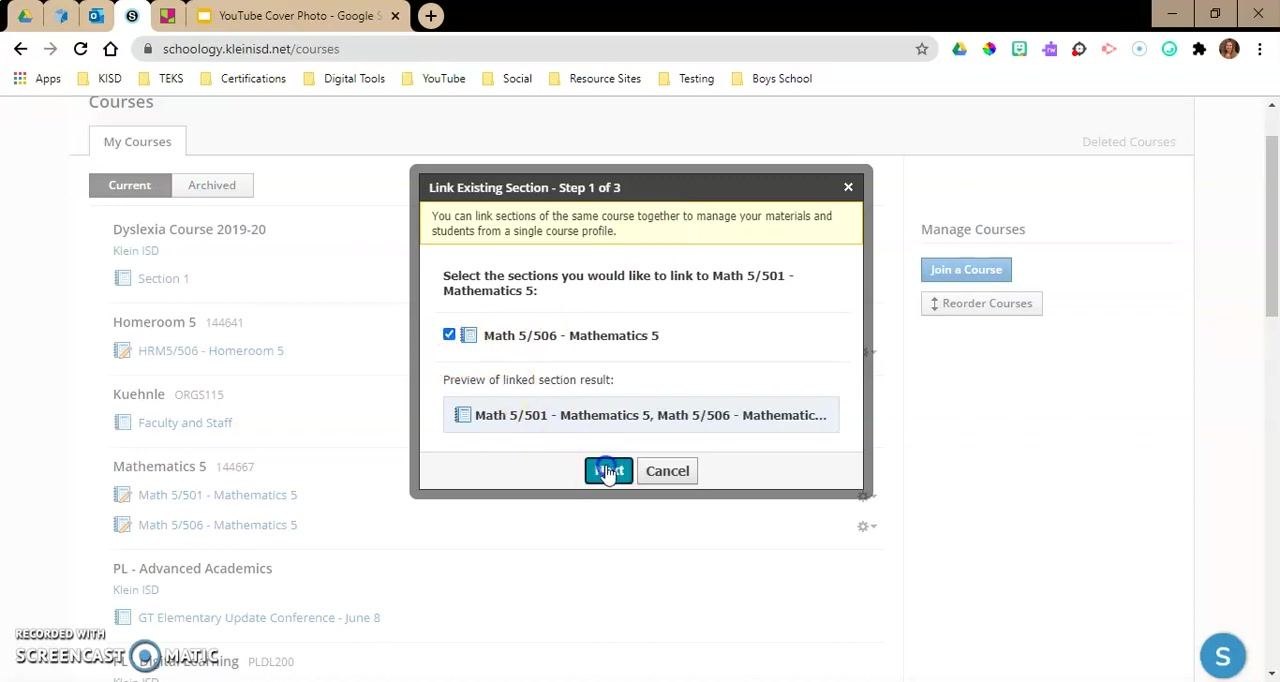
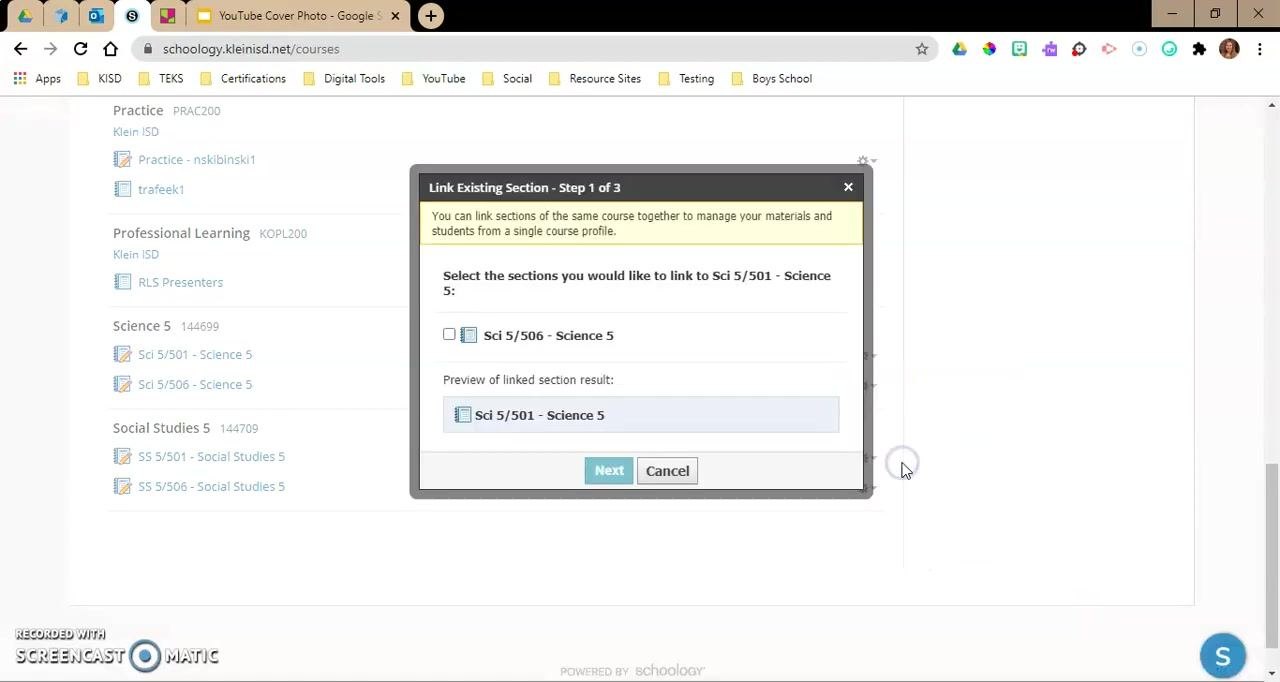
A dialog titled Link Existing Section - Step 1 of 3 appears, explaining that you can link sections of the same course to manage materials and students from a single course profile. Check the box next to the section(s) you want to link (for example, Math 5/506 - Mathematics 5), review the preview of the linked result, and click Next.
Download grades for the section being linked
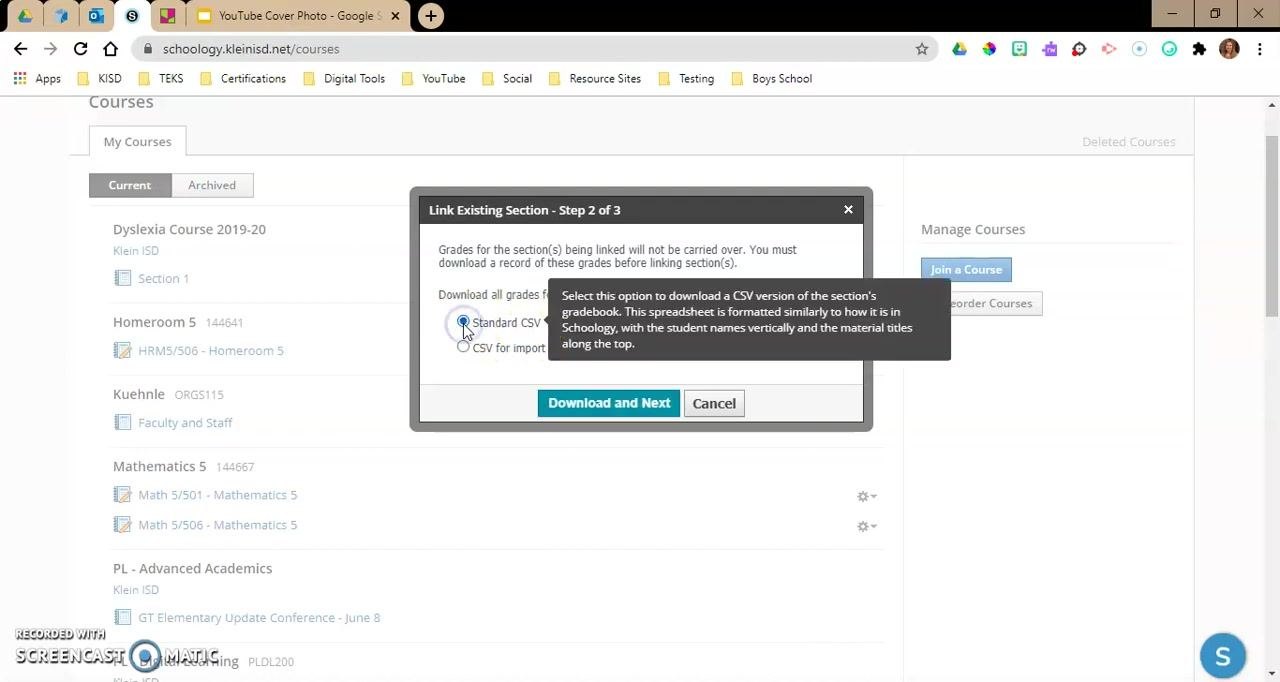
If prompted, download a record of existing grades before linking, since grades are not carried over automatically. In the Link Existing Section - Step 2 of 3 dialog, choose a format for downloading grades for the section being linked (for example, Math 5/506 - Mathematics 5):
- Standard CSV (recommended for most users)
- CSV for import into other systems
Click Download and Next to continue. The file downloads to your computer, typically shown at the bottom of your browser window. If you have no grades yet—such as at the start of the year—you can simply exit the download or ignore the file.
Review and confirm the link
The Link Existing Section - Step 3 of 3 dialog summarizes what happens next: materials from the secondary section (for example, Math 5/506 - Mathematics 5) will not be copied into the primary section (Math 5/501 - Mathematics 5). Once linked, the sections share the Grade setup, Materials, and Course profile of the primary section, while Member enrollments remain with their respective sections. Review this information carefully before proceeding.
Click Link Sections to finalize the process. The system processes the request and links the selected sections.
After linking, both sections share the same assignments, materials, grade setup, and course profile, including the course picture and details. Students in one section will not see the work, grades, or activities of students in the other section—only shared materials and assignments are visible to everyone.
Verify your linked sections
Confirm that the sections are linked
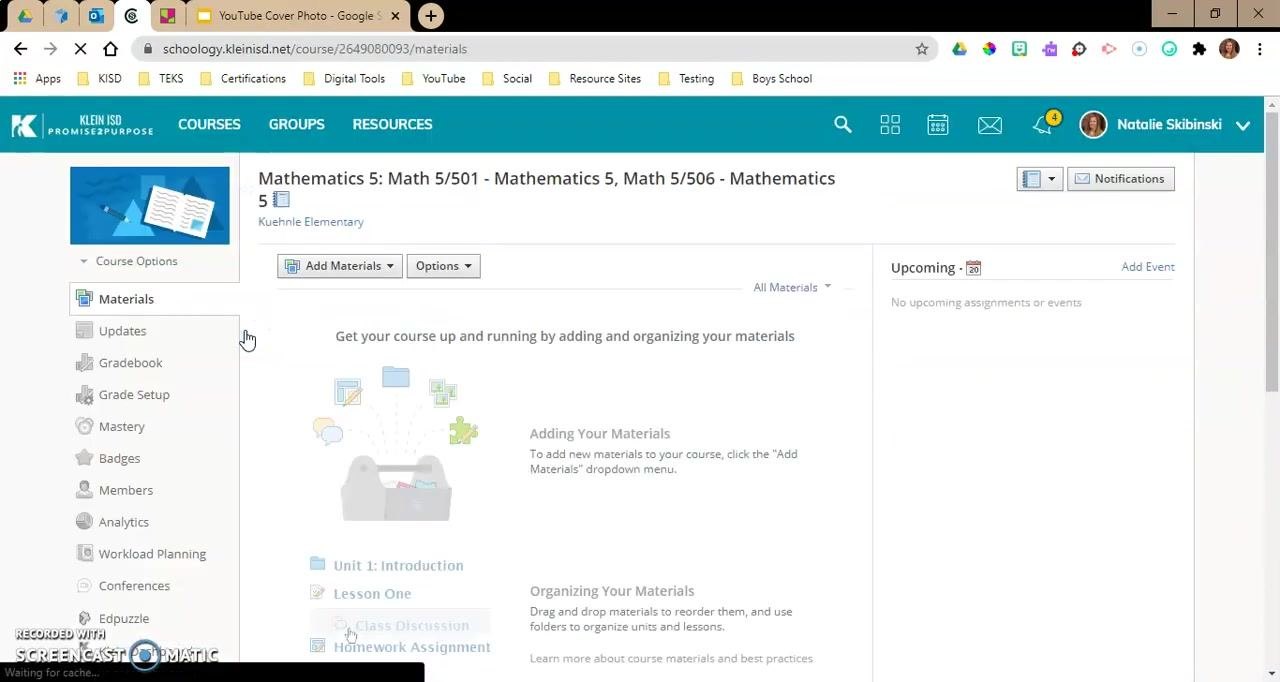
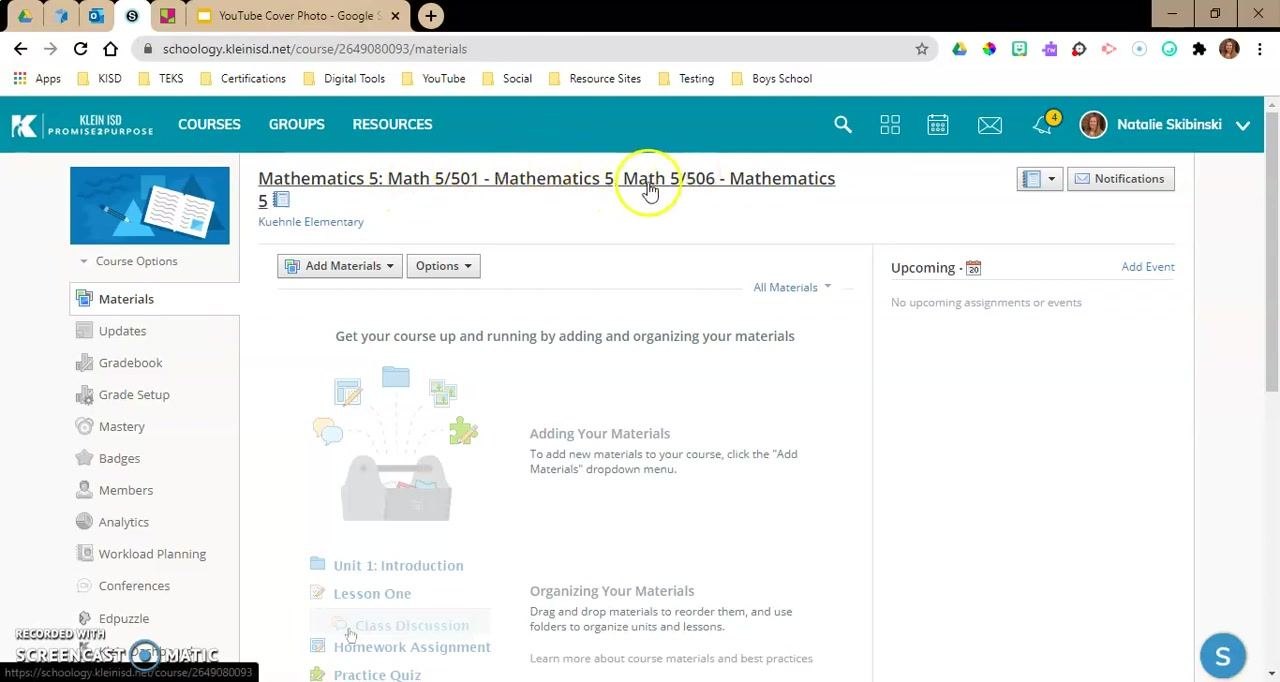
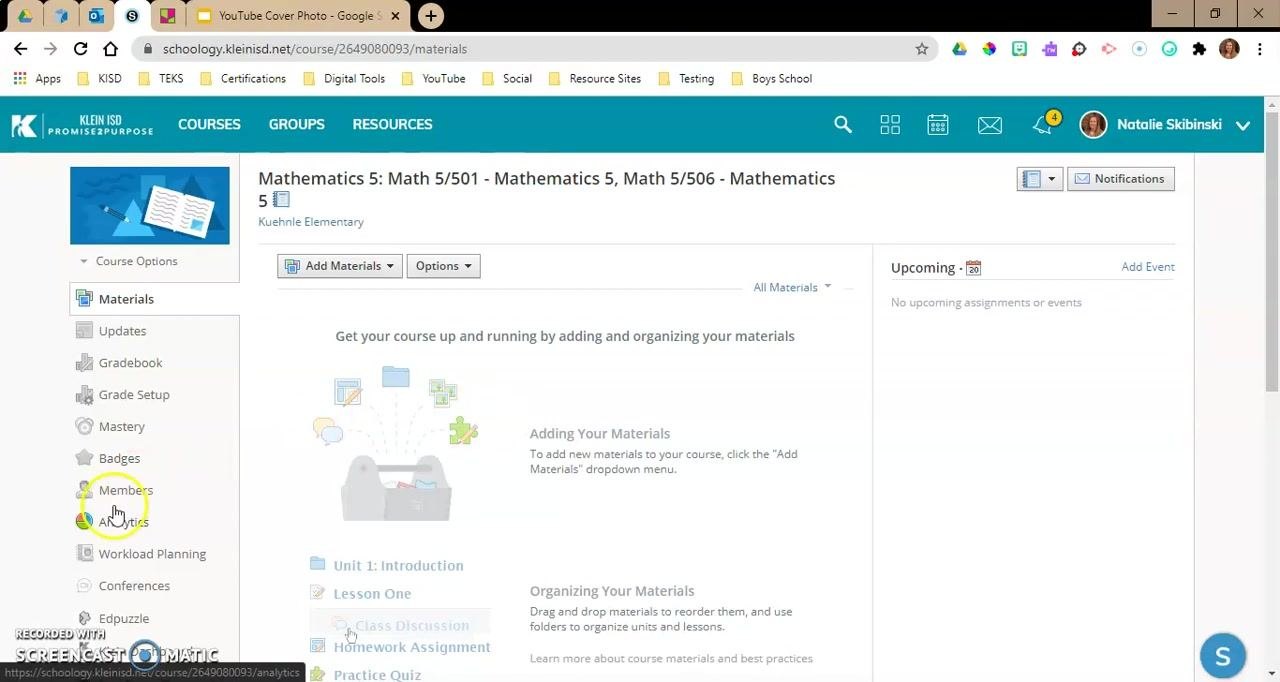
Open your course list and select the primary course (for example, Mathematics 5: Math 5/501). Check the course title at the top of the page—it should now display both section names, such as "Mathematics 5: Math 5/501 - Mathematics 5, Math 5/506 - Mathematics 5," confirming the sections are linked. Any materials, assignments, or updates you add to this course are now available to students in both sections.
Add and organize materials
Add materials for linked sections
Use the Add Materials button to create assignments, discussions, quizzes, and other resources. Everything you add here is automatically shared with students in both linked sections. Organize materials using folders and drag-and-drop to reorder as needed. The left sidebar gives you access to Updates, Gradebook, Grade Setup, Mastery, Badges, Members, Analytics, and more.
Confirm linking behavior
Double-check that any new materials or assignments you add appear for both sections. The course profile, grade setup, and materials are now unified across all linked sections, while student enrollments remain separate—so students only see their own grades and submissions.
Summary
Your sections are now linked, allowing you to manage materials, assignments, and grades for multiple classes from a single course profile. Any updates or changes you make apply to all linked sections, streamlining your workflow. Student data and enrollments remain private to each section, but all shared content is visible to every student in the linked sections. You're now ready to begin teaching with your linked Schoology sections.
Generation details: cost, quality tiers
Docsie billed 3,000 credits ($2.10) to analyze this 6-minute video at standard quality. The rewrite, template fill and Word/PDF exports were included. The same video at each quality tier:
| Quality | Frames sampled | Credits | Approx. cost |
|---|---|---|---|
| Draft | every 16-30 s | 1,500 | $1.05 |
| Standard (this guide) | every 8-15 s | 3,000 | $2.10 |
| Detailed | every 4-7 s | 6,000 | $4.20 |
| Ultra | every 1-3 s | 12,000 | $8.40 |
Credits priced at $0.70 per 1,000; plans include a monthly allowance. Enterprise customers on on-premise or bring-your-own-model deployments run this on their own inference and pay no per-video credits.
Generated by Docsie Video-to-Docs on 2026-10-12 from a 5-minute video. Screenshots are frames from the source video and belong to their creator, Natalie Skibinski, whose original is embedded above. If you own this video and want the guide removed or credited differently, contact us and we will act within one business day.