
How to Create a Course in Schoology
This guide walks you through how to create a course in Schoology, from logging in to viewing your new course homepage. It also covers how to access a companion Google Slides tutorial that provides additional walkthroughs for common Schoology tasks.
Video: Create a Schoology Course by Anne Schmidt. All credit for the demonstration goes to the creator; watch the original on YouTube. The written guide below was generated from this video by Docsie. Creator? Request a change or removal.
This guide walks you through how to create a course in Schoology, from logging in to viewing your new course homepage. It also covers how to access a companion Google Slides tutorial that provides additional walkthroughs for common Schoology tasks.
Prerequisites
- A Schoology account (new or existing).
- Access to the Schoology website.
- If your school district uses Schoology, awareness of your institution's grading periods.
Log in to your Schoology account
- Go to the Schoology website.
- Create a new Schoology account if you do not already have one.
- Log in using your credentials.
Access the Courses page
After logging in, you land on your dashboard. If you are new to Schoology, your course list may be empty. If you are a teacher with existing courses, you will see your current course load, such as your fall or spring courses.
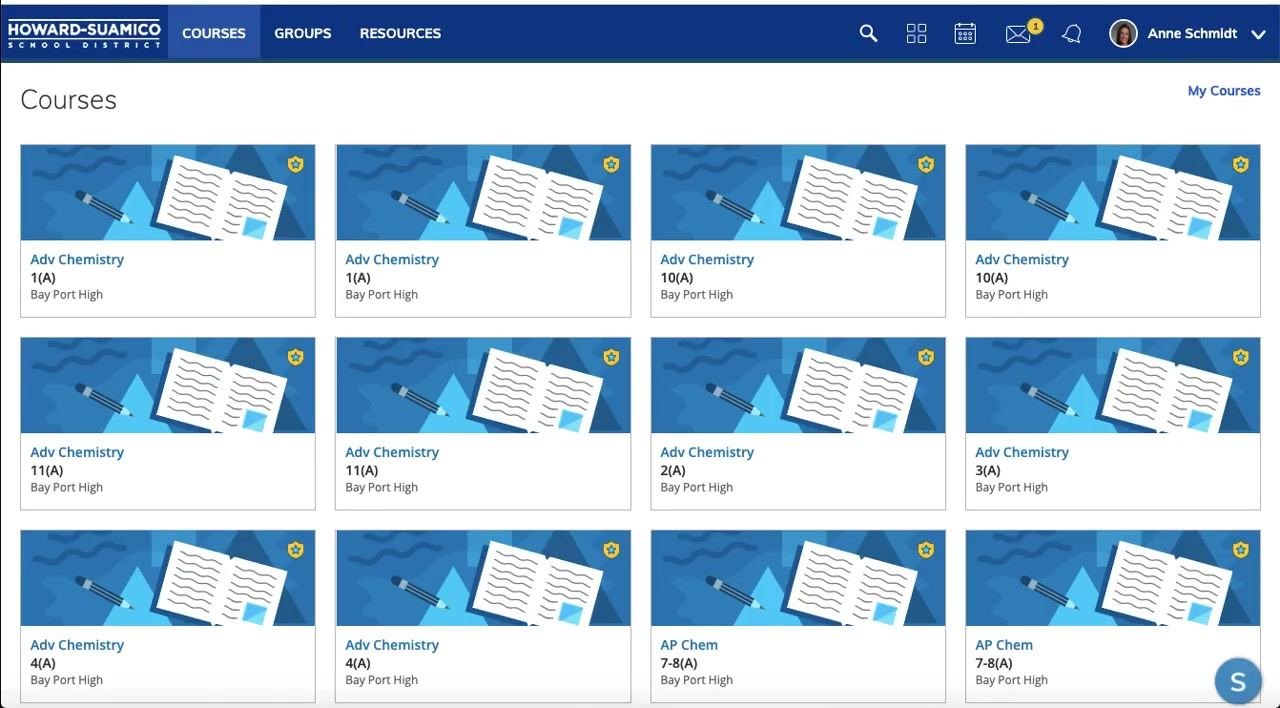
Navigate to My Courses
Locate and click the My Courses link in the upper right area of the Courses page.
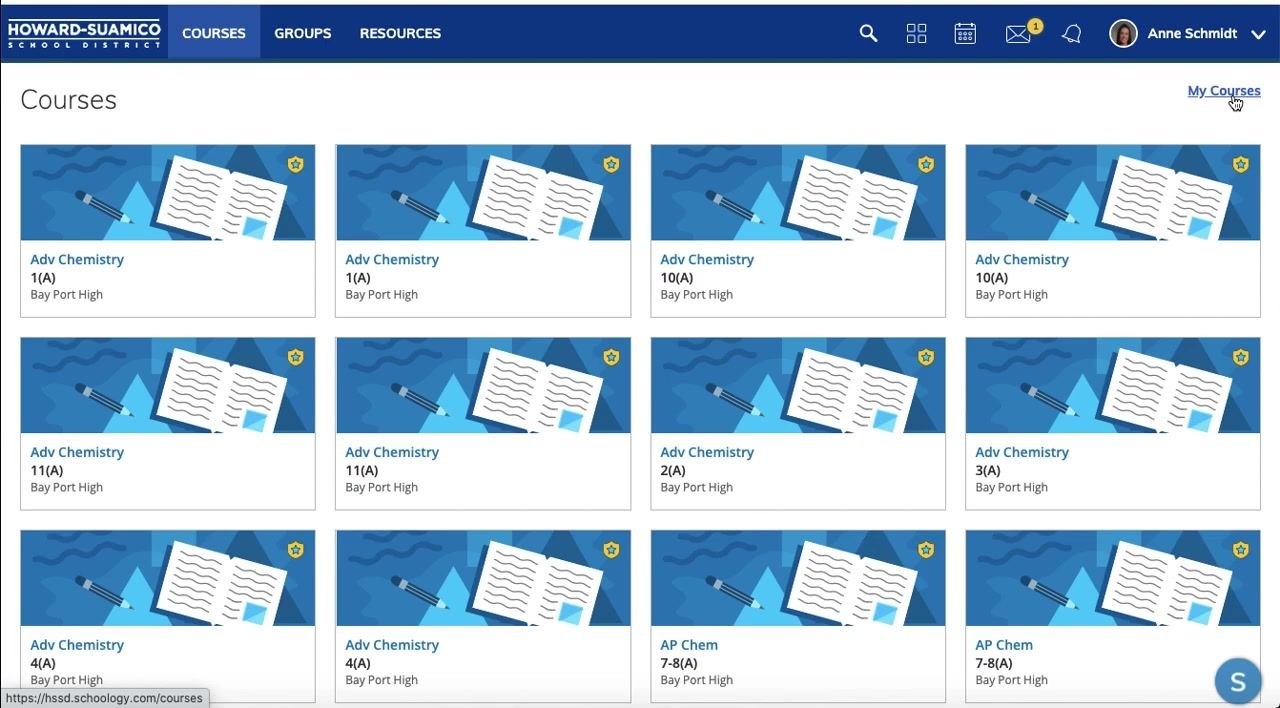
Start creating a new course
On the My Courses page, click the Create Course button to begin.
Fill out the course creation form
In the Create Course dialog, enter the following details:
- Course Name: Enter the name of your course. Example:
Schoology 101 - Section Name: Enter a section name. Example:
Section 1 - Subject Area: Select the subject area from the dropdown. Example:
Technology - Level: Select the applicable level, or choose
Noneif it does not apply. - Grading Periods: If your school district uses Schoology, select the appropriate grading period(s) so the course appears correctly in your course listing.
Once all fields are complete, click the Create button to finalize the course.
View your new course homepage
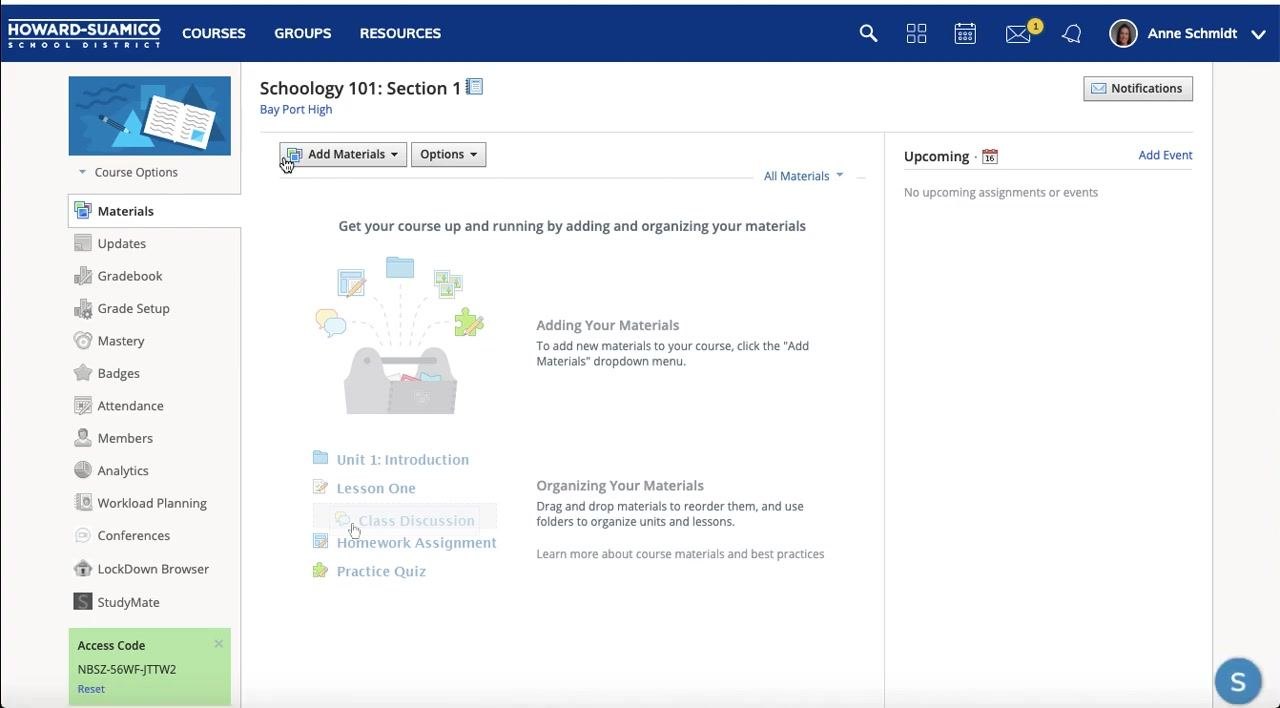
After the course is created, you are taken to the course homepage. The homepage includes options to add materials, organize content, and manage course settings.
The left sidebar provides access to:
- Materials
- Updates
- Gradebook
- Grade Setup
- Mastery
- Badges
- Attendance
- Members
- Analytics
- Workload Planning
- Conferences
- LockDown Browser
- StudyMate
An access code for the course is displayed at the bottom left of the page.
Access the Google Slides tutorial
For additional guidance on course setup and other Schoology features, you can open the "Schoology Teacher Tutorial" Google Slides presentation. The first slide is the main landing page, titled Schoology Teacher Tutorial.
The landing page features six colored buttons, each representing a major topic:
- Create (red)
- Interact (orange)
- Feedback (yellow)
- Assessments (green)
- Gradebook (blue)
- Conference (purple)
Each button is hyperlinked to a corresponding section within the presentation for easy navigation.
Navigate using hyperlinks and the table of contents
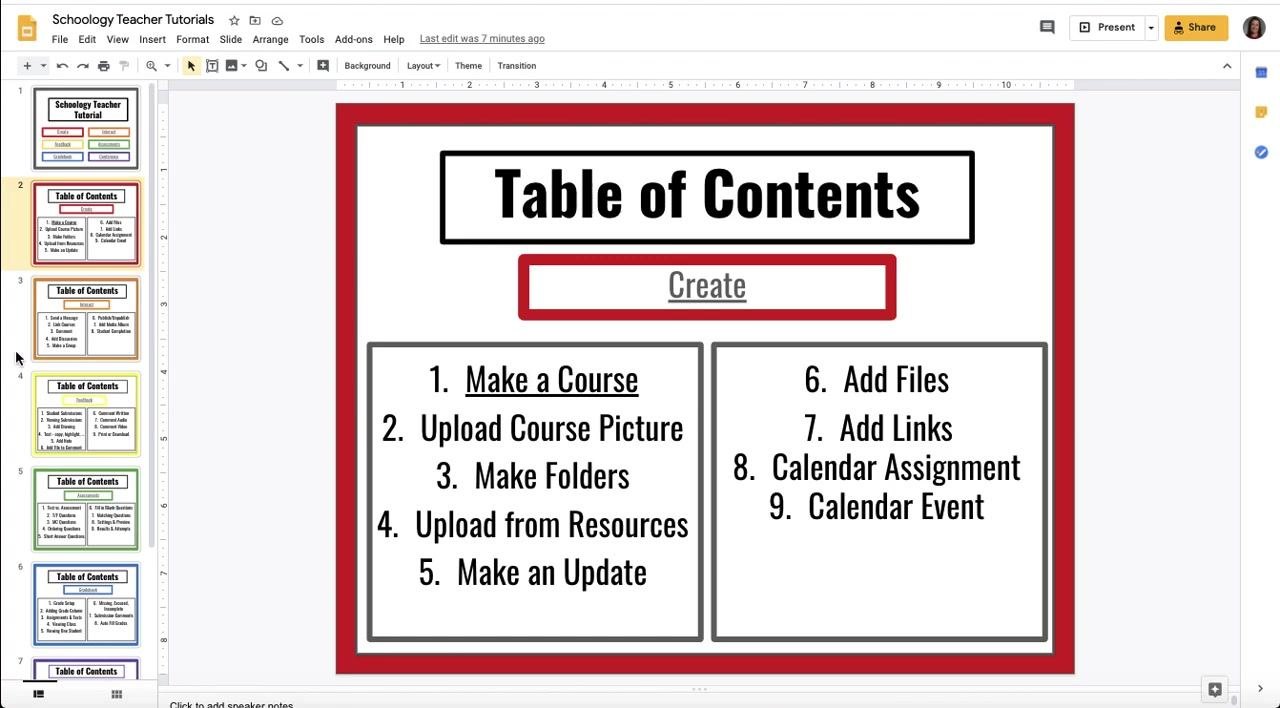
Click any of the colored topic buttons to jump directly to that section's table of contents. Each section lists the specific tutorials available under that topic.
For example, clicking Create brings you to a table of contents with the following items:
- Make a Course
- Upload Course Picture
- Make Folders
- Upload from Resources
- Make an Update
- Add Files
- Add Links
- Calendar Assignment
- Calendar Event
Each item in the table of contents is hyperlinked to its corresponding instructional slide or embedded video.
Watch embedded videos and use interactive features
Videos for each topic, such as "Make a Course," are embedded directly into the relevant slides. Click the video thumbnail or link to watch the tutorial without leaving the presentation. Use the navigation buttons or hyperlinks to return to the main table of contents or switch between topics as needed.
What's Next
With your course created, you can begin adding materials, organizing content into folders, and configuring course settings from the homepage sidebar. The Google Slides tutorial offers further walkthroughs on interacting with students, providing feedback, building assessments, managing the gradebook, and setting up conferences.
Generation details: cost, quality tiers
Docsie billed 1,500 credits ($1.05) to analyze this 3-minute video at standard quality. The rewrite, template fill and Word/PDF exports were included. The same video at each quality tier:
| Quality | Frames sampled | Credits | Approx. cost |
|---|---|---|---|
| Draft | every 16-30 s | 750 | $0.52 |
| Standard (this guide) | every 8-15 s | 1,500 | $1.05 |
| Detailed | every 4-7 s | 3,000 | $2.10 |
| Ultra | every 1-3 s | 6,000 | $4.20 |
Credits priced at $0.70 per 1,000; plans include a monthly allowance. Enterprise customers on on-premise or bring-your-own-model deployments run this on their own inference and pay no per-video credits.
Generated by Docsie Video-to-Docs on 2026-10-12 from a 2-minute video. Screenshots are frames from the source video and belong to their creator, Anne Schmidt, whose original is embedded above. If you own this video and want the guide removed or credited differently, contact us and we will act within one business day.