
How to Create a Valuation Class in SAP
This guide walks you through how to create a valuation class in SAP MM for spare parts, assign it to a material type, and verify that quantity and value updating work correctly. You will create a new valuation class, link it to an account category reference, configure the material type settings, and confirm the setup by creating and reviewing a material master record.
Video: # SAP MM #Create valuation Class and Account Category Reference # Assign with material type by ERP point (2019). All credit for the demonstration goes to the creator; watch the original on YouTube. The written guide below was generated from this video by Docsie. Creator? Request a change or removal.
This guide walks you through how to create a valuation class in SAP MM for spare parts, assign it to a material type, and verify that quantity and value updating work correctly. You will create a new valuation class, link it to an account category reference, configure the material type settings, and confirm the setup by creating and reviewing a material master record.
Prerequisites
- Access to the SAP GUI with a valid logon.
- Authorization to use customizing transactions (
OMSK) and material master transactions (MM01,MM02). - Knowledge of the plant code you will use for testing (this guide uses plant 9711).
- Familiarity with the material type you are configuring (this guide uses ERSA – Spare parts).
Part 1: Material master creation
Step 1: Open the SAP GUI initial screen
Log into SAP and confirm you are at the main screen. The screen displays Customizing: Execute Project, with options for SAP Reference IMG, IMG Information, and Project Analysis. Below this, you will see My Customizing Worklist with columns for Project and Name.
Step 2: Start material master creation
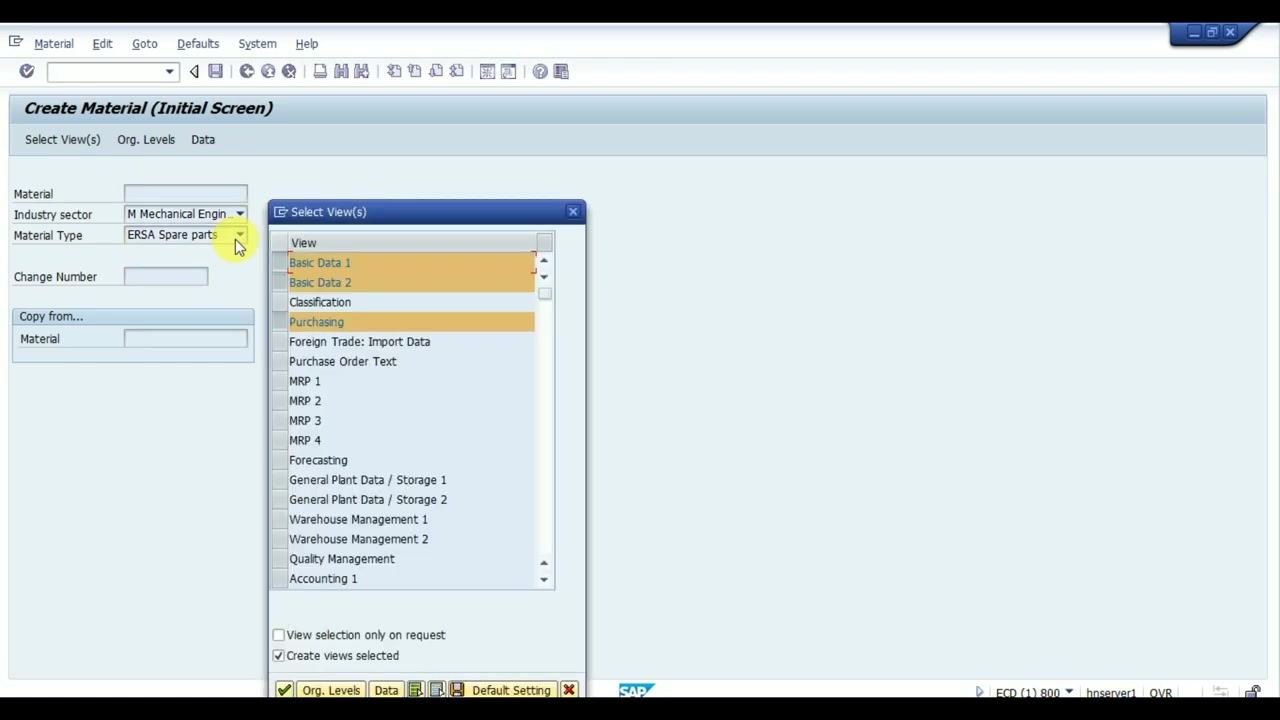
In the command field at the top of the screen, type /nmm01 and press Enter. The Create Material (Initial Screen) window opens. Set the following values:
- Industry sector: M Mechanical Engineering
- Material Type: ERSA Spare parts
Step 3: Select the material views
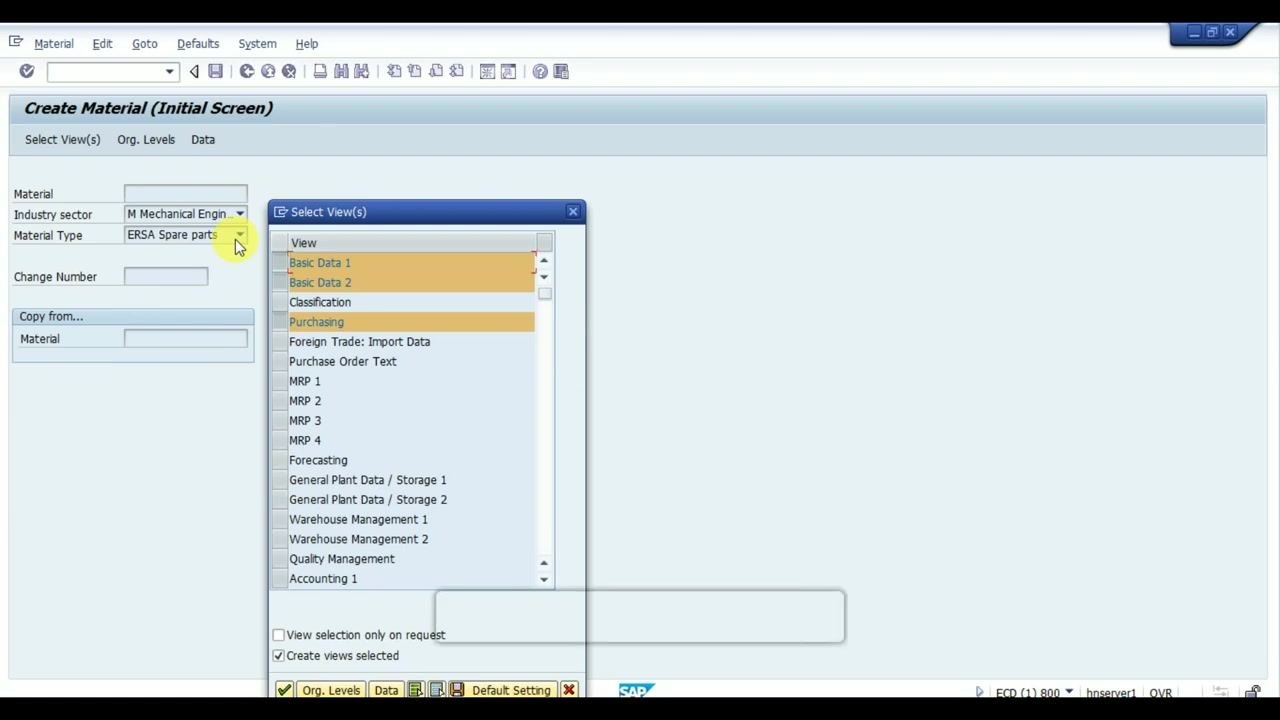
In the Select View(s) dialog, choose the views required for this material. For this example, select:
- Basic Data 1
- Basic Data 2
- Classification
- Purchasing
- Accounting 1 (required to check the valuation class)
Click Org. Levels to continue.
Step 4: Check the current valuation class assignment
On the Create Material screen, go to the Accounting 1 tab and enter:
- Material: 8700931537
- Plant: 9711
Attempt to enter a value in the Valuation Class field. If you see a message such as "No values found," the valuation class has not yet been assigned for this material type, and you need to create one.
Part 2: Creating the valuation class
Step 5: Create a new valuation class
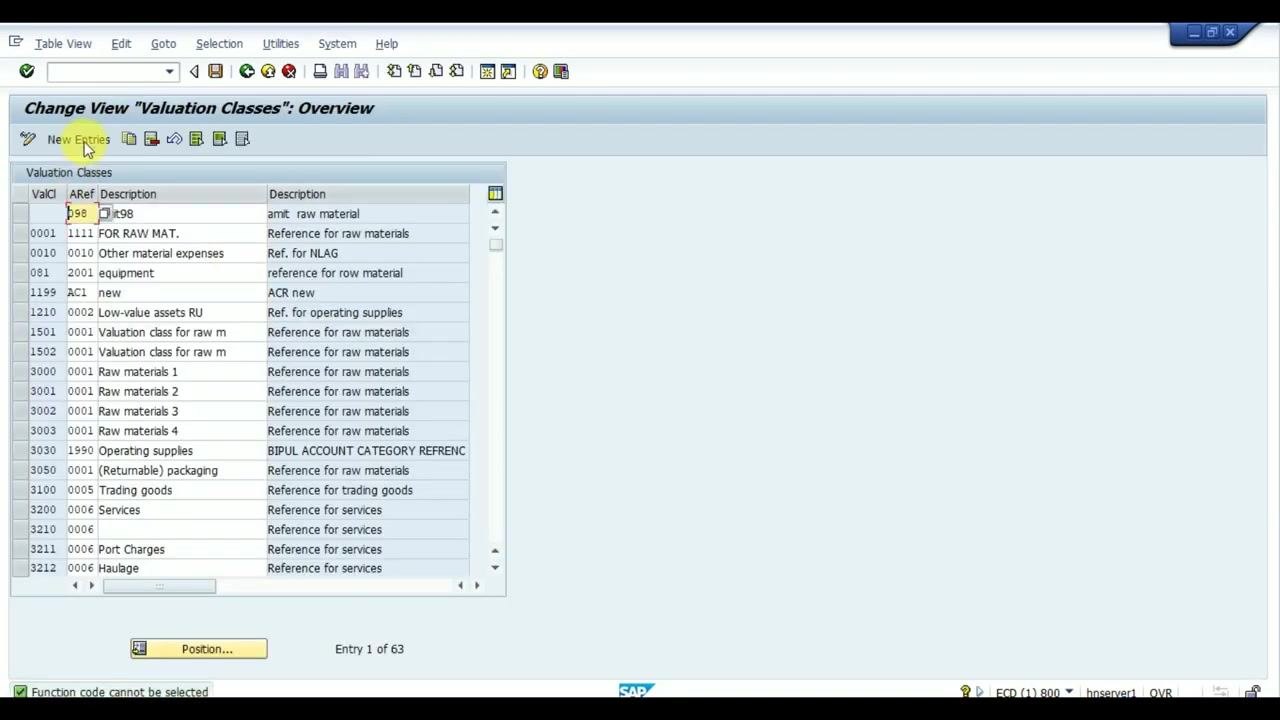
In the command field, enter /nOMSK and press Enter to open the valuation class configuration screen. On the Change View "Valuation Classes": Overview screen, click New Entries and enter:
- Valuation Class: 3040
- Account Category Reference: OMS2
- Description: Spare parts
- Additional Description: Reference for spare parts
Save your entries.
Step 6: Verify the new valuation class entry
After saving, the Overview of Added Entries screen displays your new record. Confirm that valuation class 3040, account category reference OMS2, and description Spare parts appear as expected.
Step 7: Check the account category reference
To confirm where account category reference OMS2 is defined, open the Change View "Account Category Reference": Overview screen. Locate OMS2 in the list and verify its description reads "Reference for spare parts."
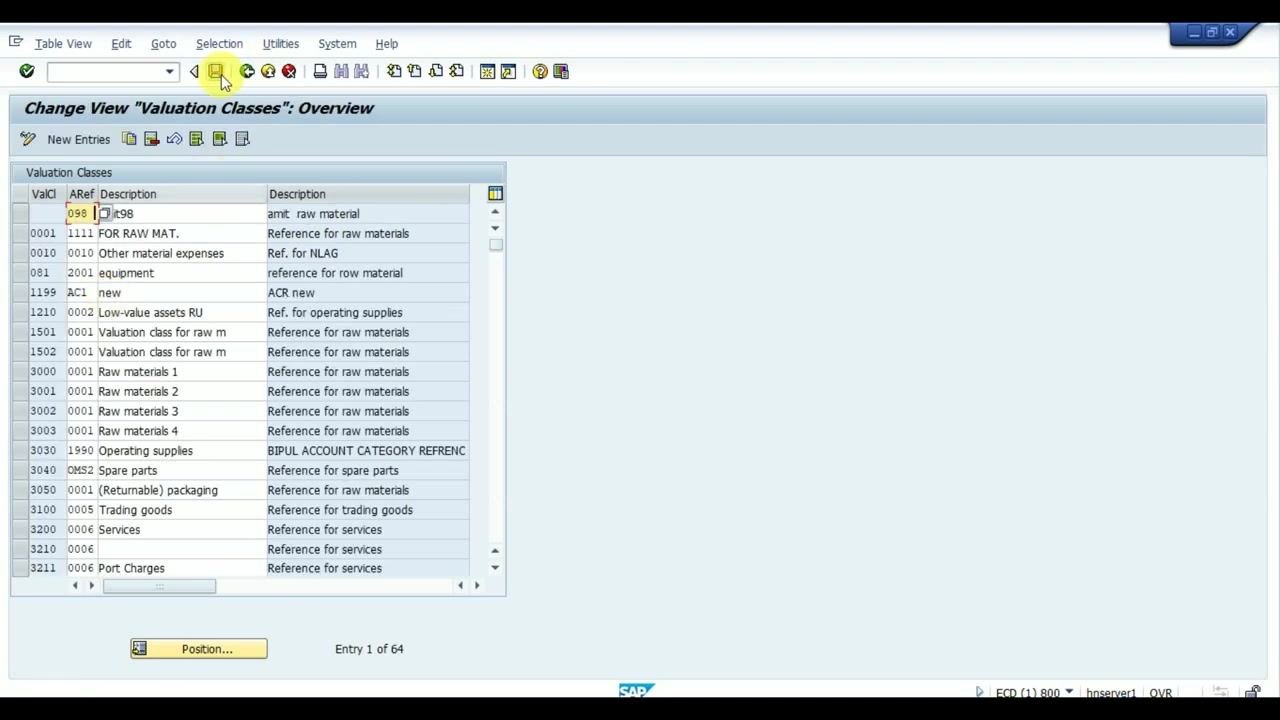
At this point, you have checked for an existing valuation class, created a new one (3040 for spare parts), and verified the related account category reference (OMS2). This confirms the valuation class is properly assigned for the ERSA material type.
Part 3: Configuring quantity and value updating
Step 8: Review material type details
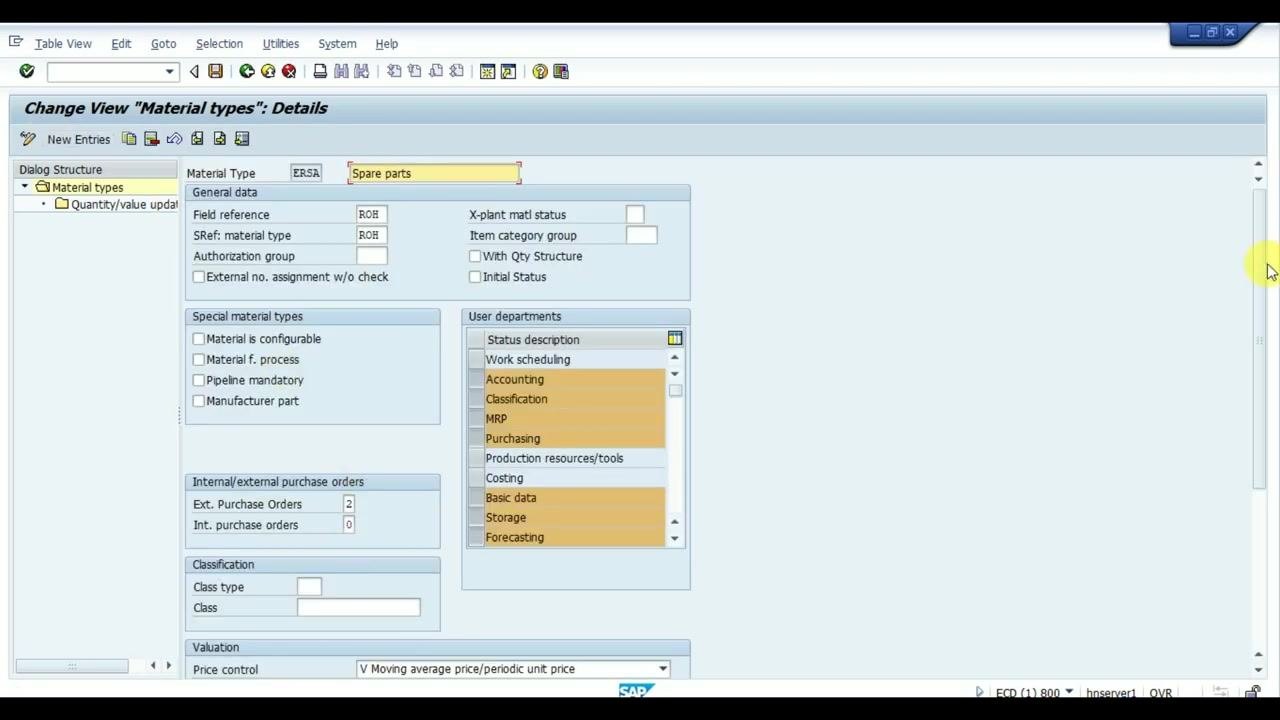
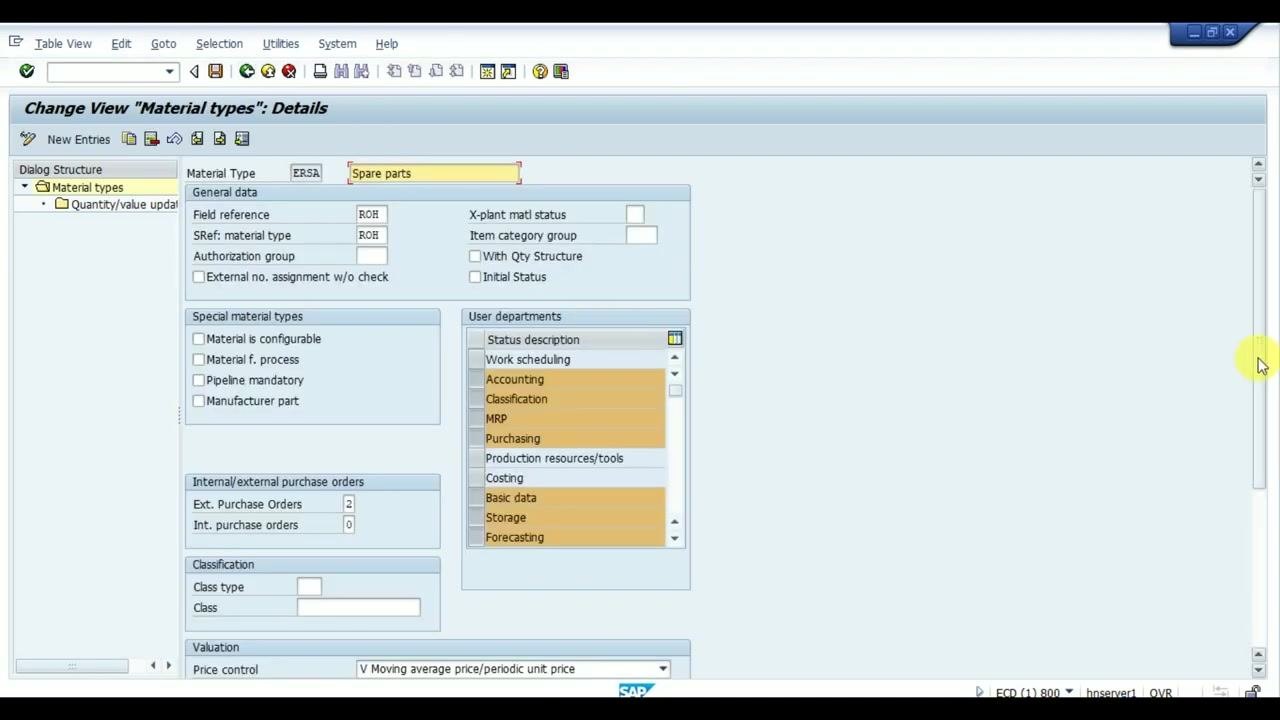
Open the Change View "Material types": Details screen for material type ERSA (Spare parts). Confirm the following:
- Material Type: ERSA
- Description: Spare parts
- Field reference: ROH
- SRef: material type: ROH
- User departments: Accounting, Classification, MRP, Purchasing, and Costing selected
This screen controls how the material type behaves across different departments.
Step 9: Access quantity/value updating settings
You can apply this configuration to all valuation areas on the server. If you do not select a specific valuation area, the settings apply globally, keeping behavior consistent across plants and storage locations.
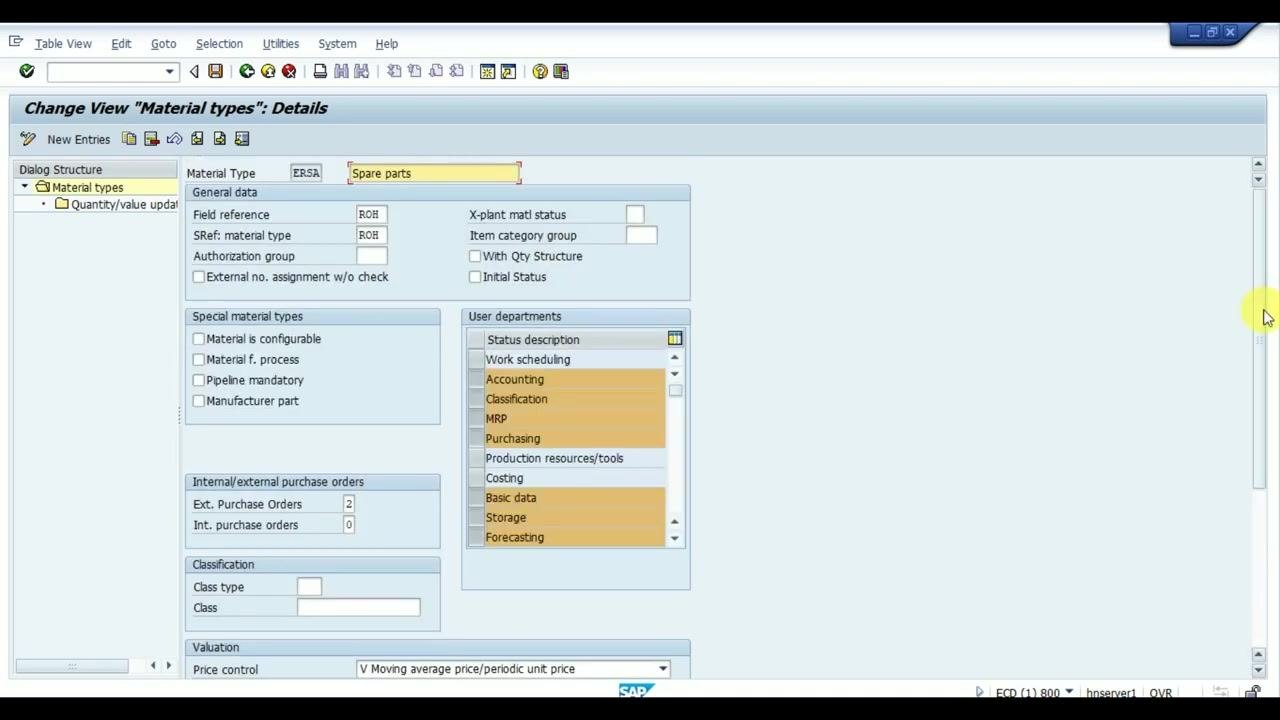
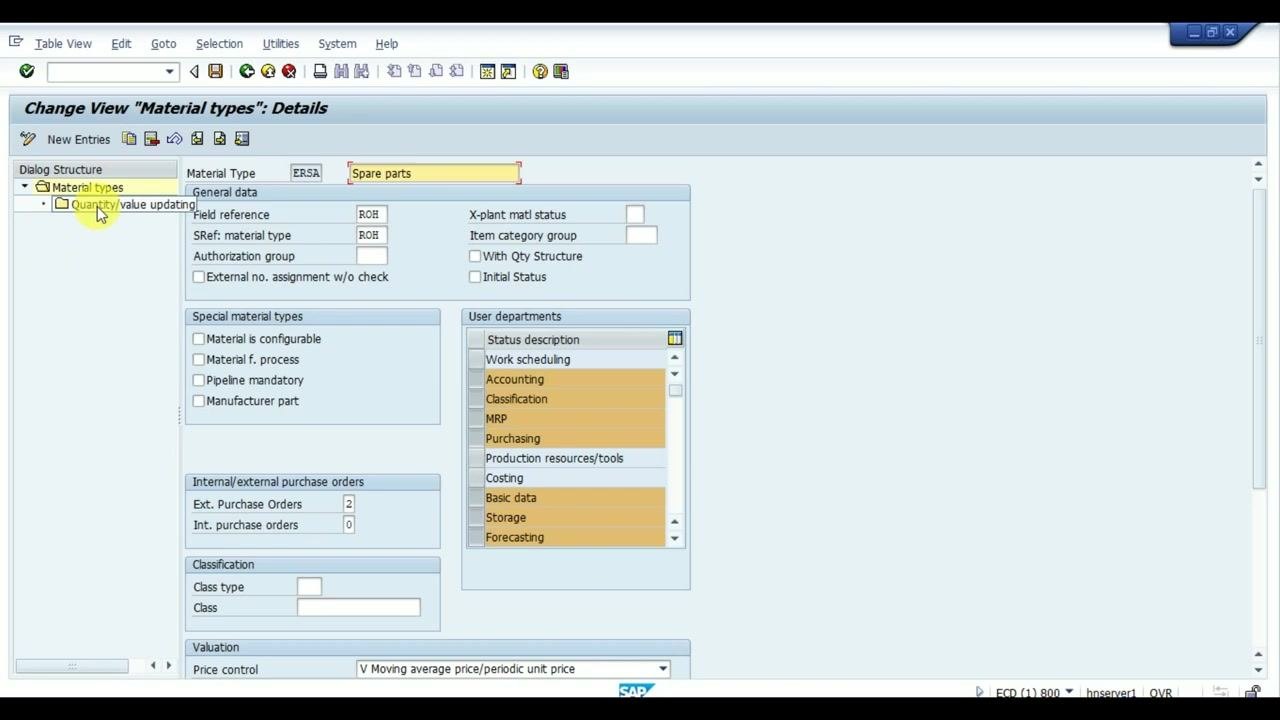
In the dialog structure on the left, click Quantity/value updating under Material types. This opens the overview screen where you configure quantity and value updating per valuation area and material type.
Step 10: Check and configure quantity and value updating
On the Change View "Quantity/value updating": Overview screen, locate your plant code (for example, 9711) and material type ERSA. Review these columns:
- Qty updating: Controls whether quantity is updated for this material type in the valuation area.
- Value Update: Controls whether value is updated.
- Pipe.mand. and PipeAllowd: Pipeline-related settings.
If neither Qty updating nor Value Update is checked, you cannot receive the material into inventory for that plant, and both quantity and value updates for inventory transactions are blocked.
Step 11: Apply settings to all value scenarios
To apply the configuration across all valuation areas, select the all value scenario option if available, then press Enter to confirm. Make sure the correct account category reference (OMS2) is selected for spare parts.
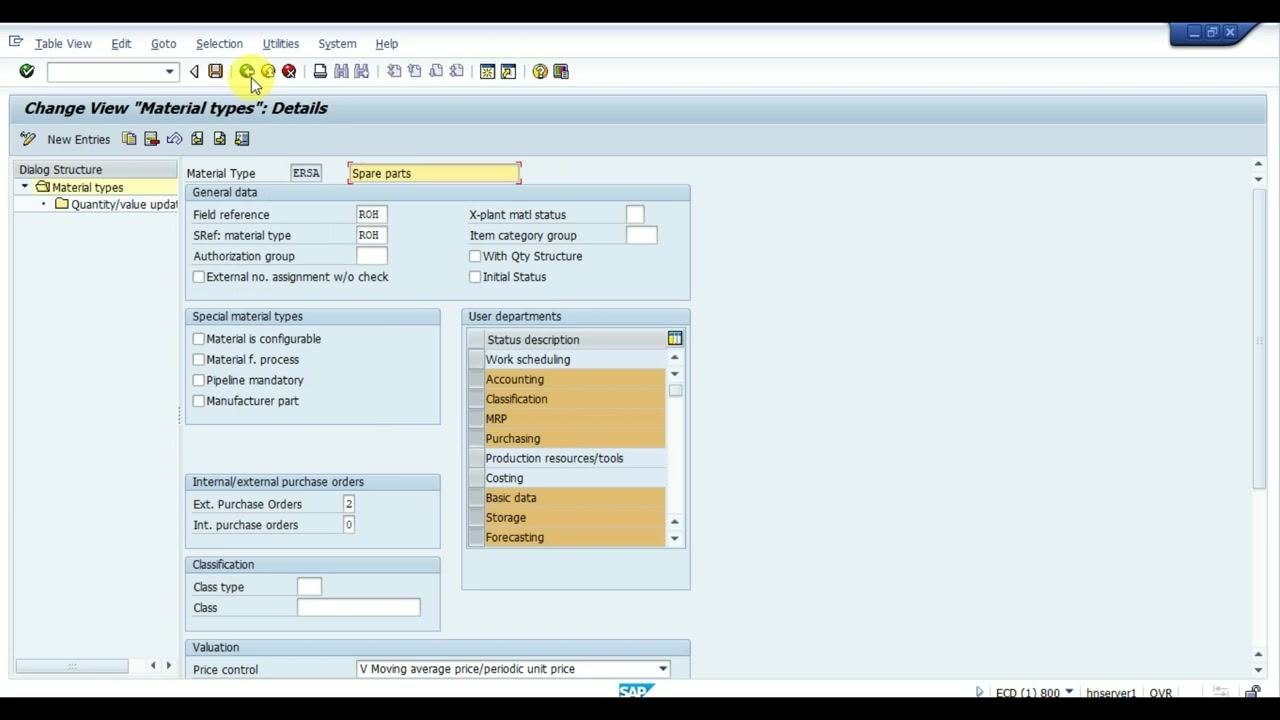
With this configuration, the valuation class and account category reference for spare parts (ERSA) are correctly set up, and quantity and value updating are enabled for all relevant valuation areas. This supports proper inventory management and accounting for spare parts across your organization.
Step 12: Review quantity and value updating settings
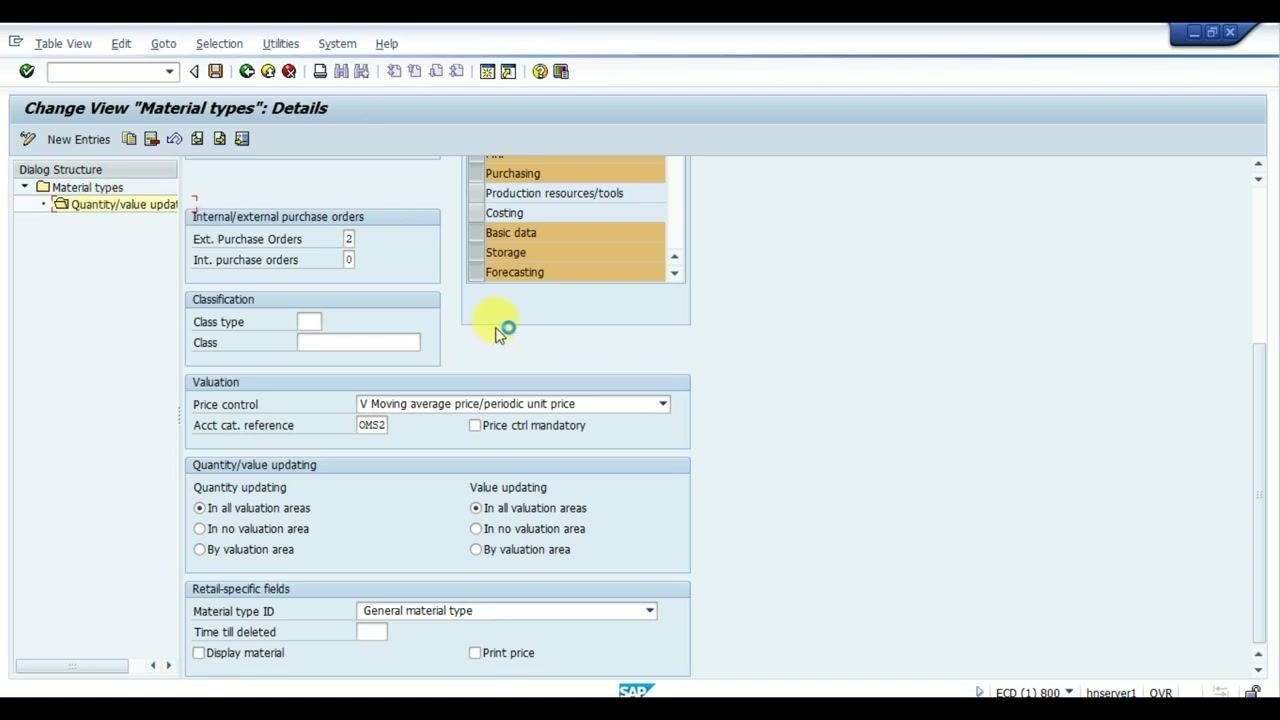
On the Change View "Material types": Details screen, confirm that Account cat. reference is set to OMS2. Under Quantity/value updating, verify that both Quantity updating and Value updating are set to "In all valuation areas," or as required for your scenario. This ensures all relevant valuation areas, such as plant 9711, have quantity and value updating enabled for ERSA.
Step 13: Confirm the automatic tick for the valuation area
Return to the Change View "Quantity/value updating": Overview screen. Confirm that for plant 9711 and material type ERSA, both Qty updating and Value Update checkboxes are ticked. These ticks appear automatically when the configuration is correct, indicating you are eligible to receive this item type into inventory. If they are not checked, you will encounter errors when trying to receive the material into stock.
Step 14: Save the configuration
After confirming the settings are correct, click the Save icon (diskette) at the top of the screen. This finalizes the configuration for quantity and value updating for the selected valuation areas and material type.
Part 4: Testing the configuration
Step 15: Create a test material master
Enter transaction MM01 to create a new material master. In the Create Material (Initial Screen), select:
- Industry sector: M Mechanical Engineering (or as appropriate)
- Material Type: ERSA Spare parts
In the Select View(s) dialog, deselect Purchasing and select only Accounting. Enter your plant code (9711) when prompted.
Step 16: Confirm automatic valuation class assignment
On the Create Material screen, under the Accounting 1 tab, verify that the Valuation Class (for example, 3000) is populated automatically. This confirms the spare parts configuration is correct and the valuation class is assigned as expected.
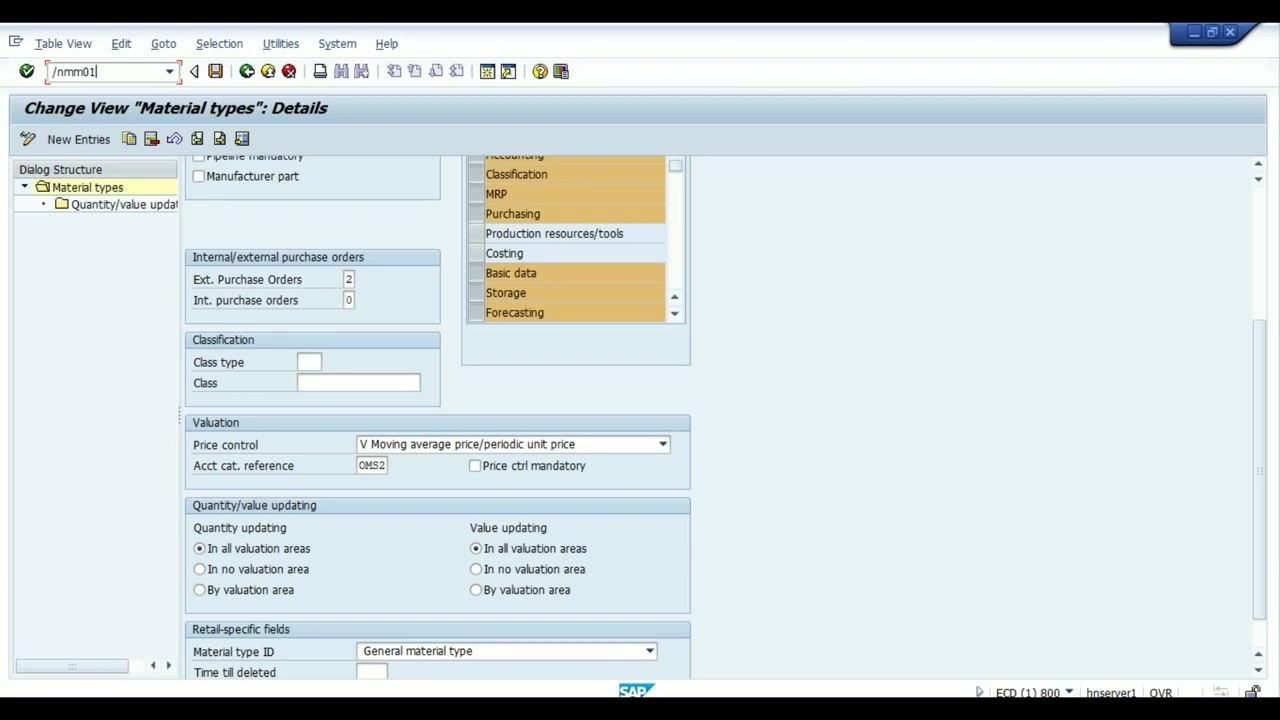
This confirms that quantity and value updating are properly configured for spare parts (ERSA), and that the system allows you to receive these materials into inventory without errors. The automatic assignment of the valuation class during material master creation verifies that the configuration was successful.
Part 5: Creating a material with the new valuation class
Step 17: Open the Create Material screen
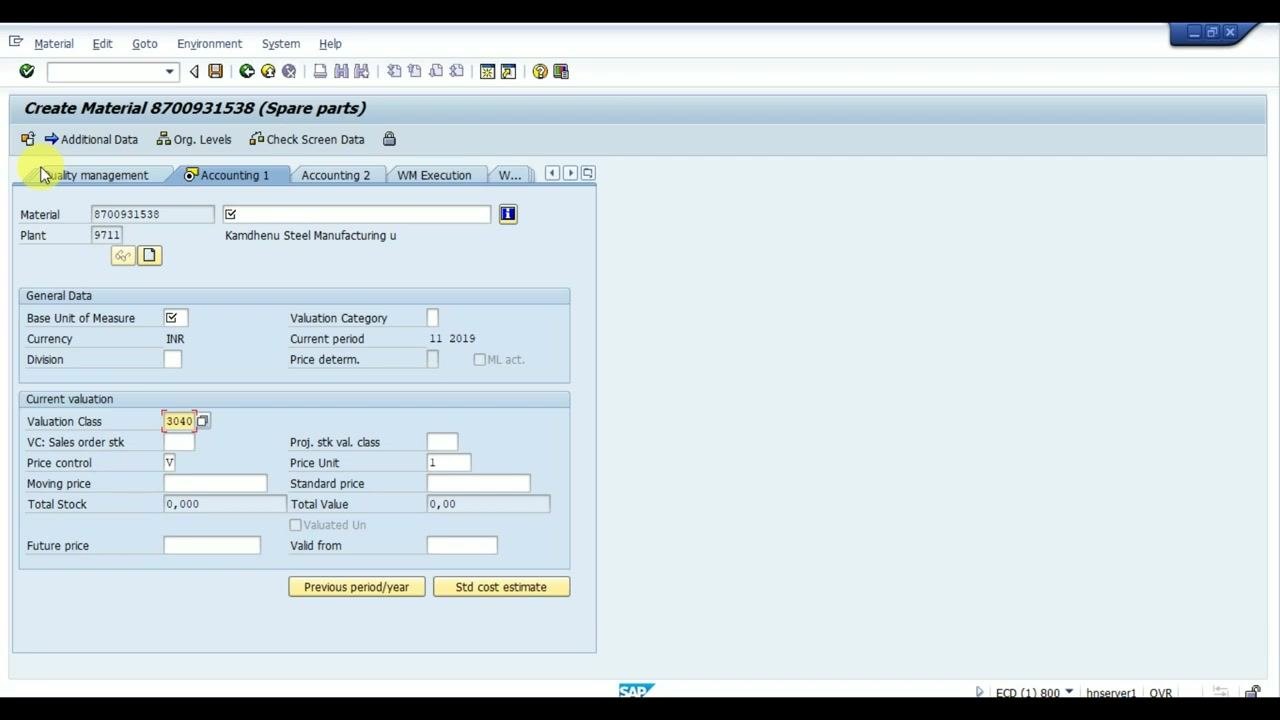
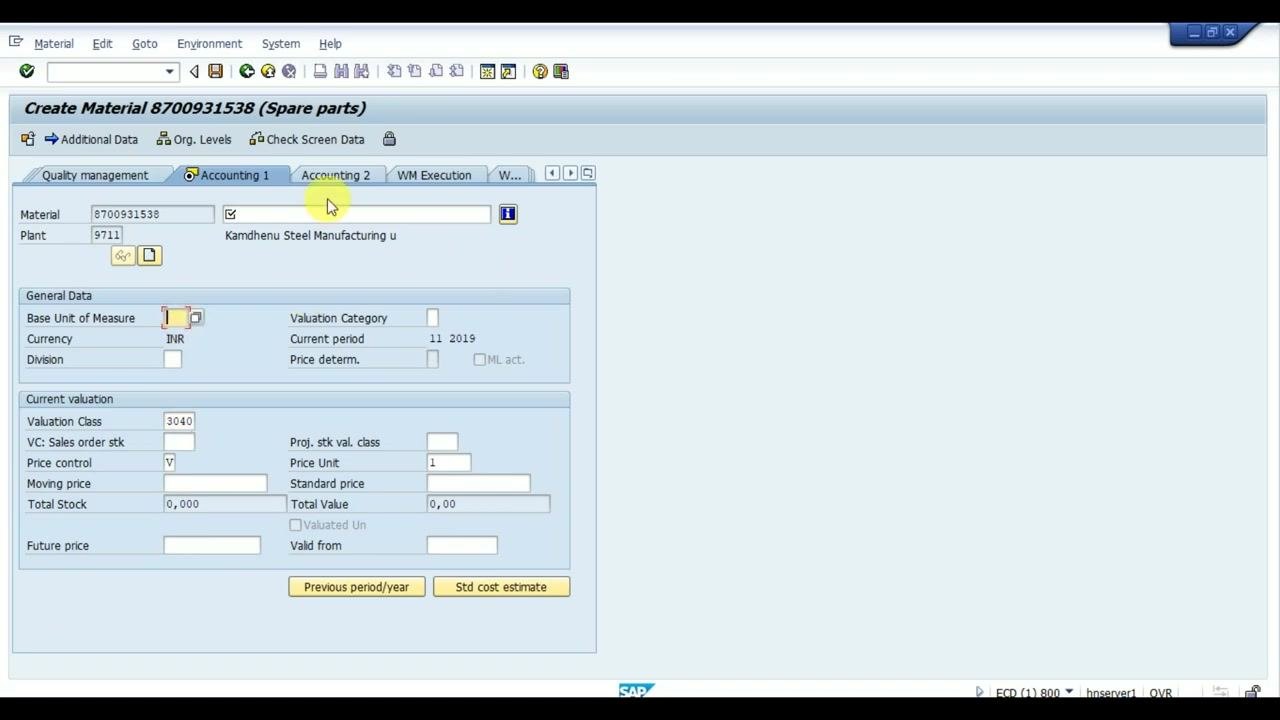
The screen title reads Create Material 8700931538 (Spare parts). Tabs including Quality management, Accounting 1, Accounting 2, and WM Execution are visible. The Material field is pre-filled with 8700931538, and Plant is set to 9711 (Kamdhenu Steel Manufacturing u). Under Current valuation, the Valuation Class is set to 3040.
Step 18: Set the base unit of measure and price control
In the General Data section, set the Base Unit of Measure to the appropriate unit (for example, KG for lube oil), and ensure Currency is set to INR. Set Price control to V for moving average price, then click Enter to proceed.
Step 19: Enter the moving price and save
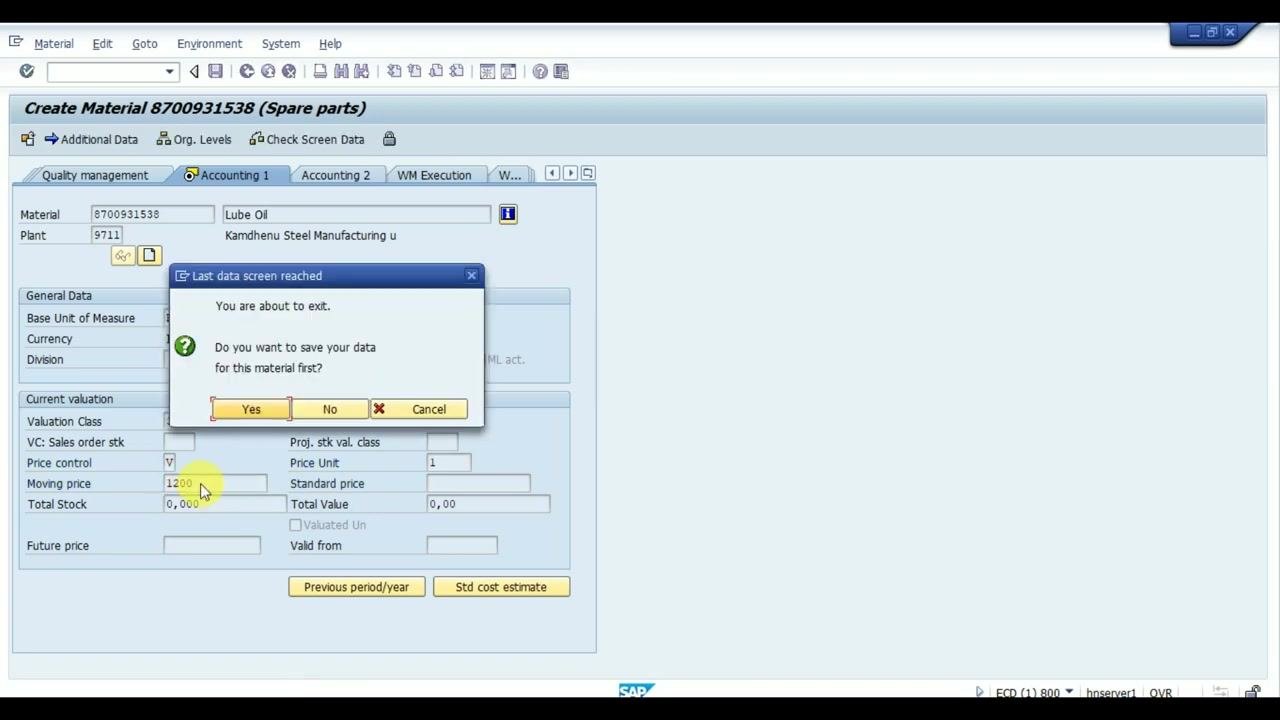
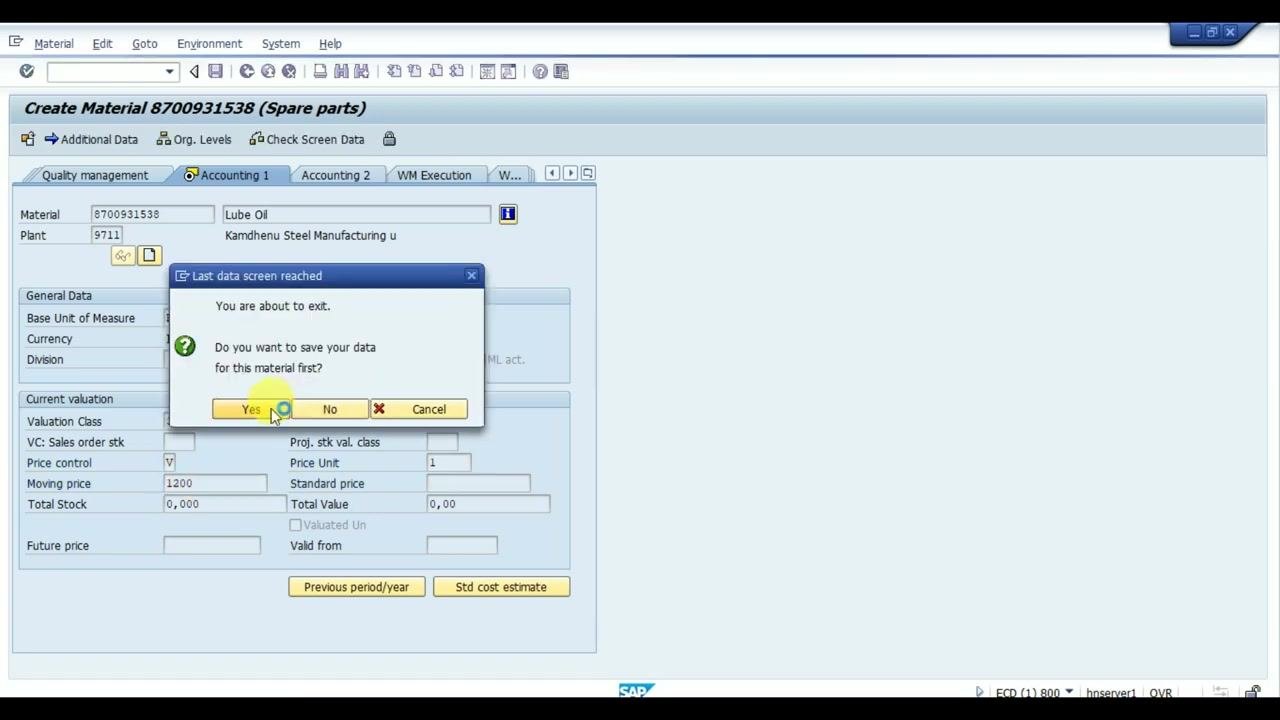
In the Current valuation section, enter 1200 as the Moving price. Confirm that Valuation Class remains 3040. When the Last data screen reached dialog appears, click Yes to save the data for this material.
Step 20: Verify material creation
A Performance Assistant window appears with the message "Material 8700931538 created" and message number M3800.
Part 6: Reviewing the created material
Step 21: Check the valuation details
Open the Change Material (Initial Screen) and enter material number 8700931538. In the Organizational Levels dialog, ensure Plant is set to 9711, then click Select View(s) to proceed.
Step 22: Review the accounting and valuation data
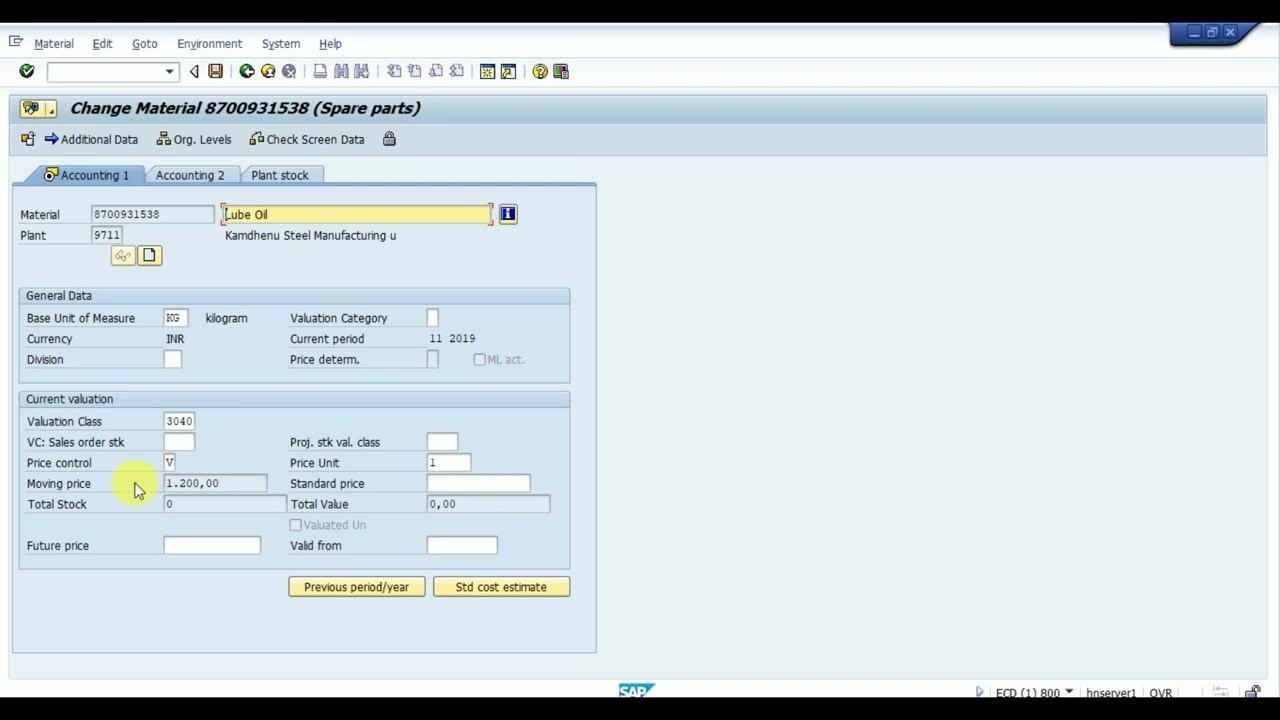
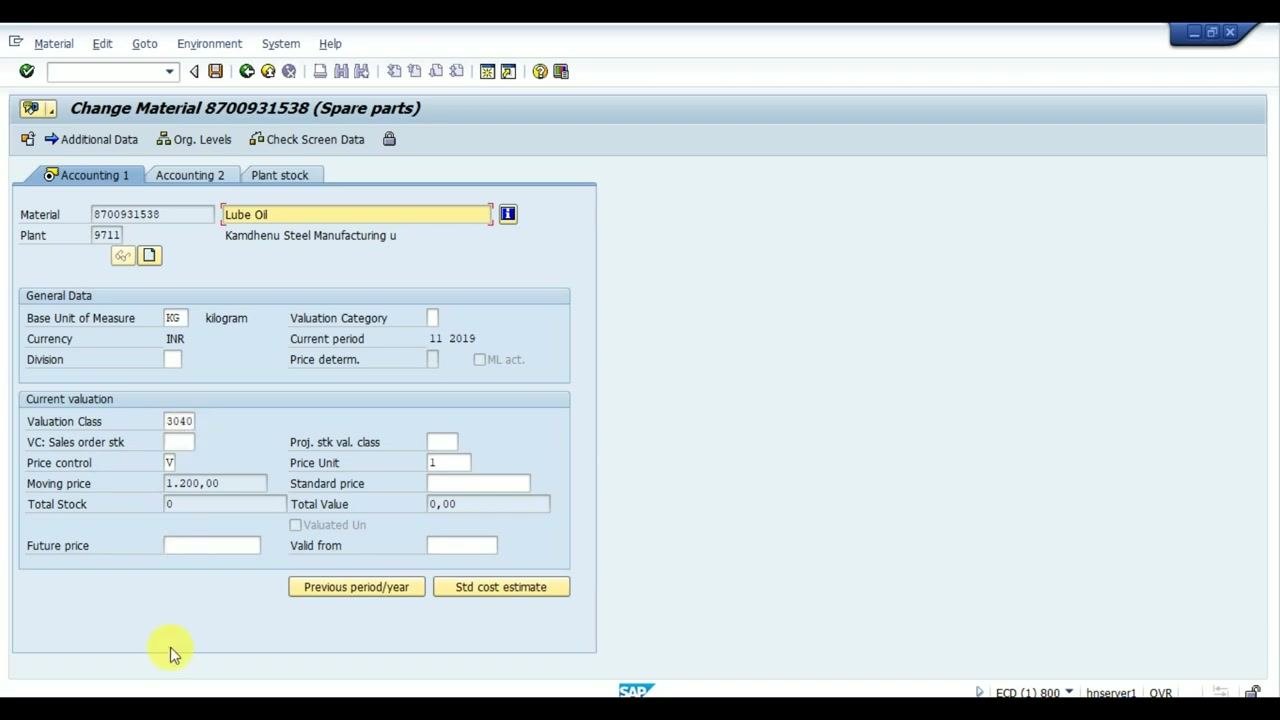
The Change Material 8700931538 (Spare parts) screen appears. Confirm the following details:
- Material: 8700931538
- Description: Lube Oil
- Plant: 9711
- Base Unit of Measure: KG (kilogram)
- Currency: INR
- Valuation Class: 3040
- Price control: V
- Moving price: 1,200.00
- Total Stock: 0
- Total Value: 0.00
Use the Previous period/year or Std cost estimate buttons if you need additional detail.
Step 23: Understand ongoing price and valuation class updates
You can create a new valuation class or account category as needed for future materials. The system lets you assign the price (moving average or standard) and valuation class during material creation or modification. After the first transaction is posted, the average price updates automatically in the Moving price field.
Summary
By following these steps, you have learned how to create a valuation class in SAP MM for spare parts, link it to an account category reference, and configure quantity and value updating for the ERSA material type. You also verified the setup by creating a test material, confirming automatic valuation class assignment, and reviewing the accounting and valuation data on a real material record. The system now automatically updates the moving average price after transactions are posted, confirming that your valuation class and material type configuration are working correctly.
Generation details: cost, quality tiers
Docsie billed 4,000 credits ($2.80) to analyze this 8-minute video at standard quality. The rewrite, template fill and Word/PDF exports were included. The same video at each quality tier:
| Quality | Frames sampled | Credits | Approx. cost |
|---|---|---|---|
| Draft | every 16-30 s | 2,000 | $1.40 |
| Standard (this guide) | every 8-15 s | 4,000 | $2.80 |
| Detailed | every 4-7 s | 8,000 | $5.60 |
| Ultra | every 1-3 s | 16,000 | $11.20 |
Credits priced at $0.70 per 1,000; plans include a monthly allowance. Enterprise customers on on-premise or bring-your-own-model deployments run this on their own inference and pay no per-video credits.
Generated by Docsie Video-to-Docs on 2026-10-14 from a 7-minute video. Screenshots are frames from the source video and belong to their creator, ERP point, whose original is embedded above. If you own this video and want the guide removed or credited differently, contact us and we will act within one business day.