
How to Itemize a Hotel Bill in SAP Concur
When you submit a hotel expense in Concur Expense, your bill typically includes more than just the room rate. You'll need to know how to itemize a hotel bill in SAP Concur so that charges like taxes, parking, meals, and personal items are each properly accounted for in your expense report. This guide walks you through the full itemization process, from understanding what's on a typical hotel bill to submitting your completed expense report.
Video: Itemizing Nightly Lodging Expenses in Concur by CSUSM Travel Office. All credit for the demonstration goes to the creator; watch the original on YouTube. The written guide below was generated from this video by Docsie. Creator? Request a change or removal.
When you submit a hotel expense in Concur Expense, your bill typically includes more than just the room rate. You'll need to know how to itemize a hotel bill in SAP Concur so that charges like taxes, parking, meals, and personal items are each properly accounted for in your expense report. This guide walks you through the full itemization process, from understanding what's on a typical hotel bill to submitting your completed expense report.
Prerequisites
Before you begin, make sure you have:
- A hotel expense already added to your expense report in Concur Expense
- Your itemized hotel bill or folio showing room charges, taxes, and incidental expenses
- Knowledge of your company's policy on personal (non-reimbursable) expenses
Understand the types of hotel expenses
A typical hotel bill includes several categories of charges that need to be separated out, such as:
- Room fees
- Taxes
- Parking
- Meals
- Personal items
Recognizing these categories upfront helps you itemize each one correctly in the steps that follow.
Prepare to itemize your hotel expense
Step 1: Review auto-populated fields
Concur Expense automatically fills in the checkout date and number of nights based on the transaction date and check-in date you provided. You can modify these fields if needed.
Depending on your company's configuration, eReceipt activation and import may also auto-populate itemizations for lodging expenses.
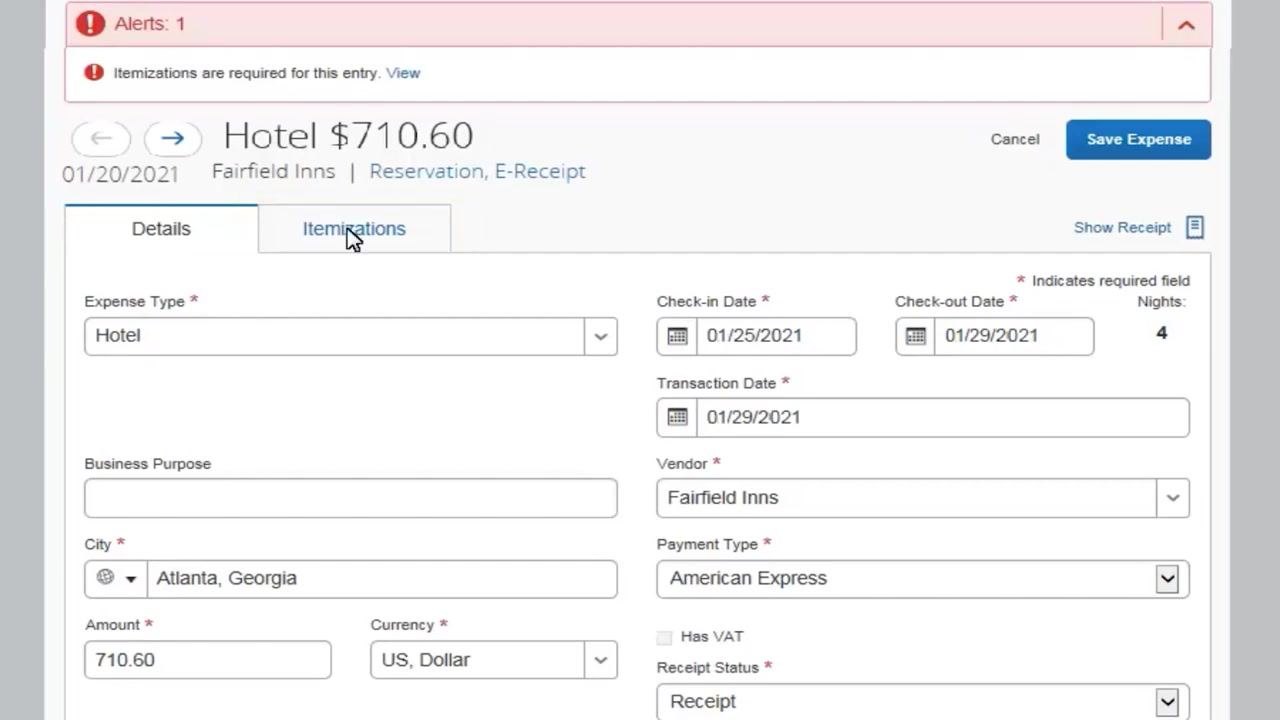
Step 2: Open the Itemizations tab
Click the Itemizations tab to begin the itemization process. Then click Create Itemization to start entering your expenses.
On the Itemizations tab, review the Amount Remaining that still needs to be itemized. You'll continue entering recurring and one-time charges until this amount reaches zero.
Itemize the hotel room expense
Step 3: Select the Hotel expense type
Click the Expense Type drop-down arrow and select Hotel. Then choose whether your room rate was the same every night or varied by night.
For example, select Not the Same if you need to enter a different rate for the last night of your stay.
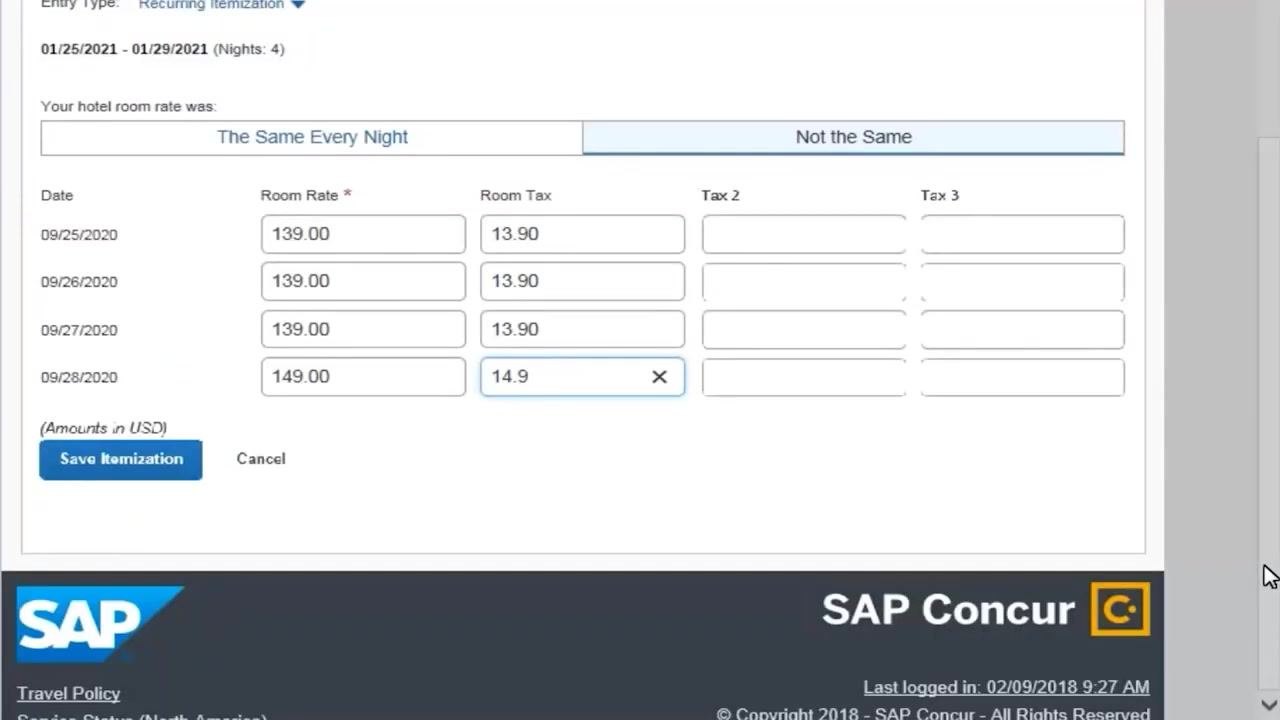
Step 4: Enter the room rate and taxes for each night
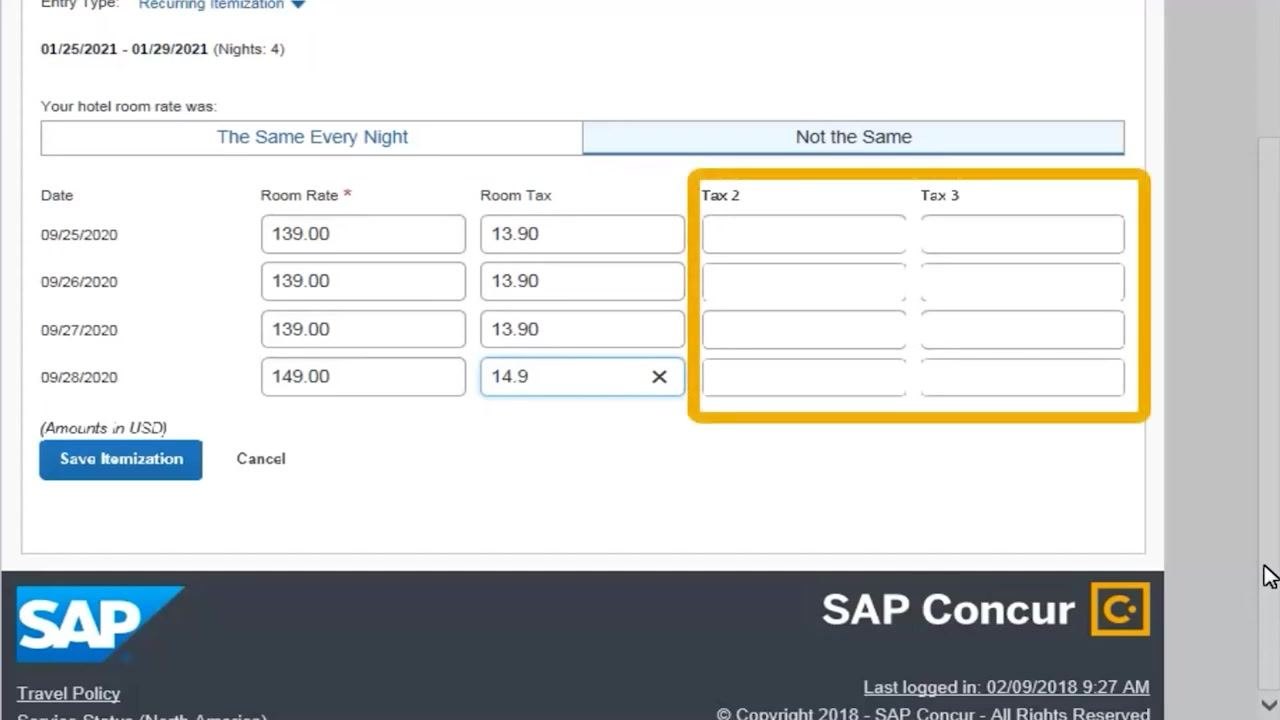
Scroll down to enter the Room Rate and Room Tax for each night of your stay. Use the Tax 2 and Tax 3 fields if you need to add any additional tax amounts.
For example, your nightly entries might look like this:
- 09/25/2020: Room Rate = 139.00, Room Tax = 13.90
- 09/26/2020: Room Rate = 139.00, Room Tax = 13.90
- 09/27/2020: Room Rate = 139.00, Room Tax = 13.90
- 09/28/2020: Room Rate = 149.00, Room Tax = 14.90
Step 5: Save the room itemization
Once all nightly amounts are entered, click Save Itemization to record your entries.
Itemize additional hotel bill expenses
After itemizing the room charge, you can itemize other expenses that appear on your hotel bill, such as dinner, tips, parking, and personal laundry.
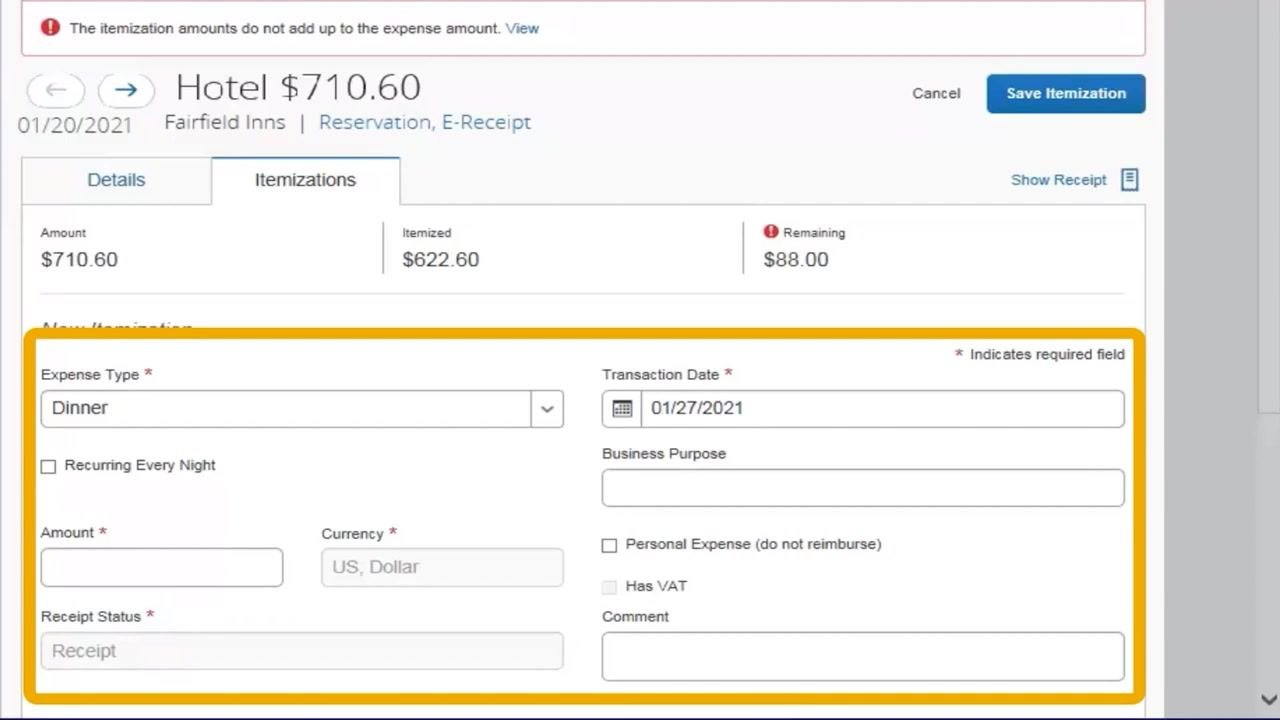
Step 6: Itemize a dinner expense
Click Create Itemization, then click the Expense Type drop-down arrow and select Dinner.
Complete all required fields marked with a red asterisk (*), including:
- Transaction Date: Enter the date of the dinner (for example, 01/27/2021)
- Amount: Enter the dinner amount
- Receipt Status: Indicate whether a receipt is attached
- Any additional fields required by your company, such as Business Purpose or Comments
Click Save Itemization to record the dinner expense.
Step 7: Itemize a tip on the dinner bill
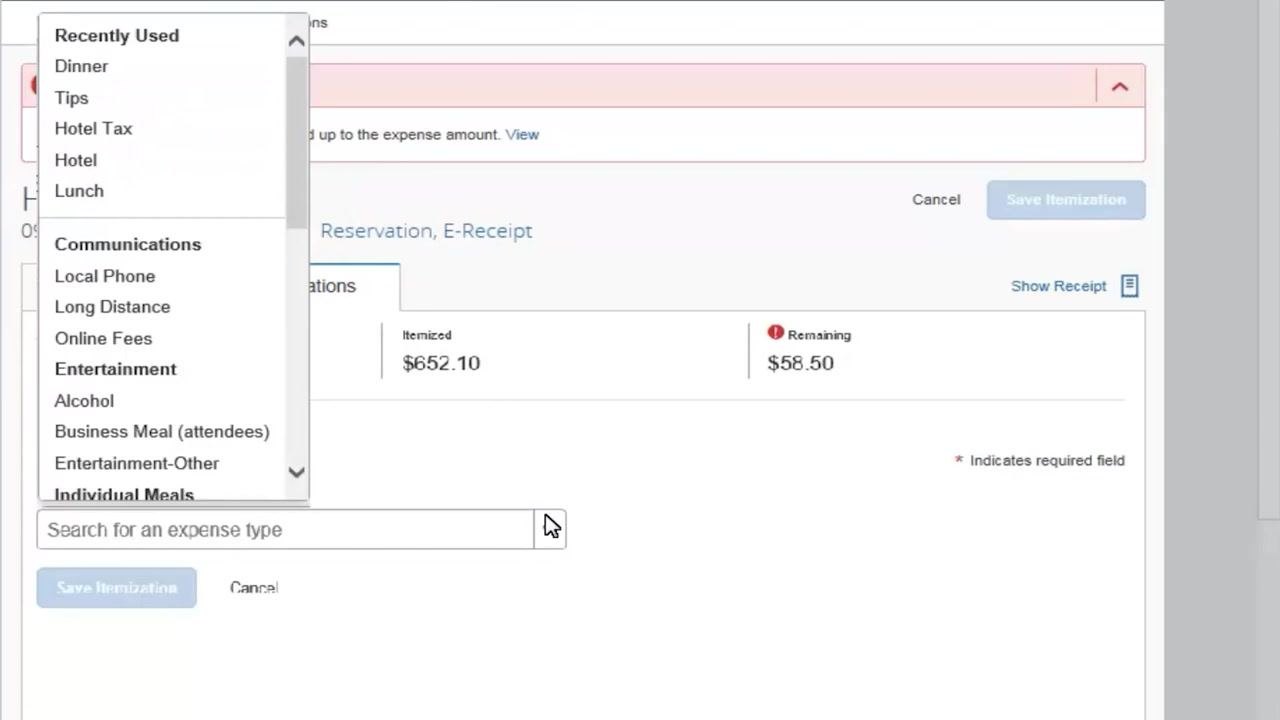
Click Create Itemization again, then click the Expense Type drop-down arrow and select Tips from the list.
Complete the required fields, such as Amount and Transaction Date, then click Save Itemization to record the tip.
Step 8: Itemize a nightly parking expense
Click Create Itemization, then click the Expense Type drop-down arrow and select Parking.
Enter the appropriate information:
- Amount: Enter the nightly parking fee (for example, 10.00)
- Transaction Date: Enter the date (for example, 01/29/2021)
Select the Recurring Every Night checkbox to indicate this is a nightly recurring expense, then click Save Itemization.
Step 9: Itemize a personal laundry expense
Click Create Itemization, then click the Expense Type drop-down arrow and select Laundry.
Enter the required information:
- Amount: Enter the laundry expense (for example, 13.00)
- Transaction Date: Enter the date (for example, 01/29/2021)
Since laundry is typically non-reimbursable, select the Personal Expense (do not reimburse) checkbox, then click Save Itemization.
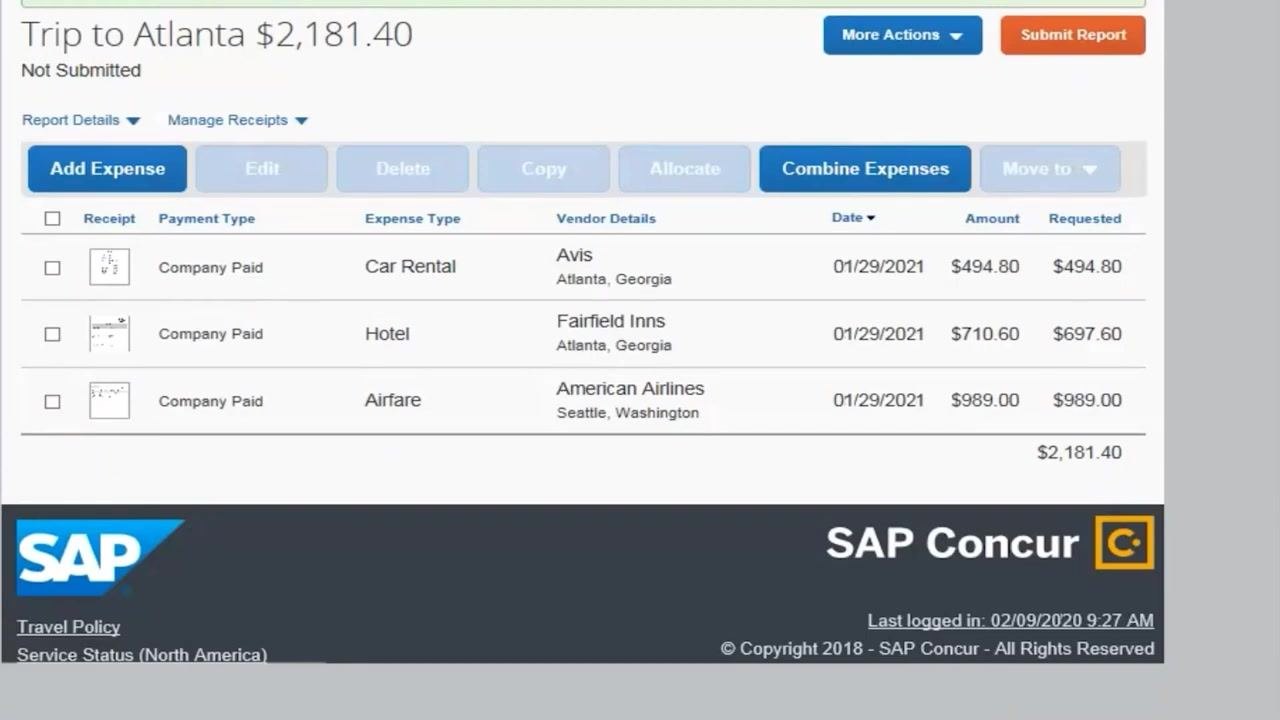
Account for the remaining amount
Step 10: Verify all itemizations
Review your itemized expenses to confirm that all major charges—room, taxes, meals, tips, parking, laundry, and so on—have been entered.
Check the Remaining amount. It should be as small as possible, ideally zero. If a small amount remains, continue to the next step.
Step 11: Create a single itemization for the remaining amount
Click Create Itemization on your hotel expense entry. In the Expense Type drop-down, select the most appropriate category for the leftover amount, such as "Other" or "Miscellaneous."
Enter the Amount equal to the remaining unallocated balance, and fill in all required fields, such as Transaction Date and any other mandatory information. Click Save Itemization to record this final entry.
Step 12: Confirm all amounts are accounted for
Check that the Remaining amount is now zero. If the remaining amount results from currency conversion or rounding, document it in the comments or business purpose field as required by your company policy.
Save the expense and submit your report
Step 13: Review and save all itemizations
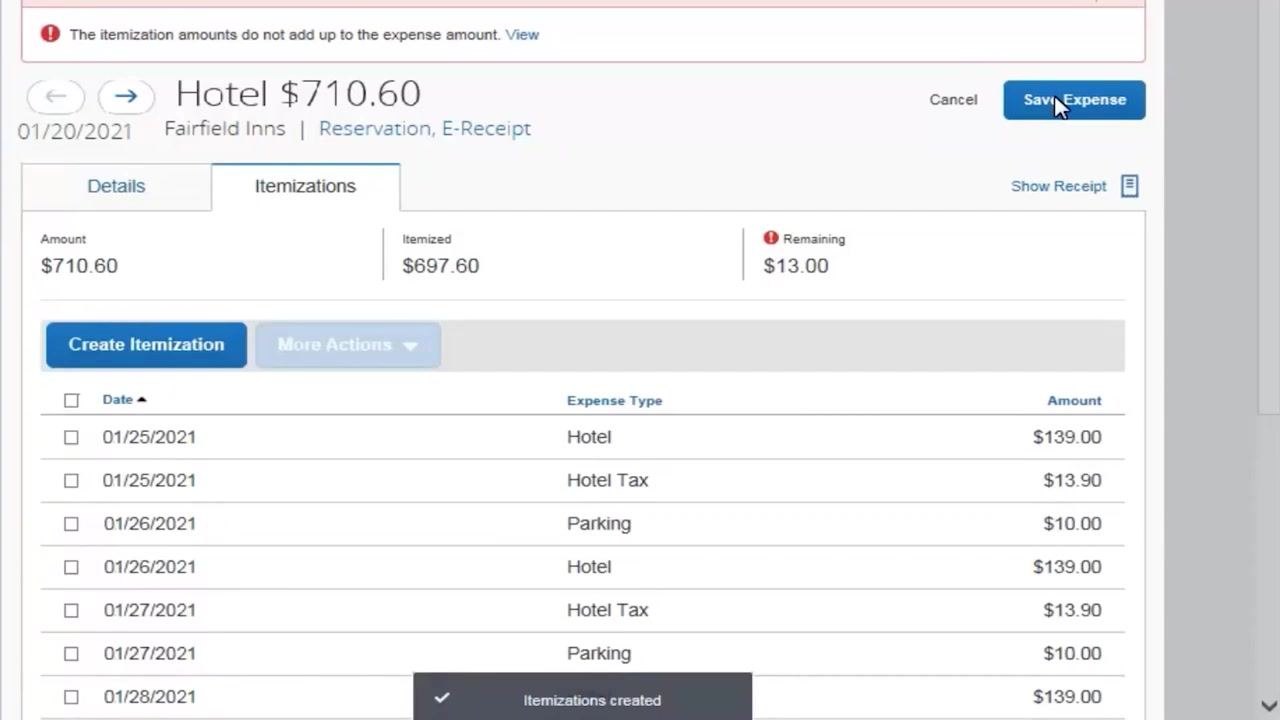
After entering all itemizations, confirm that the Remaining amount is zero or matches the total of your non-reimbursable expenses. Click Save Expense to finalize your itemized hotel bill.
A green check mark displays, confirming the itemization process is complete.
Step 14: Submit your expense report
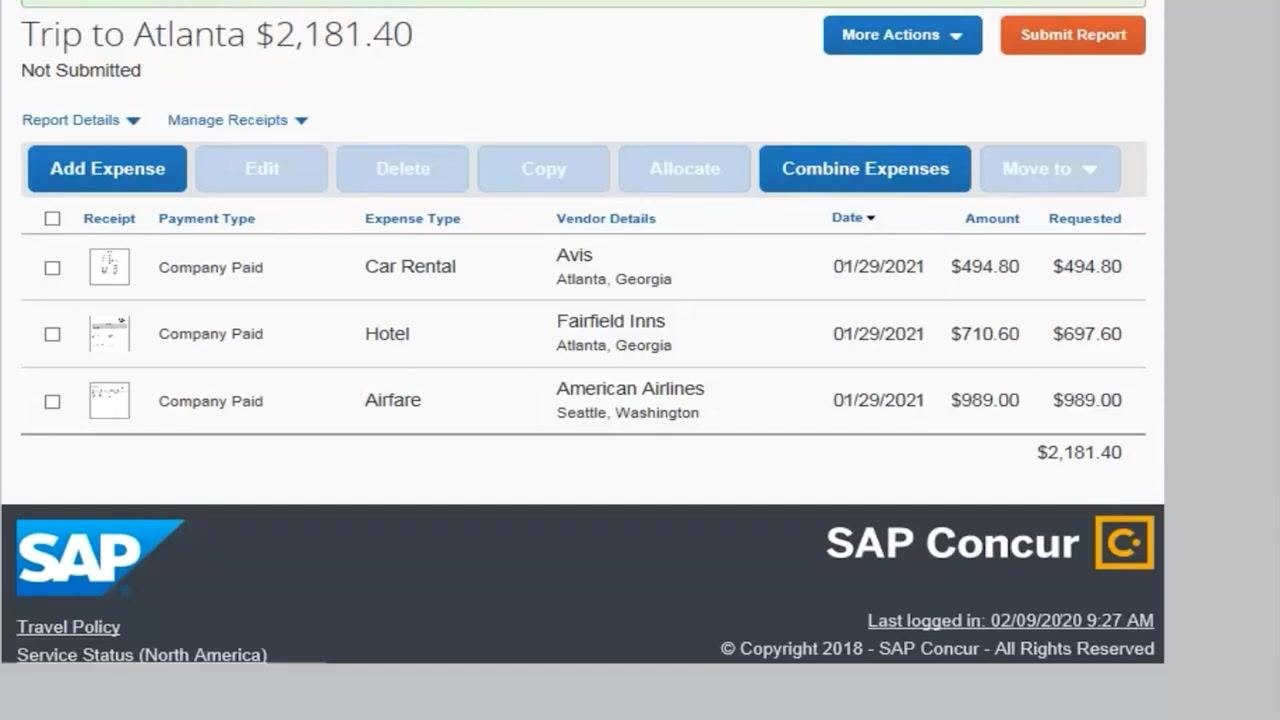
Once all itemizations are complete and the remaining amount is zero, click Submit Report to send your expense report for approval.
Additional tips
- Foreign currency: Always enter amounts in the foreign currency as shown on your hotel bill when itemizing international expenses.
- Compliance: Creating a single itemization for any remaining amount is required before you submit your report. This ensures your expense report is balanced and compliant with company policy.
What's next
By following these steps, you've properly itemized every charge on your hotel bill—including room rates, taxes, meals, tips, parking, personal items, and any small remaining amounts. Your expense report is now balanced, compliant with company policy, and ready for approval after submission.
Generation details: cost, quality tiers
Docsie billed 2,000 credits ($1.40) to analyze this 4-minute video at standard quality. The rewrite, template fill and Word/PDF exports were included. The same video at each quality tier:
| Quality | Frames sampled | Credits | Approx. cost |
|---|---|---|---|
| Draft | every 16-30 s | 1,000 | $0.70 |
| Standard (this guide) | every 8-15 s | 2,000 | $1.40 |
| Detailed | every 4-7 s | 4,000 | $2.80 |
| Ultra | every 1-3 s | 8,000 | $5.60 |
Credits priced at $0.70 per 1,000; plans include a monthly allowance. Enterprise customers on on-premise or bring-your-own-model deployments run this on their own inference and pay no per-video credits.
Generated by Docsie Video-to-Docs on 2026-10-12 from a 3-minute video. Screenshots are frames from the source video and belong to their creator, CSUSM Travel Office, whose original is embedded above. If you own this video and want the guide removed or credited differently, contact us and we will act within one business day.