
How to Add a Delegate in SAP Concur
Learning how to add a delegate in SAP Concur allows you to authorize another user to act on your behalf for tasks such as creating, submitting, and approving expense reports. This guide walks you through assigning delegate permissions, verifying email addresses, and enabling your delegate to submit receipts on your behalf.
Video: Adding a Delegate in Concur by CSUSM Travel Office (2023). All credit for the demonstration goes to the creator; watch the original on YouTube. The written guide below was generated from this video by Docsie. Creator? Request a change or removal.
Learning how to add a delegate in SAP Concur allows you to authorize another user to act on your behalf for tasks such as creating, submitting, and approving expense reports. This guide walks you through assigning delegate permissions, verifying email addresses, and enabling your delegate to submit receipts on your behalf.
Prerequisites
- A SAP Concur account with access to Profile Settings.
- Knowledge of the delegate's employee name, email address, or login ID.
- A delegate is a user who is granted permission to perform tasks on behalf of another user, including preparing, submitting, and approving expense reports.
Open your profile settings
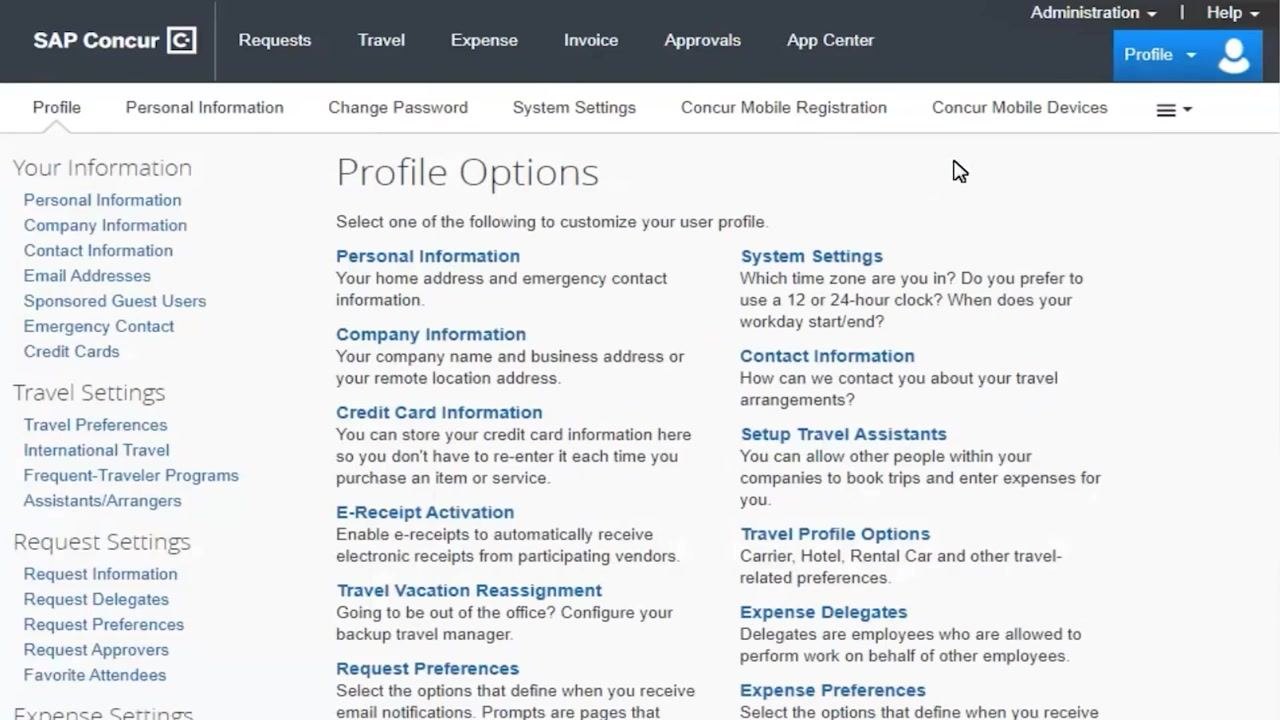
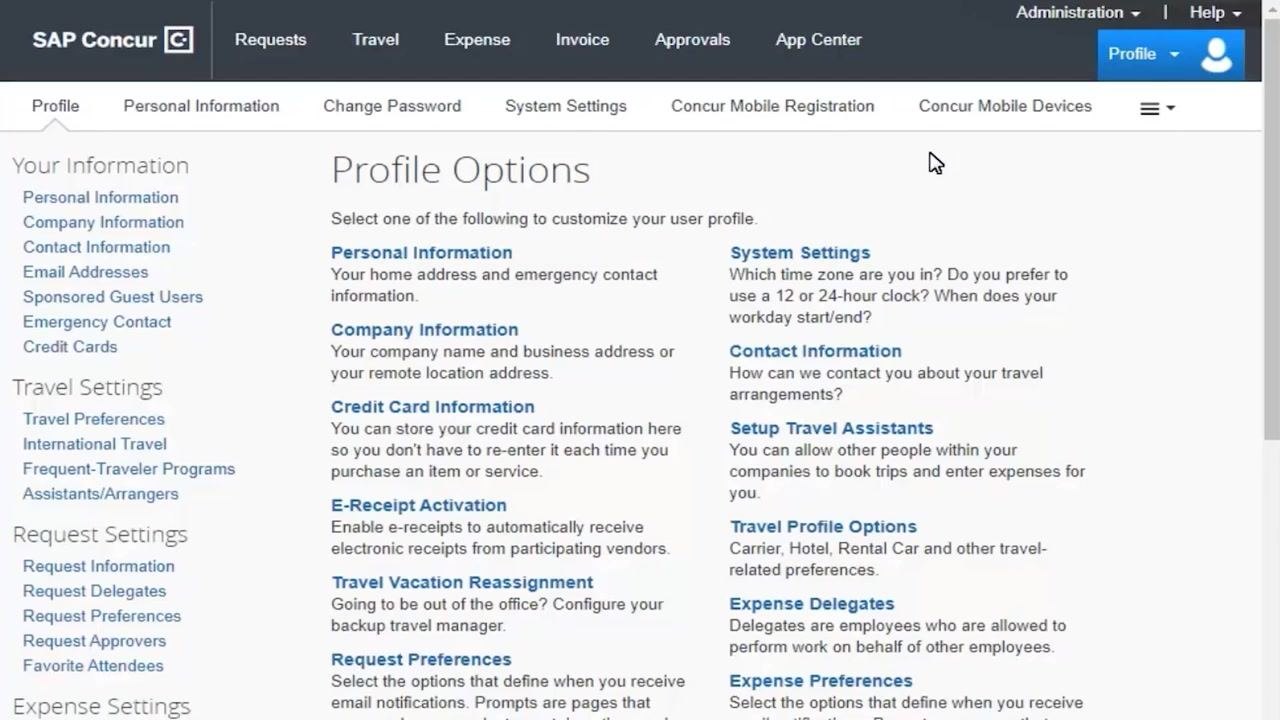
Click the Profile icon in the upper right corner of the SAP Concur homepage, then select Profile Settings from the dropdown menu.
Navigate to expense delegates
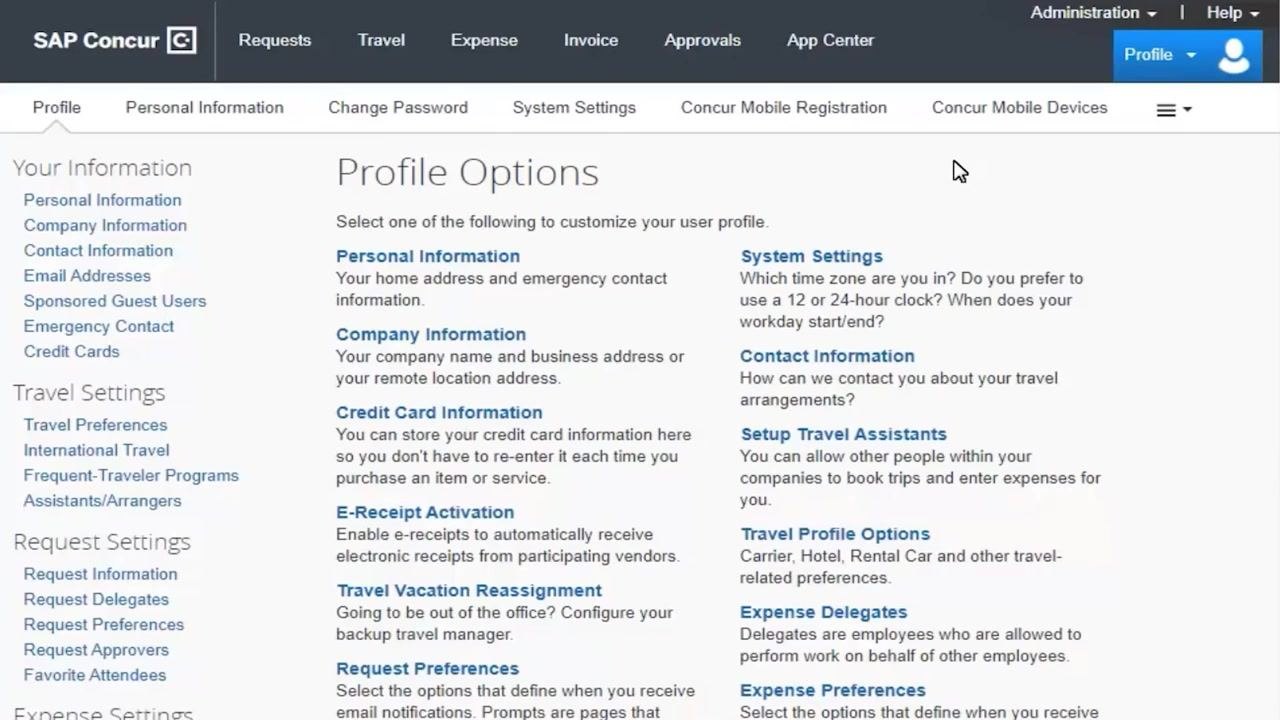
On the Profile Options page, locate and click Expense Delegates under the Expense Settings section.
Add a new delegate
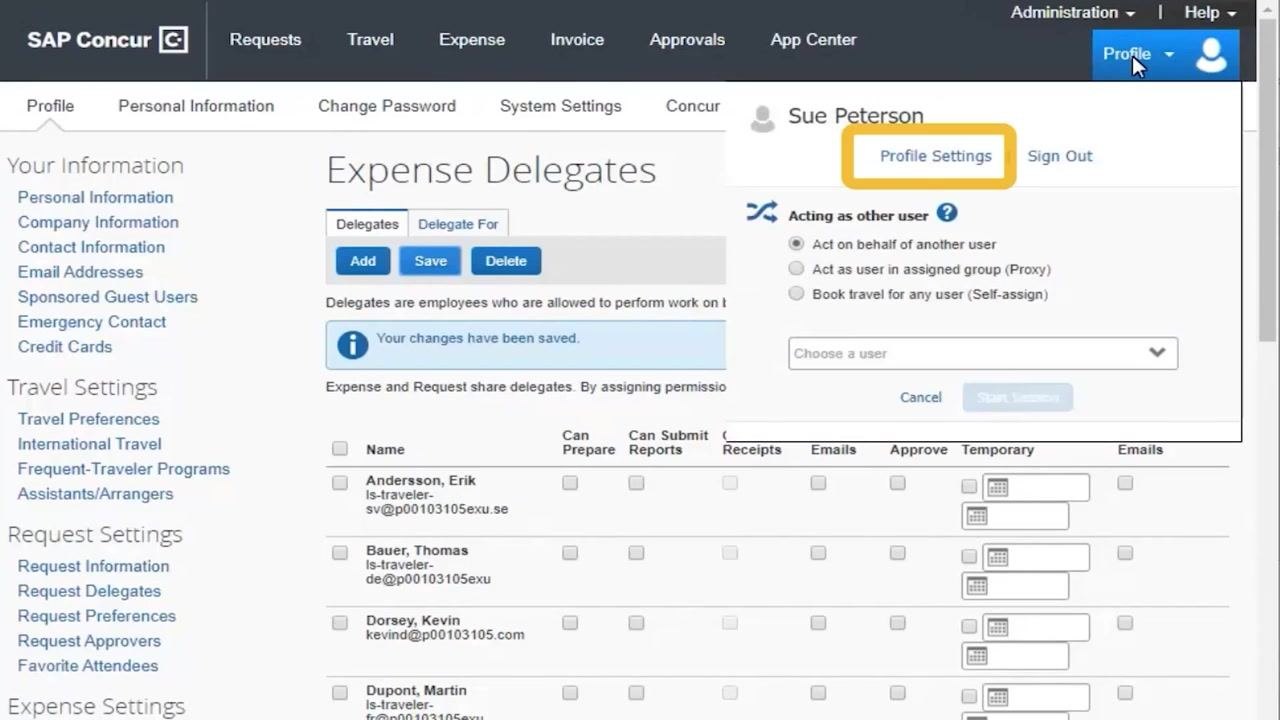
In the Expense Delegates section, confirm you are on the Delegates tab, then click Add.
Search for and select the delegate
Enter the employee name, email address, or login ID of the person you want to add as a delegate in the search field. Select the correct user from the search results and click Add.
Assign delegate permissions
For the newly added delegate, check the appropriate boxes to define what they can do on your behalf:
- Can Prepare: Allows the delegate to prepare reports.
- Can Submit Reports: Allows the delegate to submit reports.
- Can View Receipts: Allows the delegate to view receipts. Select this option if you want the delegate to email receipts into your Available Receipts library.
- Receives Emails: Allows the delegate to receive emails.
- Can Approve: Allows the delegate to approve reports.
- Can Approve Temporary: Allows the delegate to approve for a specified period; enter the date range.
- Receives Approval Emails: Allows the delegate to receive approval emails.
Save your delegate settings
After selecting the appropriate permissions, click Save. A confirmation message appears indicating that your changes have been saved.
Access email addresses in profile options
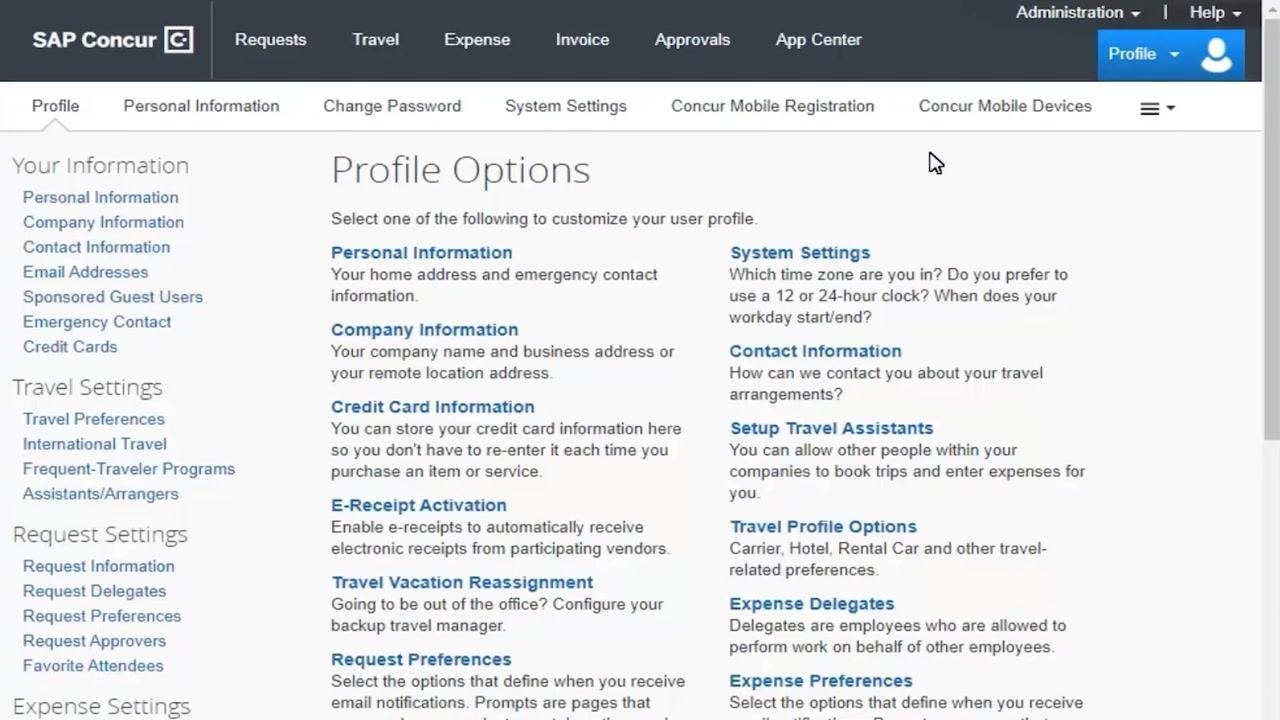
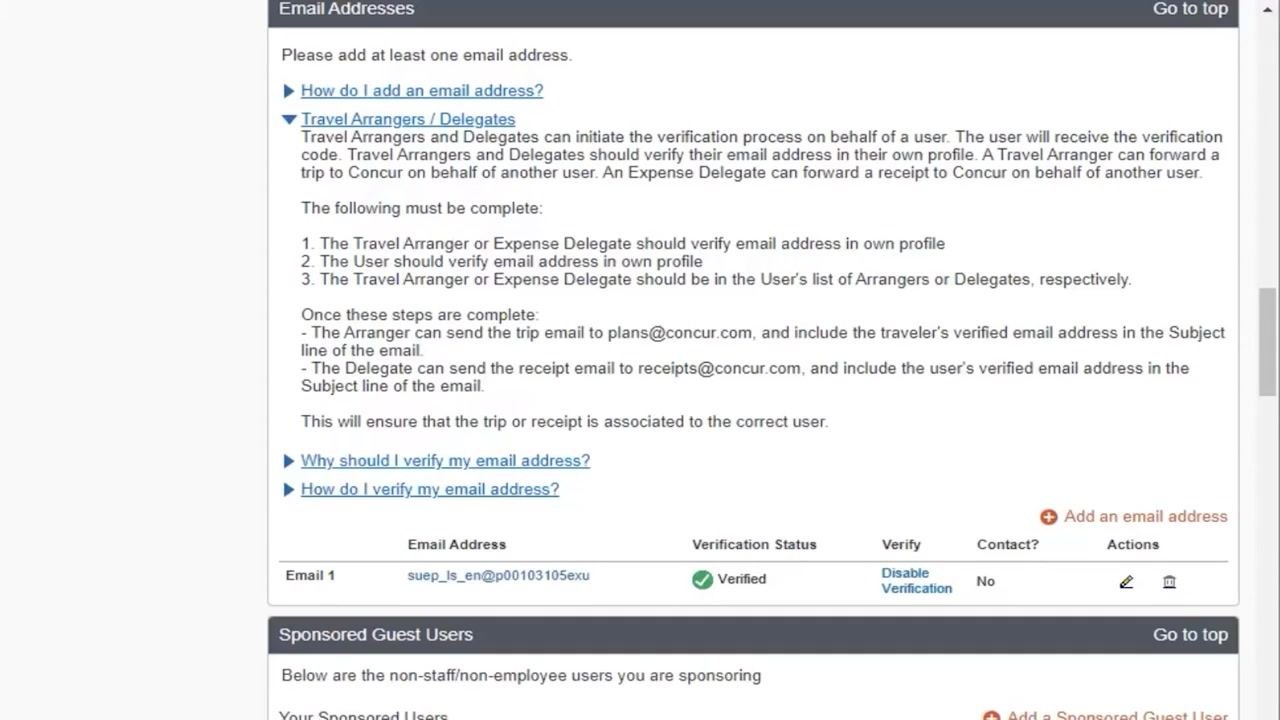
Return to the SAP Concur homepage, click the Profile icon, and select Profile Settings. On the Profile Options page, find Email Addresses in the left navigation under "Your Information" and click it.
Start email verification
In the Email Addresses section, locate your email address under "Email 1" and check the Verification Status column. If it shows "Not Verified," click the Verify link next to your email address.
Enter the verification code
SAP Concur sends a verification code to your email address. Open your inbox, locate the message from SAP Concur, and copy the code. In the Enter Code field on the SAP Concur screen, type or paste the code exactly as it appears, then click OK.
Confirm verification
After submitting the code, a pop-up window confirms successful verification. Click OK in the pop-up window. Your Verification Status now displays as "Verified."
Verify the delegate's email address
Instruct your delegate to repeat Steps 7 through 10 in their own SAP Concur profile to verify their email address as well.
Submit receipts via email
Once both you and your delegate have verified your email addresses, your delegate can send receipt images as email attachments to receipts@concur.com. In the subject line of the email, the delegate must enter only your verified email address.
Emailed receipt images sent by your delegate appear in your Available Receipts library in SAP Concur, just as if you had submitted them yourself.
Summary
By completing these steps, you've added a delegate in SAP Concur, assigned their permissions, and verified both email addresses for secure receipt submission. This setup streamlines your expense reporting process by allowing your delegate to prepare, submit, approve, or send receipts on your behalf.
Generation details: cost, quality tiers
Docsie billed 2,000 credits ($1.40) to analyze this 4-minute video at standard quality. The rewrite, template fill and Word/PDF exports were included. The same video at each quality tier:
| Quality | Frames sampled | Credits | Approx. cost |
|---|---|---|---|
| Draft | every 16-30 s | 1,000 | $0.70 |
| Standard (this guide) | every 8-15 s | 2,000 | $1.40 |
| Detailed | every 4-7 s | 4,000 | $2.80 |
| Ultra | every 1-3 s | 8,000 | $5.60 |
Credits priced at $0.70 per 1,000; plans include a monthly allowance. Enterprise customers on on-premise or bring-your-own-model deployments run this on their own inference and pay no per-video credits.
Generated by Docsie Video-to-Docs on 2026-10-11 from a 3-minute video. Screenshots are frames from the source video and belong to their creator, CSUSM Travel Office, whose original is embedded above. If you own this video and want the guide removed or credited differently, contact us and we will act within one business day.