
How to Deploy a Change Set in Salesforce
Deploying a change set in Salesforce lets you move customizations, such as custom objects, fields, page layouts, and profiles, from one org to another. This guide walks you through adding components to an outbound change set, optionally including profiles, and uploading the change set to a target org for deployment.
Video: How to Add Components to a Change Set and Deploy | Salesforce by Salesforce Support (2020). All credit for the demonstration goes to the creator; watch the original on YouTube. The written guide below was generated from this video by Docsie. Creator? Request a change or removal.
Deploying a change set in Salesforce lets you move customizations, such as custom objects, fields, page layouts, and profiles, from one org to another. This guide walks you through adding components to an outbound change set, optionally including profiles, and uploading the change set to a target org for deployment.
Prerequisites
Before you begin, make sure you have the following:
- System Administrator permissions
- Ability to create and upload change sets
- Ability to deploy change sets
- Permission to modify metadata through Metadata API Functions
You should also review your organization's documentation on component restrictions, since certain components have limitations and may not be deployable via change sets.
Log in to the source Salesforce org
Open your web browser and navigate to your Salesforce org (for example, cs1.lightning.force.com). Make sure you are logged in with the appropriate permissions listed above.
Open Setup
Click the gear icon in the upper right corner of the Salesforce interface to open the dropdown menu, then select Setup.
Navigate to outbound change sets
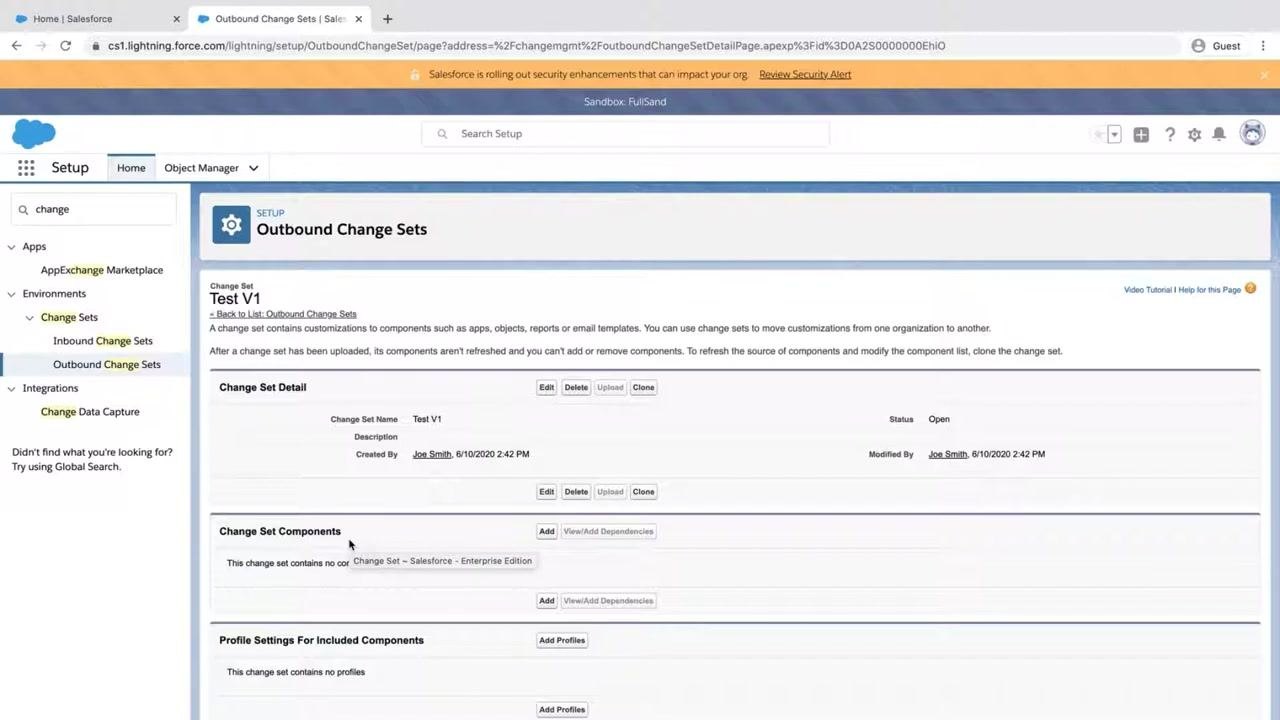
In the Setup page, use the Quick Find search box on the left sidebar and type change. Under Environments, click Outbound Change Sets.
Select the change set
On the Outbound Change Sets page, locate the change set you want to modify (for example, Test V1) and click its name to open the details page.
Add components to the change set
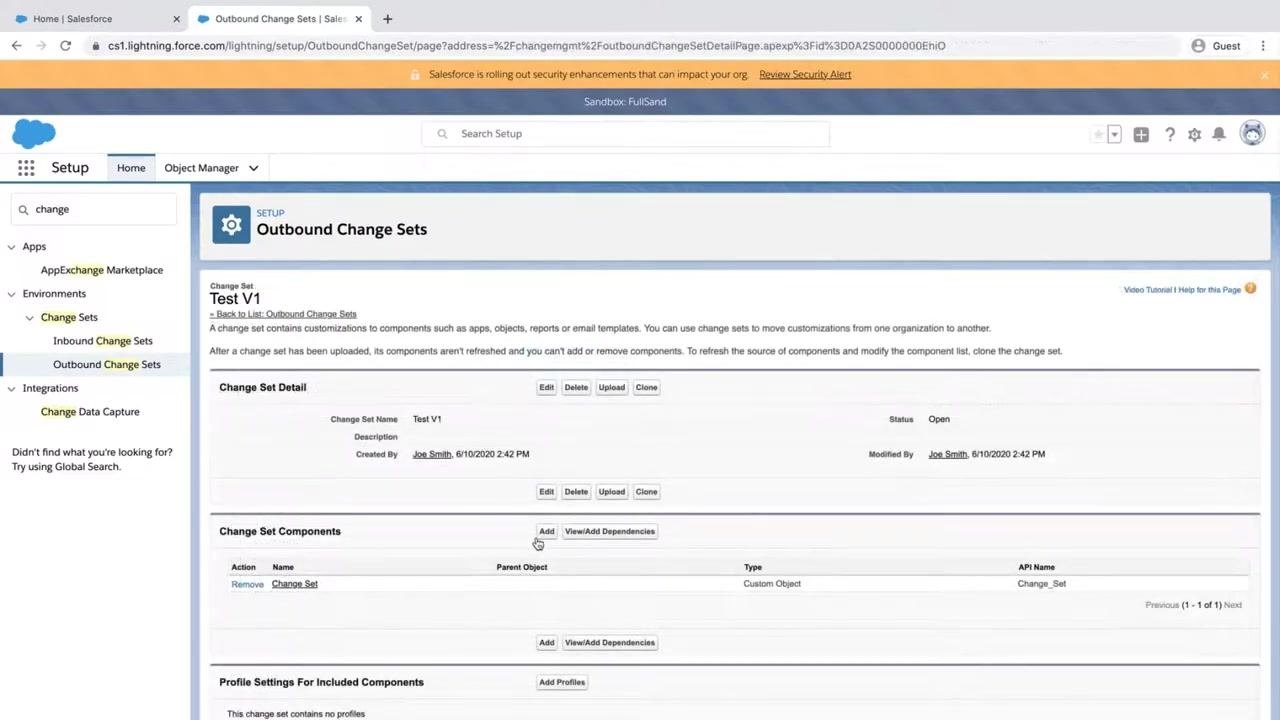
In the Change Set Components section, click Add.
Choose a component type
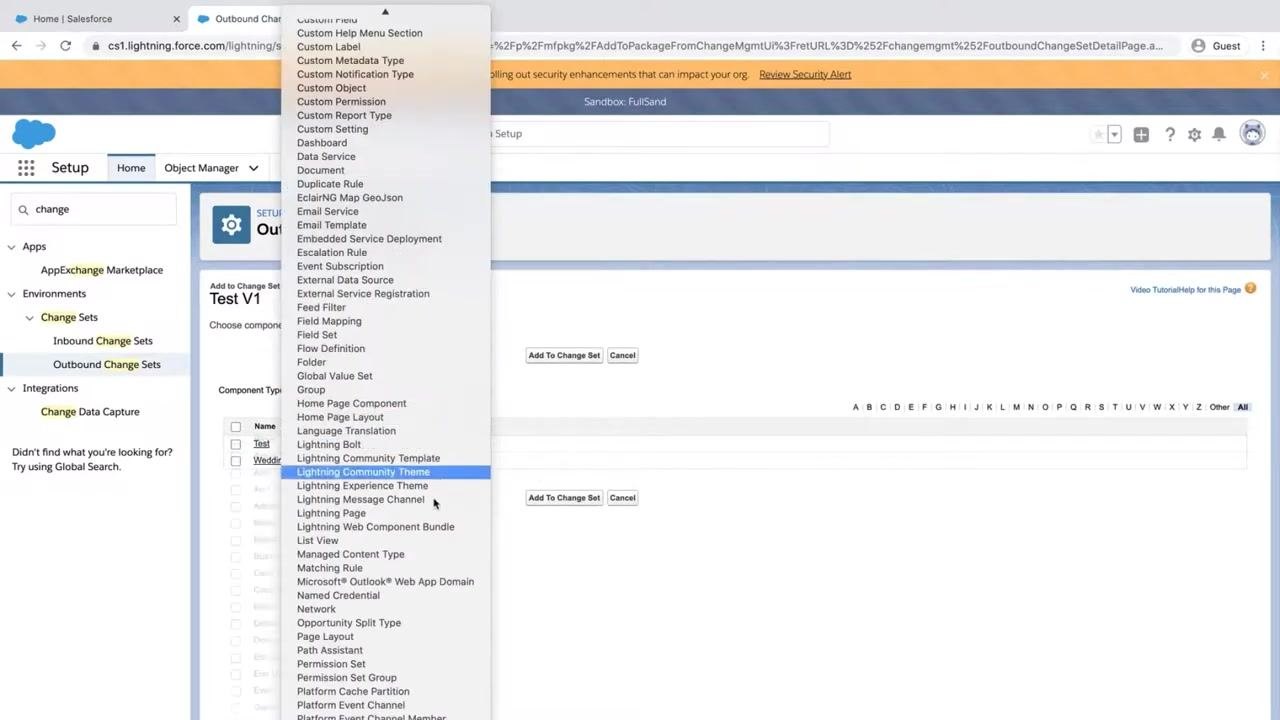
On the Add to Change Set screen, click the Component Type dropdown and select the type of component you want to add, such as Custom Object.
Select and add components
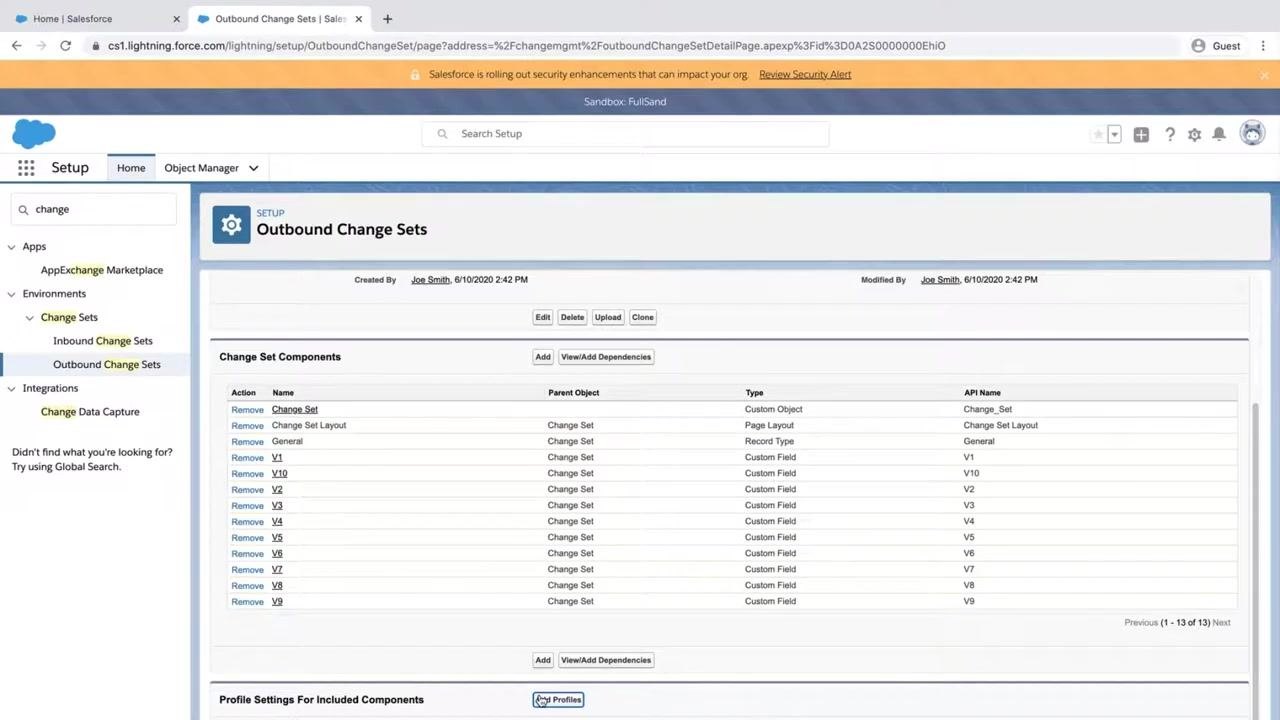
Once you choose a component type, a list of available components of that type appears. Check the boxes next to the components you want to include, then click Add to Change Set. Repeat this process for other component types, such as custom fields, record types, and page layouts, as needed.
Add profiles to the change set (optional)
Scroll to the Profile Settings for Included Components related list at the bottom of the change set details page and click Add Profiles.
In the profile selection dialog, select Change Set Profile or any relevant profile you want to include, then click Add to Change Set. If you don't need to add any profiles, you can skip this step.
Upload the change set
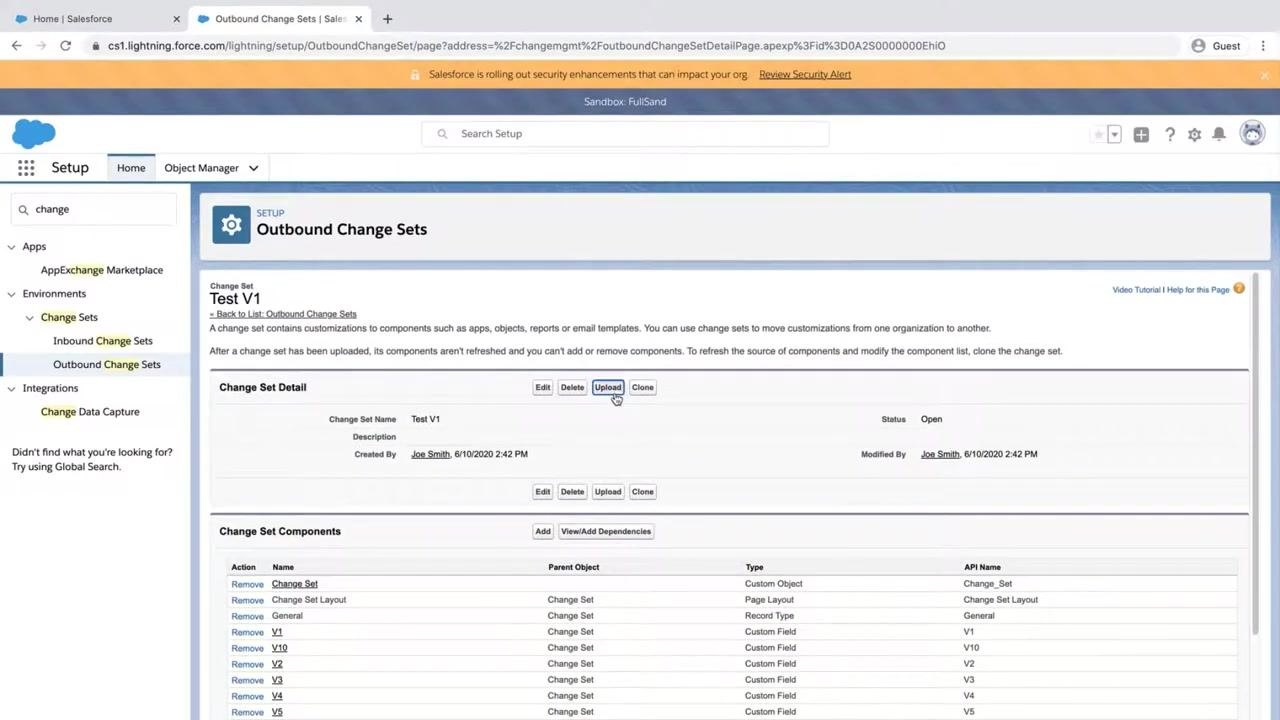
On the change set details page, click Upload at the top of the page.
Select the target organization
In the Upload Details section, select the target organization for deployment, for example Production. Confirm your selection and click Upload to begin the process.
Monitor the upload progress
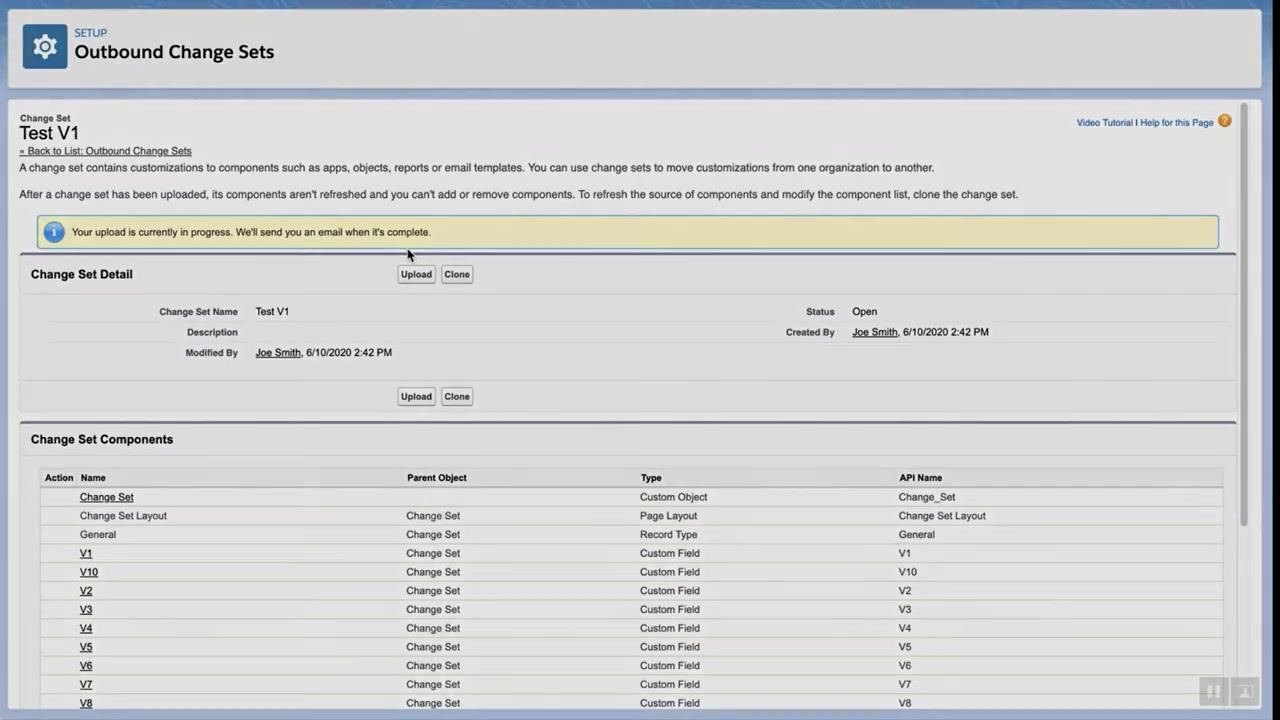
After you start the upload, a notification appears stating: "Your upload is currently in progress. We'll send you an email when it's complete." The upload history, including date, timestamp, and included components, is displayed on the page.
Summary
To deploy a change set in Salesforce, you:
- Log in to the source org and open Setup via the gear icon.
- Use Quick Find to locate Outbound Change Sets and select your change set.
- Add components by type, including custom objects, fields, record types, and page layouts.
- Optionally add profiles under Profile Settings for Included Components.
- Upload the change set to your target organization and monitor the upload progress.
What's next
Once the change set upload completes, you'll need to validate and deploy it as an inbound change set in the target org. For more information on managing change sets and metadata deployment, refer to:
Generation details: cost, quality tiers
Docsie billed 2,000 credits ($1.40) to analyze this 4-minute video at standard quality. The rewrite, template fill and Word/PDF exports were included. The same video at each quality tier:
| Quality | Frames sampled | Credits | Approx. cost |
|---|---|---|---|
| Draft | every 16-30 s | 1,000 | $0.70 |
| Standard (this guide) | every 8-15 s | 2,000 | $1.40 |
| Detailed | every 4-7 s | 4,000 | $2.80 |
| Ultra | every 1-3 s | 8,000 | $5.60 |
Credits priced at $0.70 per 1,000; plans include a monthly allowance. Enterprise customers on on-premise or bring-your-own-model deployments run this on their own inference and pay no per-video credits.
Generated by Docsie Video-to-Docs on 2026-09-14 from a 3-minute video. Screenshots are frames from the source video and belong to their creator, Salesforce Support, whose original is embedded above. If you own this video and want the guide removed or credited differently, contact us and we will act within one business day.