
How to Create a Validation Rule in Salesforce
Validation rules help you maintain data quality by enforcing specific conditions before a record can be saved. This guide walks you through how to create a validation rule in Salesforce using the Trailhead "Create Validation Rules" module as a working example, resulting in a rule that ensures a contact's mailing zip code matches its associated account's shipping zip code.
Video: Create Validation Rules | Formulas and Validations | Salesforce by wonder studies (2022). All credit for the demonstration goes to the creator; watch the original on YouTube. The written guide below was generated from this video by Docsie. Creator? Request a change or removal.
Validation rules help you maintain data quality by enforcing specific conditions before a record can be saved. This guide walks you through how to create a validation rule in Salesforce using the Trailhead "Create Validation Rules" module as a working example, resulting in a rule that ensures a contact's mailing zip code matches its associated account's shipping zip code.
Prerequisites
Before you begin, make sure you have:
- Access to a Salesforce org (a Trailhead Playground works well for practice).
- The Salesforce Trailhead module "Create Validation Rules" open in your browser.
- About 15 minutes to complete the task.
Review the learning objectives and introduction
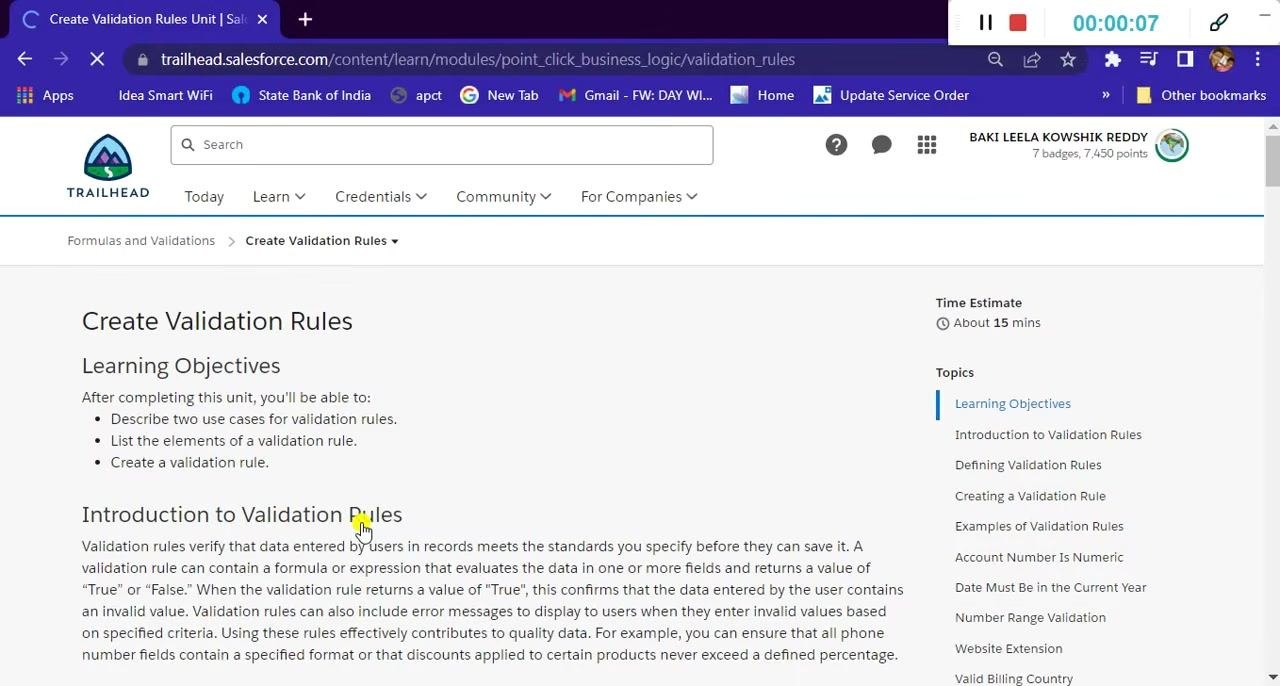
Open the Salesforce Trailhead module for Create Validation Rules. Read through the learning objectives, which cover describing two use cases for validation rules, listing the elements of a validation rule, and creating a validation rule yourself.
Review the introduction section, which explains the purpose of validation rules and how they help maintain data quality. Note that the module is estimated to take about 15 minutes to complete.
Understand the challenge requirements
Locate the Create a Validation Rule challenge section within the module. Read the instructions carefully: you need to create a validation rule that displays an error message and prevents a user from creating or updating a contact when two conditions are both true.
The challenge specifies the following requirements:
- Rule Name:
Contact_must_be_in_Account_ZIP_Code - Operator:
AND(returns true only if both conditions are true) - Error condition 1: The contact must be associated with an account ID, using the
ISBLANKandNOTfunctions. - Error condition 2: The contact's mailing zip code must differ from the account's shipping zip code, using the API names
MailingPostalCodeandShippingPostalCodewith the<>operator. - An error message describing the rule.
Once you understand the requirements, locate the Launch button to open your Trailhead Playground.
Navigate to Salesforce Setup
Open Salesforce and go to the Setup page. In the left sidebar, locate the Quick Find search box, which you'll use to find the object you need.
The Setup Home page displays various options, such as "Get Started with Einstein Bots," "Mobile Publisher," and "Real-time Collaborative Docs."
Access the Object Manager
Click Object Manager at the top of the Setup page. Browse the list of available objects, which includes items such as "Contact Point Phone," "Contact Point Type Consent," "Contact Request," "Content Version," and "Contract."
Locate and select the Contact object from the list.
Begin creating a validation rule
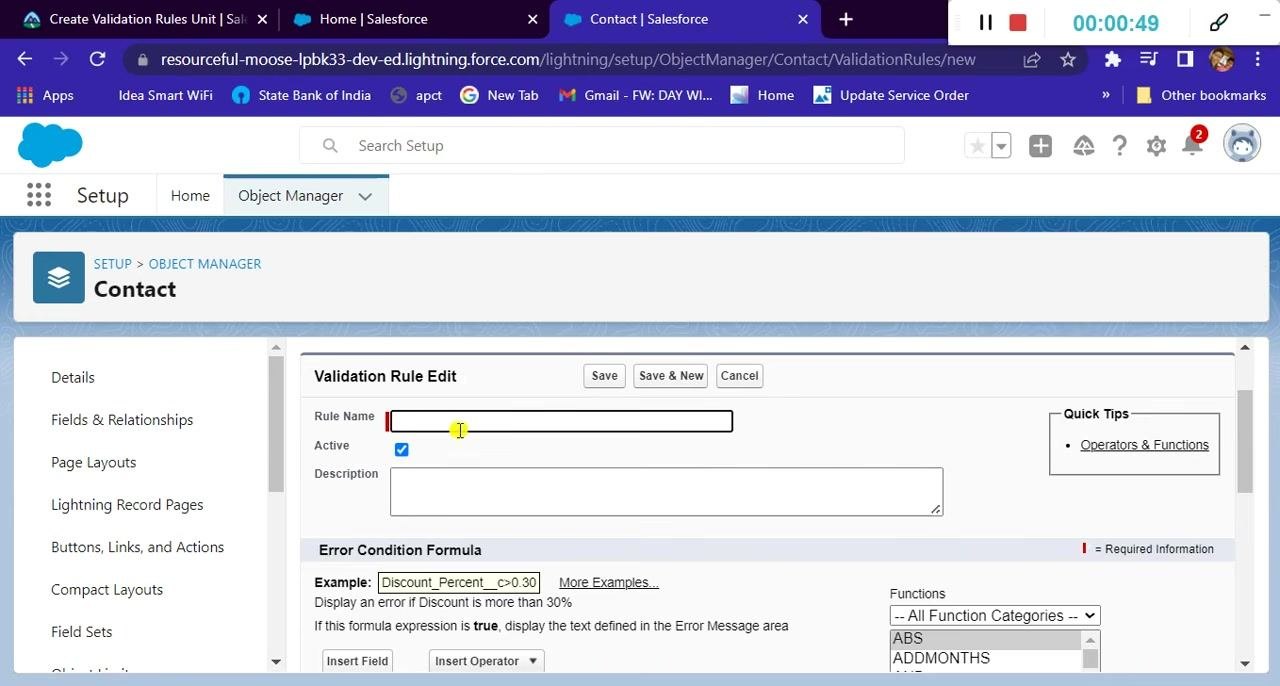
Within the Contact object setup, navigate to the Validation Rules section and click New to create a new rule. The Validation Rule Edit screen appears.
Enter the rule name Contact_must_be_in_Account_ZIP_Code, ensure the Active checkbox is selected, and leave the Description field blank for now.
Reference the Trailhead instructions for formula details
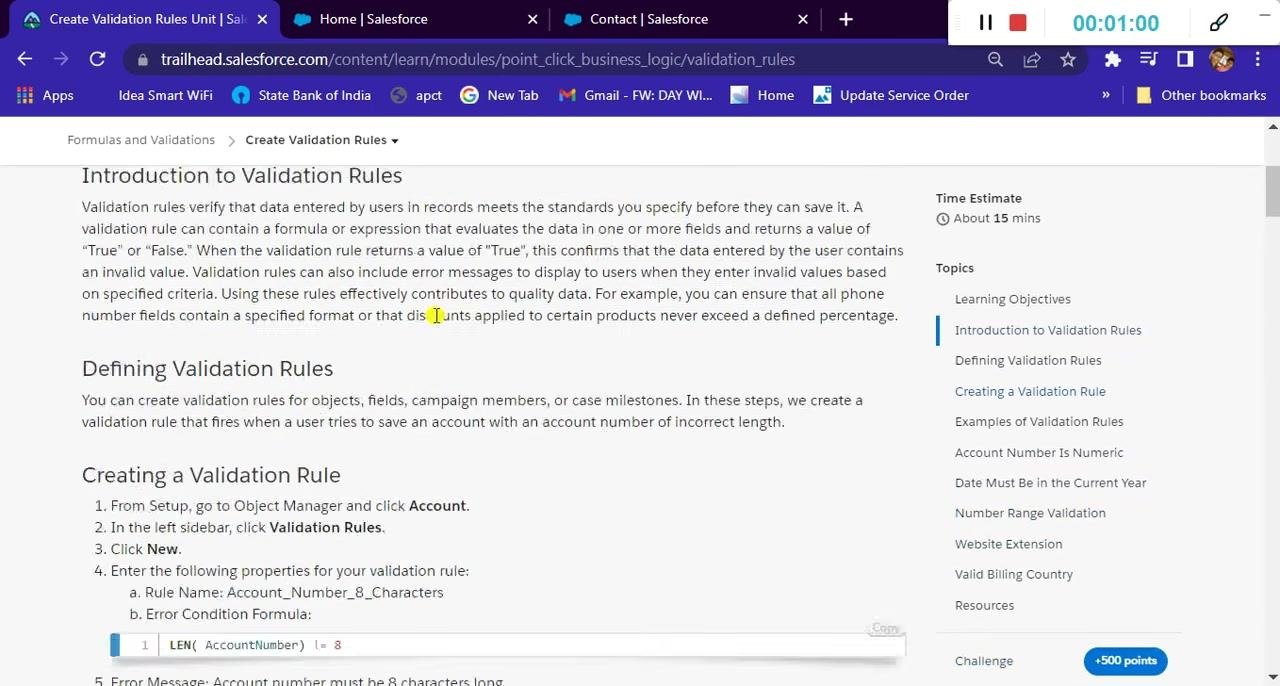
Before building your formula, return to the Trailhead module for detailed guidance. Review the example provided for defining a validation rule, including the use of the LEN function and a sample error condition formula.
Note the step-by-step instructions for entering the rule name, error condition formula, and error message.
Enter the error condition formula
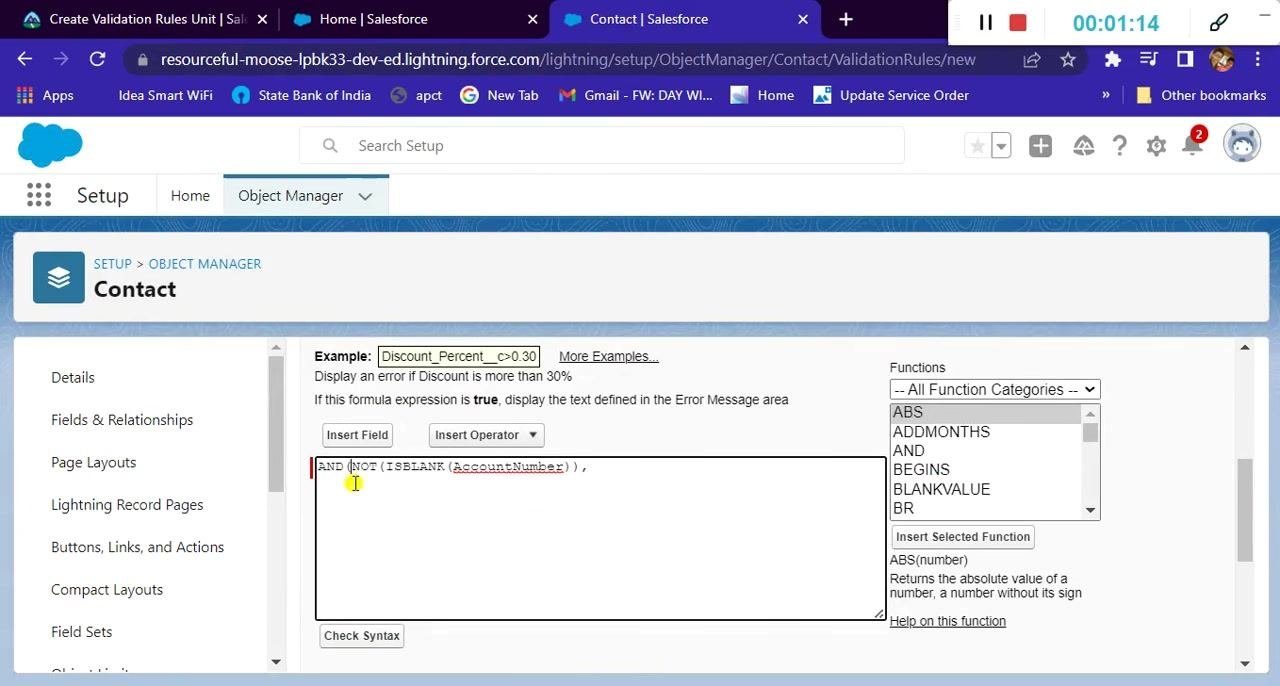
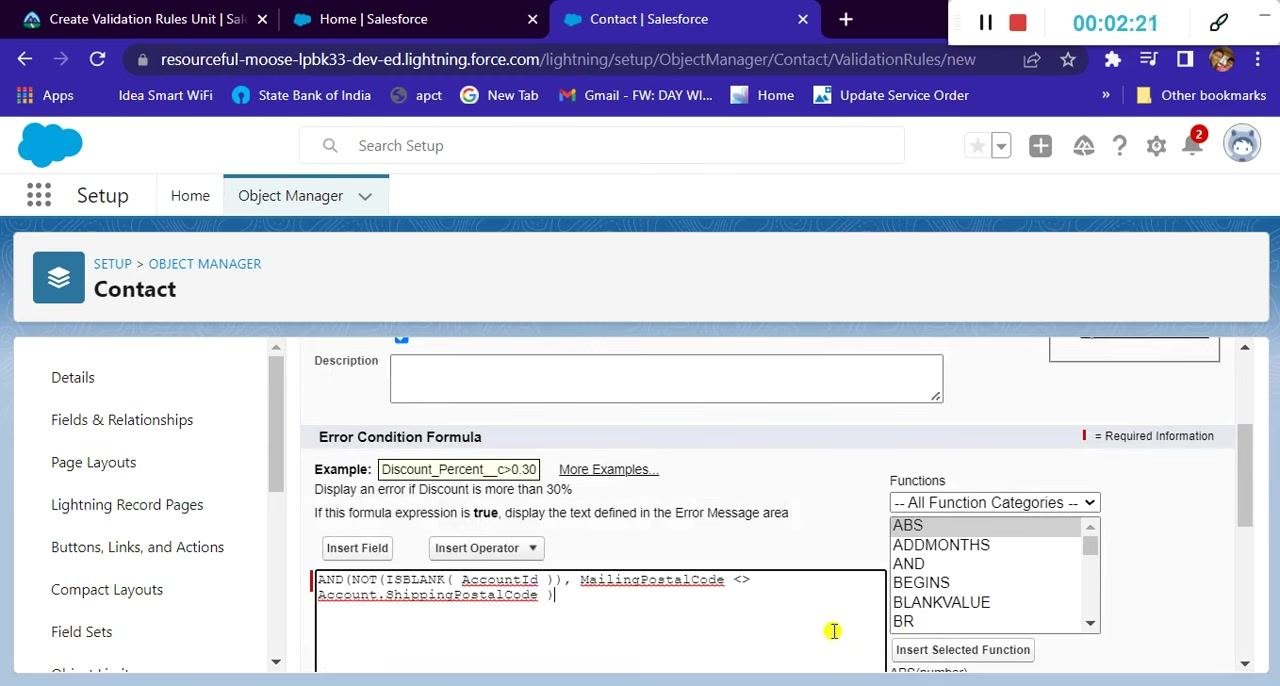
In the Error Condition Formula section, begin entering your formula. Use the AND operator to combine your two conditions, and enter NOT(ISBLANK(AccountId)) to check that the contact is associated with an account.
Use the Insert Field and Insert Operator buttons as needed to build the formula accurately.
Insert fields for the formula
Click Insert Field to open the field selection dialog. Navigate to Account > and select Account ID, then click Insert to add the field to your formula.
Continue building the formula
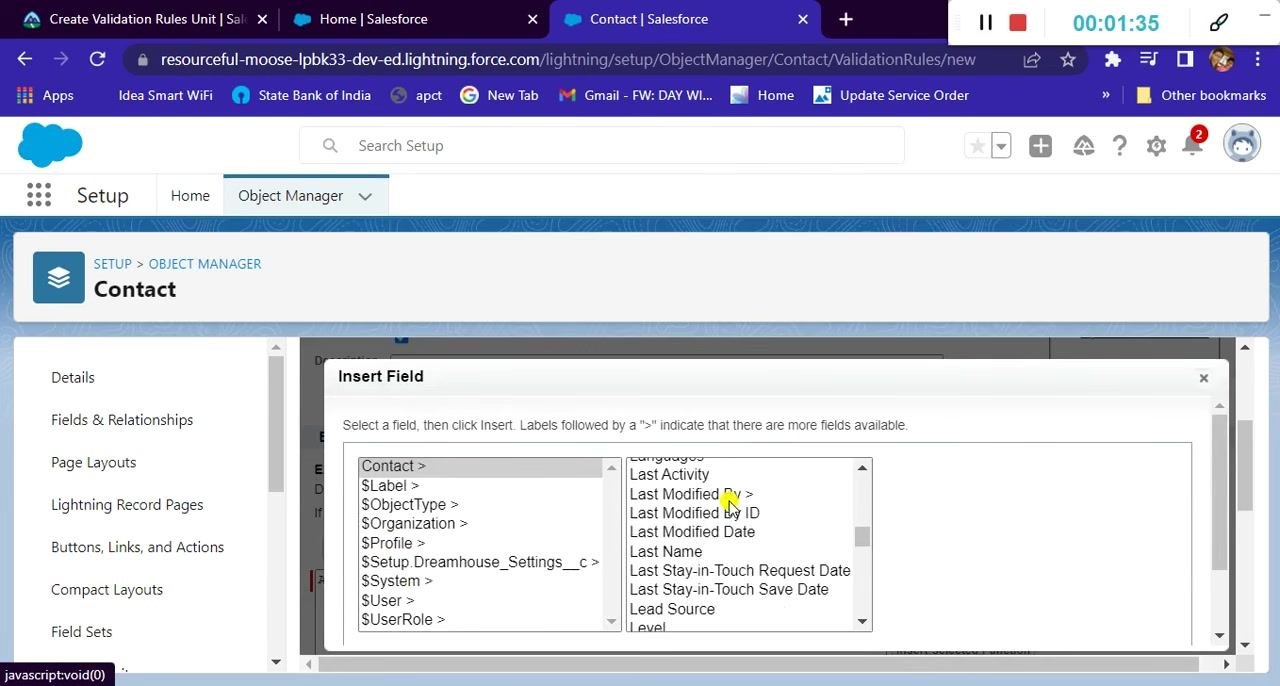
Continue using the Insert Field dialog to select additional fields as needed. Scroll through the available fields—such as "Last Activity," "Last Modified By," and "Last Modified Date"—to locate the fields your formula requires.
Insert each necessary field to complete the error condition formula.
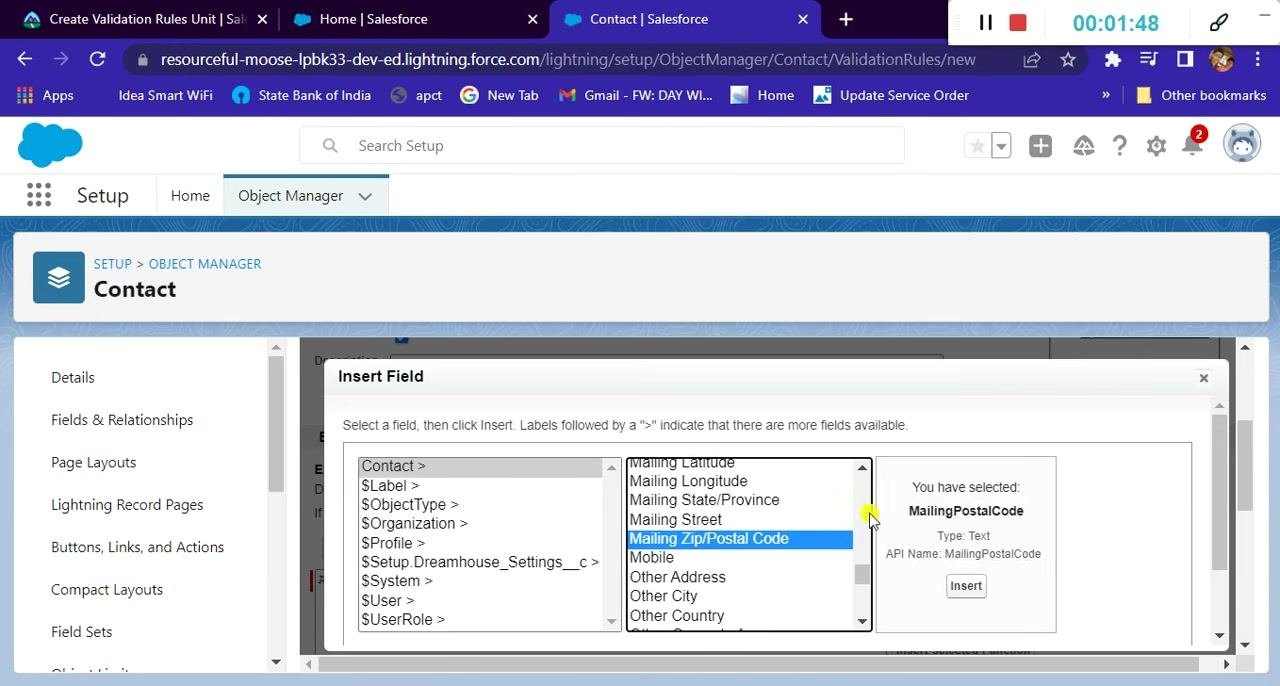
Insert the Mailing Zip/Postal Code field
In the Insert Field dialog, locate Mailing Zip/Postal Code under the Contact fields list. Select it and confirm the details shown on the right: Type is Text, API Name is MailingPostalCode.
Click Insert to add this field to your formula.
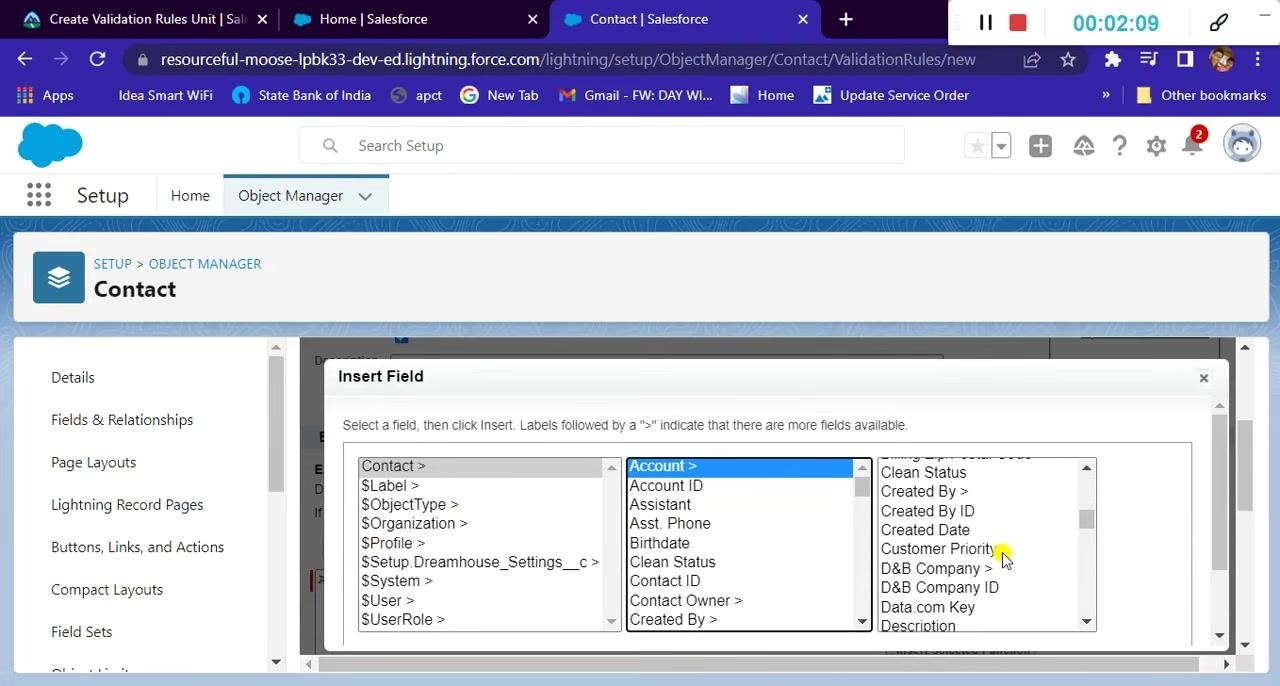
Continue building the error condition formula
In the Error Condition Formula editor, check your progress. The formula should now use the AND operator, with the first condition as NOT(ISBLANK(AccountId)) and the second condition beginning to take shape as MailingPostalCode <> (not equal to).
Your cursor should be positioned to insert the next field after the not-equal operator.
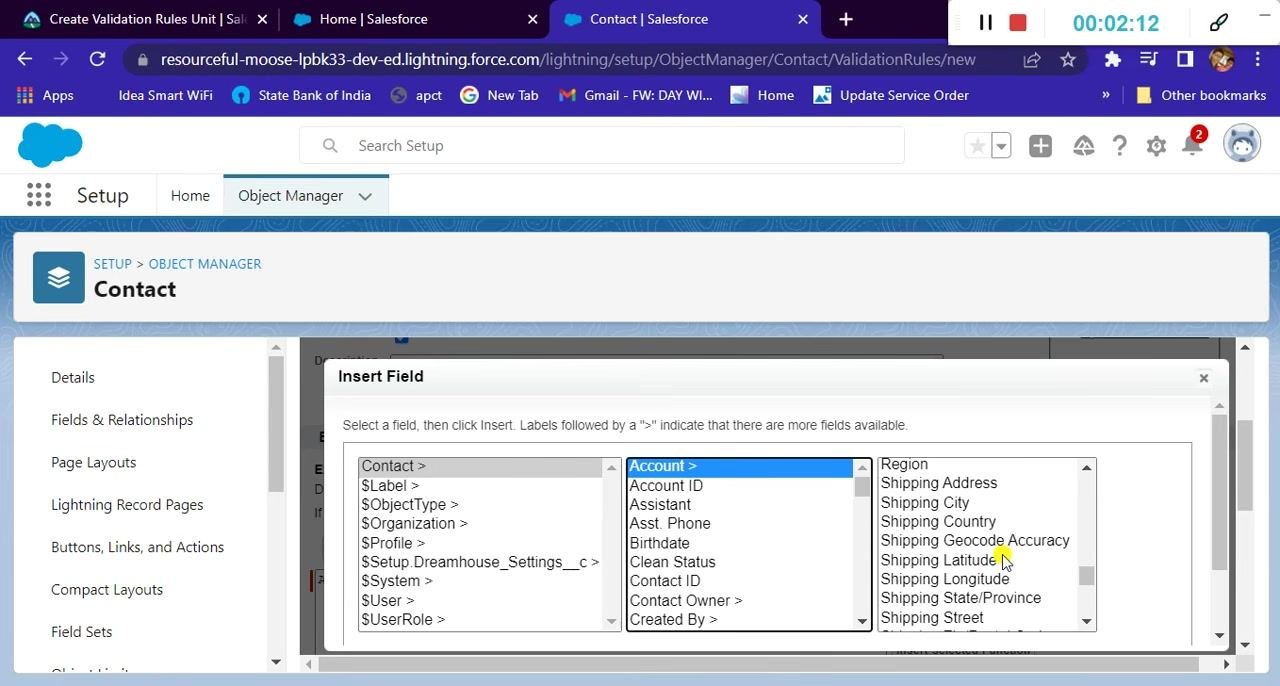
Insert the Account Shipping Postal Code field
Open the Insert Field dialog again and navigate to the Account > section to access related account fields. Scroll through the list to locate Shipping Postal Code.
Select Shipping Postal Code to use it as the comparison value in your formula.
Complete the error condition formula
Confirm that your formula editor now displays the complete formula:
AND(
  NOT(ISBLANK(AccountId)),
  MailingPostalCode <> Account.ShippingPostalCode
)
This formula checks that the contact is associated with an account and that the contact's mailing zip/postal code does not match the account's shipping postal code.
Enter the error message
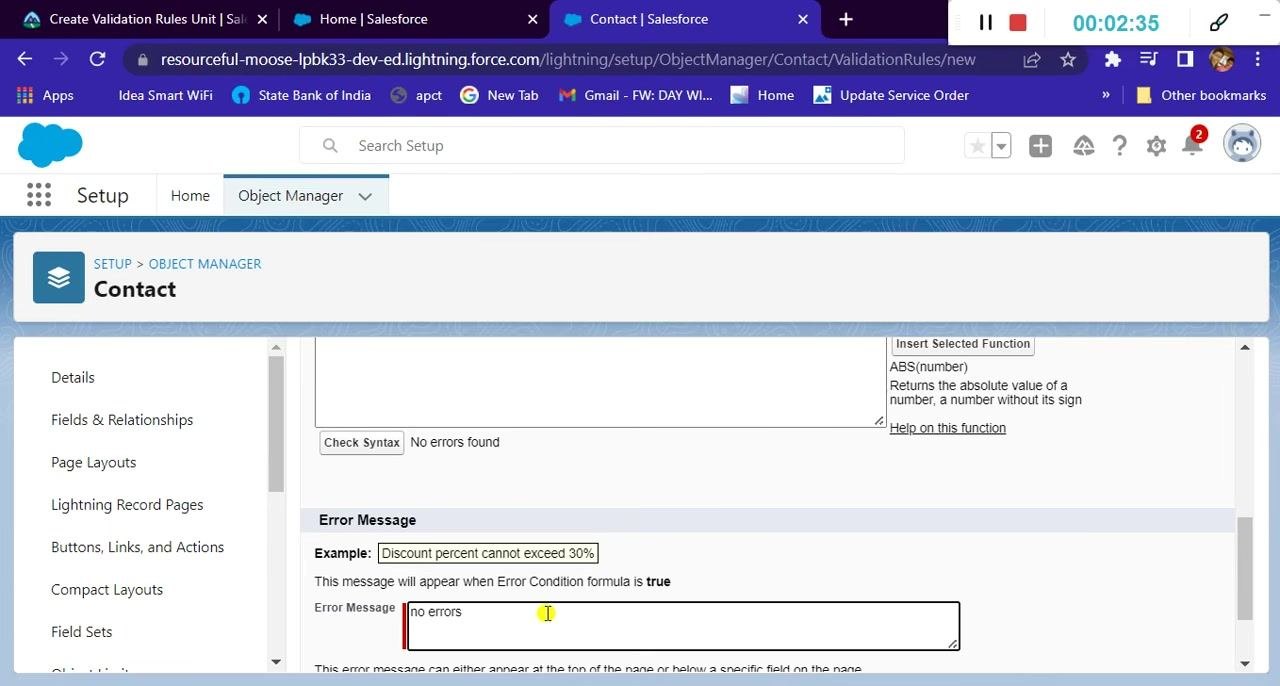
Scroll down to the Error Message section below the formula editor. Enter a meaningful message that will display when the validation rule triggers, such as "Contact mailing zip code must match account shipping zip code."
Click Check Syntax to validate your formula and confirm that the message "No errors found" appears.
Return to Trailhead and complete the challenge
Go back to the Salesforce Trailhead module and review the challenge instructions to confirm all requirements are met:
- Rule Name:
Contact_must_be_in_Account_ZIP_Code - Operator:
AND - Error conditions:
ISBLANK/NOTforAccountId, andMailingPostalCode <> ShippingPostalCode - Error message entered
Once confirmed, click Check Challenge to Earn 500 Points to submit your work.
Verify completion
Upon successful completion, a "WOOHOO!" dialog appears confirming you have earned the "Formulas and Validations" badge. The dialog also offers options to share your achievement on social media and to rate the badge's helpfulness.
Summary
By following these steps, you have successfully created a validation rule in Salesforce that enforces data quality by ensuring contacts are associated with an account and that their mailing zip code matches the account's shipping zip code. You've also completed the corresponding Trailhead challenge and earned the "Formulas and Validations" badge.
Generation details: cost, quality tiers
Docsie billed 1,500 credits ($1.05) to analyze this 3-minute video at standard quality. The rewrite, template fill and Word/PDF exports were included. The same video at each quality tier:
| Quality | Frames sampled | Credits | Approx. cost |
|---|---|---|---|
| Draft | every 16-30 s | 750 | $0.52 |
| Standard (this guide) | every 8-15 s | 1,500 | $1.05 |
| Detailed | every 4-7 s | 3,000 | $2.10 |
| Ultra | every 1-3 s | 6,000 | $4.20 |
Credits priced at $0.70 per 1,000; plans include a monthly allowance. Enterprise customers on on-premise or bring-your-own-model deployments run this on their own inference and pay no per-video credits.
Generated by Docsie Video-to-Docs on 2026-09-14 from a 2-minute video. Screenshots are frames from the source video and belong to their creator, wonder studies, whose original is embedded above. If you own this video and want the guide removed or credited differently, contact us and we will act within one business day.