
How to Create a Sandbox in Salesforce
Sandbox templates give you precise control over which objects and data are copied into your Full or Partial Copy sandboxes. This guide walks you through how to create a sandbox in Salesforce by building a sandbox template, managing object dependencies, and applying that template when you refresh a sandbox.
Video: How to Create a Sandbox Template | Salesforce by Salesforce Support (2019). All credit for the demonstration goes to the creator; watch the original on YouTube. The written guide below was generated from this video by Docsie. Creator? Request a change or removal.
Sandbox templates give you precise control over which objects and data are copied into your Full or Partial Copy sandboxes. This guide walks you through how to create a sandbox in Salesforce by building a sandbox template, managing object dependencies, and applying that template when you refresh a sandbox.
Prerequisites
- Access to your Salesforce instance with permissions to reach Setup.
- A Full Copy or Partial Copy sandbox license, since sandbox templates are only available with these sandbox types.
Access Salesforce home
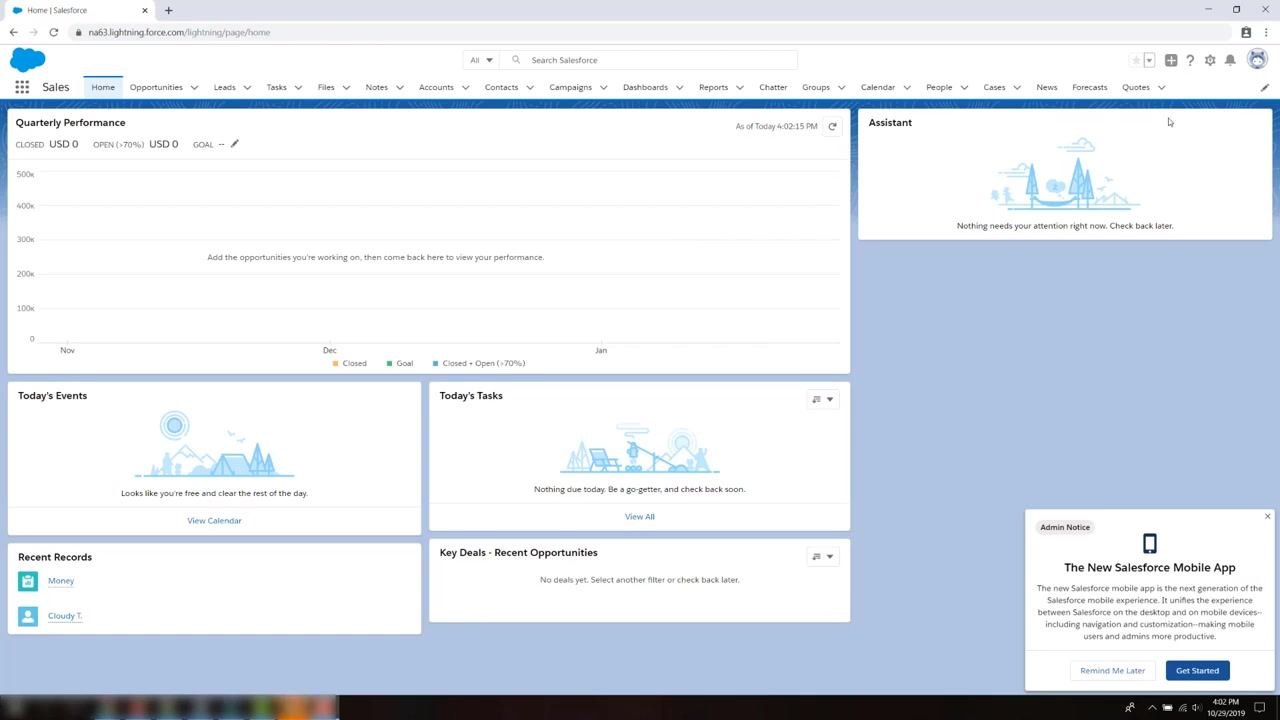
Log in to your Salesforce instance to reach the Salesforce Lightning Home page. This page displays panels for Quarterly Performance, Today's Events, Today's Tasks, Recent Records, and Key Deals.
The navigation bar at the top gives you access to Sales, Opportunities, Leads, Tasks, Files, Notes, Accounts, Contacts, Campaigns, Dashboards, Reports, Chatter, Groups, Calendar, People, Cases, News, Forecasts, and Quotes. You may also see an Admin Notice about the Salesforce Mobile App in the lower right of the screen.
Understand sandbox templates
Sandbox templates let you select specific objects and data to copy into your sandbox. They are only available for use with Full or Partial Copy sandboxes.
The Sandbox Template Editor automatically recognizes the object relationships defined in your org's schema. Some objects are always included in a template because they are required in any org.
Open the sandbox template editor
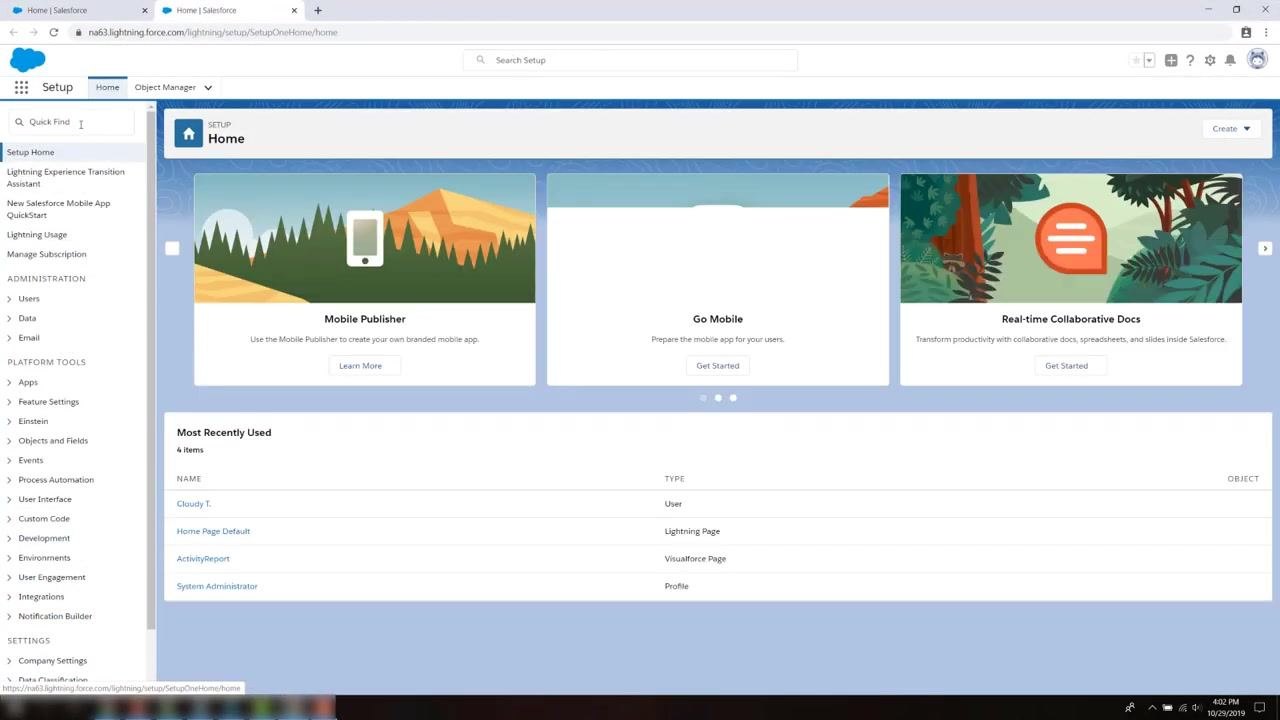
From Setup, enter Sandboxes in the Quick Find box on the left sidebar. Select the Sandbox Templates tab.
Click New Sandbox Template to start a new template, or click Edit next to an existing template to modify it.
Create a new sandbox template
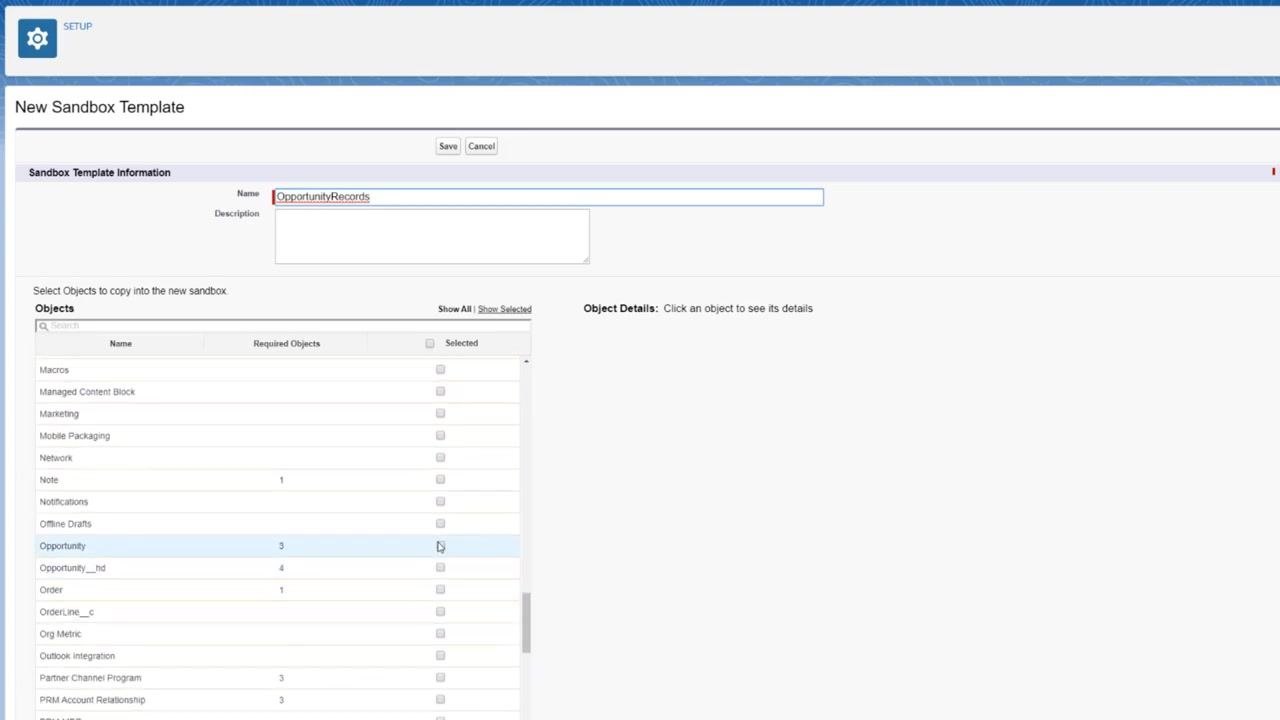
On the New Sandbox Template screen, enter a name for your template in the Name field. For example, OpportunityRecords. You can optionally add a description in the Description field.
In the "Select Objects to copy into the new sandbox" section, you see a list of available objects, each with a checkbox to select or deselect it.
Select objects for the template
Scroll through the object list or use the search bar to find the objects you want to include. To add an object, check the box next to its name — for example, check the box for Opportunity.
Required objects associated with each selection appear in the "Required Objects" column.
Review object dependencies
When you select an object, its required dependencies are automatically included. For example, selecting Opportunity also brings in Account, Contact, and Tag Definition.
To view details about a specific object, click its name in the list. The details appear in the "Object Details" pane on the right.
Remove objects from the template
To remove an object, uncheck its box in the list. If the object you remove has dependencies, any dependent objects are also removed, unless they are explicitly selected elsewhere in the template.
If you try to remove an object that has dependencies, a warning dialog appears listing all the additional objects that will be removed as a result — for example, Opportunity, Tag Definition, and Contact. You must confirm or cancel the removal before continuing.
Confirm or cancel the object removal
Review the "Removal Warning" dialog carefully, since it lists every object that will be removed due to dependencies.
- Click Confirm to proceed with removing the object and its dependents.
- Click Cancel to keep all the objects in the template.
Save the sandbox template
Once you have selected all the objects you want, click Save at the top of the template editor. Your sandbox template is now ready to use when you create or refresh a sandbox.
Refresh an existing sandbox
Navigate to the Sandboxes page in Salesforce Setup and locate the Full or Partial Copy sandbox you want to update. Click the Refresh link next to that sandbox.
Select the sandbox type
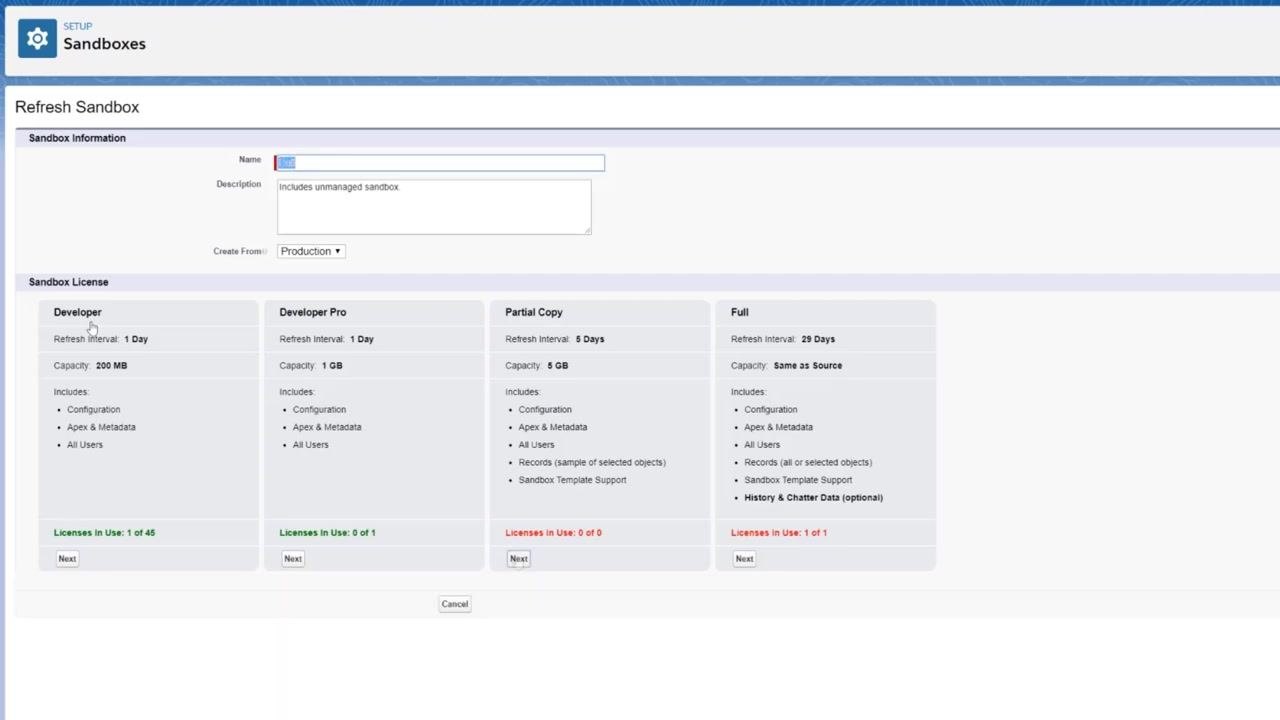
On the "Refresh Sandbox" screen, review the available sandbox license types: Developer, Developer Pro, Partial Copy, and Full. Select Partial Copy or Full, depending on your needs, then click Next.
Apply your sandbox template
In the "Sandbox Options" section, select the template you created earlier, such as OpportunityRecords, from the list of Sandbox Templates. The right pane shows a preview of the objects included in the template, for example Account, Contact, Opportunity, and Tag Definition.
- Check Auto Activate if you want the sandbox to activate automatically after creation.
- Optionally, specify an Apex Class to run after the sandbox is created.
Click Create to begin the sandbox refresh process.
Review and finalize the refresh
On the final confirmation screen, review the summary of your selections. Click Create to finalize the sandbox refresh using your selected template.
What's next
Now that you know how to create a sandbox in Salesforce with a custom template, you can build additional templates for other object sets and reuse them across future sandbox refreshes.
For more information on sandbox templates and management, visit help.salesforce.com. You can also join the Salesforce community at trailblazer.salesforce.com for further learning and support.
Generation details: cost, quality tiers
Docsie billed 1,500 credits ($1.05) to analyze this 3-minute video at standard quality. The rewrite, template fill and Word/PDF exports were included. The same video at each quality tier:
| Quality | Frames sampled | Credits | Approx. cost |
|---|---|---|---|
| Draft | every 16-30 s | 750 | $0.52 |
| Standard (this guide) | every 8-15 s | 1,500 | $1.05 |
| Detailed | every 4-7 s | 3,000 | $2.10 |
| Ultra | every 1-3 s | 6,000 | $4.20 |
Credits priced at $0.70 per 1,000; plans include a monthly allowance. Enterprise customers on on-premise or bring-your-own-model deployments run this on their own inference and pay no per-video credits.
Generated by Docsie Video-to-Docs on 2026-09-14 from a 2-minute video. Screenshots are frames from the source video and belong to their creator, Salesforce Support, whose original is embedded above. If you own this video and want the guide removed or credited differently, contact us and we will act within one business day.