
How to Create a Profile in Salesforce
This guide shows you how to create a profile in Salesforce, configure object-level and field-level security, set app and tab access, assign user and object permissions, and apply the new profile to a user. You'll walk through cloning an existing profile, tailoring its settings for a specific role — in this example, a "Lead Gen" profile for lead generation users — and assigning it to a team member.
Video: Salesforce - How to Create a Custom Profile by Salesforce Emily (2019). All credit for the demonstration goes to the creator; watch the original on YouTube. The written guide below was generated from this video by Docsie. Creator? Request a change or removal.
This guide shows you how to create a profile in Salesforce, configure object-level and field-level security, set app and tab access, assign user and object permissions, and apply the new profile to a user. You'll walk through cloning an existing profile, tailoring its settings for a specific role — in this example, a "Lead Gen" profile for lead generation users — and assigning it to a team member.
Prerequisites
- Access to Salesforce Setup with administrator-level permissions.
- An existing profile to clone (this guide uses "Custom: Sales Profile" as the base).
- A user account to which the new profile will eventually be assigned.
Understanding custom profiles
Custom profiles let you define object-level security for users, controlling which objects — such as Accounts, Opportunities, and Cases — a user can see or interact with. You can also set field-level security, allowing users to view or edit specific fields (for example, seeing an address but not a phone number).
Part 1: Create a new profile
Step 1: Navigate to Salesforce Setup
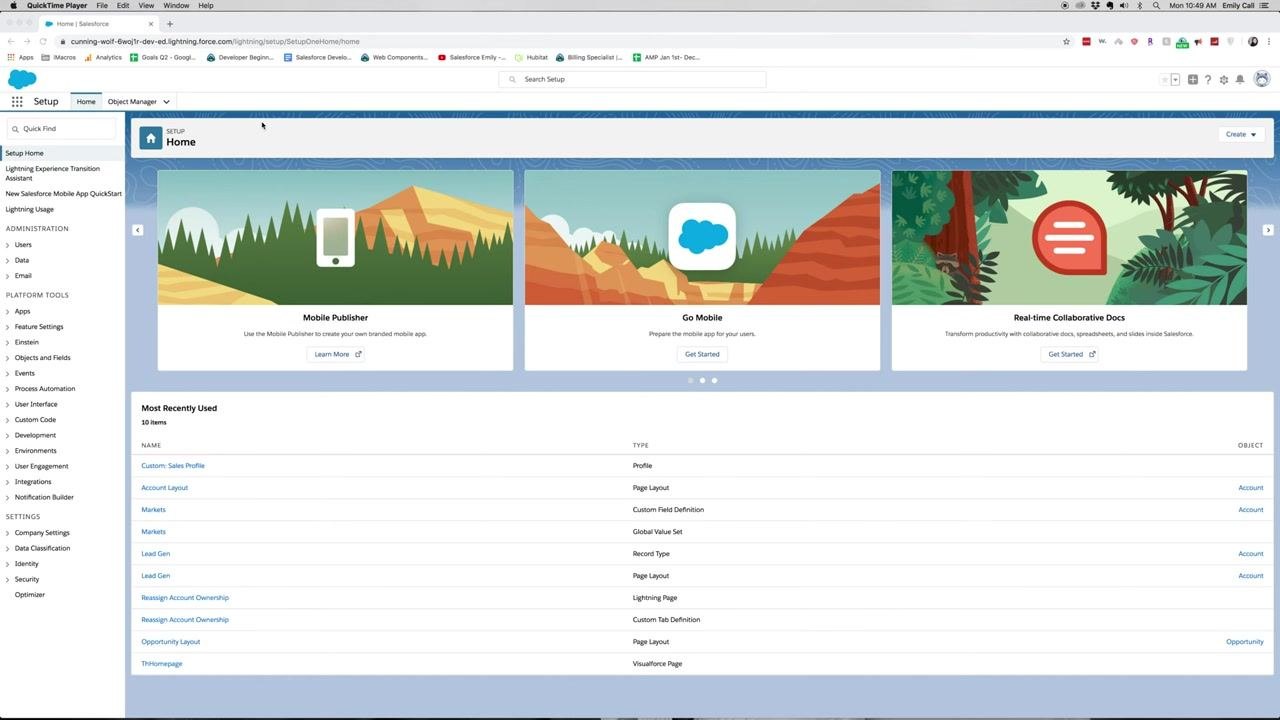
Open Salesforce and go to the Setup Home page. The Setup Home displays options such as Mobile Publisher, Go Mobile, and Real-time Collaborative Docs. The left sidebar contains navigation for Administration, Platform Tools, and Settings, while the Most Recently Used section lists items like "Custom: Sales Profile," "Account Layout," and "Lead Gen."
Step 2: Open the Profiles section
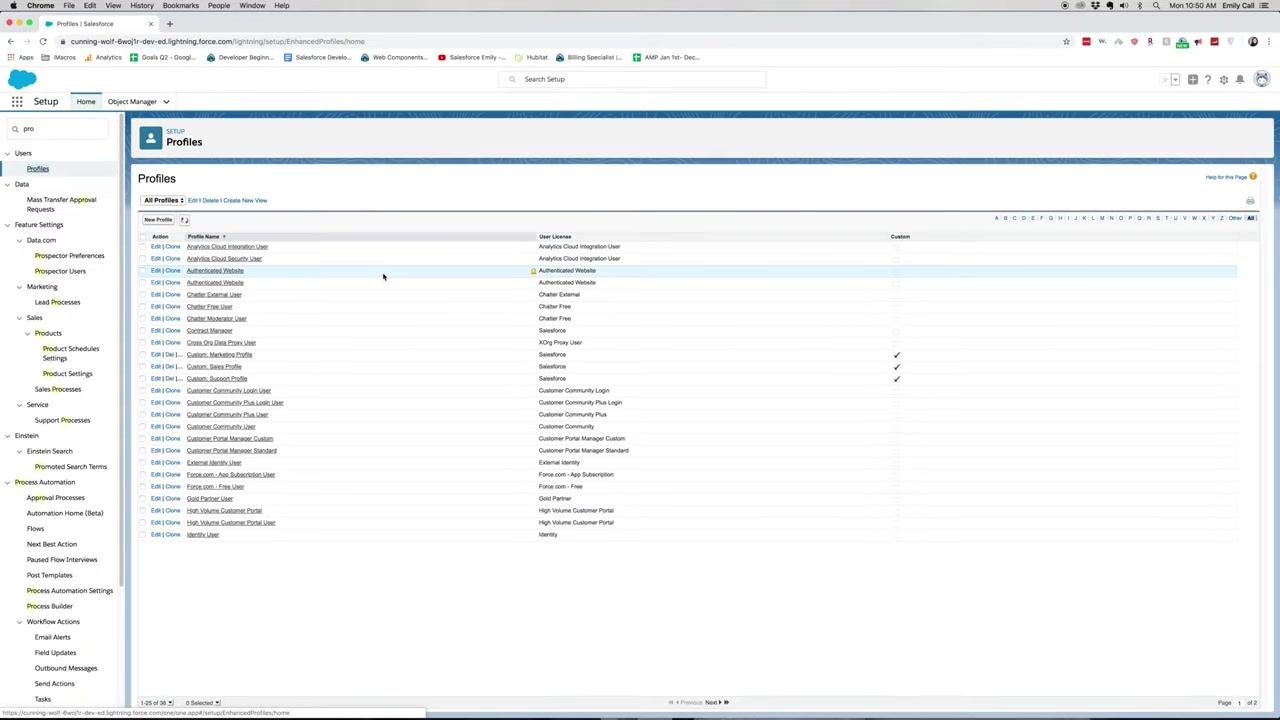
In the left sidebar, locate the Quick Find search box and type Profiles. Click Profiles under the Users section. The Profiles page lists all available profiles along with options to edit or clone each one.
Step 3: Create a new profile by cloning
Click New Profile at the top of the Profiles list. On the Clone Profile screen, select an existing profile to copy — in this example, Custom: Sales Profile — from the dropdown menu. Enter a new profile name, such as Lead Gen, for your lead generation users, then click Save.
Step 4: Review the new profile
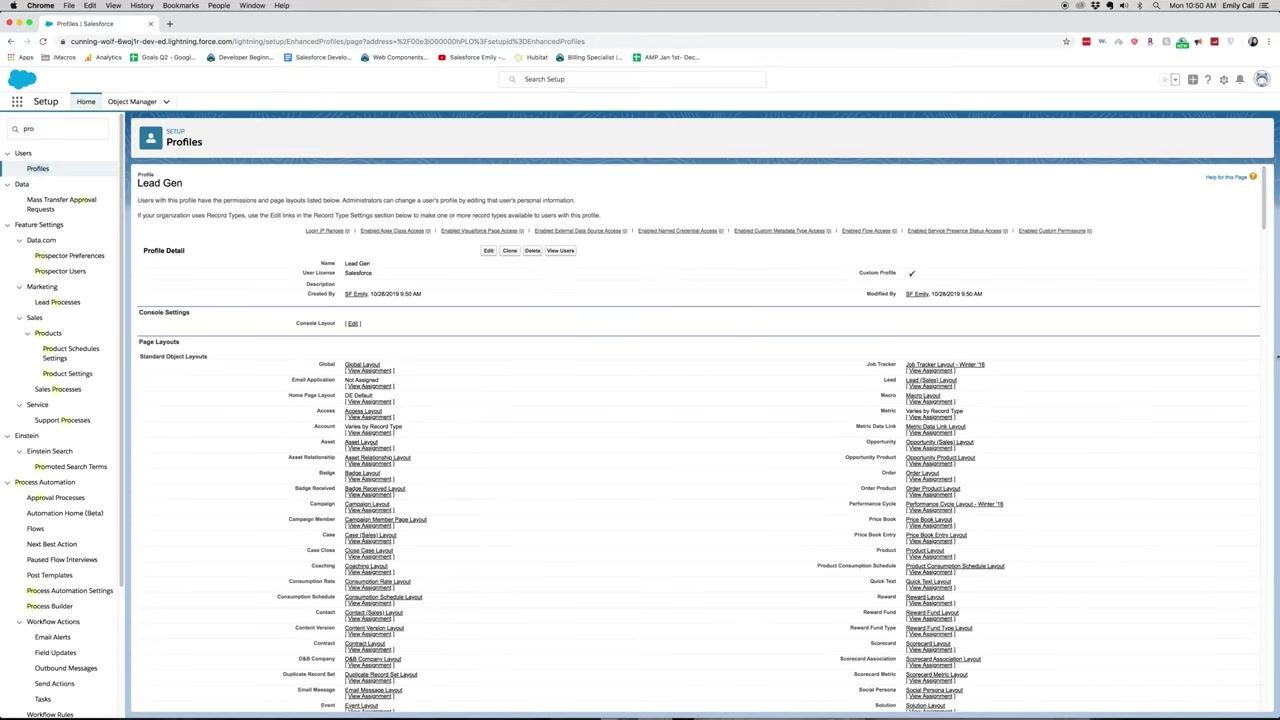
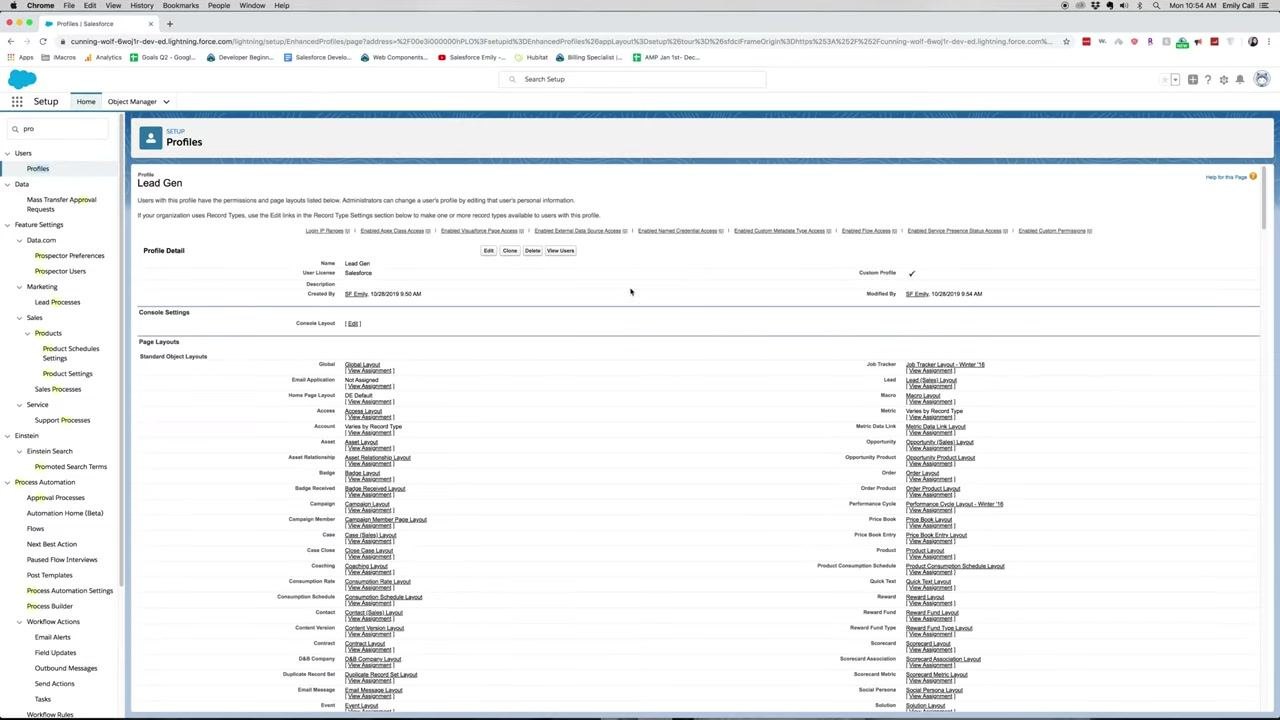
After saving, you land on the new profile's detail page. This page shows the profile name ("Lead Gen"), description, and created-by and modified-by information, along with console settings and standard object layouts associated with the profile.
Step 5: Edit the custom profile
Click Edit on the profile detail page to modify permissions, object access, and field-level security as needed.
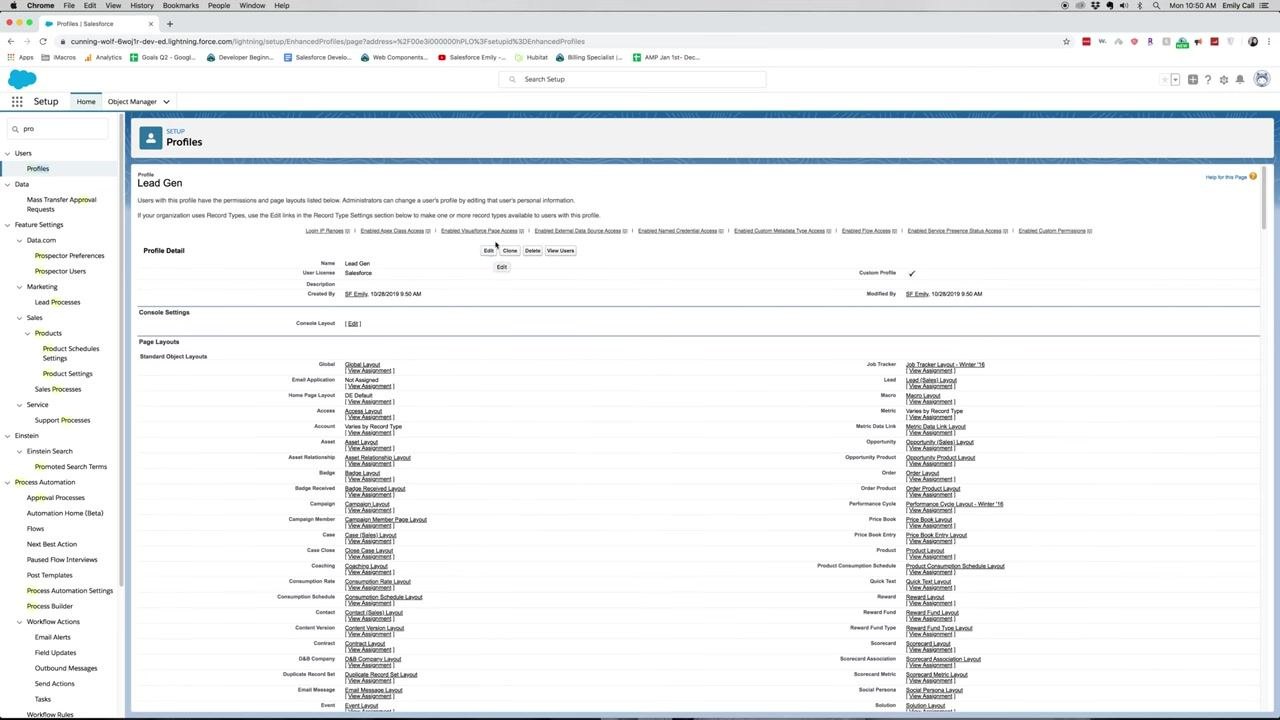
At this point, you have created a custom profile in Salesforce by cloning permissions from an existing profile, ready for further customization.
Part 2: Customize app and tab access
Step 6: Review custom app settings
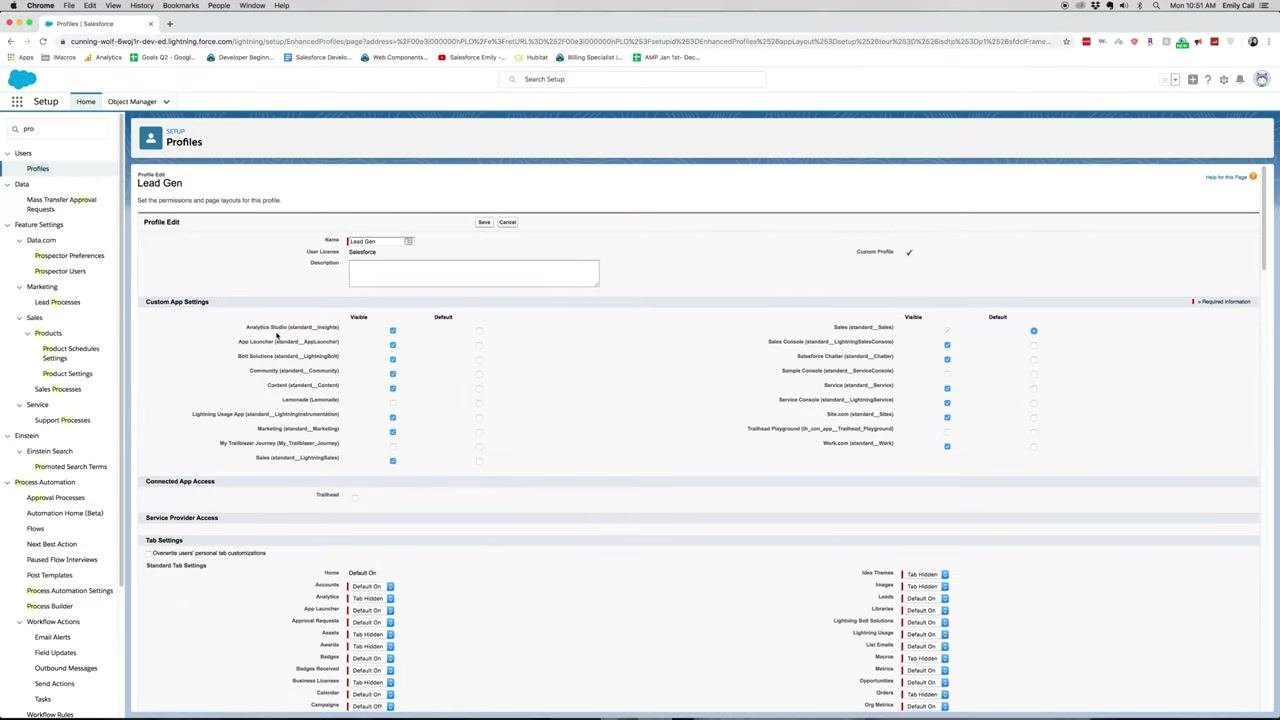
In the Profile Edit screen for Lead Gen, locate the Custom App Settings section. This lists available apps, including:
- Analytics Studio (standard_Insights)
- App Launcher (standard_AppLauncher)
- Bolt Solutions (standard_LightningBolt)
- Community (standard_Communities)
- Content (standard_Content)
- Lightning Usage App (standard_LightningUsage)
- My Trailblazer Journey (My_Trailblazer_Journey)
- Sales (standard_Sales)
- Sales Console (standard_LightningSalesConsole)
- Salesforce Chatter (standard_Chatter)
- Sample Console (standard_ServiceConsole)
- Service (standard_Service)
- Service Console (standard_LightningService)
- Site.com (standard_SiteDotCom)
- Trailhead Playground (00D_xxx_Trailhead_Playground)
- Work.com (standard_Work)
Ensure Analytics Studio, Community, and Content are checked as Visible. Uncheck Service and Service Console to restrict access to these apps, and set the default app as needed (for example, Sales).
Step 7: Review connected app access
In the Connected App Access section, verify that Trailhead is listed but not selected for this profile.
Step 8: Configure standard tab settings
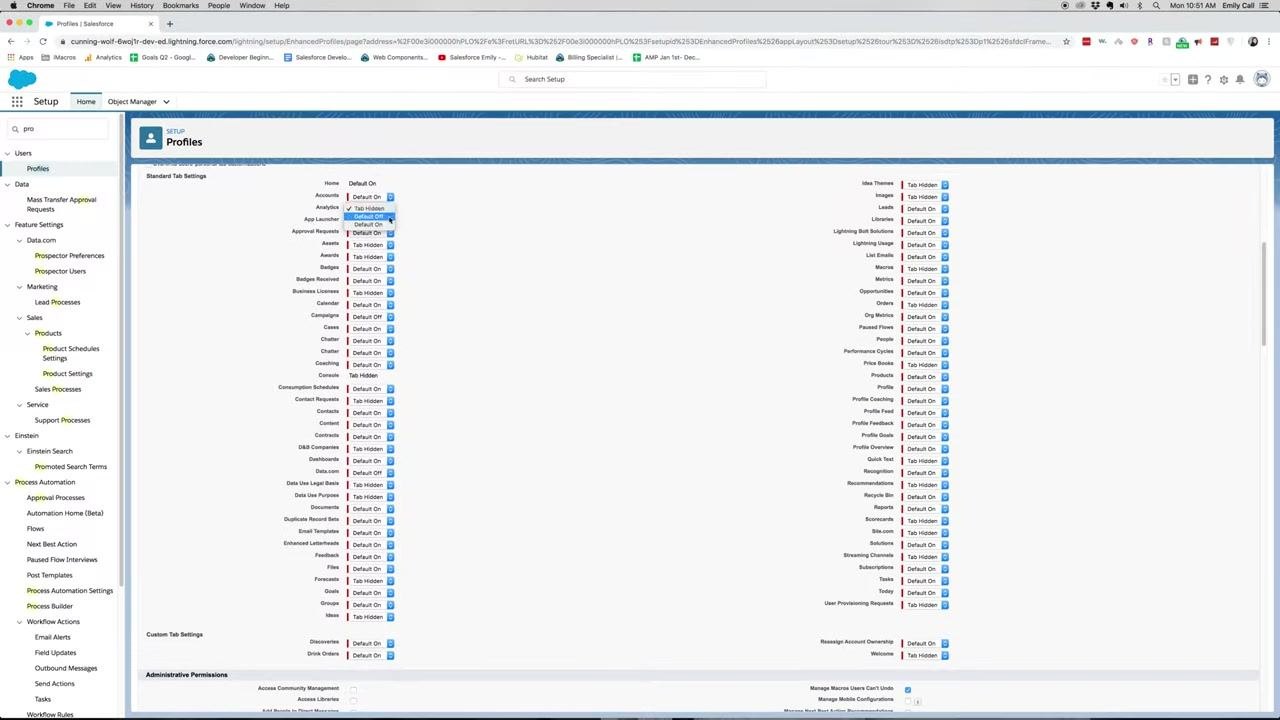
Scroll to the Tab Settings section, which lists standard tabs such as Accounts, Analytics, App Launcher, Campaigns, Cases, Chatter, Files, Forecasts, Home, Leads, Opportunities, Reports, and many others. For each tab, choose an access level:
- Tab Hidden: The tab is not visible in the app, but users may still access the object through other means.
- Default Off: The tab is not visible and users do not have access by default.
- Default On: The tab is visible and accessible by default.
Change the Analytics tab from Tab Hidden to Default On to make it visible for Lead Gen users.
Step 9: Customize custom tab settings
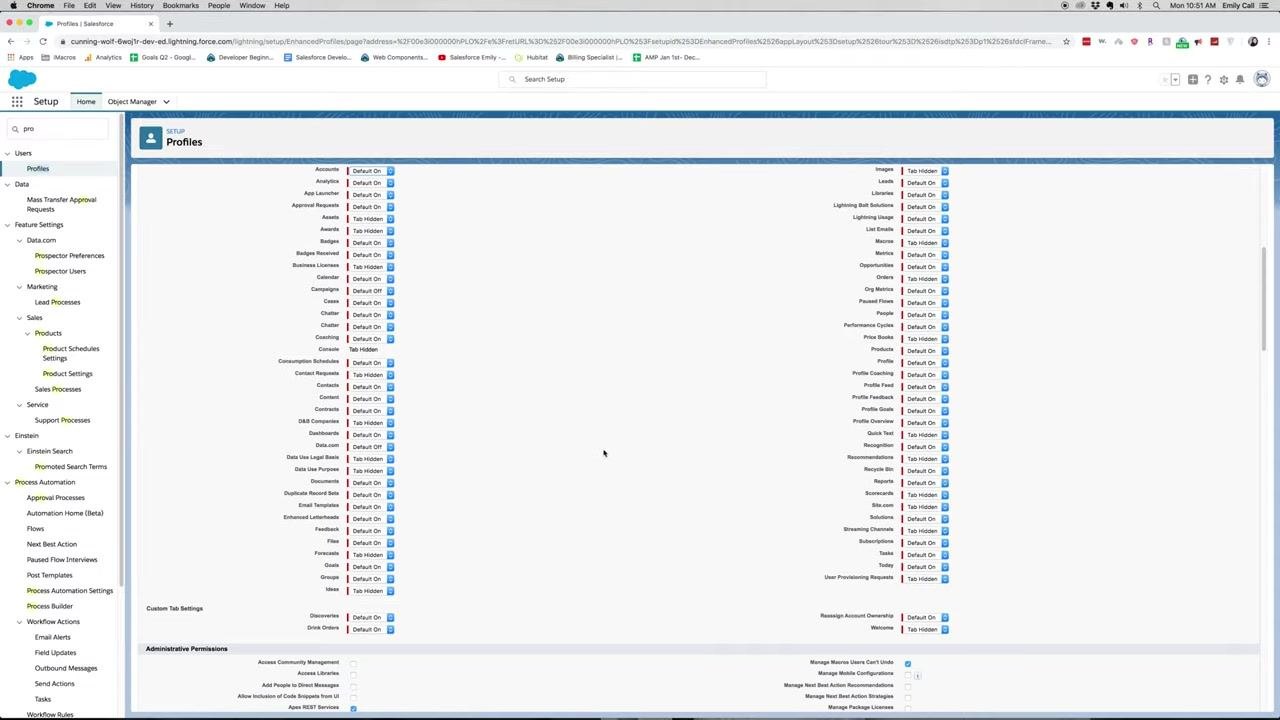
In the Custom Tab Settings section, review custom tabs such as "Discoveries" and "Drink Orders." Set unnecessary custom tabs to Default Off for Lead Gen users, and ensure Reassign Account Ownership is set to Default On so Lead Gen users can access this functionality.
Step 10: Review administrative permissions
Scroll to the Administrative Permissions section and uncheck permissions that should not be granted to Lead Gen users, such as Apex REST Services. Only enable permissions necessary for the Lead Gen role.
With this section complete, you've tailored the app and tab access for the Lead Gen profile so users have the tools they need while unnecessary or sensitive features remain restricted.
Part 3: Set user, object, and session permissions
Step 11: Adjust administrative permissions
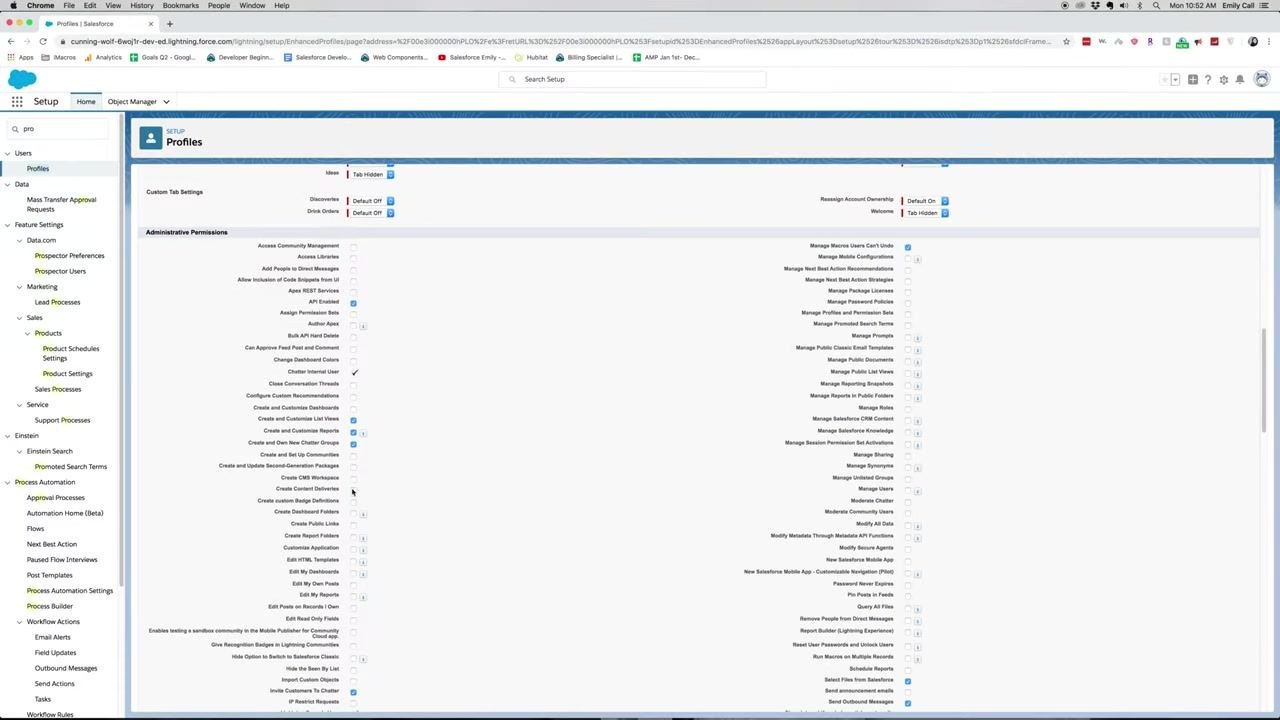
In the Administrative Permissions section, uncheck Content to restrict access to Salesforce Content. Ensure the following permissions remain enabled to support collaboration and reporting:
- Create and Own New Chatter Groups
- Create and Customize Reports
- Create and Customize List Views
Leave other general user permissions unchanged unless specific requirements dictate otherwise.
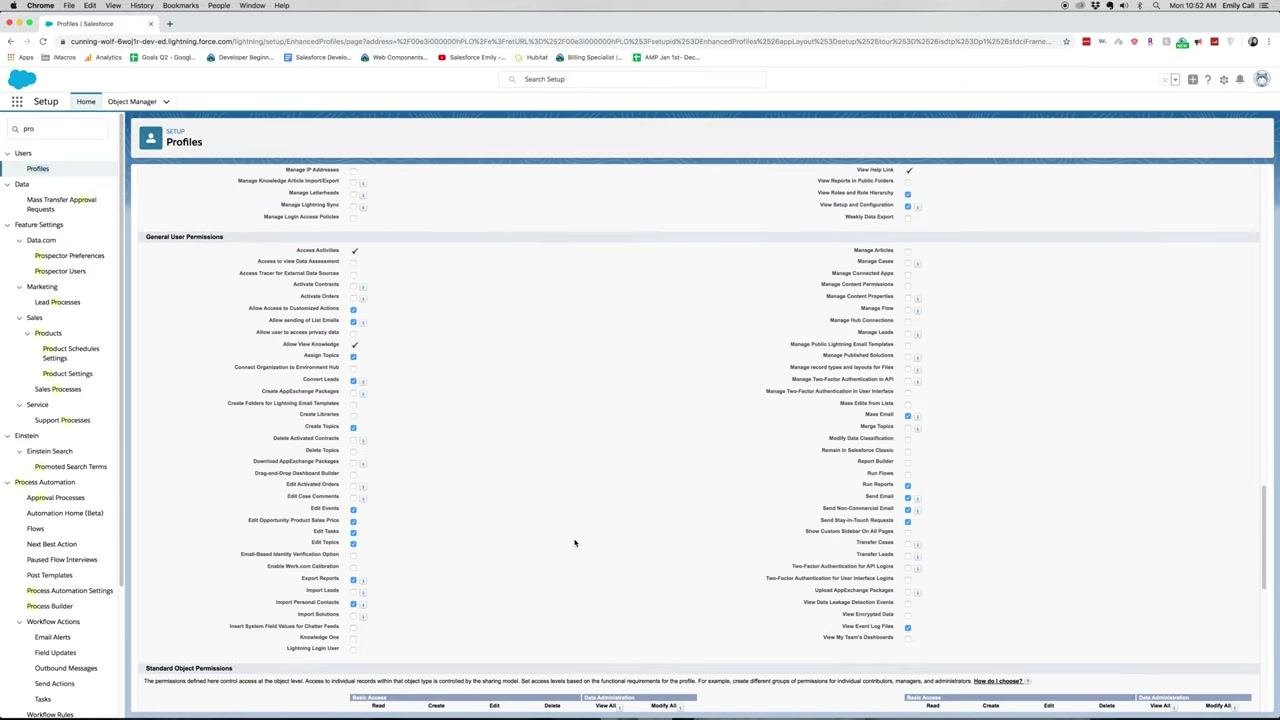
Step 12: Review general user permissions
In the General User Permissions section, verify that the following are enabled:
- Access Activities
- Access to View Data Assessment
- Activate Contracts
- Allow View Knowledge
- Create and Customize List Views
- Create and Customize Reports
- Create and Own New Chatter Groups
Leave other permissions at their default settings unless otherwise required.
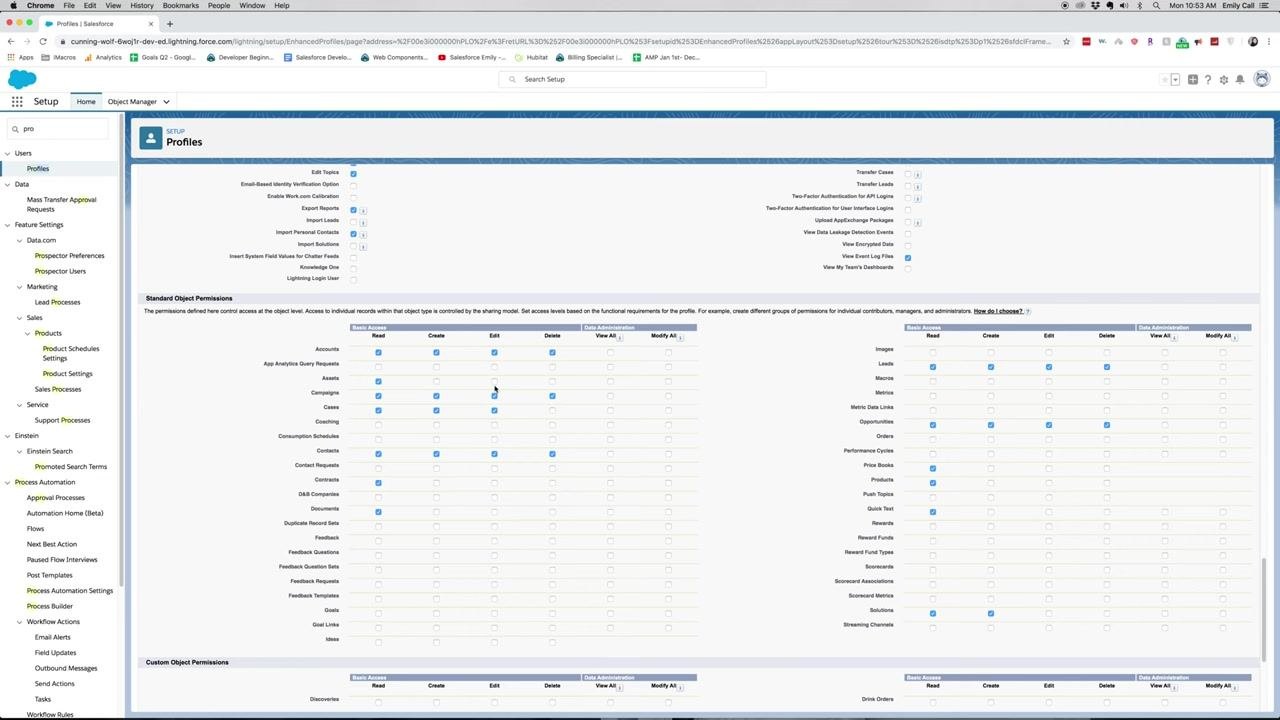
Step 13: Configure standard object permissions (CRUD)
Scroll to the Standard Object Permissions section and set access levels for each object:
- Accounts: Read only
- Assets: Read only
- Cases: No access (leave unchecked)
- Contacts: Read only
- Leads: Read, Create, Edit, and Delete
- Opportunities: Read, Create, Edit, and Delete
- Price Books: Read only
- Products: Read only
- Quick Text: Read only
- Solutions: Read only
Leave all other standard objects unchecked unless otherwise specified. If prompted with a warning about disabling Delete permissions, review and confirm as appropriate.
Step 14: Set custom object permissions
In the Custom Object Permissions section, ensure no permissions are granted for custom objects such as "Discoveries" and "Drink Orders" — leave all boxes unchecked.
Step 15: Review session settings and password policies
In the Session Settings section, confirm:
- Session Times Out After: 2 hours of inactivity
- Session Security Level Required at Login: None
In the Password Policies section, confirm:
- User passwords expire in: 90 days
- Enforce password history: 3 passwords remembered
- Minimum password length: 8 characters
- Password complexity requirement: Must include alpha and numeric characters
- Password question requirement: Cannot contain password
Leave other settings at their default values unless stricter security is required.
Step 16: Save the profile
Click Save to apply all changes to the Lead Gen profile.
Step 17: Verify profile creation
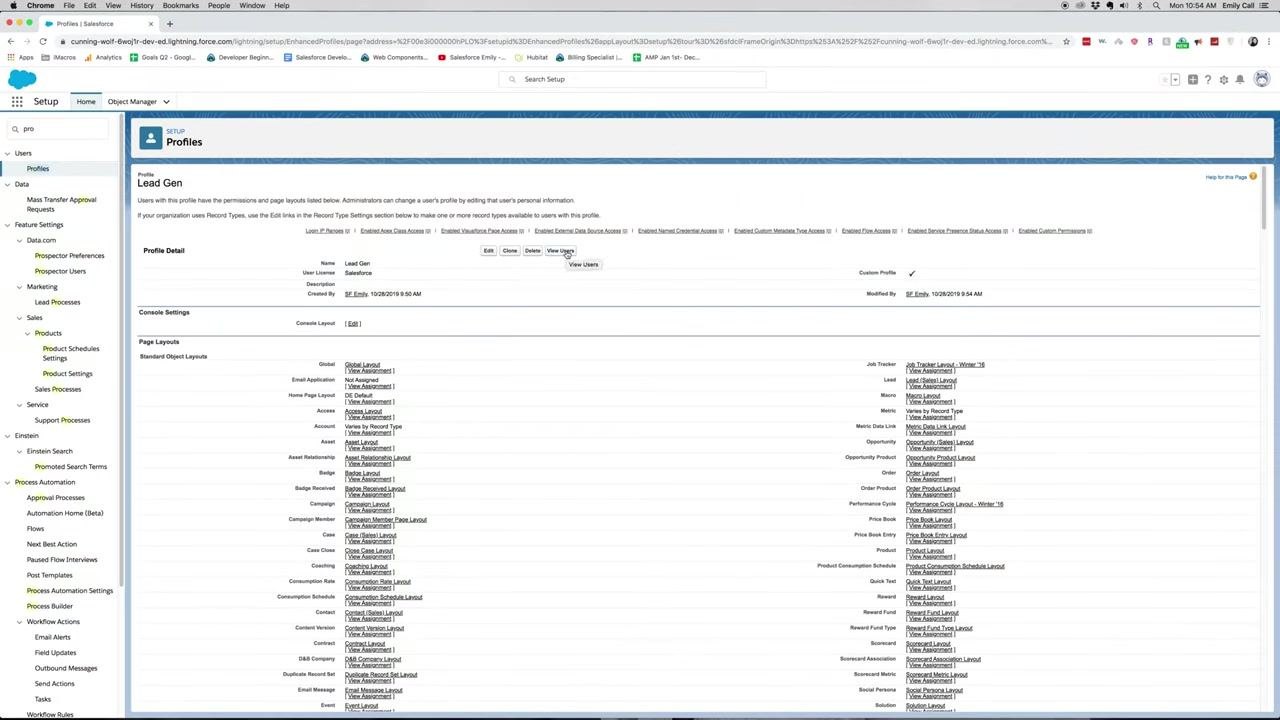
Review the Lead Gen profile summary page to confirm all settings were applied. Note that the profile currently has no users assigned.
The Lead Gen profile is now finalized, with permissions in place for collaboration, reporting, and lead management, while unnecessary access remains restricted.
Part 4: Assign the profile to a user
Step 18: Navigate to the Users section
In Salesforce Setup, use the left sidebar to search for Users, then click Users under the Users section to open the user management page.
Step 19: Locate the user to update
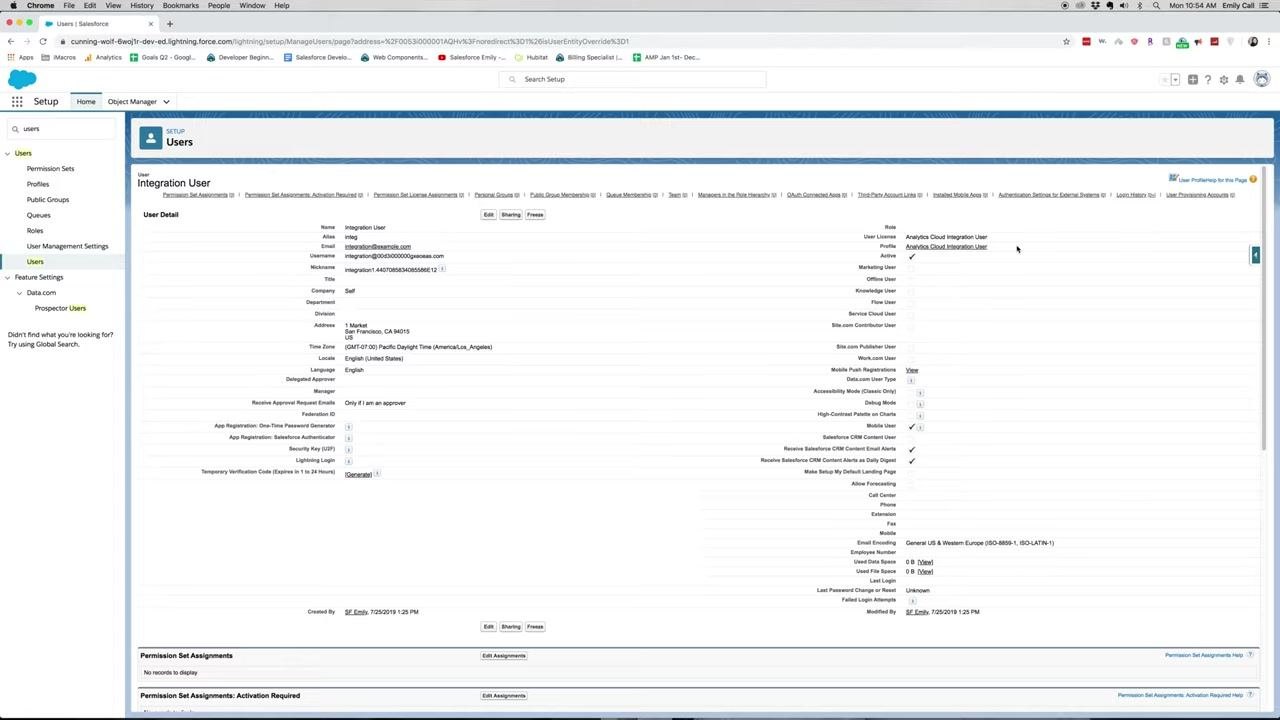
In the Users list, find the user you want to assign the Lead Gen profile to. This example uses the Integration User. Click the user's name to open their user detail page.
Step 20: Review the current profile assignment
On the user detail page, review the current Profile field. In this example, the user is assigned the Analytics Cloud Integration User profile. Confirm other user details as needed, such as username, email, and role.
Step 21: Edit the user's profile
Click Edit at the top of the user detail page. In the Profile dropdown, select Lead Gen from the list of available profiles, then save your changes. The user now has all permissions and settings configured for the Lead Gen profile.
Step 22: Verify the profile assignment
After saving, confirm that the Profile field now displays Lead Gen for the user. Review the user detail page to ensure all information is correct and the new permissions are in effect.
Summary
You have now learned how to create a profile in Salesforce from start to finish: cloning a base profile, configuring app and tab visibility, setting administrative, general, and object-level permissions, applying session and password policies, and assigning the finished profile to a user. Repeat the assignment step for any additional users who require the Lead Gen profile.
Generation details: cost, quality tiers
Docsie billed 3,000 credits ($2.10) to analyze this 6-minute video at standard quality. The rewrite, template fill and Word/PDF exports were included. The same video at each quality tier:
| Quality | Frames sampled | Credits | Approx. cost |
|---|---|---|---|
| Draft | every 16-30 s | 1,500 | $1.05 |
| Standard (this guide) | every 8-15 s | 3,000 | $2.10 |
| Detailed | every 4-7 s | 6,000 | $4.20 |
| Ultra | every 1-3 s | 12,000 | $8.40 |
Credits priced at $0.70 per 1,000; plans include a monthly allowance. Enterprise customers on on-premise or bring-your-own-model deployments run this on their own inference and pay no per-video credits.
Generated by Docsie Video-to-Docs on 2026-09-14 from a 5-minute video. Screenshots are frames from the source video and belong to their creator, Salesforce Emily, whose original is embedded above. If you own this video and want the guide removed or credited differently, contact us and we will act within one business day.