
How to Use Visual Integrator in Sage 100
Visual Integrator in Sage 100 lets you import general journal entries directly from a spreadsheet, saving time compared to manual data entry. This guide walks you through preparing your source data, creating an import job, mapping data fields, and executing the import so your general journal entries post accurately into Sage 100.
Video: Using Visual Integrator to Import Sage 100 GL Entries by Eide Bailly Technology. All credit for the demonstration goes to the creator; watch the original on YouTube. The written guide below was generated from this video by Docsie. Creator? Request a change or removal.
Visual Integrator in Sage 100 lets you import general journal entries directly from a spreadsheet, saving time compared to manual data entry. This guide walks you through preparing your source data, creating an import job, mapping data fields, and executing the import so your general journal entries post accurately into Sage 100.
Prerequisites
- A spreadsheet application (such as Excel) to prepare your source data.
- Access to Sage 100 with the Visual Integrator module and General Ledger module available.
- A general journal entry ready for import, with balanced debits and credits.
Prepare your import data
Prepare your source data for import
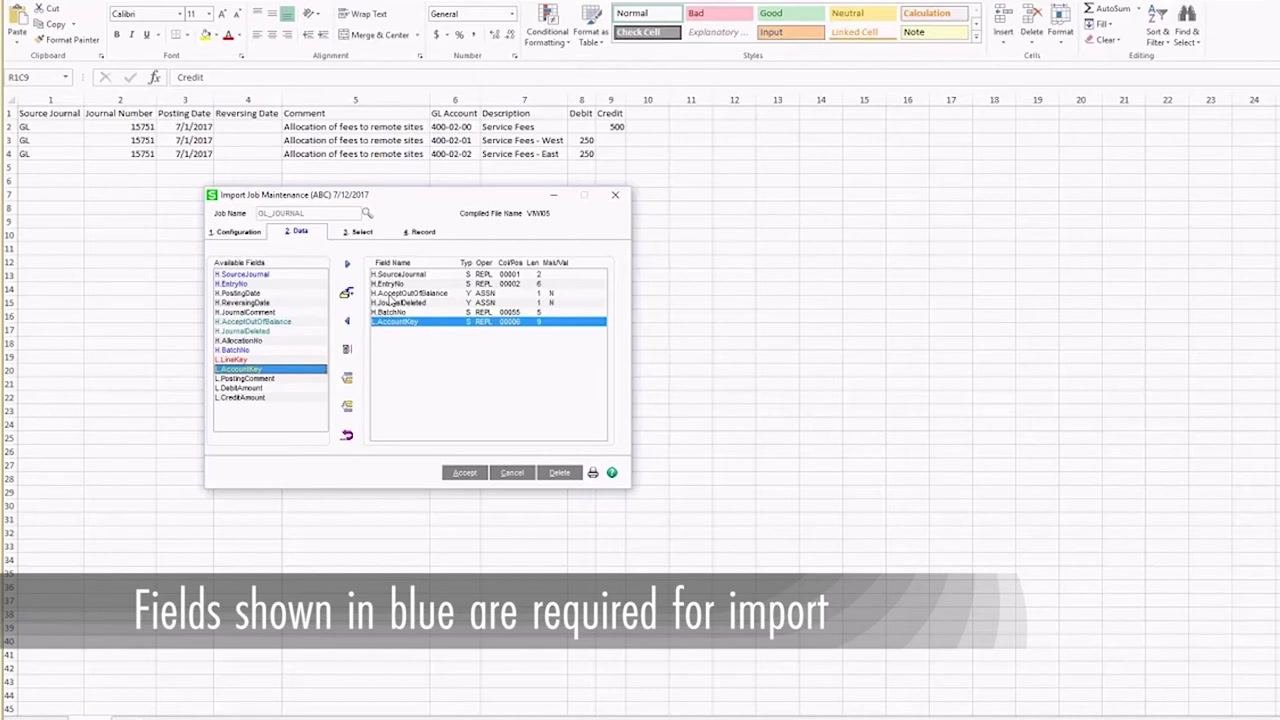
Begin by creating your source data in a spreadsheet application such as Excel. For this guide, a general journal entry is used as the source data.
Create a reusable template
The order of columns in your import file is not critical for a single job, but you must keep the column order consistent across all import jobs. For example, if column 1 is mapped as the source journal, do not change its position in future imports.
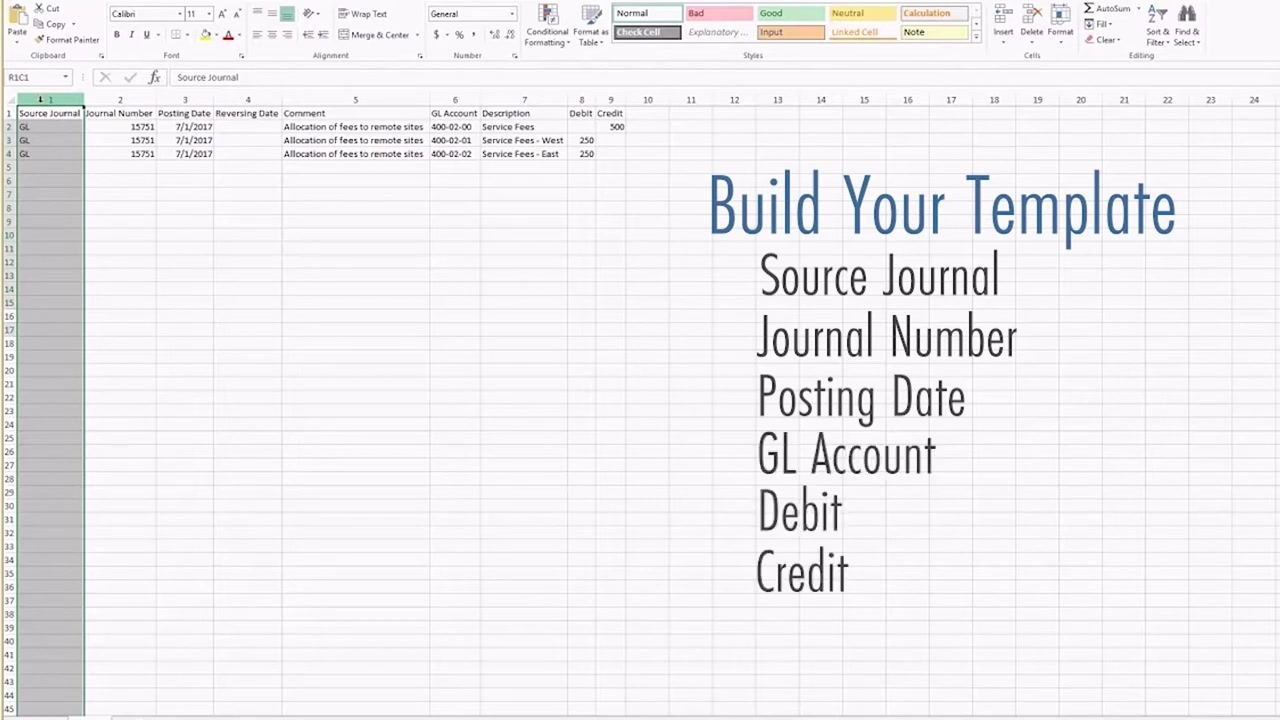
Create a template that includes all the fields you need for your general journal import jobs. A typical template includes the following columns:
- Source Journal
- Journal Number
- Posting Date
- Reversing Date (optional, can be left blank)
- Comment (optional)
- GL Account (required)
- Description
- Debit (required)
- Credit (required)
Before importing, make sure your general journal entry balances, meaning total debits equal total credits.
Finalize your import file in Excel
Confirm that your general journal entry is balanced, with total debits equal to total credits. Review all required and optional columns for completeness, such as Source Journal, Journal Number, Posting Date, Reversing Date, Comment, GL Account, Description, Debit, and Credit.
Make sure all required fields are filled in and optional fields are left blank if you don't need them.
Save your import file as a CSV
In Excel, go to the File menu and select Save As. In the "Save as type" dropdown, choose CSV (Comma delimited) (*.csv). Enter a file name and click Save.
This step is essential because Sage 100 Visual Integrator requires a CSV file for import.
Create the import job
Open Visual Integrator in Sage 100
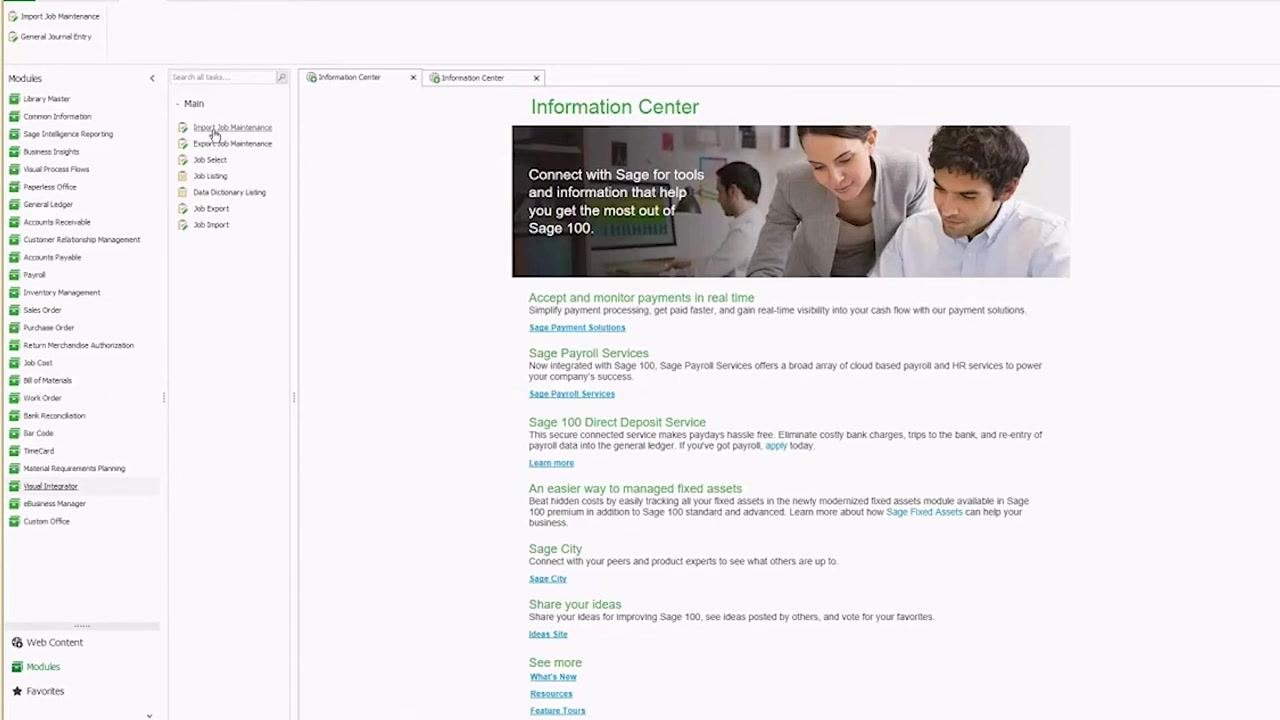
Launch Sage 100. In the left navigation pane, scroll down and select Visual Integrator. Under the Main section, click Import Job Maintenance.
Create a new import job
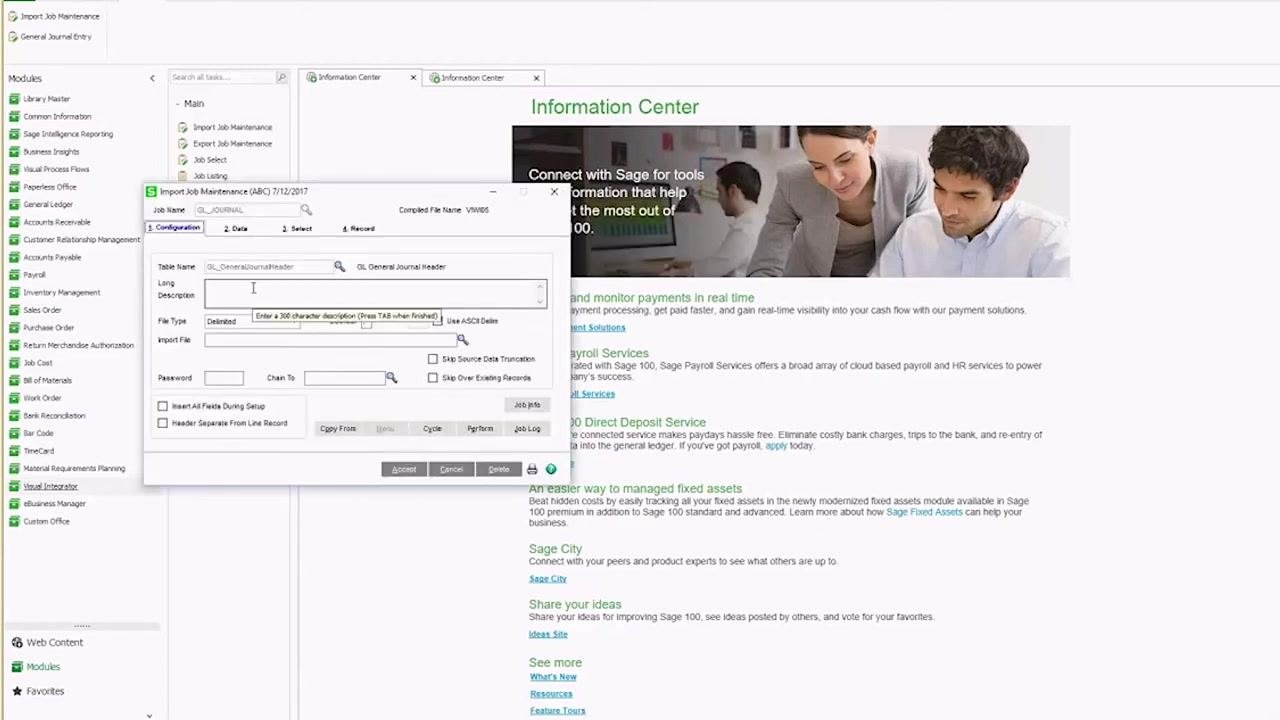
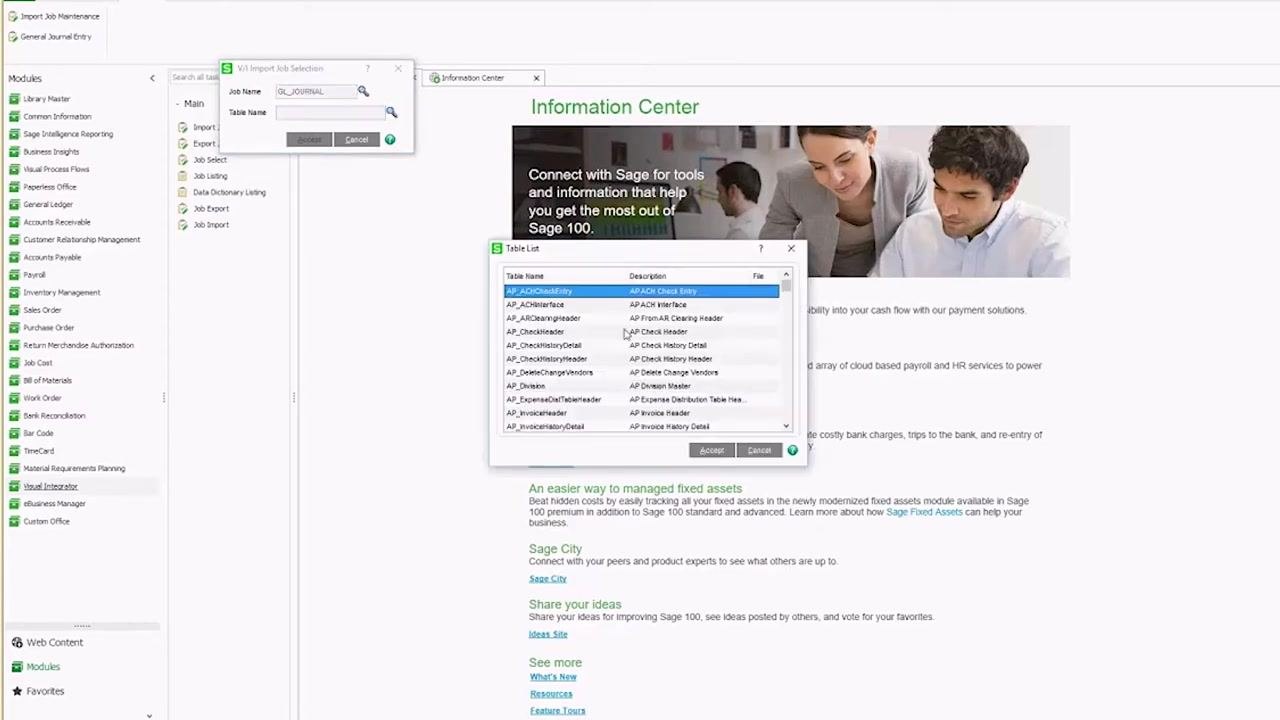
In the VI Import Job Selection window, enter a unique Job Name, such as GENERAL_JOURNAL. If you want to edit an existing job instead, click the magnifying glass icon to search for it. For a new job, proceed to the next step.
In the Table Name field, enter or select GL_GeneralJournalHeader for general journal imports. Use the table list to find and select the correct table if needed, then click Accept to continue.
Configure the import job
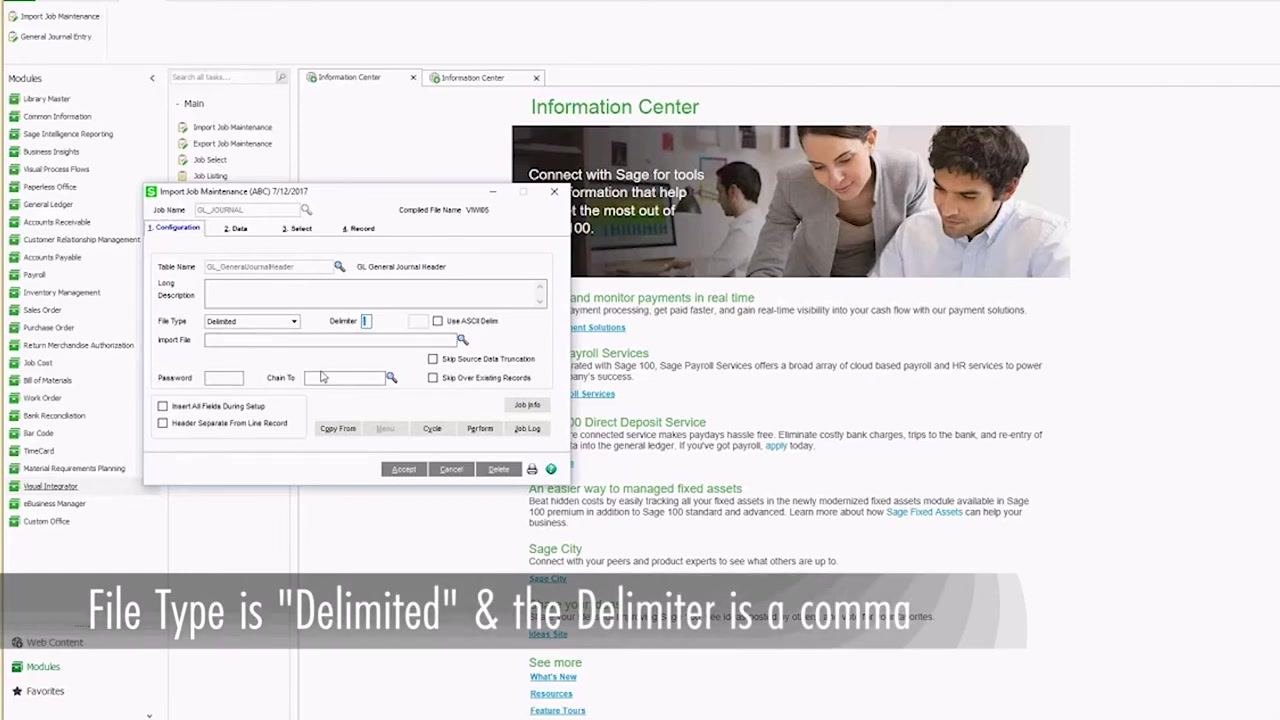
In the Import Job Maintenance window, go to the Configuration tab. Optionally, enter a long description for the job. Set File Type to Delimited and set the Delimiter to a comma (,), ensuring the settings match your CSV file format.
Map data fields
Map required fields
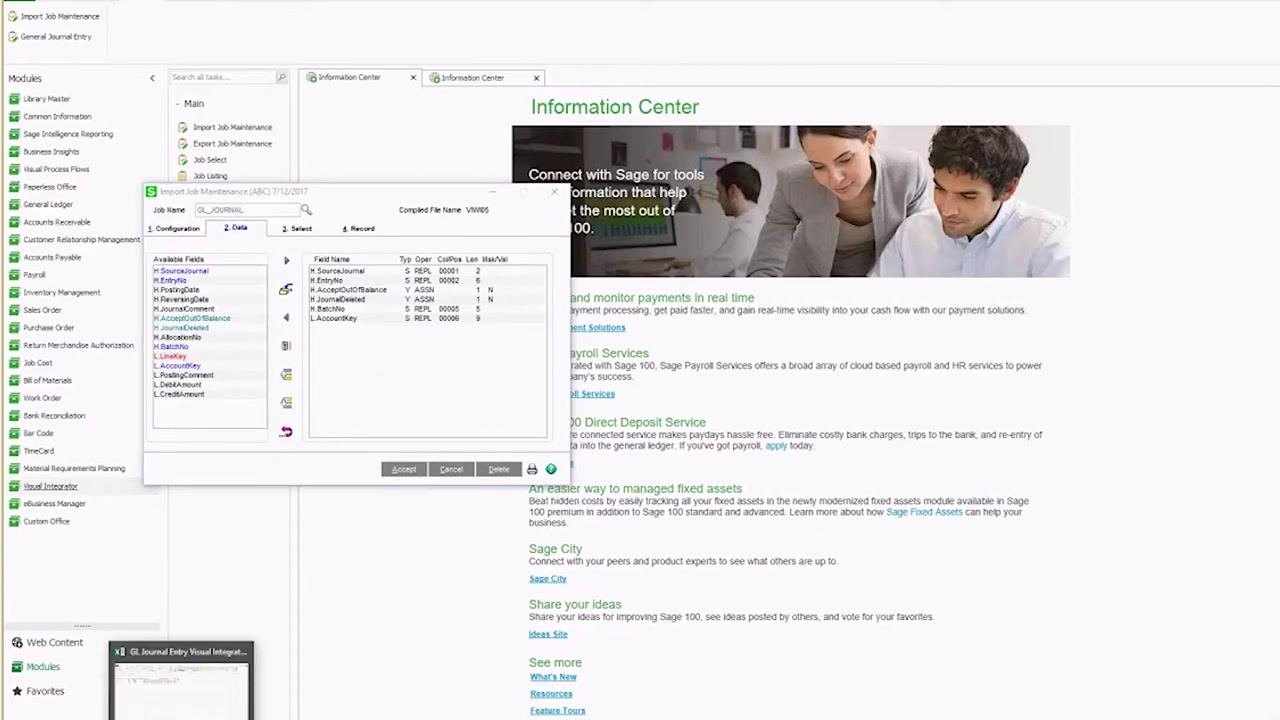
Switch to the Data tab in the Import Job Maintenance window. Review the available fields and their column positions, then map each field from your CSV file to the corresponding Sage 100 field. For example, map Source Journal to column 1 and Entry Number to column 2. Adjust column positions as needed by double-clicking a field and editing the value.
Fields highlighted in blue in the available fields list are required for the import job to function. Make sure all required (blue) fields are mapped to the correct columns in your CSV file, and confirm they appear in the grid on the right side of the Data tab.
Assign the batch number field
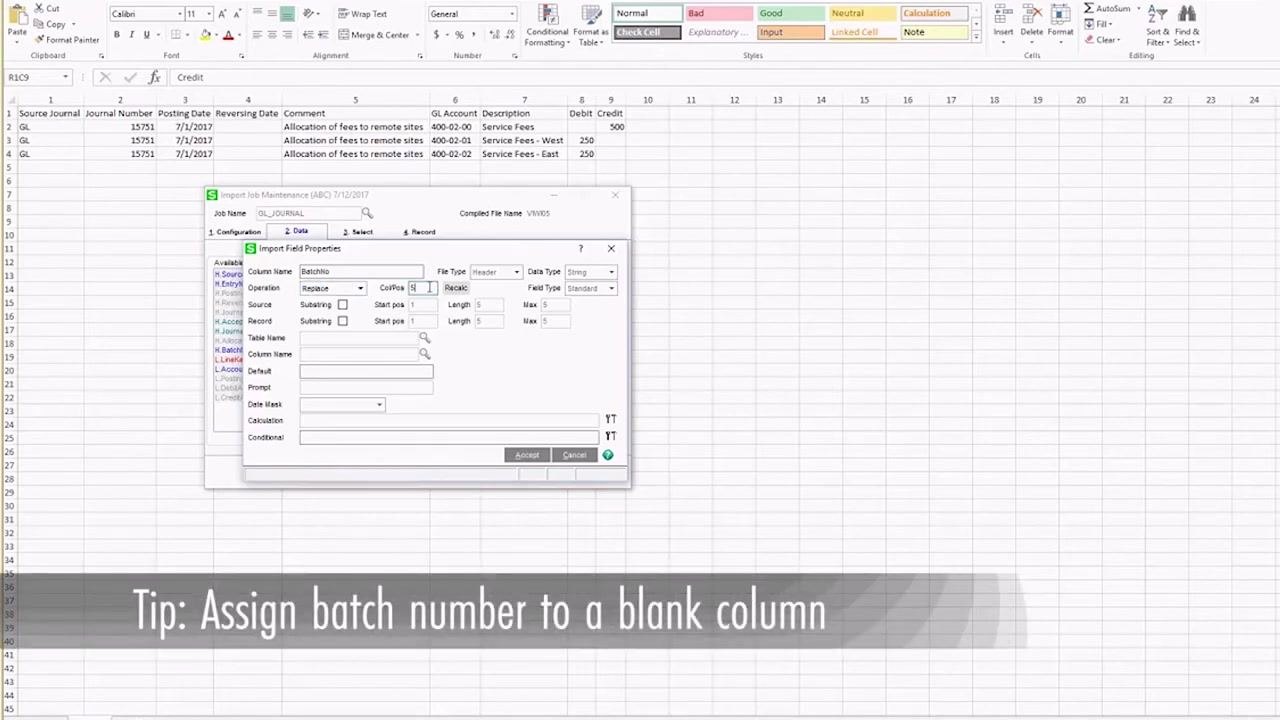
Locate the BatchNo field in the available fields list and double-click it to open its properties. Assign the batch number to a blank column — one not used by any other field. This instructs Sage 100 to use the next available batch number automatically. Click Accept to save the field mapping.
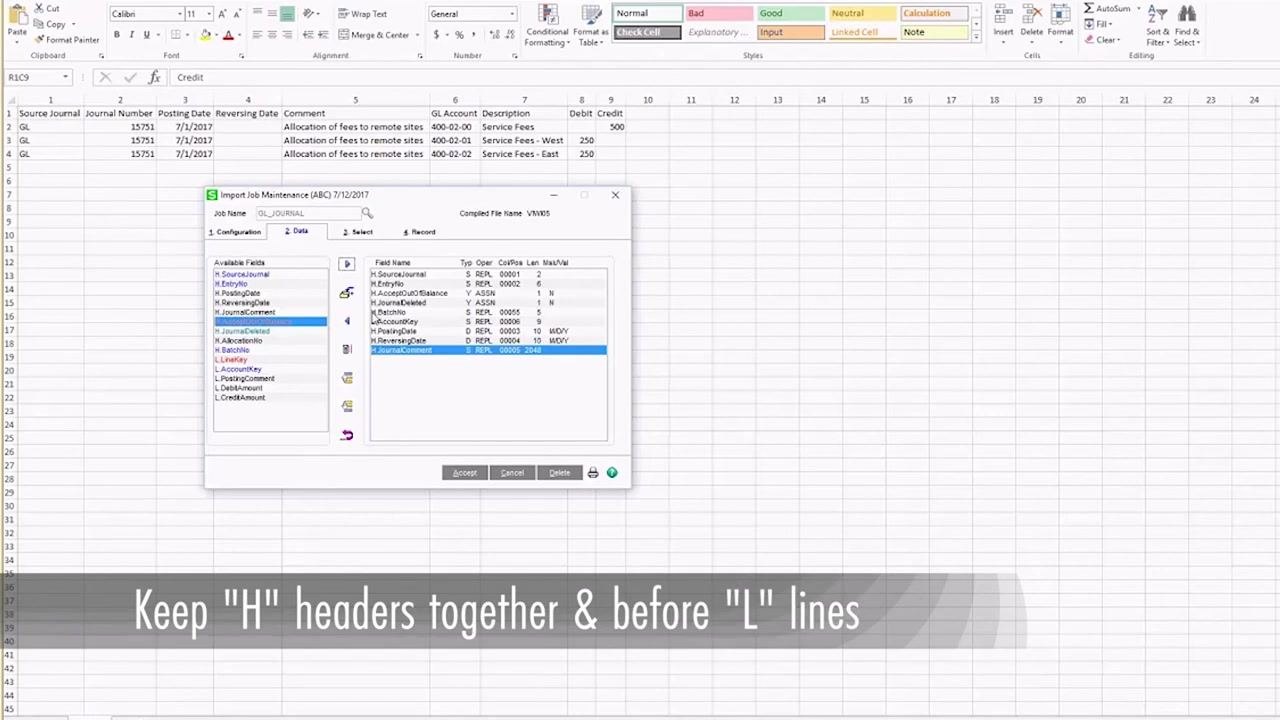
Map additional header fields
Add and map additional header fields as needed. Double-click each header field (fields starting with "H.") and assign the correct column position based on your CSV. For example:
H.PostingDate→ Column 3H.ReversingDate→ Column 4H.JournalComment→ Column 5
Keep all header fields (those starting with "H.") grouped together and listed before any line fields (those starting with "L."). This organization is required for a successful import.
Map line fields
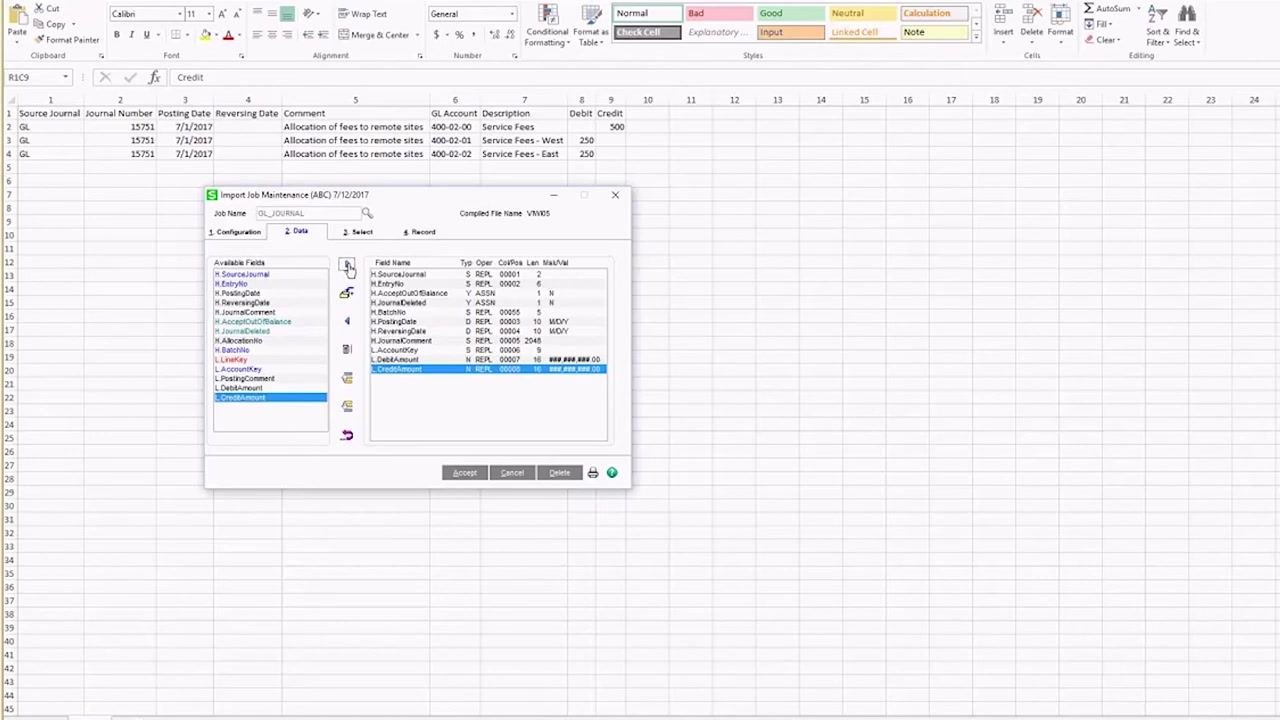
After mapping all header fields, map the line fields (fields starting with "L."). For example:
L.DebitAmount→ Column 8L.CreditAmount→ Column 9
Double-check that all necessary line fields are mapped to the correct columns.
Finalize the import job
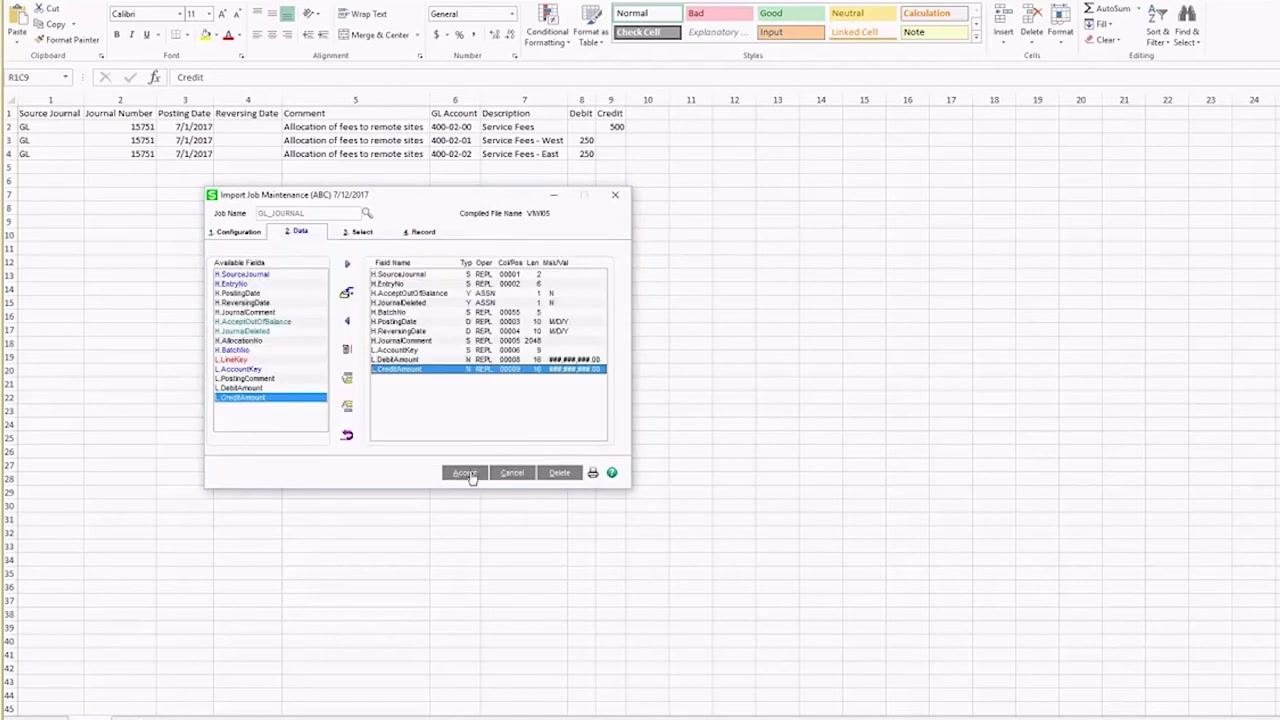
Review all field mappings for accuracy, then click Accept to save and finalize the import job configuration.
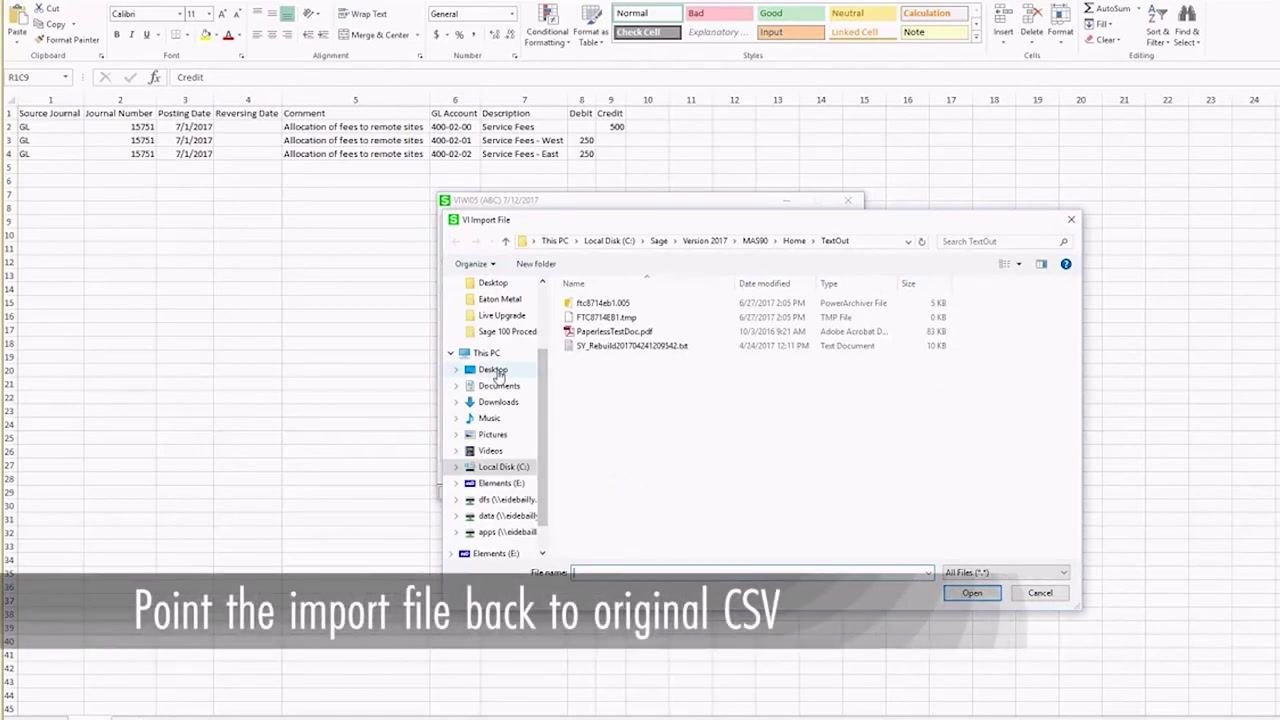
When prompted, browse to the location of your saved CSV file, select the correct file you prepared earlier, and click Open to confirm the selection.
Execute the import job
Test the import job (optional)
If desired, run a test import to verify that all General Ledger accounts exist and that the source journal is ready. Testing helps ensure the import will process without errors.
Execute the import job
When ready, confirm the prompt to execute the import job. The import process begins, using the field mappings and CSV file you specified.
Review the import summary and job log
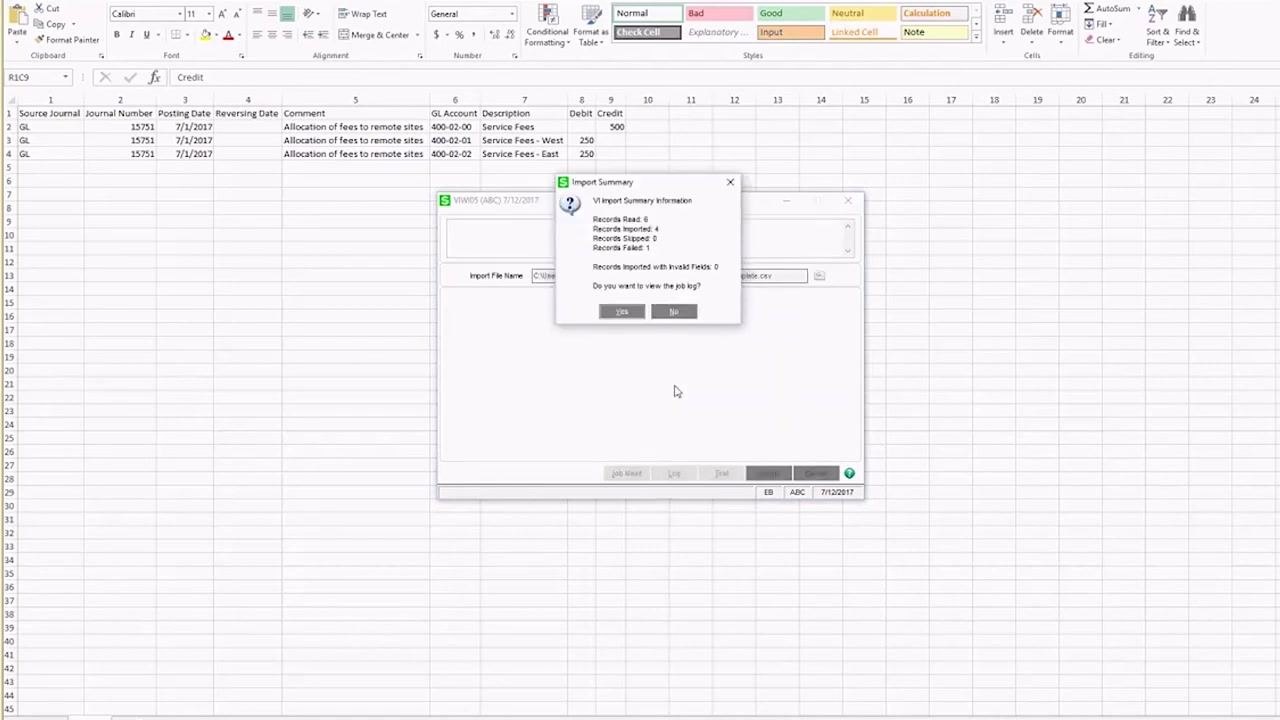
After executing the import job, an Import Summary dialog appears, showing information such as:
- Records Read: 6
- Records Imported: 4
- Records Skipped: 0
- Records Failed: 1
- Records Imported with Invalid Fields: 0
Decide whether to view the job log: click Yes to see detailed information about the import process, including any errors or warnings, or click No to close the summary and finish the import process.
Always check the Import Summary for failed records or issues, and use the job log for troubleshooting when necessary. Examine the Job Log results window for any failed records. For example, the log might show 1 record (Job1.med) Failed. Missing or invalid header. while other records pass, such as HS Record Passed - GL015751 and L Record Passed - GL015751000000001.
Confirm that your headers are present and valid, since missing or invalid headers will cause import failures. If you see a failure, note the specific error message for troubleshooting.
Review the imported general journal entry
Access the General Journal Entry module
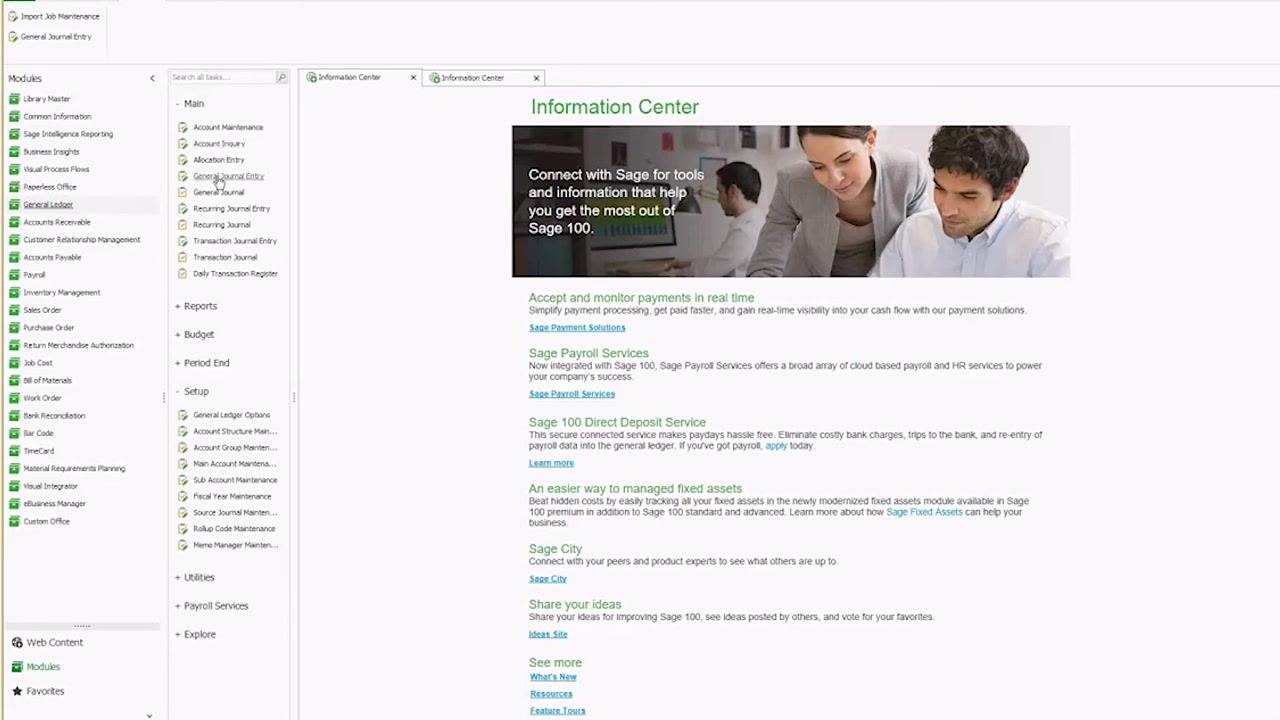
In the Sage 100 main interface, locate the navigation pane on the left. Under the "Modules" section, select General Ledger. In the "Main" section, click General Journal Entry, and use the search or navigation tools as needed to find your journal entry.
Open and review the imported journal entry
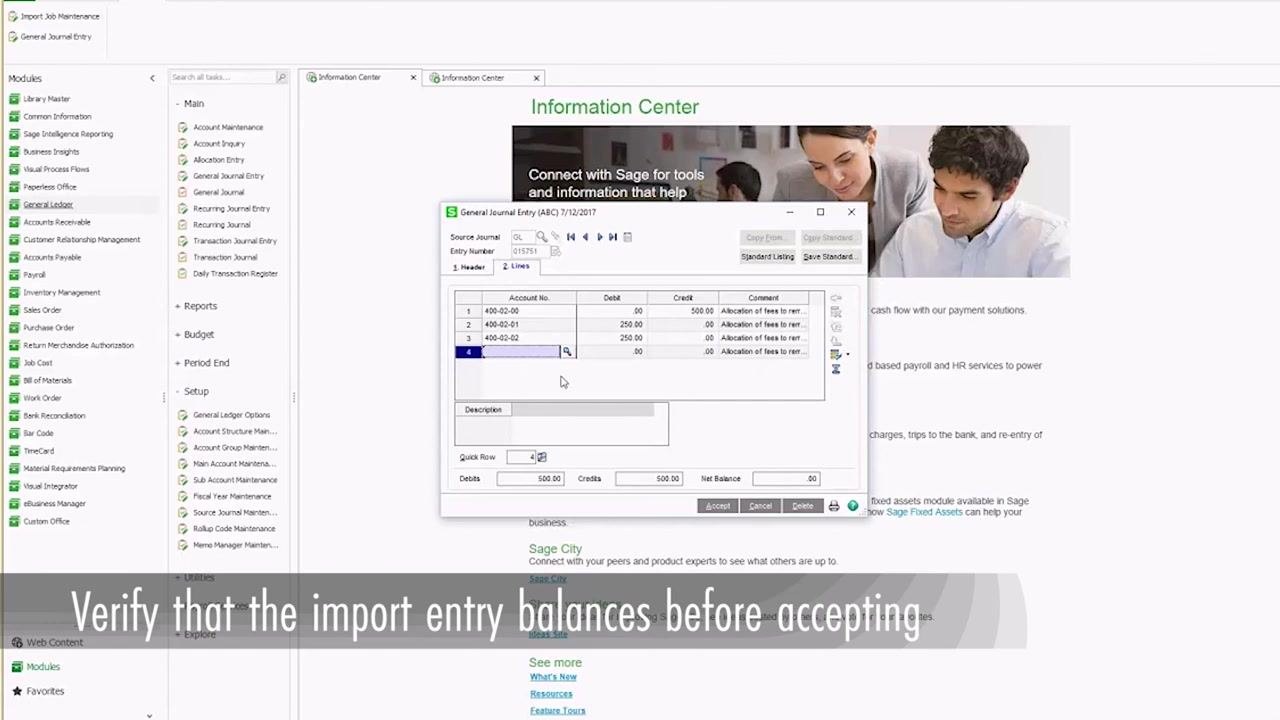
In the General Journal Entry window, locate the entry number that matches your import, for example Entry Number 015751. Review the details of the imported lines, including account numbers such as 400-02-00, 400-02-01, and 400-02-02, with each line showing matching debit and credit amounts (for example, 250.00 in both columns), along with comments such as "Allocation of fees to remote sites."
At the bottom of the window, verify that total debits and credits are equal, for example Debits: 500.00, Credits: 500.00, Net Balance: 0.00. Ensure the entry is balanced before proceeding.
Make corrections if necessary
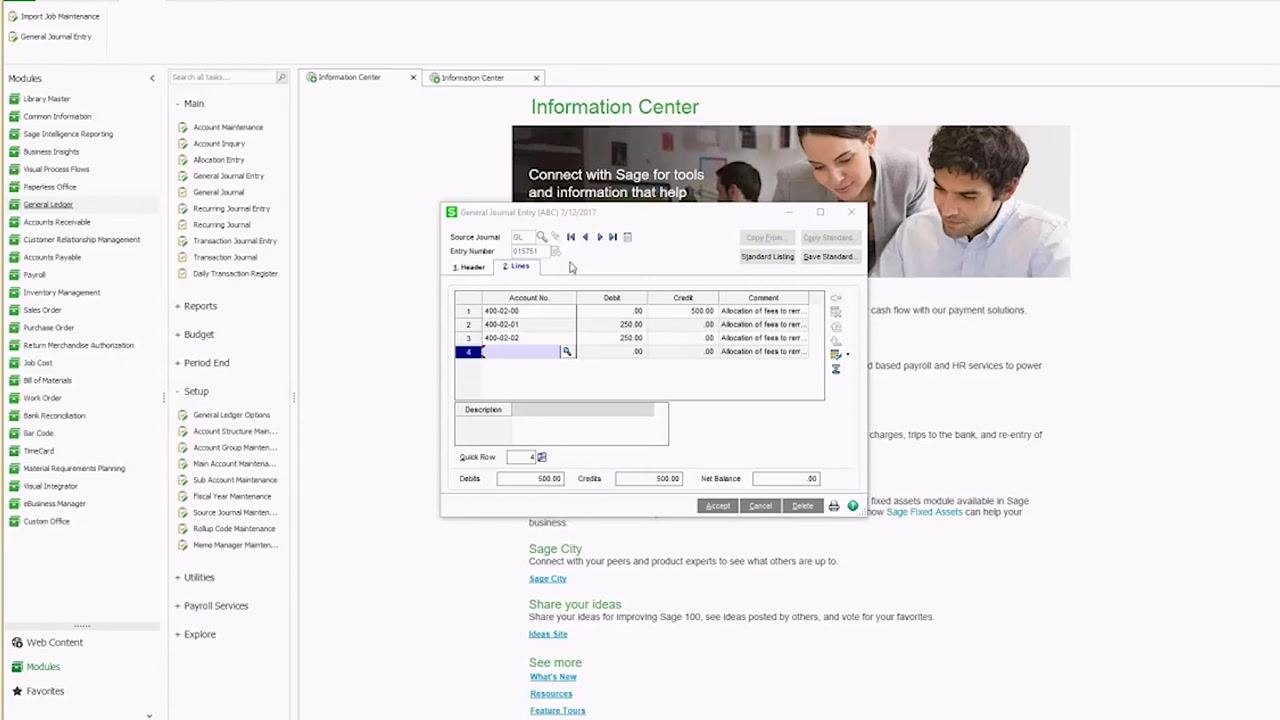
If you notice an incorrect account or value, click directly in the relevant field to make changes. For example, if an account number is incorrect, select the cell and enter the correct account. You can also update comments or amounts as needed before accepting the entry.
Save or accept the journal entry
Once all information is correct and the entry is balanced, click Accept to save the journal entry. If you need to cancel or delete the entry instead, use the respective buttons at the bottom of the window.
What's next
With your import job configured, you can reuse the same template and job mappings for future general journal imports. Always verify that your source file balances and that header fields remain grouped ahead of line fields before running future import jobs in Sage 100 Visual Integrator.
Generation details: cost, quality tiers
Docsie billed 3,500 credits ($2.45) to analyze this 7-minute video at standard quality. The rewrite, template fill and Word/PDF exports were included. The same video at each quality tier:
| Quality | Frames sampled | Credits | Approx. cost |
|---|---|---|---|
| Draft | every 16-30 s | 1,750 | $1.22 |
| Standard (this guide) | every 8-15 s | 3,500 | $2.45 |
| Detailed | every 4-7 s | 7,000 | $4.90 |
| Ultra | every 1-3 s | 14,000 | $9.80 |
Credits priced at $0.70 per 1,000; plans include a monthly allowance. Enterprise customers on on-premise or bring-your-own-model deployments run this on their own inference and pay no per-video credits.
Generated by Docsie Video-to-Docs on 2026-10-12 from a 6-minute video. Screenshots are frames from the source video and belong to their creator, Eide Bailly Technology, whose original is embedded above. If you own this video and want the guide removed or credited differently, contact us and we will act within one business day.