
How to Create a Data Model in Oracle Fusion
This guide walks you through how to create a data model in Oracle Fusion using Reports and Analytics. You will learn how to build a new data set with an SQL query, review and customize the resulting columns, assign column aliases, and save your finished data model to a shared folder for later use.
Video: How to create a DataModel in Oracle Fusion by The SCM Fusion Guy (2024). All credit for the demonstration goes to the creator; watch the original on YouTube. The written guide below was generated from this video by Docsie. Creator? Request a change or removal.
This guide walks you through how to create a data model in Oracle Fusion using Reports and Analytics. You will learn how to build a new data set with an SQL query, review and customize the resulting columns, assign column aliases, and save your finished data model to a shared folder for later use.
Prerequisites
- Access to an Oracle Fusion instance with permissions to use Reports and Analytics.
- Knowledge of the data source and table you want to query (this guide uses
ApplicationDB_FSCMand thepoz_supplierstable as an example). - Basic familiarity with writing SQL queries.
Log in to your Oracle Fusion instance
Sign in to Oracle Fusion using your credentials to reach the main dashboard.
Navigate to the Tools section
On the main dashboard, locate the top navigation bar and click the Tools tab. This opens a set of app tiles, including Set Preferences, Announcements, Alerts Composer, Deep Links, Developer Connect, Approvals, Contact Search, and Scheduled Processes.
Access Reports and Analytics
Scroll down within the Tools section and click the Reports and Analytics tile under the Management section. This opens the Reports and Analytics window.
Open the Catalog and start creating a new data model
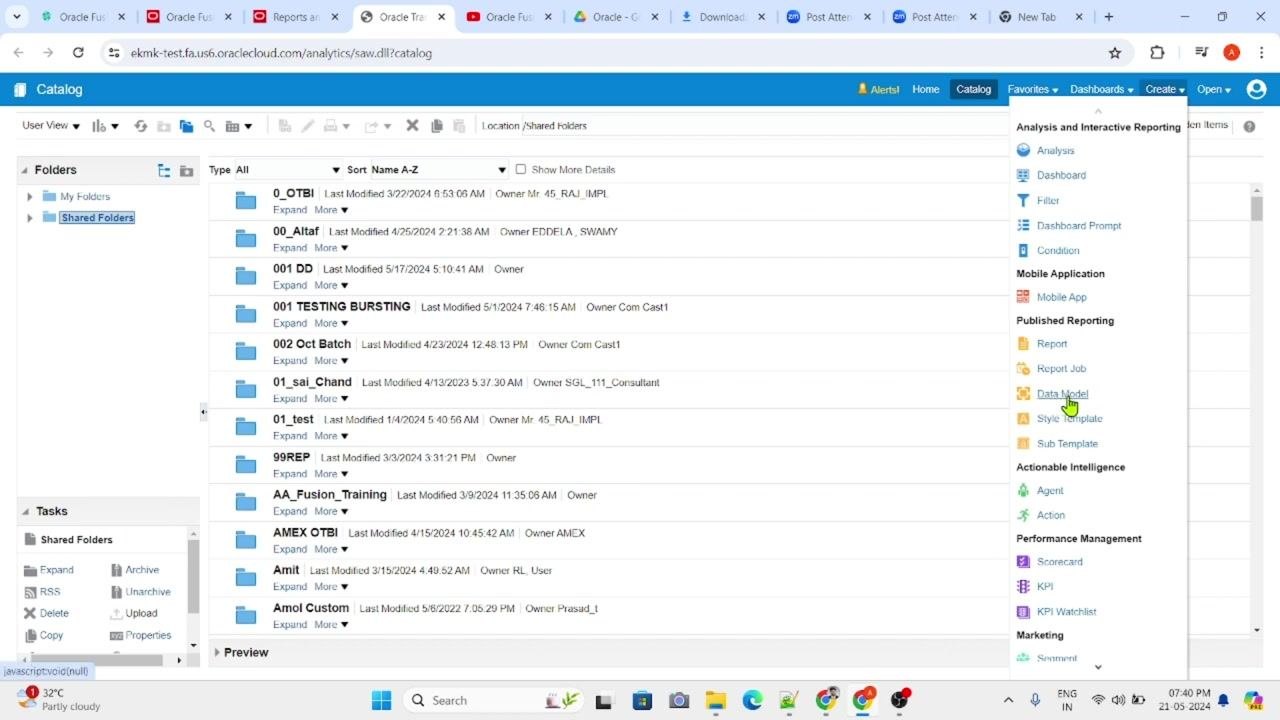
In the Reports and Analytics window, click the Catalog tab if it is not already selected. Then click the Create dropdown in the top menu and select Data Model from the Published Reporting section.
Create a new data set
In the Data Model editor, under the Diagram tab, click the + button to add a new data set. From the list of data set types, select SQL Query.
Configure the SQL Query data set
In the New Data Set - SQL Query dialog, enter the following details:
- Name:
XX_Test - Data Source:
ApplicationDB_FSCM - Type of SQL:
Standard SQL - SQL Query:
select * from poz_suppliers
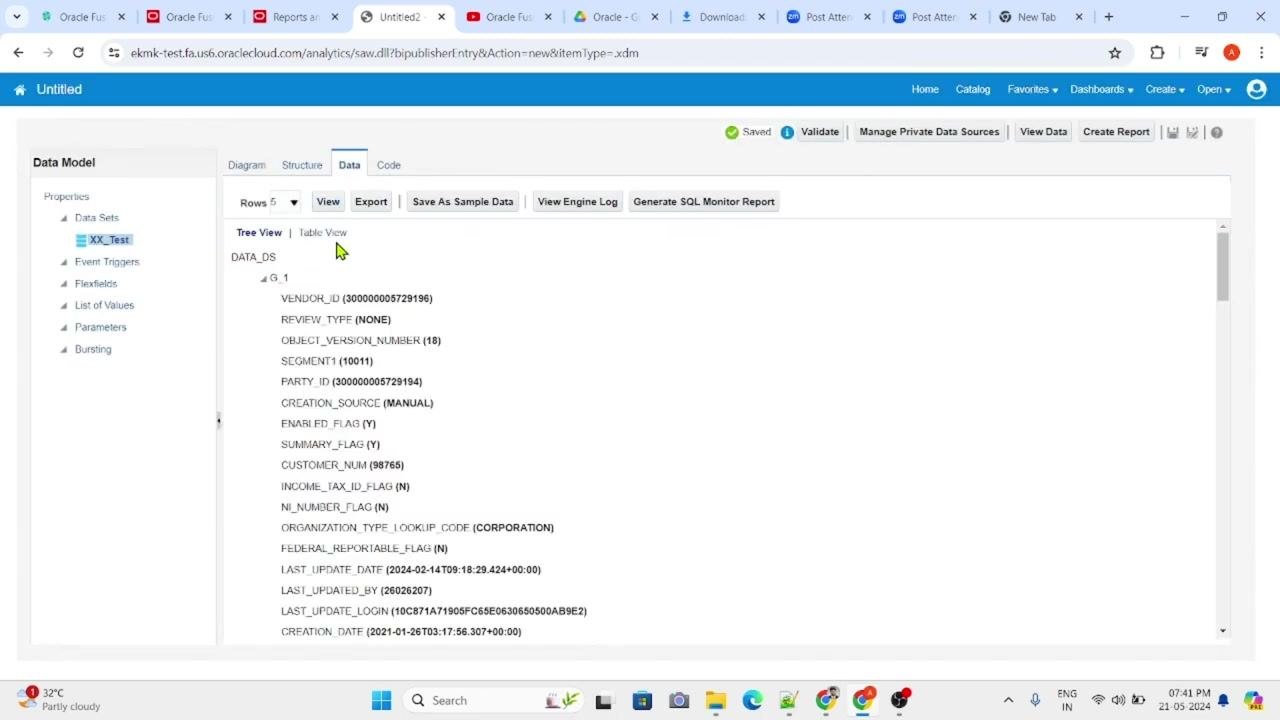
Click OK to proceed. The query executes and the data model displays the columns retrieved, including VENDOR_ID, REVIEW_TYPE, OBJECT_VERSION_NUMBER, SEGMENT1, PARTY_ID, CREATION_SOURCE, ENABLED_FLAG, SUMMARY_FLAG, VENDOR_TYPE_LOOKUP_CODE, CUSTOMER_NUM, ONE_TIME_FLAG, EMPLOYEE_ID, PARENT_PARTY_ID, PARENT_VENDOR_ID, and MIN_ORDER_AMOUNT. These columns are listed under the data set node (for example, G_1) in the diagram.
View and validate the data
Click the Data tab and select Table View to see the data output. By default, the row limit is set to 5, but you can change this value as needed. Review the sample data for each column, such as VENDOR_ID (e.g., 300000005729196), REVIEW_TYPE (e.g., NONE), OBJECT_VERSION_NUMBER (e.g., 18), SEGMENT1 (e.g., 10011), PARTY_ID (e.g., 300000005729194), CREATION_SOURCE (e.g., MANUAL), ENABLED_FLAG (e.g., Y), and CUSTOMER_NUM (e.g., 98765), among others.
At this point, you have successfully created a new data model and data set using an SQL query in Oracle Fusion Reports and Analytics.
Increase the row limit to view more data
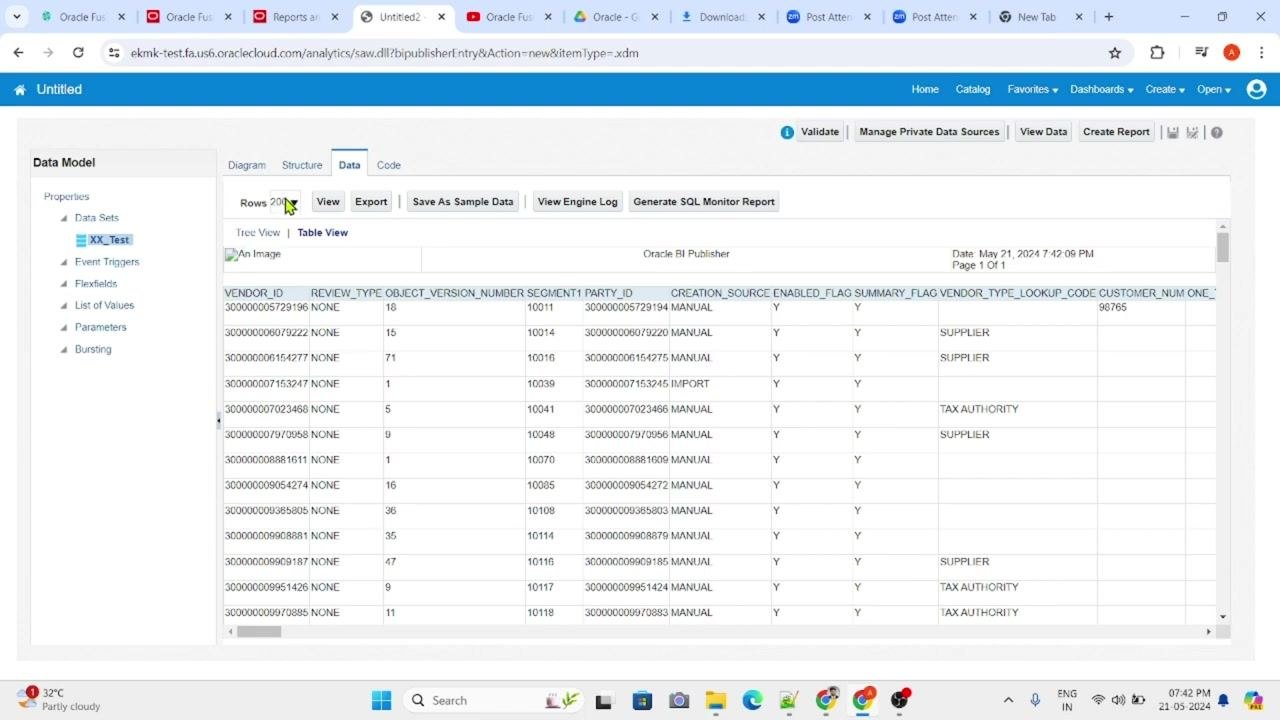
In the Data tab, locate the Rows dropdown above the data table. Click the dropdown and select a higher value, such as 10, 50, 100, or 200, to increase the number of rows displayed. Click the View button to refresh the data display with the new row limit.
After increasing the row limit, review the additional rows now visible in the table and confirm that all columns from the poz_suppliers table display, including VENDOR_ID, REVIEW_TYPE, OBJECT_VERSION_NUMBER, SEGMENT1, PARTY_ID, CREATION_SOURCE, ENABLED_FLAG, SUMMARY_FLAG, VENDOR_TYPE_LOOKUP_CODE, and CUSTOMER_NUM.
Copy specific column names for custom queries
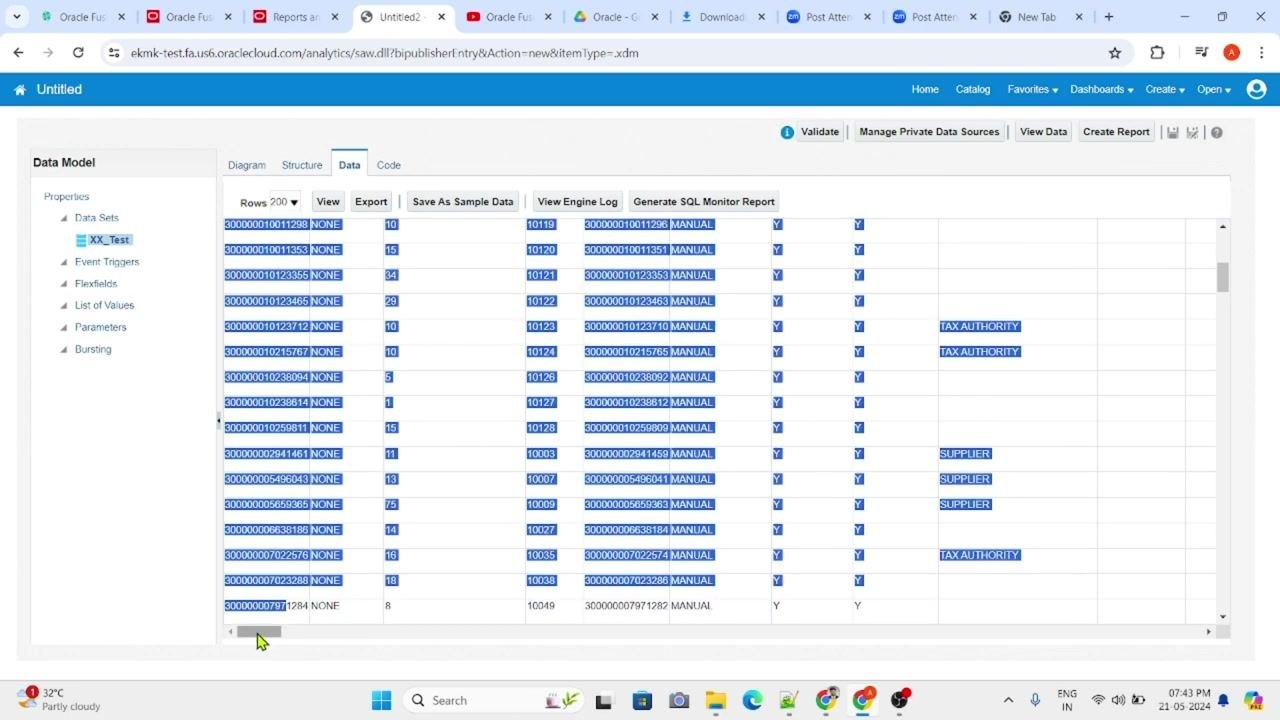
If you want to use only particular columns in your SQL query, identify and select the desired column names from the table header (for example, VENDOR_ID or PARTY_ID). Right-click and copy the column name you wish to use.
Select and copy multiple column names (optional)
To copy several column names at once, hold the mouse and drag across the desired headers, or use keyboard shortcuts to select multiple columns. Right-click and select Copy to copy the selected column names.
Switch to the Structure tab to view or edit column mappings
Click the Structure tab at the top of the Data Model editor to review the list of available columns and their mappings. You can see columns such as ENABLED_FLAG, SUMMARY_FLAG, VENDOR_TYPE_LOOKUP_CODE, CUSTOMER_NUM, ONE_TIME_FLAG, EMPLOYEE_ID, PARENT_PARTY_ID, PARENT_VENDOR_ID, MIN_ORDER_AMOUNT, SET_OF_BOOKS_ID, TYPE_1099, WITHHOLDING_STATUS_LOOKUP_CODE, WITHHOLDING_START_DATE, and INCOME_TAX_ID_FLAG.
Edit your SQL query to use specific columns
Return to the SQL Query editor by clicking the appropriate option, such as the Diagram or Code tab, or Edit Data Set. Paste the copied column names into your SQL query to retrieve only the desired columns. For example:
SELECT VENDOR_ID, PARTY_ID FROM poz_suppliers
Click OK or Apply to save your changes.
At this point, you have learned how to increase the row limit, review and copy specific column names, and edit your SQL query to customize the data set in Oracle Fusion Reports and Analytics.
Assign an alias to a column in your SQL query
In the Edit Data Set - XX_Test dialog, update your SQL query to assign an alias to the SEGMENT1 column. For example:
SELECT VENDOR_ID, SEGMENT1 supplier_num, PARTY_ID, VENDOR_TYPE_LOOKUP_CODE FROM poz_suppliers
This displays the SEGMENT1 column as supplier_num in your results. Click OK at the bottom of the Edit Data Set dialog to save your SQL query changes.
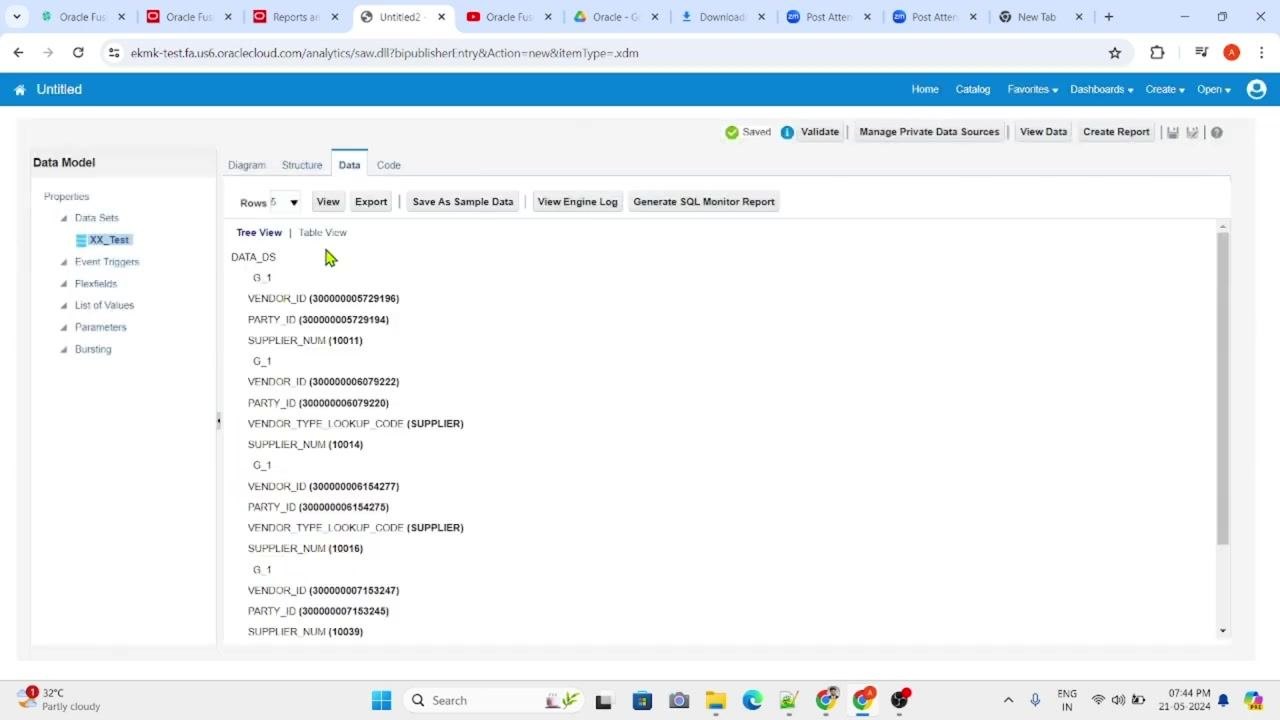
Preview the data with the updated columns
Click the Data tab to return to the data preview, then click View to refresh the display. Click Table View to see the data in tabular format and confirm that the columns now reflect your SQL query, including the new alias supplier_num.
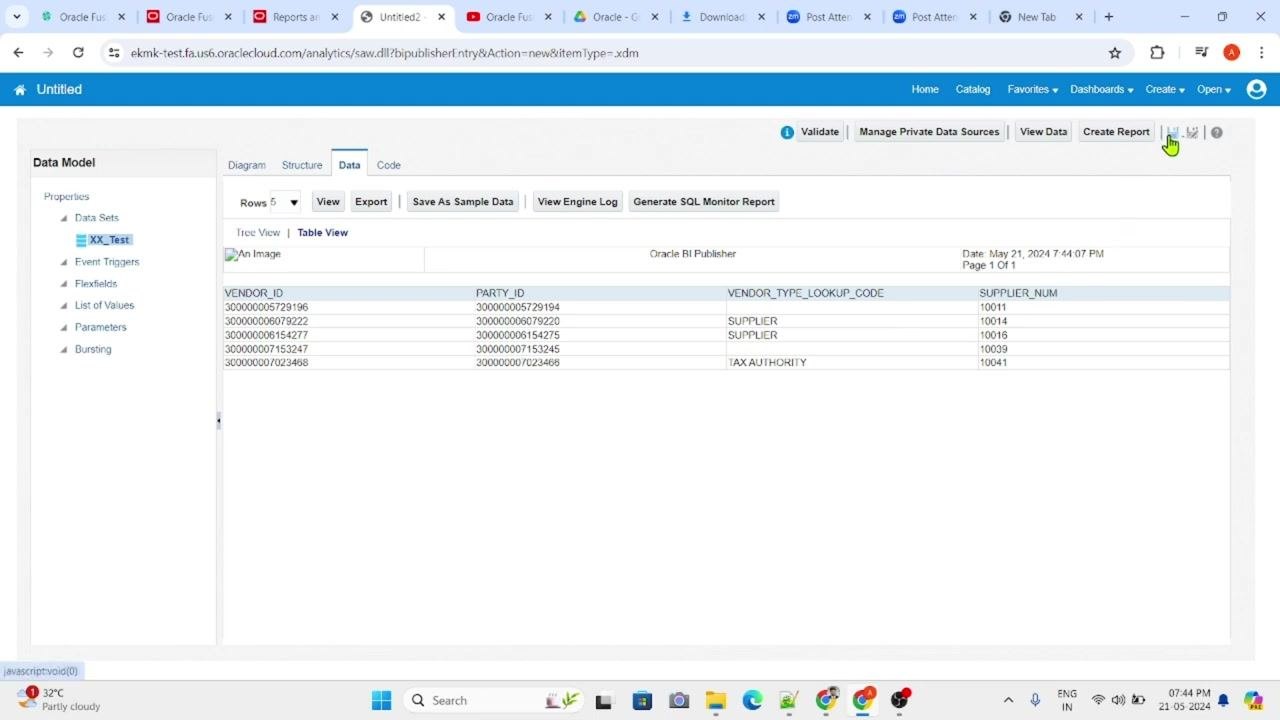
Save the data model
Locate and click the Save icon (floppy disk) in the top right of the Data Model editor.
In the Save As dialog, select the folder where you want to save your data model. You can choose between My Folders or Shared Folders for broader access.
If needed, expand the folder tree and select a specific subfolder, such as /Shared Folders/Custom.
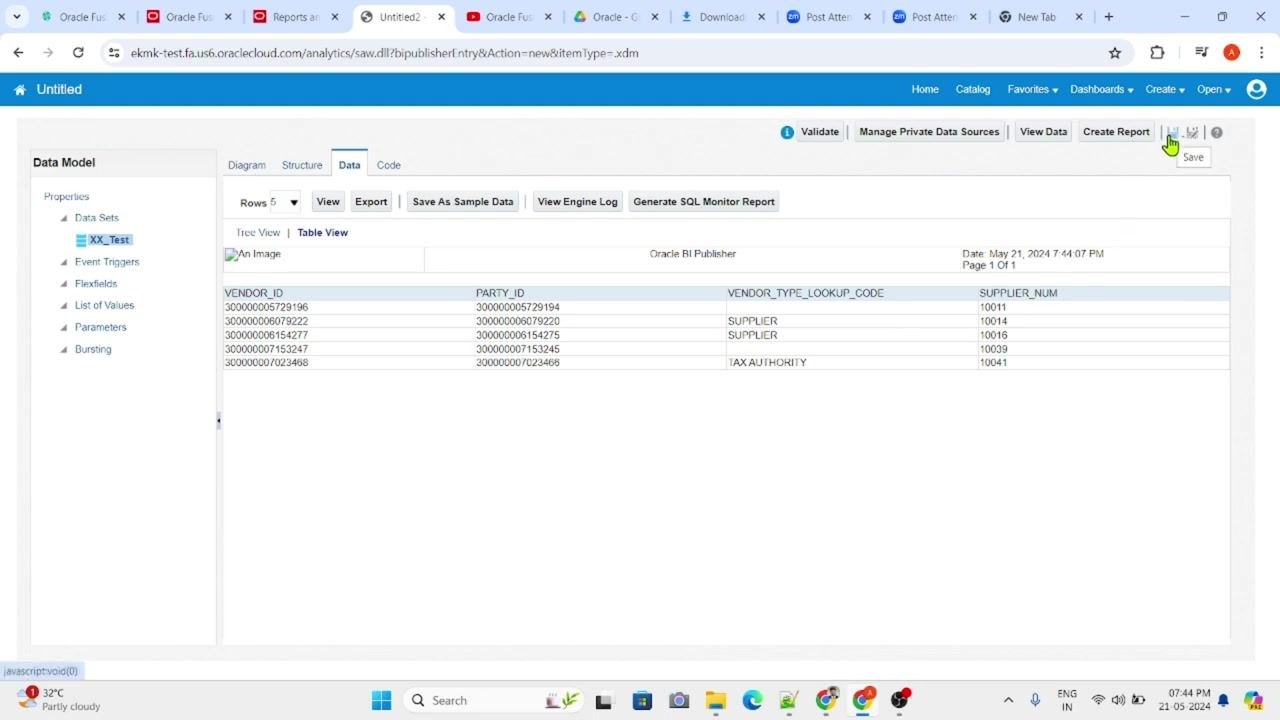
Name and describe your data model
Enter a name for your data model in the Name field (for example, XX_Supplier_DM). Optionally, add a description in the Description field (for example, xx_test). Click OK to save.
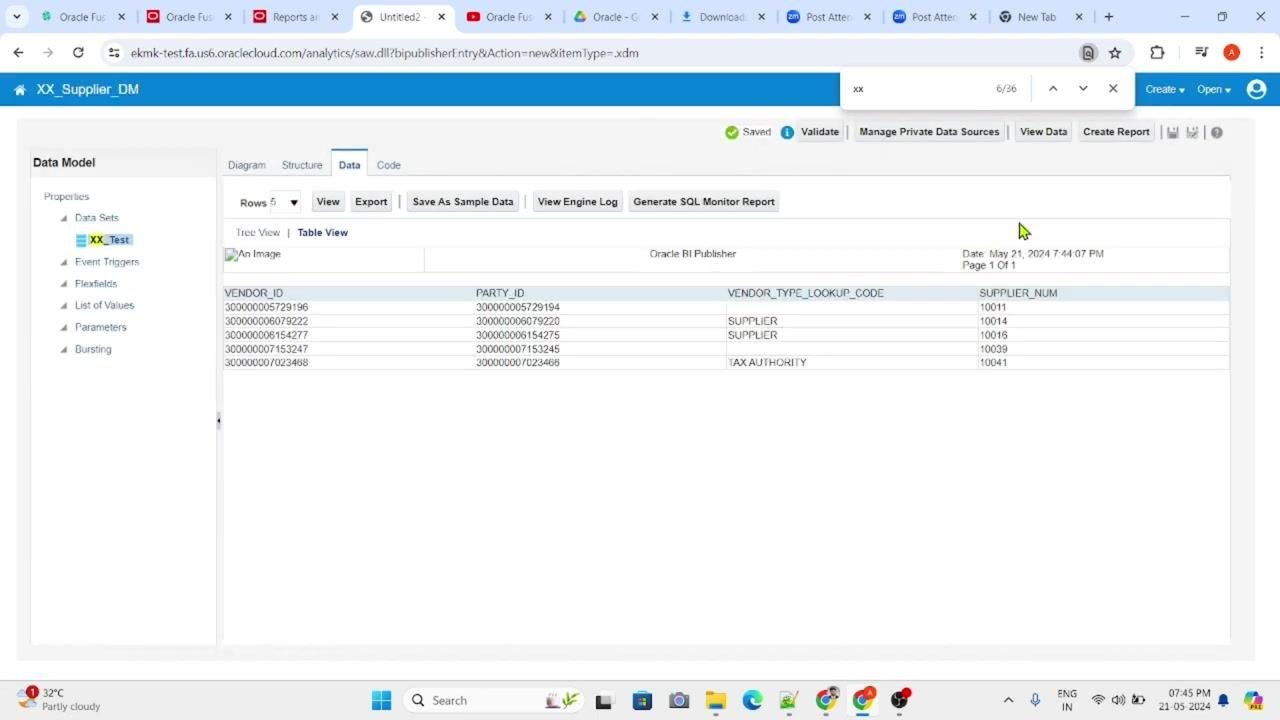
Verify the data model is saved
Confirm that the data model name appears at the top of the Data Model editor (for example, XX_Supplier_DM), and ensure the data preview still displays the correct columns and data.
At this point, you have learned how to assign column aliases in your SQL query for clearer reporting, preview and verify the updated data set, and save your Oracle Fusion data model to a specific location with a custom name and description.
Locate and verify the saved data model
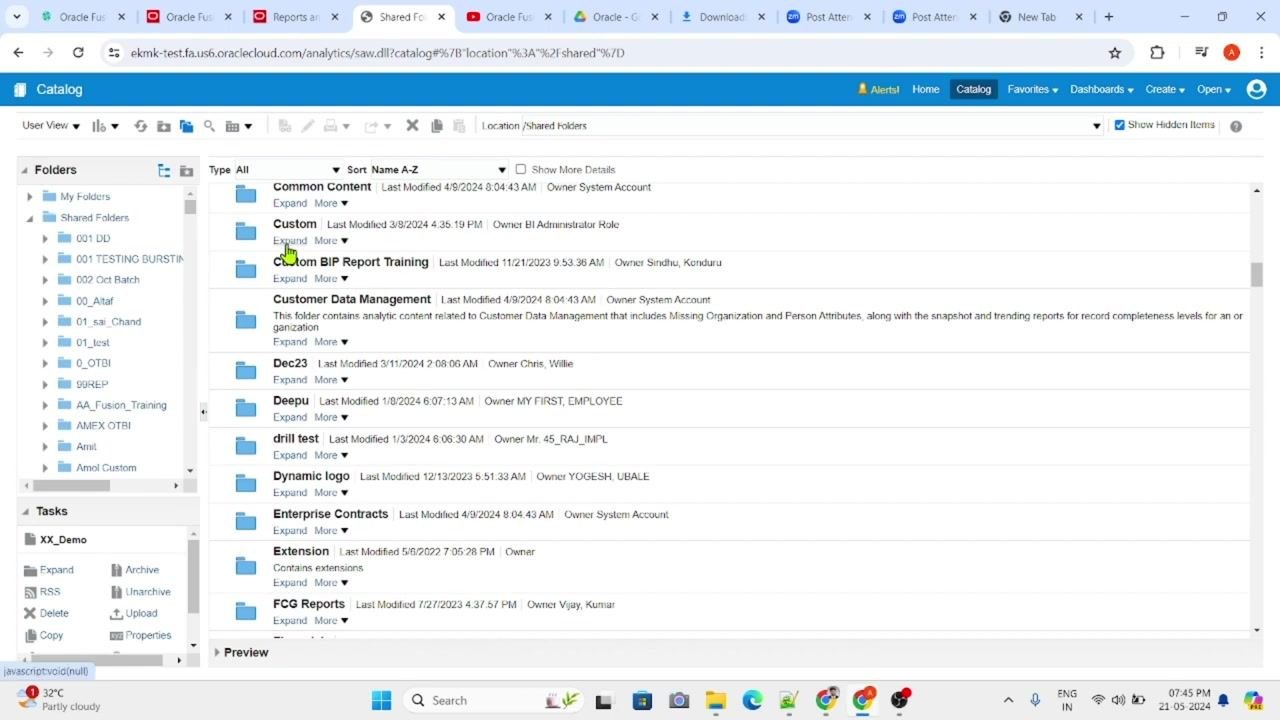
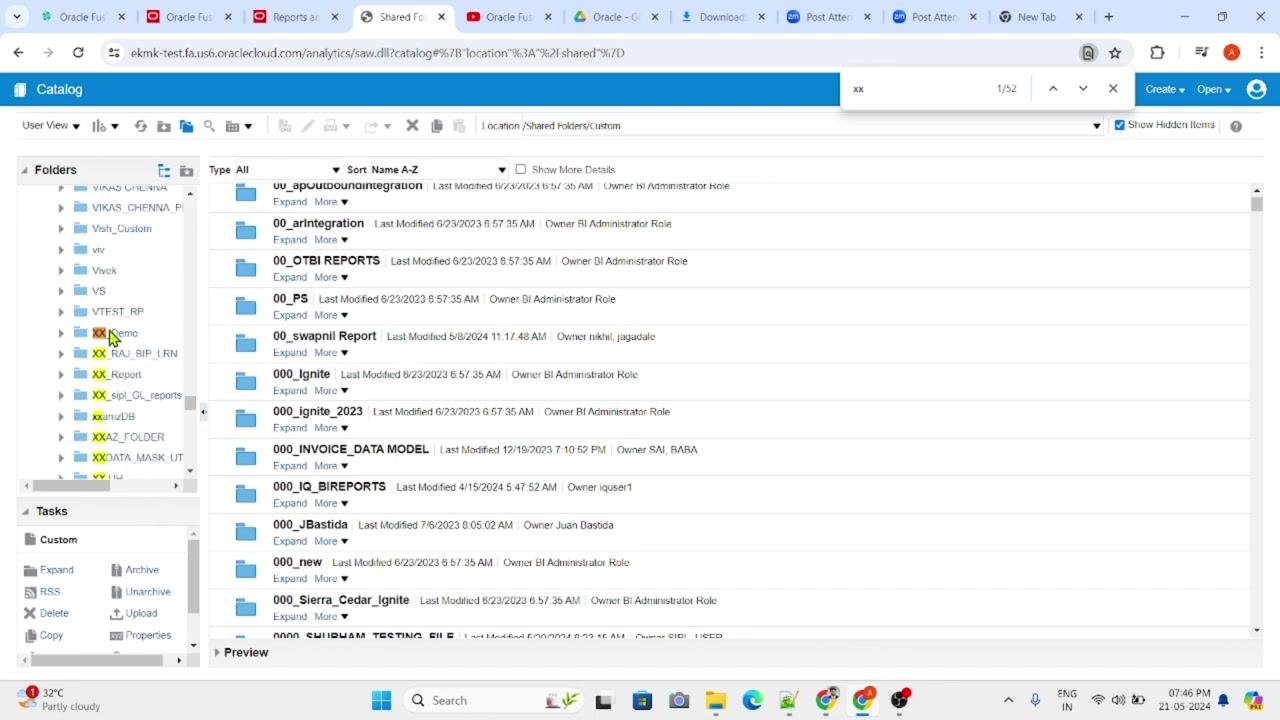
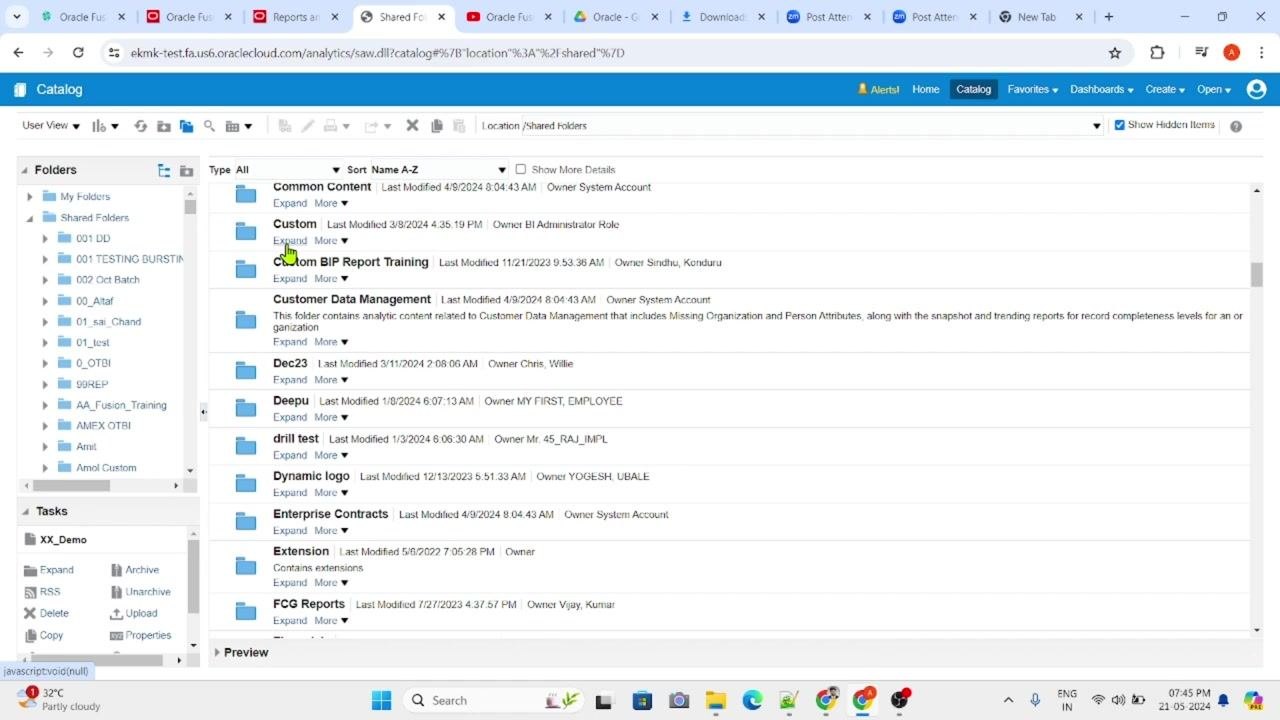
Click the Catalog option in the Oracle BI Publisher interface to open the catalog view. In the left navigation pane, click Shared Folders to expand its contents, then find and click the Custom folder, which is where the data model was saved. Expand the folder tree further if needed to reveal subfolders.
Within the Custom folder, locate and click the XX_Demo subfolder, the specific location where the data model was saved.
In the XX_Demo folder, look for the data model named XX_Supplier_DM. Confirm that it appears in the list, showing its name, last modified date, and owner. Optionally, click Edit to open or modify the data model if needed.
What's next
By completing these steps, you have successfully learned how to create a data model in Oracle Fusion, including how to:
- Access the Catalog and Reports and Analytics, and create a new data model with an SQL query data set.
- Review, customize, and alias columns in your SQL query.
- Save your data model to a shared folder with a custom name and description.
- Locate and verify your saved data model in the Oracle Fusion BI Publisher catalog.
With your data model saved, you can use it as the basis for building reports in Oracle Fusion.
Generation details: cost, quality tiers
Docsie billed 3,000 credits ($2.10) to analyze this 6-minute video at standard quality. The rewrite, template fill and Word/PDF exports were included. The same video at each quality tier:
| Quality | Frames sampled | Credits | Approx. cost |
|---|---|---|---|
| Draft | every 16-30 s | 1,500 | $1.05 |
| Standard (this guide) | every 8-15 s | 3,000 | $2.10 |
| Detailed | every 4-7 s | 6,000 | $4.20 |
| Ultra | every 1-3 s | 12,000 | $8.40 |
Credits priced at $0.70 per 1,000; plans include a monthly allowance. Enterprise customers on on-premise or bring-your-own-model deployments run this on their own inference and pay no per-video credits.
Generated by Docsie Video-to-Docs on 2026-10-14 from a 5-minute video. Screenshots are frames from the source video and belong to their creator, The SCM Fusion Guy, whose original is embedded above. If you own this video and want the guide removed or credited differently, contact us and we will act within one business day.