
How to Enable Form Personalization in Oracle EBS
Form Personalization is a powerful customization feature in Oracle E-Business Suite that lets you modify form behavior without custom code. By default, the Personalize option is hidden from the Help menu, so before you can use it, you must enable a few system profile options. This guide walks you through how to enable form personalization in Oracle EBS, from verifying its initial unavailability to configuring the required profile options and confirming the feature is active.
Video: 2. How to Enable Form Personalization (R12) - Oracle ERP Apps Guide by Oracle ERP Apps Guide. All credit for the demonstration goes to the creator; watch the original on YouTube. The written guide below was generated from this video by Docsie. Creator? Request a change or removal.
Form Personalization is a powerful customization feature in Oracle E-Business Suite that lets you modify form behavior without custom code. By default, the Personalize option is hidden from the Help menu, so before you can use it, you must enable a few system profile options. This guide walks you through how to enable form personalization in Oracle EBS, from verifying its initial unavailability to configuring the required profile options and confirming the feature is active.
Prerequisites
- Access to Oracle Applications with a valid user login.
- Access to the System Administrator responsibility to update profile options.
- Permission to modify system profile values at both the User and Site levels.
Open the Oracle Applications Navigator
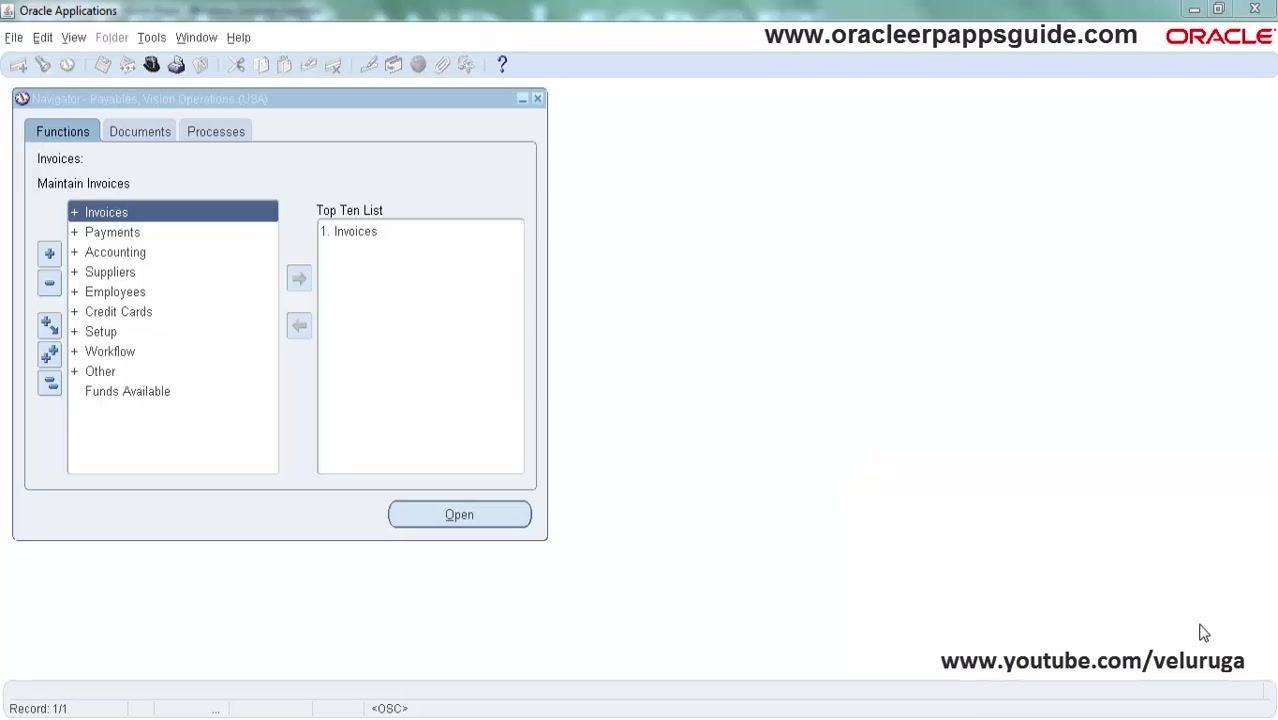
Launch Oracle Applications and log in with your credentials. The main navigator window appears, displaying available functions such as Invoices, Payments, Accounting, Suppliers, Employees, Credit Cards, Setup, Workflow, Other, and Funds Available.
Navigate to the Invoices screen
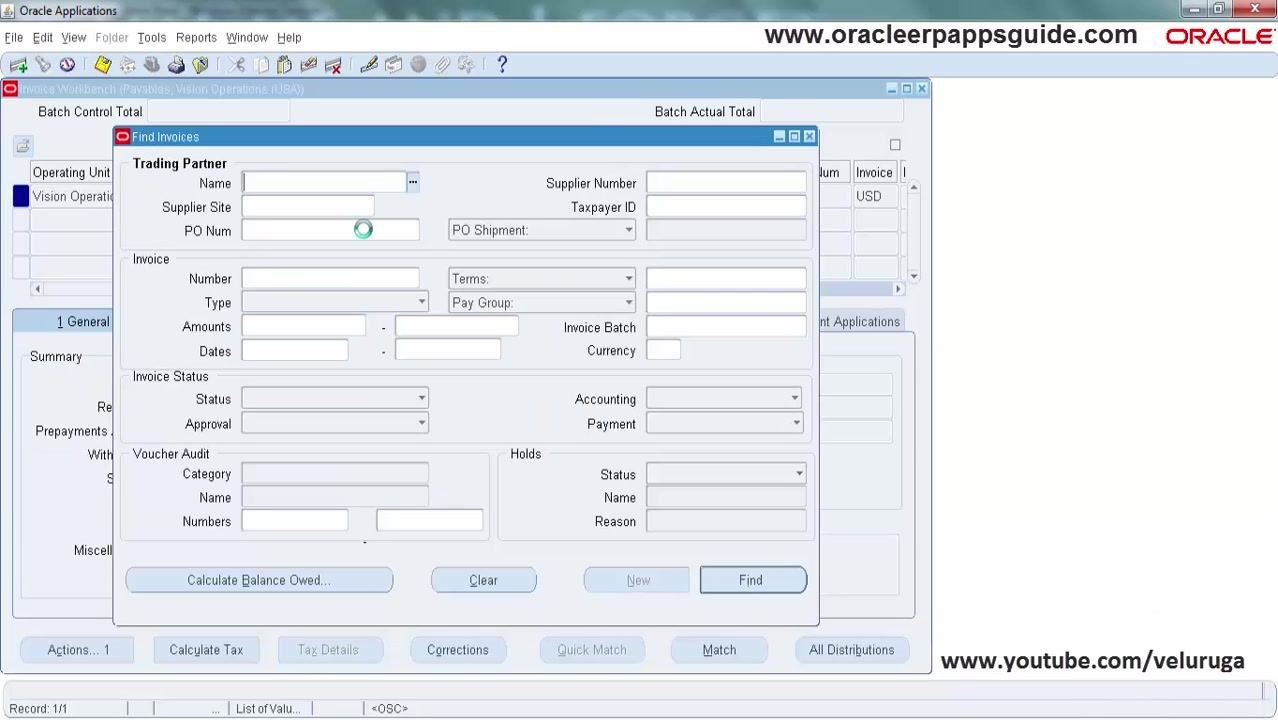
In the navigator, select Invoices under the Maintain Invoices section. Click the Open button to launch the Invoices Workbench.
Verify that Form Personalization is not yet available
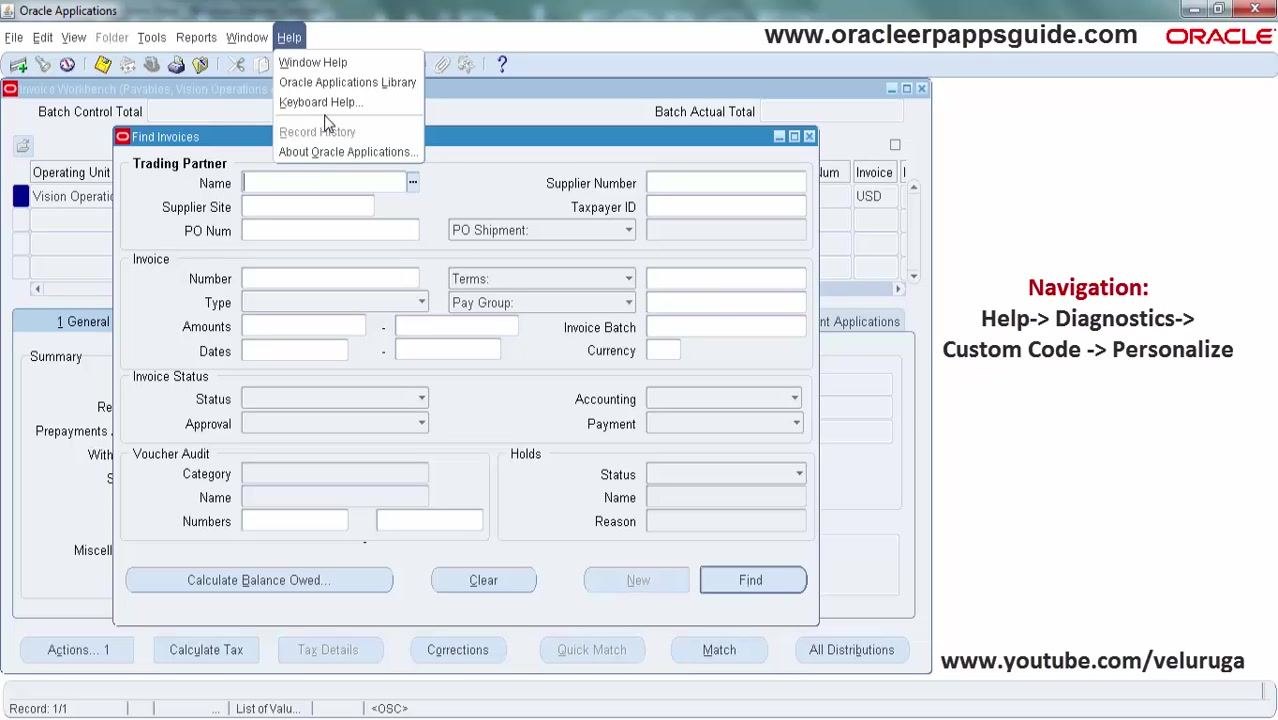
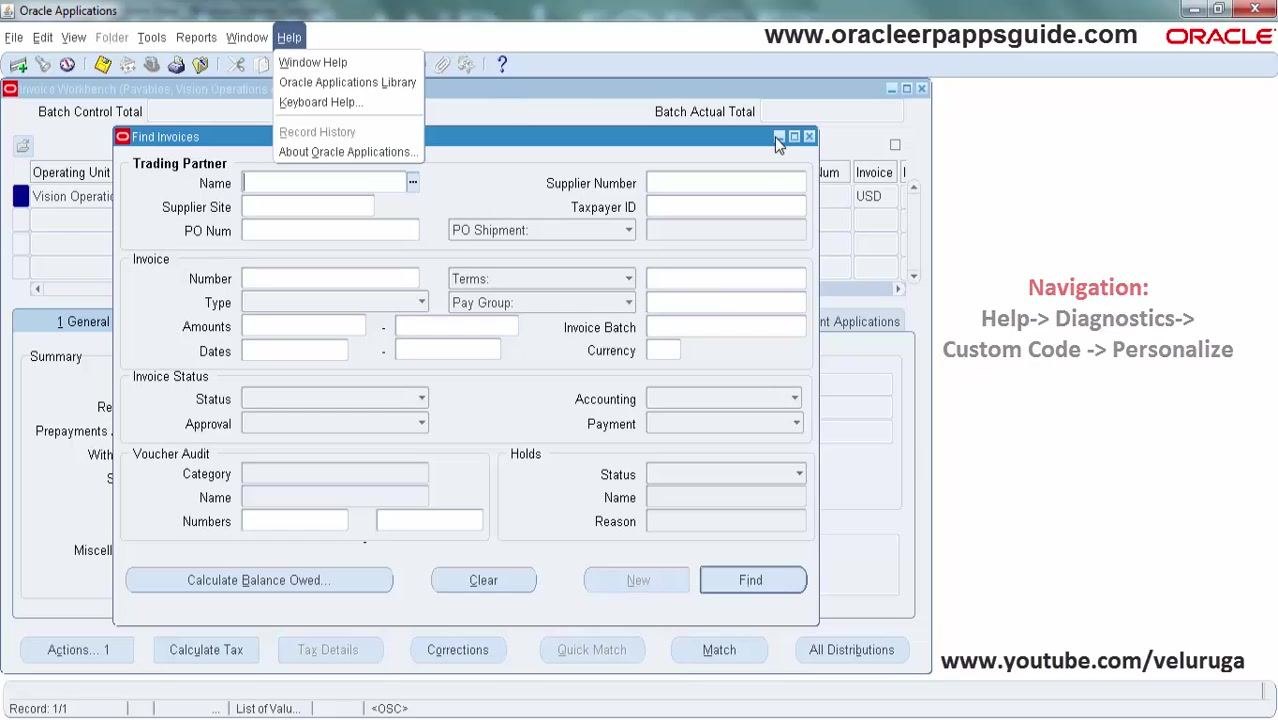
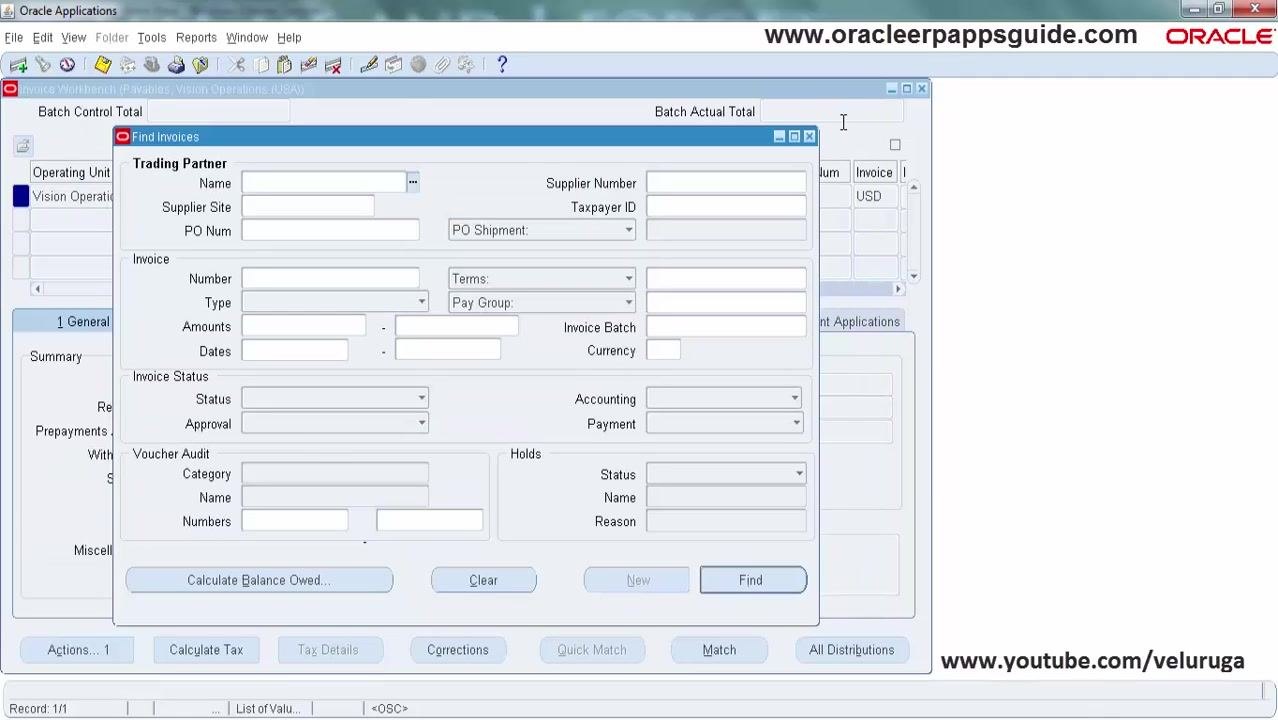
In the Invoices Workbench, select Help from the menu bar, then look for the Diagnostics option. At this stage, the Personalize option does not appear under Diagnostics, confirming that form personalization has not yet been enabled.
Switch to the System Administrator responsibility
Close the Invoices Workbench and return to the main navigator. Select the System Administrator responsibility to access system-level configuration options.
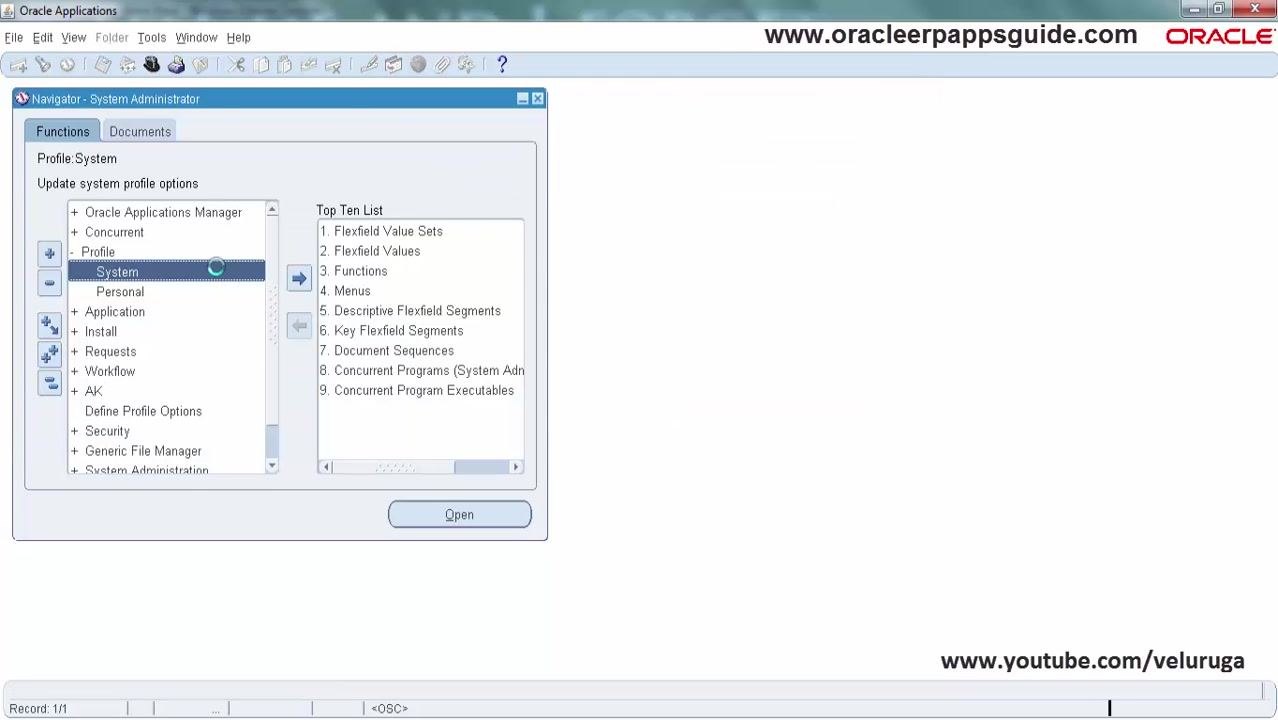
Navigate to the Profile options
In the System Administrator navigator, expand the Profile section and select System to open the profile options window.
Search for the 'Hide Diagnostics menu entry' profile option
In the Find System Profile Values window, configure the search as follows:
- Under Display, check the User box and enter your username (for example, VELURUGA).
- In the Profile field, enter Hide Diagnostics menu entry.
Click Find to run the search.
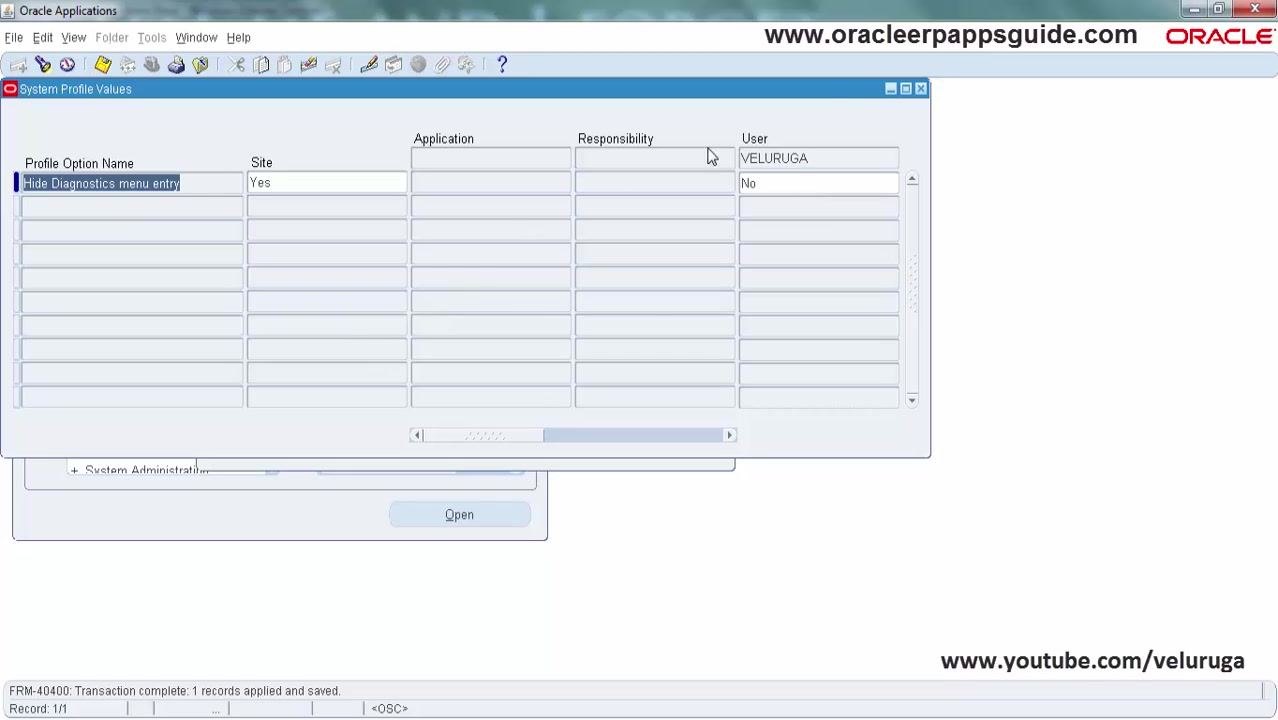
Update the 'Hide Diagnostics menu entry' value
In the search results, locate the Hide Diagnostics menu entry profile option. The Site column value is set to Yes, which hides the Diagnostics menu. For your User (for example, VELURUGA), set the value to No so the Diagnostics menu becomes visible for your user, then save your changes.
Search for the 'Utilities: Diagnostics' profile option
In the Find System Profile Values window, configure the search as follows:
- Under Display, check the User box and enter your username (for example, VELURUGA).
- In the Profile field, enter Utilities: Diagnostics.
Click Find to run the search.
Update the 'Utilities: Diagnostics' value
In the search results, locate the Utilities: Diagnostics profile option. The Site column value is set to No. For your User (for example, VELURUGA), set the value to Yes to enable diagnostics for your user, then save your changes.
Close the Profile Options form
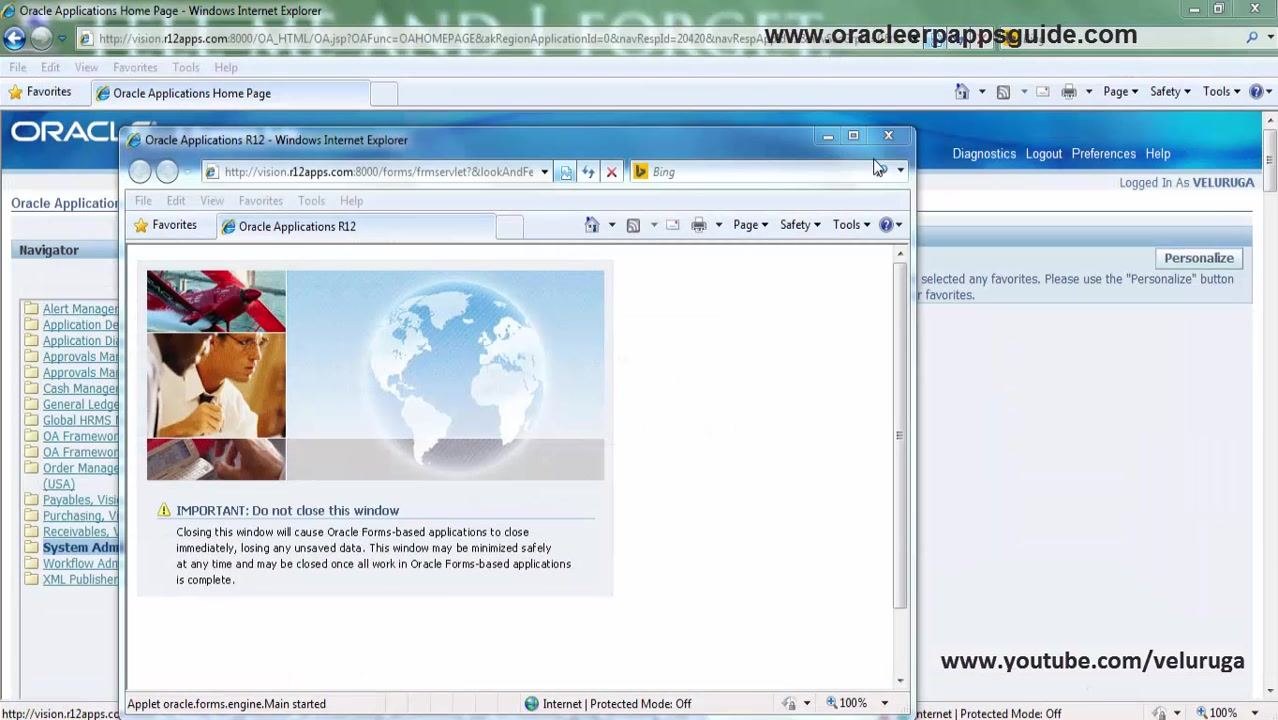
After saving, close the System Profile Values window. You can exit the application or switch responsibilities to see the changes take effect.
Reopen the Oracle Applications Home Page
Open the Oracle Applications Home Page in your browser and log in as your user (for example, VELURUGA). Make sure you are in the correct responsibility to access the Invoices form.
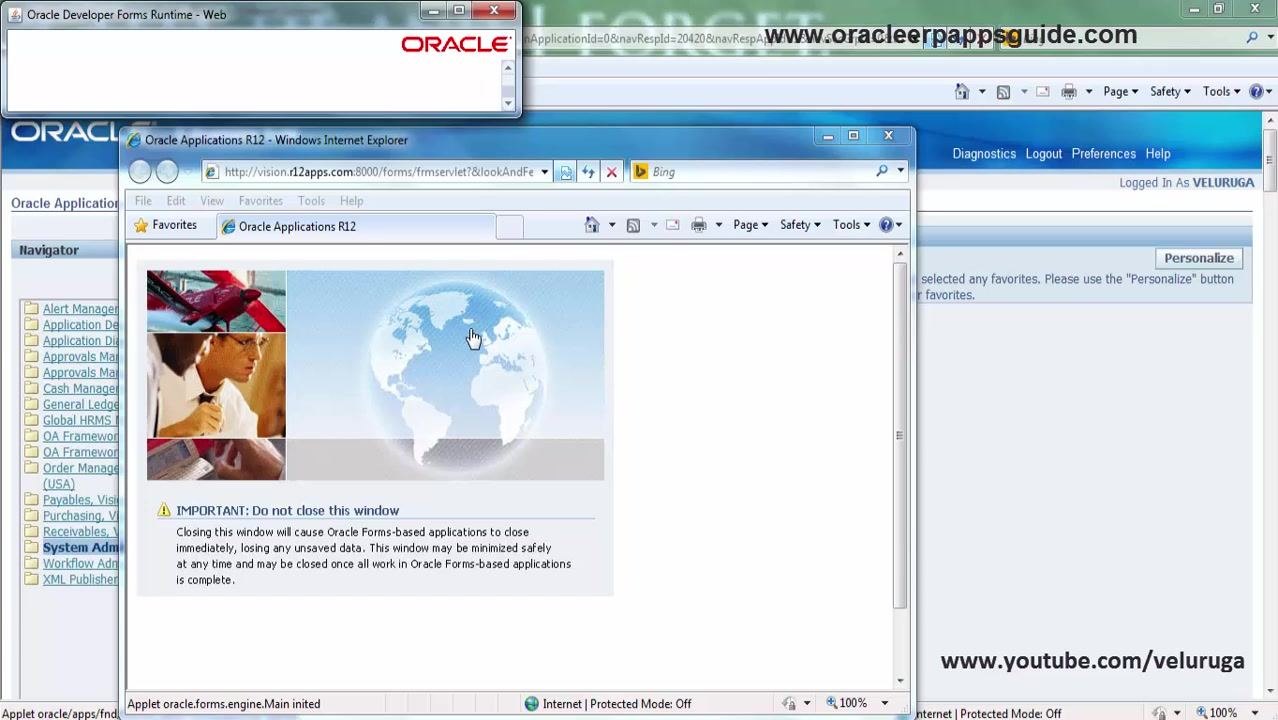
Reopen the Invoices form
From the navigator, open the Invoices form again to verify the changes, and wait for the Oracle Developer Forms Runtime to load.
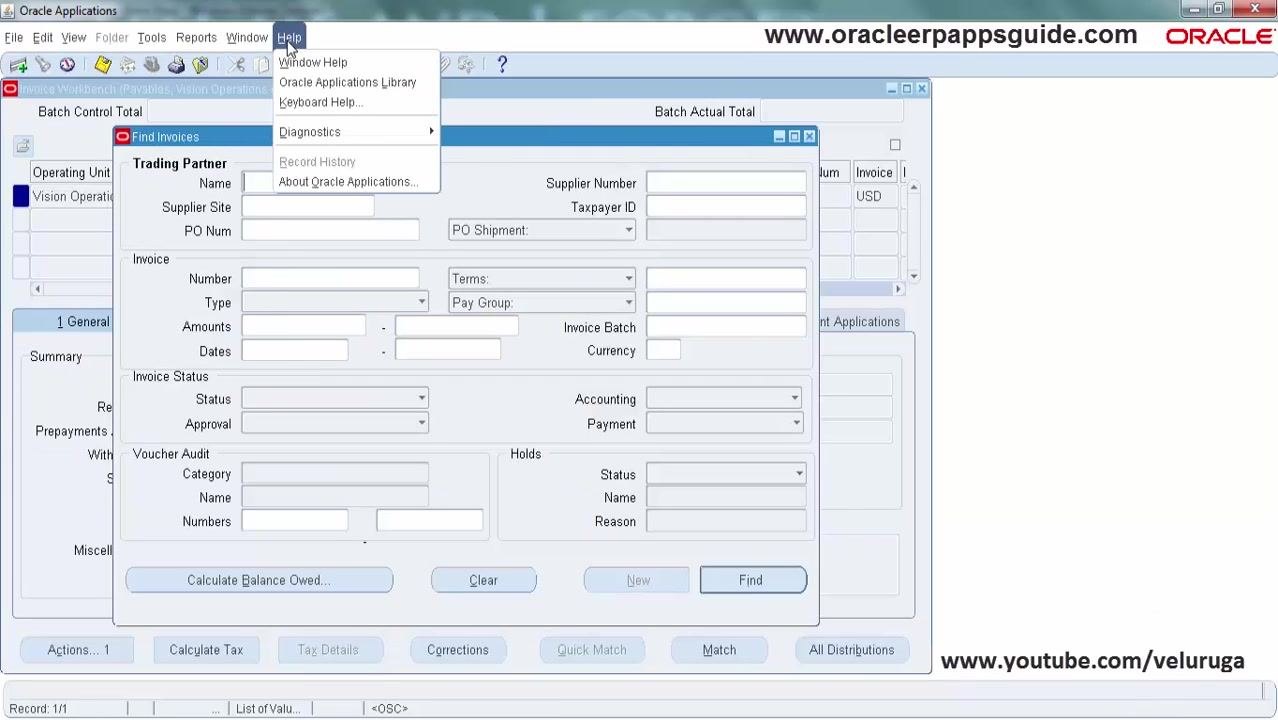
Verify that the Diagnostics menu is enabled
In the Invoices Workbench, select Help from the menu bar and confirm that the Diagnostics option is now visible.
Access the Form Personalizations window
Under Help > Diagnostics, navigate to Custom Code > Personalize, then click Personalize to open the Form Personalizations window.
The Form Personalizations window displays fields such as:
- Function Name (for example, AP_APXINWKB)
- Form Name (for example, APXINWKB)
- Debug Mode
- Seq, Description, Level, Enabled
- Condition and Actions tabs
- Trigger Event (for example, WHEN-NEW-FORM-INSTANCE)
- Processing Mode, Context, and other personalization options
This is where you create and manage all personalizations related to this form.
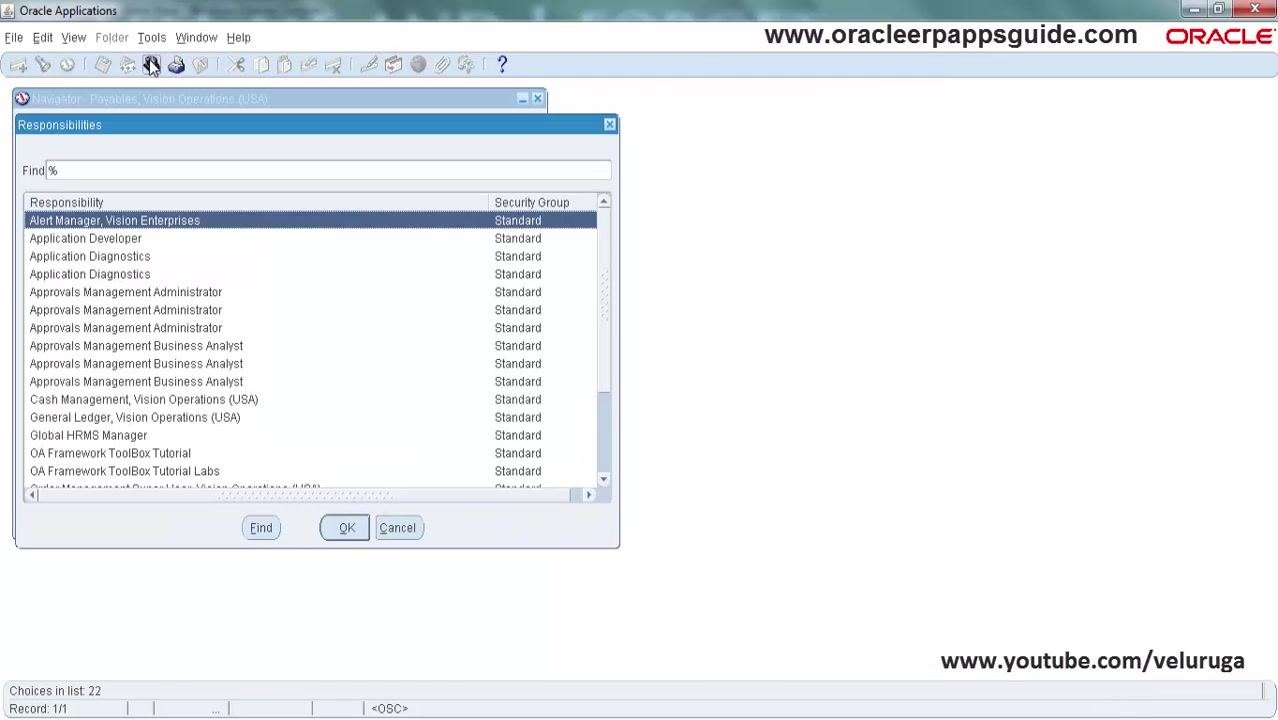
Open the Responsibilities window
Navigate to the window where you select your responsibility. The Responsibilities window lists all available responsibilities, such as "Alert Manager, Vision Enterprises," "Application Developer," and "Application Diagnostics." Select the appropriate responsibility if prompted.
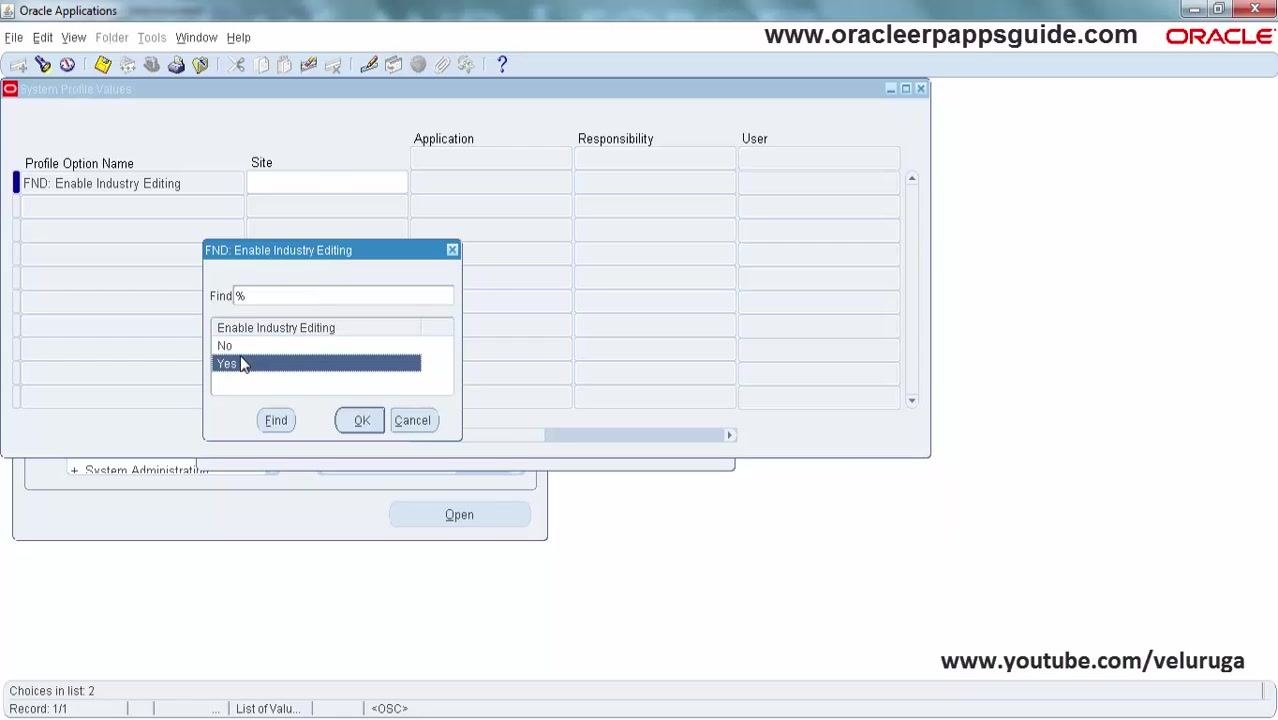
Search for the 'FND: Enable Industry Editing' profile option
Open the Find System Profile Values window. In the Display section, check the Site box to ensure the profile option is set at the Site level. In the Profile field, enter FND: Enable Industry Editing, then click Find.
Set the 'FND: Enable Industry Editing' value
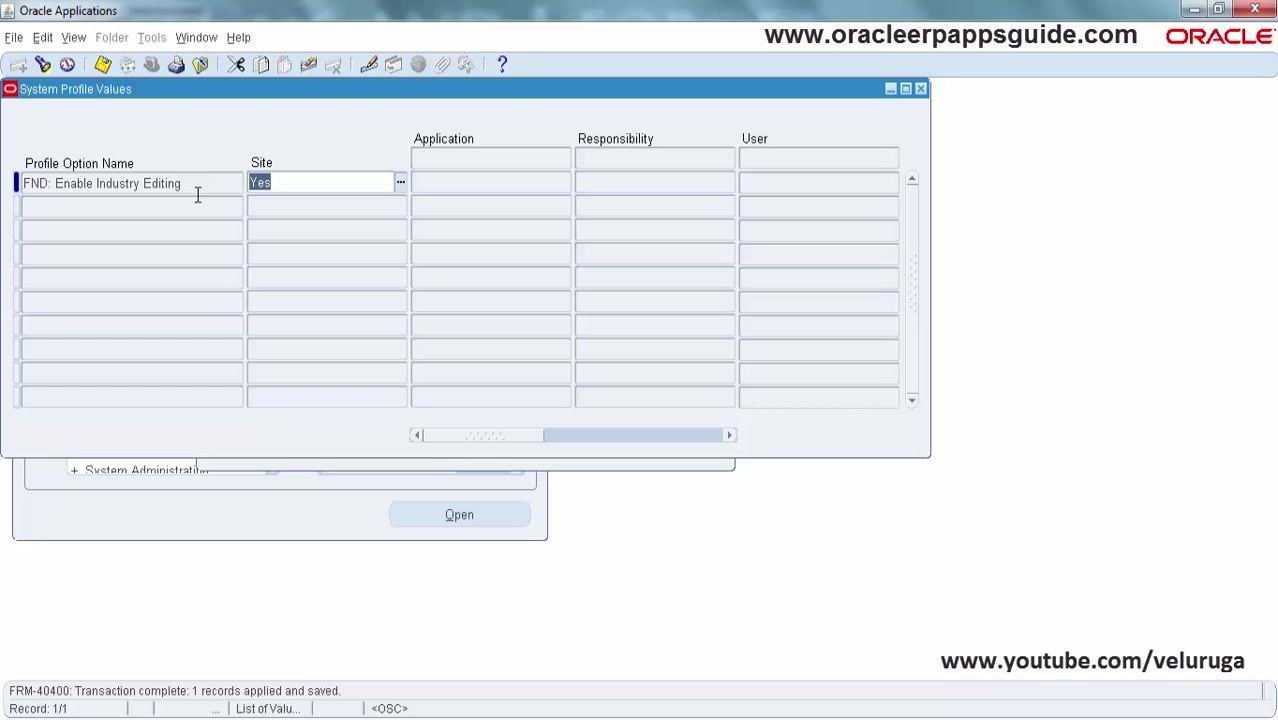
In the search results, locate the FND: Enable Industry Editing profile option. Click the field in the Site column to edit it, select Yes from the dropdown list, and click OK to confirm your selection.
Save the profile option setting
Confirm that the Site value for FND: Enable Industry Editing is now set to Yes. The status bar at the bottom should indicate "Transaction complete: 1 records applied and saved," confirming your changes were saved successfully.
Review and close the form
Review the updated profile option to confirm the value is set correctly, then close the System Profile Values window.
About the 'FND: Enable Industry Editing' option
- Purpose: Enabling this profile option allows you to view Oracle seeded personalizations, which are not visible by default.
- Scope: This setting is only applicable at the Site level and is rarely used in practice, since modifying seeded personalizations is generally not recommended.
- Best Practice: Only enable this option if you have a specific requirement to view or troubleshoot seeded personalizations.
Summary
You have now completed the process of enabling form personalization in Oracle EBS. The key actions were:
- Opening the Invoices screen and confirming that form personalization was not initially available.
- Switching to the System Administrator responsibility and navigating to Profile > System.
- Updating the Hide Diagnostics menu entry profile option to No for your user.
- Updating the Utilities: Diagnostics profile option to Yes for your user.
- Reopening the Invoices form and confirming the Diagnostics menu, and the Personalize option under it, are now visible.
- Optionally enabling FND: Enable Industry Editing at the Site level to view seeded personalizations.
What's next
With form personalization enabled, you can access Help > Diagnostics > Custom Code > Personalize on any form to begin creating and managing personalizations. For most use cases, the FND: Enable Industry Editing option should remain disabled unless you have a specific need to view or troubleshoot seeded personalizations.
Generation details: cost, quality tiers
Docsie billed 2,500 credits ($1.75) to analyze this 5-minute video at standard quality. The rewrite, template fill and Word/PDF exports were included. The same video at each quality tier:
| Quality | Frames sampled | Credits | Approx. cost |
|---|---|---|---|
| Draft | every 16-30 s | 1,250 | $0.88 |
| Standard (this guide) | every 8-15 s | 2,500 | $1.75 |
| Detailed | every 4-7 s | 5,000 | $3.50 |
| Ultra | every 1-3 s | 10,000 | $7.00 |
Credits priced at $0.70 per 1,000; plans include a monthly allowance. Enterprise customers on on-premise or bring-your-own-model deployments run this on their own inference and pay no per-video credits.
Generated by Docsie Video-to-Docs on 2026-10-12 from a 4-minute video. Screenshots are frames from the source video and belong to their creator, Oracle ERP Apps Guide, whose original is embedded above. If you own this video and want the guide removed or credited differently, contact us and we will act within one business day.