
How to Create a Web ADI in Oracle EBS
This guide explains how to create a Web ADI in Oracle EBS (Enterprise Business Suite) using a custom PL/SQL package for receipt upload. You will learn how to configure a custom Web ADI integrator, define its layout, upload data through an Excel template, and verify the uploaded records in Oracle Applications.
Video: Create Custom Oracle WebADI - Oracle Application EBS R12 Web ADI for Receipt Upload by eTutor Infotech Pune (2019). All credit for the demonstration goes to the creator; watch the original on YouTube. The written guide below was generated from this video by Docsie. Creator? Request a change or removal.
This guide explains how to create a Web ADI in Oracle EBS (Enterprise Business Suite) using a custom PL/SQL package for receipt upload. You will learn how to configure a custom Web ADI integrator, define its layout, upload data through an Excel template, and verify the uploaded records in Oracle Applications.
Prerequisites
Before you create a Web ADI in Oracle EBS, confirm the following:
- You understand there are two main approaches to building a custom Web ADI: Based on Table or Based on Packages. This guide uses the package-based approach.
- You have a custom PL/SQL package (for example,
XX_REC_ADI) containing at least one procedure (for example,XX_REC_PRC) that accepts the parameters you plan to upload, such asv_amount(NUMBER) andv_receipt_number(VARCHAR2). - You have access to a remote machine or desktop environment where Oracle Applications is installed.
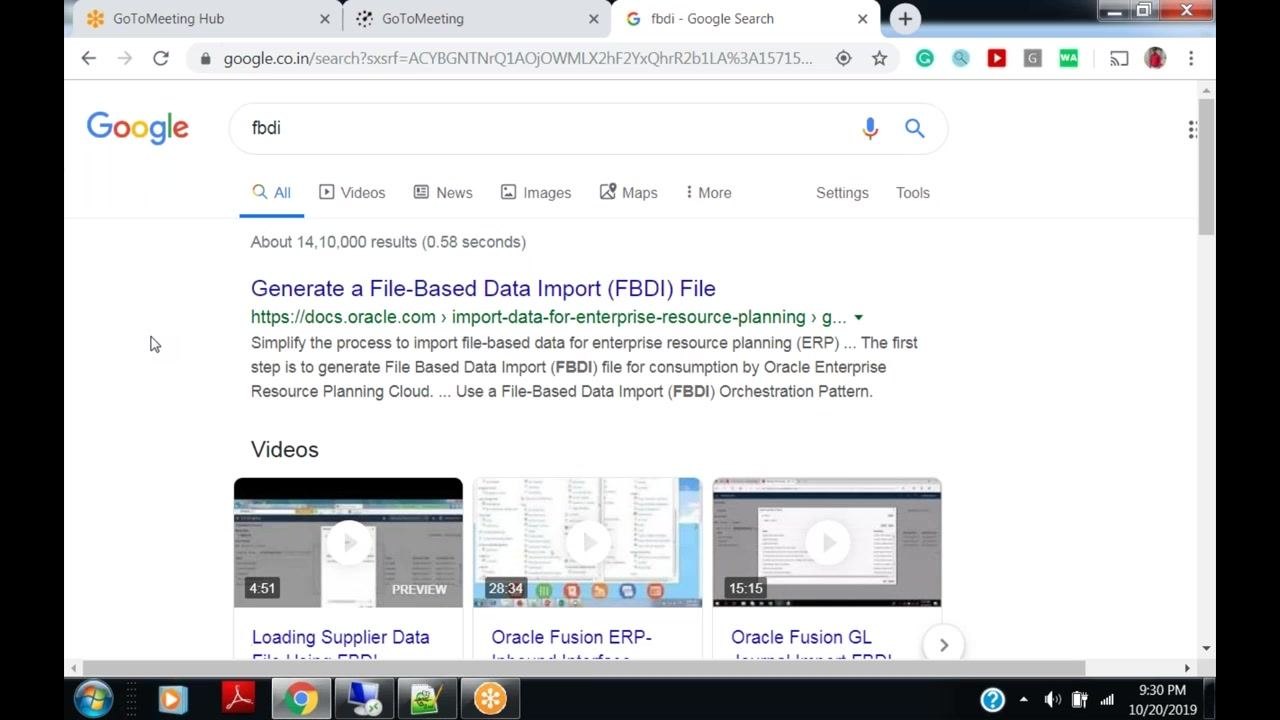
Prepare the custom PL/SQL package
Create a package specification similar to the following example:
CREATE OR REPLACE PACKAGE XX_REC_ADI AS
  PROCEDURE XX_REC_PRC(v_amount NUMBER, v_receipt_number VARCHAR2);
END XX_REC_ADI;
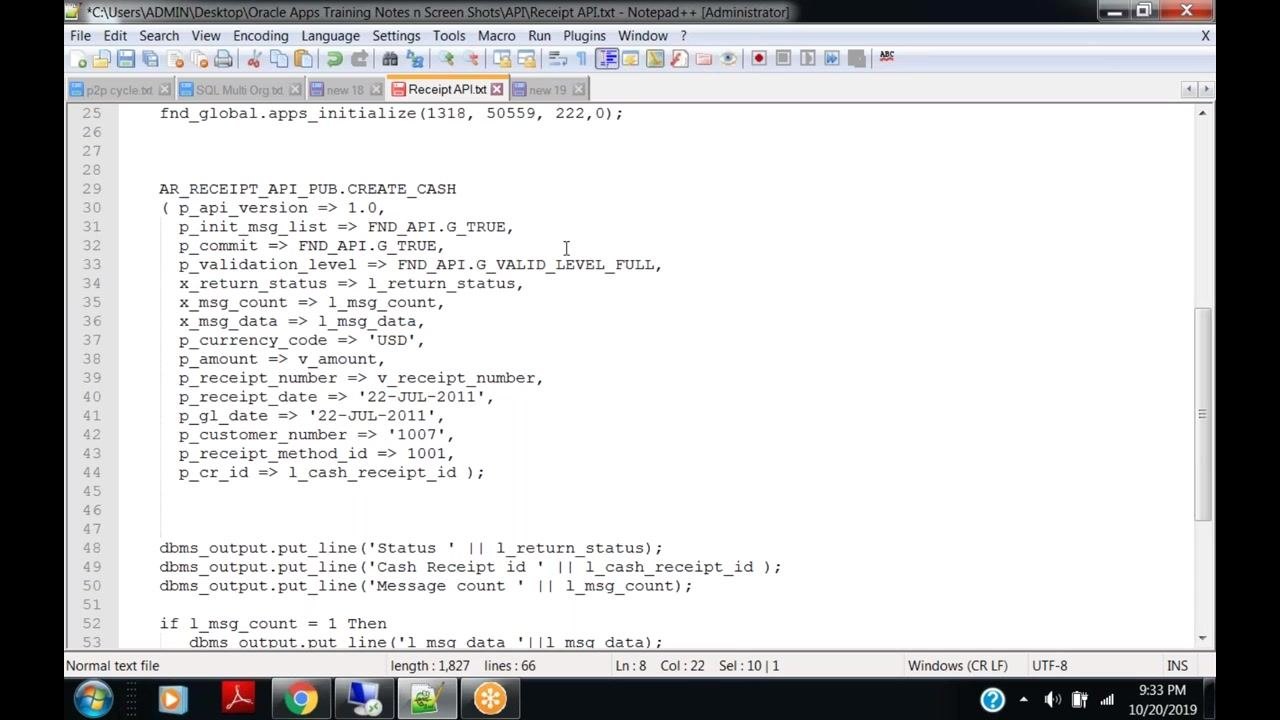
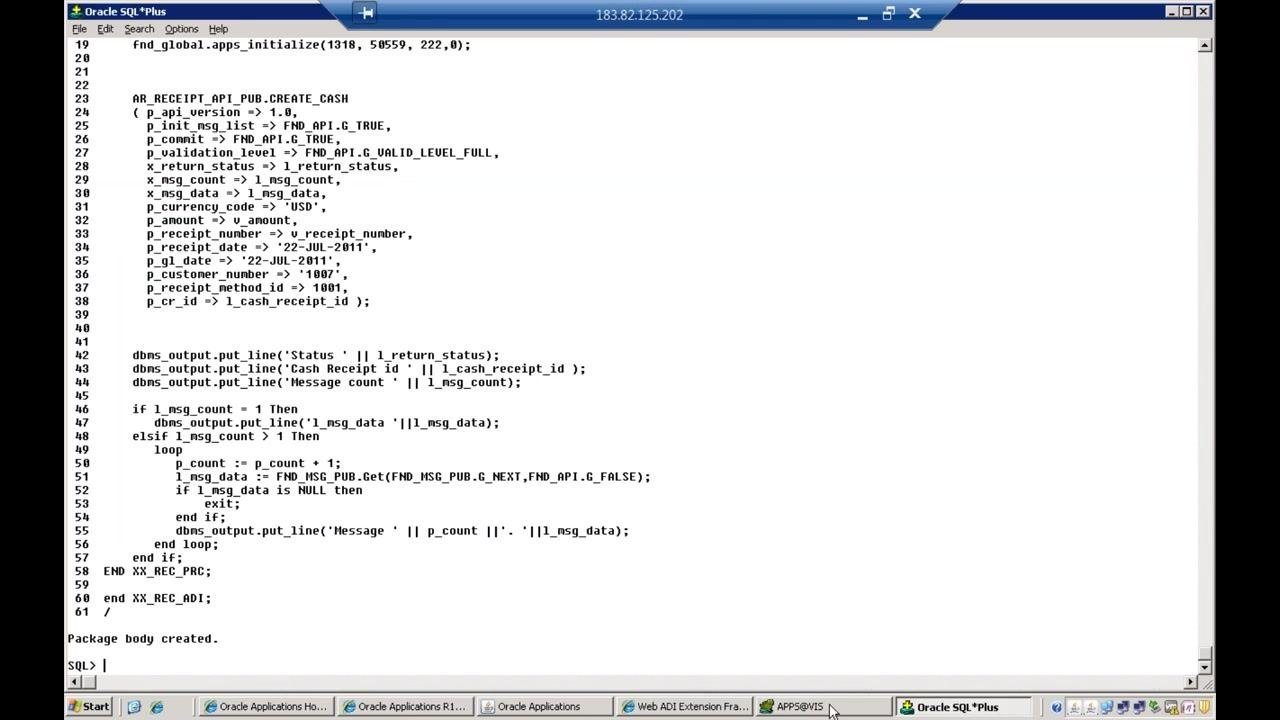
The package body should initialize the application context and call the AR Receipt API to create the cash receipt.
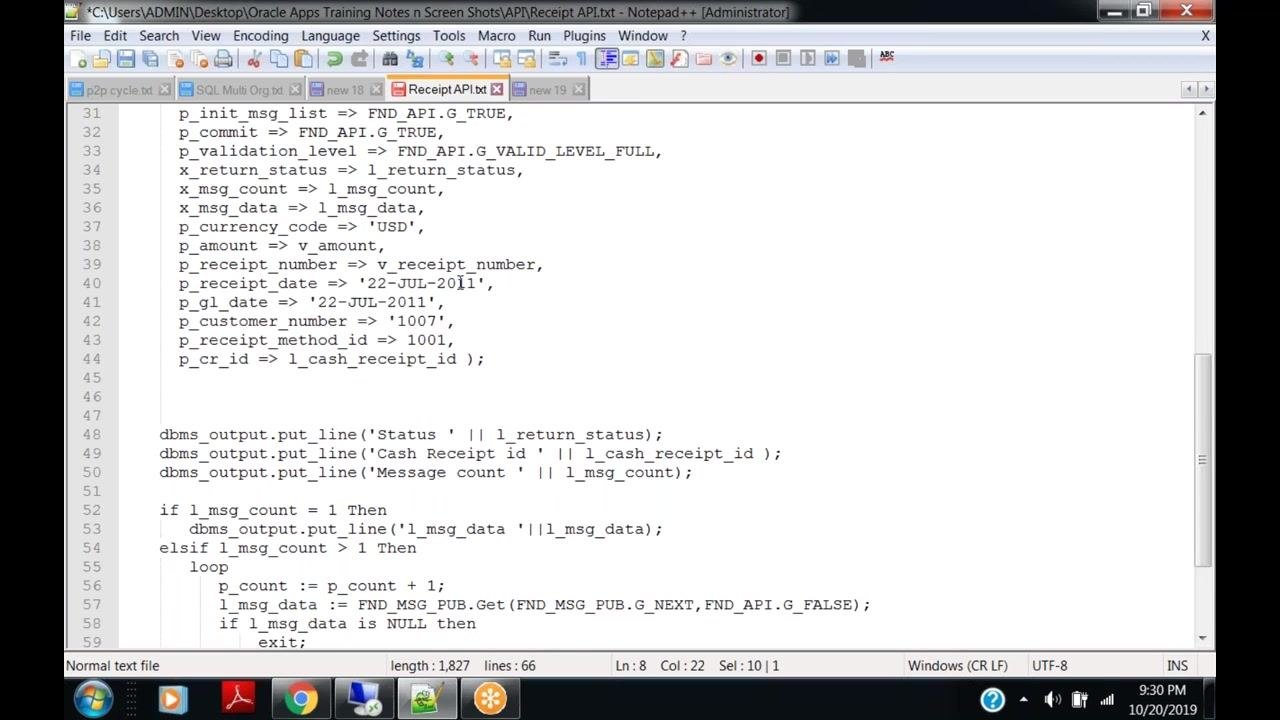
Review the API call parameters
Open the PL/SQL package body (for example, apps.xx_rec_adi) and review the procedure definition for xx_rec_prc:
- Parameters:
v_amount(NUMBER),v_receipt_number(VARCHAR2) - Local variables:
l_return_status,l_msg_count,l_msg_data,l_cash_receipt_id,p_count
The procedure must perform the following initialization steps before calling the API:
mo_global.init('AR');mo_global.set_policy_context('S', '204');fnd_global.apps_initialize(1318, 50559, 222, 0);
The procedure then calls ar_receipt_api_pub.create_cash to create the receipt.
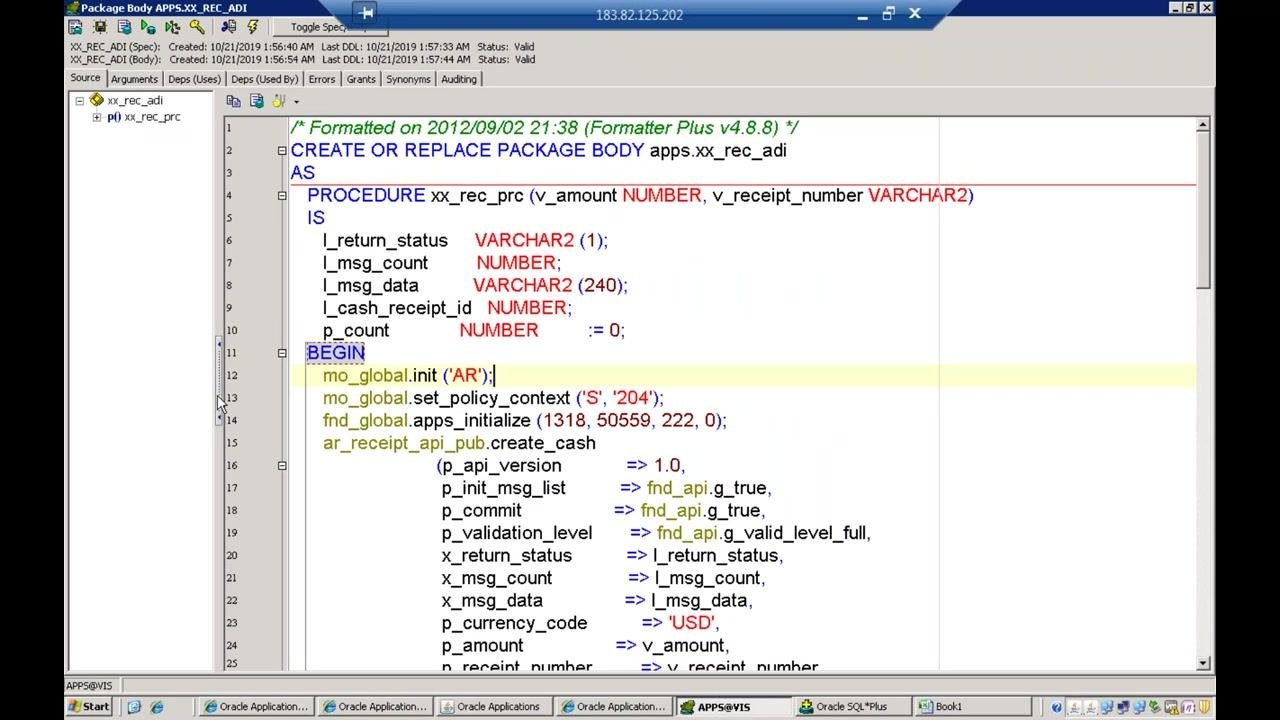
Ensure the following parameters are set in the ar_receipt_api_pub.create_cash call:
p_api_version => 1.0p_init_msg_list => FND_API.G_TRUEp_commit => FND_API.G_TRUEp_validation_level => FND_API.G_VALID_LEVEL_FULLx_return_status => l_return_statusx_msg_count => l_msg_countx_msg_data => l_msg_datap_currency_code => 'USD'p_amount => v_amountp_receipt_number => v_receipt_numberp_receipt_date => '22-JUL-2011'p_gl_date => '22-JUL-2011'p_customer_number => '1007'p_receipt_method_id => 1001p_cr_id => l_cash_receipt_id
Include output lines in the procedure to display the status, cash receipt ID, and message count after the call completes.
Access Oracle Applications
Start your remote machine and open the desktop environment where Oracle Applications is installed. Locate the Oracle Applications shortcuts and confirm you have access to the required tools and files before continuing.
Create a new integrator
Open the Desktop Integration Manager
In the Navigator, select Manage Integrators. You will see options including:
- Create Integrator
- Manage Components
- Define Parameter
Select Create Integrator to begin creating your custom Web ADI.
Start the Create Integrator wizard
In the WebADI Development Framework, the Create Integrator wizard prompts you to enter the required integrator information:
- Integrator Name
- Internal Name (uppercase letters, numbers, and underscores only)
- Application
- Enabled set to Yes
- Optionally, Reporting Only or Display in Create Document Page
Click Next to proceed to the next step of the wizard.
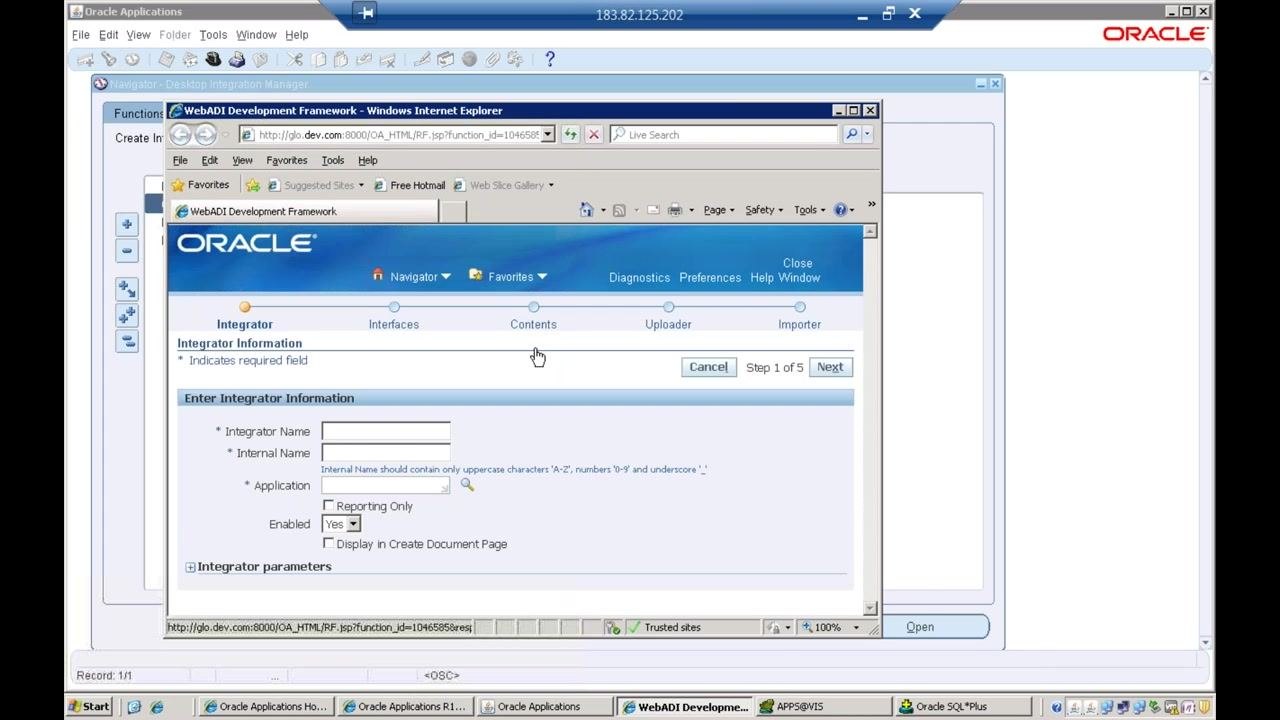
Enter the integrator information
Complete the fields as follows:
- In Integrator Name, enter
XX_REC_ADI. - In Internal Name, enter
XX_REC_ADI. - In Application, type part of the application name (for example, "gen") and select General Ledger from the dropdown list.
- Set Enabled to
Yes. - Select Display in Create Document Page to make the integrator available for document creation.
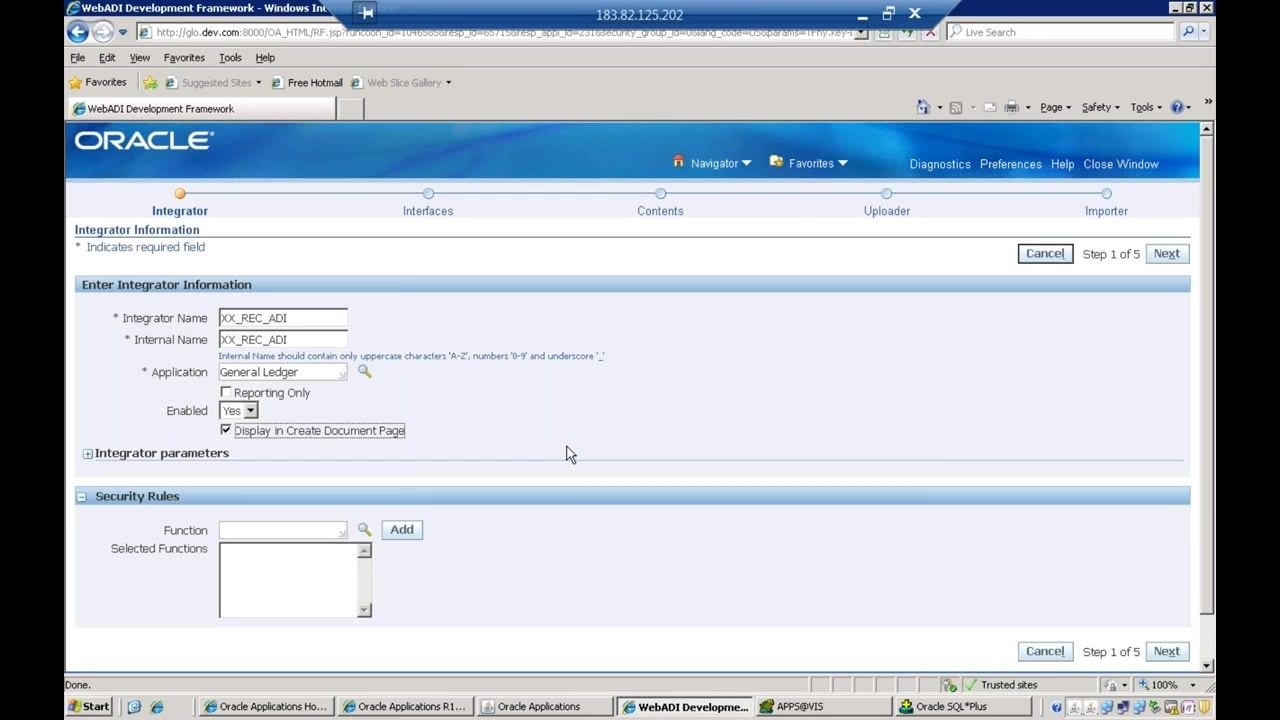
Click Next to move to Step 2 of 5 in the integrator creation wizard.
Define the interface
Complete the interface definition:
- In Interface Name, enter
eTutor Receipt Interface. - In Interface Type, select API - Procedure instead of the default Table. The Table option is for direct table inserts; this guide uses a PL/SQL package instead.
- In Package Name, enter your custom package name, for example
XX_REC_ADI. - In Procedure/Function Name, enter the procedure defined in your package, for example
XX_REC_PRC.
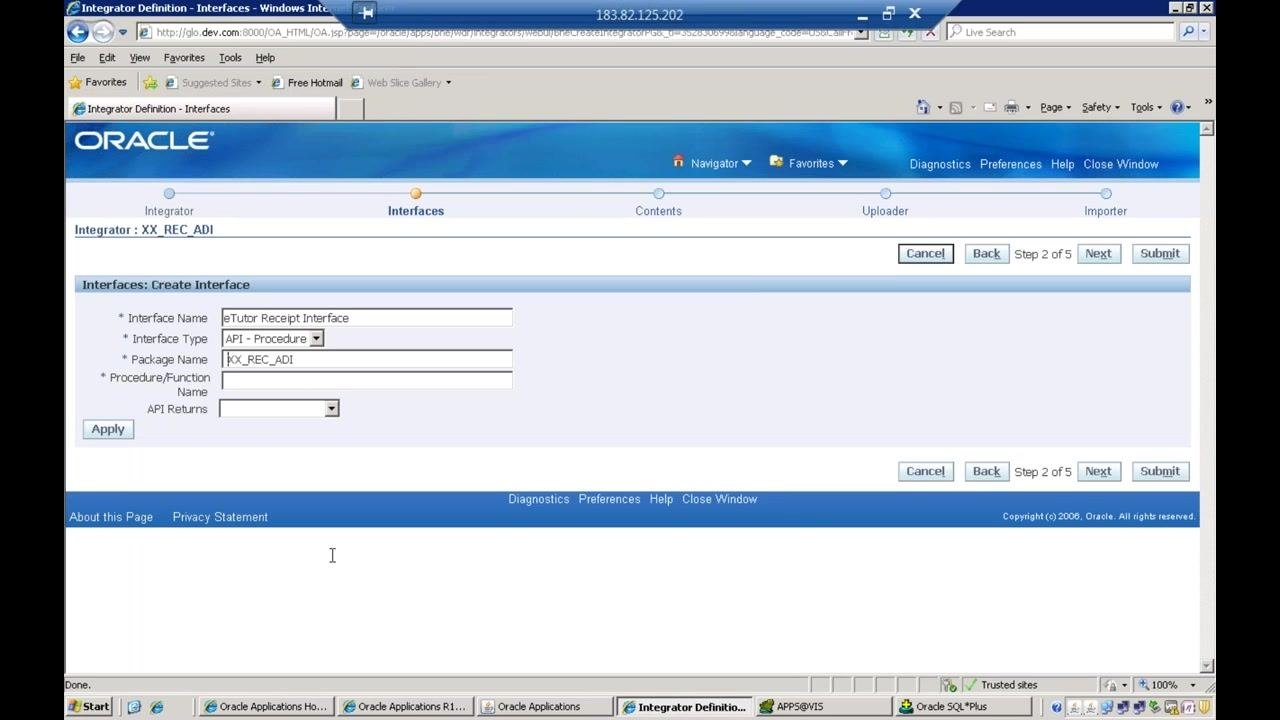
Click Apply to save the interface definition. You have now configured the basic integrator and interface details, ensuring the integrator uses your PL/SQL package and procedure for data upload.
Review the interface attributes
Click Next after defining the interface to proceed to the interface attributes step. The system automatically detects and enables parameters based on your PL/SQL procedure. In this example, two parameters are enabled:
RECEIPT_NUMBERAMOUNT
These correspond to the parameters defined in your PL/SQL package.
Confirm that Enabled and Displayed are checked for both V_RECEIPT_NUMBER and V_AMOUNT. Ensure the Data Type for V_RECEIPT_NUMBER is set to String and for V_AMOUNT is set to Number. Set default values or types if your use case requires them.
If the API allows additional parameters, you can add and enable more attributes one by one to match your business process.
Click Submit to finalize the interface definition. This creates the integrator in the Web ADI Extension Framework.
Define the layout
Search for your integrator
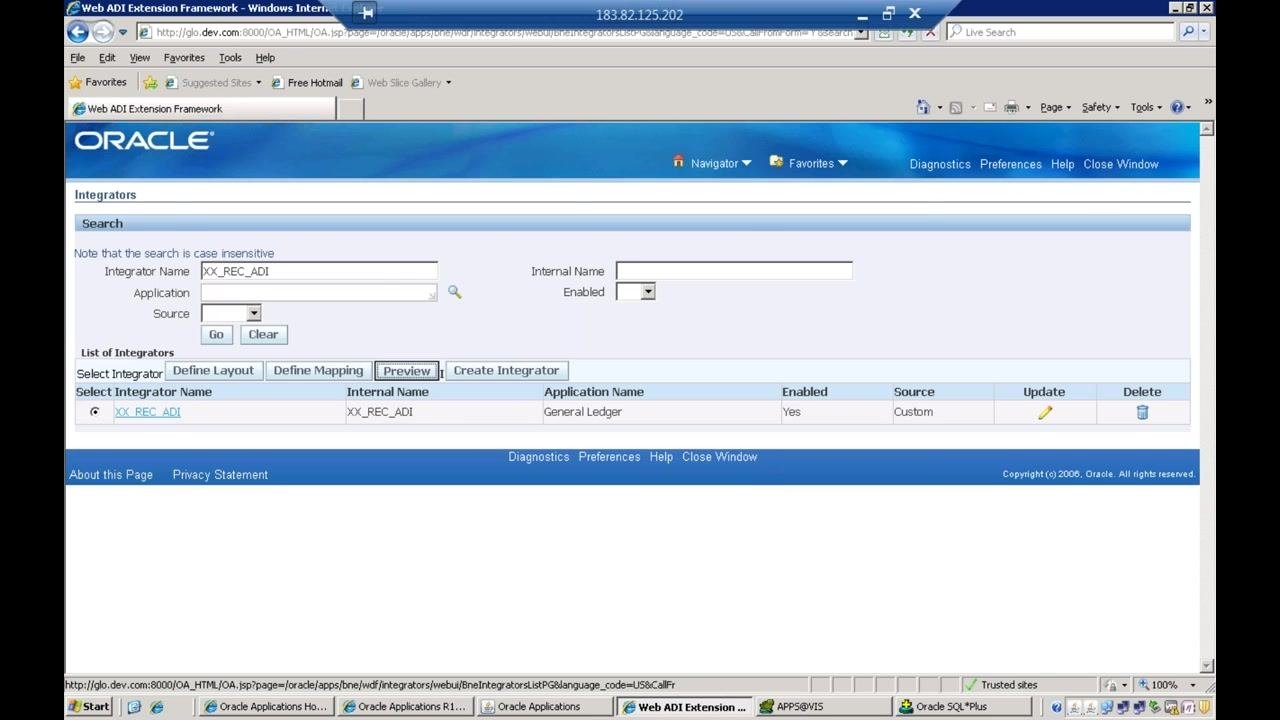
Open the Oracle Web ADI Extension Framework in your web browser and go to the Integrators page. In the Search section:
- Enter
XX_REC_ADIin Integrator Name. - Leave Application and Source blank unless otherwise required.
- Click Go to search for the integrator.
In the List of Integrators section, confirm that XX_REC_ADI appears with General Ledger as the Application Name, Yes as Enabled, and Custom as Source. Select the integrator by clicking its radio button, then click Define Layout.
Create the layout
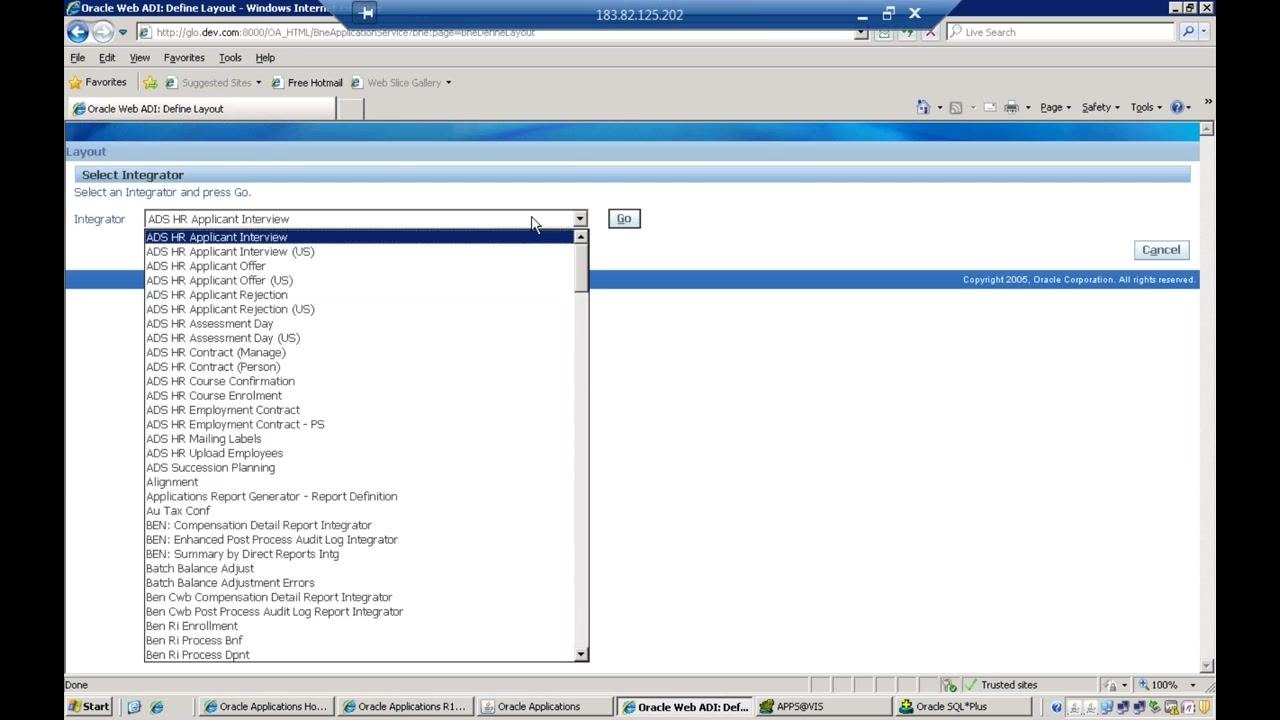
On the Define Layout screen, in the Create Layout section:
- Enter a name in Layout Name, for example
eTutbr REceip. - Set Number of Headers to
1using the dropdown menu.
Click Next to proceed.
Place the required fields
For each field, choose its placement from the dropdown menu:
- For
AMOUNT, select Line. - For
RECEIPT_NUMBER, select Context, Header 1, or Line, as appropriate for your use case.
You can optionally enter default values and select a default type. Click Next or Apply to save your field placements.
Preview and test the integrator
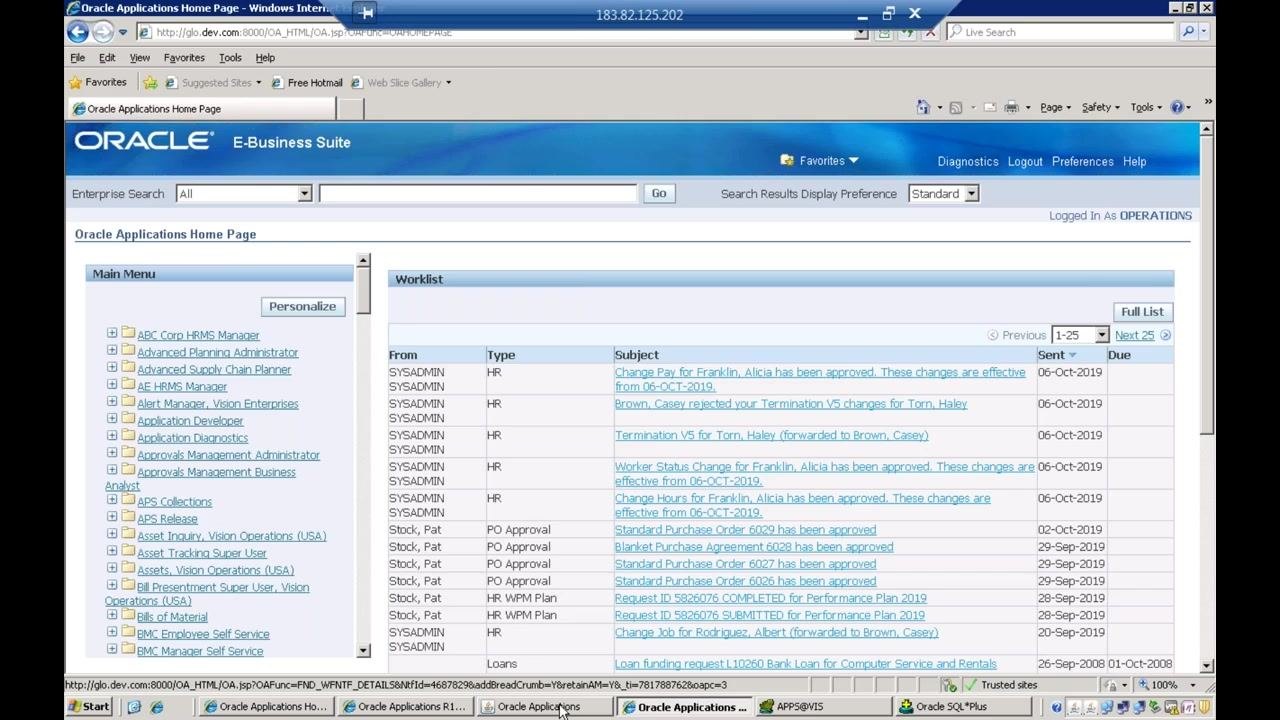
Return to the Integrators page in the Web ADI Extension Framework. Select your integrator (XX_REC_ADI) and click Preview to confirm the integrator and its associated documents were created successfully. Enter test data, for example Amount = 7500, and continue with further data entry as needed.
Upload the data
Download the Web ADI template
In Internet Explorer, a yellow information bar appears indicating the site is attempting to download a file. Click the bar and select Download File... from the dropdown menu. The on-screen message explains: "A file will be downloaded to your desktop. When prompted, choose to open the file and to enable macros. If no prompt appears, ensure your browser security settings allow files to be downloaded."
Enable macros in the template
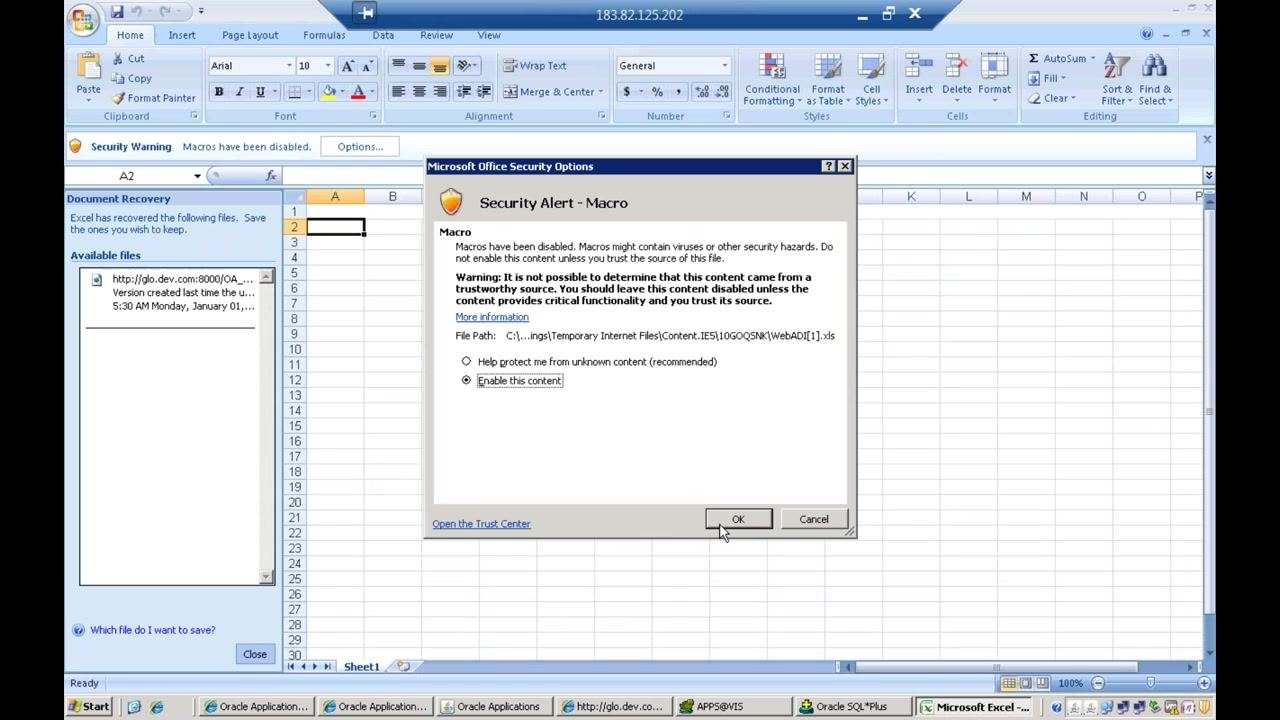
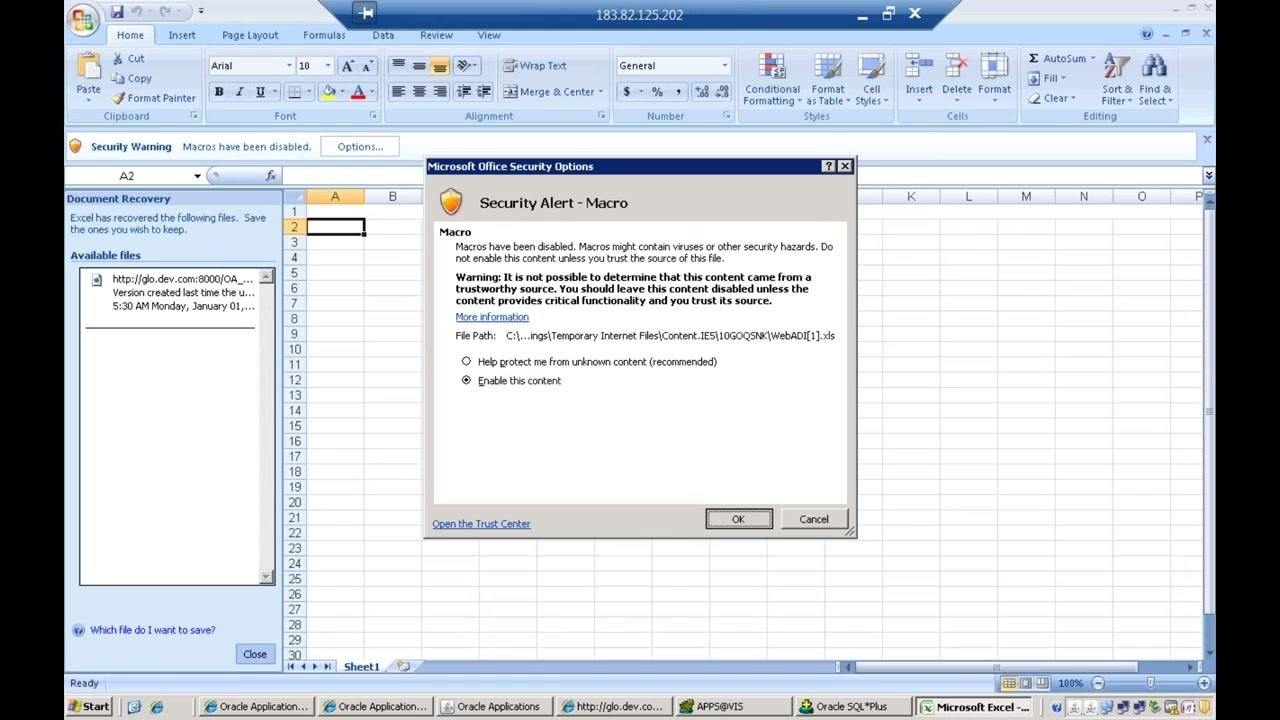
When the file opens in Microsoft Excel, a Security Alert - Macro dialog appears, warning: "Macros have been disabled. Macros might contain viruses or other security hazards. Do not enable this content unless you trust the source of this file." Select Enable this content and click OK to proceed.
Enter the receipt data
In the Excel template, locate the AMOUNT and RECEIPT_NUMBER columns:
- Enter
7500in the AMOUNT column. - Enter
eTutor Rec 02in the RECEIPT_NUMBER column.
A tip at the bottom of the template notes: "This is not the end of the Template. Unprotect the sheet and insert as many rows as needed."
Upload the data to Oracle Applications
Go to the Add-Ins tab in Excel if required by your configuration, and use the Oracle Web ADI plugin to upload the data from the template. Wait for the upload confirmation dialog to appear.
A confirmation window titled Upload to Oracle Applications displays: "The upload process has completed successfully. Press Close to return to the document." Confirm the message states "1 rows successfully uploaded," then click Close to return to the Excel document.
Verify the receipt details
Search for the uploaded receipt
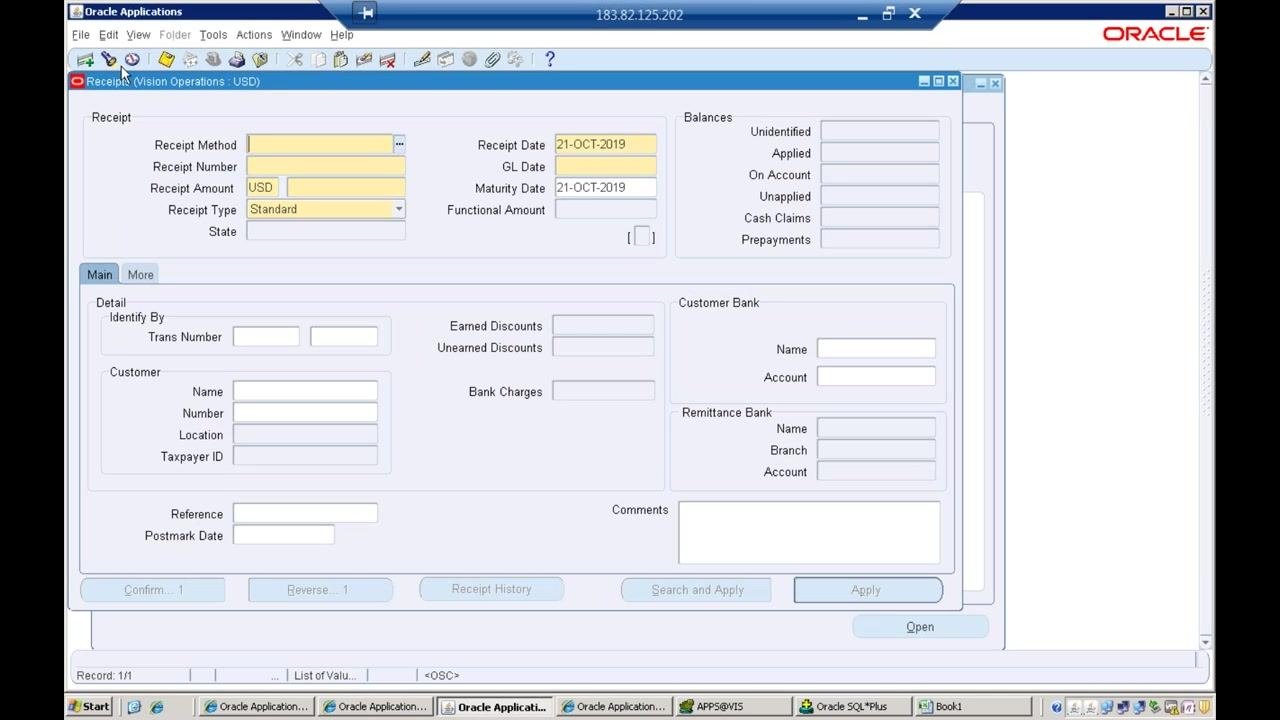
Open Oracle Applications and navigate to the appropriate module, for example Receivables. In the Navigator - Desktop Integration Manager window, use the Find field to search for your responsibility by entering re%. Select the relevant responsibility, for example "Receivables, Vision Operations (USA)," and click OK.
Review the uploaded receipt
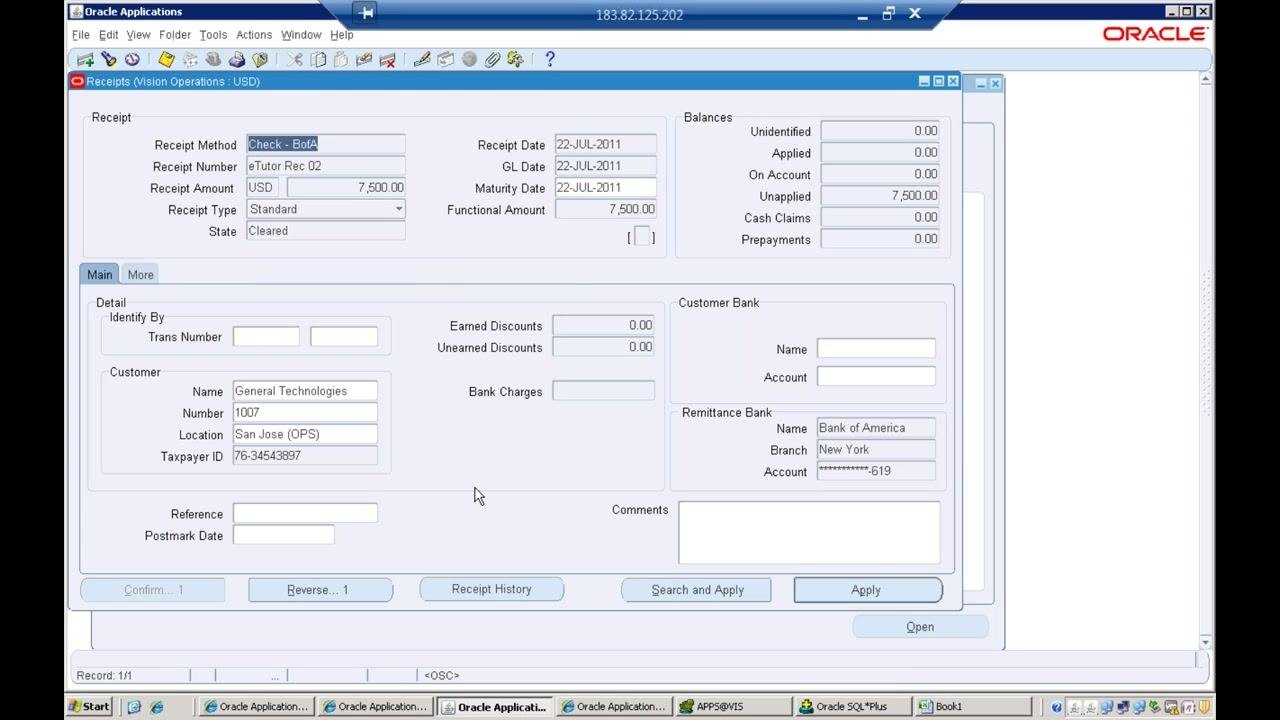
Open the Receipts form and review the key fields:
- Receipt Number
- Receipt Amount
- Receipt Date
- GL Date
- Maturity Date
- Receipt Type
- State
Confirm these details match your uploaded data.
Confirm all receipt and customer details
In the Receipts form, verify the complete set of receipt and customer information:
- Receipt Method: Check - BofA
- Receipt Number: eTutor Rec 02
- Receipt Amount: 7,500.00 USD
- Receipt Date, GL Date, Maturity Date: 22-JUL-2011
- Receipt Type: Standard
- State: Cleared
- Balances: Unapplied = 7,500.00, all other balances = 0.00
- Customer Name: General Technologies
- Customer Number: 1007
- Location: San Jose (OPS)
- Taxpayer ID: 76-34543897
- Remittance Bank: Bank of America, Branch: New York, Account ending in 619
Ensure all details match the data you uploaded.
Summary
You have now learned how to create a Web ADI in Oracle EBS using a custom PL/SQL package: preparing the package and API call, creating and configuring the integrator, defining its interface and layout, uploading data through the generated Excel template, and verifying the resulting receipt in Oracle Applications. With this process, your custom Web ADI integrator is ready for ongoing use and further testing as your business requirements evolve.
Generation details: cost, quality tiers
Docsie billed 5,000 credits ($3.50) to analyze this 10-minute video at standard quality. The rewrite, template fill and Word/PDF exports were included. The same video at each quality tier:
| Quality | Frames sampled | Credits | Approx. cost |
|---|---|---|---|
| Draft | every 16-30 s | 2,500 | $1.75 |
| Standard (this guide) | every 8-15 s | 5,000 | $3.50 |
| Detailed | every 4-7 s | 10,000 | $7.00 |
| Ultra | every 1-3 s | 20,000 | $14.00 |
Credits priced at $0.70 per 1,000; plans include a monthly allowance. Enterprise customers on on-premise or bring-your-own-model deployments run this on their own inference and pay no per-video credits.
Generated by Docsie Video-to-Docs on 2026-10-14 from a 9-minute video. Screenshots are frames from the source video and belong to their creator, eTutor Infotech Pune, whose original is embedded above. If you own this video and want the guide removed or credited differently, contact us and we will act within one business day.