
How to Create a Work Order in Maximo
This guide walks you through how to create a work order in Maximo, from logging in to the Work Order Tracking application through completing all the information needed to approve and save your work order. You'll learn how to select an asset or location, assign a work type, attach a job plan, and document actuals, safety information, and failure details.
Video: Maximo Training | How to Create a Work Order In Maximo | IBM Maximo Asset Management by Banetti Inc.. All credit for the demonstration goes to the creator; watch the original on YouTube. The written guide below was generated from this video by Docsie. Creator? Request a change or removal.
This guide walks you through how to create a work order in Maximo, from logging in to the Work Order Tracking application through completing all the information needed to approve and save your work order. You'll learn how to select an asset or location, assign a work type, attach a job plan, and document actuals, safety information, and failure details.
Prerequisites
Before you begin, keep in mind that the options you see in Maximo may vary depending on your installed add-ons and your security settings. You may have more or fewer menu items than shown in this guide.
Log in to IBM Maximo
Open your web browser and navigate to your Maximo login page (for example, banetti-demo.emaximo.com/maximo/webclient/login/login.jsp). Enter your user name and password in the respective fields, then click Sign In to access Maximo.
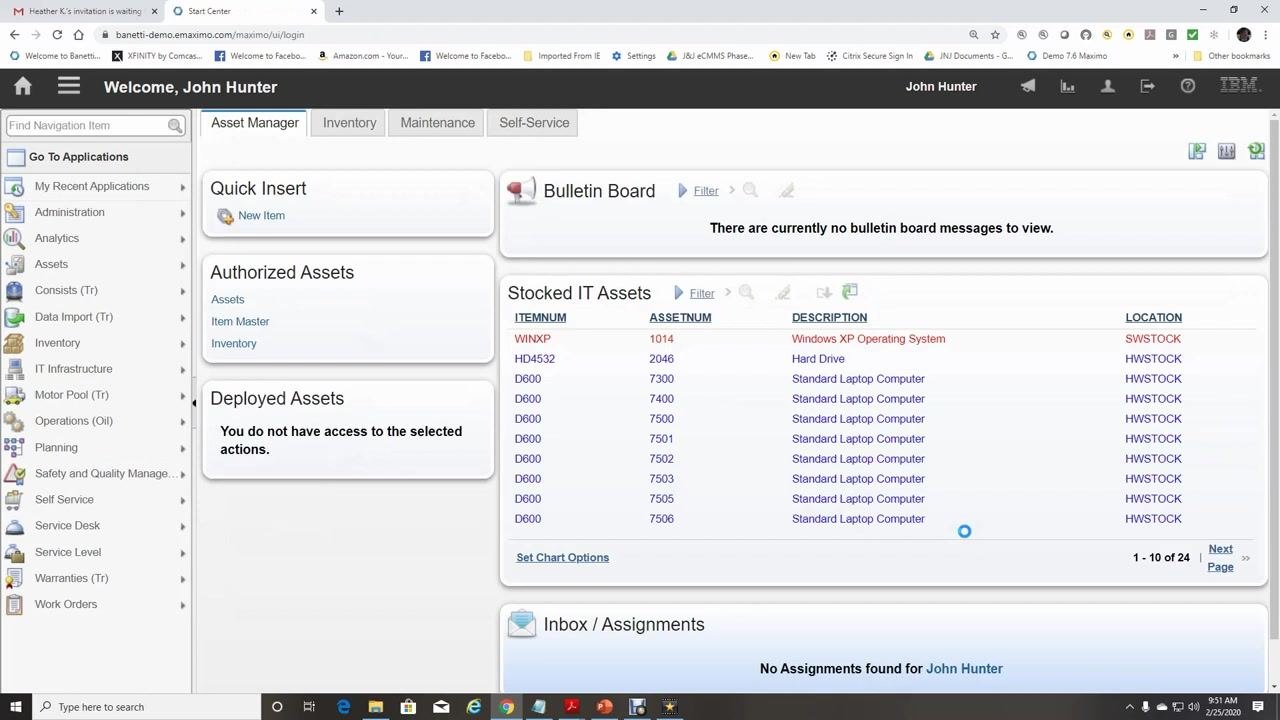
After logging in, you arrive at the Start Center. The Start Center displays various portlets such as Quick Insert, Authorized Assets, Deployed Assets, Stocked IT Assets, Bulletin Board, and Inbox/Assignments. Your name appears in the top right corner, confirming that you are logged in.
Open the Work Order Tracking application
On the left sidebar, expand the Work Orders section, then click Work Order Tracking from the dropdown menu.
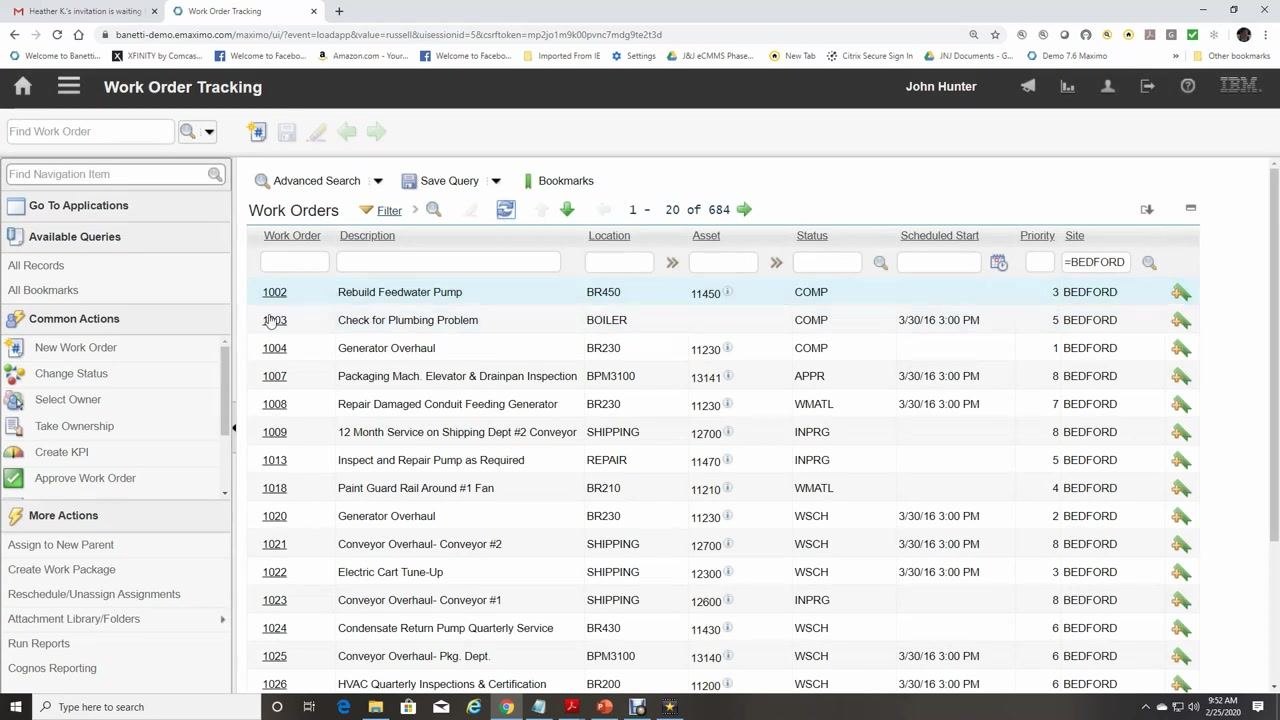
Selecting Work Order Tracking opens the application where you can create and manage work orders for assets and locations. The interface includes:
- A search/filter bar for Work Orders, Description, Location, Asset, Status, Scheduled Start, Priority, and Site
- A Common Actions menu with options such as New Work Order, Change Status, Select Owner, Take Ownership, Create KPI, and Approve Work Order
- A More Actions menu for advanced options
Create a new work order
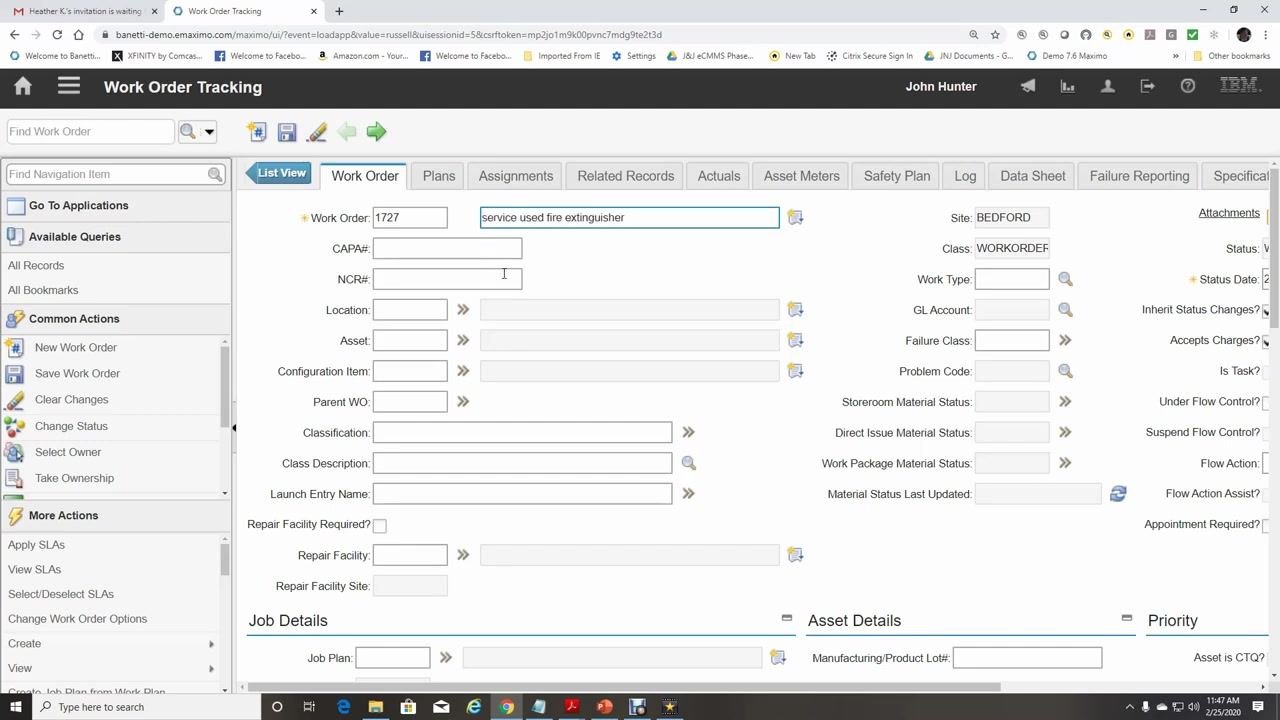
Select the New Work Order icon from the Work Order Tracking screen. Maximo can be configured to automatically assign a work order number. Enter a clear and descriptive summary of the work to be performed in the Description field.
Select the location or asset
All work must be recorded against either a Location or an Asset. These fields are empty by default and must be filled in before you proceed.
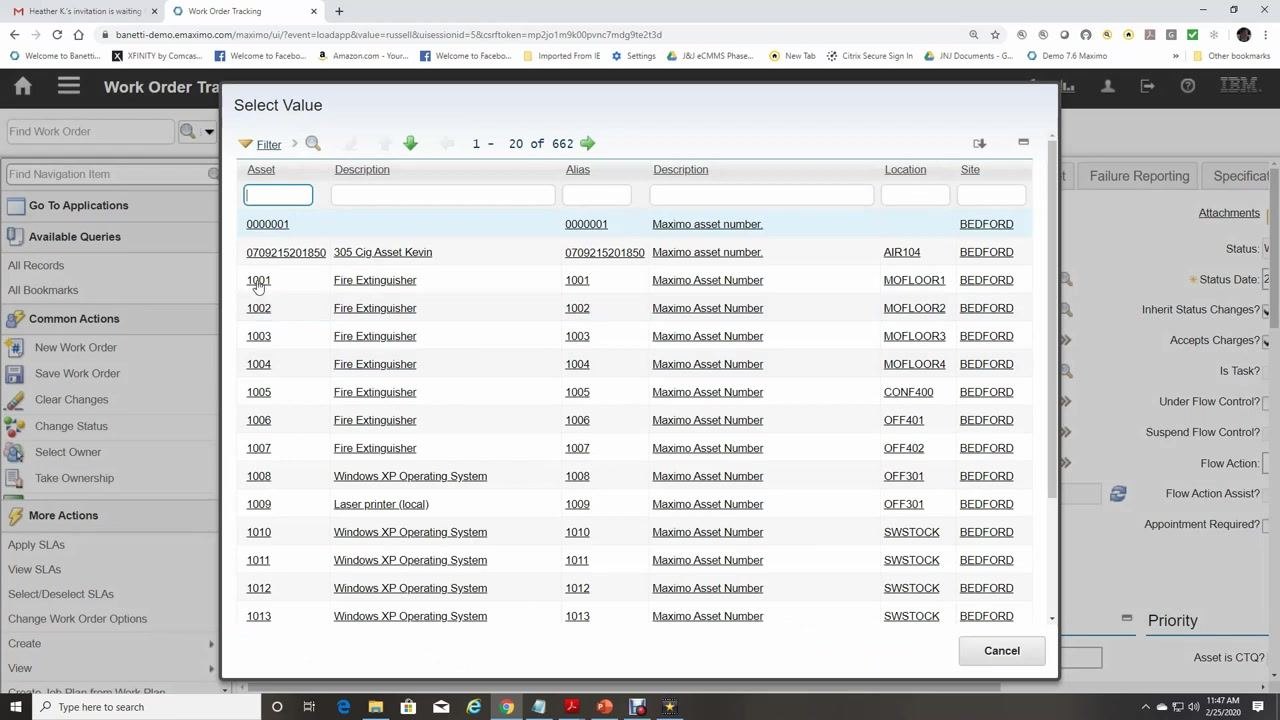
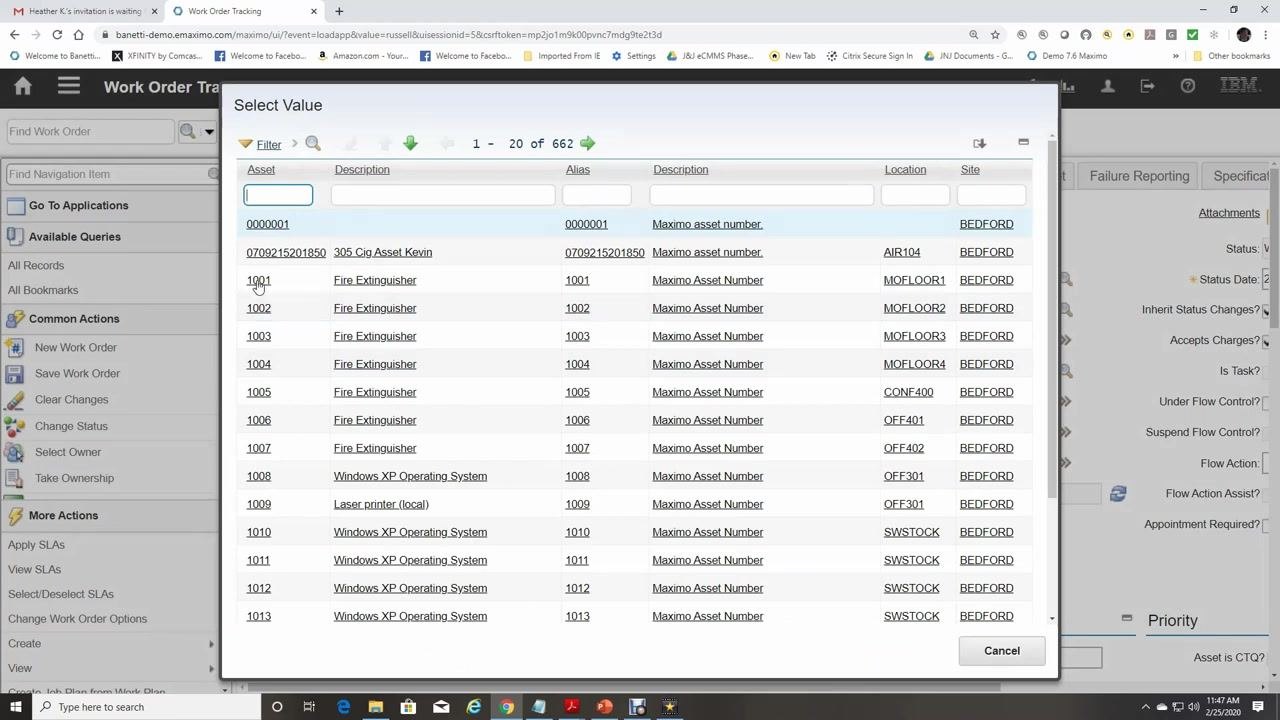
Locate the Asset field in the Work Order tab and click the Detail Menu (arrow icon) next to it to open the asset selection dialog.
In the Select Value dialog, review the list of available assets and select the one matching these details:
- Asset: 1001
- Description: Fire Extinguisher
- Location: MOFLOOR1
- Site: BEDFORD
Click the row for asset 1001 to select it.
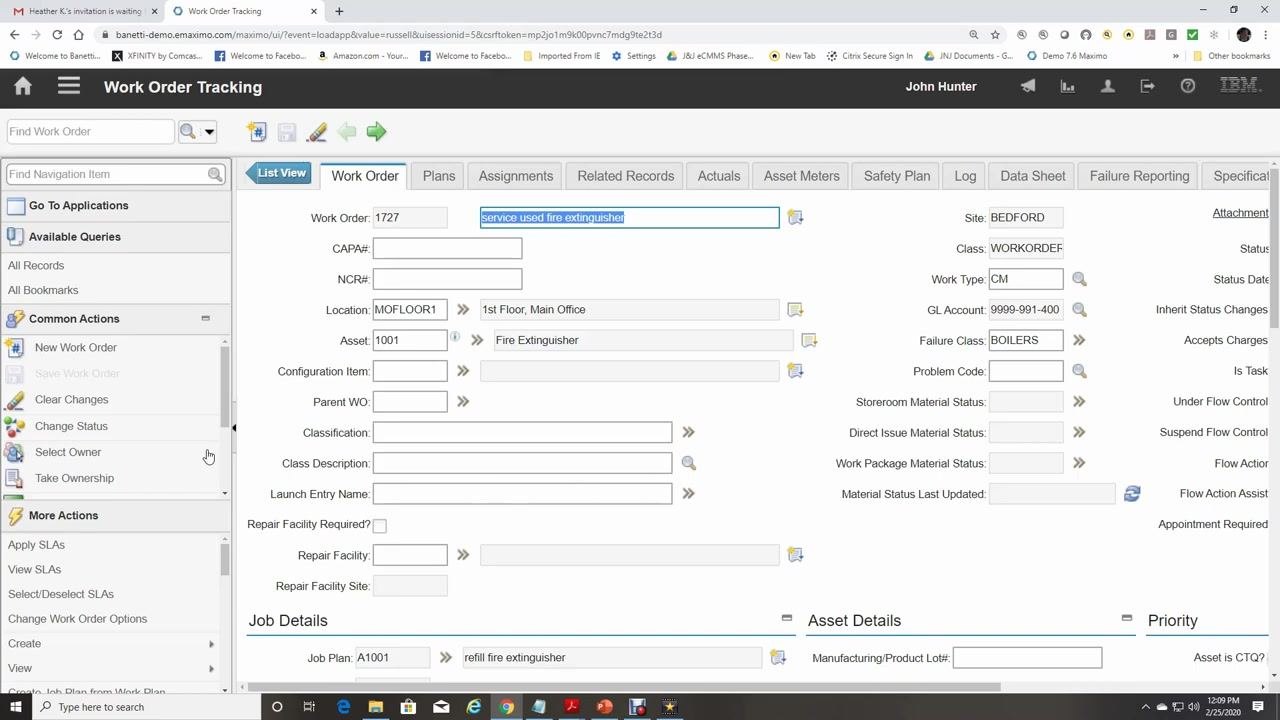
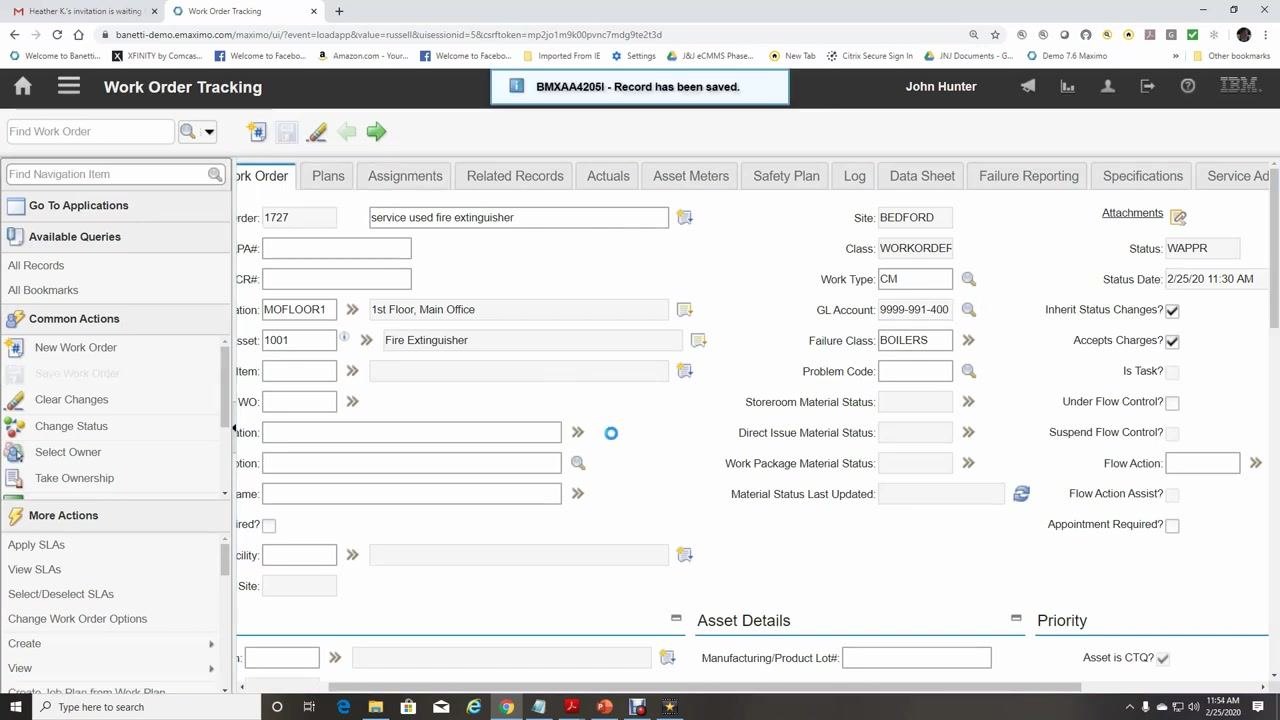
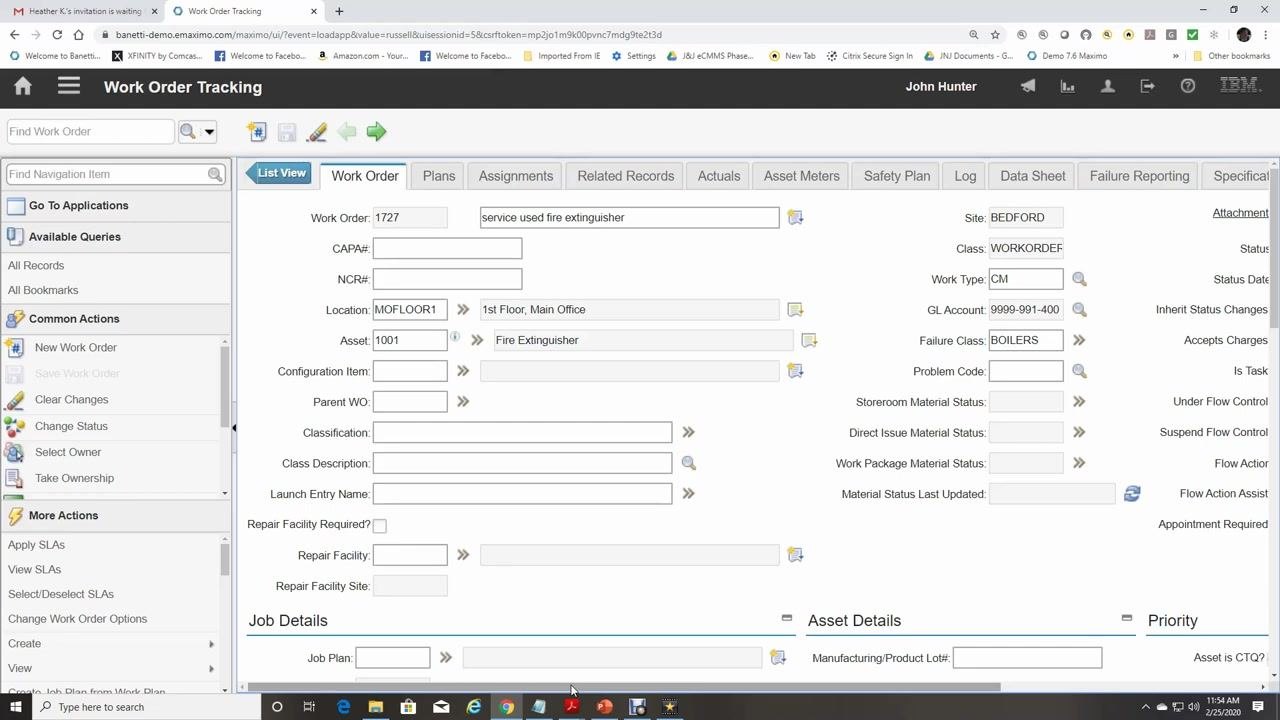
After selecting the asset, verify that the Location and Asset fields are automatically populated:
- Location: MOFLOOR1 (1st Floor, Main Office)
- Asset: 1001 (Fire Extinguisher)
Additional fields may also auto-populate, such as GL Account (9999-991-400) and Failure Class (BOILERS).
Assign the work type
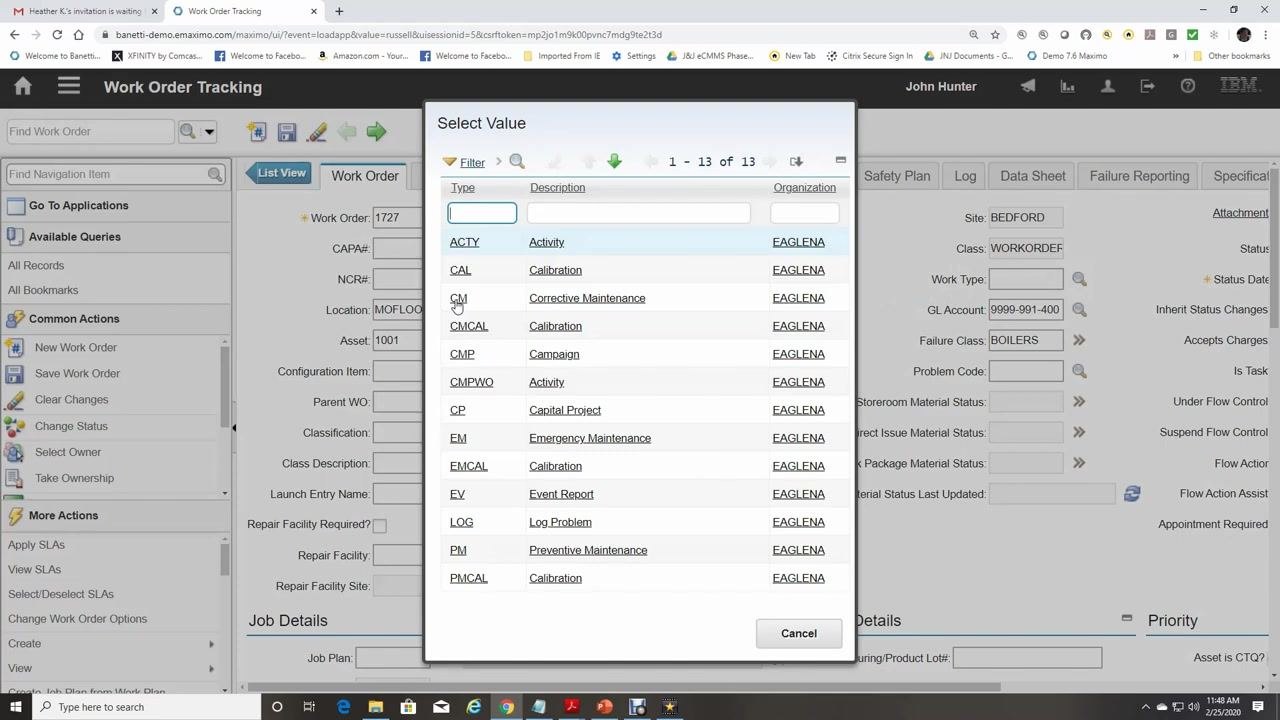
Locate the Work Type field on the right side of the Work Order tab and click the Select Value (magnifying glass) icon next to it to open the selection dialog.
In the Select Value dialog, select CM (Corrective Maintenance) from the list of available work types and confirm that the Work Type field now shows CM.
Review the minimum required information
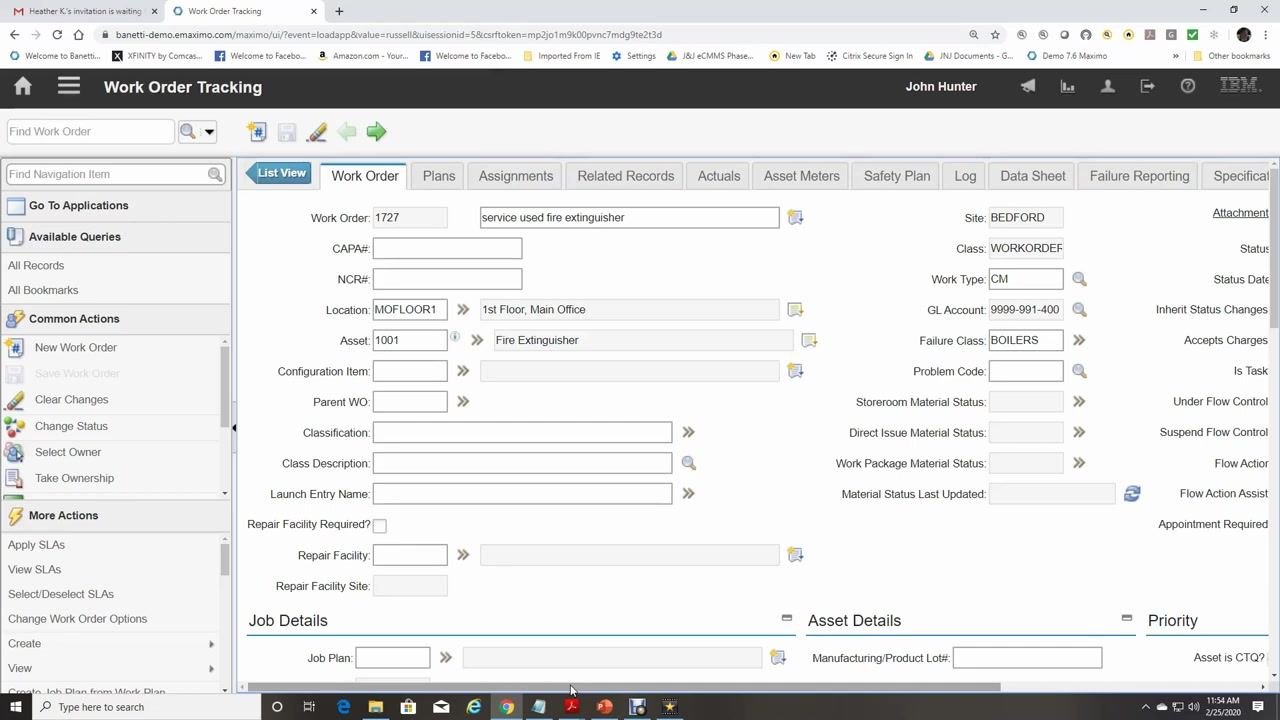
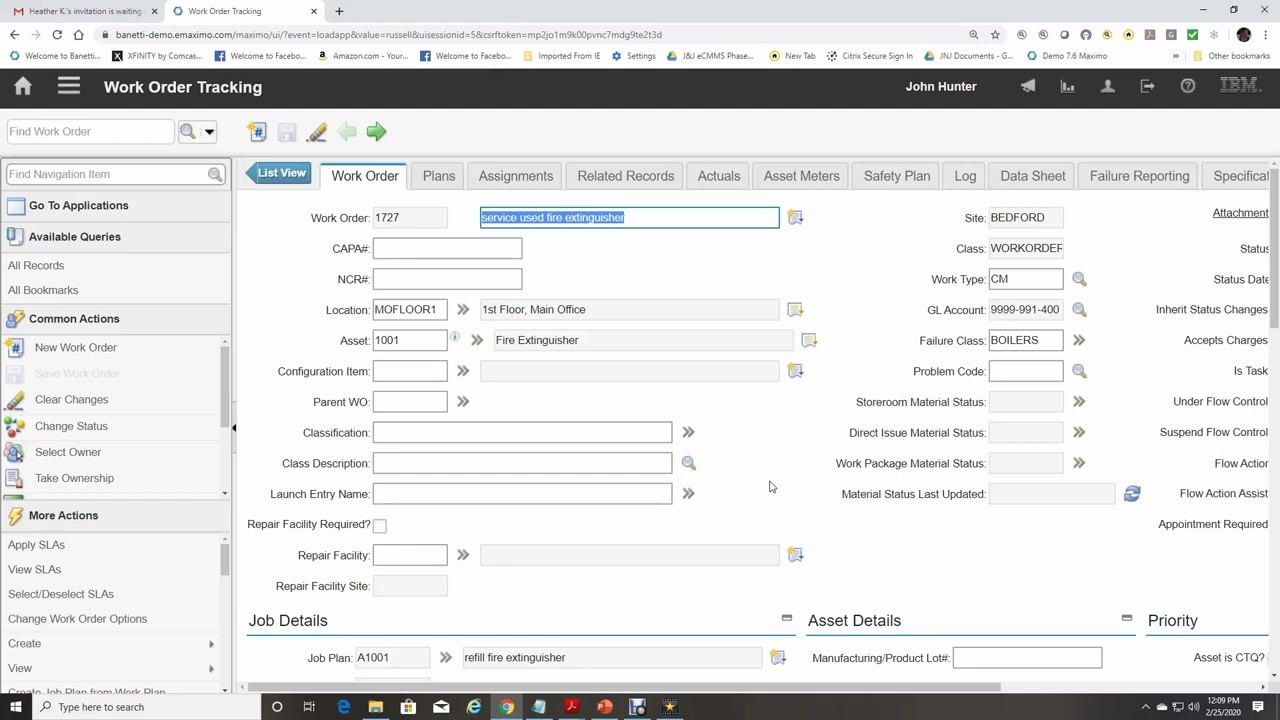
Before moving on, confirm the following fields are completed in the Work Order tab:
- Work Order: 1727
- Description: service used fire extinguisher
- Location: MOFLOOR1 (1st Floor, Main Office)
- Asset: 1001 (Fire Extinguisher)
- Site: BEDFORD
- Class: WORKORDER
- Work Type: CM
- GL Account: 9999-991-400
- Failure Class: BOILERS
Confirm that the Status is set to WAPPR (Awaiting Approval). This represents the minimum information needed on a work order.
Attach a job plan
Job plan procedures can be developed and added to a work order, which lets you avoid typing out the procedure each time a work order is created. The Job Plan field is located under the Job Details section at the bottom of the Work Order tab.
Click the Detail Menu (arrow icon) next to the Job Plan field to open the Select Value dialog for job plans.
In the Select Value dialog, use the following checkboxes to filter job plans:
- Show Job Plans for the Work Order's Asset and Location Only? (checked)
- Show Job Plans with No Classes Defined? (checked)
Confirm the WO Class is set to "Work Order." Review the filtered list and select the job plan matching these details:
- Job Plan: A1001
- Description: refill fire extinguisher
- Template Type: MAINTENANCE
- Organization: EAGLENA
- Site: BEDFORD
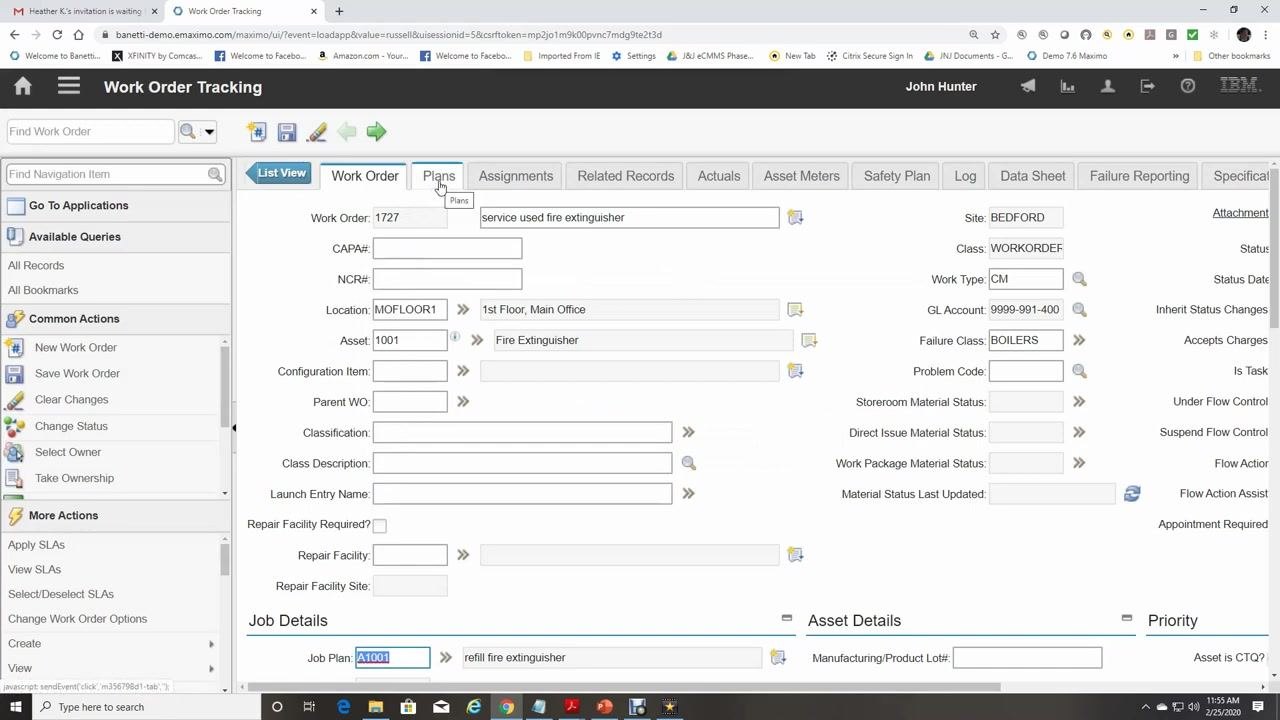
Click the row for job plan A1001 to select it. The Job Plan field in the Job Details section is now populated with A1001 (refill fire extinguisher), which links the job plan's procedures and tasks to the work order.
Review tasks and labor from the job plan
Click the Plans tab at the top of the Work Order Tracking screen to view the details of the assigned job plan.
In the Plans tab, review the following sections:
- Tasks for Work Order 1727, listing all tasks imported from the job plan: Task 10 (call fire equipment service comp), Task 20 (replace with temp fire extinguisher), and Task 30 (put equipment back in service and close WO). Each task displays its sequence, summary, estimated duration, status (WAPPR), and other details.
- Labor, showing labor requirements such as Crew Type (CARP), Quantity (1), Regular Hours (2.00), and Rate (15.00), linked to the relevant job plan tasks.
Additional tabs for Materials, Services, and Tools are available for further planning. Attaching a standardized job plan ensures all associated tasks and labor requirements are clearly documented, which streamlines execution and keeps maintenance procedures consistent.
Allocate labor using the Assignments tab
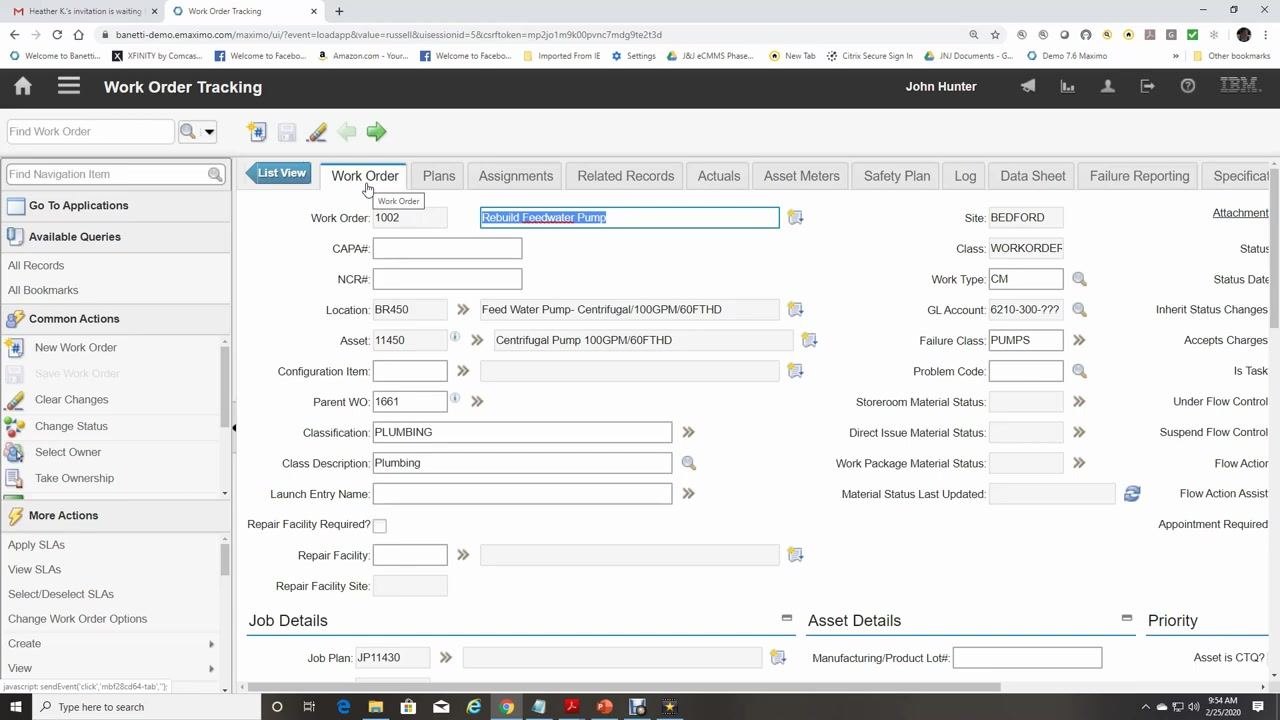
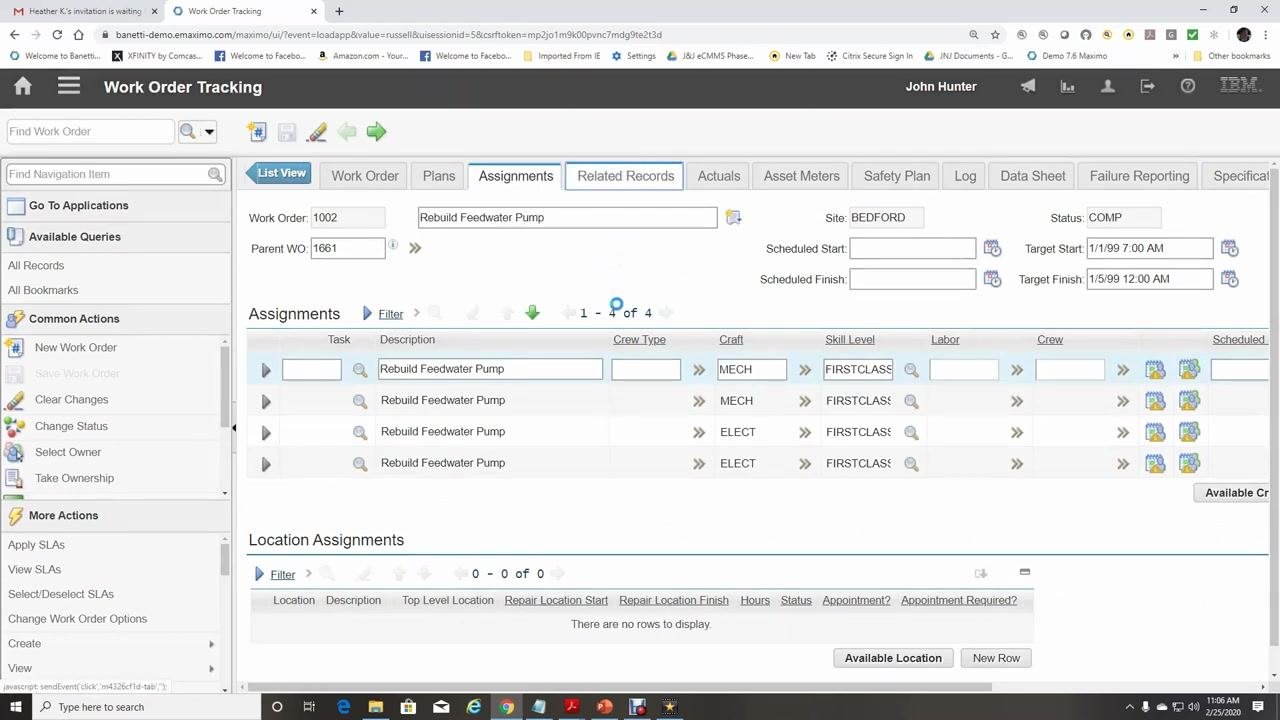
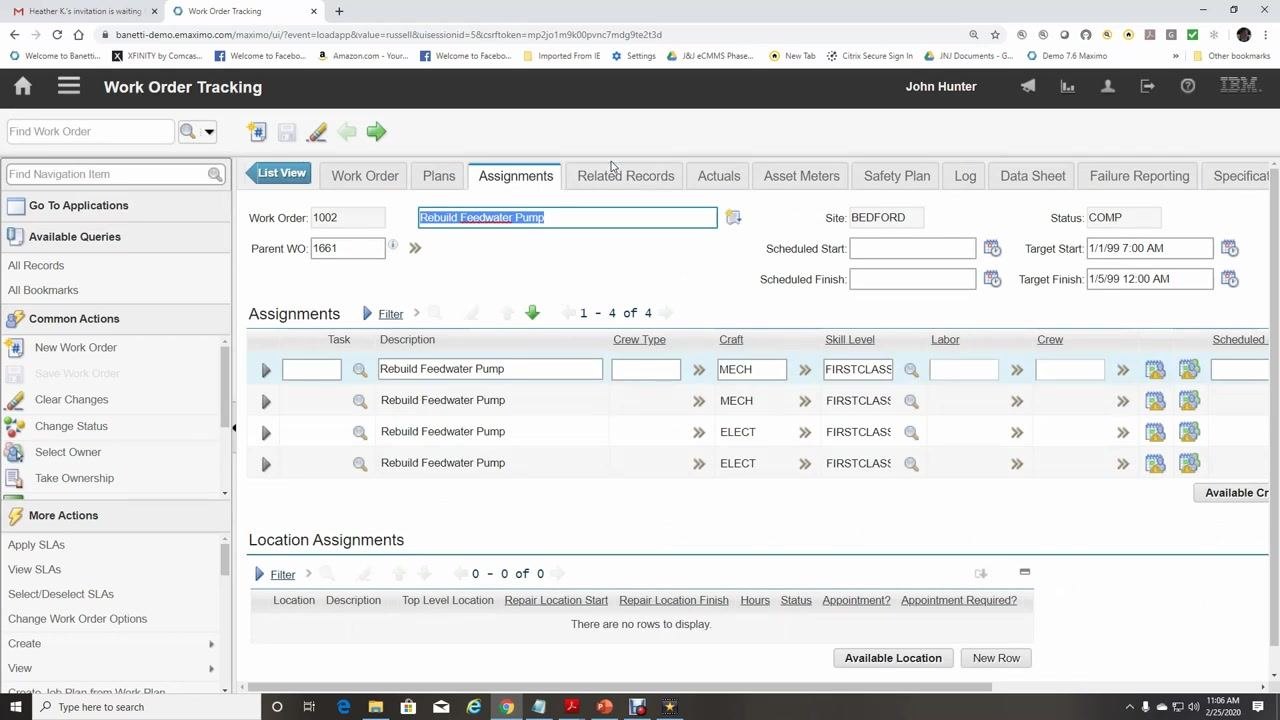
Select the Assignments tab to assign labor resources to the work order. This section lists the task description (for example, Rebuild Feedwater Pump), Crew Type, Craft (such as MECH or ELECT), Skill Level (such as FIRSTCLASS), Labor, Crew, and Scheduling details. Use this tab to specify which personnel or crews are responsible for each task.
Link related records
Click the Related Records tab to associate other work orders or service requests with the current work order. This is useful for tracking dependencies or grouping related maintenance activities.
Record actuals
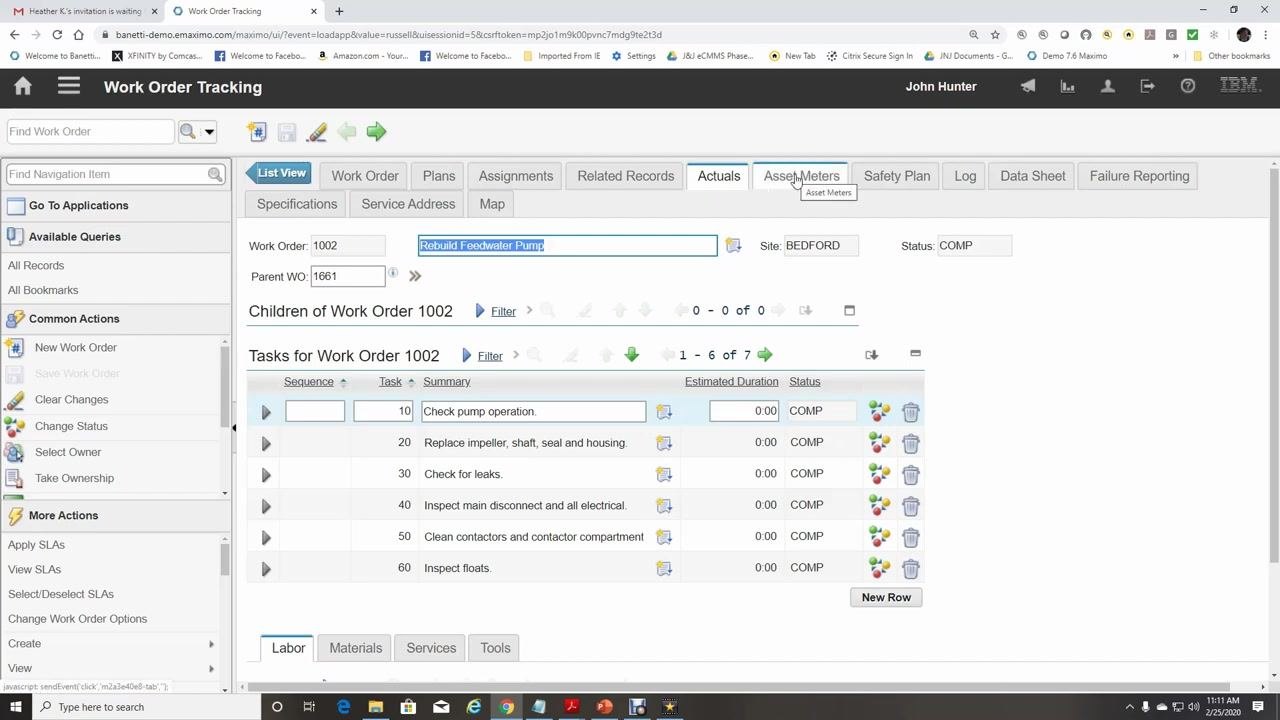
Select the Actuals tab to record what was actually done to complete the work order, including labor hours spent, materials used, and services and tools utilized. The tab displays tasks for the work order and lets you enter actual values for each. Note that actuals can only be entered on an approved work order.
Under the Actuals tab, use the sub-tabs (Labor, Materials, Services, Tools) to enter detailed records for each resource used, ensuring all actuals are documented for accurate reporting and cost tracking.
Review asset meters
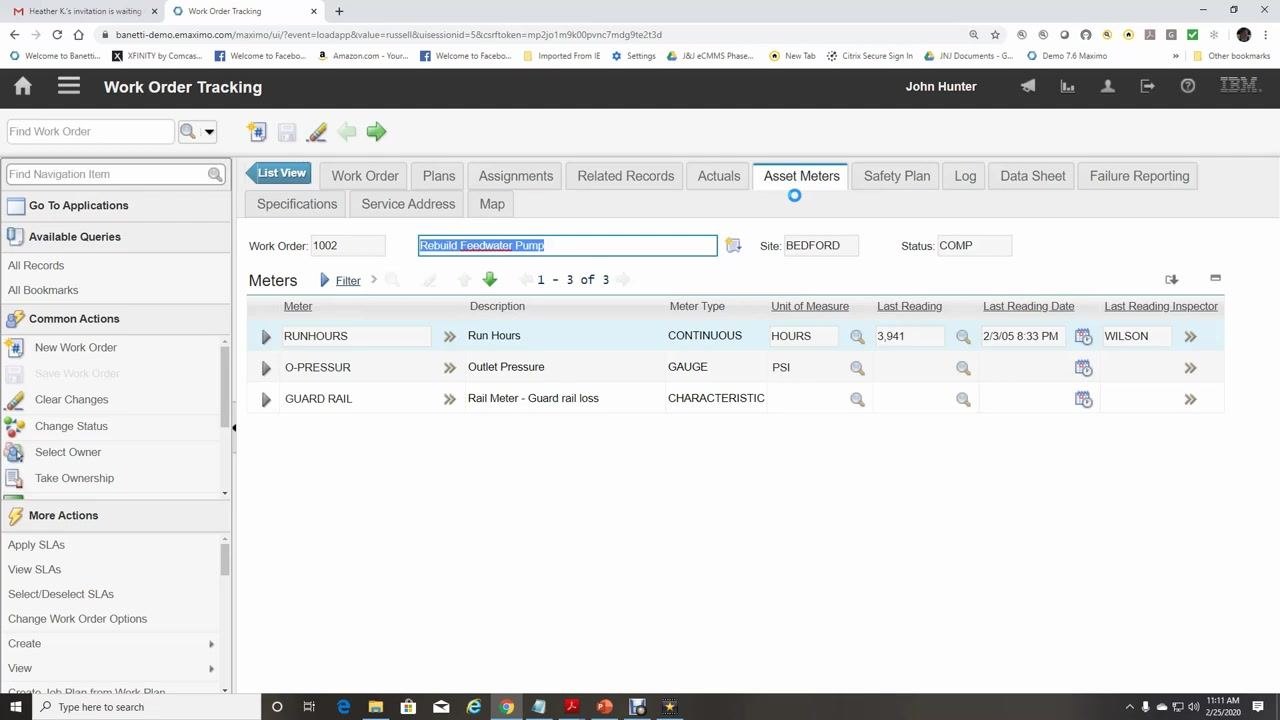
Select the Asset Meters tab to view meter readings associated with the work order:
- Run Hours (Type: CONTINUOUS, Unit: HOURS, Last Reading: 3,941, Last Reading Date: 2/3/05 8:33 PM, Inspector: WILSON)
- Outlet Pressure (Type: GAUGE, Unit: PSI)
- Rail Meter - Guard rail loss (Type: CHARACTERISTIC)
Use this information to verify operational data before proceeding.
Complete the Safety Plan tab
Click the Safety Plan tab to view or add safety-related information for the work order. This tab contains:
- Hazards and Precautions, where you add or review hazards and precautions relevant to the work order
- Hazardous Materials, where you track any hazardous materials involved
- Lock Out/Tag Out, where you document lockout/tagout procedures if required
To add a new hazard or precaution, click the New Row button in the respective section.
Record log entries and communications
Select the Log tab to capture log entries and communications related to the work order. Use this tab to document any ongoing notes, updates, or communications for audit and tracking purposes.
Record calibration findings in the Data Sheet tab
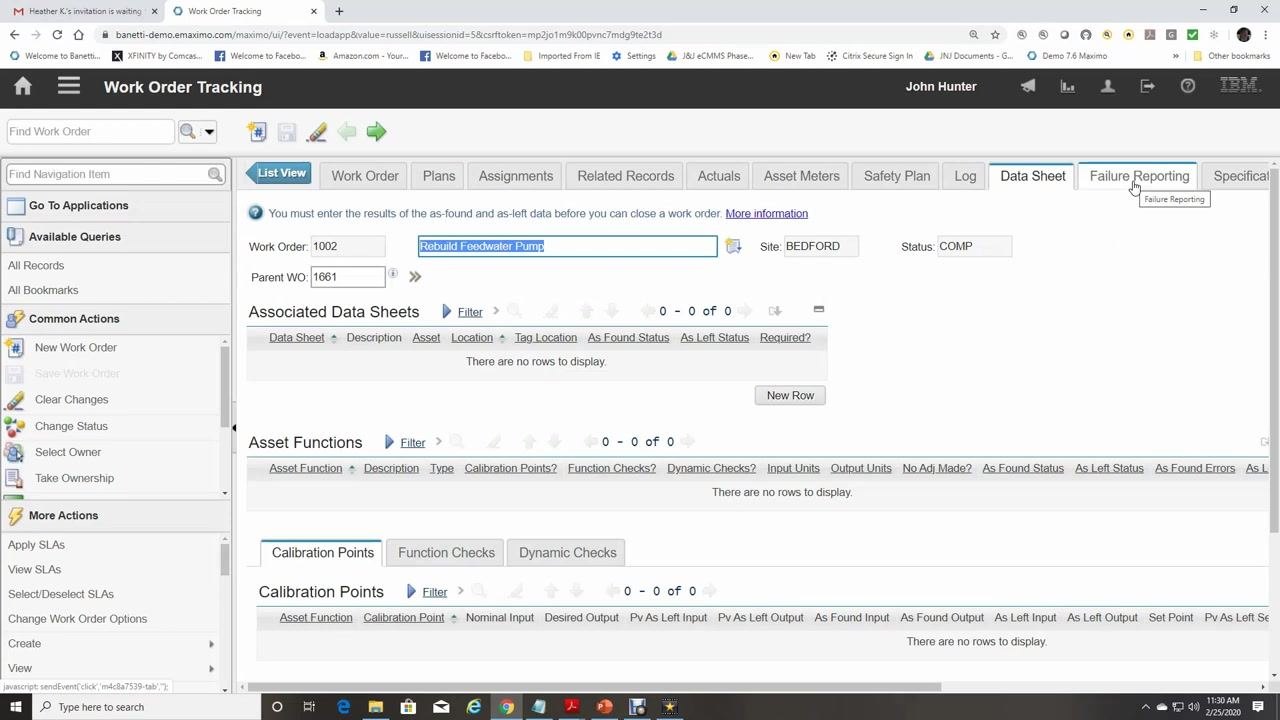
Click the Data Sheet tab to enter calibration results and findings, including the required as-found and as-left data before closing the work order. This tab includes:
- Associated Data Sheets, where you add or review data sheets linked to the work order
- Asset Functions, where you document function checks, calibration points, and dynamic checks
- Calibration Points, where you enter details such as asset function, calibration point, nominal input, desired output, and actual results
Document failure reporting
Go to the Failure Reporting tab to document failure details for the work order. Enter the following information:
- Failure Class: select the appropriate failure class (for example, PUMPS > Pump Failures)
- Failed Date: enter the date and time of failure (for example, 2/25/20 11:27 AM)
- Failure Codes: add codes for Problem, Cause, and Remedy — for example, Problem: LEAK (Leaking), Cause: SHAFT (Shaft Scored), Remedy: REPLSHFT (Replaced Shaft)
You can optionally add remarks and a remark date.
Approve and assign the work order
Once all required information is entered and reviewed, approve the work order and assign it to a technician or appropriate personnel for execution.
Finalize and save the work order
Ensure all relevant tabs (Safety Plan, Log, Data Sheet, Failure Reporting) are completed as needed, then save the work order to commit all changes and updates.
Summary
You now know how to create a work order in Maximo from start to finish: logging in, selecting an asset or location, assigning a work type, attaching a job plan, allocating labor, and recording actuals, safety information, calibration data, and failure details before approving and saving the work order. Following these steps ensures a standardized, well-documented work order that streamlines execution and keeps maintenance procedures consistent.
Generation details: cost, quality tiers
Docsie billed 5,500 credits ($3.85) to analyze this 11-minute video at standard quality. The rewrite, template fill and Word/PDF exports were included. The same video at each quality tier:
| Quality | Frames sampled | Credits | Approx. cost |
|---|---|---|---|
| Draft | every 16-30 s | 2,750 | $1.92 |
| Standard (this guide) | every 8-15 s | 5,500 | $3.85 |
| Detailed | every 4-7 s | 11,000 | $7.70 |
| Ultra | every 1-3 s | 22,000 | $15.40 |
Credits priced at $0.70 per 1,000; plans include a monthly allowance. Enterprise customers on on-premise or bring-your-own-model deployments run this on their own inference and pay no per-video credits.
Generated by Docsie Video-to-Docs on 2026-10-12 from a 10-minute video. Screenshots are frames from the source video and belong to their creator, Banetti Inc., whose original is embedded above. If you own this video and want the guide removed or credited differently, contact us and we will act within one business day.