
How to Reduce Sink Marks in Injection Molding
Sink marks are one of the most common defects found in plastic injection-molded components. This standard operating procedure explains how to identify sink marks, understand their root causes, and apply corrective actions to reduce sink marks in injection molding. It also covers how to troubleshoot sink marks that appear suddenly in components that normally run without defects.
Video: Sink mark / shrinkage problem in injection molding. by Molding Mantra (2021). All credit for the demonstration goes to the creator; watch the original on YouTube. The written guide below was generated from this video by Docsie. Creator? Request a change or removal.
Sink marks are one of the most common defects found in plastic injection-molded components. This standard operating procedure explains how to identify sink marks, understand their root causes, and apply corrective actions to reduce sink marks in injection molding. It also covers how to troubleshoot sink marks that appear suddenly in components that normally run without defects.
Purpose
This procedure provides a structured approach for recognizing sink mark defects, understanding why they occur, and taking corrective action to reduce sink marks in injection molding. It also provides a troubleshooting sequence to follow when sink marks appear unexpectedly during otherwise stable production runs.
Scope
This procedure applies to plastic injection molding production processes where sink mark defects are observed on component surfaces, whether during initial process setup or during ongoing regular production.
Required equipment and tools
- Mold with functioning cooling channels
- Standard cooling system (cooling tower or chiller)
- Water temperature monitoring equipment
- Mold maintenance and inspection tools for checking cooling pipelines
Identify the sink mark defect
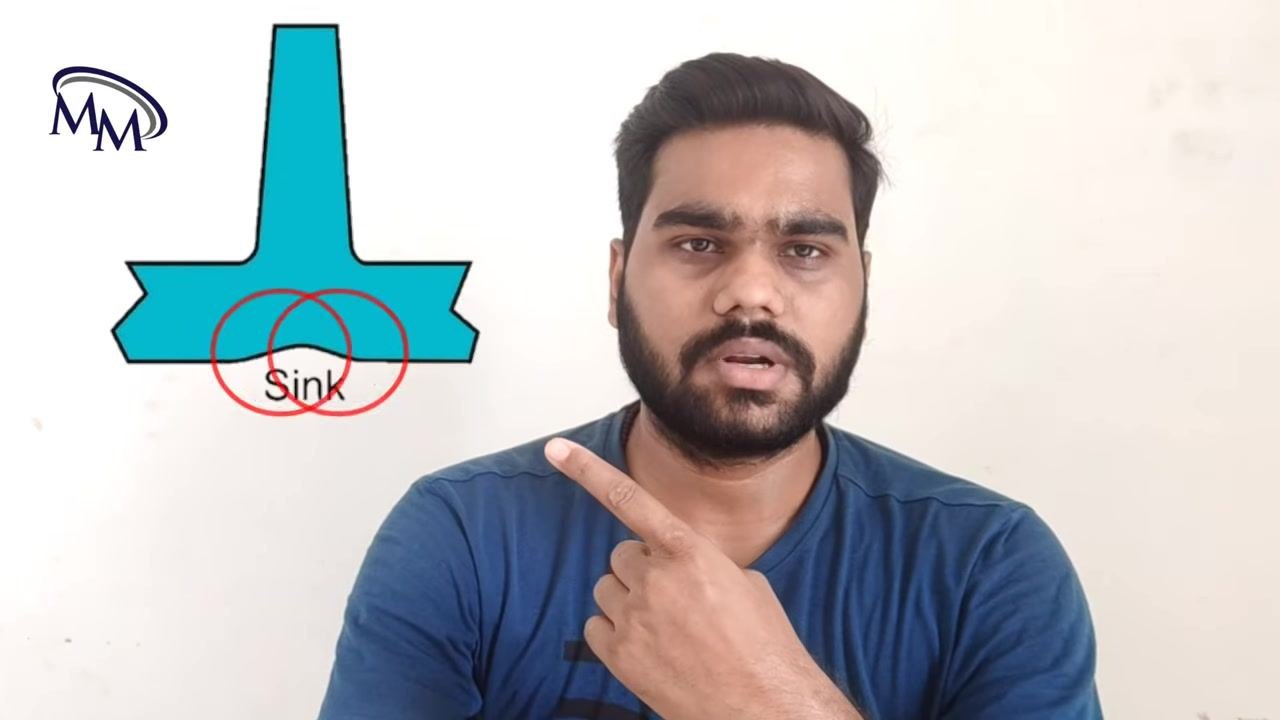
A sink mark appears as a small depression or hole on the surface of a plastic component. This defect is most commonly observed in thick areas of the part, where material takes longer to cool and solidify evenly.
Determine the common causes of sink marks
Before adjusting the process, confirm which of the following factors may be contributing to the defect:
- Insufficient cooling time during the molding cycle
- Overpacking, meaning too much material is injected into the mold
- Inadequate holding speed, pressure, or time during the holding phase
- Insufficient cooling water supplied to the mold
Review correct rib design to reduce sink marks
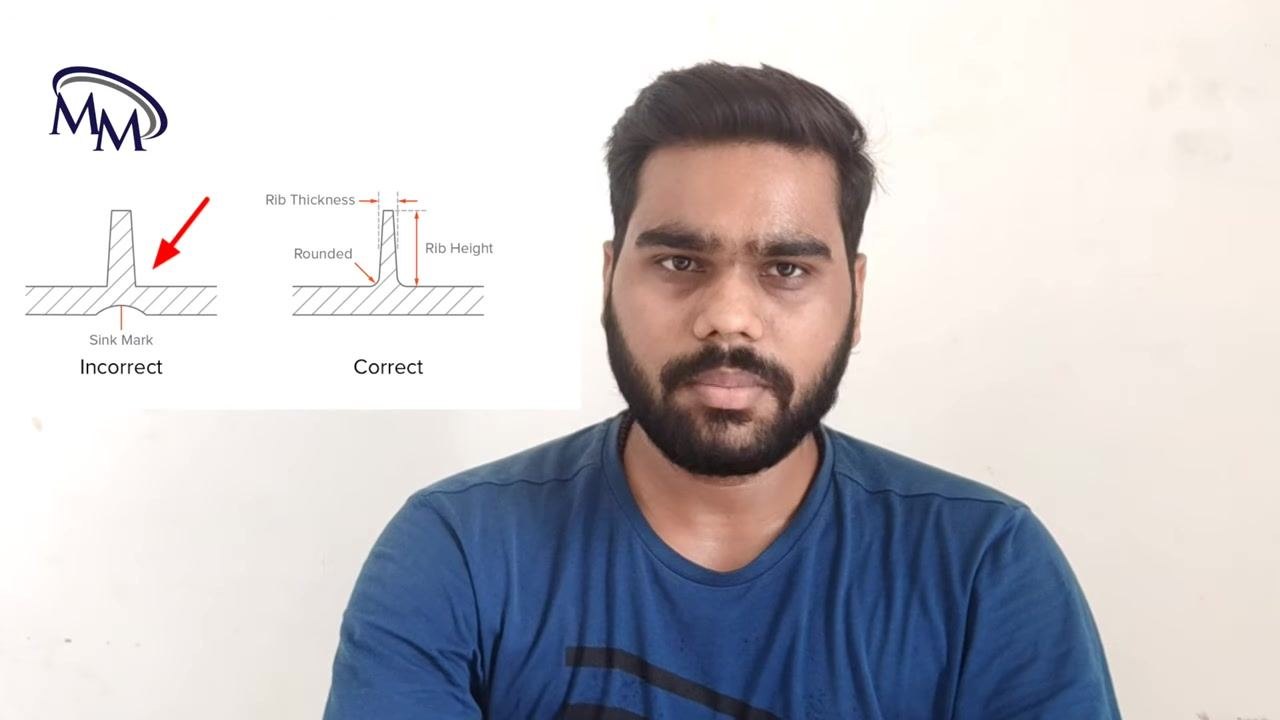
Compare the rib design of the component against correct design standards. An incorrect rib design, with improper thickness, produces a visible sink mark. A correct rib design uses proper rib thickness, rounded edges, and appropriate rib height to avoid sink marks.
Apply corrective actions to reduce sink marks in injection molding
Once the cause has been identified, apply the following adjustments as needed:
- Reduce the packing of the part to avoid overfilling the mold with material
- Increase holding pressure, holding speed, and holding time so material is properly packed and cooled
- Increase cooling time to allow the part more time to cool before ejection
- Ensure sufficient cooling water is supplied to the mold
Troubleshoot sudden sink mark defects during regular production
If a component that normally runs without sink marks suddenly develops the defect during a regular production run, follow this troubleshooting sequence.
- Confirm that the issue is inconsistent with the component's usual performance. Inconsistent appearance of the defect typically points to a process or equipment issue rather than a design or material issue.
- Check whether the mold has been left on the machine for many days without maintenance, since prolonged use without maintenance can lead to blockages in the cooling channels.
- Inspect the cooling pipelines for blockages. A blocked cooling channel prevents proper water circulation in that area of the mold, causing uneven cooling and increasing the likelihood of sink marks. If a sink mark appears suddenly in a component that usually runs fine, inspect the cooling pipelines first.
- If no blockage is found, check the temperature of the cooling water. Confirm that the water temperature matches the regular, recommended value for the process. If the temperature is within the normal range, continue monitoring for other potential issues.
- If the water temperature is outside the recommended range, adjust it to the correct value immediately using your standard cooling system, whether a cooling tower or a chiller. Ensure there is no variation in water temperature during production, since a stable water temperature prevents sink mark problems from occurring.
- If sink marks persist even after the water temperature has been stabilized, treat this as an indication that the affected area of the component is experiencing uneven cooling. Direct further troubleshooting toward identifying and correcting the source of uneven cooling in the mold or cooling system.
Verification and summary
To confirm that sink marks have been successfully reduced or eliminated, verify the following:
- The component surface no longer shows depressions or holes in thick areas
- Cooling channels are free of blockages and water circulates properly through the mold
- Cooling water temperature remains stable at the recommended value throughout the production run
- Holding pressure, holding speed, holding time, and cooling time are set according to the corrective adjustments applied
When troubleshooting sink marks in a component that normally runs without defects, always check the mold's cooling system and water temperature first, as these are the most common sources of unexpected sink mark issues in otherwise stable production processes.





Generation details: cost, quality tiers
Docsie billed 2,500 credits ($1.75) to analyze this 5-minute video at standard quality. The rewrite, template fill and Word/PDF exports were included. The same video at each quality tier:
| Quality | Frames sampled | Credits | Approx. cost |
|---|---|---|---|
| Draft | every 16-30 s | 1,250 | $0.88 |
| Standard (this guide) | every 8-15 s | 2,500 | $1.75 |
| Detailed | every 4-7 s | 5,000 | $3.50 |
| Ultra | every 1-3 s | 10,000 | $7.00 |
Credits priced at $0.70 per 1,000; plans include a monthly allowance. Enterprise customers on on-premise or bring-your-own-model deployments run this on their own inference and pay no per-video credits.
Generated by Docsie Video-to-Docs on 2026-09-14 from a 4-minute video. Screenshots are frames from the source video and belong to their creator, Molding Mantra, whose original is embedded above. If you own this video and want the guide removed or credited differently, contact us and we will act within one business day.